Sweet bottle carbed Pasturisation plan.

Homebrew Talk - Beer, Wine, Mead, & Cider Brewing Discussion Forum

Help Support Homebrew Talk - Beer, Wine, Mead, & Cider Brewing Discussion Forum:

This site may earn a commission from merchant affiliate links, including eBay, Amazon, and others.

nanglec

Member
Joined
Nov 9, 2020
Messages
6
Reaction score
1
Location
Australia
Sup everyone. I've been cruising the forums a bit, but it's come to the time I need to ask more specific questions. Feel free to pop in with any advice or experiences.

I want to make a sweet, bottle carbed cider. I don't have the gear or funds for force carbing, and I hate the taste of sweeteners (especially Stevia 🤢 ). I have had it suggested I use Lactose or Maltodextrine, but I was reading about pasteurization and feel like that will do the trick.

So here's my plan.

Ferment with OG of 1.080 aiming to bottle at 1.030 for a few days worth of carbing (sans primer), then pasteurize as per Papper's method (gonna experiment on how long to leave it to carb prior, trialing bottles at 3 days, 5, 7 and 9 days).

Logic behind the 1.080 is this; I am aiming for a decent 8% and figure ABV estimates are probably determined by the difference between OG and 1.000. So by pulling early (and assuming the bottle carbing will continue to drop my sg at about 0.005 a day until the yeasties nom all the sugar or I kill em) I will have roughly the same alcohol generated as in a 1.060 OG left to full dry.

I guess my first question would be, does anyone see anything glaringly wrong that I've missed?

Is there any inherent difference between bottle carbing a brew at 1.030 and say adding primer? To my understanding you essentially are just feeding the yeasties so they can carb the bottle, and the few grams used would probably equal an sg increase of about 0.01 depending on the size of the bottle considering the volume 🤔 is it likely to carb faster either way?

Also, someone mentioned the boiling point of a water/ethanol mix (approx 199F for a 10% ABV). How do you determine that? (Newbie question I know, but all the things I could find are for high concentrations of ethanol and distillation, which is NOT what I'm after).

I appreciate any help you can give :)

Chris
 
Last edited:
Chris, I have never pasteurized anything, other than using sorbate. My concern is pressure. With bottle carbing there will be increased pressure in the bottle and as you heat the bottle the liquid and gas in the bottle will expand. This may cause bottle bombs, which are a badddd thing. I hope you get more responses from the cider/mead/wine folks who do these things. :mug:
 
I hate artificial sweeteners too. But I found something called Xylitol that tastes like sugar and leaves no aftertaste. It's what I used when bottle carbonating.
 
Ferment with OG of 1.080 aiming to bottle at 1.030 for a few days worth of carbing (sans primer), then pasteurize as per Papper's method (gonna experiment on how long to leave it to carb prior, trialing bottles at 3 days, 5, 7 and 9 days).
You can skip the guesswork and mount a pressure gauge on one of the bottles. A number of members here have done that. Then you're not guessing, you just pasteurize when the bottle with the gauge reads your desired carb level (assuming you know what that level is).

Depending on your fermentation temp and yeast, 3 days may be way too long. Remember you're bottling an active fermentation, not adding priming sugar. So the yeast are going to town and don't have the lag period they do in bottle carbing.

Is there any inherent difference between bottle carbing a brew at 1.030 and say adding primer? To my understanding you essentially are just feeding the yeasties so they can carb the bottle, and the few grams used would probably equal an sg increase of about 0.01 depending on the size of the bottle considering the volume 🤔 is it likely to carb faster either way?
The only thing I can think of is that by stopping fermentation the yeast won't be able to "clean up after themselves" as they do when doing normal fermentation, but I don't have enough experience to know how big of a flavor difference that will make.

I hate artificial sweeteners too. But I found something called Xylitol that tastes like sugar and leaves no aftertaste. It's what I used when bottle carbonating.
I haven't tried this myself but everybody I've seen mention it says it tastes great and has no aftertaste. But I should mention for the OP that it can cause gas and diarrhea in large amounts. From what I gather it shouldn't be a big issue if you're having one or two, but bingeing out on xylitol sweetend cider may not be the best idea if that's something you ever do. It's also extremely toxic to dogs.
 
I guess my first question would be, does anyone see anything glaringly wrong that I've missed?
The potential problem I see is that yeast don't read, so they don't know what they are 'supposed' to do. I can follow your 1st part- I assume take daily SG readings until you reach that 1.030, then bottle. OK. But then how are you going to follow what's happening in those bottles? Crack one open per day until you get the carbonation level you're happy with then pasteurize? You can't be sure all the rest of the bottles are at the same stage. There's a risk that you may have some low carbonated bottles and some potential bottle bombs. The other thought is that when you bottle during active fermentation, you'll be transferring alot of active yeast and trub, that if you let fermentation go to completion, will settle to the bottom.
 
Here's what I do with my ciders and Grafs if I want a slightly sweet, carbonated product:
Ferment to completion and let her settle until clear. Bottle with 1 can of FAJC per 5 gallons (2 cans if I want it sweeter). Bottle one in a plastic soda bottle, squeeze out the air and cap. When that bottle is turgid, the rest SHOULD be also ready ( I have had an occasional batch where the carbonation hasn't been consistent with all the bottles, but no bombs during pasteurization). This is usually 4 days, but it all depends on your temperature and the yeast strain. I use the cooler pasteurization method which is easier than the stovetop method. It works. Good luck!
By the way, I have used xylitol in some of my fruit beers, and agree with Maylar- it sweetens without an artificial taint.
 
Your plan is more or less O.K. but with some inherent dangers that you need to get your head around. Firstly, if you bottle at 1.030 (then do nothing else but let it continue fermenting) you are starting with the potential to generate around 200 psi of carbonation which is about the limit of most common beer bottles before BOOM! Perhaps you mean 1.003, which would give you 1.5 volumes of CO2 or twenty something PSI.

Secondly, ABV is calculated on the difference between OG and FG (not OG and 1.000). So, your FG will be determined by when you pasteurise (Your idea is right, but the calculation needs to be ABV=(OG-FG)x131.25).

A rough "rule of thumb" is that a SG drop of 0.001 will generate about 0.5 volumes of CO2, so 0.005 change between bottling and pasteurising should result in a "nice" 2.5 volumes of CO2. According to Andrew Lea, medium dry cider has a SG of around 1.010 and medium sweet is 1.015.

I typically use SO4 yeast which finishes around 1.003, leaving just a touch of sweetness and good carbonation if I bottle at 1.008. For a sweeter carbonated cider I will bottle around 1.010-1.012 and heat pasteurise around 1.005-1.007 (or add sugar or AJC to come up to those figures once fermentation is complete). To make life a bit easier, as suggested above I have a Grolsch "test" bottle fitted with a pressure gauge and will simply heat pasteurise when the pressure reaches 2.5 bar or 45 psi. Alternatively, a rougher method is to bottle some of the cider in a sealed soda bottle which will feel quite firm at 2.5 volumes of CO2.

During the recent "covid quiet time" I spent some time researching pasteurisation, bottle pressure, bottle strength etc. Rather than repeat myself ad nauseum, I suggest that you look up my various posts around October, particularly 24 and 26 October. You might also like to look at the attachment to the post of 25 September which covers different heat pasteurisation approaches.

Have fun!
 
Last edited:
Thanks everyone for your replies so far :) For clarification, I'm using EC-1118 so champagne yeast.

Definitely aware of the risk of bottle bombs (either through structural issues with the bottles themselves, or pressure from carb levels being multiplied by heat), but I feel like it's far from guaranteed to explode provided I minimize the risks. That said, obviously gonna take precautions; reasonable headspace in the bottle, low heat for long duration, protective gear, and cracking a bottle from the batch prior to check it's not highly carbed.

@ Jseyfert, Love the idea of a pressure gauge directly on a bottle, would definitely eliminate guesswork. Is there any threads suggesting how to do that?

@ JimRausch, nah I mean 1.030 (predicting a 0.005 drop each day with the active yeast and estimating 3 days as the carb sweet spot. Will need adjusting according to results, this is just a starting point). In regards to following the SG in a sealed bottle, I figure I can estimate the daily drop based on the progression of the ferment with tolerable accuracy; so if it took 6 days to go from 1.050 to 1.020, it averages 0.005 a day.

@ Chalky, cheers I'll check them out. So to be clear, my plan is not to bottle carb from 1.030 to dry (which yeah would be heaps of PSI generated), but to essentially pasteurize when there is enough carbonation, but it's still sweet. So at this stage aiming to pasteurize at 1.015- 1.020ish (estimated). But your reply has given me a question; does the higher SG correlate with more CO2 production per point dropped? Or is it just that letting it go to dry, then priming has less activity?

Also, a question to the room; I've read a few posts suggesting that ABV doesn't change during carbing. Is this just because the standard is to ferm to dry, then prime to carb and primer levels are small enough they don't substantially add to the ABV?
 
@ JimRausch, nah I mean 1.030 (predicting a 0.005 drop each day with the active yeast and estimating 3 days as the carb sweet spot. Will need adjusting according to results, this is just a starting point). In regards to following the SG in a sealed bottle, I figure I can estimate the daily drop based on the progression of the ferment with tolerable accuracy; so if it took 6 days to go from 1.050 to 1.020, it averages 0.005 a day.

@ Chalky, cheers I'll check them out. So to be clear, my plan is not to bottle carb from 1.030 to dry (which yeah would be heaps of PSI generated), but to essentially pasteurize when there is enough carbonation, but it's still sweet. So at this stage aiming to pasteurize at 1.015- 1.020ish (estimated). But your reply has given me a question; does the higher SG correlate with more CO2 production per point dropped? Or is it just that letting it go to dry, then priming has less activity?
This backs up my concern that three days is way too long to let them go without checking. @Chalkyt said a change of 0.005 is roughly 2.5 volumes of CO2. 2.5 volumes is pretty normal for ciders and a lot of beers. If you drop by 0.005 per day then you'll be at normal carb in 1 day, 2 days you'll be at 5 volumes or from what I can see above even the highly carbonated soda level. So you should probably aim to only drop about 0.005 before pasturizing, give or take a tad based on your preferences.

A given drop in SG will yield a given amount of CO2 produced. It doesn't matter if it's a higher or lower SG or if fermentation vs bottle carbing.
 
I did this the way you describe it myself and it works. Here's a sticky in the forum about bottle pasteurisation that I would follow, also read the comments, there is additional information.

If I were you, I would create a must that has 1.05 og, ferment it dry, let the yeast settle out, put enough sugar into each bottle that you got an sg of 1.03 in each bottle after filling it up with the fermented and cleared cider. This way, you don't have the big amount of yeast in the bottle that you would have when bottling an actively fermenting cider.

I would also use one plastic bottle that I would squeeze every other day to see if it has enough carbonation.
 
I'm in the process of testing out Dave's Carmel Apple Cider but skipping the chem fermentation stop and using the Easy Stove Top Pasteurizing instead. I really like the gauge mount for a PET bottle. Might throw one together. I have pressure gauges for other tasks that can be dual purposed. Thanks for the tip Maylar.
 
To answer your questions, I try to pasteurise when the SG is on its way down simply because there is a suggestion that you retain a bit more apple flavour that way (not sure if this is so but there are views that the flavour "blows off" below around 1.005.... I have found this to be the case with EC1118). Having said that, it is certainly easier to ferment all the way down to 1.000 then add sugar or AJC to bring the SG up for carbonation and I can't really say that I notice much difference between the two approaches.

Re the bottle with pressure gauge... I followed Maylar's post with success using a soda bottle. This can also double as a "squeeze test" bottle.

Later on I made a Grolsch type bottle version (a bit more about that later). My original idea was to include the pressure gauge bottle with the others when heat pasteurising in order to monitor bottle pressure. The trap FYI, is that pasteurising heat and the pressure generated can cause the seal to soften and leak so you don't get a true reading of the bottle pressure.

My first attempt involved a false sense of security with the plastic soda bottle in the hot pasteurising water as the gauge seemed to stabilise at around 5 atm (of course by then the seal had softened and was leaking as the pressure was really over10 atm), then the bottom popped out of the soda bottle and it fell over in the now very hot water. While trying to retrieve it, one of the bottles went BOOM!... talk about a multi tasking comedy show as I tried to retrieve everything, stop the gauge from filling up with water, and prevent any more bottle bombs. Of course when just using the bottle and gauge to monitor normal carbonating pressure of around 2.5 atm (45 psi) at room temperature this isn't an issue.

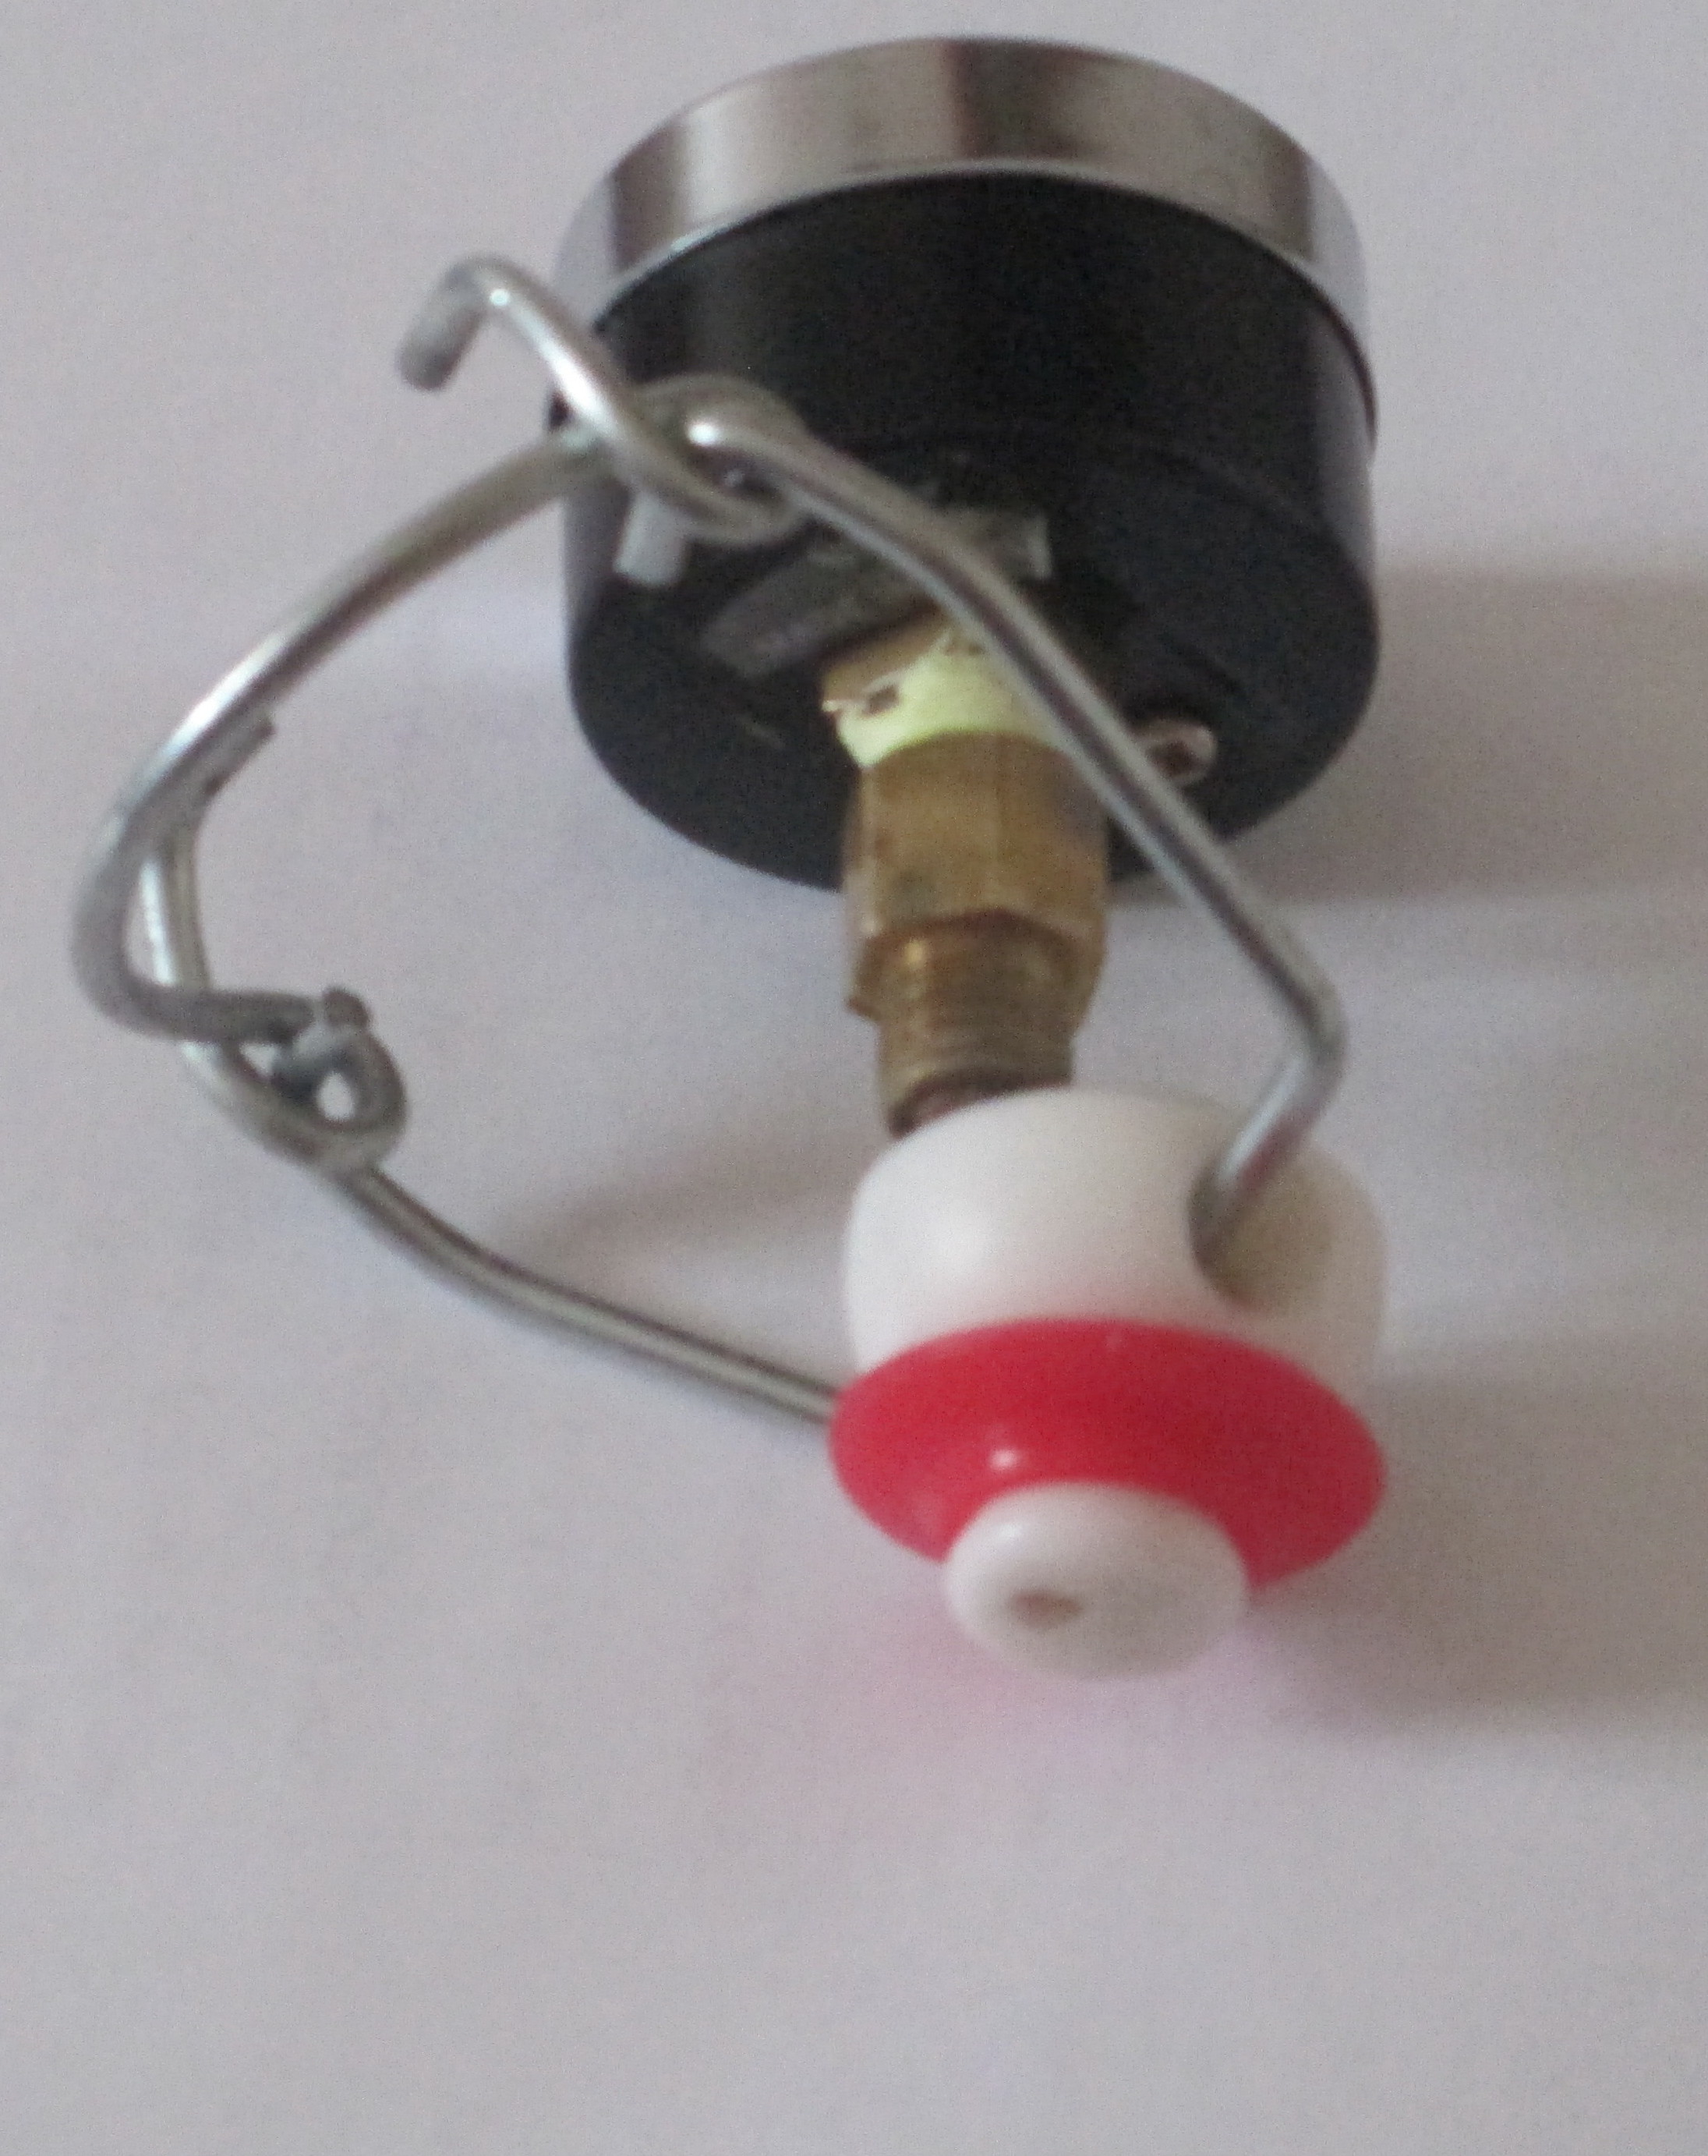
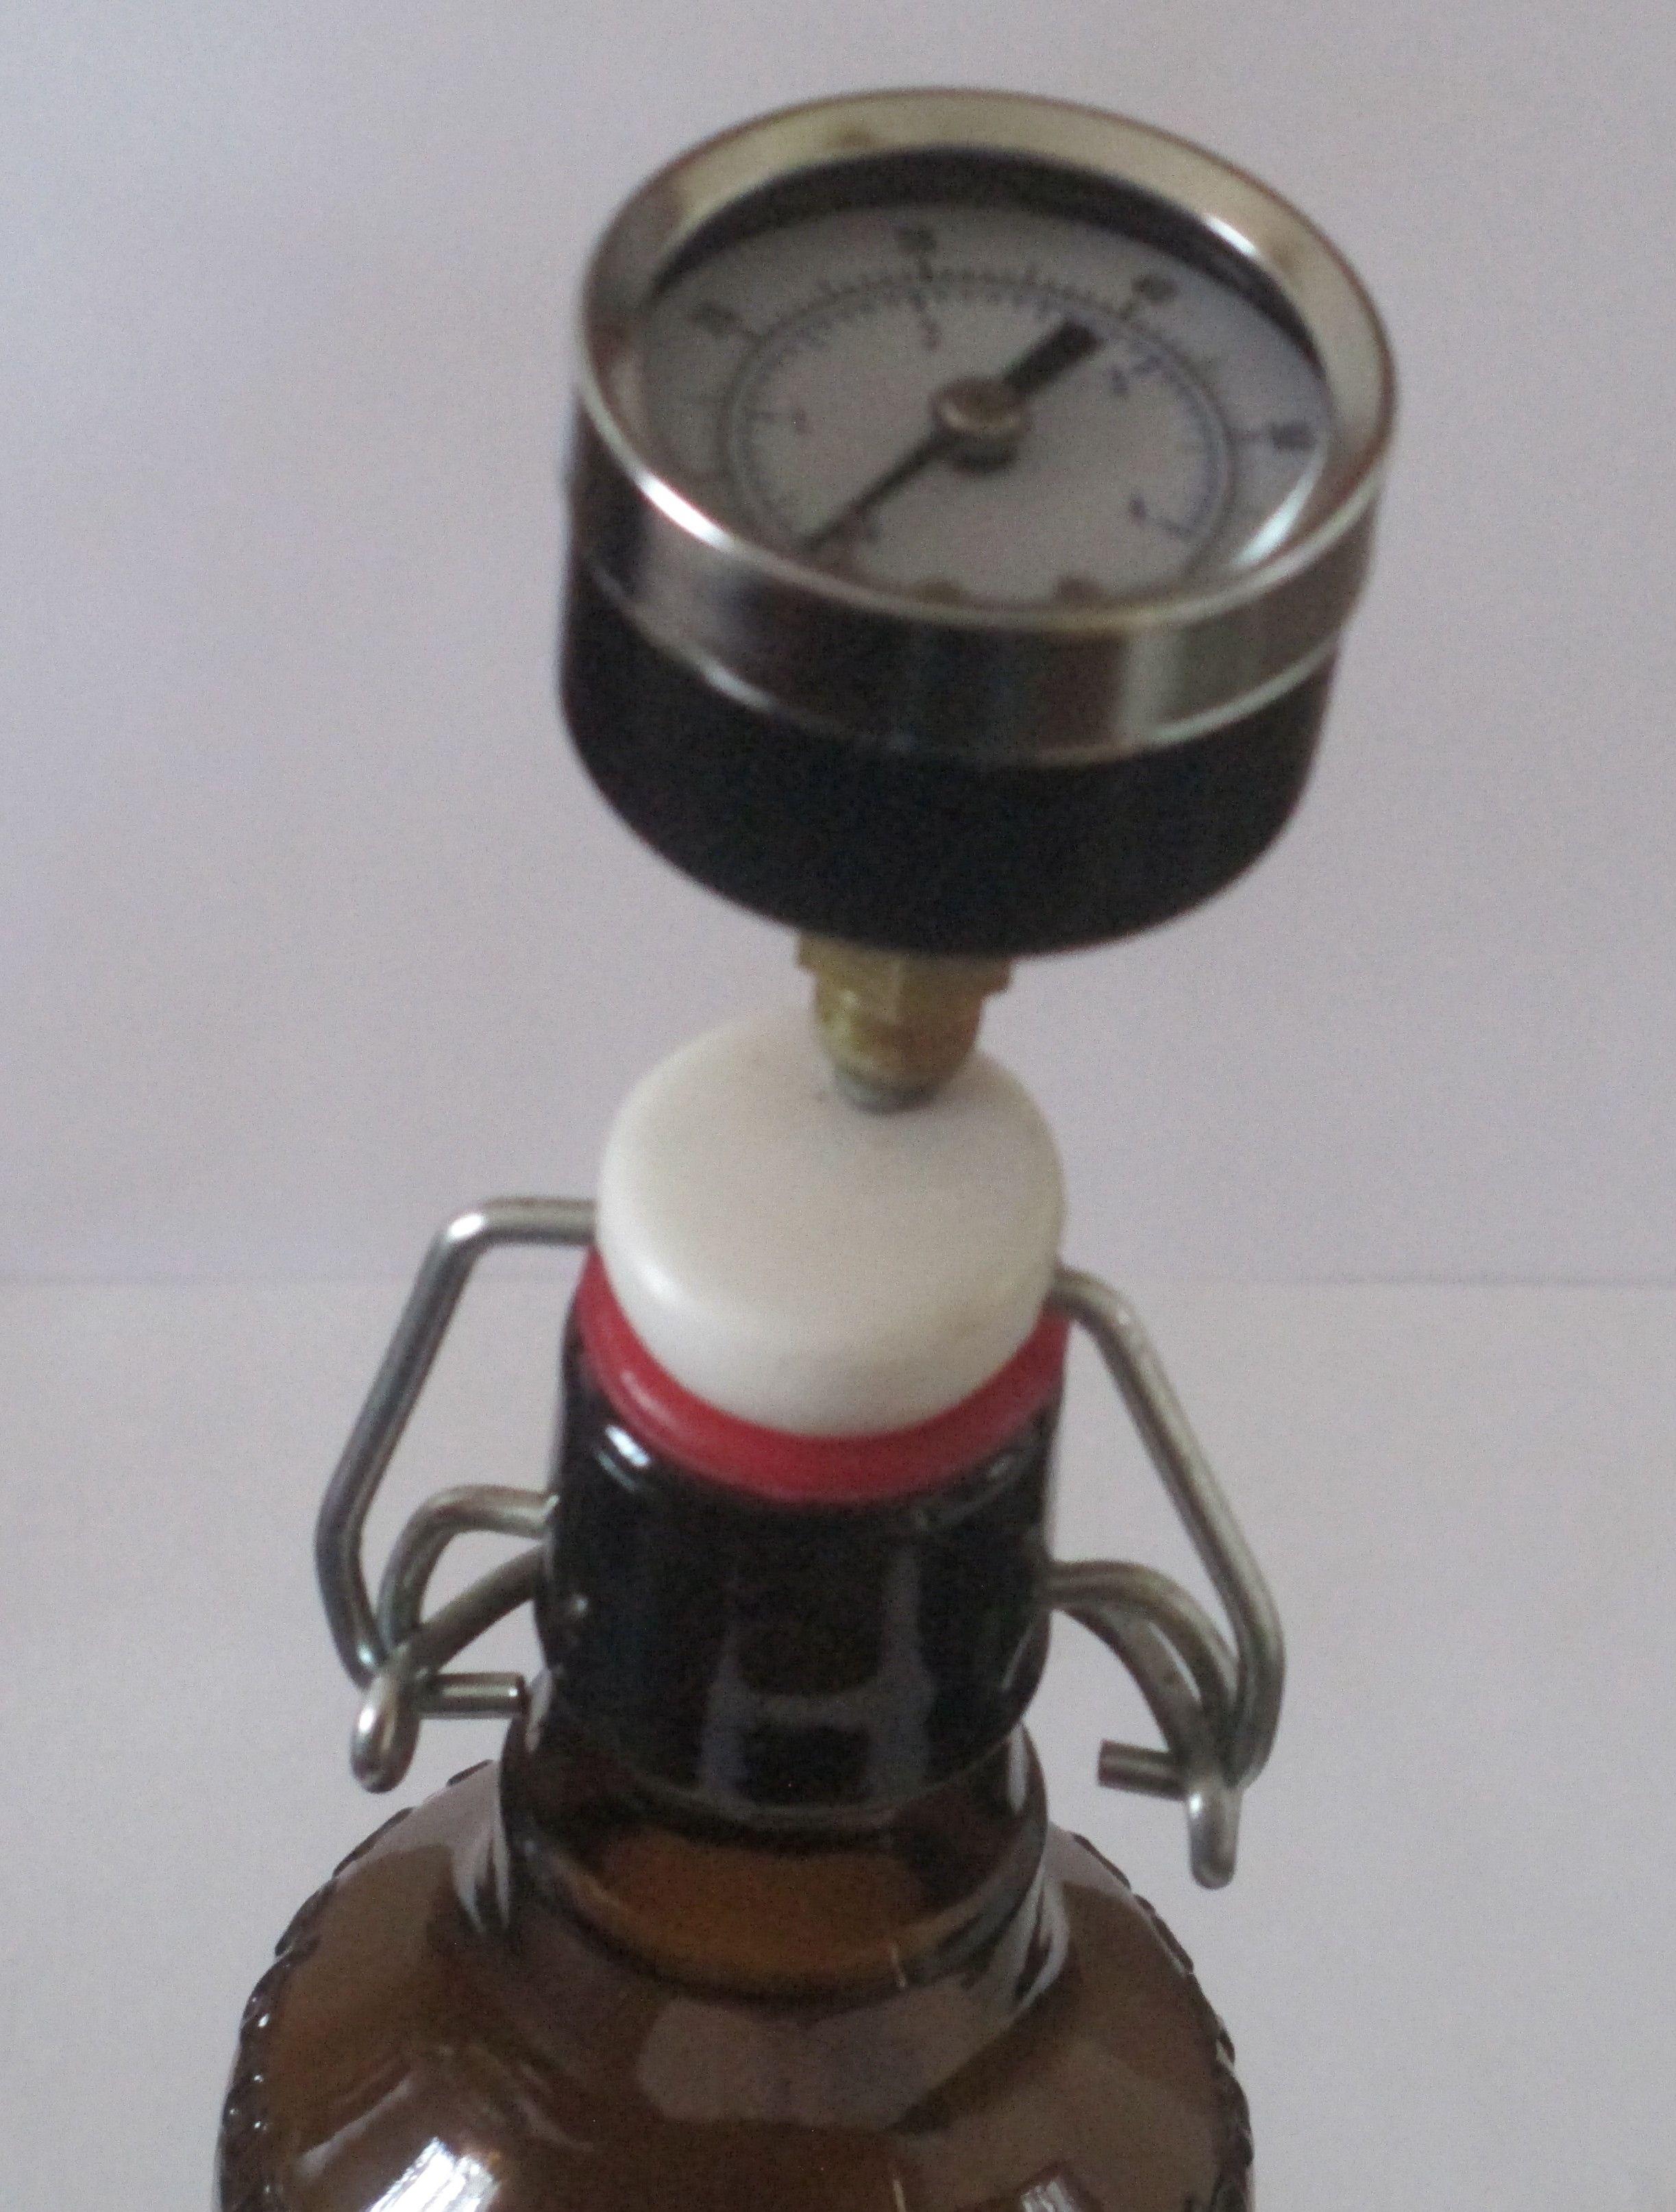
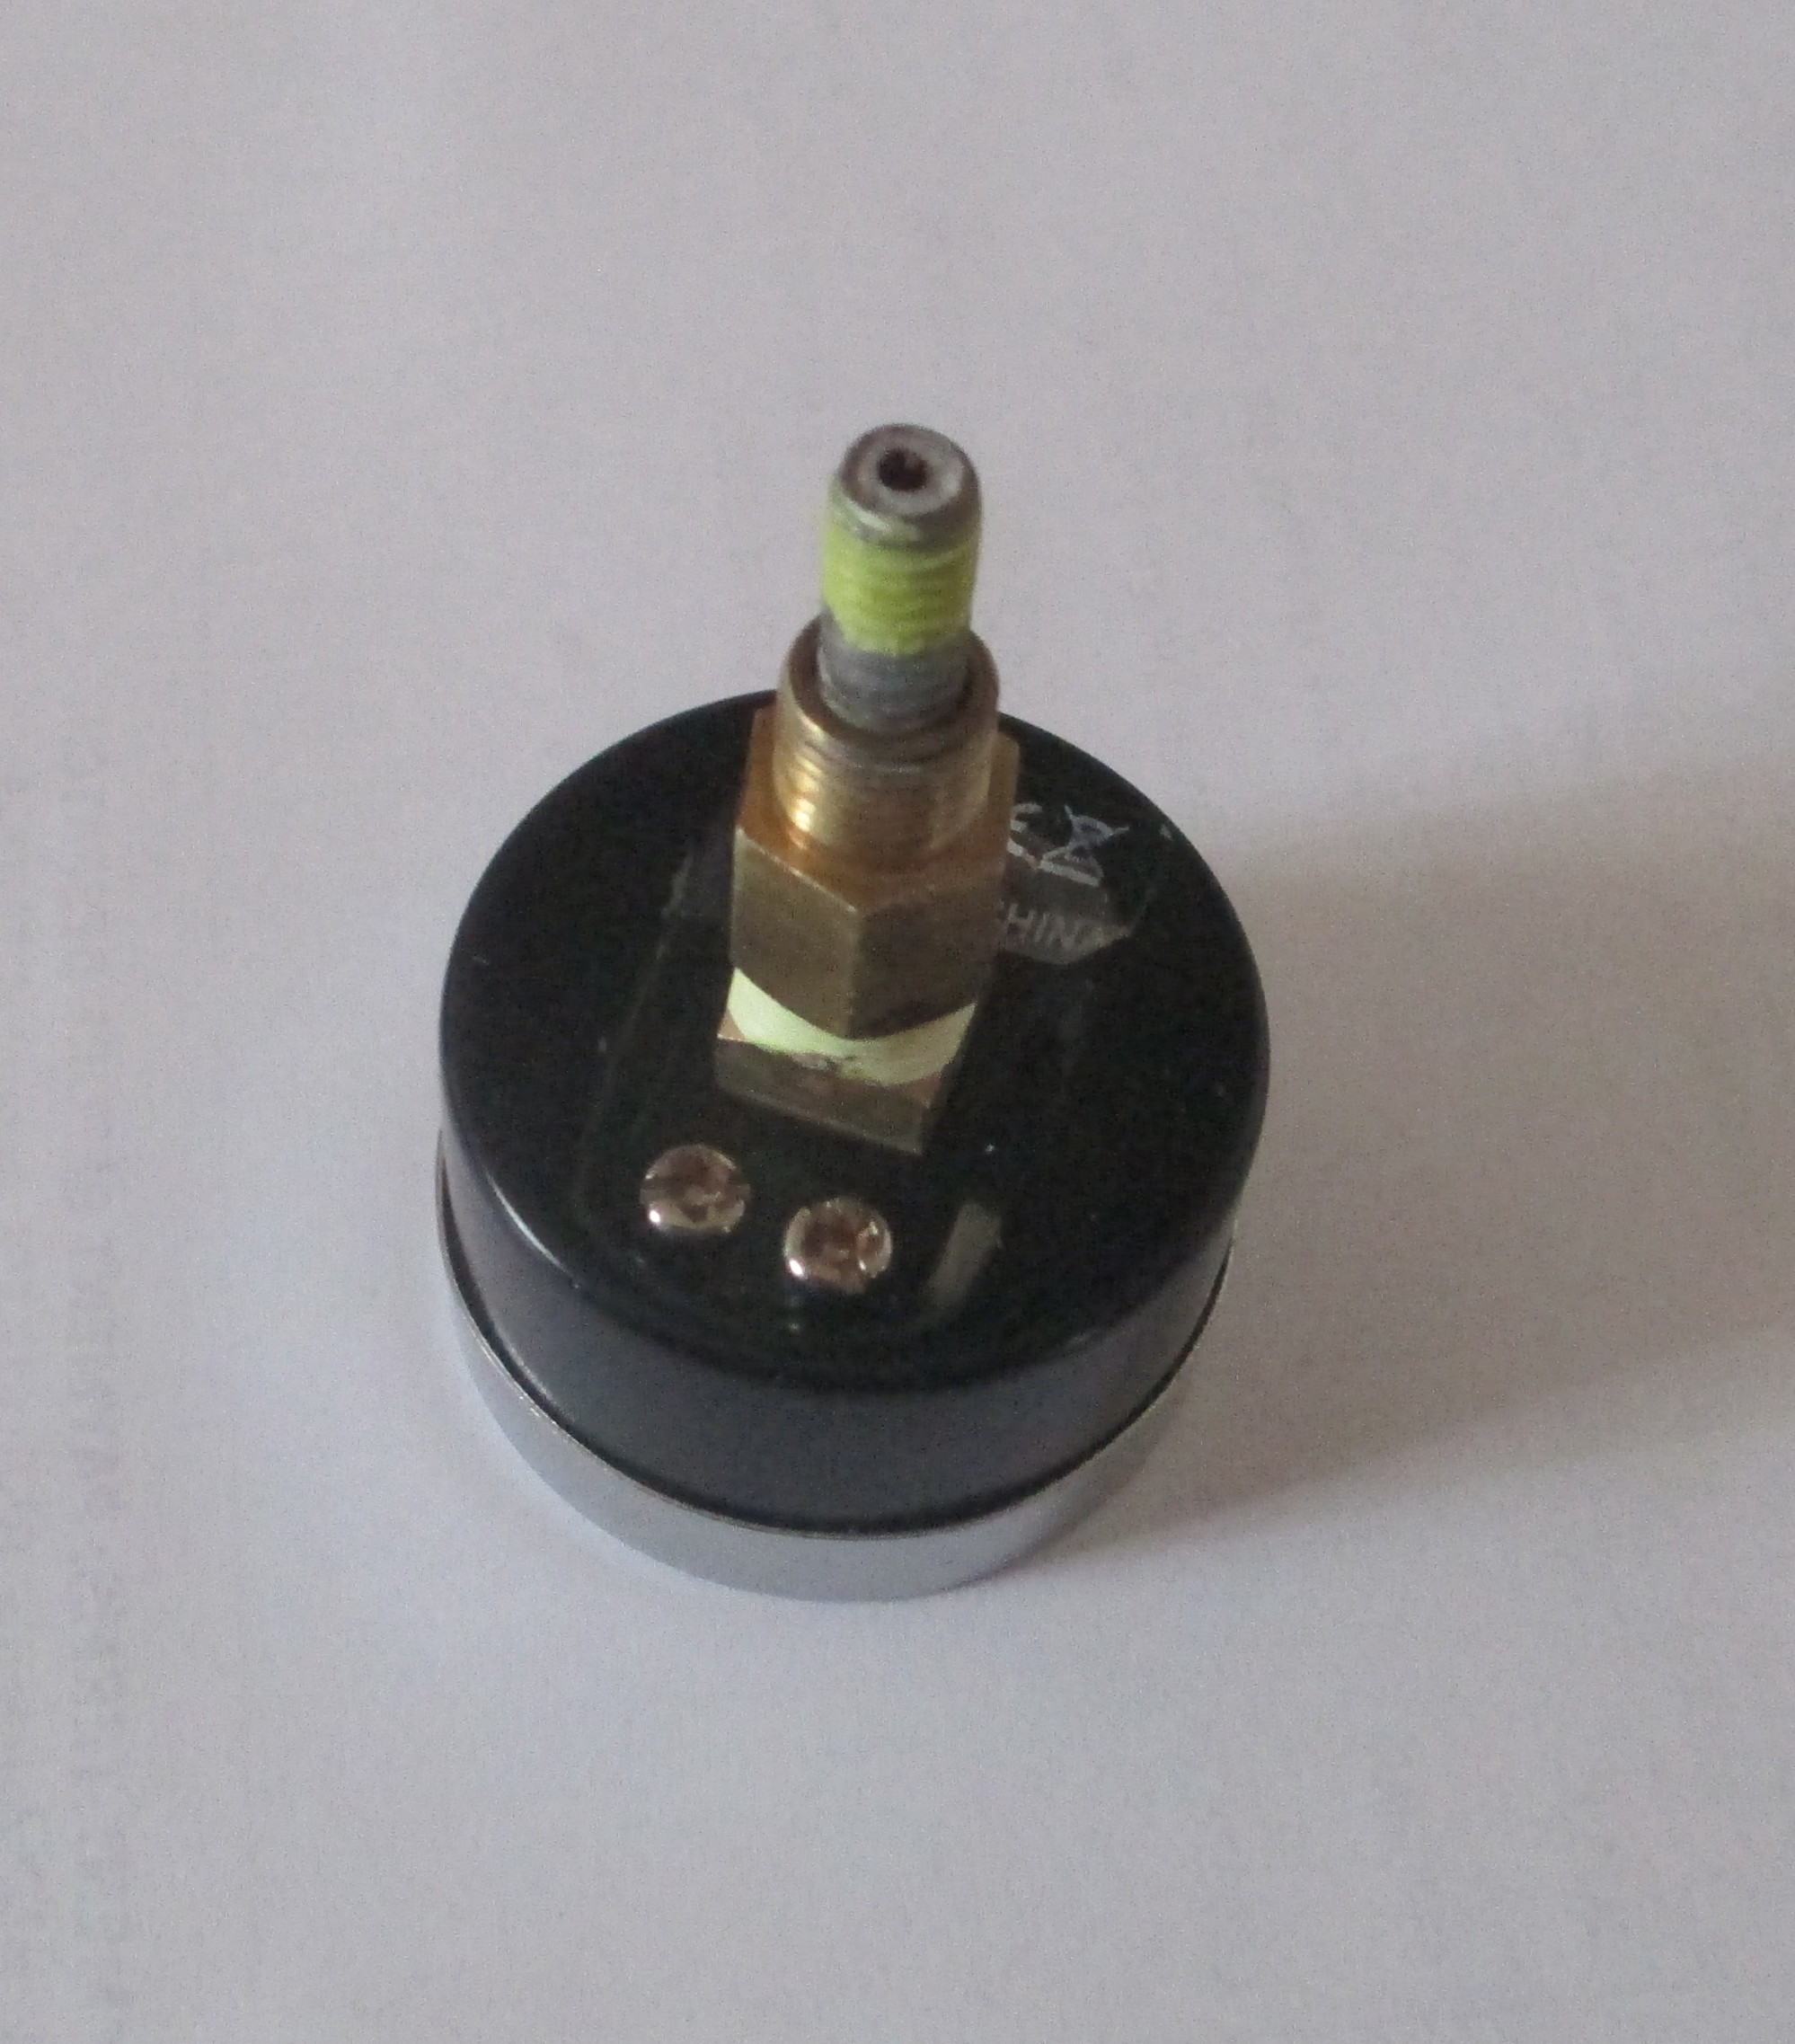
With the Grolsch type glass bottle (actually a 333ml or 12 fl oz Fleichenburger) which is generally heavier, thicker and stronger than "standard" bottles, 240g vs 200g), I drilled and tapped a 1/4" screw hole part of the way into the stopper (one of the plastic ones rather than ceramic, of course) and fastened the gauge to a suitable size screw with a hole drilled down it and screwed that into the stopper with some sealant. There is space between the bail wire hole and the side of the stopper to drill and tap about half way down then continue with a smaller hole on an angle towards the centre of the bottom of the stopper. This makes a clear air/gas path into the gauge.

It is interesting to note that a post by Beaudoin (9 April 2013) reports that Grolsch advised that their seals release pressure at around 5 atm (75psi) and this is also mentioned by Claude Jolicoeur in his book.

Grolsch 1.jpg
Grolsch 2.jpg
Grolsch 3.jpg
 
To answer your questions, I try to pasteurise when the SG is on its way down simply because there is a suggestion that you retain a bit more apple flavour that way (not sure if this is so but there are views that the flavour "blows off" below around 1.005.... I have found this to be the case with EC1118). Having said that, it is certainly easier to ferment all the way down to 1.000 then add sugar or AJC to bring the SG up for carbonation and I can't really say that I notice much difference between the two approaches.

Re the bottle with pressure gauge... I followed Maylar's post with success using a soda bottle. This can also double as a "squeeze test" bottle.

Later on I made a Grolsch type bottle version (a bit more about that later). My original idea was to include the pressure gauge bottle with the others when heat pasteurising in order to monitor bottle pressure. The trap FYI, is that pasteurising heat and the pressure generated can cause the seal to soften and leak so you don't get a true reading of the bottle pressure.

My first attempt involved a false sense of security with the plastic soda bottle in the hot pasteurising water as the gauge seemed to stabilise at around 5 atm (of course by then the seal had softened and was leaking as the pressure was really over10 atm), then the bottom popped out of the soda bottle and it fell over in the now very hot water. While trying to retrieve it, one of the bottles went BOOM!... talk about a multi tasking comedy show as I tried to retrieve everything, stop the gauge from filling up with water, and prevent any more bottle bombs. Of course when just using the bottle and gauge to monitor normal carbonating pressure of around 2.5 atm (45 psi) at room temperature this isn't an issue.

With the Grolsch type glass bottle (actually a 333ml or 12 fl oz Fleichenburger) which is generally heavier, thicker and stronger than "standard" bottles, 240g vs 200g), I drilled and tapped a 1/4" screw hole part of the way into the stopper (one of the plastic ones rather than ceramic, of course) and fastened the gauge to a suitable size screw with a hole drilled down it and screwed that into the stopper with some sealant. There is space between the bail wire hole and the side of the stopper to drill and tap about half way down then continue with a smaller hole on an angle towards the centre of the bottom of the stopper. This makes a clear air/gas path into the gauge.

It is interesting to note that a post by Beaudoin (9 April 2013) reports that Grolsch advised that their seals release pressure at around 5 atm (75psi) and this is also mentioned by Claude Jolicoeur in his book.

Great stuff. I've been doing this a while, but these are new ideas for me - especially the stove top pasteur. I don't do beer, so my stuff is all oriented to ciders. Pappers deserves a medal :D

I will try the soda bottle. And I will make a pressure gauge on a bottle to learn more and not guess as much. I bought a ton of the 16 oz belgian beer bottles, They probably give me a measure of added safety, but also will deserve a longer bath time. So first time will have an open bottle and an instant thermometer.

Of note, seems safer when stovetop pasteurize to let a primary finish then restart with added sugar sources.... however, I am enamored of the catch the SG on the way down and save some of the fruit flavors. Can't wait!

Thank you sir.

Rick
 
Personally I would prefer to let it go dry, condition off any off flavors, get it nice and clear, then prime/sweeten and bottle. Seems like you would have less bottom crud, and with the slower carb you wouldn't need to watch it 24/7 for pressure. the plastic bottle for firmness test is always good.

And if your going to insist on risking the pressure, remember that champagne bottles hold about twice the pressure of beer bottles. And they take crown caps. Guy who owns one of the local brew stores told me they will blow off the crowns before grenading the bottle. I know as a kid we blew out beer bottles, switched to champagne and never blew another. When i made Root beer with my kid, they badly overcarbed. The yeast did not stop in the fridge like it did when I was a kid. The taste was not great (lack of sugar) so we started to dump them, opened one, the top popped so loud our ears rang, and 2/3 the bottle went straight up. the cap wrapped itself around the opener and had to be pried off.... but no broken bottles. I bought kegs the next weekend, not willing to hurt my kids. (This was before I brewed beer)

The down side of the champagne bottles is you have to drink 25 oz in one sitting... or recap... if you can stand that torture.... better than glass in the face.

I have four 5 gallon batches in secondary that are right near 1.000 or under. (one english cider, one apple pie, one cranberry and one blueberry) Those normally get back sweetened with Xylitol and bottled with an ounce/gallon prime of something sweet - depending on my mood. I always wait till the taste mellows a bit - month or two anyway. This is a fairly slow process compared with catching the SG on the way down..... and I am always feeling the need to add some sort of fruit flavor back to the dry dry aged stuff I end up with. They never quite have the flavors off the primary or secondary fruit additions that I expect. And Xylitol ain't cheap!

So this week I started a few smaller batches of store bought - year started out with 28 gallons of fresh pressed off my own apple trees this year. Need to do something different. Working my butt off on the bottling side to get flavors I appreciate.

I am going to try the Dave's Carmel 'crazy man's' recipe, a cran raz from a can of frozen and a Cider House Rules by Pappers. All using Notty. I'm hoping to catch all of them on the way down at 1.010, prime and pasteur at couple atmos.

The OP on this thread is trying for a lot higher ABV than I. I apologize for hijacking!

Rick
 
As heat pasteurisation has been mentioned above, I thought it worthwhile pointing out how the process works. Both the Pappers and JimRausch methods produce pretty near perfect results while minimising the risk of bottle bombs. There are other approaches which are outlined in the Cider Heat Pasteurisation and Carbonation attachment to my post of 25 September.

"Stove top" doesn't mean that you have to continually heat the waterbath, it is just the convenient method of heating it up. The process simply relies on a transfer of heat from initial 82C (180F) or so waterbath to the cold bottles which heat up until equilibrium temperature is reached (i.e both the waterbath and the bottles reach the same temperature) ... ideally around 70C. The bottles are then removed (or left in as required) and allowed to cool down to the minimum pasteurisation temperature of 60C.

I did some tests on the process and found that the mass of heating water needs to be several times larger than the mass of the bottles being heated otherwise a high enough bottle temperature won't be achieved. A ratio of about 7:1 (volume of heated water to volume of bottles... i.e 15 litres of water to 2 litres of bottles) worked. If the ratio is different to this, then the equilibrium temperature will be different so the time that bottles are kept in the water needs to be adjusted accordingly.

These numbers are fairly rough guides but it is useful to understand the process and adapt the heating time of the bottles accordingly.

(Edit note: Whoops, C and F managed to get themselves tangled up. The waterbath temperature above was originally shown as 180C and of course it should have been 180F or 82C... I have now corrected it. Sorry for any confusion.)
 
Last edited:
I'm really appreciating the back and forth guys, thank you.

@Rick Stephens, no apologies needed :)

@jseyfert3 thanks. I've taken your (and Chalkyt's) advice regarding the speed of carbonation, and cracked a couple of bottles from the batch that have been carbing for 48h (from 1.025 down to 1.015). Doesn't seem to be any leaking in the bottle, but the carbing was rather tame, so I'm going to recheck another couple at 72 hours (total), and probably pasteurize then.

@Maylar @Chalkyt that is a great project, may have a play with that later 🤓

So far the most common advice (other than kegging, which seems to have an almost cult following) is to ferm to dry, backsweeten and prime for my carb. I probably could, but I'm enjoying figuring out how to do it this way; I guess my intention is to do it as safely as possible by picking people with more experience's brains.

Plan at this stage is likely pasteurize of about 6 bottles on their third day using 80c water off the boil for minimum of 10 mins. The ones I cracked open today weren't especially clear, but I reckon that will bottle condition out after a while.

Quick question about finings (to anybody); do they affect your ability to bottle carb? I assume at least the majority of cider related cloudiness is down to apple pulp particles, and yeast, so clearing it out entirely would make it nigh impossible to bottle carb without the addition of more yeast 🤔
 
So far the most common advice (other than kegging, which seems to have an almost cult following)
It's not cult, it is just addictive and easy. Finish the beer, cider, wine, mead, soda or whatever you want just the way you like it, Then keg and hit the gas. done. And then you find yourself walking around store going "I can ferment that" and also "I can carbonate that". I tasted Countrytime strawberry lemonade, thought, hey, that would be good with bubbles.... It was very good, one of my kids drank almost nothing else for a month.
 
Lately I've done 2 Melomels and a Cyser. Used pectinase in both of the melomels, but ran out of it for the cyser- which used 3/4 gallon of fresh pressed cider. In the melomels I used Red Star Cote des Blanc yeast, the cyser used EC-118. The melomels have taken 4 months, a cold crashing and gelatin to clear. I racked the cyser for the 1st time today after 3 weeks. It's remarkedly clear. Point being- strain of yeast makes a difference in how fast things clear up.
 
And my ciders and Grafs , using various ale yeasts, tend to clear very nicely, although I do tend to give them 6-8 weeks before bottling. And they carbonate without problems.
 
@Maylar @JimRausch Thanks both, that's food for thought if i feel the need to clear it a bit :)

@TheBluePhantom Oh I can definitely see the benefits. Just noticed in forum posts that when people start kegging they seem to see no other way to brew from then on.

So first attempt at pasteurization today; had one critical failure, and one success. 2 things learnt. One, is that for the carbonation I like, and the bottles I use, 80C (about 175F) is about the limits. The other is that releasing pressure from the bottle just prior may make enough of a difference to matter.

I opened and resealed one bottle to test carb level, and put them both in a pot (with a rack underneath to keep them clear of the base) with the hottest possible tap water, then added boiling water to the pot to bring it up further. Then a medium heat to bring it from 50C(about 122F) to 80C. Took about 45 mins to get up the 30 degrees to 80C with no hissing, bubbling or any other stressful signs. This also means I probably overshot the required time above 60C(140F) to kill the yeast before achieving my goal temp.

A few minutes into 80C, the unopened bottle ruptured, so I turned off the heat, let it cool and the second (opened bottle) survived.

I've got another set of bottles 24hours into carbing from the same batch (I've staggered bottling to test the end flavor profile at the same time) so I'll try half at 48hrs, and half at 72 hours, all of which at approx 70C (160F). I'll probably also pasteurize the test bottle for each batch again, see if I can't compare carb levels between a released bottle and a sealed one. Will keep everyone up to date.

(Just to reiterate, I'm using safety gear, prechecking the bottles and heating very slowly. Seeing the amount of glass and the distance it flew, I cannot advocate anyone attempting this without an understanding of the dangers).
 
Hi all! Just wanted to contribute to the thread...I just bottled some Pear Cider...ended up with 2 gal. From 20lbs. Of frozen Pears from neighbors wild trees. I extracted the juice with a Steam Juicer, let it sit in secondary for 4 months. I back sweetened (per gallon) with 1 32oz. bottle of Knudsons brand Pear nectar and 1/3 cup sugar for one and 1/2 cup honey with other. Was still slightly dry as I like it...waited 4 days for carbonation to build up as I like, using flip-top bottles as test.

Using a big lobster pot, heated water to 190f...while waiting, I prepped bottles in large containers with hot tap water about 120f...I figured room temperature to 190f would be a dangerous spike in temperature with carbonated liquid. So at 190f I shut off heat, dropped in a hand towel to keep bottles from clinking too much, covered pot for 10min. removed bottles to cookie racks to cool and heated up water for next batch...worked well! All this while wearing a rain slick and safety glasses in case of Hot Cider Geyser

Pear nectar had pulp so bottles looked like lava lamp...but tastes great! The honey batch was the best!
 

Attachments

  • 20200430_195710.jpg
    20200430_195710.jpg
    1.4 MB · Views: 8
@TheBluePhantom Oh I can definitely see the benefits. Just noticed in forum posts that when people start kegging they seem to see no other way to brew from then on.
Indeed. I tried my first sweet carbed cider. Racked into keg, added sorbate and sulfate, added frozen apple juice concentrate (FAJC), purged and hooked to gas. Done!

I started with kegging, and I actually started wondering if it was worth it when I was breaking down kegs to clean and fussing with orings. Then I bottled about 20 bottles as part of a yeast comparison test with 1/2 gallon batches, and realized the keg was way easier to do.

Anyway, highly recommend kegs if it falls into your budget in the future.
 
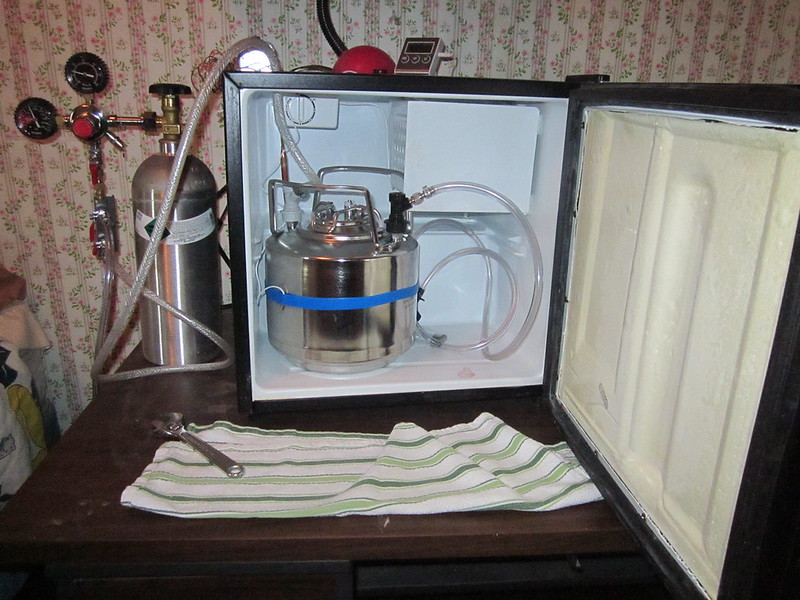
You don't need a big investment in space or money for kegging, if you want to do small batches like I do. My setup is the mini Cannon Ball keg from Northern Brewer and a dorm sized fridge. Fits on a small cart. LOVE it.

26615235565_a40c675fe7_c.jpg
 
You don't need a big investment in space or money for kegging, if you want to do small batches like I do. My setup is the mini Cannon Ball keg from Northern Brewer and a dorm sized fridge. Fits on a small cart. LOVE it.

26615235565_a40c675fe7_c.jpg
All together, what did you spend? How much fits into the keg?
 
All together, what did you spend? How much fits into the keg?

The keg is about $75, though I got mine for Xmas. Regulator and gauges another 60, CO2 tank from my local gas supplier was $100 though they can be had cheaper. Assorted hoses and fittings etc. on top of that. CO2 fill up is $20 for 5 lbs. The keg holds 1.75 gallons, I fill it with 1.5. I can bottle directly from the keg :)
 
The keg is about $75, though I got mine for Xmas. Regulator and gauges another 60, CO2 tank from my local gas supplier was $100 though they can be had cheaper. Assorted hoses and fittings etc. on top of that. CO2 fill up is $20 for 5 lbs. The keg holds 1.75 gallons, I fill it with 1.5. I can bottle directly from the keg :)

I am interested in hearing your 'bottle direct from keg' walkthrough. Any special delivery parts that make this easier to fill without foaming up?
 
The keg is about $75, though I got mine for Xmas. Regulator and gauges another 60, CO2 tank from my local gas supplier was $100 though they can be had cheaper. Assorted hoses and fittings etc. on top of that. CO2 fill up is $20 for 5 lbs. The keg holds 1.75 gallons, I fill it with 1.5. I can bottle directly from the keg :)
Wow, that is a lot.
 
I am interested in hearing your 'bottle direct from keg' walkthrough. Any special delivery parts that make this easier to fill without foaming up?

I dispense from the keg with a picnic tap and fairly short line to the keg. You can see in my pic that the line stays in the fridge (I have a real tap handle that I'll install some day). A standard bottling wand fits tightly into the tap. Push the button, fill the bottle, easy peasy. Cider foams very little. I use 12-13 psi of CO2 in the keg, and I drop it down to about 5 psi when bottling.
 
I dispense from the keg with a picnic tap and fairly short line to the keg. You can see in my pic that the line stays in the fridge (I have a real tap handle that I'll install some day). A standard bottling wand fits tightly into the tap. Push the button, fill the bottle, easy peasy. Cider foams very little. I use 12-13 psi of CO2 in the keg, and I drop it down to about 5 psi when bottling.
Thanks! Didn't figure it was a big deal, but hearing it answers that nicely. Might have to consider a keg system one day. I own a welding shop, lots of CO2 cylinders around and don't need em permanently hooked if only carbonizing pre-bottling. Nor any kind of kegerator.
 
From the number of responses, you can see that your little project is certainly keeping us interested and entertained.

I am a bit of a purist and the idea of bottle conditioning/carbonation appeals to me especially as I tend to make in one gallon lots. Having said that, I am not too much of a purist since I use sulphite, pectinase, DAP, bought yeast etc and I must say that kegging does have its attractions.

Back to your bottle bomb issue... bottle conditioning and heat pasteurising does take things close to a few limits, but it can be managed if you have your head around what these limits are. There are three issues that might have gone pear shaped for you.

1. In the Pappers (and JimRausch) methods, the heat is turned OFF when the bottles are put in the bath. This causes the bath to cool down as the bottles heat up and equilibrium temperature is reached. As outlined above (Wednesday) the ideal equilibrium temperature is about 70C. At this temperature the bottle pressure with 2.5 volumes of CO2 would be around 125 psi, but at 80C it would be closer to 160 psi. Pressure increases exponentially with temperature. Slightly higher carbonation and temperature would get you to around 200psi or higher which is getting into bottle bomb territory (see Andrew Lea's www.cider.org.uk/carbonation_table.xls).

2. Glass is a funny animal. It can stand quite high stresses for a short while before it breaks. The stresses eventually concentrate at "weak points" (corners, flaws, etc) until they cause failure. So minimising the time that the glass is stressed (i.e. pasteurise during cool down rather than maintain a high temperature for too long) helps avoid this problem. It sounds as though you had the bottles in the water for 45 minutes while it heated up, so they may have been subjected to stress from internal pressure for quite a while. Something in the order of 100 PUs (pasteurisation units) can be produced as the bottles are cooling down from 70C to below 60C. As cider only needs 50PUs, it is actually quite difficult to "under pasteurise", so a really high starting pasteurising temperature isn't needed and "over pasteurising" doesn't appear to affect the flavour of the cider, it is only overheating or cooking it that has an effect, and from my experience 70C doesn't go anywhere near causing this sort of issue..

3. Most "standards" require ordinary 12 fl oz bottles to withstand around 250 psi. However testing for this involves sampling from a production batch and if the samples pass the test, so the batch passes. In practice the spread of pressure resistance in a batch can be quite high due to flaws and variances in the production process with a worst case bottle withstanding much less than the test level. Of course if the worst case bottle doesn't get selected for testing the batch goes into production and the under-spec bottle can potentially end up with us. So, it is prudent to use a heat pasteurising method that doesn't generate more than say, 125psi which should accommodate a "worst case bottle" and can be achieve with 2.5 vols of carbonation at 70C.

You are not "Robinson Crusoe" (i.e. by yourself). I have had a similar situation to yours where a bottle "went off", and although I didn't have temperature etc figures on that occasion, as it was my first attempt at heat pasteurisation, the bottles had been in for a long time and the heat was still on. I guess we learn (quickly) from our mistakes.
 
Just bottled up 55 bottles. Half at FG of 1.015 and the other half at 1.010. These are new crimp capped 375 Belgians. Been doing carbonation priming and backsweet with Xylitol in the past. This is first time doing Paps method. Looking forward to it! I read the entire thread over the last week or so. Each half batch, out of the same fermenter but sweetened differently, has its own pop bottle.

I have canning stuff galore. I'll let you know how it goes. My plan is one water bath at 130, the other at 165-170, both with flame off while bottles are in. I have trays for the bottom, so no bottles touching kettle. While a batch is in the hot one, I'll be warming up the next batch in the other. I have plenty of temp measuring tools, instant thermometer, laser gun, etc. Lots of propane heat capability to bring back up between dunks. I'll start with an open top bottle to get an idea of internal temps.


My bet is the issue with those who have bombs and over carbonation issues are often based on both yeast type and temperature during conditioning. All it takes is a few degrees hotter than the other guy and your fermentation is much quicker with narrower windows. Overshoots are too likely when temps are a little higher or yeast is hotter or more active. These bottles are heavier as well, which also means they'll take a bit more time to do a yeast kill.

I even got SWMBO helping out. We had a blast.

IMG_2093.JPG
 
Last edited:
@Maylar @TheBluePhantom Kegs may be a long term thing. Right now I want to keep my kit minimal and portable, since i'm likely to move soon. And there's something kinda special about more old school methods, akin to grandpas planer and cast iron pans :)

@Chalkyt Appreciate the reassurance and details. I'm still pretty fresh, but it's good to have scientific data to work of the back off :)

So to update; I split the same batch previously in order to suss out flavor vs FG vs carbonation, so the new bottles are technically the same batch as the first ones, just bottled a few days later.

48hours carbing, 70C pasteurization using a medium heat, and not one bottle bomb. Again today (72 hours) at 70C and no bottle bombs. I think I've found the sweet spot for now (obviously with the caveat that temp will change carb levels per day and I'm not measuring but estimating that factor, other than cracking open a bottle and looking).

My thinking with my approach is this; by heating the bottles up from low (about 50C) slowly up to 70C (took about 30 mins) I will minimize thermal shock, and give the contents of the bottles time to come to temp. A wire rack between the bottles and the base on the pan will protect it somewhat from uneven heat, and allow water movement.

And there is minimal drop from the bottles "absorbing" the heat as the stove top is adding heat back into the mix. As soon as it hits 70, bam, flameout. Then leave the bottles in place and let the water naturally drop back to a reasonable temp/pressure level, again avoiding too much shock.

Next experiment will be a full batch, all bottled at 1.020-1.025, all carbed for about 2 days, and all pasteurized at 70C.

(Well that and my experiment with SafCider vs EC-1118. Saf is much cloudier, and fizzes up when siphoning to the point of breaking the flow, but it tastes a whole lot more round and apple-y so may be worth a batch 🤓)
 
And there's something kinda special about more old school methods, akin to grandpas planer and cast iron pans :)
You don't have to tell me about old stuff. My bench capper is my grandfathers, same one I used as a kid on soda. It is back from the 30's or so. My kid did a soda with it, so 4 generations on the same capper. I have several carboys that say Absopure from my father, from when they converted to plastic and sold the glass to winemakers. I just took the easy route for soda and cider. bottle pasteurization is fairly advanced and can get dangerous, I am not that ambitious. Kegging is faster and easier, but yes, it is expensive. On a side note, with kegs, you can try keg carbonation with yeast...
 
Re monitoring pasteurisation, you might like to look at a post by Bembel (May 11, 2016) where the elapsed time to reach each temperature point (i.e. 65C, 66C, etc) is recorded and the number of accumulated PUs (pasteurisation units) is calculated. I have used a similar but slightly different approach where the temperature reached at each minute is recorded.

PUs are the measure of pasteurisation achieved from a combination of temperature and time. One PU results from holding a beverage at 60C for one minute, so 50 PUs needed for cider could be achieved by 60C for 50 minutes, or as suggested by both Jolicoeur and Lea, 65C for 10 minutes. Pasteurisation increases exponentially with temperature.

i.e.
Temp C6061626364656667786970
PUs/Min1.01.41.92.73.85.27.310.214.219.727.5

Also, it takes about 20 minutes for a change in temperature to distribute evenly throughout a bottle, so measuring the temperature in the middle of the bottle will slightly understate the temperature at the edges. This isn't a bad thing as the peripheral bottle contents will be a little "overpasteurised" in relation to what the temperature in the middle suggests.
 
Back
Top