You are using an out of date browser. It may not display this or other websites correctly.
You should upgrade or use an alternative browser.
You should upgrade or use an alternative browser.
Spike Conical- observations and best practices
- Thread starter sheikyerbouti
- Start date

Help Support Homebrew Talk - Beer, Wine, Mead, & Cider Brewing Discussion Forum:
This site may earn a commission from merchant affiliate
links, including eBay, Amazon, and others.

OK, this is long, and there are pics, but for anyone who's contemplating temp control using the freezer compartment of a refrigerator...this may give you some ideas.
Just bought a Spike CF10. Also bought the temp control kit. Seems a little pricey for what it is, but on the other hand, it's designed to fit.
The question was how to enable cold water/cold solution chilling ability. I'm tapped out--I can't afford, at the moment, any kind of glycol chiller. Certainly not a Penguin, and not even the ones for aquariums. So it has to be done with either icewater in a cooler or using a cold-solution reservoir in a freezer.
I chose the freezer option.
One issue is what kind of vessel will hold the solution. I have a gallon of Glycol, mixed w/ 2 gallons of water...I need at least three gallon capacity. But I wanted a larger vessel.
I found a plastic tub with 18 quarts of capacity at the home store; I felt that would give me enough capacity for the 3 gallons of solution, plus I wanted the thinnest rectangular area possible so it would shed heat as readily as possible. I set it on two half-bricks to lift it off the bottom of the freezer so cold air can circulate on all sides.
What you see in the pics below is a somewhat smaller tub I used for a trial run with just water. Actually screwed up and it froze on me at one point, had to add hot water to thaw the ice in the lines. C'est la vie. The tub I have includes a lid, into which I cut a slot to allow for capping the reservoir. Easy to remove. Not sure if it makes more sense to leave it off in the freezer or not. Probably try it with first.
************
I chose the location on top of the fridge--which looks strange actually as you'd think the best place would be on a corner or the edge--because it allowed the lines to drop straight down to where the pump is. There's enough resistance to bending in those lines that I felt the pump would likely end up cockeyed if the lines were not dropped straight in. I could have, I suppose, found some sort of thin metal I could have bent to force a bend that would have worked, but this seemed simpler.
I bought a sheet-metal drill bit that maxed out at 3/4" diameter, drilled the two holes you see. I did the usual drill a small hole and probe w/ a piece of coat hanger to ensure there were no lines in the way....I would have bet you $500 there weren't, but if I'd hit one, finding another refrigerator of the same size, etc. would have been nigh impossible--and pricey.
The neoprene covering the vinyl tubing is about 3/4" in diameter--but it also has a little webbing piece connecting the two. This is good, it keeps the two lines together, BUT.....how do you drill a kind of figure-8 hole with a "waist" as well? I drilled the two holes and used my dremel tool to essentially connect the two holes. With the narrow waist between the holes I just couldn't get the tubing through there--it caught on the inside edges of the hole leading into the freezer compartment. So I widened them up into essentially an oval. You can see that in the one pic showing the extra space where the tubes go into the top--there's an arrow pointing to it.
As it turns out, that was a good thing--it provides a space through which the power line for the pump can pass, and the other side for the temp probe from the inkbird. Sometimes you get lucky.
****************
So, all that was left was seeing if it worked. I added 6+ gallons of Star-San solution to the conical, turned on the heater; found that it could take the temp up about 4 degrees in a half hour--which is just fine to keep things warm in the winter, or raise the temp for a diacetyl rest or just to let the yeast finish. So that works.
Then it was the cooling part. Installed the cooling coil, connected the lines, filled the reservoir with water, turned on the pump....and water starts spraying from one of the John Guest fittings connecting the tubing to the coil. Turn off, reconnect, turn on--and things are better. But one is still dripping. Disconnect, reconnect--I think I know how to do that now--and got it to work with no leaks.
The pump runs water through at a pretty good pace. All that will matter is whether there's enough thermal mass in the cooling solution--and recovery capacity with the freezer--to run this down to cold crash levels. We'll see. In the meantime, I have a way to do normal temp control that cost me $6 for the plastic tub and $10 for the drill bit. And $30 for the Propylene Glycol.
********
I was ready to brew today and then realized I forgot to bring the garden hose inside. It was in the teens last night, so I have a hose which is 50 feet of coiled ice. Maybe later...
View attachment 565343 View attachment 565342 View attachment 565338 View attachment 565341 View attachment 565340 View attachment 565339
This is an addendum to post 182. I've been trying to do temp control using a Propylene Glycol solution cooled in a freezer. See above for some of the details as to how I got the cooling lines into the freezer.
I've been working to enhance the cooling of the PG mixture. I bought a coil of copper tubing, used a John Guest fitting to connect to the Spike-supplied tubing, and had it set up to drain into the reservoir.
I also made up a heat sink out of scrap aluminum I had lying around. What I have not yet done is used a small fan to blow cold air across the coil and heat sink, but based on performance testing today, I don't know if I will.
I have about $4 in the plastic tub, about $11 in the copper tubing, about $4 in the John Guest fitting, and what is probably about $10-15 or so in scrap aluminum. I also have about $30 in the Propylene Glycol, 1 gallon on Amazon, and $9 in a moving blanket.
I put 6 gallons of Star-San solution in my Spike CF10, and used the supplied heater to raise the temp of that 6 gallons to 67 degrees. Meanwhile I had the refrigerator/freezer on, setting the temp control of the solution to 27 degrees. When it had fallen to 30 degrees I dropped the temp on the Spike controller from 67 to 50, and began to time the performance. Ambient in the garage was 65 degrees.
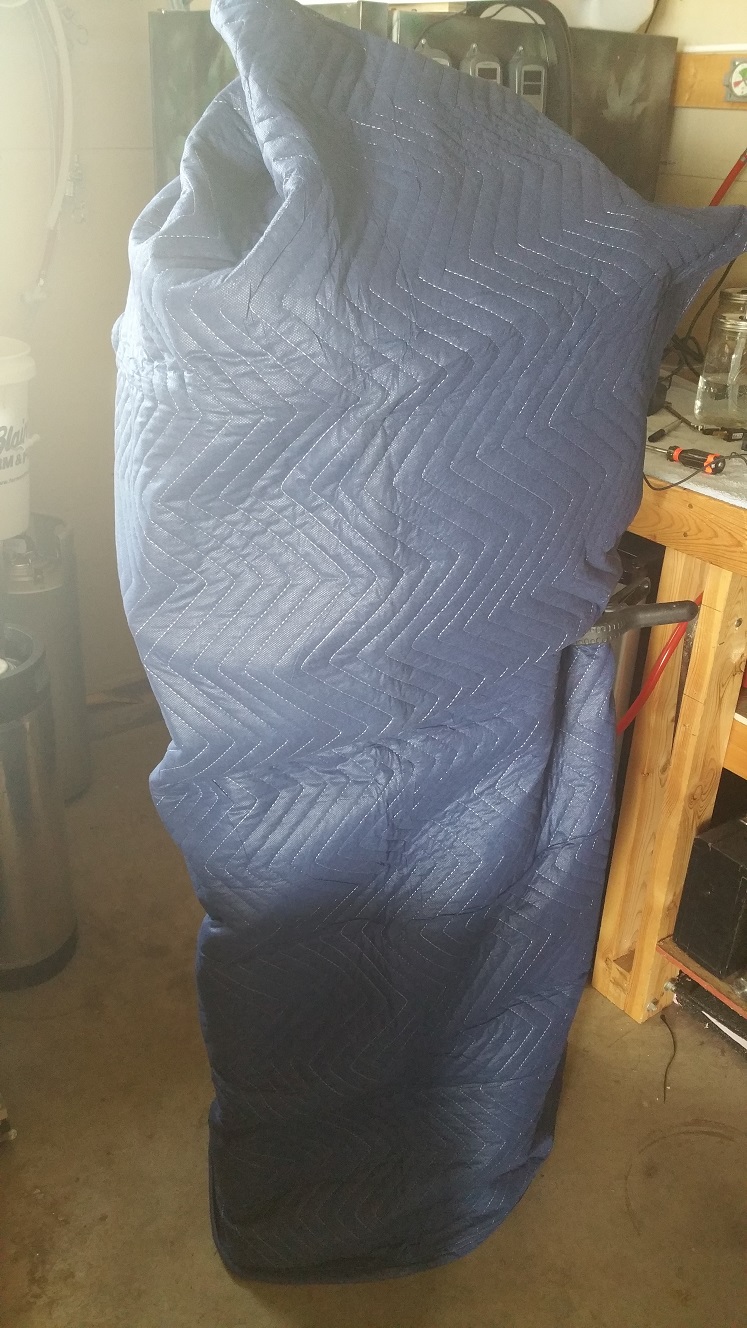
It took 2 hours to drop the temp from 67 to 50. Note in the pics below the moving blanket I used to wrap the fermenter. I've been stewing over how to insulate/isolate the fermenter from ambient, and this is the best idea I've had. The blanket is wrapped around the fermenter and held in place with a spring clamp. If I were doing this for real and the garage was warmer, I'd throw a bath towel over the top to cover the domed lid, and use a couple more spring clamps to hold it around the conical.
Then, I dropped the temp again from 50 to 36, to simulate crashing. It has taken 3 hours and 40 minutes to drop from 50 to 37.8 degrees. Another half hour or so and I should be there.
The moral of the story is that I can readily reach lager temps with this setup, and likely can crash with it as well, though if it's 85 degrees in my garage in the depths of summer, that'll take longer. I've also considered getting a largish water heater box to put around this, as a way to further isolate the conical from ambient when conditions are extreme.
***********
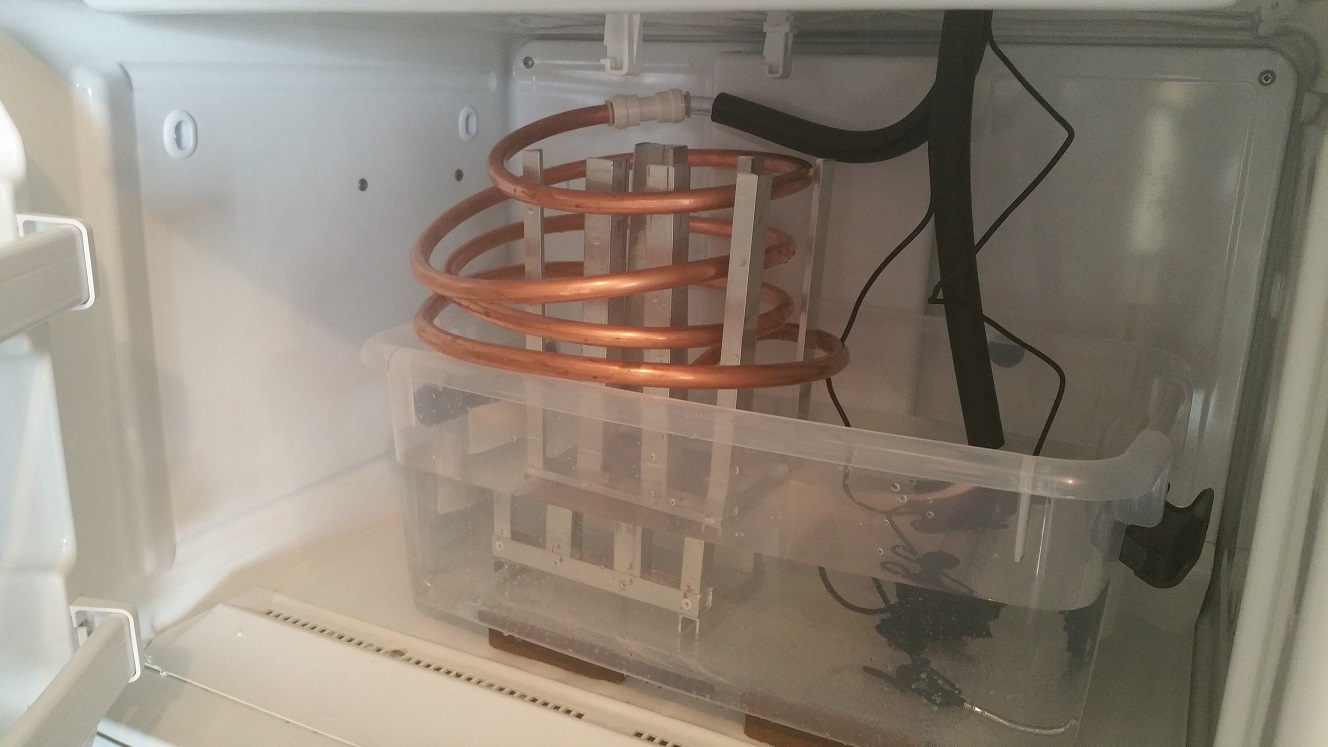
Heat Sink:


Last edited:
- Joined
- Jun 25, 2014
- Messages
- 27
- Reaction score
- 16
I have an odd situation occurring with my current fermentation. Imperial red fermenting like formal through a blow off tube attached to a ball lock attachment on the gas manifold, about 4 days in I start seeing it slow down so I remove the ball lock to save some of the last bits of CO2 for carbonating. The pressure gauge rises to about 9 psi and stays there. My release valve tends to release between 11 and 12 psi. I thought maybe it's done producing CO2 so to test it I release a little bit of pressure back down to 5 psi. A short time later I checked it and it was back up to 9 psi. It sat for a couple of days at that pressure as its not a huge deal between 9 and 12. Just to check and see if the prv was releasing lower for some reason I hit it with CO2 from the tank and the prv released at 13. I'm testing it holding the 13 psi now to see if a leak shows up around 9 psi. Anybody have a rational reason for this? Haven't had any batches behave this way previously.
philly224
Well-Known Member
How are you guys adding your dry hops to these? I just have been opening the lid and dumping them in and then purging with co2 but won't that still introduce some oxygen?
i use the 4" opening in the lid. remove the tri clamp, barely lift/tilt the cooling coil, dump them in and seal it back up. no purging for me, dump them in with a few gravity points left and whatever minimal oxygen gets in there will get eaten up by the yeast.How are you guys adding your dry hops to these? I just have been opening the lid and dumping them in and then purging with co2 but won't that still introduce some oxygen?
I know this is a debated topic but I dont worry about O2 exposure from dry hopping. Dont get me wrong, I dont dilly-dally or pump O2 in or anything either. But, I always wait until well after fermentation has stopped and then I start the dry hop. Just open the 4" lid and put them in through there...
I use nylon paint strainer bags to contain the hops and SS weights to help keep the hops submerged.
A post on my process with illustration pics is here:
https://www.homebrewtalk.com/forum/...alf-barrel-bme-chronical.579210/#post-7539767
And I've never had any O2 staling from doing this! At least none thats has been noticed anyway...
Last edited:
sheikyerbouti
Well-Known Member
- Joined
- May 13, 2007
- Messages
- 78
- Reaction score
- 18
Personally, I add them straight through the 4" lid and I actually flush them in a cup with CO2 first. May be unnecessary, but I'll take all the help I can get.
Blazinlow86
Well-Known Member
- Joined
- Oct 19, 2016
- Messages
- 1,687
- Reaction score
- 743
I also always add dryhops a few points before fermentation finishes up and switch from the blow-off to the prv cap at the same time. If I was to have to reopen after that I would definitely purge with o2 at that point
Blazinlow86
Well-Known Member
- Joined
- Oct 19, 2016
- Messages
- 1,687
- Reaction score
- 743
Random spike conical pic from the other night. Carb stone works great


Blazinlow86
Well-Known Member
- Joined
- Oct 19, 2016
- Messages
- 1,687
- Reaction score
- 743
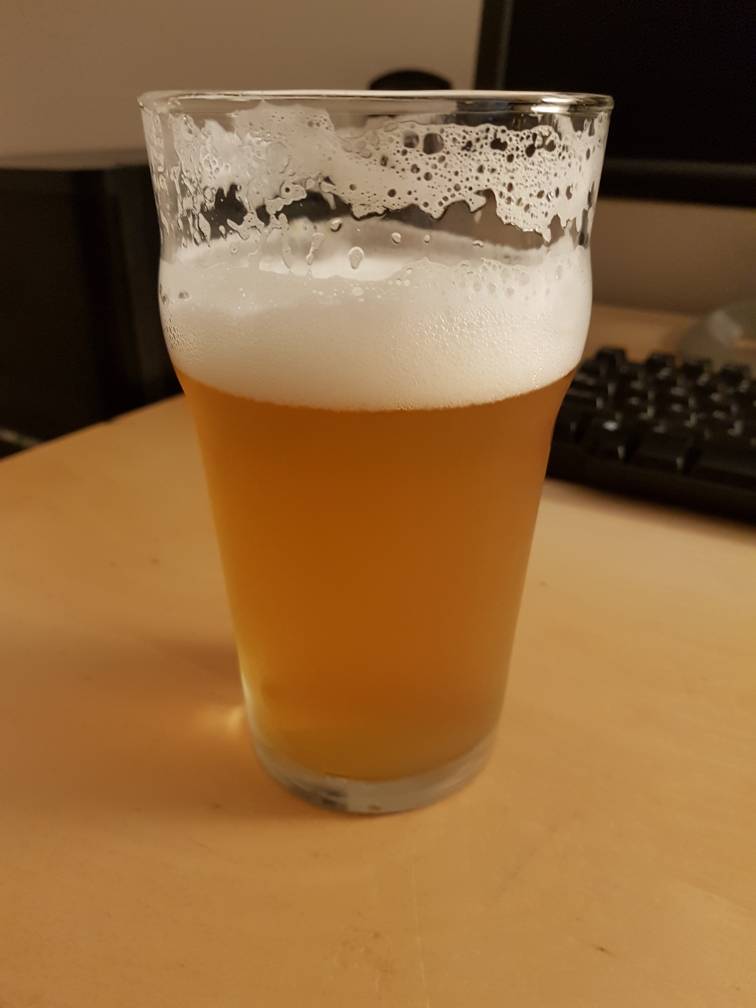
Here's another picture of 24 hours after adding the carb stone. Jerkface 9000 wheatbeer clone poured from the sample port. Grain to glass in 12 days

philly224
Well-Known Member
Nice! The carb stone is one of my favorite parts about the conical. It's awesome not having to worry about carbing in the keg. Its perfect right out of the conical every time!
I've been trying to figure a way to get gelatin finings into the conical without releasing pressure. I ended up doing this:
The problem was introducing finings into a pressurized fermenter. It occurred to me that I have a way to introduce gas into the fermenter...why not finings through the same path?
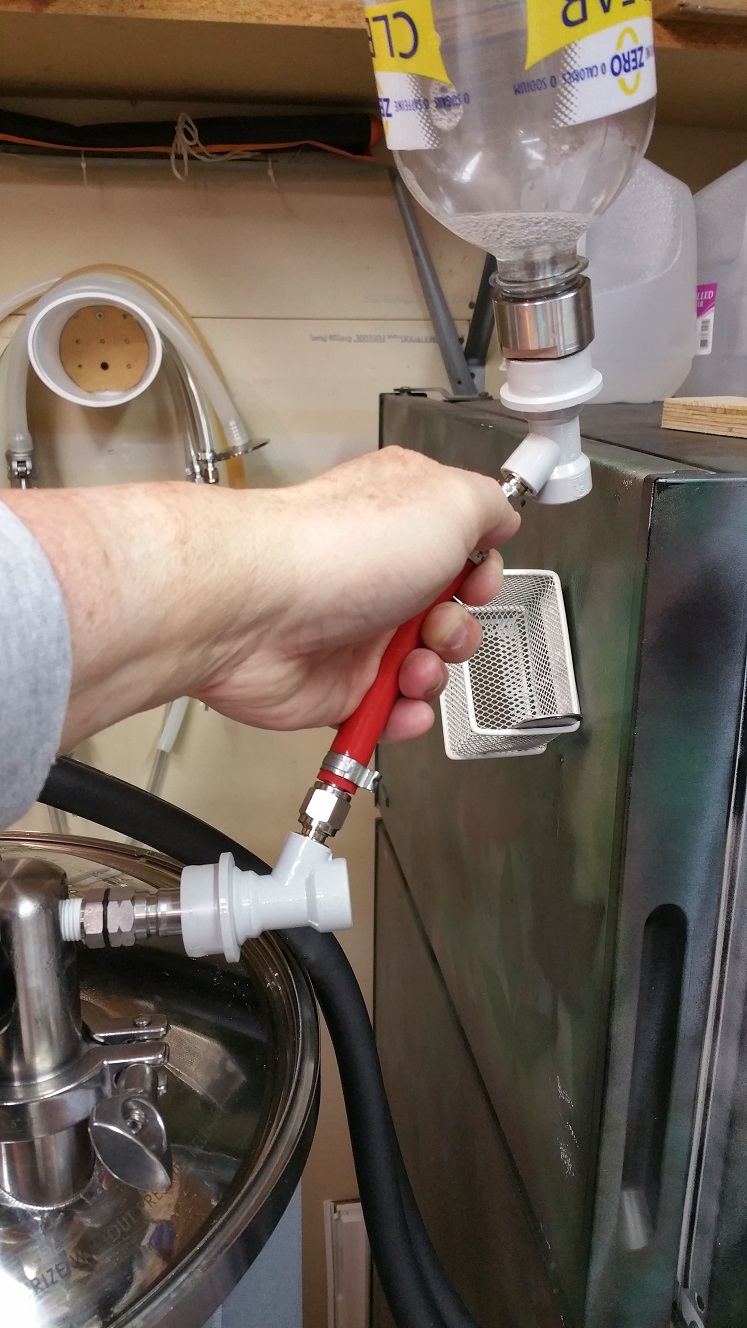
I had a carb cap I use for cleaning tap lines, emptied out a bottle of flavored water, rinsed and rinsed it, then rinsed it in Star-San. Added the carb cap and guess what? It'll hold 30psi.
So I made up a gelatin finings solution. Meanwhile, I fashioned a very short jumper with gas QDs on each end. I filled the bottle partway with Star-San, pressurized it, attached the jumper, inverted the bottle, attached the jumper post to release the pressure, and guess what? Out comes the Star-San.
Once the gelatin was ready, I poured it into the bottle, replaced the carb cap, pressurized it, attached the jumper, inverted the bottle above the gas post on the gas manifold and....attached it.
Those finings went right into the fermenter lickety-split. No loss of pressure, no anything.
Couple of pics attached. Should work. I'll probably have to carefully clean the gas manifold when I'm cleaning the fermenter, but this is a pretty slick way to get finings in there without losing the carbonation.


Blazinlow86
Well-Known Member
- Joined
- Oct 19, 2016
- Messages
- 1,687
- Reaction score
- 743
Neat idea. I just release the pressure and pour in the top. Then re pressurize using my co2. That being said I use the carb stone at the end to fully carb my beer overnight
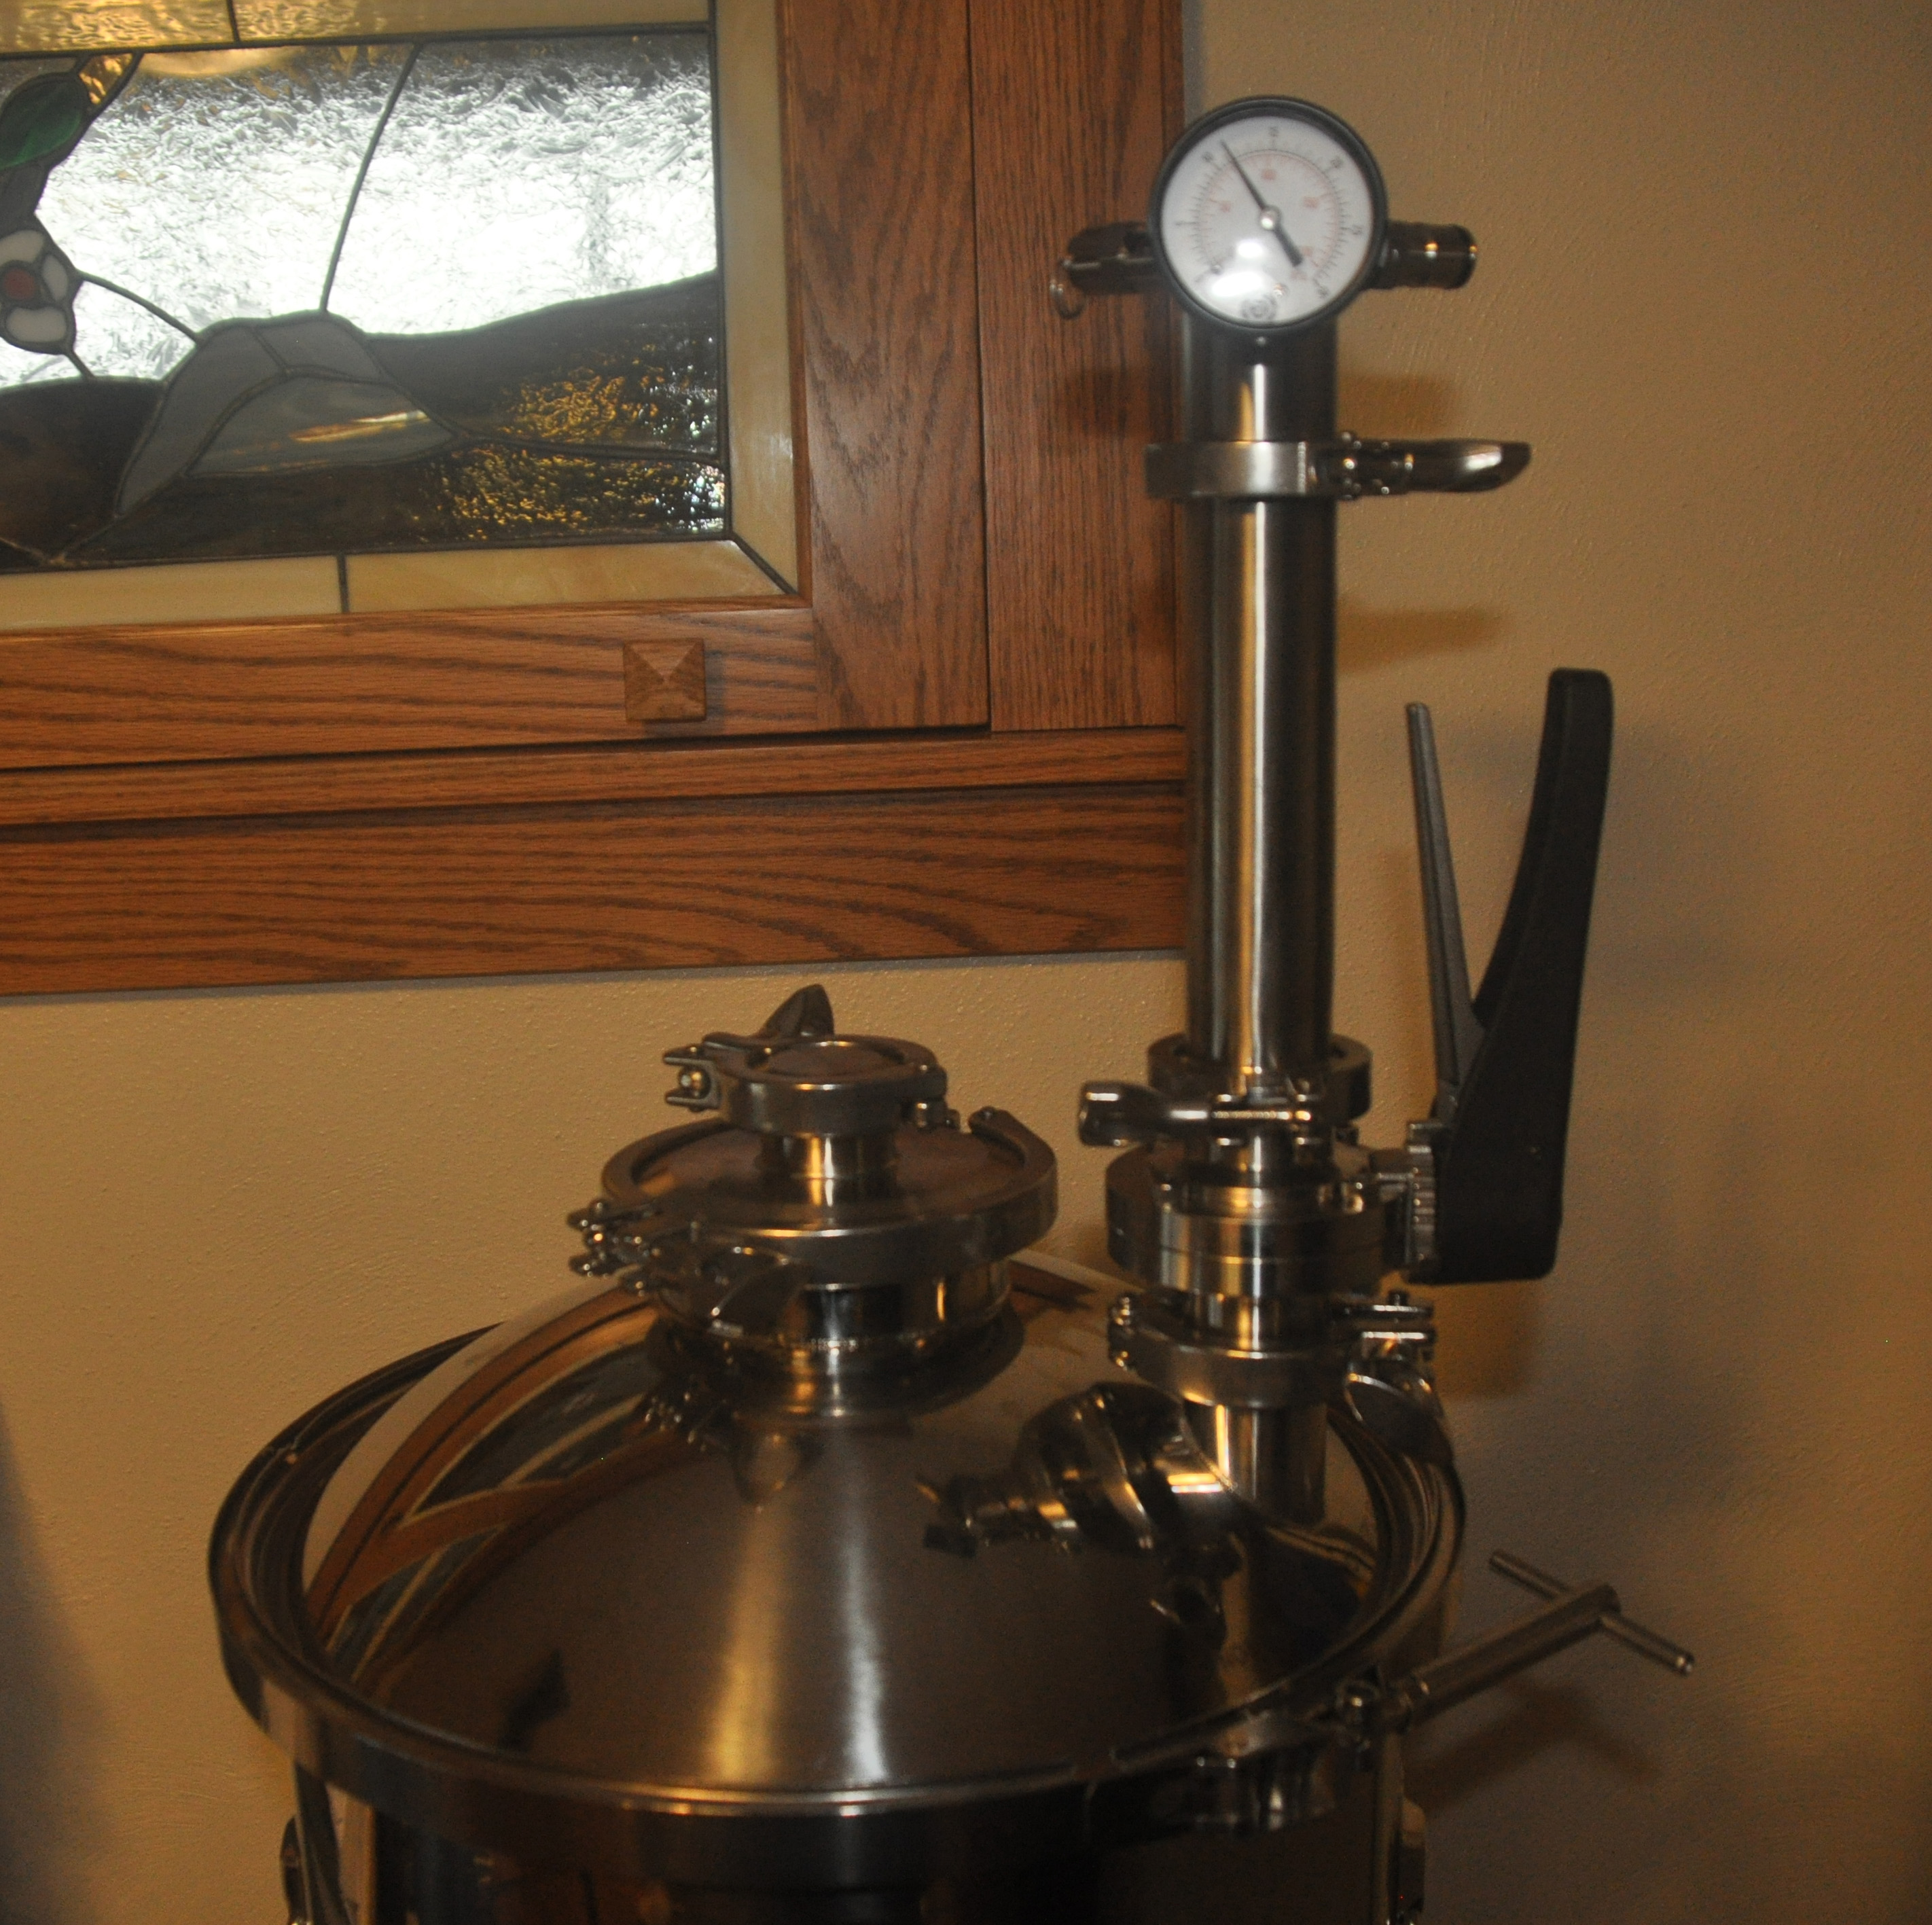
I use this method for adding things to the fermenter at pressure. Turn the valve off, then put whatever you want to add in the straight pipe. If you release the pressure slowly it does not seem to go up the straight pipe. If you are concerned about your addition going up the pipe you could drop it with a cap on the end of the 1.5" TC or add CO2 back into the pipe with the gas fitting.

Carlscan26
Well-Known Member
Is anyone having issues with the spike cleaning ball working with a March pump? Mine will turn but doesn’t spray hard enough to get much of the top wet much less clean.
pennengr
Well-Known Member
Not sure about a March pump, but it's working for me with a Chugger.Is anyone having issues with the spike cleaning ball working with a March pump? Mine will turn but doesn’t spray hard enough to get much of the top wet much less clean.
Is anyone having issues with the spike cleaning ball working with a March pump? Mine will turn but doesn’t spray hard enough to get much of the top wet much less clean.
i've only used the spray ball once (with a chugger) and had mixed results, the ball kept clogging and stopped spinning. after a few cleanouts, it worked fine and got to all parts of the conical. i previously used a spray ball to clean my carboys and it worked awesome but i realized i had cleaned most of the gunk out before inverting it on the spray ball. with the conical, first go was a neipa and i didn't rinse anything out before firing up the spray ball. sure, most stuff came out the bottom of the conical on dumping but there was still plenty of gunk stuck to the sides/cooling coil. in the future, i'm going to once-through some plain water with the spray ball to get the bulk of the stuff out of there, then switch to recirculating with pbw.
Carlscan26
Well-Known Member
i've only used the spray ball once (with a chugger) and had mixed results, the ball kept clogging and stopped spinning. after a few cleanouts, it worked fine and got to all parts of the conical. i previously used a spray ball to clean my carboys and it worked awesome but i realized i had cleaned most of the gunk out before inverting it on the spray ball. with the conical, first go was a neipa and i didn't rinse anything out before firing up the spray ball. sure, most stuff came out the bottom of the conical on dumping but there was still plenty of gunk stuck to the sides/cooling coil. in the future, i'm going to once-through some plain water with the spray ball to get the bulk of the stuff out of there, then switch to recirculating with pbw.
Can I ask what your setup is with the Pump with regards to fittings and hoses etc?
Can I ask what your setup is with the Pump with regards to fittings and hoses etc?
i have a 1/3 hp sump pump in a 5 gal bucket. outlet is an 18" long, 1/2" diameter pvc pipe with a male camlock fitting at the end. from there, it is about a 5' length of 1/2" silicone tubing with female camlock on the end at the pump and a hose barb fitting on the other end, connecting to the 1.5" tc elbow barb that came with the conical and then to the cip ball.
i have some parts on the way to get a camlock connection at the conical lid, rather than the hose barb. this is simply for convenience of connecting the cleaning line, since all my silicone hoses are female camlock on both ends (first time i cleaned, i had to take the camlock off one end of hose to attached to the barb on the conical).
i already had a spray ball from my old setup but it is simply a 1/2" female thread so was not ready to use as-is with the 1.5" tc port, that's why i got the spike ball. but then i stumbled upon this nifty little part:
https://www.brewhardware.com/product_p/tc15f12nptdouble.htm
i order it, along with a camlock fitting and a short threaded nipple, which will allow me to use my old spray ball if necessary. my old one is bigger than the spike one and has a gnarlier spray pattern. i may not need to use the old one but i will now have the option.
another part i got on order is an additional 2" tc elbow. when i did the first cip, i had to really work at getting a 5 gal bucket under the conical, to allow the cleaning solution to gravity-drain back into the bucket with the sump pump. bending the bucket to get it in/out between the conical legs does not seem like a ling-term option. with the additional 90 degree elbow, i can place the bucket on the floor in front of the conical and direct the discharge right into the bucket. so from the bottom of the discharge it is sight glass, 2" valve, elbow coming out to the front of the conical and then another elbow turning down into the bucket
Blazinlow86
Well-Known Member
- Joined
- Oct 19, 2016
- Messages
- 1,687
- Reaction score
- 743
i was originally planing to buy the cip place ball but have found with the top coming off so easy i just manually clean it. if your running glychol and dont want have to mess with removing the coil or unhooking the lines the cip ball is probably easier
philly224
Well-Known Member
i was originally planing to buy the cip place ball but have found with the top coming off so easy i just manually clean it. if your running glychol and dont want have to mess with removing the coil or unhooking the lines the cip ball is probably easier
I just put the coils into a bucket without disconnecting my lines and clean it that way. Still super easy.
Blazinlow86
Well-Known Member
- Joined
- Oct 19, 2016
- Messages
- 1,687
- Reaction score
- 743
And you still use the cip ball? Not to be a smartass but seems at that point might as well just remove the lid and give it a scrub by hand. Only takes a minute or so to clean mine that way. The cip makes more sense to me if your fermenter cannot be easily moved. CheersI just put the coils into a bucket without disconnecting my lines and clean it that way. Still super easy.
philly224
Well-Known Member
And you still use the cip ball? Not to be a smartass but seems at that point might as well just remove the lid and give it a scrub by hand. Only takes a minute or so to clean mine that way. The cip makes more sense to me if your fermenter cannot be easily moved. Cheers
Oh no I don't use the cip at all. I could see using it for one of the larger conicals maybe but did the cf5 and cf10 it doesn't seem needed. Being able to take the lid off is one of the best feature of this unitank over some others imo.
sheikyerbouti
Well-Known Member
- Joined
- May 13, 2007
- Messages
- 78
- Reaction score
- 18
I used the CIP once. Now I do it by hand, does not take long.
I bought the spray ball for my CF10 because I was used to using CIP in my previous conical (40 gal Stout). It is so easy to clean the CF10 by hand that I no longer CIP. I do use the spray ball to sanitize the CF10.
Blazinlow86
Well-Known Member
- Joined
- Oct 19, 2016
- Messages
- 1,687
- Reaction score
- 743
I just use a handpump sprayer with a detachable sprayer to sanitize. Seems to work ok. CheersI bought the spray ball for my CF10 because I was used to using CIP in my previous conical (40 gal Stout). It is so easy to clean the CF10 by hand that I no longer CIP. I do use the spray ball to sanitize the CF10.
Well I finally got my cf10 up and running. Built a glycol chilling system too. It's working like a dream! I've been reading up a bit on fermenting under pressure and it seems quite interesting! I'm fermenting a double sunshine clone at the moment. This conical is a whole different world from buckets and carboys !


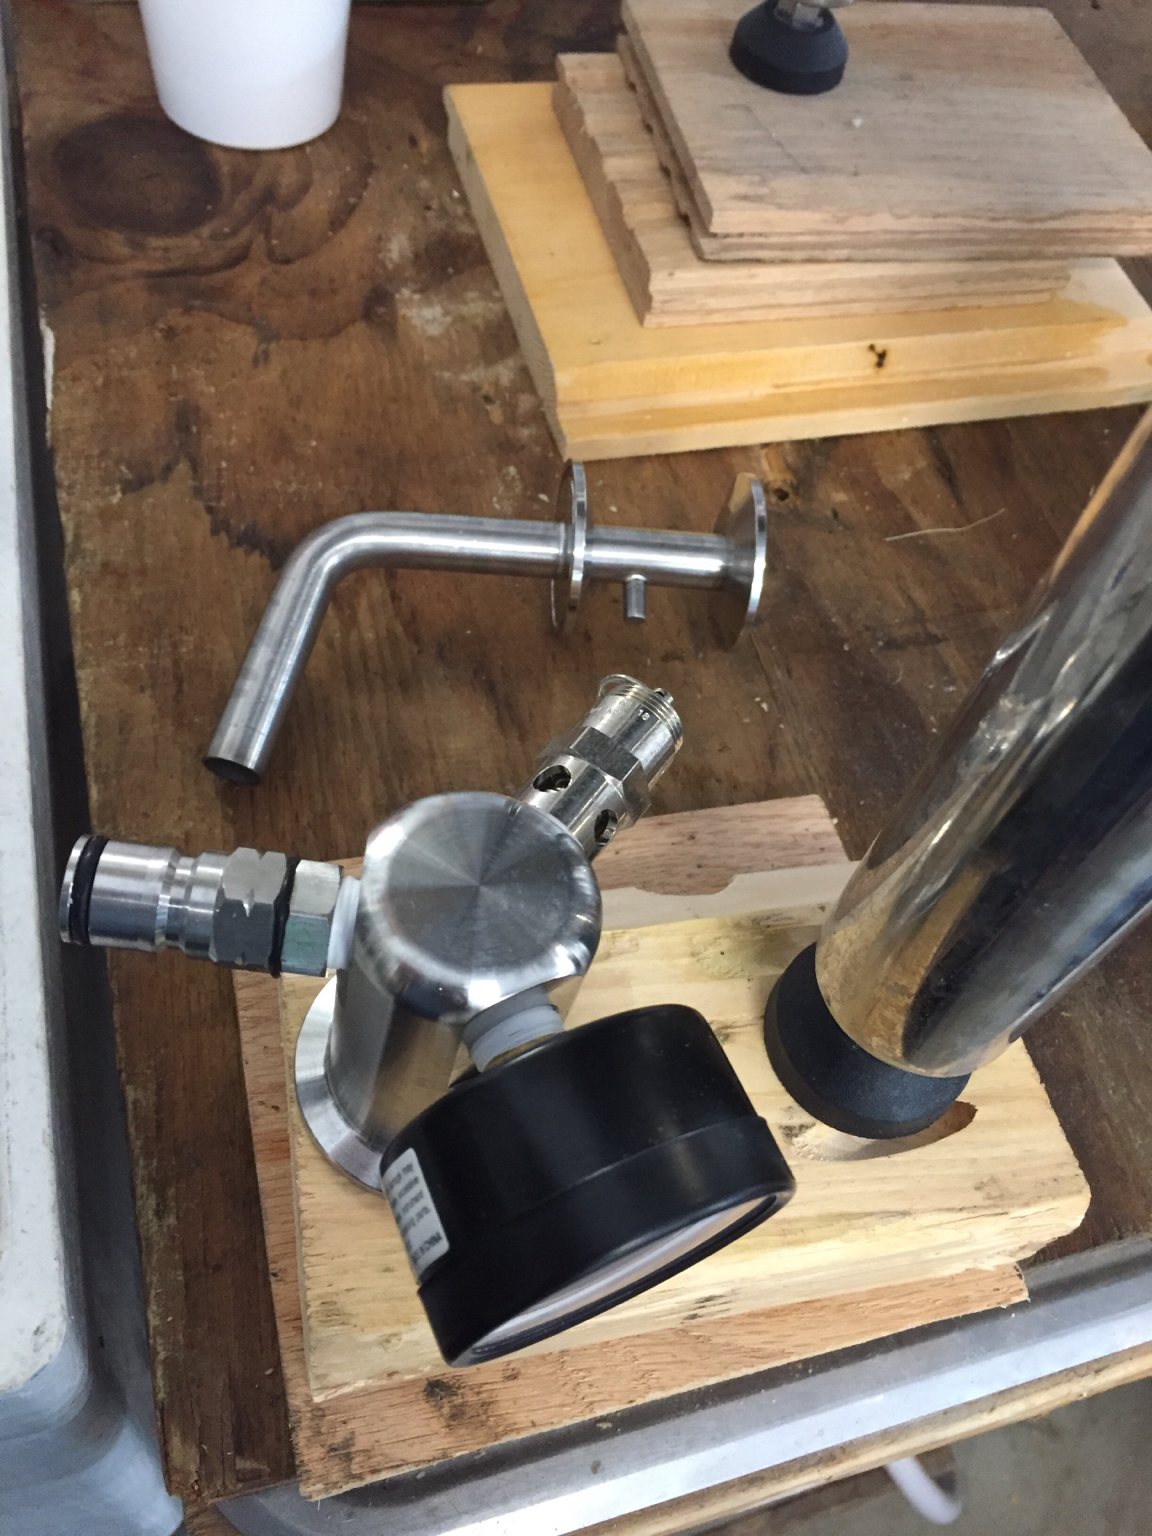


@brewluvin , you may discover that the controller pingpongs back and forth between heating and cooling at fermentation temps; that is, it overshoots causing the opposite device to be kicked on.
The answer to that is not use as cold a glycol mixture as you can. When I was using mine at 28* with a 5-gallon batch, it would pingpong back and forth. A mix temp of, say, 45 or 50 may be the right one for you, depending on ambient temp.
I've thrown in the towel on my homegrown glycol chiller and pulled the trigger on the Penguin.
i typical set my chiller to about 55 when fermenting at 68 for an ale and leave the heater unplugged. plenty of heat from the fermentation process that adding a heater is just asking for yo-yo heater/chiller operation. in the summer, my basement is warm enough that i can let the brew free-rise to 72 or so at the end of fermentation and set the temp to that. it is the opposite in the winter, where i unplug the chiller as fermentation slows and have to run the heater just to maintain temp (this is all in an unfinished part of my basement).
Blazinlow86
Well-Known Member
- Joined
- Oct 19, 2016
- Messages
- 1,687
- Reaction score
- 743
Well I finally got my cf10 up and running. Built a glycol chilling system too. It's working like a dream! I've been reading up a bit on fermenting under pressure and it seems quite interesting! I'm fermenting a double sunshine clone at the moment. This conical is a whole different world from buckets and carboys ! View attachment 581138View attachment 581139View attachment 581141
Get the carb stone. its amazing and easily my favorite part of the unitank. cheers
MeGrimlockKing
New Member
So I bought a CF5 early this year and have done several batches. I brew a lot of NEIPAs and wanted ask how people are dry hopping beers that have a large amount of dryhops (I've been doing 6 to 10 oz depending on the recipe.)
I use pellets and dryhop without a bag. I've had issues with hops in the racking port and clogging my transfer lines when doing closed pressure transfers. So far my solution has been to brew 6 gallons for 5 a gal batch and dumping the hops after cold crashing. I could bag them but I worry about some of the hops not getting fully saturated and losing some flavor and aroma.
Has anyone else had issues with this or have any advice?
Blazinlow86
Well-Known Member
- Joined
- Oct 19, 2016
- Messages
- 1,687
- Reaction score
- 743
Not sure what your asking. I add the hops thru the top port and purge with co2. When it's done I cold crash down to 38 for 24-48 hours. I then do the dump and add the carb stone. 24 hours later I have completed pretty clear beer that's ready to drink. I've never came close to having any hop in the racking arm ( I use the spike racking arm)So I bought a CF5 early this year and have done several batches. I brew a lot of NEIPAs and wanted ask how people are dry hopping beers that have a large amount of dryhops (I've been doing 6 to 10 oz depending on the recipe.)
I use pellets and dryhop without a bag. I've had issues with hops in the racking port and clogging my transfer lines when doing closed pressure transfers. So far my solution has been to brew 6 gallons for 5 a gal batch and dumping the hops after cold crashing. I could bag them but I worry about some of the hops not getting fully saturated and losing some flavor and aroma.
Has anyone else had issues with this or have any advice?
After reading your post again I believe your not using a racking arm. If that's the case I can see having issues because even after crashing whatever sediment is sitting in the port area will remain and then enter the fitting/line once opened. It happens occasionally on the sample port to myself.id think prior to racking if you give it a blast of 02 it should clear it up. The racking arm is cheap and allows you to get abit more finished product. I'd recommend it. Cheers
Blazinlow86
Well-Known Member
- Joined
- Oct 19, 2016
- Messages
- 1,687
- Reaction score
- 743
To clarify I meant a shot of c02 . Cheers
MeGrimlockKing
New Member
Thanks for the advice. The racking arm was next on my list of accessories to buy.
I just wasn't sure if others had to dump their hops prior to racking. If don't dump the hops through the 2" valve the bed of hops is at the racking port. Even after dumping I may get some floaters here there. I'm curious to see if the racking arm would help.
Thanks!
I just wasn't sure if others had to dump their hops prior to racking. If don't dump the hops through the 2" valve the bed of hops is at the racking port. Even after dumping I may get some floaters here there. I'm curious to see if the racking arm would help.
Thanks!
Blazinlow86
Well-Known Member
- Joined
- Oct 19, 2016
- Messages
- 1,687
- Reaction score
- 743
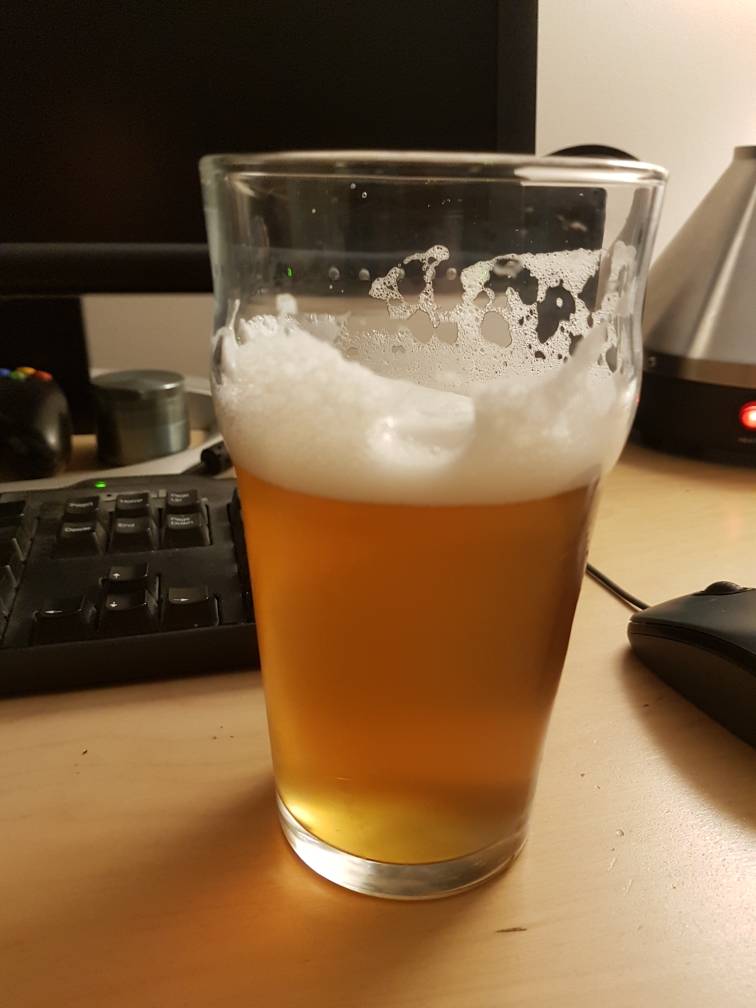
No problem. Just to clarify I drop the hops thru the dump port prior to racking. I actually rarely harvest the yeast and only do one dump after cold crashing in that case 24 hours prior to racking. That's a picture of a hoppy wheat beer poured from the sample port after 48 hours after crashing. CheersThanks for the advice. The racking arm was next on my list of accessories to buy.
I just wasn't sure if others had to dump their hops prior to racking. If don't dump the hops through the 2" valve the bed of hops is at the racking port. Even after dumping I may get some floaters here there. I'm curious to see if the racking arm would help.
Thanks!
Lets revive this.
I'm two beers into this conical so far with the new system, a couple observations and hoping for some feedback.
1. Carbonation stone. While this is my only conical so far, my issue with the carbonation stone isn't so much of an issue, but I can see it becoming one if you're moving it from conical to conical. My issue with the carb stone is how to make attaching the stone to the racking port not introduce a bunch of oxygen into the beer. What I've been doing is loosely connecting the stone to the racking port (so gas can escape) and pushing some CO2 into it for a minute or so. Hoping this can do an effective job of purging the area where any air was. if anyone has a better practice, please advise!
2. CIP cleaning. Spike's claim that a chugger pump can effectively CIP a CF10 is total crap. Even with their modified CIP ball. I love this piece of equipment, and drank most of their koolaid, but they forgot to add the sugar on this flavor. I bought the 'Superior Pump 91330 1/3 HP' submersible pump from Amazon. This has done a great job for CIP for me. Not using 180* PBW like they recommend considering that might kill this pump, but for PBW mixed with the 125* water from my hot wat water tank, this works great.
I put a bucket below my conical (my conical rests on a table) and bought a second 90* elbow to aim the PBW down into the bucket. Recirculate for 20 or so minutes and then rinse with hot water that I plumbed to above my conical. I also use this pump/cip ball as a keg cleaner, which worked great.
For sanitizing, I'm using iodopher and recirculate for about 5 minutes. Everything is done with the temp coil in. Make sure to unplug your temp control thermostat so you're not chilling your cleaning chemicals/heating your glycol system.
3. My last gripe for this - has anyone had issues with the spike pressure gauge? My first one dropped, which I'll say was responsible for screwing up the reading, but I bought a second one from them, and this one is reading a few PSI over what I believe it should. It also never actually reads zero, even when it's not connected.
So far, I LOVE my conical. I haven't brewed in a year before using this (new system, coupled with moving and renovations), and my first two beers (basic Centennial Blonde and a scraped up amber) were great. I pressure fermented both beers with Notty, cold crashed, and finished carbonating in the fermentor. My next purchase, I'd like to get a spunding valve for my kegs so I don't need to keep popping the PRV on the kegs for closed pressure transfers while maintaining pressure in the keg.
One word of caution. I used a submersible pump for my keg cleaner and it began leaking oil. I am pretty sure your superior pump is not oil-free. I am currently looking for an oil-free submersible pump to use for my keg cleaner.
- Joined
- Feb 25, 2015
- Messages
- 186
- Reaction score
- 172
Can anyone comment on how well a CF15 works with a typical 5gallon finished batch in regards to glycol chilling? Can you lager/cold crash effectively? They advertise it as being suitable for 5-half bbl batches.
Can anyone comment on how well a CF15 works with a typical 5gallon finished batch in regards to glycol chilling? Can you lager/cold crash effectively? They advertise it as being suitable for 5-half bbl batches.
Don't have a CF15, but I have a CF10. In my experience, while it will chill the 5-gallon batch down to about 40 degrees fairly well, it's really hard to get it to go below that. I had a little more success with a 10-gallon batch, but in my experience, all that extra stainless sucks heat into the beer making it harder to chill it.
Now, this is not to say you can't do a small batch. That's almost all I've done with my CF10, and it does chill down to about 40 degrees. Even with a lot of insulation around the CF10, about the best I have done is 38.5 degrees.
The fact that the welds show through is a good thing. Its called 100 percent penetration. It means the welder at Spike is good and knows what he is doing. In the interest of full disclosure I've been making a living welding for 35 years, but I haven't ran a TIG machine since school.As promised here is the view inside the fermenter. As you can see the welds for the handles and legs do show through, but are completely smooth. The is no ridge or ledge and nothing gets stuck in there, you can clean it easily using a wet rag.
BTW, that dunkelweizen with wlp300 fermented under pressure is phenomenal. Some nice subdued banana esters, didn't get much clove though.
I'm considering the CF-5. Anybody else have this size?
Last edited:
Similar threads
- Replies
- 2
- Views
- 656
- Replies
- 1
- Views
- 245
- Replies
- 0
- Views
- 565

