Racking to a keg

Homebrew Talk - Beer, Wine, Mead, & Cider Brewing Discussion Forum

Help Support Homebrew Talk - Beer, Wine, Mead, & Cider Brewing Discussion Forum:

This site may earn a commission from merchant affiliate links, including eBay, Amazon, and others.

hinkensj

Supporting Member
HBT Supporter
Joined
Dec 6, 2011
Messages
95
Reaction score
14
Location
Middleton
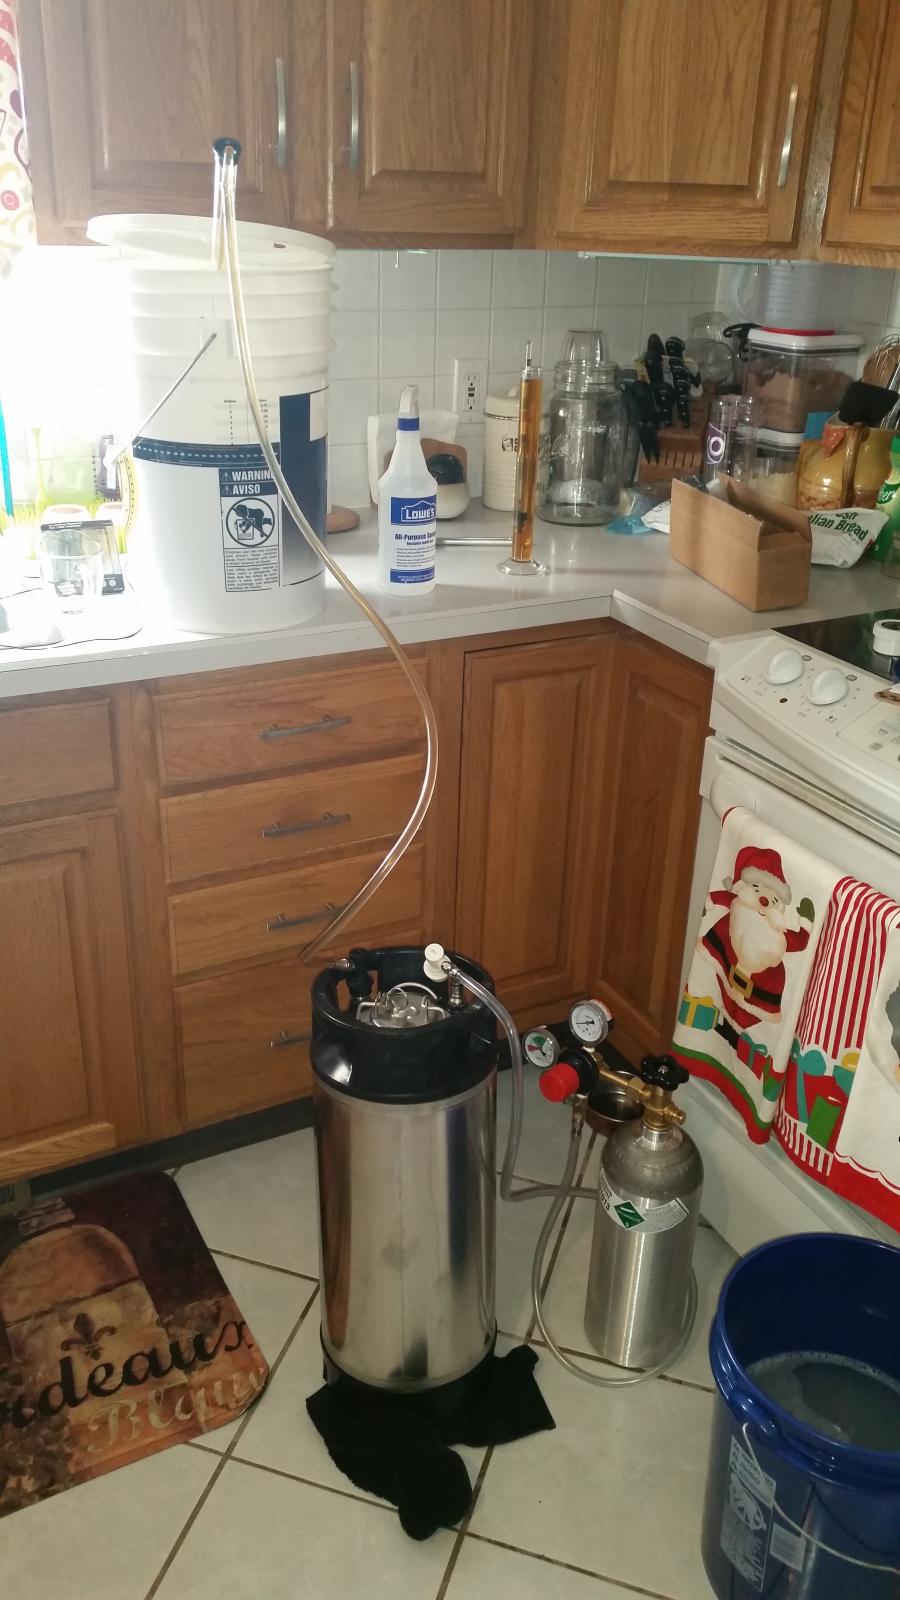
Many of you have probably already done this so I thought I would get some input. Usually when we rack into a keg we do so through the open lid. We fill the keg with starsan then use CO2 to empty the keg. We then open the lid, insert the hose and rack into it--usually covering the opening with sanitized foil.

Tonight I did something different. After emptying the keg with CO2, I fit the racking tube to a beer/out ball lock and snapped it onto the keg. I then opened the pressure relief valve and started the siphon. It worked well and I had no chance of contamination or oxygen entering the keg, but the process was a lot slower due to the small opening in the ball lock.

Any of you do this? Do you have a trick or gadget that can speed the process? Maybe some sort of modified ball lock on the out?
 
This is exactly what I do. It doesn't seem that much slower to me. What diameter tubing are you using on your siphon?
 
I do the same. I use a sterile siphon (just stainless steel racking cane) and connect to the beer out. It does take a bit longer than a fatty 1/2 ID, but slow a steady wins the race..right?
 
We got this covered.

The bits. The shorter cane is for racking between carboys.
push_rigs.jpg

Closeup
co2_push_rig_01_sm.jpg

Setup
co2_push_rig_03_sm.jpg

Purging
ab_sep_21_2014_01.jpg

Filling
ab_sep_21_2014_02.jpg

Then there's advanced oxidation prevention for obsessed fanatics.
This is how I totally avoid O2 take-up during a cold crash.

More bits
CO2_crash_01.jpg

Assembled
CO2_crash_02.jpg

Balloons as pneumatic safety fuses with CO2 reg set for the absolute minimum head pressure...
CO2_crash_03.jpg

Cheers! :mug:
 
I typically rack directing into the ball lock liquid out post. I do something similar to @day_trippr . I do it with a Fermonster fermenter. I drilled 2 holes into the lid. One for the racking cane and one for the CO2 in. After sanitizing the keg and pushing out the solution, I open the PRV on the keg and apply a really low pressure from the CO2 tank into the fermenter to push it through the ball lock liquid post. Since I do strictly hoppy IPAs, I find this to be the best way to avoid oxygen while transferring. But you have to watch out for getting a plugged poppet either in the post or in the quick disconnect. One solution is to remove the poppet from both the post and the QD. Makes transfers less stressful but then you have to replace the poppet after transfer so theoretically you are introducing oxygen.
 
I fill the keg with star san, and hookup the co2 and the liquid lines. The liquid line has an MFL connector on one end, and open tube on the other. Using the co2 I purge the star san out of the keg. Once its all out I turn off and remove the co2, and hook up the open end of the liquid line to my siphon and start filling the keg purging the air as needed.

The only downside to my setup is I am using a bucket, so there is still some air exposure upon cracking the lid open. I am working on a lid for the bucket where I can just put the siphon in, without having to fully open the lid, and possible have a small plexi window where I can keep an eye on the levels to avoid the trub.

20161128_140254.jpg
 
I typically rack directing into the ball lock liquid out post. I do something similar to @day_trippr . I do it with a Fermonster fermenter. I drilled 2 holes into the lid. One for the racking cane and one for the CO2 in. After sanitizing the keg and pushing out the solution, I open the PRV on the keg and apply a really low pressure from the CO2 tank into the fermenter to push it through the ball lock liquid post. Since I do strictly hoppy IPAs, I find this to be the best way to avoid oxygen while transferring. But you have to watch out for getting a plugged poppet either in the post or in the quick disconnect. One solution is to remove the poppet from both the post and the QD. Makes transfers less stressful but then you have to replace the poppet after transfer so theoretically you are introducing oxygen.

Couldnt you just put a piece of mesh bag (such as day tripper posted) over the end of the siphon in avoid plugging the poppets/ball lock?
 
I took pictures of what I do tonight. First, I took the keg full of StarSan and used it to flush my kegerator tap. Not sure why I never figured that out before.
Then push my tubing over the MFL on the liquid out tube and attach the disconnects to the keg. Haven't figured out a way to push with CO2 using my big mouth bubblers.
Edit: pictures didn't post from the phone. Hrmmm.
 
i do none of those things.
I stick the tube from the auto siphon in the keg and transfer with the tube as close to the bottom as possible..no flushing the keg,no tin foil.no nothing
beer always tastes good till i kill it around 2 weeks later

amen!
 
I think I'm in a mood...
I'm calling BS on the whole oxidation paranoia craze....just like the "don't disturb the 02 blanket" in the fermenter theory that has gone down the drain.
Are you POSITIVE your beer isn't getting darker just because all the particles have dropped out?
Are you SURE your off flavors aren't from a thousand other possible issues?
I know for a fact my beers get darker overnight after a cold crash AND I get no cardboard flavor, Quite the opposite they loose the bite and taste a thousand times better. If it takes a month to drink a keg your brewing to much or drink to slow...Brew what you consume within the timeframe of a fresh beer.....Theres a reason every food item has an expiration date...The freshest milk tastes like crap in 3 weeks
 
co2 blanket not o2.

As for the oxidation thing, while i've never noticed it either you cant simply call BS on it because others can have both more sensitive as well as knowledgeable and attuned in what to look for.

There are people that are considered "supertasters" that can sense taste in far greater intensity than the average. (i am certainly not one of them) Combine that with an experienced palate in what to look for and they can sense things you and I cannot.

It's like headphones in a way. When i bought a set of quality headphones i could hear sounds in my games i never even knew were there before on my speakers.

In a sense i consider myself lucky. There are negative things that require extra work to avoid that i can ignore :)
 
Yah so this is literally the best racking method i've ever seen and i've embraced it... Same idea applies to ales as well. You have to primary in a corny keg, which IMHO is the the best value of all fermentation vessels options.

You basically start it, then casually come back 30 minutes later when it's complete. It's worry free.

From: http://www.braukaiser.com/wiki/index.php?title=Fermenting_Lagers

Another efficient and more elegant way of racking beer from one keg to another is to siphon the beer from one keg to another. For that place the source keg above the destination keg. Connect the gas-in of the destination keg and the gas-in of the source keg to the same CO2 regulator. This results in the same pressure in the destination and source keg. Now take a long jumper hose and first connect it to the bev-out of the destination keg and then to the bev-out of the source keg. Always make sure to connect to the bev-out of the source keg last. If there is pressure in the jumper hose, you could bubble CO2 through the dip tube on the source keg which will stir up sediment.

Nothing is flowing yet. To get the siphon started disconnect the CO2 on the destination keg and briefly pull the pressure relieve valve on that keg. Now that the pressure is slightly lower in the destination keg the beer will start flowing and the siphon is started. Reconnect the gas-in of the destination keg to the CO2 system so the CO2 from that keg can flow into the source keg. This process will take a while, but you don't need to monitor it.
 
DaveMN: my set up is almost identical to yours. I use a ⅜ ID hose and slip it over the MFL. Only difference is that I put the racking tube right through the bung hole in the top of my big mouth rather than removing the lid.

I'm thinking using the two hole lid and some hardware bits like day_tripper I could hook a QD to a bung and use that to get the CO2 into the big mouth and push the beer through a racking cane in the other bung.
 
Oxidation is real. It doesn't make undrinkable beer, but it makes it less than it could be. If it stresses you out to think about it, then by all means ignore it. This hobby should be fun. If you don't want to worry about it, then don't. But it doesn't make it not exist.

Anyways, I wanted to diagram up what i think is the easiest way to get a low oxygen and EASY to rack kegging set up. Kegs are cheap ($50) so i think its the ideal fermentation vessel. Here's how to do it.

Step 1: Turn a standard corny keg into 1 of each a Fermentation Vesssel (FV) and Serving Keg (SK).
cornyferm1.png

To make the FV all you do is bend the liquid dip tube to reach the side wall of the keg. This should put you about an inch off the bottom so you'll avoid all the yeast. If it doubt bend a little more and if you're leaving too much beer, then bend it further back.

For both an SK and FV you cut the GAS dip tube flush with the inside of the keg. This equates to removing approx 1/2" of the dip tube. The gas dip tube is nothing more than an o-ring holder. For the FV shortening this by 1/2" gives you even more head space, which equals another 1-2 beers into the SK.

Step 2: Water purge the SK
This is easier than it sounds.

Clean the SK with PBW or whatever. Starsan is optional. Fill the SK to the brim with water, then install the lid with PRV closed. Install a gas disconnect to the gas side, and liquid disconnect to the liquid side. The liquid side should be connected to a water source.

Tilt the SK to a 45 degree angle with the gas port on the top. Slowly fill the remaining portion of the keg with water until it starts squirting out the gas disconnect. Rock the keg around a few more times to ensure all the bubbles are out (the lid in a corny is a HUGE gas pocket, that's why you are tilting it AND shortening the gas dip tube). Pull the PRV up to get the last of the air out and then close it again. Simulaneosly pull off the liquid and gas QD. You now have a keg 99.99% full of water.

Use commercial CO2 to push all the water out of the liquid dip tube. You now have a keg 99.98% full of CO2.


Step 3: Ferment
cornyferm3.png

Add yeast and a few psi of pressure to the kegs. You need this pressure to keep the lid sealed. Set spunding valve to match. I like about 3.5 psi, but you could experiment here.

The idea of this set up is that you use all of the fermentation gas to continue to purge the serving keg.

Bonus: The added head pressure collapses the kraussen bubbles. My lager fermentations max at 1cm of kraussen, meaning i can nearly fill the keg tp capacity.

Step 4: Racking
cornyrack4.png

Another easy step. With a few gravity points to go (4-6 ideally)...

Purge the hoses you use in this step with gas saved in the SK (attach, use your finger or screwdriver to push the poppet).

Elevate the FV above the SK. Connect the 2 gas ports together and if flow didn't already start, pull the PRV slightly on the SK. Beer will start to flow. Then connect the gas side together to equalize the head pressure.

Set timer for 30 minutes and walk away.

When you return you'll have the SK completely full and the FV empty. At this point i usually disconnect everything, and then top the pressure off in the kegs to ~5 psi to ensure a good lid seal. Then back to whereever to finish the last few points and naturally carbonate.
 
@mongoose33
Could you please share tips and steps on how you set that up?
 
Day trippr,
You are a gadget God and my Hero. Thanks for sharing...(I am totally going to steal these ideas)
 
I think the balloons are the bomb! Even if you only filled the balloons with CO2 and attached them to your primary in place of your air lock it is brilliant!
 
@mongoose33
Could you please share tips and steps on how you set that up?

Sure. I want to note that I didn't invent the return to fermenter idea; can't recall offhand who posted that and from whom I stole the idea shamelessly. If I find that post I'll give him credit.

The receiving keg is filled with Star-San and then it's pushed out using CO2 into either another keg using a jumper or into a 5-gallon bucket so as to save the Star-San for the next time. That leaves the receiving keg empty but for the CO2 in it.

[Side note: I hate leaving any Star-San in the keg. When I first started, I'd crack the lid, invert the keg to drain out the last 1/3 cup of Star San, then reseal. A little air entered the keg, but I lived with it. Now, what I do is after the keg is purged of Star-San, I attach a QD with tubing on it to the OUT side, and then tilt the keg toward the OUT dip tube, and let the high-pressure CO2 blow out the rest of the Star-San through the tubing into the sink. I know that in the end, a 1/3 cup of Star-San isn't going to make much difference to the beer, but it makes a difference to ME. :) So I blow it out of there. Takes maybe 10 seconds.]

The "Fill" side is tubing that fits snugly over the spigot, and which is connected to a Liquid Out Quick Disconnect. Of course, at this stage the liquid is going into the Out post of the keg. The advantage to this is it fills the keg from the bottom up through the Out dip tube in the keg. No splashing.

On the IN side I have a Quick Disconnect attached to tubing which goes to the top of the fermenter to return CO2 to the fermenter as it drains. The problem was finding something to which I could connect the tubing on top of the fermenter. I found that one of my airlocks was perfect for this. Using a Dremel I cut off the top of the airlock leaving just the plastic tube poking up, and I connect the tubing from the "IN" post of the keg to that airlock.

I'm sure it would work as well with any device that can seal to the stopper on top of the fermenter. Maybe the tube from a plastic bottle filler or...well, anything for that matter.

So, in sum, the finished beer drains from the fermenter into the OUT side of the keg, the displaced CO2 moves out of the IN side of the keg back to the top of the fermenter.

Here are a couple closeups of the pic I posted earlier in the thread:

siphonlessc02.jpg

airlockco2.jpg
 
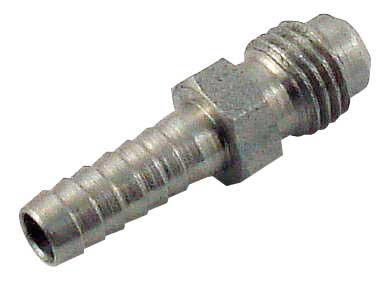
I want to note one thing about the QD that goes into the OUT post of the keg: I had used a QD with an MFL connection (I like those :) ), but it was slow. I swapped it tonite with a QD that came with a barb, with a somewhat larger diameter than the hole in the MFL fitting. Guess what? Faster.

Sticking w/ the barbed QD. YMMV.
 
YMMV indeed. I use both in various applications and doubt there's much difference in the stem ID between barbed vs MFL versions of CMB disconnects. Perhaps the first one used had some fermentor debris in it?

Cheers!
 
Couldnt you just put a piece of mesh bag (such as day tripper posted) over the end of the siphon in avoid plugging the poppets/ball lock?

Yes, that's an option. My experience, though, is that the mesh bag can often get sucked into the intake and that will slow/stop the flow. I'm fine with some particulate getting into the keg. I dry hop in the keg anyway so some extra stuff isn't going to cause any additional headaches.

What I've been using lately is something called the Clear Beer Draught System. It hooks up to the liquid post but instead of a rigid dip tube, it is a silicone tube with a floatation mechanism that keeps the intake near the surface of the beer. That way, you are never pulling from the bottom. So when I rack through the liquid tube and then crash, all the particles (including the dry hops) sink to the bottom while the intake floats near the surface. My pulls never have particles anymore and I don't have to get too crazy trying to filter everything.
 
When purging a corny keg using the Star San push method, the inside of the lid can hold almost a third of a cup of air above the tip of the PRV housing. It's tricky to get most of that out, probably impossible to get all of it.

This morning as I was preparing a couple of kegs it dawned on me that my kicked kegs rarely have more than a tablespoon of fluid remaining as the dip tube tips are in the tiny wells at the bottom. And we pretty much rely on that when using Star San to purge a keg in the first place, not wanting to leave much Star San behind.

So, I filled the first keg to the brim, put the lid in place, attached a fill line to the gas post and a bleed line to the beer post, flipped the keg over, opened the ball valve on my sanitizer bucket, and kept it flowing until the bleed line ran clear.

keg_purge.jpg

I'm pretty sure I got every last bit of air out of that keg...

Cheers!
 
I'm pretty sure I got every last bit of air out of that keg...

Cheers!

that looks like a lot of work.

cut the gas dip tube flush. fill via liquid qd at 45 degree angle until no more bubbles come out gas qd. push out liquid qd.
 
Nope. Still air left.

fwiw, I cut all of my gas tubes to under 1/2" - they don't even make it through the risers. But that's irrelevant - the gas isn't trapped because of the gas tubes. They could be a foot long and not change anything, because you're not venting through the gas tube, but via the PRV. Which can't be shortened.

Otoh, if venting through the shortened gas tube, at some point when you're trying to get the air out of the lid cavity by tilting, the bubble will move to the corner of the keg and miss the gas tube port. Too indeterminate for my likes ;)

I've been using the "upright" method for over a year, and noticed more than once that I could hear a slight gurgling when moving a "filled" keg. That's because there was air left. When I shook these kegs there was nothing - it was solid water.

And the second keg didn't take more than a couple of minutes extra, as the infrastructure stuff was solved with the first keg...

Cheers!
 

Latest posts

Back
Top