Racking a Better Bottle

Homebrew Talk - Beer, Wine, Mead, & Cider Brewing Discussion Forum

Help Support Homebrew Talk - Beer, Wine, Mead, & Cider Brewing Discussion Forum:

This site may earn a commission from merchant affiliate links, including eBay, Amazon, and others.

Riffington

Member
Joined
Jan 26, 2007
Messages
6
Reaction score
0
Location
Pittsburgh
Okay, this is probably a stupid question. But I haven't done this before, and I want to go buy some equipment and brew some cider.

Suppose I am scared that siphoning will be annoying (though correct me if I'm wrong and it's no big deal).

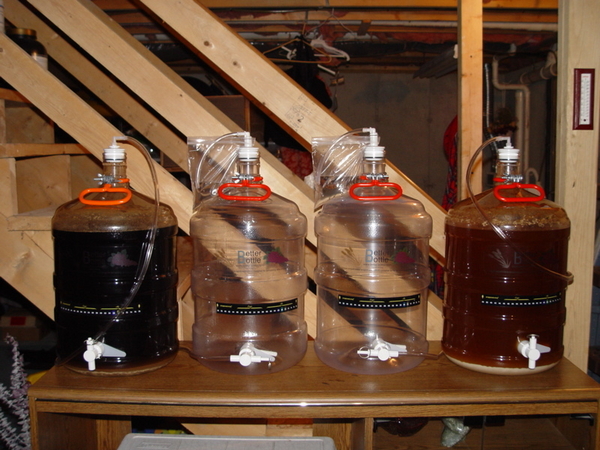
Here's what I am imagining: I would presumably need to buy a Better Bottle with a Racking Port (and, I assume, a highflow valve). So I would start fermentation in that, and then presumably need to rack into a second Better Bottle (again with a Racking Port and highflow valve) to ferment some more. And then from that I would pour into bottles.

But: why can't I misuse the Racking Port to skip the second Bottle: adjust the level of the Racking Port to below the level of the cider, and discard the sediment. Then I would need only one bottle. Why doesn't that work?
 
Starting a siphon is pretty easy. If you get an autosiphon, even easier yet. I wouldn't sweat it at all.
 
Real answer. You could, but why.

You'd miss the benefits of a secondary fermentation vessel (really a clearing process).

Go find the carboy cap thread started by Walker. There's a sticky in the Beginner's thread with a bunch of links started by Lord Sterrock Hammerston 8. Yeah that's his handle and he's touchy about it.

If you want to properly use the racking ports on better bottles to do transfers in a sealed environment, you actually need 3 better bottles.

Basically you use BB2 to collect the natural CO2 from BB1. BB2 collects up to 15psi. You use BB2 to push beer from BB1 to BB3.

Racking ports and dry tap seems costly to me but Johnsma22 swears by it.
 
Riffington said:
But: why can't I misuse the Racking Port to skip the second Bottle: adjust the level of the Racking Port to below the level of the cider, and discard the sediment. Then I would need only one bottle. Why doesn't that work?

Different yeasts produce different thicknesses of sediment. Some will probably clog the valve, the others will just pull off the sediment above the racking port tube and then start draining your cider/beer, leaving the majority of the sediment there.

In my opinion, the racking ports on the better bottles are cool, but way too expensive. I get the plain better bottles and use an auto siphon. Siphoning can't be easier, and it's very inexpensive.

-Steve
 
Yes, they are expensive, but oh so easy to do your racking with. You can also set it up to fill your secondary BB with the CO2 that is expelled from the primary which allows you to do a completely oxygenless transfer. Pricey, but worth every penny IMHO.
 
olllllo said:
If you want to properly use the racking ports on better bottles to do transfers in a sealed environment, you actually need 3 better bottles.

Basically you use BB2 to collect the natural CO2 from BB1. BB2 collects up to 15psi. You use BB2 to push beer from BB1 to BB3.

Racking ports and dry tap seems costly to me but Johnsma22 swears by it.
You actually only need two Better-Bottles to do oxygen free transfers. The primary has a ported closure with a 90˚ barb fitting installed. A length of 1/4" ID tubing from the barb fitting connects to the ID of the inlet of the high flow valve on the secondary. The secondary also has a ported closure, but this is where the dry trap air lock is installed. I put a short length of tubing on the barb of the airlock and insert it into a sandwich bag with sanitizer in it so that I can see the bubble rate.

The CO2 produced during the primary phase is used to purge the air out of the secondary. When it is time to rack, the 1/4" ID tubing simply gets removed from the valve on the secondary to the outlet barb of the air lock. This will allow for equalization during the transfer. Next, I connect a length of 1/2 ID tubing to the OD of both high flow valves. Now the secondary is placed on the floor while the primary is elevated, both valves are opened, and gravity does the rest. No introduction of O2 whatsoever. I even purge the air out of the tubing with CO2 from my tank before connecting it up. Sanitizing the valves and fittings is easy with a spray bottle of Star-San.

I know it seems like a lot of fuss after reading my description, but it really couldn't be simpler once you have done it once. As for the cost, yes it is expensive to purchase all of the Better-Bottle accessories. The racking adapter and high flow valve assembly costs more than the Better-Bottle itself, but I'm OK with that. The convenience far outweighs the cost for me. I didn't get into this hobby because I wanted to save money. As most of you know, the exact opposite is true of this hobby. You can spend a butt load of money in a hurry!

The first photo is a diagram from Better-Bottles website showing the oxygen free transfer procedure. The second photo are mine in action, and the third is the blow off tube setup for Better-Bottles that I found at Hearts Homebrew

4295-racking_schematic_carboy_purge_1.jpg


4295-DSC02180.jpg


4295-DSC02202.jpg
 
All right, I pulled the trigger on some setup, which I hope arrives soon. Two better bottles without racking ports and a "sterile filter"type of siphon setup. Unfortunately, that product's listing didn't specify the tubing size it comes with, so I have to wait on getting a bottling tip (not to mention, I haven't quite convinced myself how those tips actually would make bottling easier rather than just introducing yet another part to potentially get contaminated). A local microbrewer promised me some extra yeast, which just sounds way cooler than packaged - hoping that's not foolish...

Anyway, I'm psyched :)
 

Latest posts

Back
Top