Howhownow
Well-Known Member
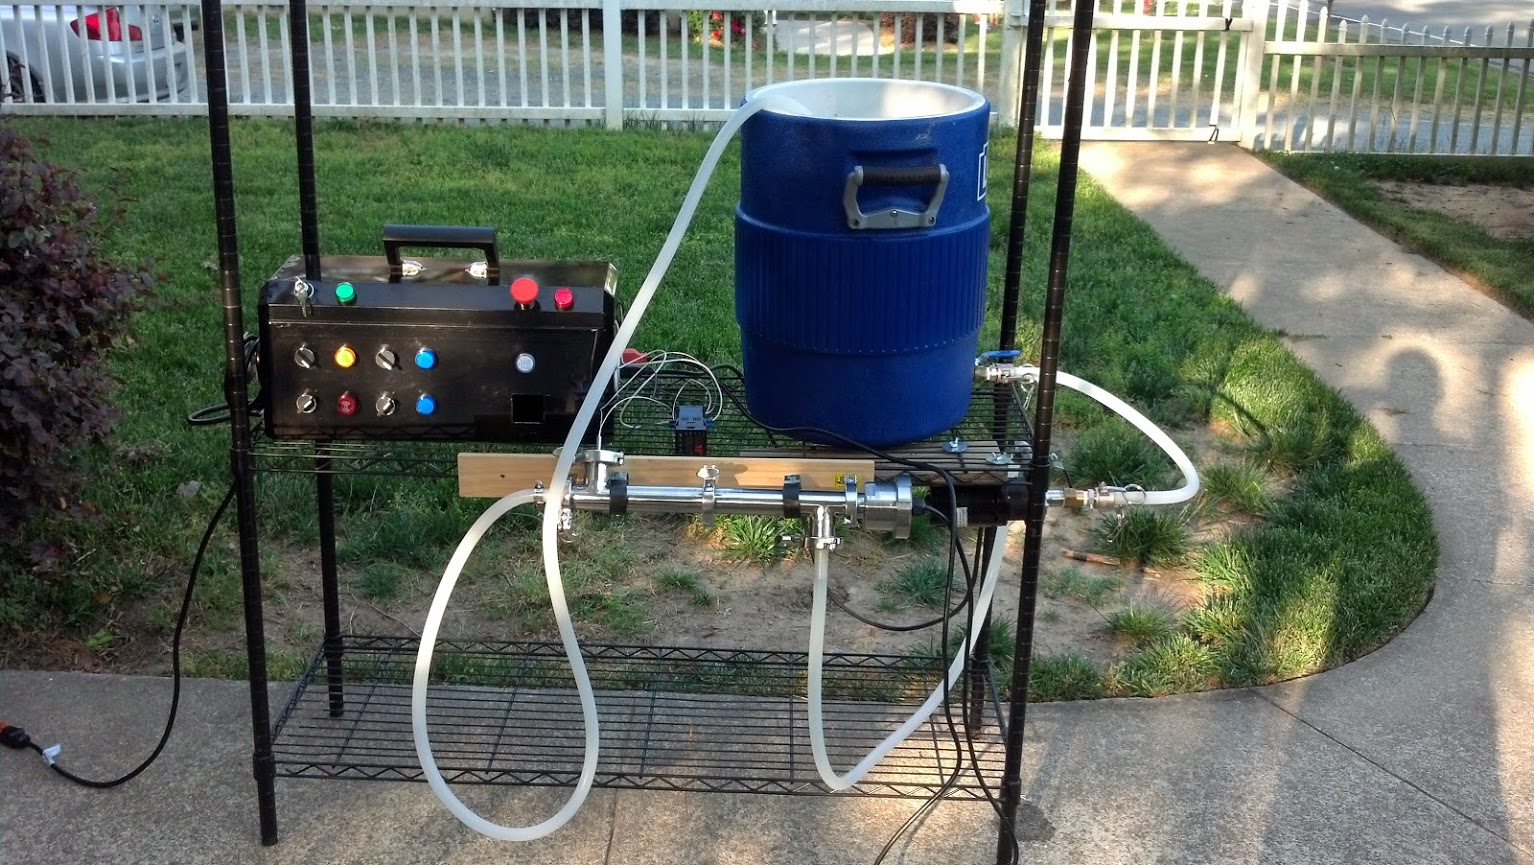
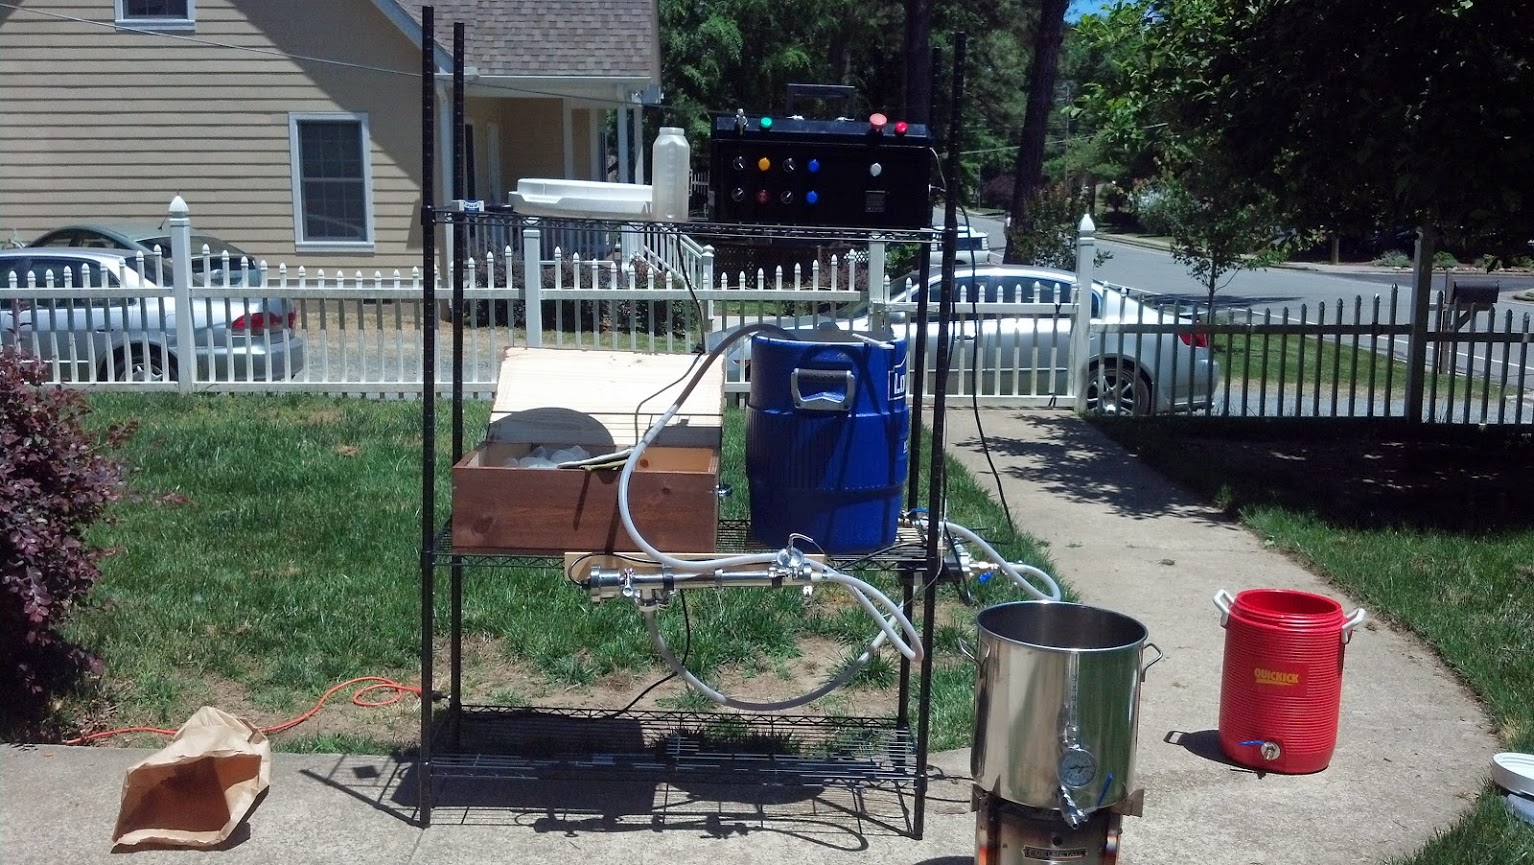
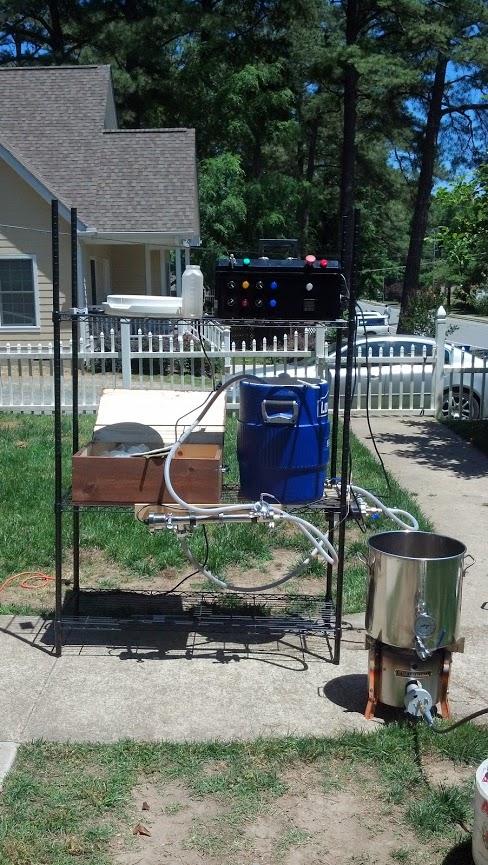
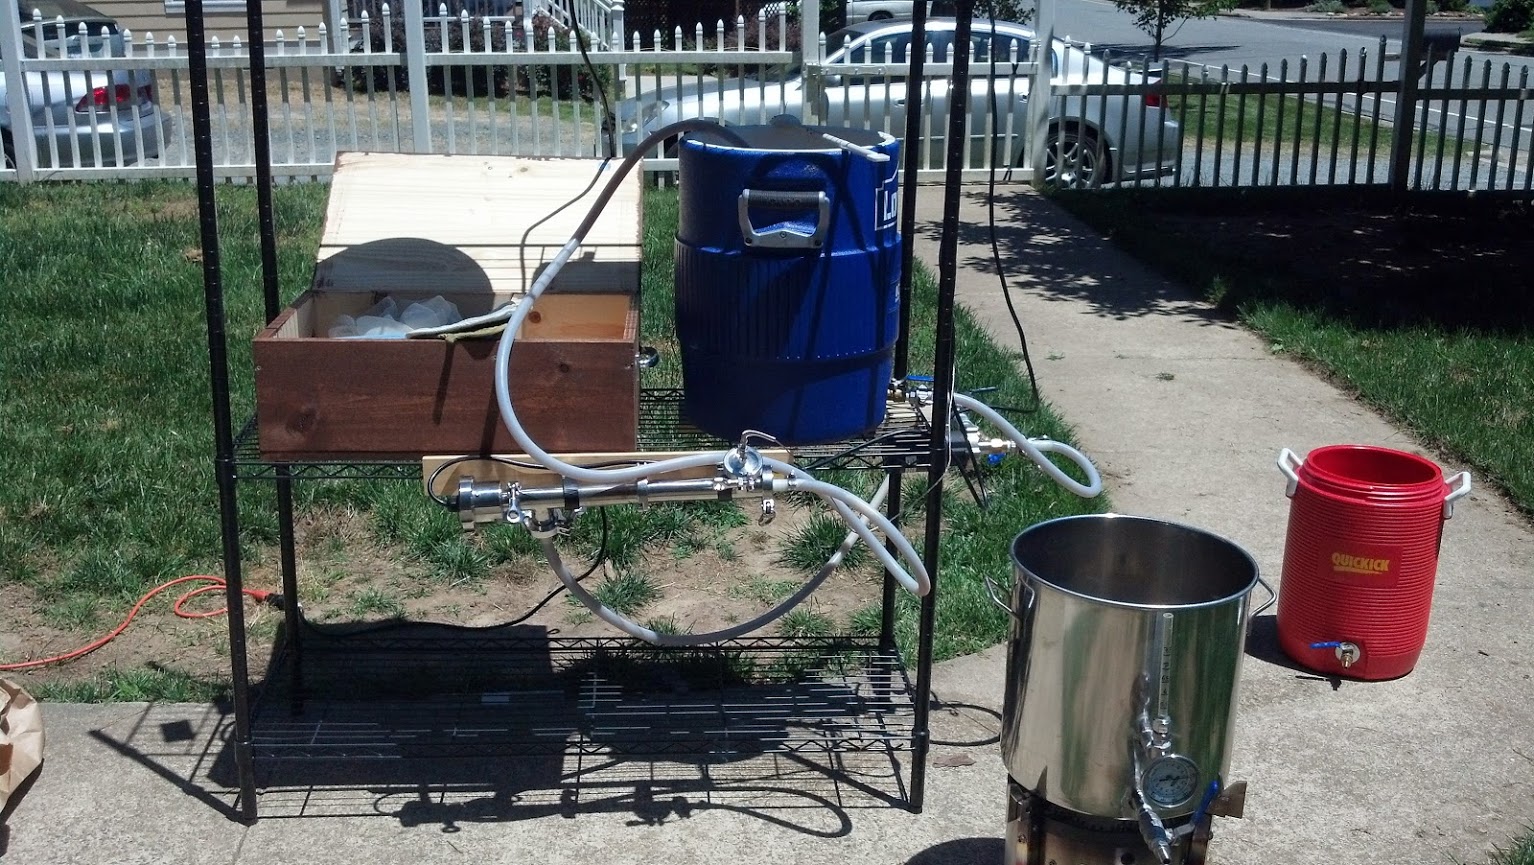
After much planning, design, and coveting on HBT I have decided to make the jump to a RIMS system. I have learned so much and gotten so many ideas from posts of similar builds on here that I am going to try and document the process as best I can. I have one additional challenge in that my rig lives outside, my gear inside, and so the controller, pump, and the RIMS itself must be modular.
The RIMS tube, pump, fittings, etc. I picked up from NorCal (who are fantastic if you've not ordered from them). Their tube seemed to have the best features already baked in, and with the sale they had going on, the price was right. Those items should arrive late this week.
The PID is a Ebay Sestos that came with a probe. That should be here early in the week.
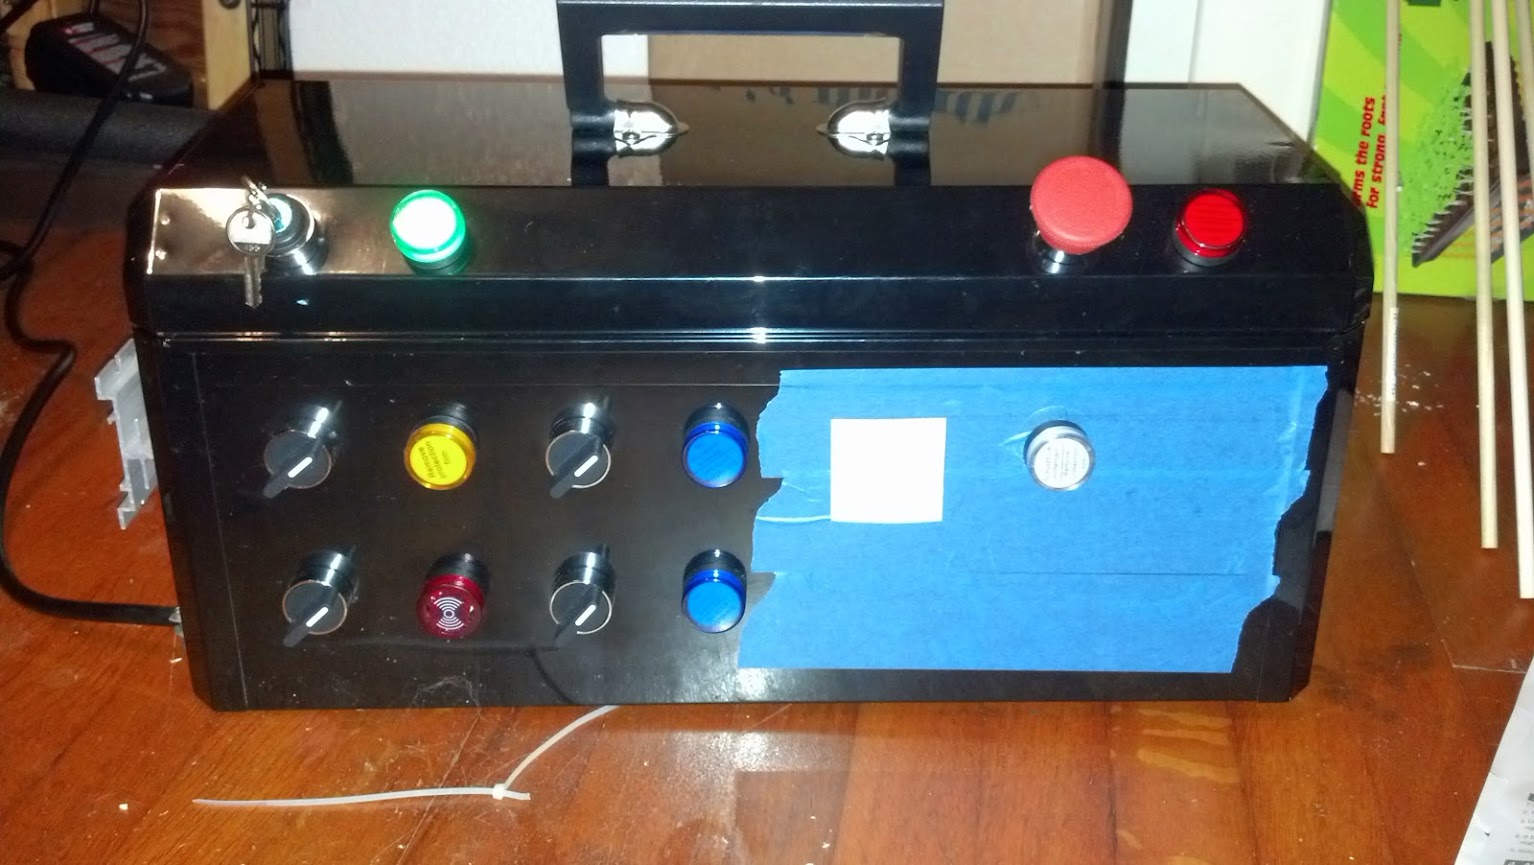
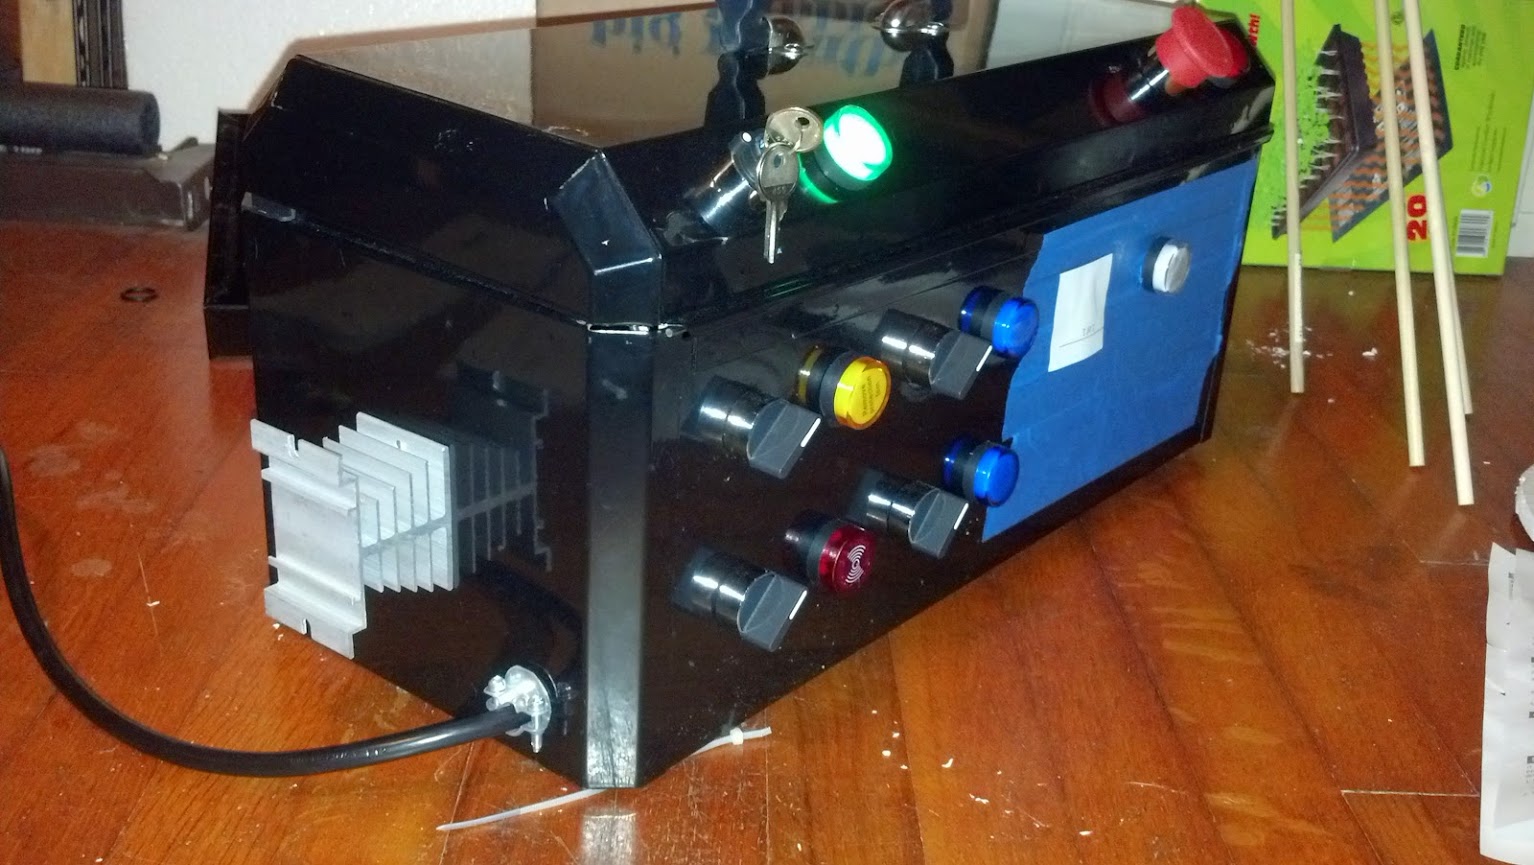
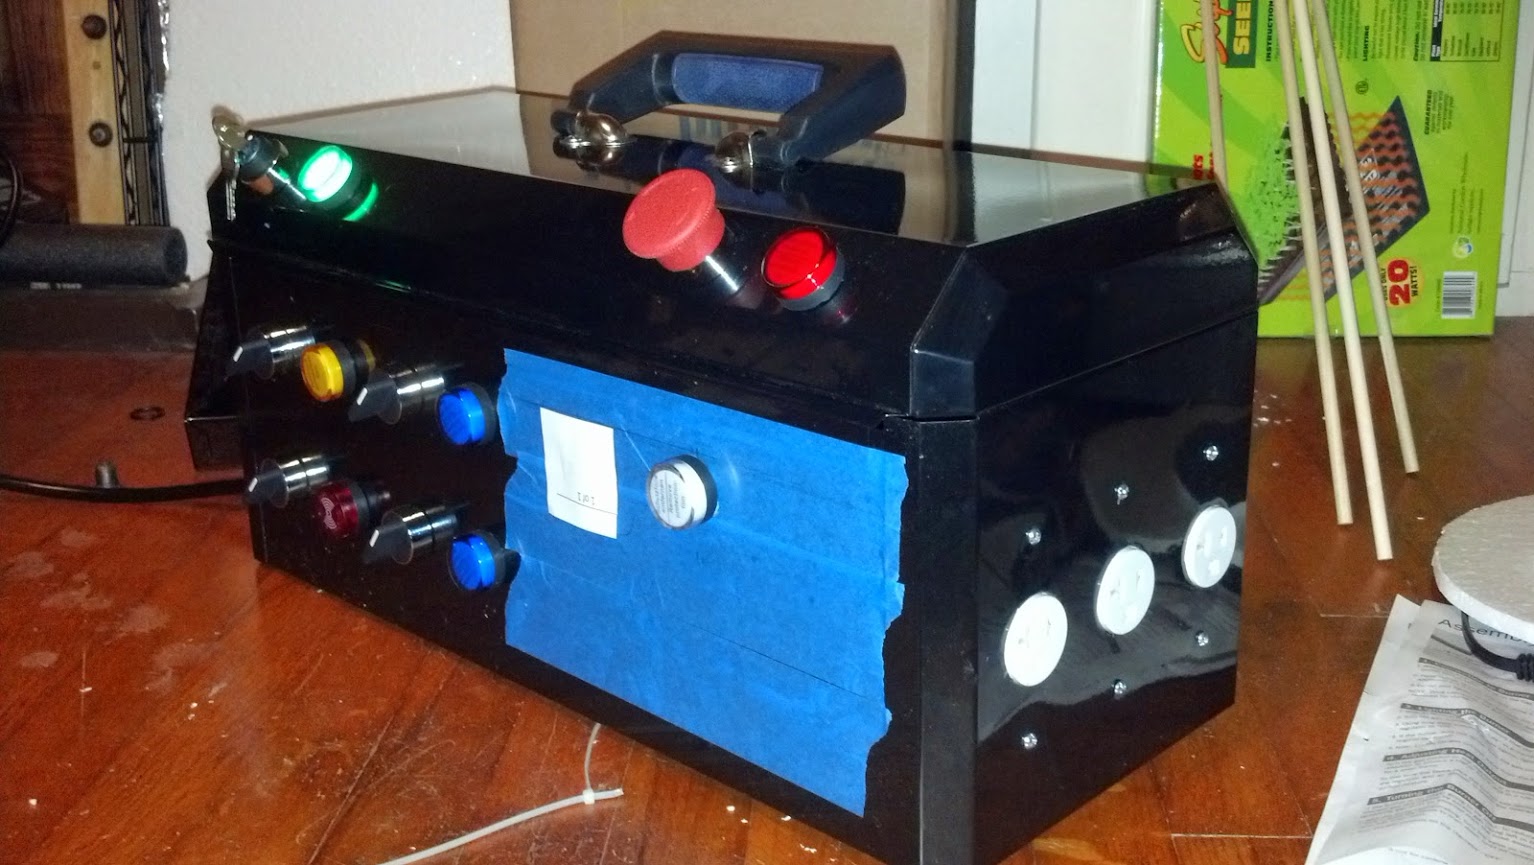
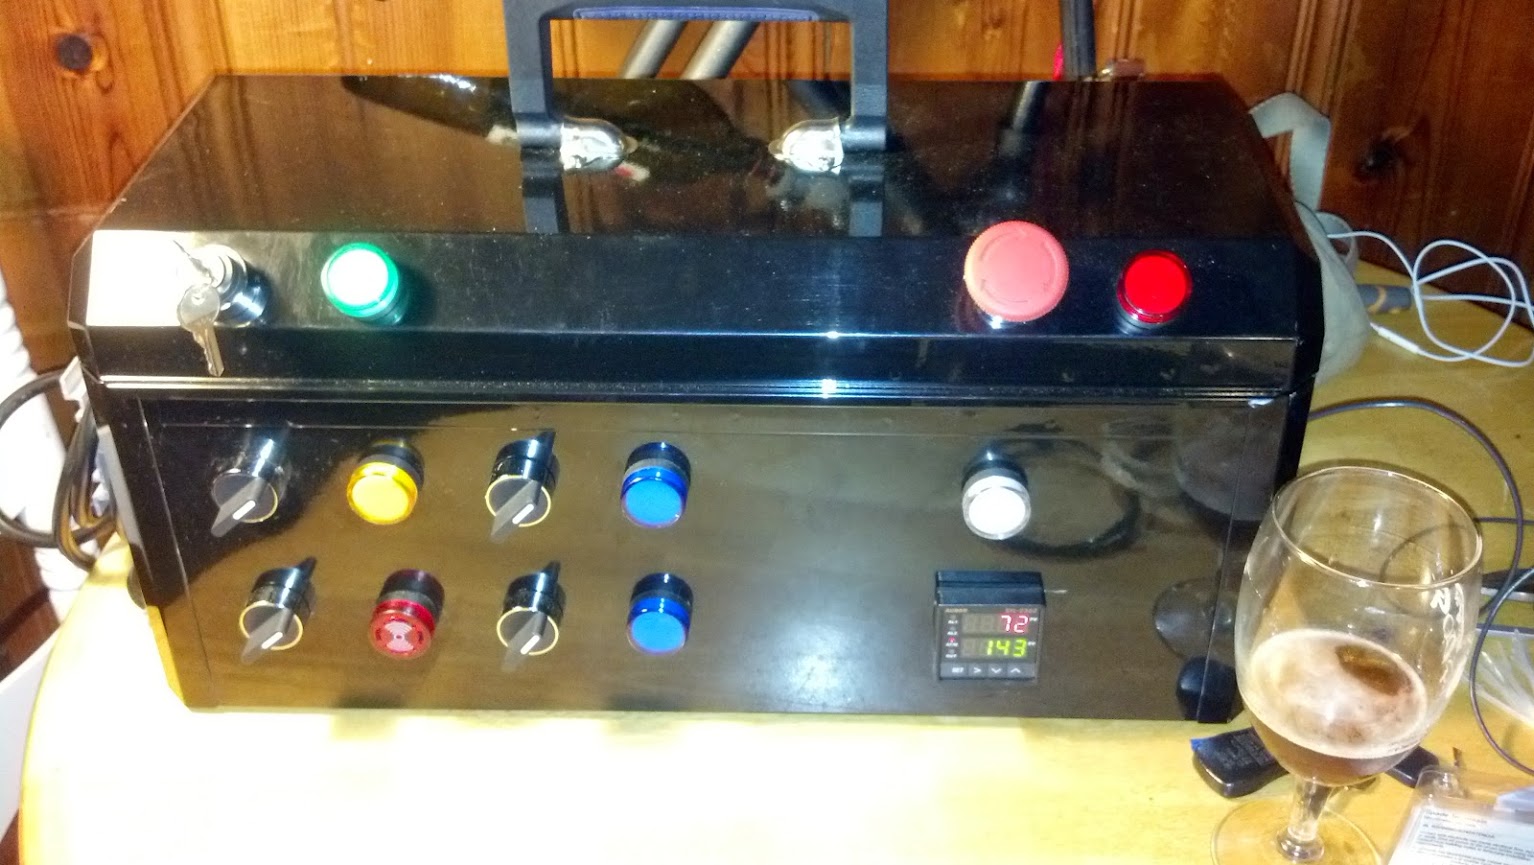
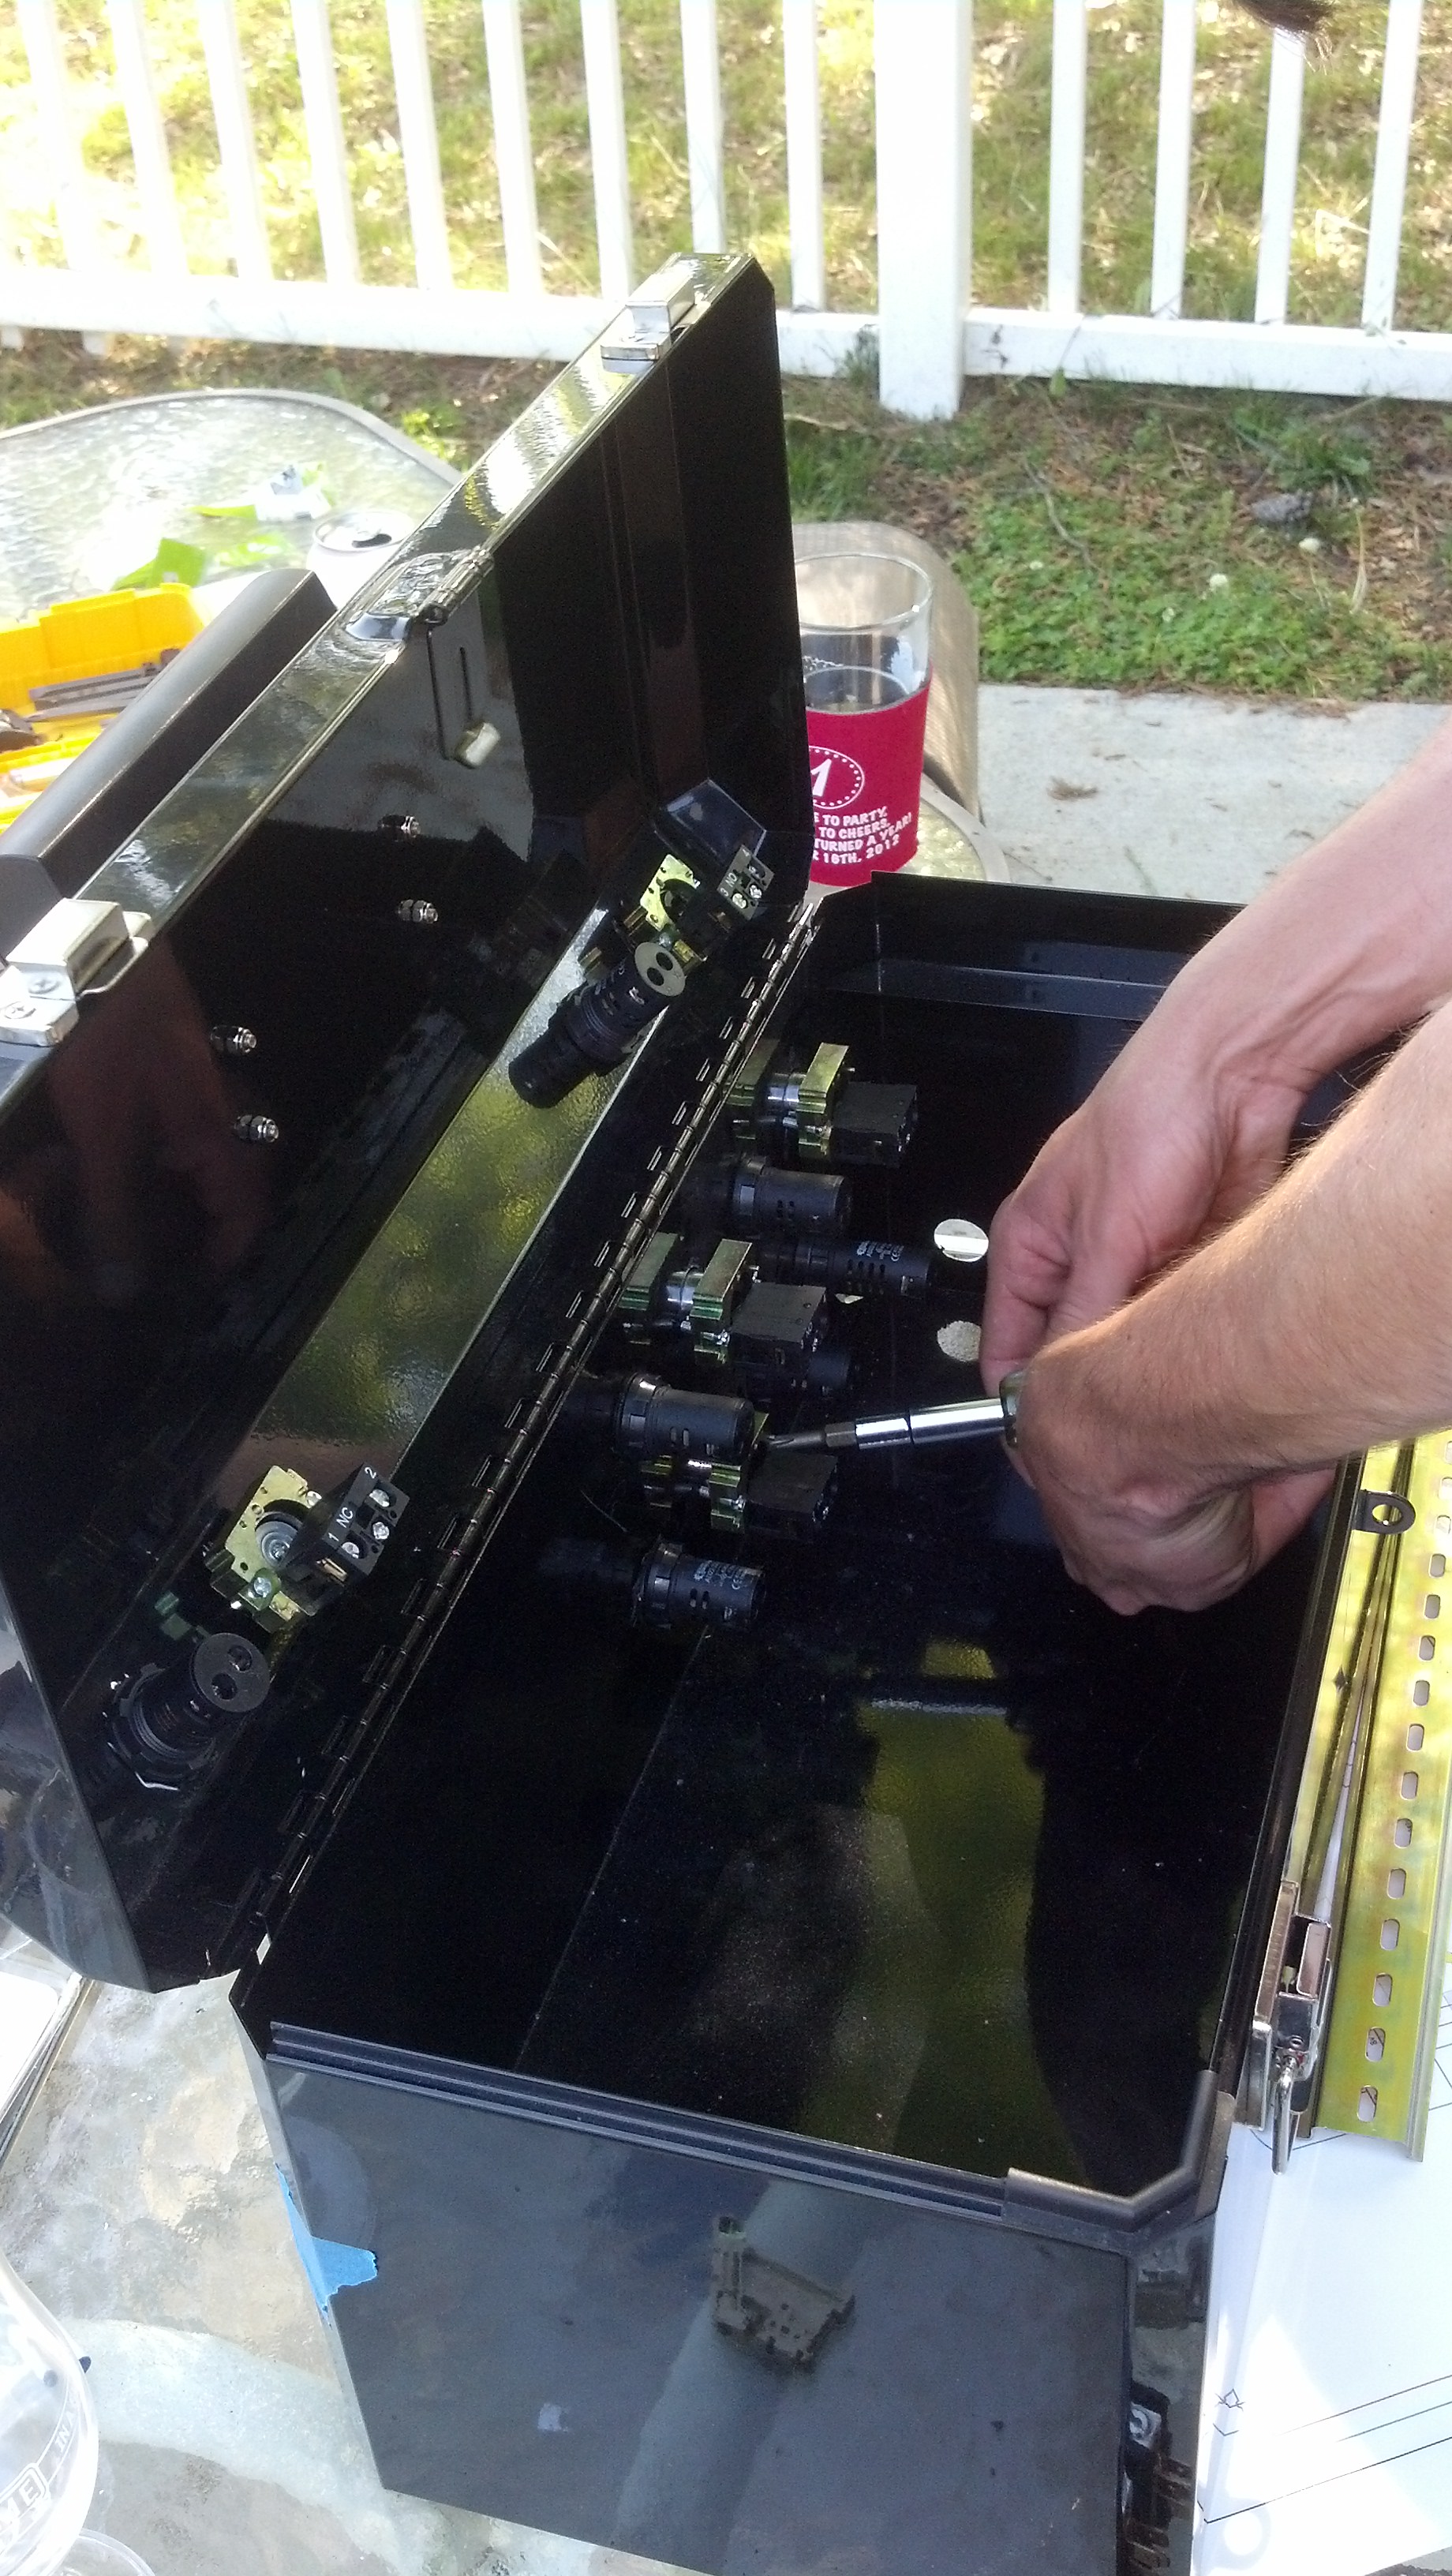
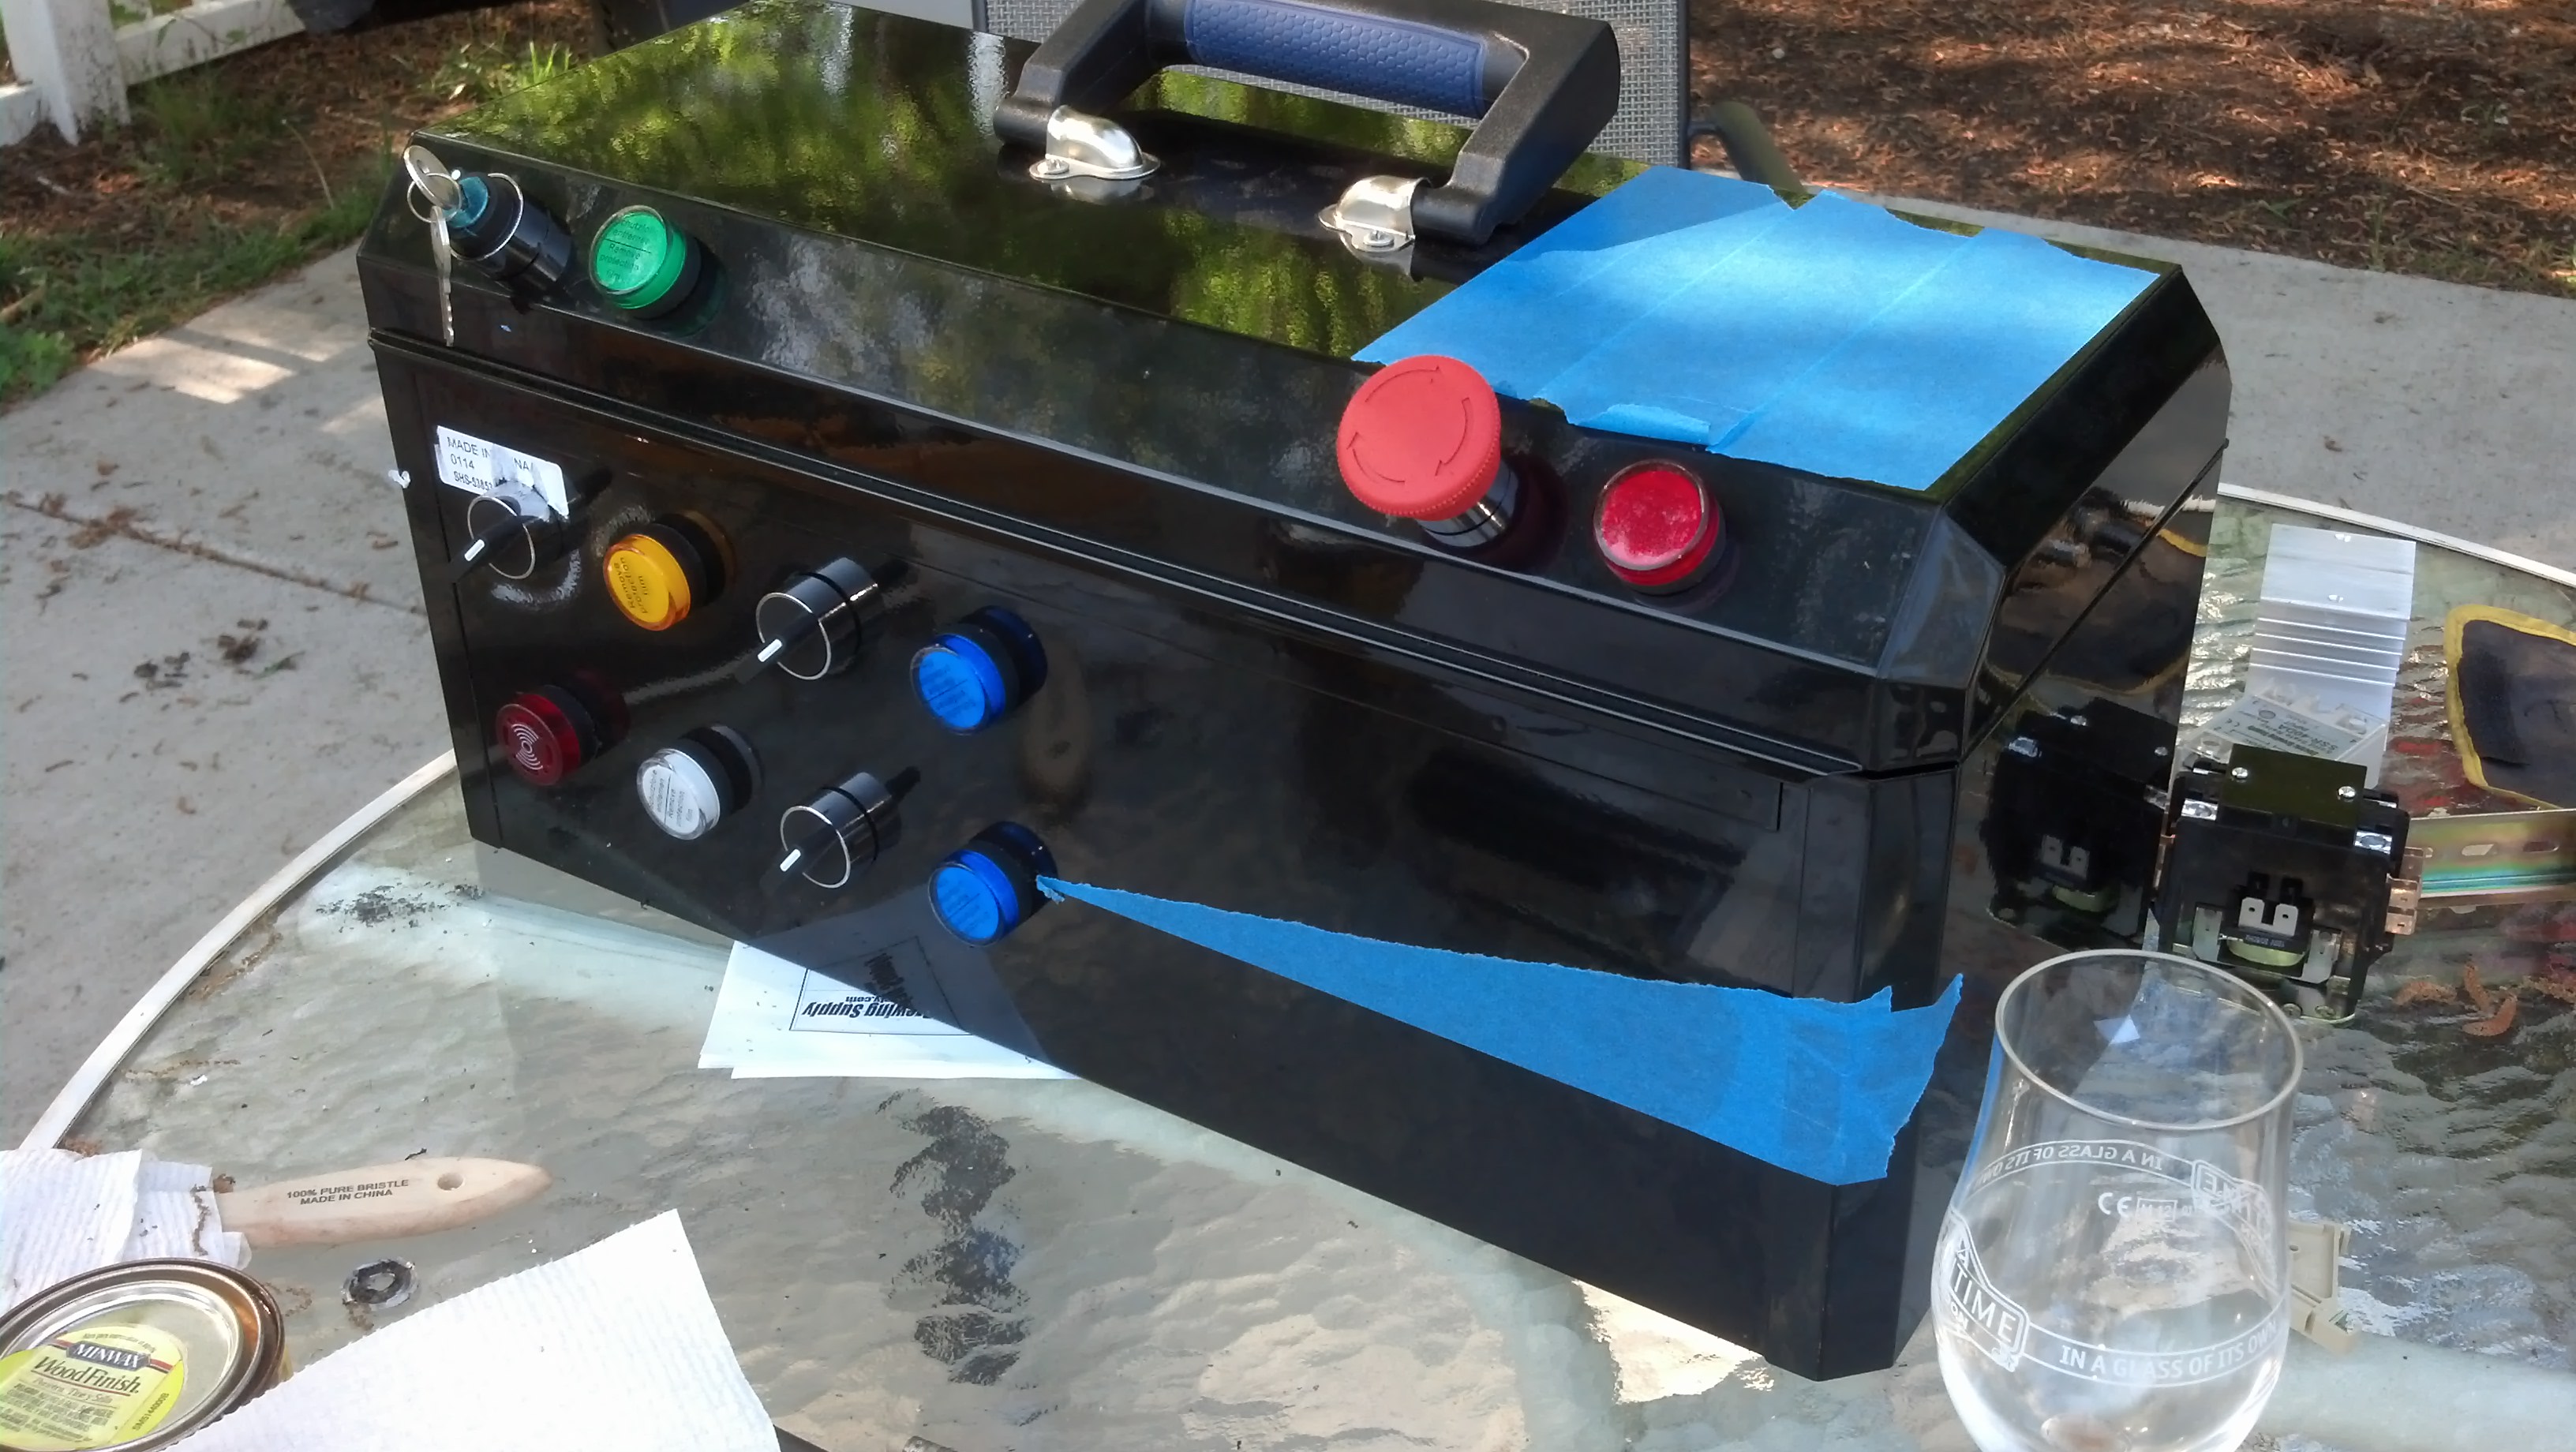
For the controller, I knew I wanted to try and build something myself, but I am no electrician, and with my rudimentary at best electrical knowledge I went with the 20A PID kit from ebrewsupply. I started to try put together a part list myself, but I just don't have the knowledge or confidence to be comfortable that I got everything I need. I know I probably paid a little more, but not that much, and it was well worth it for the piece of mind knowing that I wouldn't start work to realize I forgot one integral piece that is going to take another week to order. I looked into a lot of options for the controller, and ultimately went with a metal toolbox for the portability, ruggedness, as well as the price and looks. I used this one http://tinyurl.com/lbv6fnn.
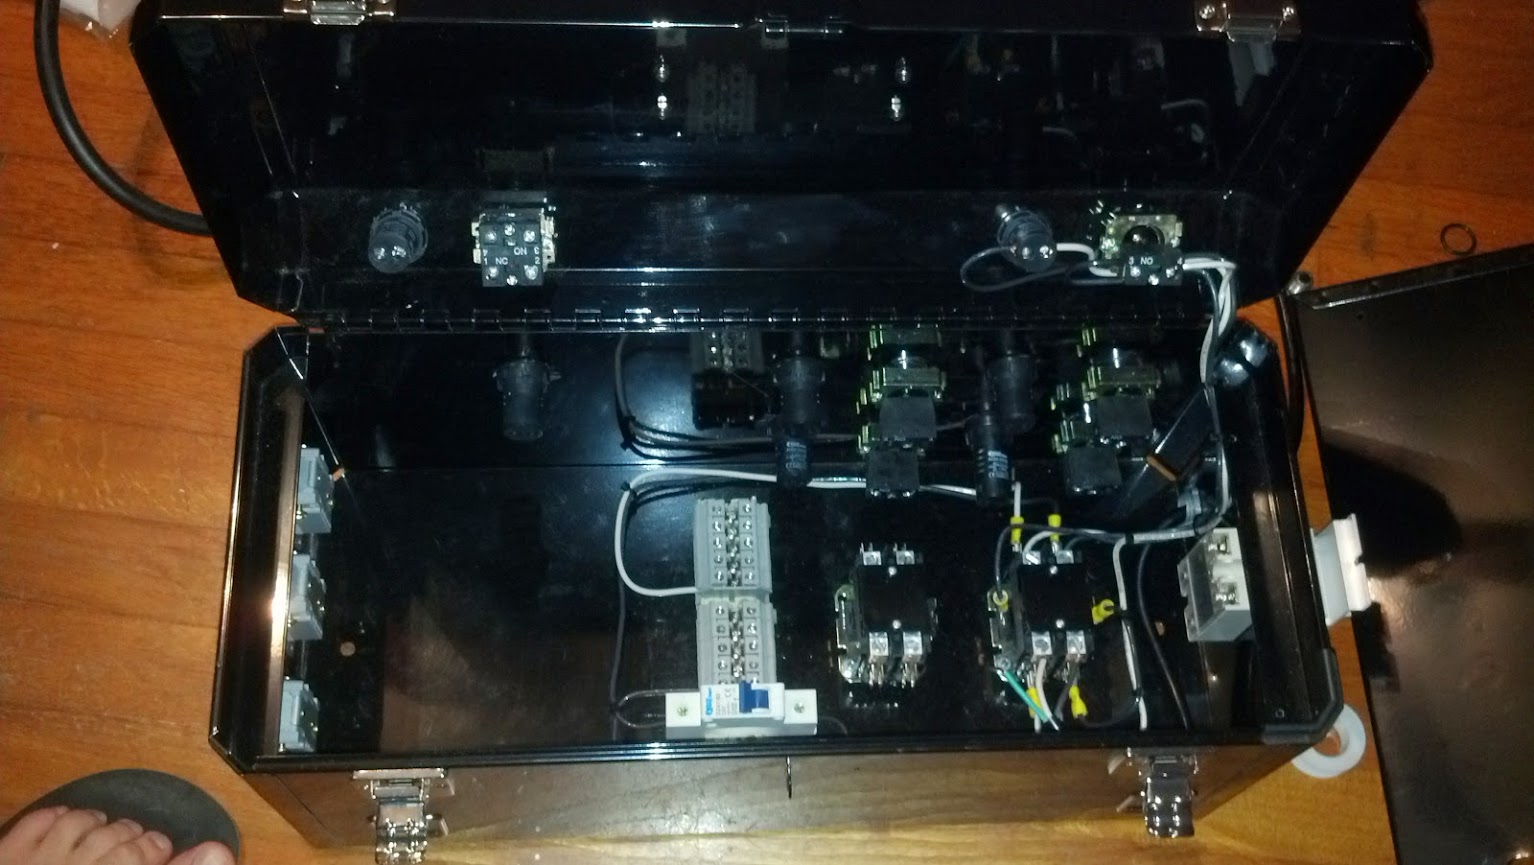
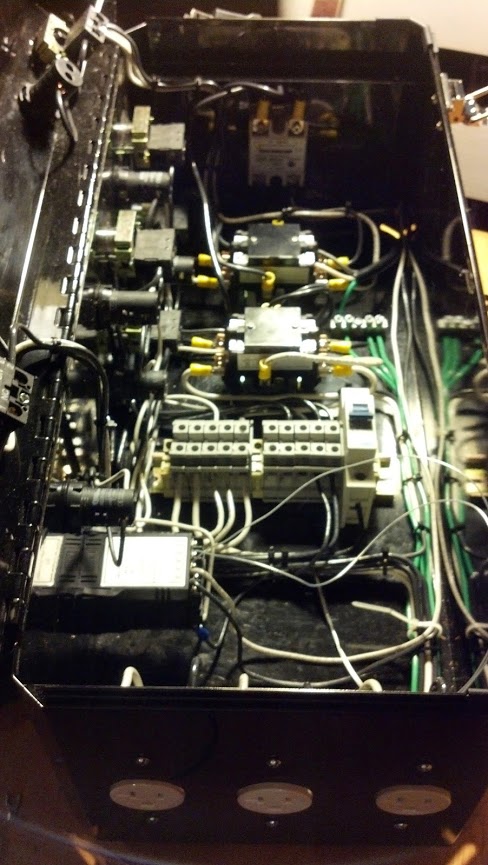
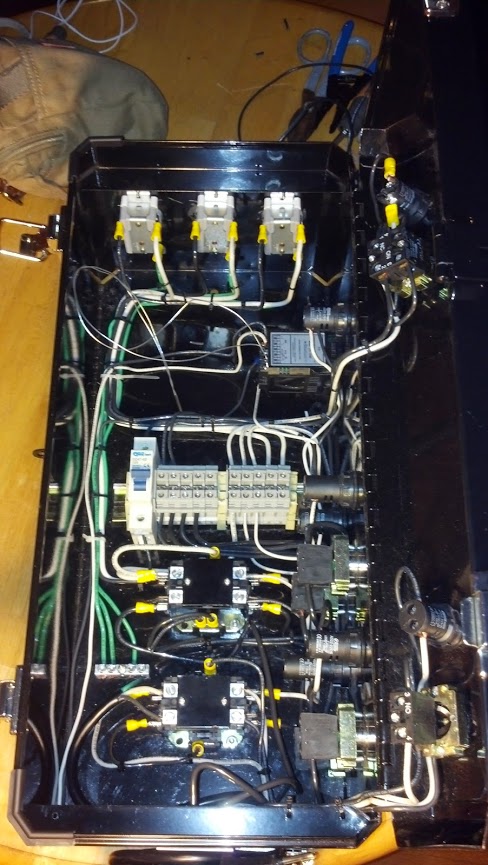
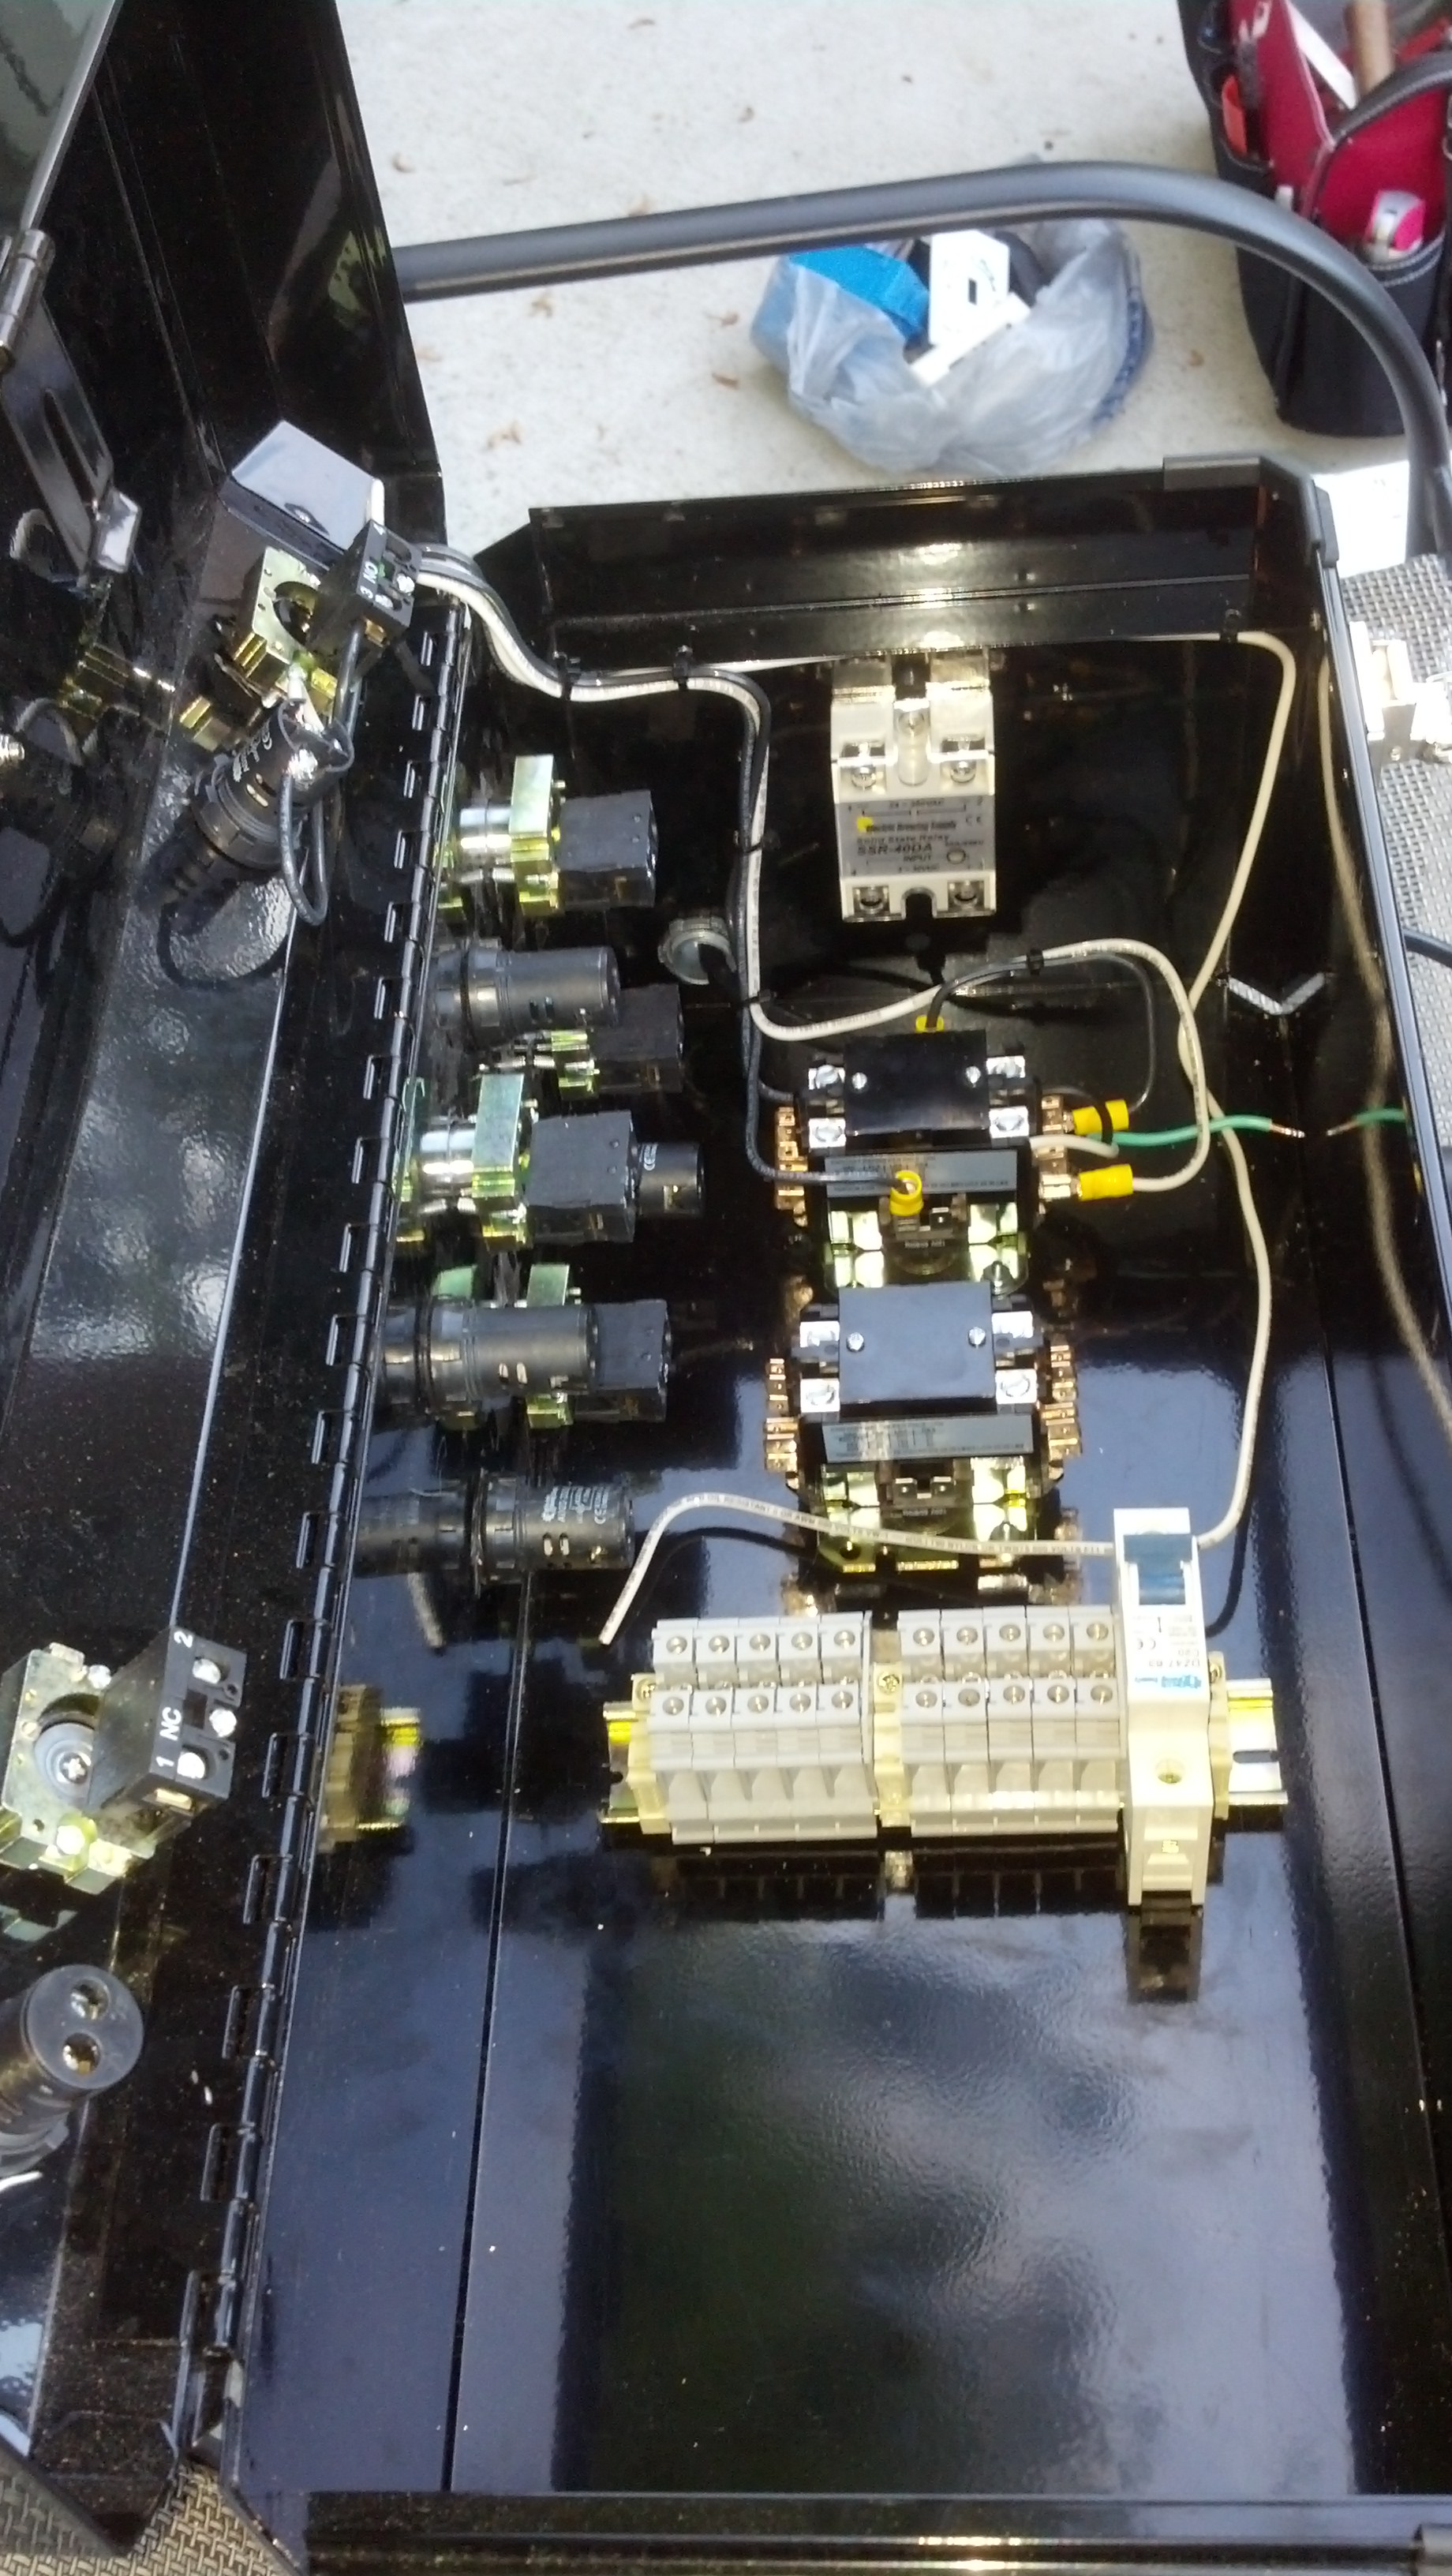
My parts for the controller (less the PID) were in, so I started on that today. I was lucky enough to be able to get my coworker, who is an excellent electrician (he commissions 5MW utility solar farms) to come over and help. Let me say this first- if you do not have a good bit of electrical experience try your damnedest to get someone who does. It would have taken me 5x as long, and looked 5% as good. Plus I learned a lot along the way and usually folks will work for beer and pizza. In a day of work we were able to get through about 75% of the controller. Had a couple of hang-ups, but everything is now mounted and wiring has begun. He was not super pleased overall with the wiring diagram from EBrew, but again- it has all the components and will work. I'd say we still have one after work build session to get it done (again, less the PID and RIMS tube).
Configuration Mock-Up (has changed just a bit)
The RIMS tube, pump, fittings, etc. I picked up from NorCal (who are fantastic if you've not ordered from them). Their tube seemed to have the best features already baked in, and with the sale they had going on, the price was right. Those items should arrive late this week.
The PID is a Ebay Sestos that came with a probe. That should be here early in the week.
For the controller, I knew I wanted to try and build something myself, but I am no electrician, and with my rudimentary at best electrical knowledge I went with the 20A PID kit from ebrewsupply. I started to try put together a part list myself, but I just don't have the knowledge or confidence to be comfortable that I got everything I need. I know I probably paid a little more, but not that much, and it was well worth it for the piece of mind knowing that I wouldn't start work to realize I forgot one integral piece that is going to take another week to order. I looked into a lot of options for the controller, and ultimately went with a metal toolbox for the portability, ruggedness, as well as the price and looks. I used this one http://tinyurl.com/lbv6fnn.
My parts for the controller (less the PID) were in, so I started on that today. I was lucky enough to be able to get my coworker, who is an excellent electrician (he commissions 5MW utility solar farms) to come over and help. Let me say this first- if you do not have a good bit of electrical experience try your damnedest to get someone who does. It would have taken me 5x as long, and looked 5% as good. Plus I learned a lot along the way and usually folks will work for beer and pizza. In a day of work we were able to get through about 75% of the controller. Had a couple of hang-ups, but everything is now mounted and wiring has begun. He was not super pleased overall with the wiring diagram from EBrew, but again- it has all the components and will work. I'd say we still have one after work build session to get it done (again, less the PID and RIMS tube).
Configuration Mock-Up (has changed just a bit)