New eBIAB Rig Takes Shape!

Homebrew Talk - Beer, Wine, Mead, & Cider Brewing Discussion Forum

Help Support Homebrew Talk - Beer, Wine, Mead, & Cider Brewing Discussion Forum:

This site may earn a commission from merchant affiliate links, including eBay, Amazon, and others.

nobadays

Supporting Member
HBT Supporter
Joined
Apr 4, 2016
Messages
758
Reaction score
2,950
Location
Payson AZ/Colorado
New - Old - brewer here ("Back at It" in Introductions.) Started back brewing last December and now with 7 batches under my belt decided to build an "All Grain - eBIAB" rig complete with PID controller and recirculating mash...and a neat Hop Rocket I scored off EBAY!

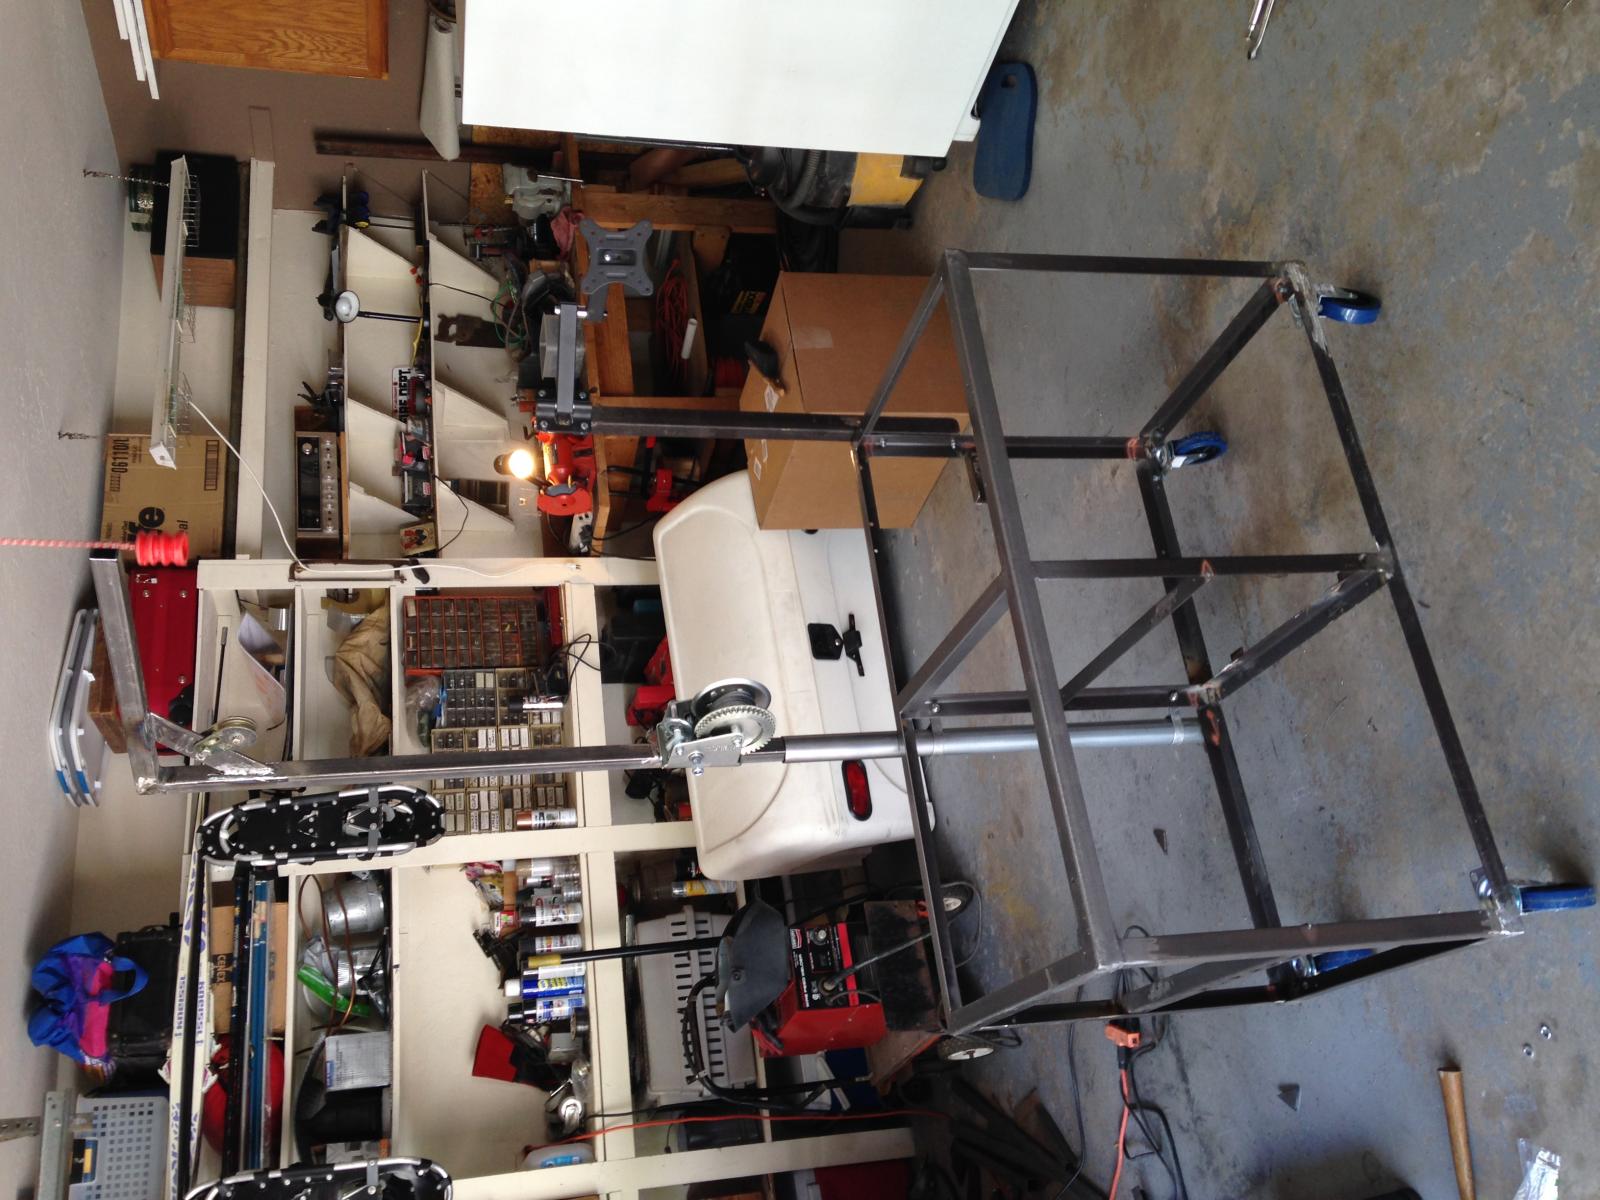
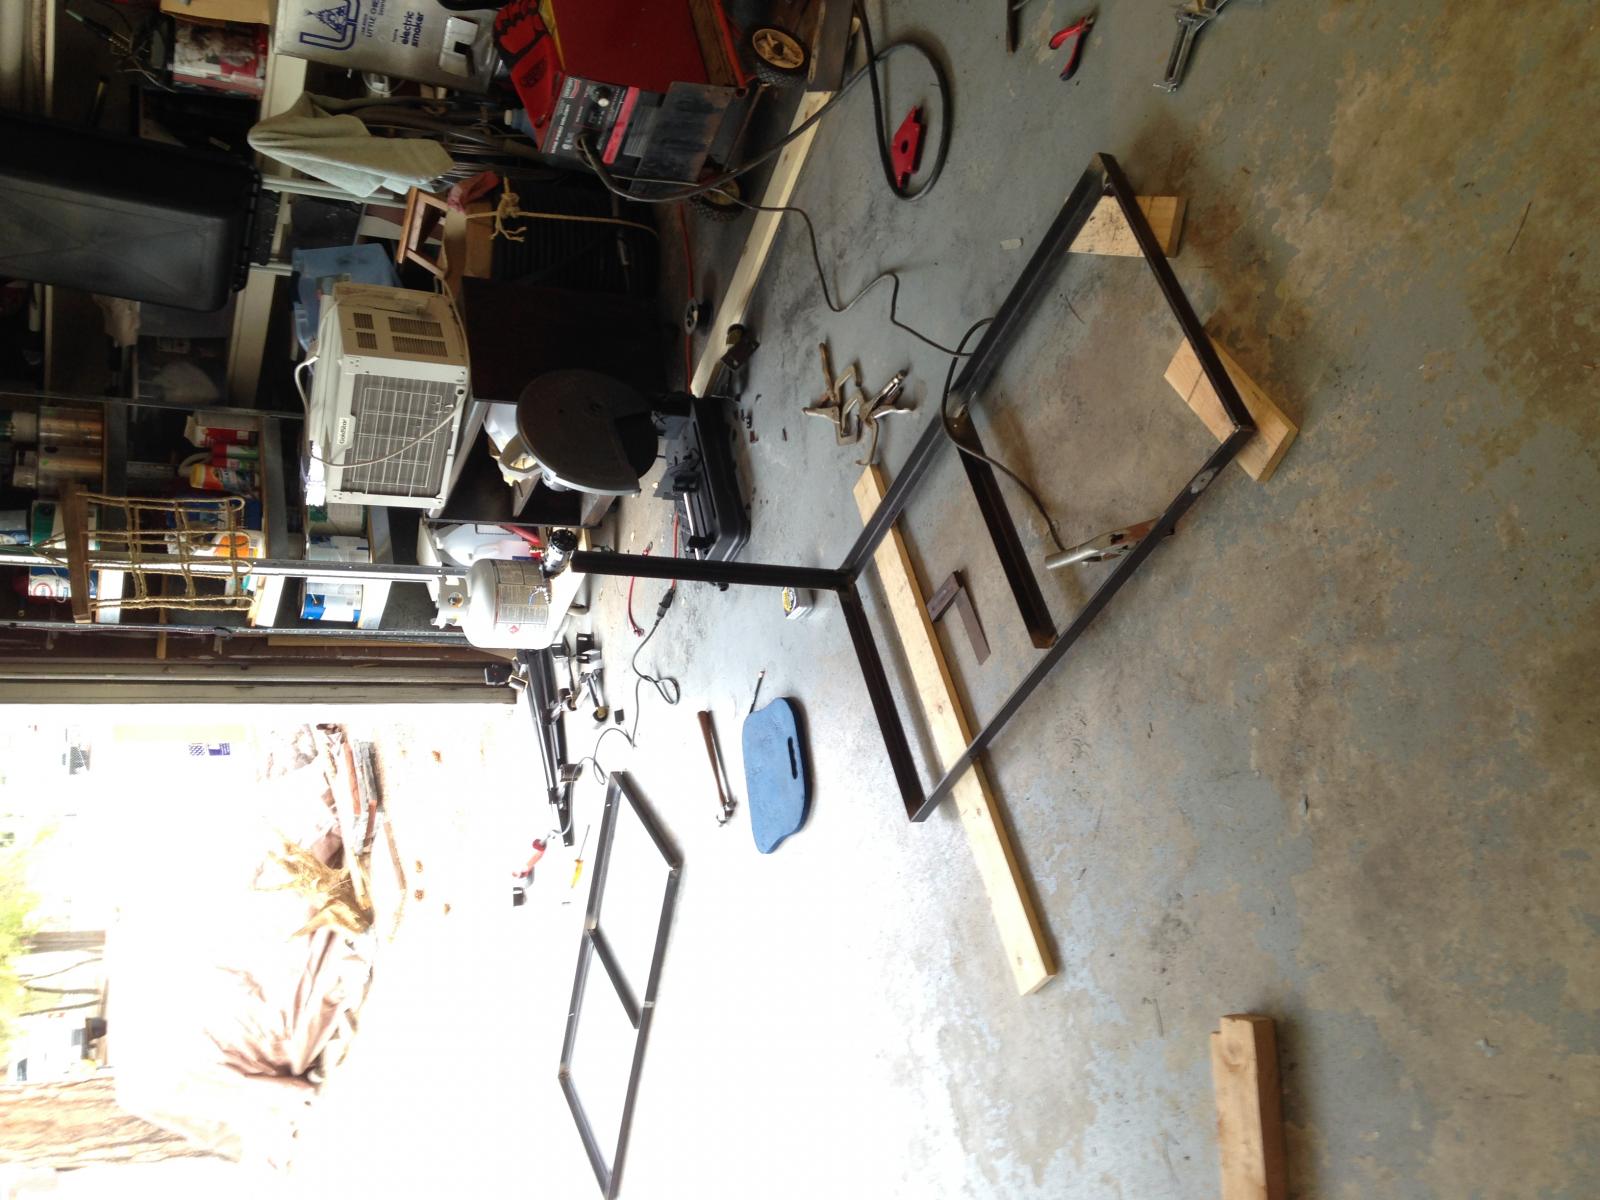
After 20 years of not welding (never with a MIG welder) the learning curve was steep but quick, the welds got better quickly... Here are some pics as it is going together... Don
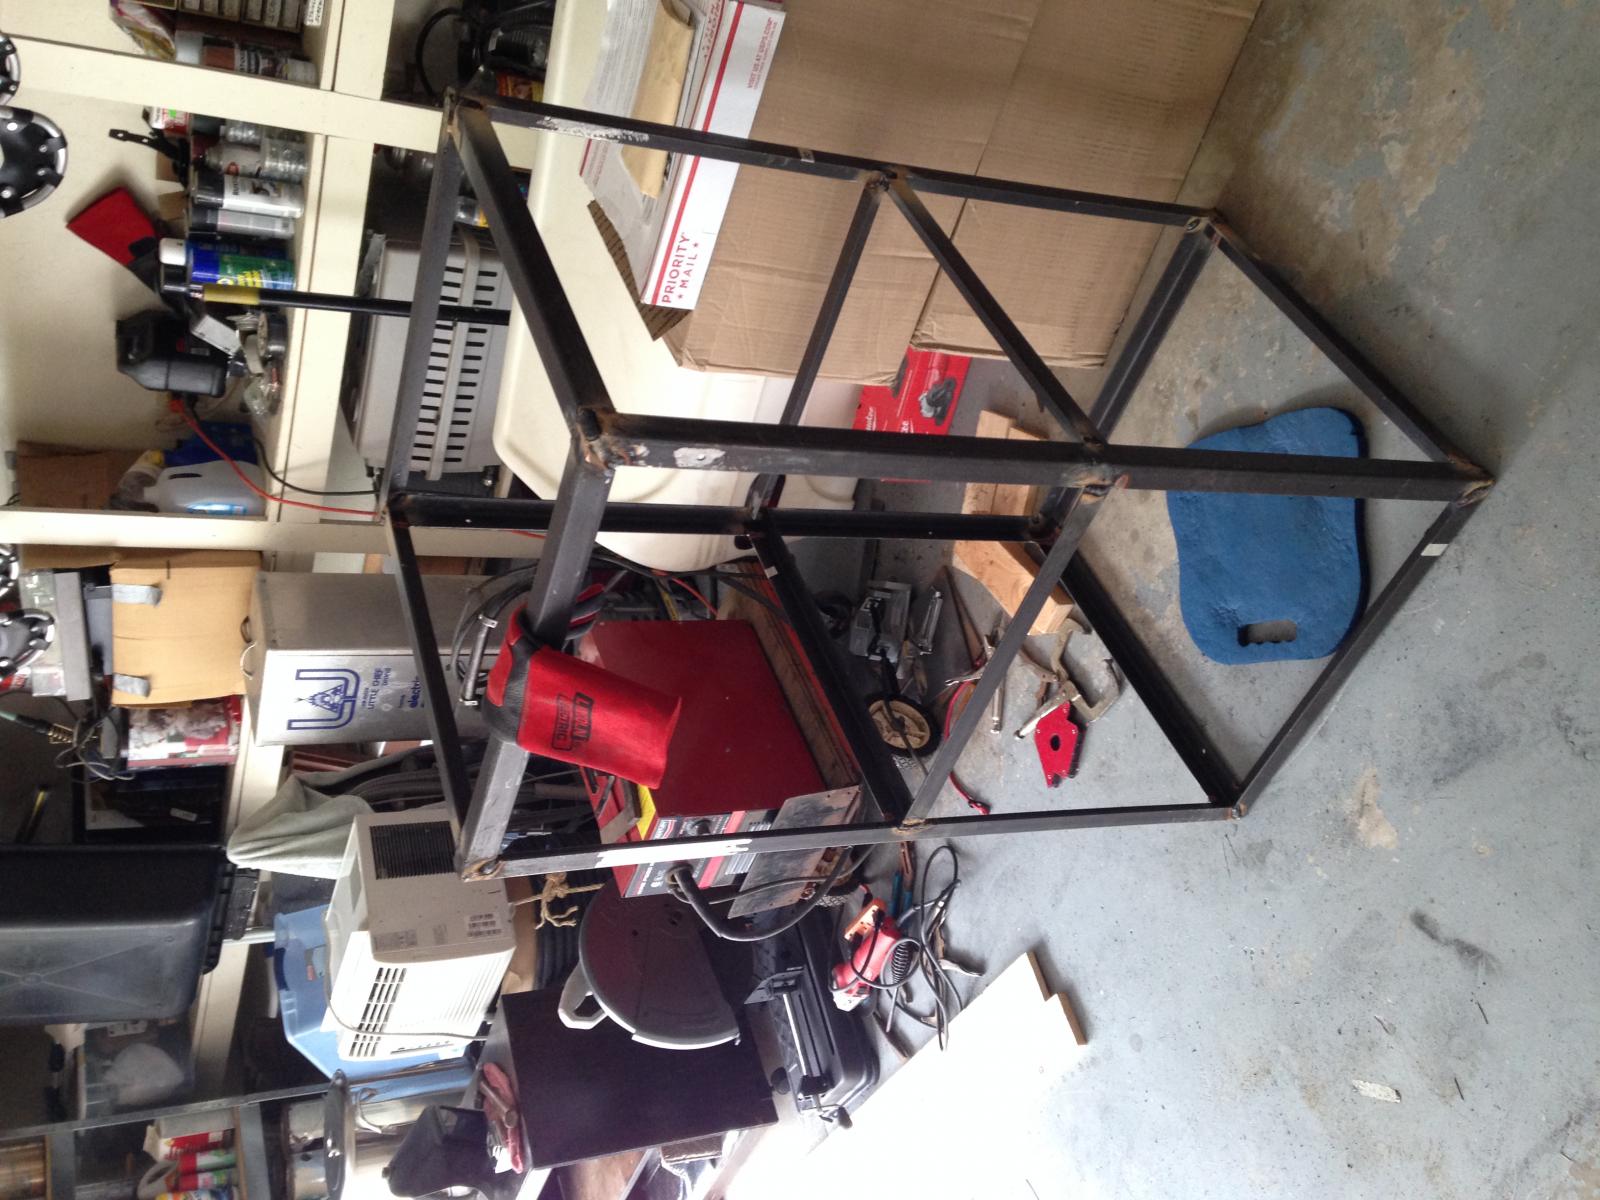
IMG_1337.jpg


IMG_1347.jpg


IMG_1356.jpg


IMG_1364.jpg
 
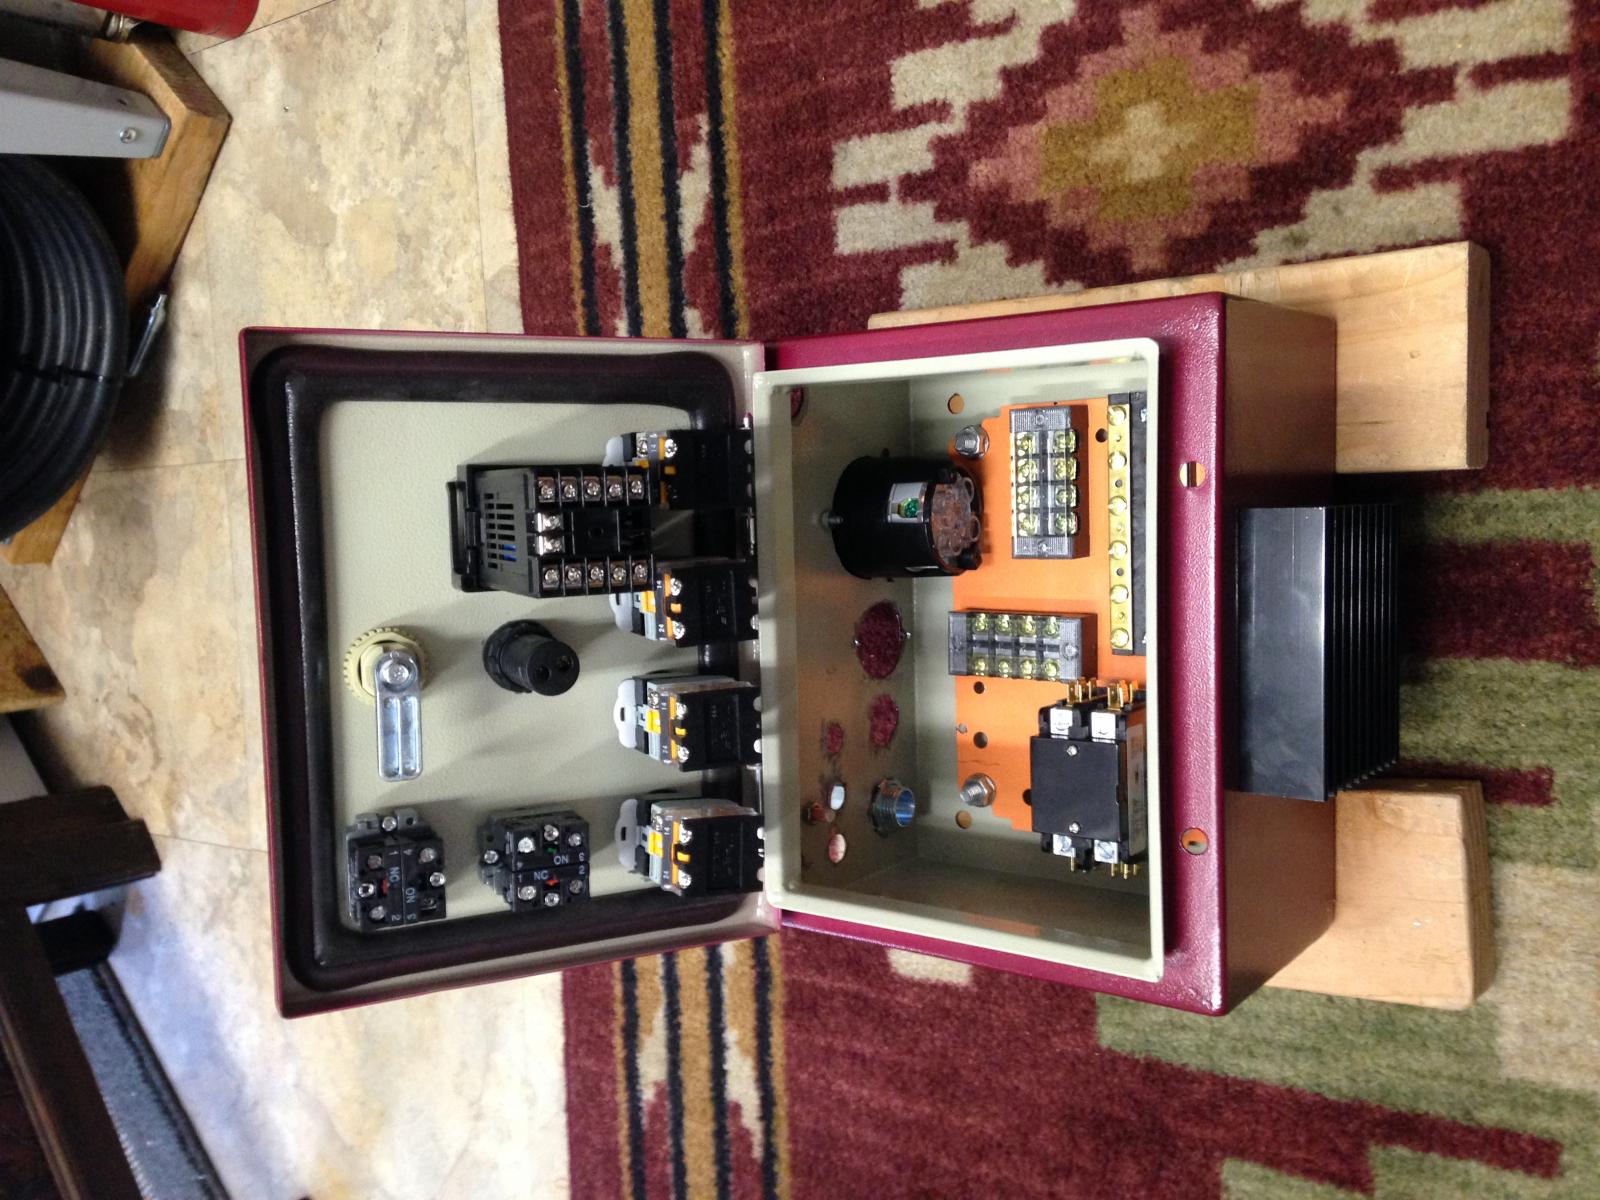
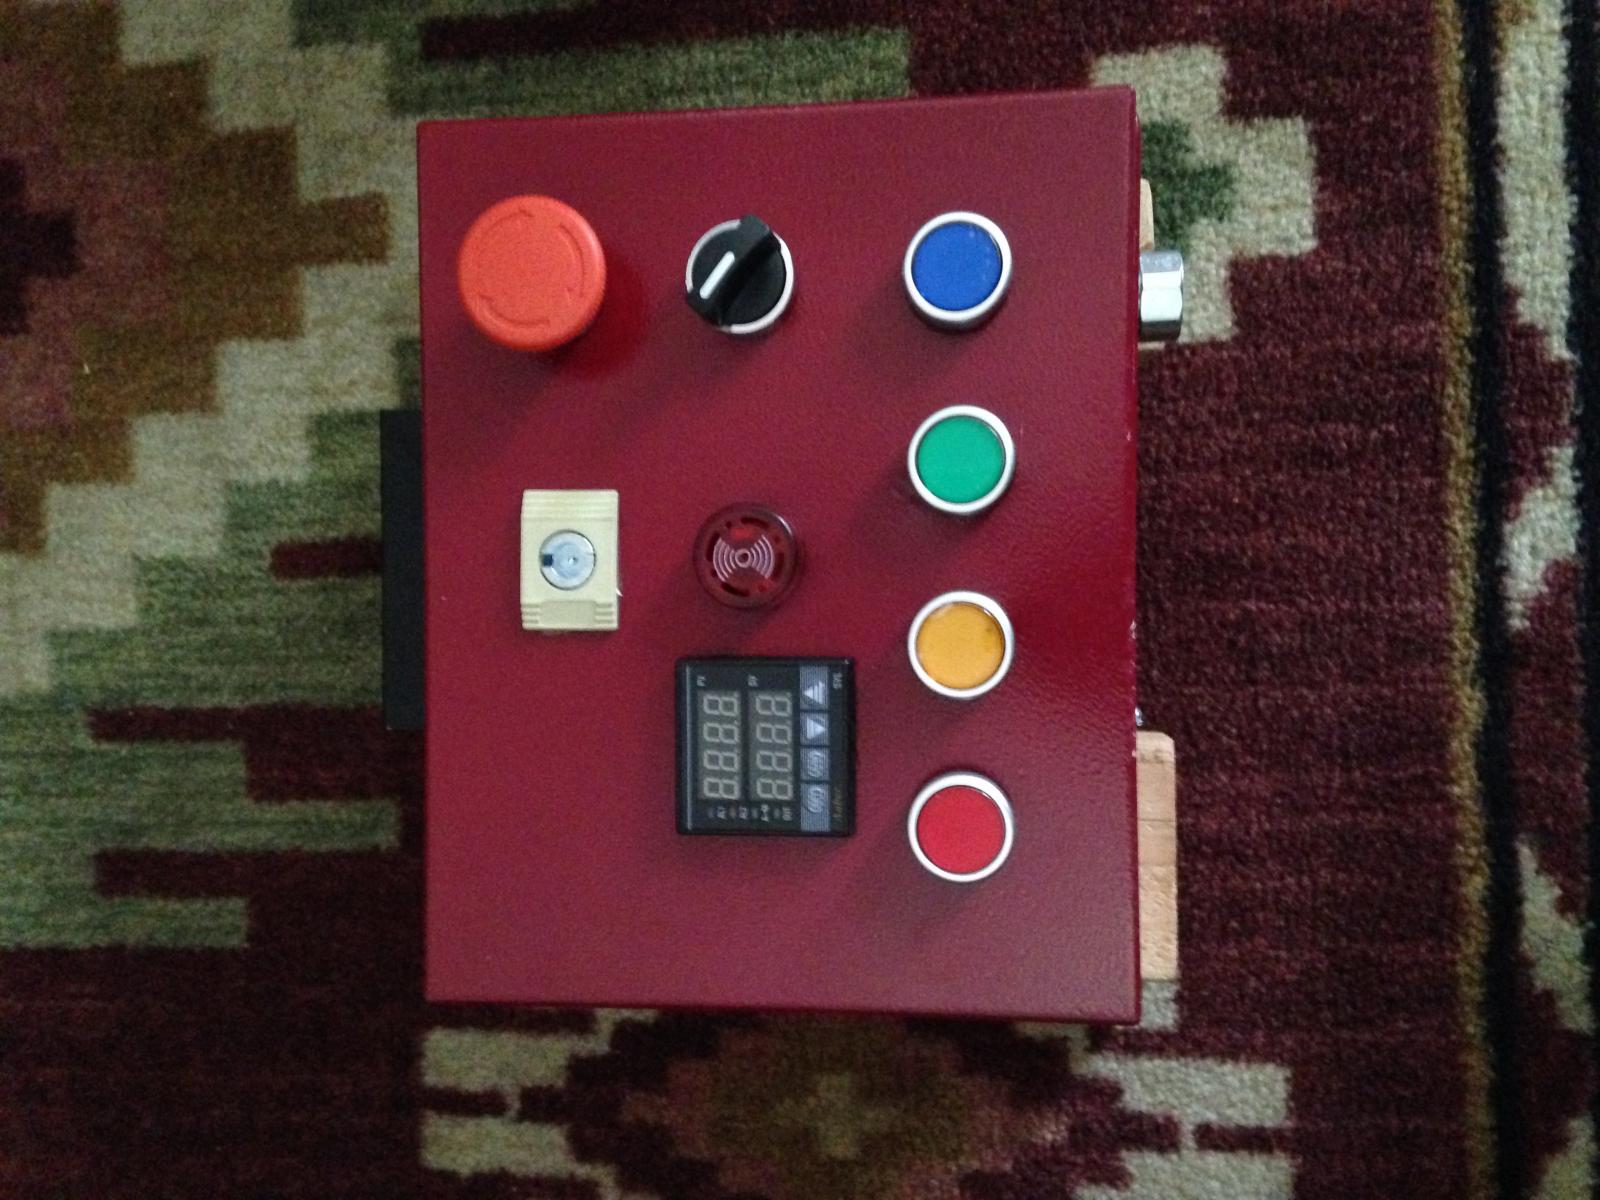
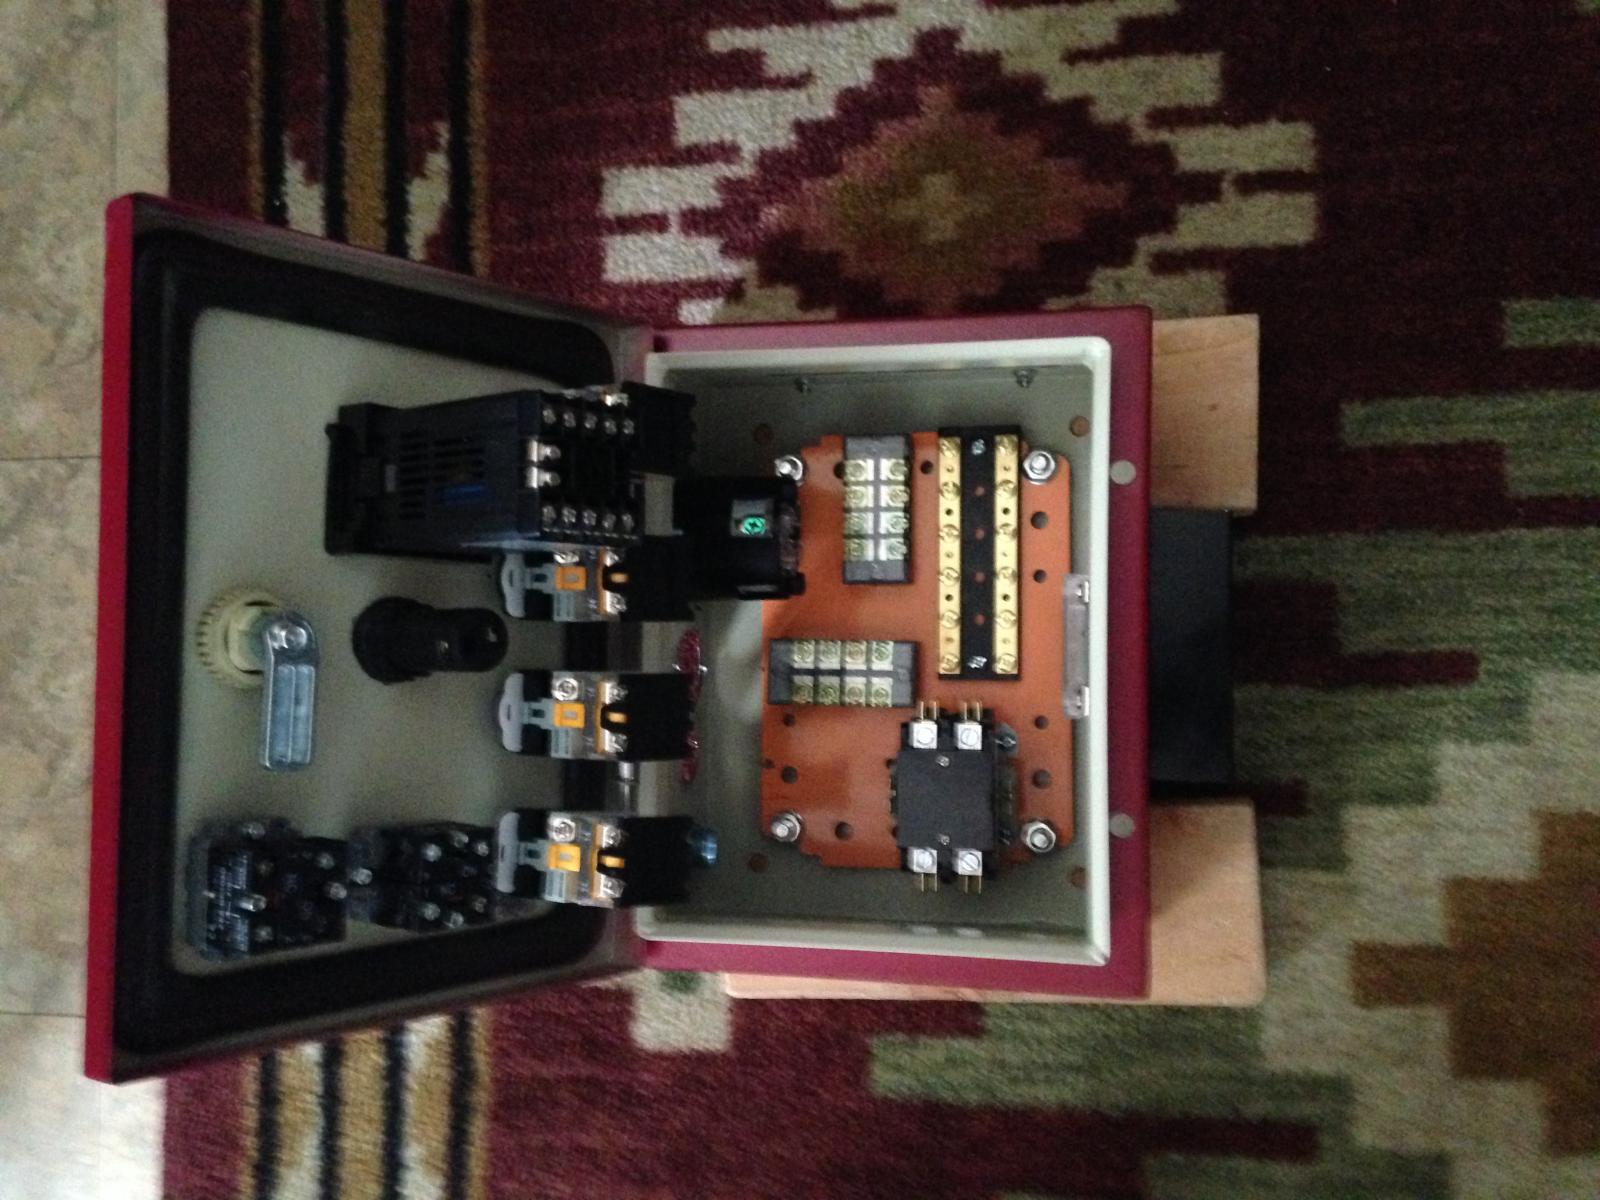
Stormy day in northern AZ... Time to start punching holes in the control panel. BTW, an Aubrins "Wall Mount Box for Single Controller 10x8x6" is almost too small for even a single PID control panel. It's going to all fit but a word of warning to those thinking of using this box: make sure you check and re-check depth of switches-vs-proposed placement of fuses, receptacles, etc. I had marked all of these on the bottom (actually the side but I have turned the box for mounting to gain more space) then when I flipped it up to start layout on the control switches realized the bases of the switches were going to hit the fuse holders and a receptacle. Back to the drawing board and rearranging the fixtures. Glad I hadn't punched any holes yet!

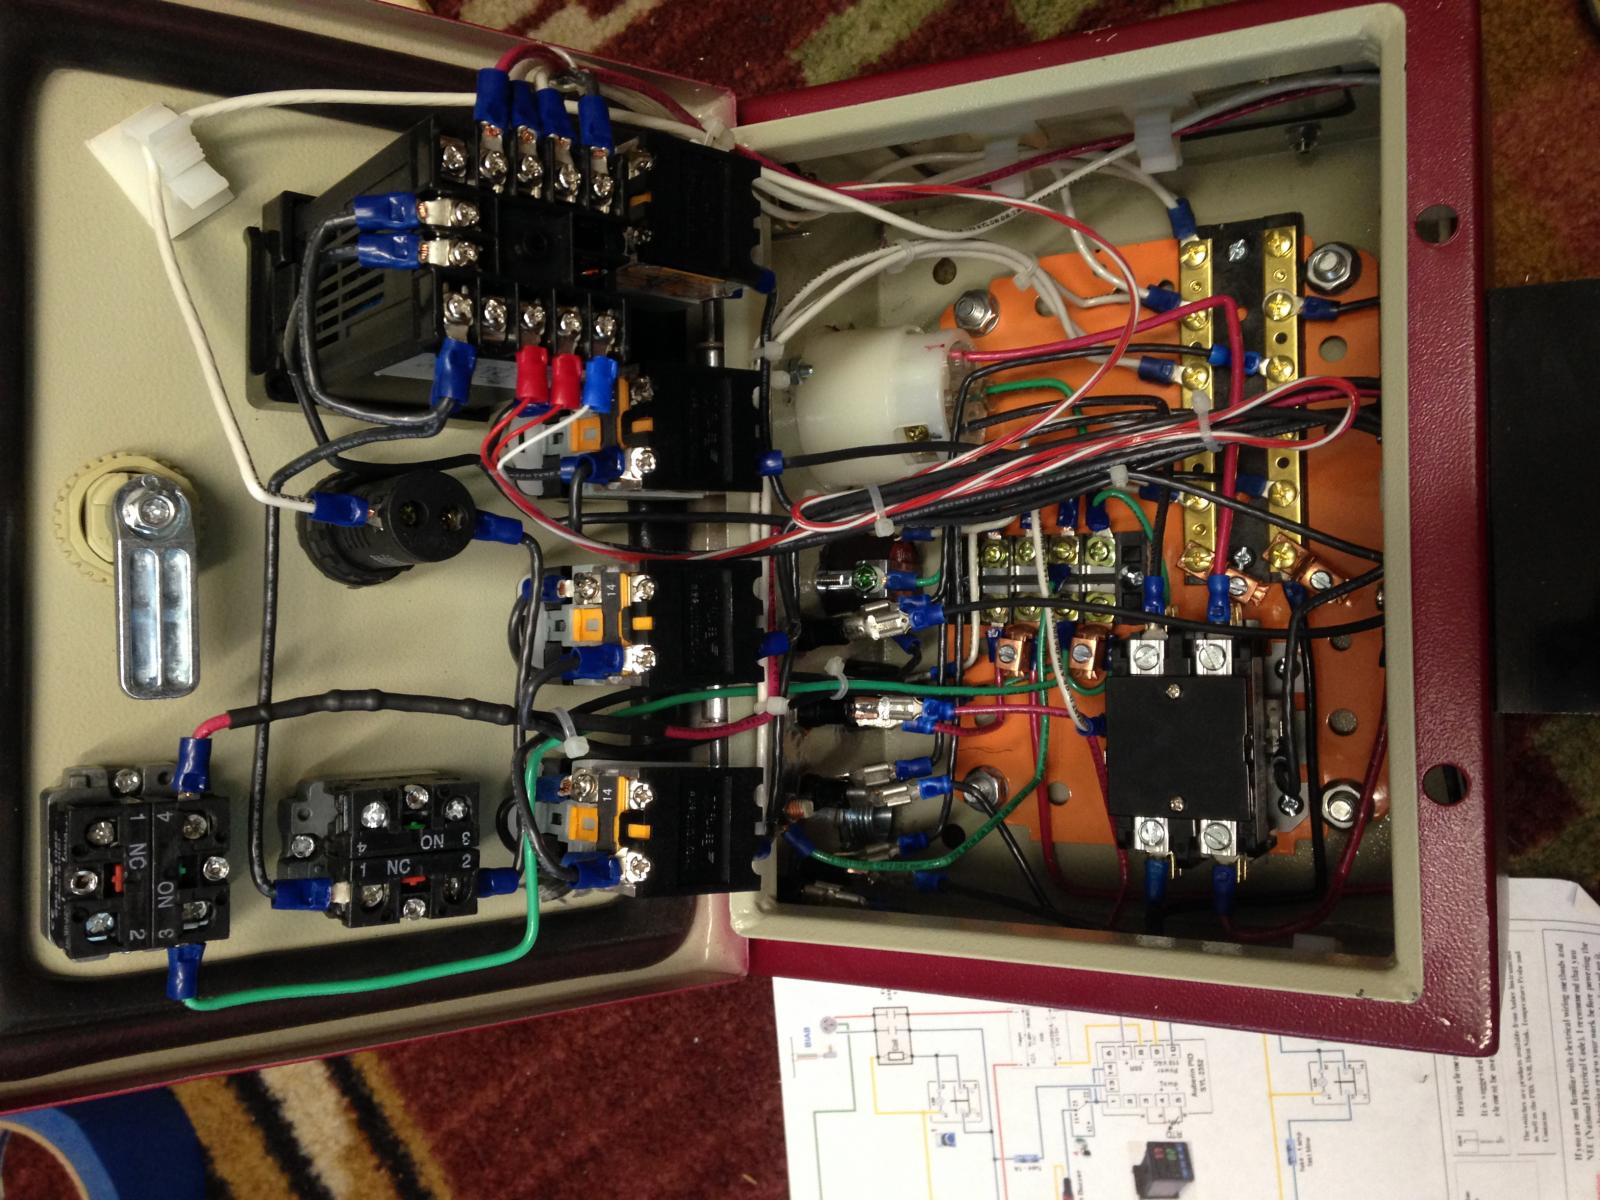
In case anyone is wondering... Red - system on | Yellow-heating element | Green pump 1 | Blue pump 2/possibly future 120V RIMS conversion for my Hop Rocket (will use a "Mini Power Relay" to energize the 20A receptacle if that happens) obligatory E-Stop | Alarm and Alarm cut-off switch. GFCI Spa panel to be attached to the brew stand with a 6/4 extension cord to plug into near-by dryer outlet.

This will power/control a 5500W Camco element in a 62 Quart Bayou Classic kettle, 1 Chugger pump, and possibly a small solar hot water recirculation pump for recirculating mash/wort.

Hope these pics come out upright.

Don

IMG_1373.jpg


IMG_1374.jpg
 
So... I read someone had said it took them around 20 hours to build their control panel. I was thinking; Hmmm a bit excessive, it shouldn't take that long. Just punch some holes, throw the components in there, wire it up and "Bob's your uncle."

Well I am now approximately 14 hours into my panel build and I haven't run a piece of wire. 20 hours? Yeah that's a little light for this guy!

The Burgundy is a tribute to the MG Midget I sold earlier this year (after almost 30 years of ownership) which is funding my new eBIAB rig!

BTW, the colored switches are at the bottom, the panel will open down rather than right to left or visa-versa.

Don
P.S. sorry in advance of the pics end up turned...I have no idea how or why they do that!

IMG_1380.jpg


IMG_1381.jpg


IMG_1383.jpg
 
I have been looking at pictures of wiring done in other simple panels... I think I have too many terminal strips in here... I see others have doubled up connectors as well as crimping 2 wires into 1 connector. I think I better rethink this a bit.
 
Yeah, I think you only realize that after you start physically wiring. On the drawings it looks like you need separate coupling locations all over the place but the places you can tap off of are plentiful. I don't think I would double up in the crimps, but stacking them under a screw terminal works. You also have the extra blades on the contactor.
 
Thanks Bobby... I am beginning to see this. As I've been trying to visualize the wiring - and studying the schematic, I was getting the sense I just didn't need so much terminal block space. I found an older build thread that is nearly identical to mine so studied the pictures to get a better idea of how they had used the terminal blocks and routed wiring. I think now I can remove one of my smaller terminal blocks and all will be sweet. I am assuming you are talking about using the "hot side" spade connectors on the contactor for additional hots to power switches, etc. Makes sense as there would be 8 additional hots that could be utilized. My plan now is to use the 4 post terminal block (bridging as needed) for 1 hot side and the ground as these two won't be used much. Then my larger 6 post block for the other hot side (branching off it to feed components) and the common. I think this will give me all I need.

Thanks for the input! (and the cool element enclosure/false bottom I got from you!)

Don
 
Thanks "Chief!" It has been fun... re-learning to fabricate and weld after purchasing a "yard sale" MIG welder. Now puzzling over the wiring of the control panel. Should be up and running in a month (3 weeks traveling starting Tue or it would be earlier.)

Selling my old gas fired rig next weekend so no brewing until this setup is running! Just bottled 5 gallons of APA and 5 gallons of Rye IPA so I think I'm covered!

Don
Primary: nothing
Secondary: nothing
Bottled: Oatmeal Stout, Blonde IPA, APA and Rye IPA
 
I like the pully system.What did you use for the hoist? What is the upright thing on the right? Does the hoist spin so you can lower the bag away from the pot or are you going to reach over the pot?
 
"JR"

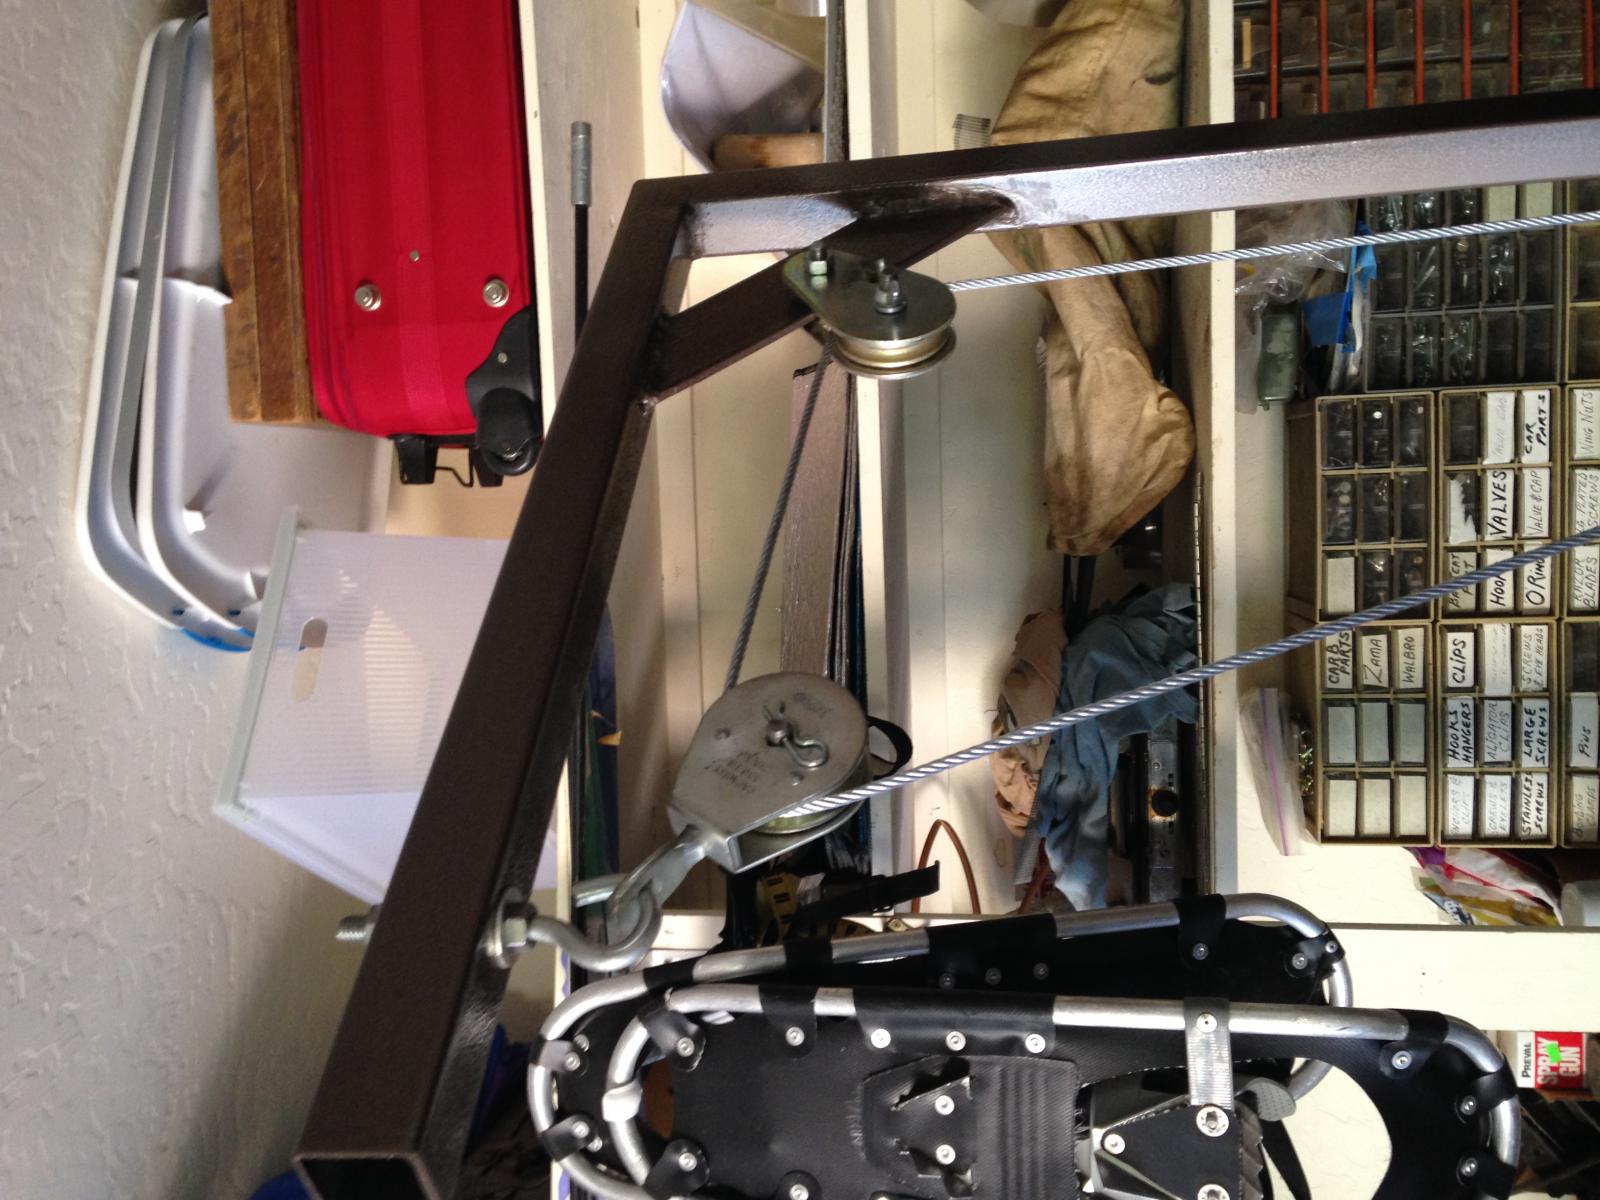
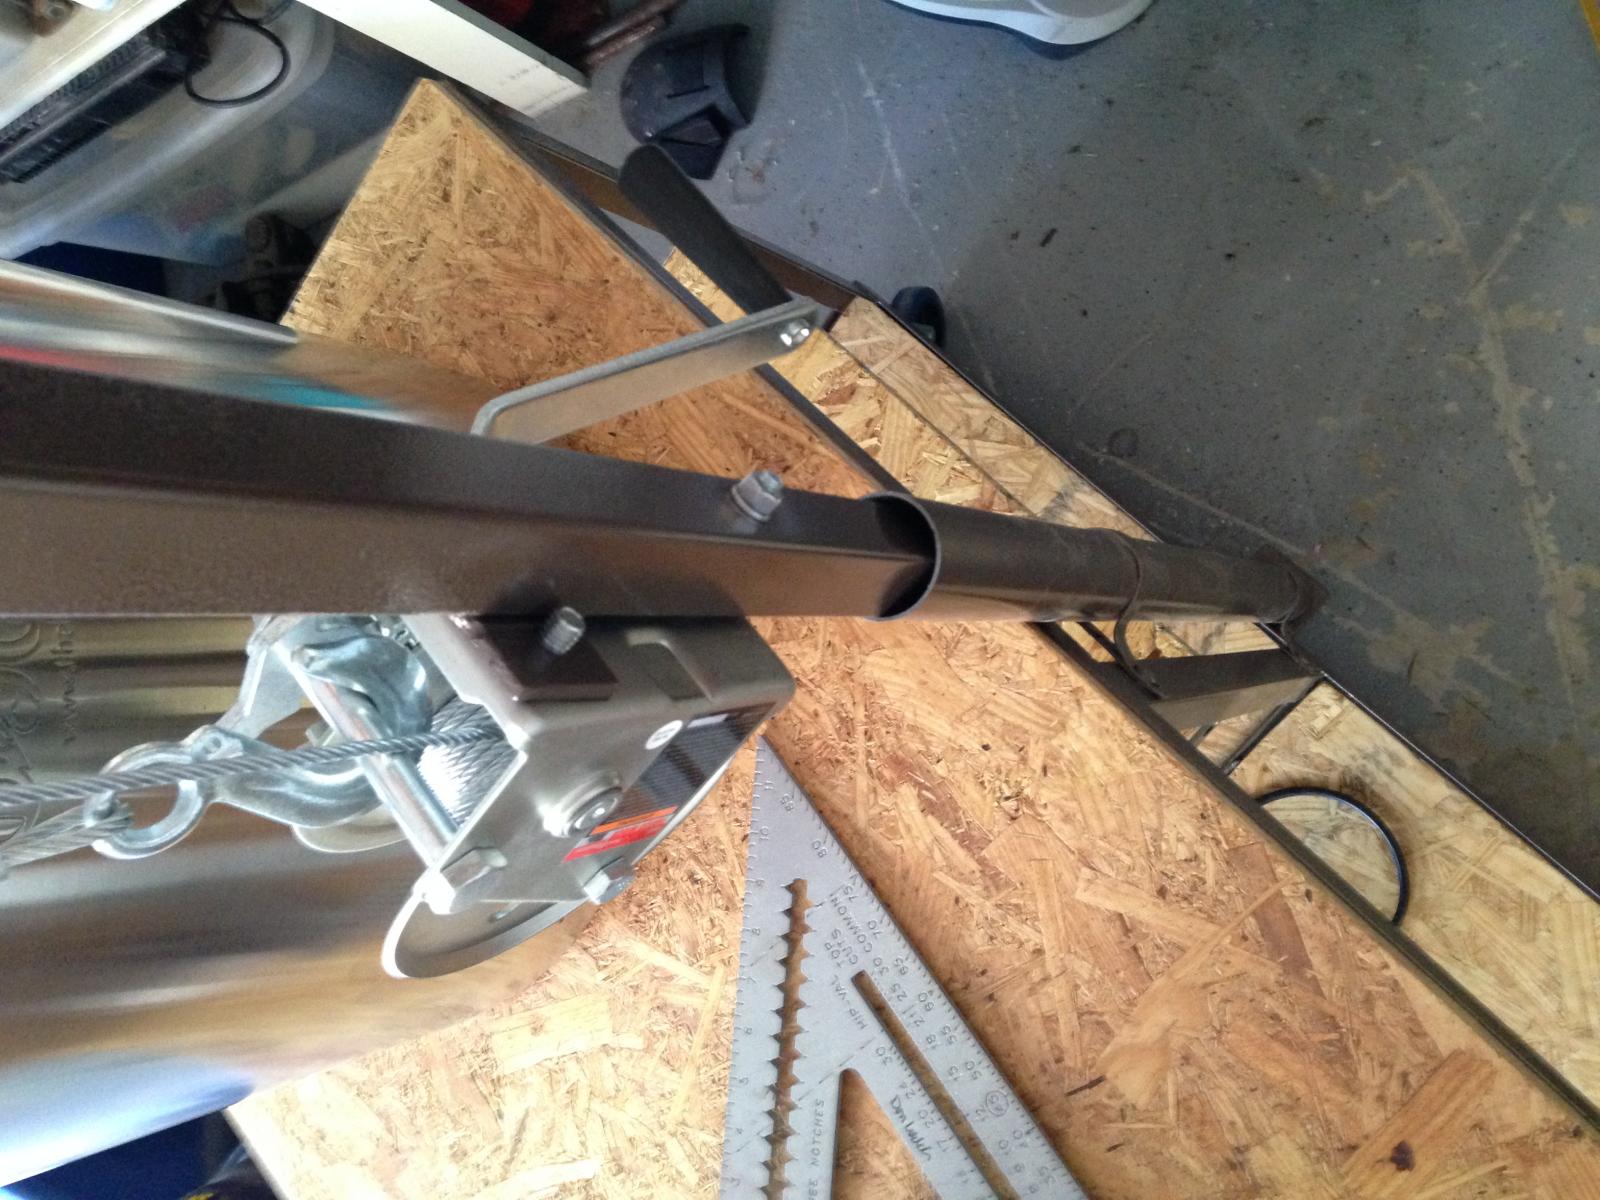
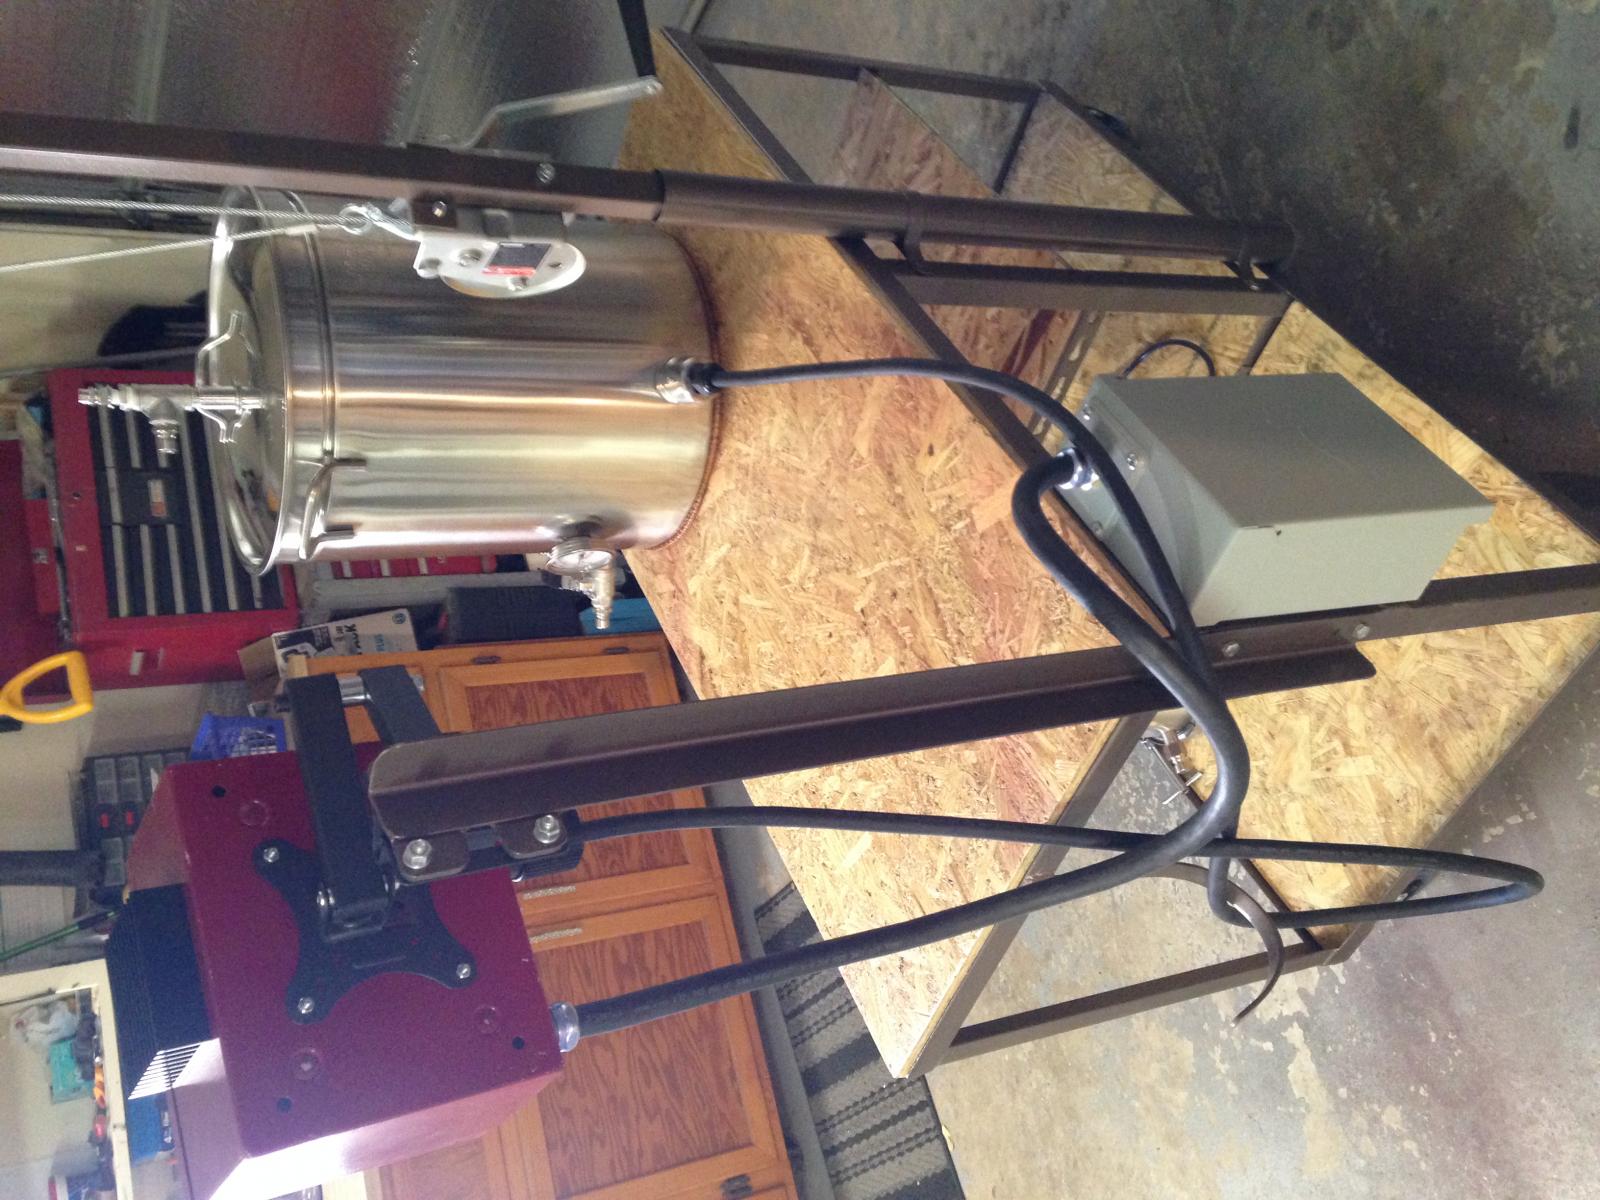
The lift system is built out of 1" square tubing with a brace on a 45 degree to help support the tubing when lifting a full bag of wet malt. The tubing is inside of a piece of chain link fence post (It is 1 5/8" I.D.)that sits on a piece of flat steel welded to the bottom rail. The 1" square tubing fits well in the fence post with just enough room it will pivot without too much play. The winch is a cheap $25 "boat trailer winch" from Harbor Freight. The 2 pulleys were "yard sale'd" for $2.00 - they would be around $6 each new.

The plan is to hoist the bag out, let it drain then swing the boom over and lower the bag into a bucket to carry out to the composter. I'm hoping it works as planned!

The only disadvantage I have found so far is the pot has to be moved toward the front of the deck so the winch handle will clear. Not a big deal as it can still set completely on the deck - it doesn't have to "hang over" the edge. I might try to shorten the handle if I feel it is worthwhile. (I should have mounted the winch system to the right of center instead of left of. I used the BIAB Stands plans...sort of...)

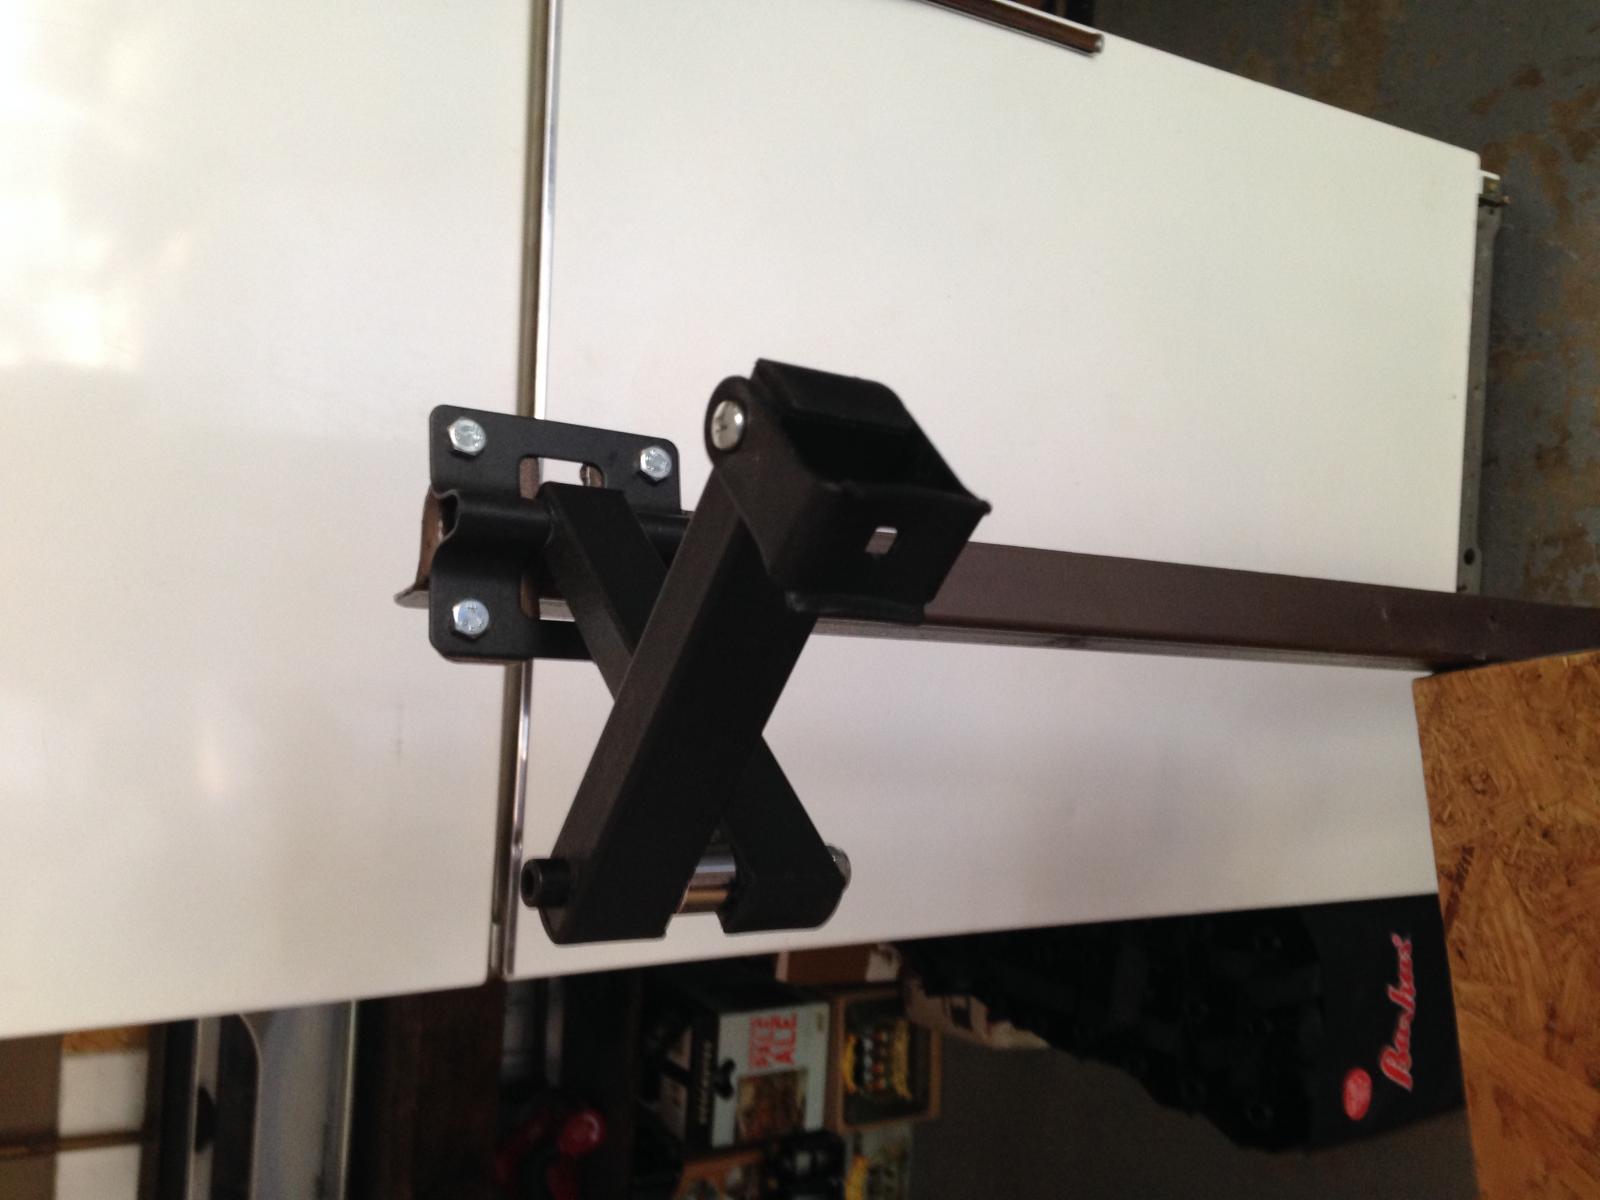
The upright "thing" on the right is the support for the control panel. It is just a piece of angle iron (bed frames!) for the upright then a small flat screen TV swinging wall mount for the actual control panel mount... will allow me to swing it in out of the way for storage then swing it out to a convenient angle when brewing.

These forums are great for gleaning information and ideas!! When I get a little ahead I will become a supporting member for sure!

Don
Primary: nothing
Secondary: nothing
Bottled: Oatmeal Stout, Blonde IPA, APA and Rye IPA
 
A couple more pictures...again hope they show up...upright. Hope this clears up "JR's" questions.

Don
Primary: nothing
Secondary: nothing
Bottled: Oatmeal Stout, Blonde IPA, APA and Rye IPA

IMG_1385.jpg


IMG_1386.jpg


IMG_1387.jpg


IMG_1388.jpg
 
Can anyone tell me how to load pics upright?

Photos taken with an iPhone in an upright position. All pictures were correctly orientated on my computer. All of them "tipped" to the left after loading... do i intentionally "tip" them to the right before loading?

Thanks, Don
Primary: nothing
Secondary: nothing
Bottled: Oatmeal Stout, Blonde IPA, APA and Rye IPA
 
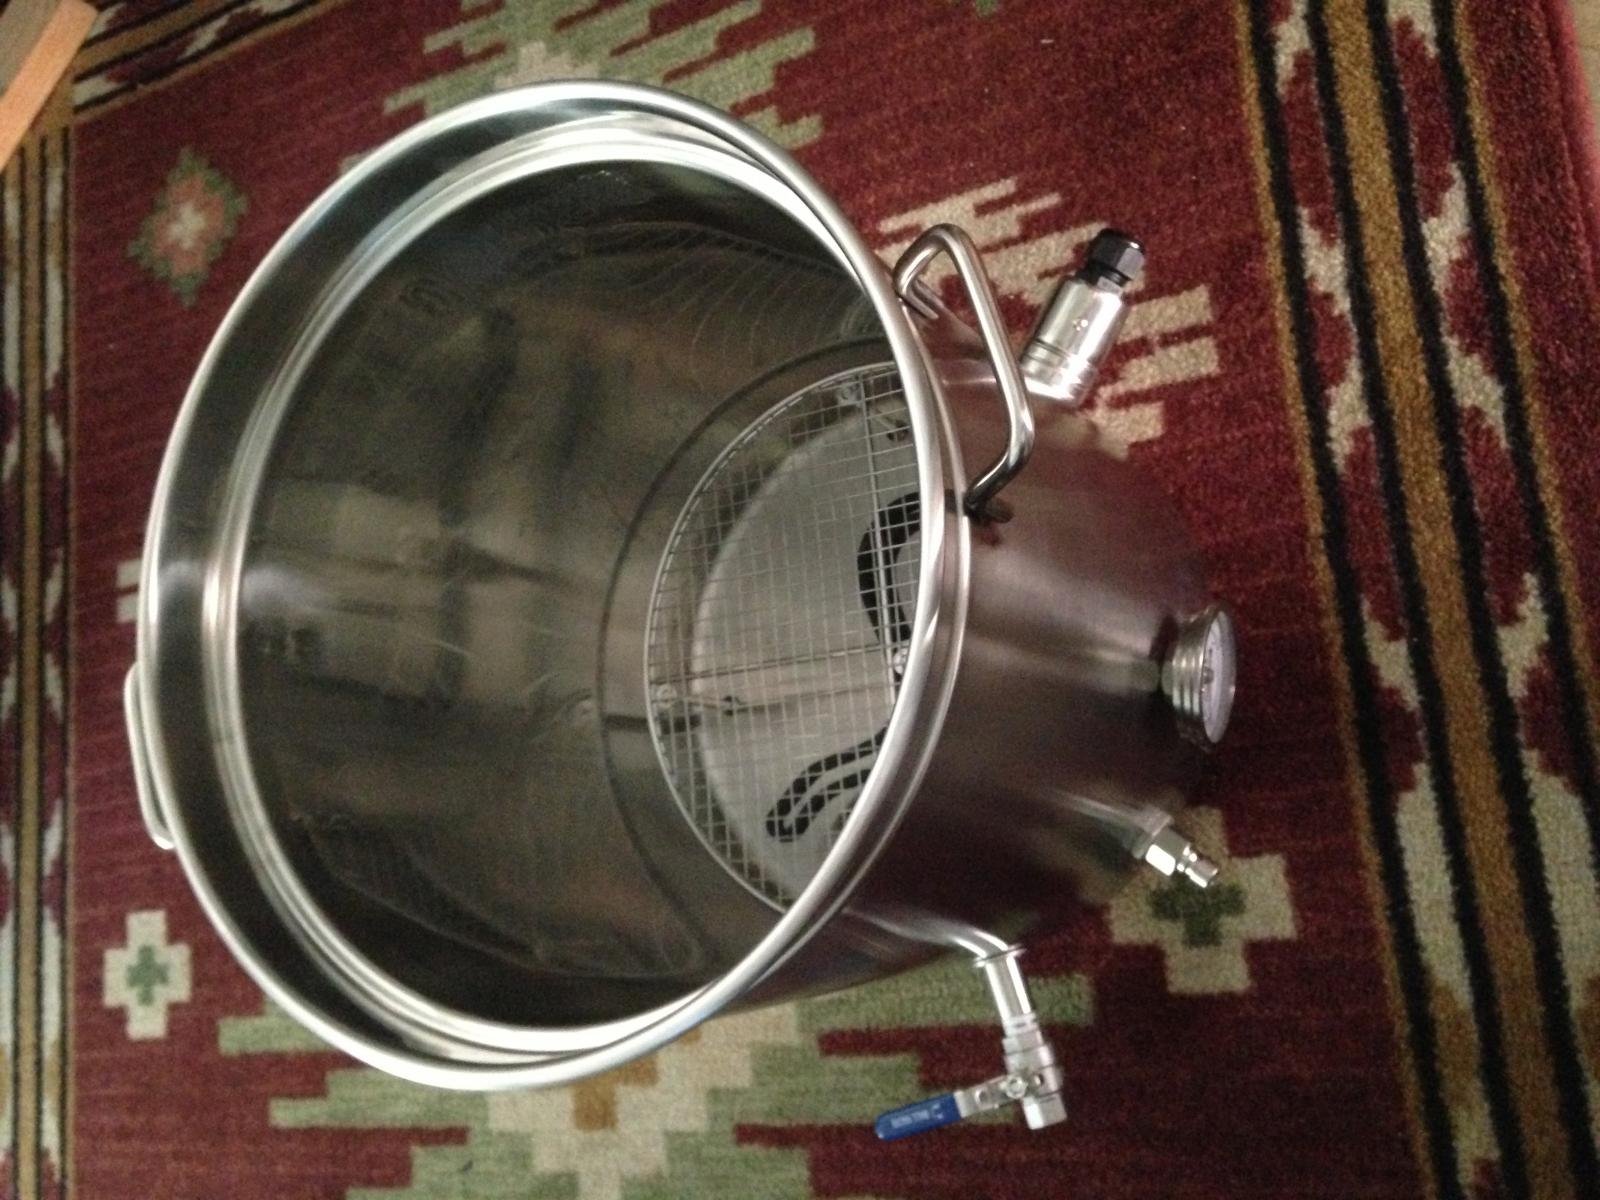
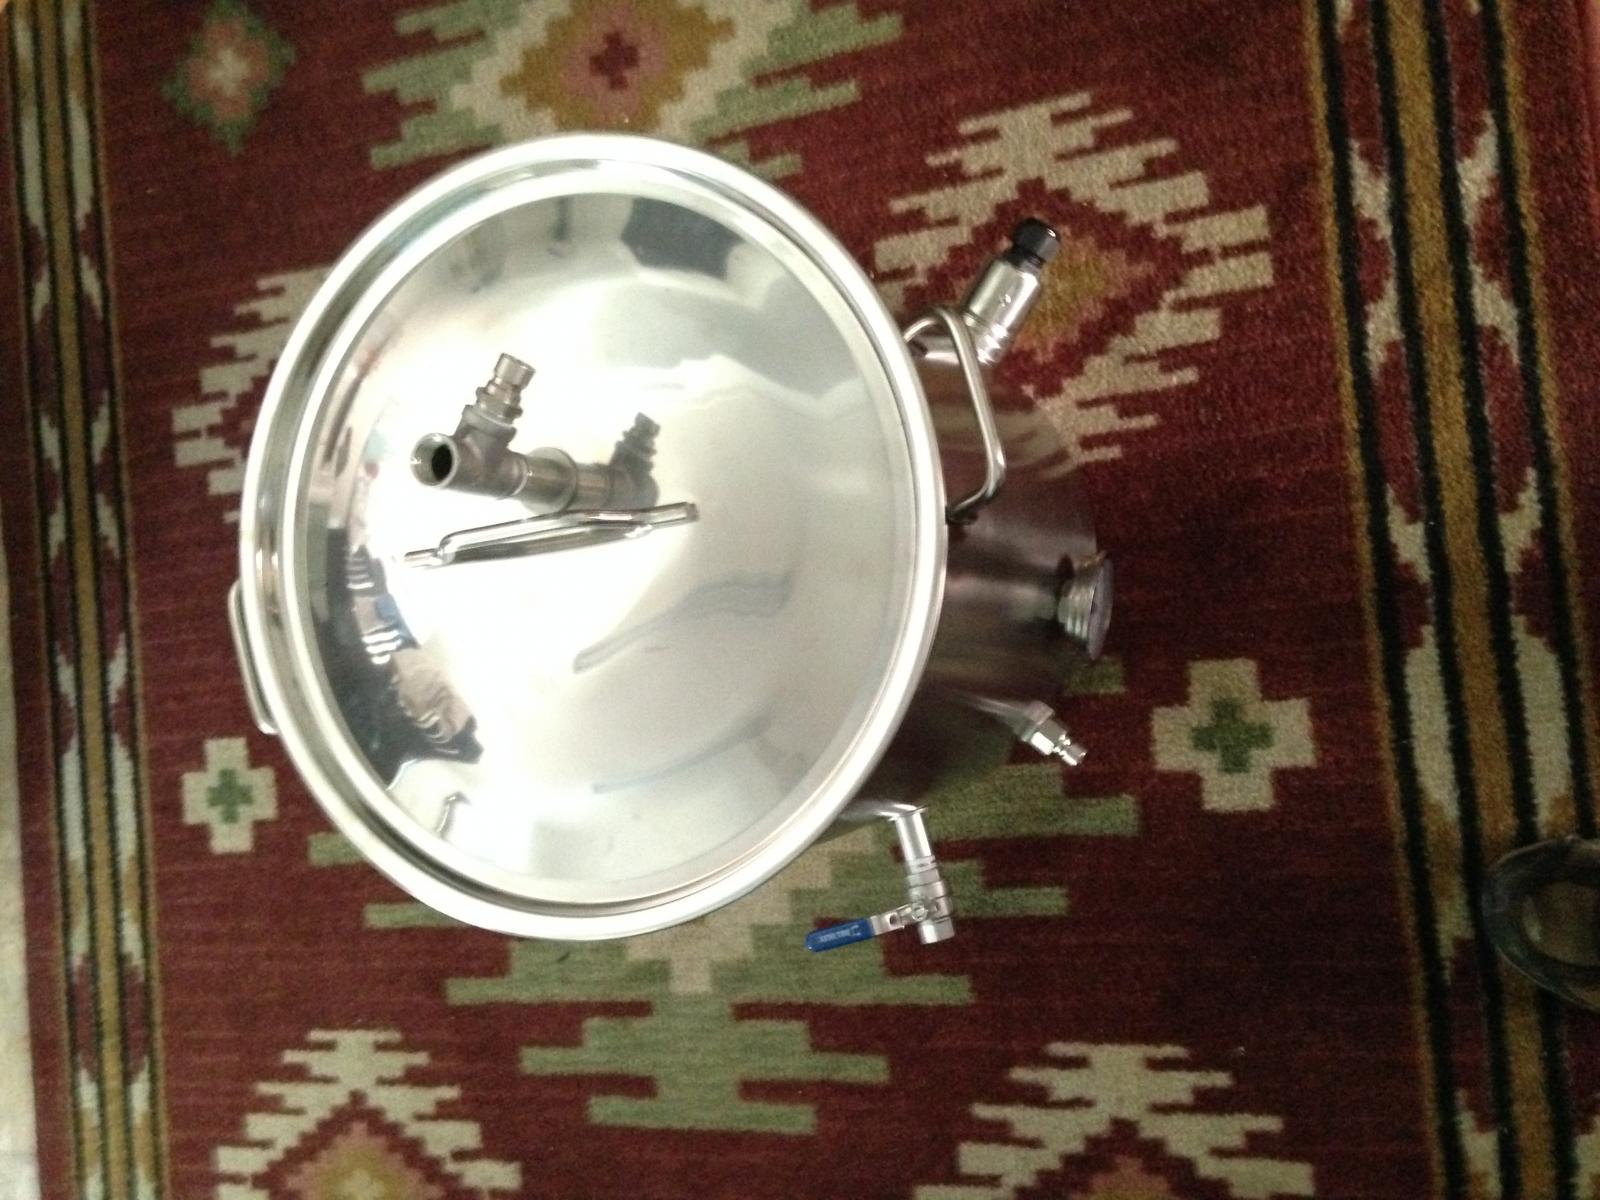
Got the kettle drilled and punched today and the hardware mostly installed. Not leak tested yet but my only worry is the quick connect onto the whirlpool weld-less bulkhead. The fitting bottoms out against the bulkhead nut before tightening sufficiently onto the threads. I think I can fabricate a silicone gasket if that is indeed a problem. Pics...

Don
Primary: nothing
Secondary: nothing
Bottled: Oatmeal Stout, Blonde IPA, APA and Rye IPA

IMG_1398.jpg


IMG_1399.jpg


IMG_1393.jpg
 
Realized I needed a valve on the whirlpool inlet... plus that bulkhead just isn't going to work. Needed a couple other fittings as well. Found a different style weldless bulkhead from another vendor... Also needed the correct 240v receptacle for the control panel. Orders in.. I hope I will have everything I need now - hardware wise anyway - to complete this build. Bleed'in money!!

Don
Primary: nothing
Secondary: nothing
Bottled: Oatmeal Stout, Blonde IPA, APA and Rye IPA
 
After a week and maybe 20-25 hours the wiring on the control panel is completed and checked against the schematic... I think it is all correct. The lid opens and closes with minimal resistance from all the wire and there seems to be little pressure against any of the lugs. The #6 wire lugs are installed on the terminal strips and are ready for the main lines to be fed in and hooked up. In retrospect I probably could have used #8 or #10 from the Spa Panel to the control box since the Spa panel is mounted on the brew stand less than 3' below the Control Panel... oh well.

I have the fittings for the brew kettle - the valve is installed for the whirlpool with the new bulkhead fitting. The 45 degree fitting is loosely threaded onto the main drain in the kettle... yet to tighten that down and add the pick-up tube.

Still need to: Leak test the kettle, Mount the Spa Panel, Mount the 4 prong twist-lock receptacle in the Spa Panel, Make up the cord and connect to the kettle element/install twist-lock plug on the other end that will connect to the Control Panel, Make up the #6/4 power cord that will connect the Spa Panel to the Drier receptacle - appropriate plugs on each end (which I still don't know if it is 3 prong or 4 prong...praying for 4!!)

Maybe another week at the rate I work!


Don
Primary: nothing
Secondary: nothing
Bottled: Oatmeal Stout, APA and Rye IPA
(Only 2 cases of homebrew left...gotta get this rig up and running!)

IMG_1459.jpg
 
Some new pictures... while I attempt to solve my power supply issues...

Don
Primary: nothing
Secondary: nothing
Bottled: Oatmeal Stout, APA and Rye IPA
(Only 2 cases of homebrew left...gotta get this rig up and running!)

IMG_1468.jpg


IMG_1467.jpg


IMG_1466.jpg
 
Got the kettle drilled and punched today and the hardware mostly installed. Not leak tested yet but my only worry is the quick connect onto the whirlpool weld-less bulkhead. The fitting bottoms out against the bulkhead nut before tightening sufficiently onto the threads. I think I can fabricate a silicone gasket if that is indeed a problem. Pics...

Don
Primary: nothing
Secondary: nothing
Bottled: Oatmeal Stout, Blonde IPA, APA and Rye IPA

Where did you get that grain bag support to keep the bag off the element? Thanks!
 
Thanks TexasWine! Yep that is where I got it!

Don
Primary: nothing
Secondary: nothing
Bottled: Oatmeal Stout, APA and Rye IPA
(Only 2 cases of homebrew left...gotta get this rig up and running!)
 
Update... got a TEMPORARY fix for my "need a neutral" problem sorted (pulled a neutral from a near-by receptacle). Leak test done...leaks fixed - gotta use the nut with the O'ring retaining groove if you want it to seal - so it is time to fire this puppy up!

Don
Primary: nothing
Secondary: nothing
Bottled: Oatmeal Stout, APA and Rye IPA
(Only 2 cases of homebrew left...gotta get this rig up and running!)
 
Happy dance! Took a bit of reading and Googling and more reading (this thing is way above my "geekness!") but I do believe it is working correctly. The auto-tune feature seemed on reliable, kept raising the temp above my set temp 2-3 degrees (I set at 155 and recirculated the water while it was on.)

Took a bit of fiddling to get the PID temp and my thermometers to all agree but I think I've got that set. The only head scratcher is that the PID showed the element firing but the temp didn't go above 199. The kettle mounted temp guage was reading about 200 and my digital guage was saying 203. YET....the kettle was doing a rolling boil! I'm at 5000' so water does boil at about 198 degrees here so I guess we're good to go.

I did figure out I need to move the RTD temp probe. Currently it is on the lid where the recirc water passes over it. That is great but when it is time to boil I willbtake the lid off and cease recirculation. I just figured out that the temp probe has to have water on it (?) to register/work... so the PID will function. I kept the recirc going as I heated to a boil this time. SO... I will move the tee/temp probe down putting it in the kettle drain - kettle side of the valve. Isee many others do this. I could add a second probe, but that can wait.

All and all I think it will be a great brewing rig! Looks like the first eBIAB beer will be next week.... thinking about doing a 10 Barrel Brewery Joe IPA clone. Gotta get some grain ordered!

Don
Primary: nothing
Secondary: nothing
Bottled: Oatmeal Stout, APA and Rye IPA
(Only 2 cases of homebrew left...gotta get this rig up and running!)
 
I did figure out I need to move the RTD temp probe. Currently it is on the lid where the recirc water passes over it. That is great but when it is time to boil I willbtake the lid off and cease recirculation. I just figured out that the temp probe has to have water on it (?) to register/work... so the PID will function. I kept the recirc going as I heated to a boil this time. SO... I will move the tee/temp probe down putting it in the kettle drain - kettle side of the valve. Isee many others do this. I could add a second probe, but that can wait.

Not sure what controller you got, but there should be no need to have the controller read the temperature when you're heating up to boil and boiling. Just put it in manual mode, dial it up to 100% until you get it to boil, then dial it back down to hit the boil off rate you're shooting for.

My temp probe is in my recirculation return (pump discharge). Works just fine there. Plus I can tell what temp the wort is exiting my plate chiller when it comes time to chill.
 
After a week and maybe 20-25 hours the wiring on the control panel is completed and checked against the schematic... I think it is all correct. The lid opens and closes with minimal resistance from all the wire and there seems to be little pressure against any of the lugs. The #6 wire lugs are installed on the terminal strips and are ready for the main lines to be fed in and hooked up. In retrospect I probably could have used #8 or #10 from the Spa Panel to the control box since the Spa panel is mounted on the brew stand less than 3' below the Control Panel... oh well.

I have the fittings for the brew kettle - the valve is installed for the whirlpool with the new bulkhead fitting. The 45 degree fitting is loosely threaded onto the main drain in the kettle... yet to tighten that down and add the pick-up tube.

Still need to: Leak test the kettle, Mount the Spa Panel, Mount the 4 prong twist-lock receptacle in the Spa Panel, Make up the cord and connect to the kettle element/install twist-lock plug on the other end that will connect to the Control Panel, Make up the #6/4 power cord that will connect the Spa Panel to the Drier receptacle - appropriate plugs on each end (which I still don't know if it is 3 prong or 4 prong...praying for 4!!)

Maybe another week at the rate I work!


Don
Primary: nothing
Secondary: nothing
Bottled: Oatmeal Stout, APA and Rye IPA
(Only 2 cases of homebrew left...gotta get this rig up and running!)

I was looking at your panel and it looks like your E-stop goes to ground. That is a problem with those diagrams. If you read further into the thread where you got the P-J's diagram it gets into the correct wiring for an E-stop. I'm doing this from on my phone, but I'll try to find it.
 
TexasWine... I'm using the Auberins 1/16 DIN PID Temperature Controller (For SSR)
Model: SYL-2352 - as called for in P-Js schematic.

So if I hear you right... you are saying that the PID WILL operate OK without the temp probe. I can just set the lid off and use "manual" mode for the boil (which I would anyway). I would lose the temperature reading on the PID... but it would still heat just fine...I would just have to use the temp gauge on my kettle...correct?

So you "pull" wort through your plate chiller? I use a counter-flow chiller but have always "pushed" the wort through...hmm. So far one pass through the CF will drop boiling wort to about 85 degrees so figured I would whirlpool the wort - (I have an Blichmann inline thermometer in that line) and then pump it to the fermenter when the proper temp is reached.

Do you have pictures up anywhere of your system?

Always looking for a better way!

Thanks!
Don
Primary: nothing
Secondary: nothing
Bottled: Oatmeal Stout, APA and Rye IPA
(Only 2 cases of homebrew left...gotta get this rig up and running!)
 
daveMN... from what I have read, that is exactly what P-J intended the E-stop to do thus tripping the GFCI and shutting "ALL" power to the control head. I've not seen where P-J changed this design...

Don
Primary: nothing
Secondary: nothing
Bottled: Oatmeal Stout, APA and Rye IPA
(Only 2 cases of homebrew left...gotta get this rig up and running!)
 
The post below is from the "Electrical Primer for Beginners" thread. Sorry, it's the best I can do.
Hope the back is feeling better Brewbeemer.

If any one is curious as to what a stop/start station and Emergency Stop looks like here you go...

The E stop button is normally closed, make sure it is the variety that need to be twisted or pulled to reset. Once it is pushed, the R1 circuit will open up causing Relay R1's coil to drop out, which will cause contactors CR1 and CR2 to drop out and kill power to their designated loads.

To start the system the momentary start button is pushed causing Relay R1 to energize. When Relay R1 energizes a set of it's normally open contacts (DPDT icecube relay) close bypassing the momentary start button causing Relay R1 to stay energized with the start button released. This is what is called a latching relay circuit with reset. The E-stop acts as the reset.

Further down you can see the second set of contacts on Relay R1 turns on the coils for contactors CR1 and CR2.
If more than one E-stop button is desired they need to be wired in series.

Mods, can we sticky this or make a link to it from the project list? It's only a few days old and buried 3 pages into the annuls of DIY. I don't mind writing all this stuff up but it is going to take a lot of time and I would hate to see it forgotten and serve help to no one at the bottom of the heap.

* I've attached a picture of an operator interface to run a 1000Hp motor speed controller. You can see the System Start and E-Stop in the upper right hand corner. When the System is on the start button illuminates green as an indicator. Smacking the red mushroom will kill all control power in the panel.
 
daveMN... I just did some searching on the forms for this... it is controversial for sure! From what I read, it works but some say it is not proper to trip the GFCI in this manner. Is there a simple re-wire that accomplishes the same thing - i.e. kills all power to the control head?

I'm not an electrician so pictures please!

Thanks!
Don
Primary: nothing
Secondary: nothing
Bottled: Oatmeal Stout, APA and Rye IPA
(Only 2 cases of homebrew left...gotta get this rig up and running!)
 
TexasWine... I'm using the Auberins 1/16 DIN PID Temperature Controller (For SSR)
Model: SYL-2352 - as called for in P-Js schematic.

So if I hear you right... you are saying that the PID WILL operate OK without the temp probe. I can just set the lid off and use "manual" mode for the boil (which I would anyway). I would lose the temperature reading on the PID... but it would still heat just fine...I would just have to use the temp gauge on my kettle...correct?

Yes. But there's really no need to know what the temp is as you're ramping up to a boil. It's either boiling or not. No need for a kettle thermometer really.

So you "pull" wort through your plate chiller? I use a counter-flow chiller but have always "pushed" the wort through...hmm.

No, my chiller is on the pump discharge. Pump>chiller>back to kettle
 
daveMN... I just did some searching on the forms for this... it is controversial for sure! From what I read, it works but some say it is not proper to trip the GFCI in this manner. Is there a simple re-wire that accomplishes the same thing - i.e. kills all power to the control head?

I'm not an electrician so pictures please!

Thanks!
Don
Primary: nothing
Secondary: nothing
Bottled: Oatmeal Stout, APA and Rye IPA
(Only 2 cases of homebrew left...gotta get this rig up and running!)

Do you have a diagram of your panel wiring? I just have a switch to my element instead of an E-stop. I don't have my pump wired into the panel yet. You could just eliminate the E-stop if you have a switch to the element.
Here's a pic of the inside of my panel. I have a DPST switch to my element. I bought it from Auberins.com. this one is an illuminated switch.
 
daveMN... It doesn't look like you are using a contactor to energize the element. Your switch is rated for 10A how is that going to work?

Yes I do have a switch to turn the element on or off. The schematic I used is in this post: https://www.homebrewtalk.com/showthread.php?t=584489 (I got schooled on electrical theory where an element/resistor is in the loop.)

I appreciate your concern for my E-Stop wiring - to ground...I really do. This E-Stop design has been used by many folks on this forum without incident to my knowledge. If you look at the schematic you will see 2 - 1K/1watt resistors between the E-Stop and ground. These will reduce the amperage going to ground to about 0.06 amps (if the calculator I used is correct and I think it is.) So even though it is wired to ground the chance of ill effects from this is kept to a minimum. I think P-J intentionally wanted to only send enough amperage through to trip the GFCI... not enough to cause damage or shock.

A search of the forums showed that when P-J was questioned, he said it was intentional so that ALL power is cut off to the control panel... not just power to the element.

Thanks again!

Don
Primary: nothing
Secondary: nothing
Bottled: Oatmeal Stout, APA and Rye IPA
(Less than 2 cases of homebrew left...gotta get this rig up and running!)
 
Well fired up the rig again today to take another stab at the auto tune. Set my target temp at 154, turned on the element then right away put it into auto tune mode. Went for 1 hour and 3 minutes before the AT/temperature quit flashing. I have let it go now for another 30 minutes and is doing great holding the temp. The element will kick on and briefly it will hit 155 then within a minute or two it is back to 154. I have the recirculation going open about 1/3rd which is what I expect to run at when mashing.

Only issue is the PID temp and my digital and kettle gauges don't agree. The kettle gauge is maybe .3 degrees hotter than the digital but the PID is running 1.5ish cooler. I had went the wrong direction when I calibrated it before so after the auto tune was done I reset the calibration up 2 degrees. Hasn't seemed to affect it. Will the PID have to be turned off and back on before the adjustment takes affect?

Thanks.
Don
 
Well right or wrong I think I answered this question -

I reset the calibration up 2 degrees. Hasn't seemed to affect it. Will the PID have to be turned off and back on before the adjustment takes affect?

I turned off the PID/element after it had maintained mash temp for 30 minutes then ran the water through my CF chiller , whirl-pooling it until the kettle reached about 95 degrees. Turned the PID back on and let it bring the water back up to mash temp... this time it was nearly spot on! Maybe .3 - .6 degrees cooler than the water in the kettle read on the digital thermometer. Close enough!

After holding mash temp for 20 minutes I switched to manual @ 100% and brought the kettle to a boil (I had 7 gallons in it) took approx 10 minutes - impressed! That usually took 20 minutes with my 40,000btu burner. After reaching a boil I re-set the PID to 65% of power and let it cycle on and off for another 10 minutes.

I'm really impressed with this electric kettle rig! Gonna brew Friday so we will see how it goes with wort in there.

That brings up a question... since I tuned the PID to regular water, what can I expect with wort/mashing as far as holding my intended temps? I know from experience that my CF chiller with approximately the same flows - wort and cooling water - will chill tap water 6-10 degrees cooler than wort with one pass.

Thanks! I value this forum!!
Don
Primary: nothing
Secondary: nothing
Bottled: Oatmeal Stout, APA and Rye IPA
(Less than 2 cases of homebrew left...gotta get this rig up and running!)
 
daveMN... It doesn't look like you are using a contactor to energize the element. Your switch is rated for 10A how is that going to work?

Yes I do have a switch to turn the element on or off. The schematic I used is in this post: https://www.homebrewtalk.com/showthread.php?t=584489 (I got schooled on electrical theory where an element/resistor is in the loop.)

I appreciate your concern for my E-Stop wiring - to ground...I really do. This E-Stop design has been used by many folks on this forum without incident to my knowledge. If you look at the schematic you will see 2 - 1K/1watt resistors between the E-Stop and ground. These will reduce the amperage going to ground to about 0.06 amps (if the calculator I used is correct and I think it is.) So even though it is wired to ground the chance of ill effects from this is kept to a minimum. I think P-J intentionally wanted to only send enough amperage through to trip the GFCI... not enough to cause damage or shock.

A search of the forums showed that when P-J was questioned, he said it was intentional so that ALL power is cut off to the control panel... not just power to the element.

You are correct regarding my element switch. No contactor, at least, not yet... I found out the hard way that the 10A switch didn't work out so well on yesterday's brew day.
Back to the drawing board.

From what I read, the E-stop to ground isn't technically how an industrial control would be wired but, like you said, people do it. Just be sure to test it before brew day. Looks like you're getting close!
 
Back
Top