• Please visit and share your knowledge at our sister communities:
  • If you have not, please join our official Homebrewing Facebook Group!

    Homebrewing Facebook Group

Need Suggestions for a new 55 gallon system

Homebrew Talk

Help Support Homebrew Talk:

This site may earn a commission from merchant affiliate links, including eBay, Amazon, and others.
Originally Posted by kladue
Power the cooling unit and pump continously and use solenoid valve to divert coolant to fermenter.

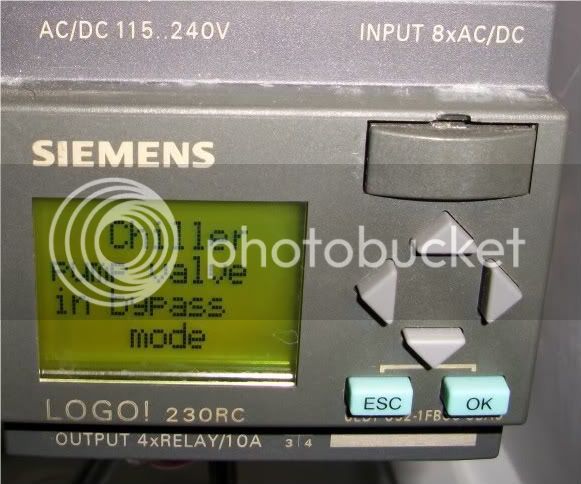
My internal cooling set up works with a continuous running pump, except I installed an automatic motorized bypass valve to protect the pump when none of the solenoid valves are energized.
100_0293-1.jpg


Cheers,
ClaudiusB
 
My internal cooling set up works with a continuous running pump, except I installed an automatic motorized bypass valve to protect the pump when none of the solenoid valves are energized.
100_0293-1.jpg


Cheers,
ClaudiusB

I saw one of those LOGO controllers the other day on eBay - It was cheap!
I just didn't know anything about it...

Is it hard to program?
 
I saw one of those LOGO controllers the other day on eBay - It was cheap!
I just didn't know anything about it...

Is it hard to program?
SweetSounds as long the software is version 5 or 6 no problem.
The old software can be tricky.
My old setup was programmed with version 2.

Cheers,
ClaudiusB
 
I went to the post office today and to my surprise, this is what I found. I was not expecting these to come by USPS. I was expecting freight or ups ground.

Well now I guess it is time to get to work. I ordered all my fittings today plus extra ones to make greenmonti's "keg tool". I am excited to get started with this project. I will create a build thread when I get a little further into the build.

IMG_08871.JPG
 
I have concerns that the heat transfer of copper coils wraped around plastic will not be sufficient. That plastic will hold a decent temp. gradient. Plus, you won't have good contact with plastic. Even if the tank was SS, I think you would need to braze the copper on, or make some other thermal connection.
 
I have concerns that the heat transfer of copper coils wraped around plastic will not be sufficient. That plastic will hold a decent temp. gradient. Plus, you won't have good contact with plastic. Even if the tank was SS, I think you would need to braze the copper on, or make some other thermal connection.

I agree 100% our 42 gallon SS Blichmann's temp will go up at least 7 degrees F with only 35 gallons. you have to be looking at 2-3 times that for 100 gallons. And you are in plastic that will not shed the heat as well as SS. I think you must put something in the conical to take some of that heat out.
 
That is something to consider. I am going to start looking into that in the next few weeks. I may have to ferment in smaller tanks and combine them into the 100 gallon tank for conditioning and tax measurement.

I would love to buy jacketed tanks but I don't think that fits into the plan for round one. Round two of investment and expansion will have us buying a commercial system and tanks. We are trying to get up and running and prove we can be profitable then go back to our investors with a stronger plan. We have a deal on the table for a building downtown. We need to pull the trigger by next week if we want to secure it. So my mind has been in other places the last 48 hours.
 
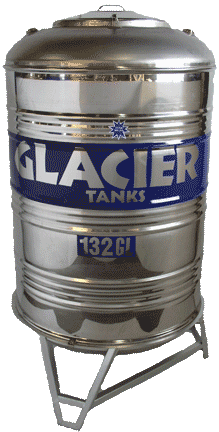
What about this? http://www.glaciertanks.com/Vertical%20Tanks.htm

vertical-tank.gif


Do you think I would have an easier time maintaining temps in this? I just got an email from the company about their Ph level warning on their site. I saw it posted in another thread so I emailed them. This is what they said:


The PH requirements was given to us by our previous manufacture of our tanks for warranty. Last year we switched to a manufacturer that does not have a PH requirement and failed to update our website with that information.

We began selling our tanks for the primary use of water storage. However In the past year they have been used for primary and secondary fermentation of wine with no problem. As well as manufacturing and storing of different types of distilled alcohols with no problem. At this time I have not heard of our tanks being used for beer.

Our tanks have a rubber o ring seal on all bulkheads. We also use FDA approved Dow corning 703 Silicon on all weld joints as a secondary seal

Thank you
Nick Roelle
Glacier Tanks
503-253-5919
Portland, Oregon

This would probably fit into my budget if I can make them work.
 
Three 42 gallon (you can ferment 35-38 gallons max) Blichmann conicals (or other maker) on legs and casters would give you the ability to fill that 100 gallon conical as a secondary. As a primary you would have to keep more head space. If you started with 35 gallons you probably could transfer 32 –33 to your secondary something like that. Depending upon your beer you could easily brew your 100 gallons every week.
 
+1 on the tank. The round one one their site looks awesome....looks kinda like sputnik...too bad your tap room isnt space themed....
 
I think you're right - However, you would have to vary the temperature of the room as the fermentation progresses... Powerful active fermentation could last a day or 2 where the yeast is putting off a lot of heat, but after that you would then increase the temperature of the room to keep the core temp of the fermenter stable.

That's all fine and good, until you add 5 more tanks at different stages of fermentation ;) That will complicate using the room temperature to control liquid temperature.

Again, It's not a deal breaker, just something to be aware of...

On this scale, it my be practical to use a small glycol system and some sort of immersion chiller, or submersible plate chiller like they use for wine.
Because, if you're after repeatability, fermentation temperature for any single recipe needs to be very close to the batch before.
OTOH, I doubt 1 or 2 fermenters out of 6 in a climate controlled room will pull the temperature of the room (And non-active fermenters) up my any degree that the AC units couldn't handle...

But hey, I have no practical knowledge. Just trying to think through it. :tank:

More actually helps keep the situation stable since you have a higher thermal mass to move.
 
Glacier Tanks have arrived. At first look everything looks great. I think they will work fine. I do have a few things I need to do before they get used. The lid does not seem to be very tight fitting. It has no gasket so I think I am going to buy a sheet of silicon and make a gasket. Then I need to buy some fittings and they should be all set.

I decided to go with a chiller for fermentation. I bought 50' stainless immersion chillers for each fermenter. I am going to attach them through the lid so they can be pulled out. I am going to run temp controllers and thermometers to some solenoid valves for cooling.

If I ever get a moment free I am going to do a build thread of the brewery. You can see the progress on our facebook page if you are interested.

http://www.facebook.com/#!/bonfirebrewing?ref=ts
 
Do you knnow how many BTU's you've got going to each? Roughly, anyway. And what about the chiller-- what's the spec or brand-- thanks
 
Sorry I dont have the details on any of that yet. I am building it all from scratch. The chiller will be a pump and some temp controllers that are connected to selenoid valves. I will let you know more when it is all built.
 
Congratulations on your awesome taproom!!!
Your design is greatly influencing my design.
I know you're busy with your new business, but whenever you find the time could you please step through your brew process? It's two vessel brewing, right? So, no sparge?
 
I do sparge. I stagger the brews by about twenty minutes for several reasons, one is for sparging and the other is for cooling through my heat exchanger. While both batches are mashing, I fill one boil kettle up with water and heat. The other boil kettle is about half full so I batch sparge with the remaining water in the half full kettle. Then I start transferring the wort from that mashtun back to the boil kettle. When the level gets about an inch above the grains I start fly sparging with the water from the other boil kettle. When the kettle is full, I keep filling the first mash tun with the remaining water in the second boil kettle. Start transferring the second mash tun to the second boil kettle and again when it gets about an inch from the grains I start sparging with the remaining water in the first mashtun. It works pretty well. I end up with about 78% efficiency.
 
You process is quite unique. I like it and hope to emulate it. However, I do not think I understand completely though, so let’s see if I can figure this out…

1. You have MLT1, MLT2, BK1, and BK2.
2. The mash in MLT1 is started 20 minutes before the mash in MLT2.
3. BK1 is half full with heated water. BK2 is full with heated water.
4. Once the mash in MLT1 is finished, do you mash out MLT1 with the heated water (around 185?) from BK1?
5. Let’s assume you do. After you get all the water out of BK1, you begin draining MLT1 into BK1?
6. Once it drains enough, you begin flysparging MLT1 with heated water from BK2.
7. During the flysparging of MLT1, BK1 will fill up.
8. After BK1 is full, you add the remaining sparge water from BK2 into MLT1.
9. You begin to drain MLT2 into BK2.
10. Once it drains enough, you begin flysparging MLT2 with water from MLT1.
11. Finally, MLT2 completely drains into BK2.

I’m confused on steps 4 and 5. The rest I think I understand. A picture or drawing could really help with explaining your process.

Do you have heater elements in the MLTs? How many elements do you have in the BKs? Three?

I look forward to visiting Bonfire Brewing next time I go snowboarding! Do you ride? I’m your 420th fan on FB, BTW. :D
 
Back
Top