Need info on DIY tower.

Homebrew Talk - Beer, Wine, Mead, & Cider Brewing Discussion Forum

Help Support Homebrew Talk - Beer, Wine, Mead, & Cider Brewing Discussion Forum:

This site may earn a commission from merchant affiliate links, including eBay, Amazon, and others.

Grimsawyer

Well-Known Member
Joined
Mar 28, 2006
Messages
877
Reaction score
10
Location
Salem, OR
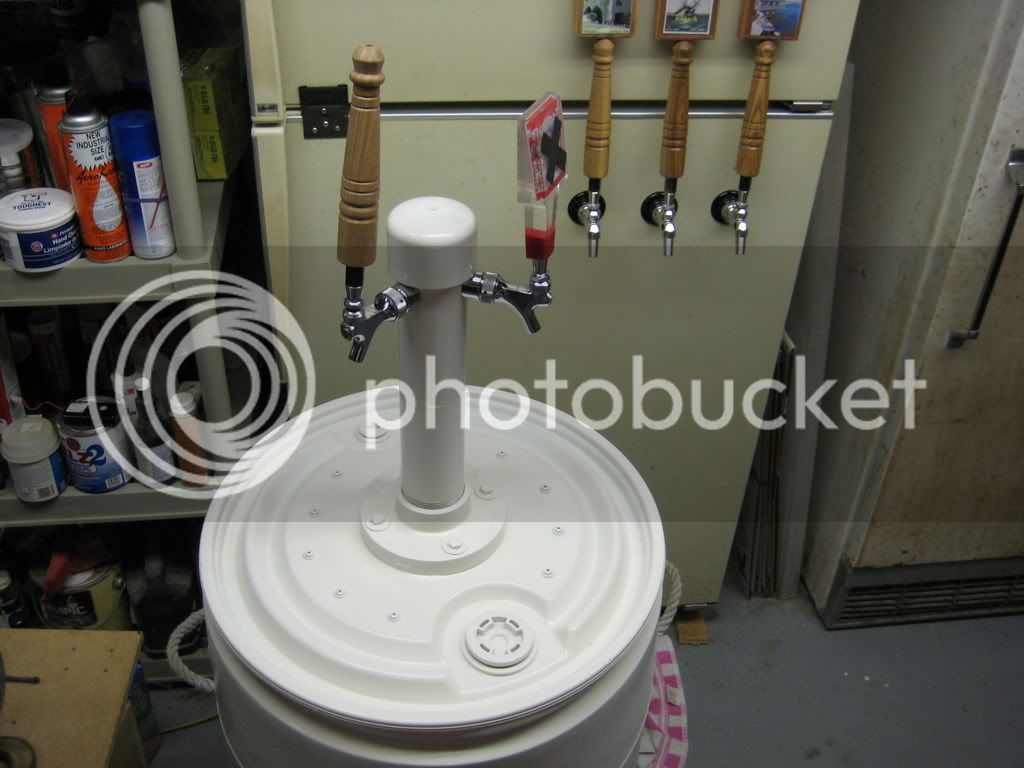
I've been given the task of figuring out which fridge would make the best 2 corny kegerator(sanyo 4912) and how best to add taps to it. I've actually put alot of time into searching and clicking everything I can find on the subject and can't find anything on DIY tap towers. I saw Biermuncher's pvc tower but can't find a thread on what materials needed, where to get the elbow shanks/ etc. I Don't know what the individual parts are called. I know what the shank and the faucet are but not so sure on how many and what washers do you need. Is there some wierd spacer you are going to need to get the taps to form to the convex shape on the outside of a 3" diameter tower? What diameter of PVC is needed to make aforementioned spacers? If i go with a ventmatic or perlick faucet is there a different elbowed shank I need or does it matter? What parts are needed to make a metal tap tower? I can find plastic/pvc parts (pvc toilet flange, etc) and paint but I can't find the shiney metal parts in the hardware store to duplicate it in chrome. I can find galvanized steel but I want it nice shiney. Any help on this topic will benefit someone who wants to drink more hand crafted NON BMC beer! All of that said I've seen some great ideas on insulating towers and using a copper pipe to transfer cold to the top as well as foam insulation added to the tower filling up the space. All great ideas that I can't wait to employ, just need to get some info on parts so I can build a tower in the first place. :cross:
 
I made a tower following Biermuncher's outline, with a couple of modifications, so I'll post what I did:

The tower:
1 PVC Toilette flange (for a 3" pipe)
1 2' length of 3" diameter PVC
1 PVC cap (for a 3" pipe)
1 can spray-paint
4 2.5" bolts, washers, nuts

Beer HW:
10' beer line (LHBS, or various)
Clamps for beer line (mcmaster, the pinch ones are great, but worm-drive should work)
2 beer-line to 45deg flare fittings (mcmaster)
2 elbow shanks (LHBS, or micromatic)
2 taps (I like my perlicks, but haven't tried standard)

Optional (no-fan cooling rig):
1 can spray-foam insulation
4' 1/2" ID Copper tube

(The elbow shanks are special shanks designed for a tower. They have a 90deg bend in the tube, and are cut to fit a curved surface (seems to be set for a 2.5" diameter curvature, but I thought that the 3" was a better fit than 2" when I did a dry-fit).

Assembly:

A) Cut your PVC to length, use a 7/8" hole-saw to cut holes for your shanks, and spray-paint the PVC black.

B) If using no-fan cooling option:
B.1) Cut 2 lengths of 1/2" copper tube to fit from about 3-4" below tap holes, to about 6" past the end of the tower (fridge end). The copper will be cooled from the fridge, and you will run beer-line inside, thus keeping the beer-line cold without needing a fan.
B.2) Wrap a random food can in tin foil and insert into drilled end of the tower pipe (provides a buffer for the foam insulation),
B.3) cap one end of each copper pipe in aluminum foil, and put pipes in tower (capped end inside). Use blocks, string, etc. to center the copper pipe in the tower.
B.4) Spray the insulation into the gap between pipe and the PVC. /DO NOT TOUCH OR MOVE/ overnight. (If you do, the not-yet-dry insulation will collapse, giving you endless grief). And the part on the inside, away from the air, takes a long time to dry. I'm sure you know how I figgured this out. ;)
B.5) Remove tin-can, and use a dowel or other long object to break through tin-foil in pipe.

C) Attach beer-line to shanks, clamp line to shanks, and use locking nuts to attach shanks to tower. (If using optional cooling option, run 1 length of line through each copper pipe) Attach hose-to-flare fittings and clamp them to the beer line.

D) Drill hole in fridge, use bolts to mount flange to fridge.

E) Cut hole in plastic lid and re-attach.

F) Put tower in flange, put cap on tower.

G) mount taps on shanks, connect to kegs

H) This is the hardest part: Pour about 1" of foam from each faucet, then leave to cool so that you stop pouring foam. Alternative, pull a pint or two of foam, and then the beer will have cooled everything down (assuming your beer was cold before you started).

Hopefully that helps... let me know if you have any questions!
 
I made a tower following Biermuncher's outline, with a couple of modifications, so I'll post what I did:

The tower:
1 PVC Toilette flange (for a 3" pipe)
1 2' length of 3" diameter PVC
1 PVC cap (for a 3" pipe)
1 can spray-paint
4 2.5" bolts, washers, nuts

Beer HW:
10' beer line (LHBS, or various)
Clamps for beer line (mcmaster, the pinch ones are great, but worm-drive should work)
2 beer-line to 45deg flare fittings (mcmaster)
2 elbow shanks (LHBS, or micromatic)
2 taps (I like my perlicks, but haven't tried standard)

Optional (no-fan cooling rig):
1 can spray-foam insulation
4' 1/2" ID Copper tube

(The elbow shanks are special shanks designed for a tower. They have a 90deg bend in the tube, and are cut to fit a curved surface (seems to be set for a 2.5" diameter curvature, but I thought that the 3" was a better fit than 2" when I did a dry-fit).

Assembly:

A) Cut your PVC to length, use a 7/8" hole-saw to cut holes for your shanks, and spray-paint the PVC black.

B) If using no-fan cooling option:
B.1) Cut 2 lengths of PVC to fit from about 3-4" below tap holes, to about 6" past the end of the tower (fridge end). The copper will be cooled from the fridge, and you will run beer-line inside, thus keeping the beer-line cold without needing a fan.
B.2) Wrap a random food can in tin foil and insert into drilled end of the tower pipe (provides a buffer for the foam insulation),
B.3) cap one end of the copper pipe in aluminum foil, and put pipes in tower (capped end inside). Use blocks, string, etc. to center the copper pipe in the tower.
B.4) Spray the insulation into the gap between pipe and the PVC. /DO NOT TOUCH OR MOVE/ overnight. (If you do, the not-yet-dry insulation will collapse, giving you endless grief). And the part on the inside, away from the air, takes a long time to dry. I'm sure you know how I figgured this out. ;)
B.5) Remove tin-can, and use a dowel or other long object to break through tin-foil in pipe.

C) Attach beer-line to shanks, clamp line to shanks, and use locking nuts to attach shanks to tower. (If using optional cooling option, run 1 length of line through each copper pipe) Attach hose-to-flare fittings and clamp them to the beer line.

D) Drill hole in fridge, use bolts to mount flange to fridge.

E) Cut hole in plastic lid and re-attach.

F) Put tower in flange, put cap on tower.

G) mount taps on shanks, connect to kegs

H) This is the hardest part: Pour about 1" of foam from each faucet, then leave to cool so that you stop pouring foam. Alternative, pull a pint or two of foam, and then the beer will have cooled everything down (assuming your beer was cold before you started).

Hopefully that helps... let me know if you have any questions!

Shall I call you Lord or Sir? THANK YOU! So the elbow shanks are already shaped to fit a 3" diameter? Do they come with all parts necessary to attach them to the tower(lock nuts, washers, etc...)? And thank you again!
 
I share what I learn... as do most homebrewers. Just build your tower and enjoy! I did edit my post to correct step B.1 to read cutting /copper/ tube (not pvc) for the cooling. My shanks seemed to be curved for about a 2.5" diameter, but the 3" worked best. They come with the proper nuts, locking rings, and everything, so you don't need anything else.
 
Like this?

IMG_0168.jpg
 
Back
Top