My Keezer Build: Ode to Jester and Snowveil

Homebrew Talk - Beer, Wine, Mead, & Cider Brewing Discussion Forum

Help Support Homebrew Talk - Beer, Wine, Mead, & Cider Brewing Discussion Forum:

This site may earn a commission from merchant affiliate links, including eBay, Amazon, and others.

anderik1

Member
Joined
Nov 30, 2013
Messages
17
Reaction score
3
I started homebrewing about 5 months ago and based on my well established hate of sanitizing wine bottles, I knew beer bottles would only be worse. A great Craigslist find on corny kegs, a whole bunch of money, and a month worth of nights here and weekends there, I finally finished my keezer. I looked through nearly all of the keezers / kegerators and a lot of the build threads in designing and building mine, so I wanted to contribute back with pictures and lessons I learned along the way. I probably would have done a few small things differently, but all in all, I'm extremely pleased with the results considering this was my first interior grade wood project. I hope this helps someone else in their project. Definitely a big thanks to Jester for the original design, and snowveil whose overall woodworking design I tried to emulate. I opted for a wood top since it was going to be used inside and I wanted to avoid tile to keep the weight down.

The goal was to create something that my wife would allow in our dining room -- which was met in the end. I love having a nice way to dispense my brew a few steps away. I'll be adding the interim pictures and steps as I can over the next few days.

The keezer holds Five 5 gallon corny kegs and is built with these and many other parts.

Freezer - http://www.sears.com/kenmore-7.2-cu...p-04618702000P?prdNo=1&blockNo=1&blockType=G1

Temperature Controller - http://www.amazon.com/dp/B00368D6JA/?tag=skimlinks_replacement-20

4 way air distributor - http://www.amazon.com/gp/product/B00E3XT69G/?tag=skimlinks_replacement-20

Stainless perlick faucet and shank assemblies - http://www.beveragefactory.com/draftbeer/faucets/faucets/perlick525_stainless_combo_shtml

More details to come...

IMG_4782 (Large).jpg
 
Last edited by a moderator:
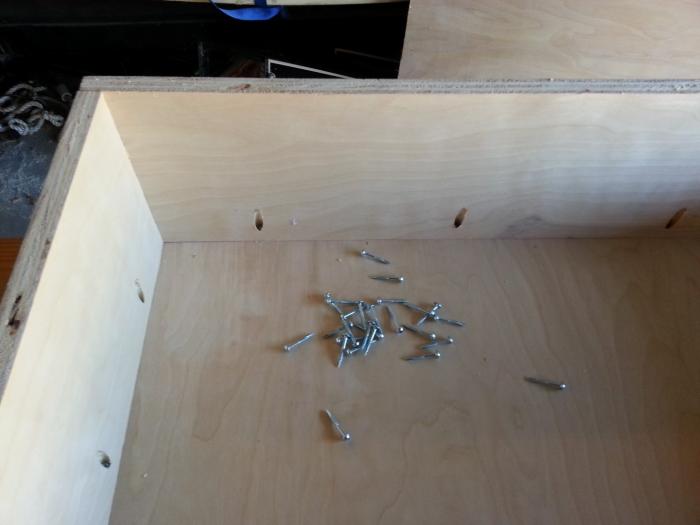
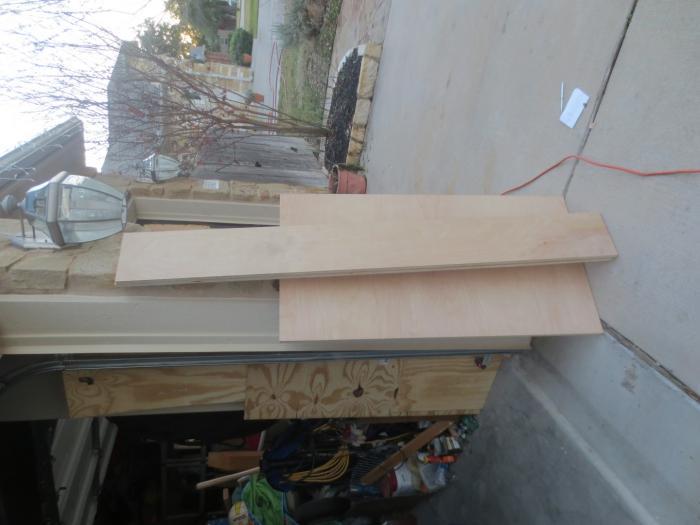
I chose 3/4" birch BC plywood for the bulk of the build. I was able to complete everything out of a single 4'x8' sheet of 3/4" plywood, 1/4" birch plywood, and an assortment of 1x3 and 1x4 pine solid wood boards.

I didn't really have a great feel for the entire end project at the beginning from a dimension perspective, so I started with what I knew about. That was the opening of the freezer itself.

Step 1 was to build a collar so that I could fit a fifth keg for conditioning/carbing and also have a place to connect fittings and have access to the interior without drilling into the freezer.

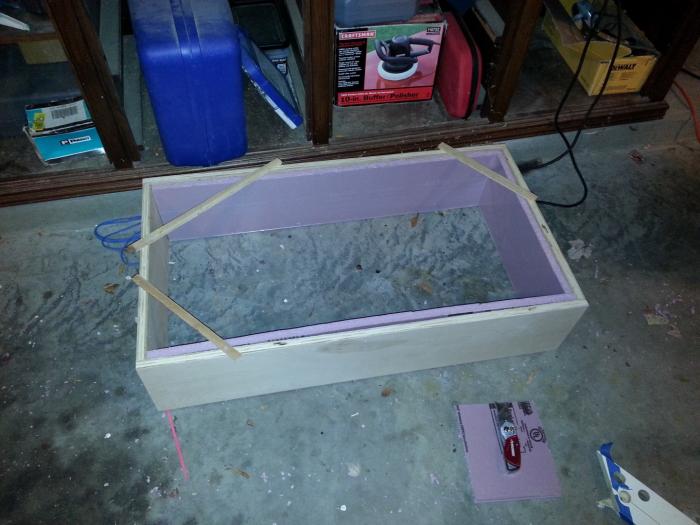
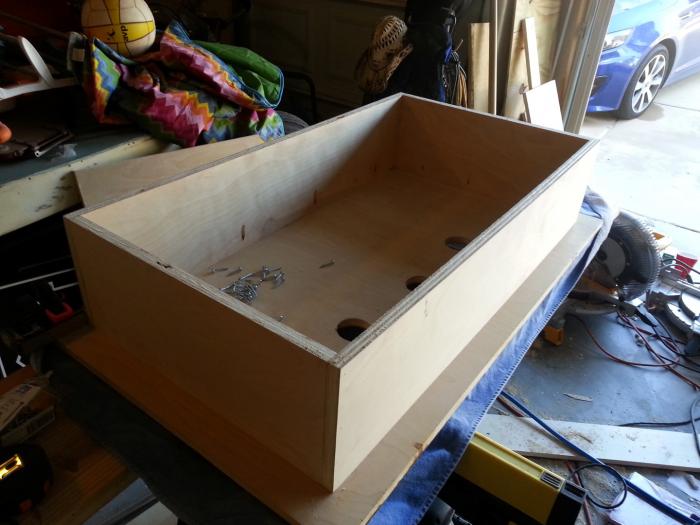
I measured the outside dimensions of the freezer opening and build a collar out of plywood to match them. I set my table saw to the desired width and cut two strips of plywood to the exact width so that I knew that it would be the exact same height all the way around.
I applied wood glue to the edges and used a brad nailer to hold the pieces together. After squaring the collar by comparing the diagonal dimensions, I added some diagonal braces to keep everything square while the wood glue dried.

I wanted the the collar to be part of the lid assembly so after checking the fit, I put the piece to the side until the rest of the coffin was assembled.

After the collar was assembled, I started to work on my insulation. I bought a 4'x8' sheet of 3/4" rigid foam insulation and used a utility knife to cut it to size. I ended up doing two layers of insulation all the way around.

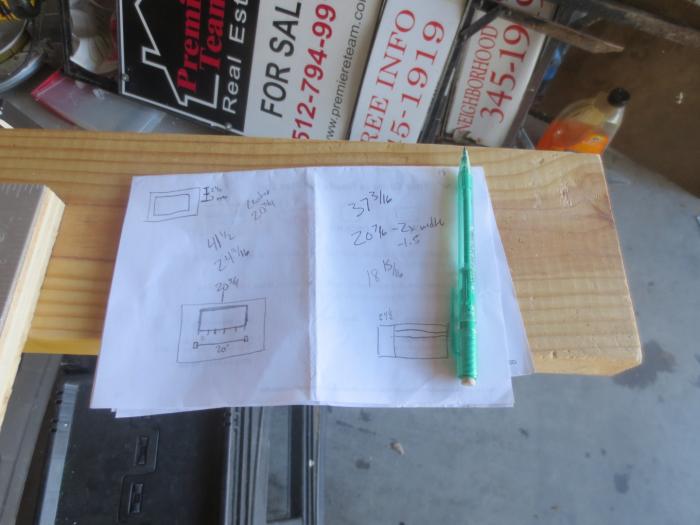
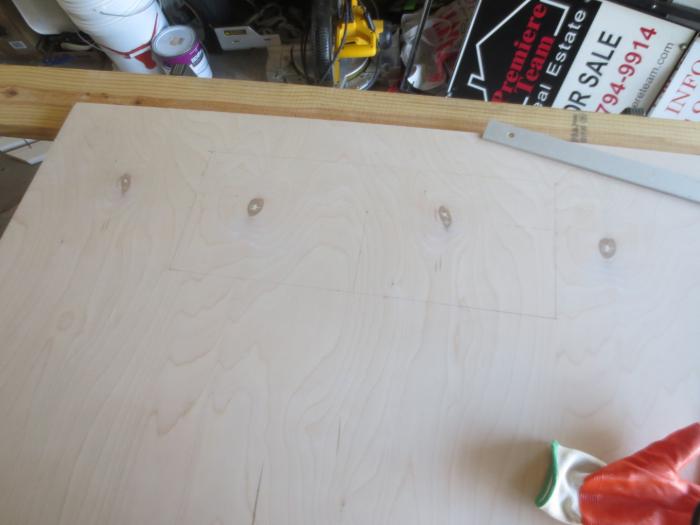
Next, I determined the size and layout of my coffin. I wanted 4" spacing between my four taps, and 1x4's framing the front of the coffin, so I ended up with approximately a 24.5" wide coffin.

I also estimated how bit I wanted the keezer top to be based on the size of the base. My keezer bar top was 41 1/2 x 24 9/16. That too was cut out of my 3/4" plywood sheet.

2013-12-24 22.07.04 (Large).jpg


IMG_1334 (Large).jpg


IMG_1333 (Large).jpg


IMG_1335 (Large).jpg


IMG_1336 (Large).jpg
 
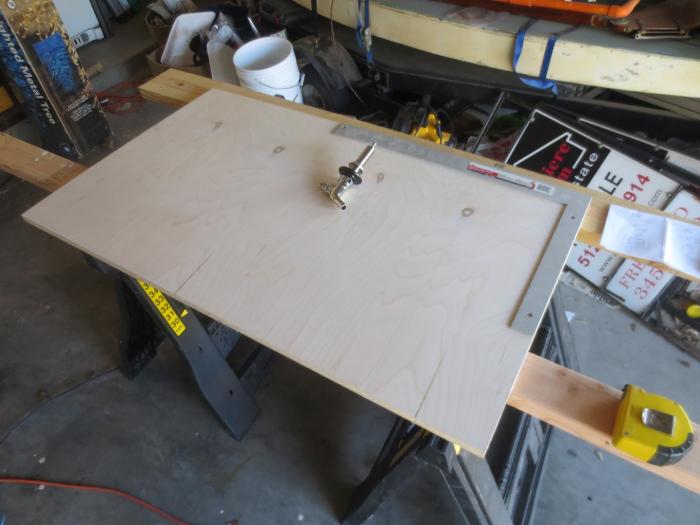
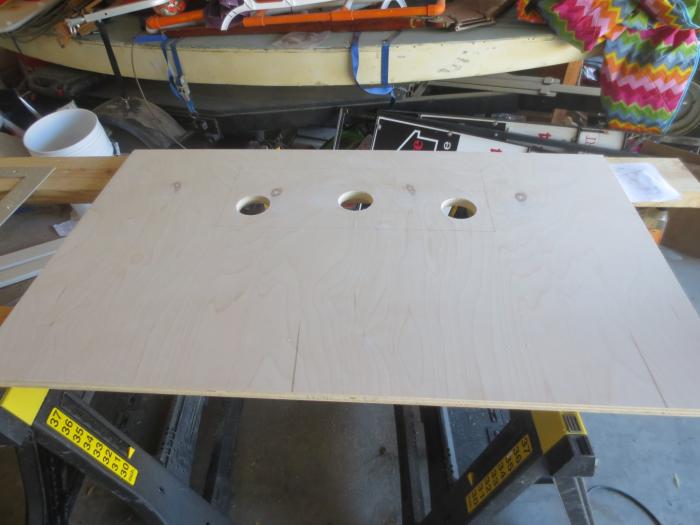
After cutting the keezer bar top to size, I determined where the coffin should be. I wanted it to be as close to the back as possible, but needed to allow for the insulation and overhang so it ended up about 1/3 of the way into the top. After making sure it was where I wanted it, I drilled three 2 1/2 inch holes using a hole saw attachment to a drill. One on each edge for ventilation and one in the middle for the beer lines to run.

I then centered the collar on the top (upside down) and attached it using pocket screws. I didn't have a pocket screw jig, but it turned out to be an invaluable tool to really make this look nice without screws sticking out all over the place. I bought the Kreg jig and clamp at Lowe's for about $60. All things considered, I think this was one of the biggest helps for this project. It allowed me to quickly connect the wood pieces together and not have any visible screws or nail holes. I used some standard caulk to give an airtight seal between the wood before adding any insulation

IMG_1337 (Large).jpg


IMG_1338 (Large).jpg


2014-01-04 10.27.33 (Large).jpg


2014-01-04 10.27.38 (Large).jpg


2014-01-04 10.41.04 (Large).jpg
 
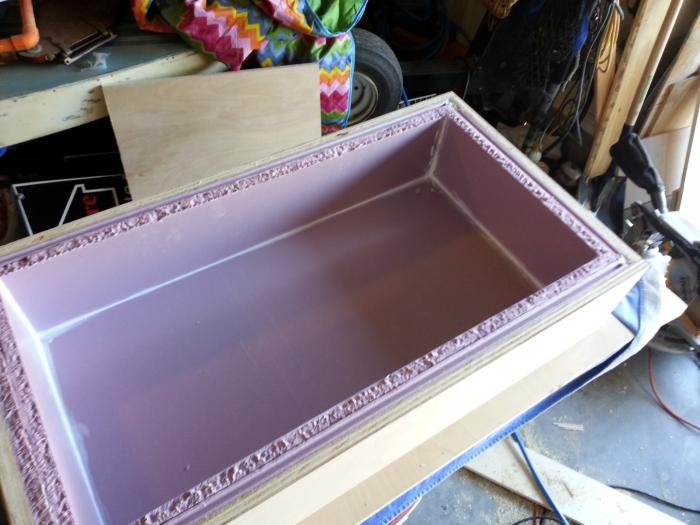
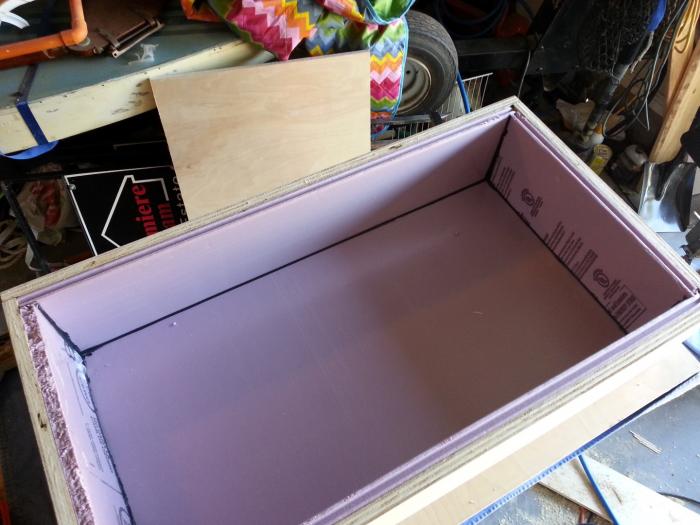
I added two layers of the rigid foam to the inside of the collar. I figured this would be one of the biggest temperature loss areas, so used caulk on each seam of this as well. Perhaps a bit overkill, but caulk is cheap. It also helped to hold the material in place.

On the inside of the freezer, I used one of the ideas I saw to improve air circulation by running PVC pipe underneath all of the kegs. I personally used 1" pipe with about 20 holes spread throughout the pipe that got bigger as they moved farther away from the air inlet. I used wire shelving that you can find at Home Depot doubled back on itself to serve as the base. All the pipes are dry fit together and I didn't end up using any PVC cement. I trimmed the final length of the vertical pipe to be a little below the edge of the freezer.

I have a single 90mm PC fan that pushes air through it. It doesn't provide a ton of movement, but certainly enough to keep things cool. I used aluminum tape to direct the air down the pvc. (I was too cheap to buy the marine pump and was getting PC fans already to cool the coffin).

2014-01-04 10.47.08 (Large).jpg


2014-01-04 11.07.20 (Large).jpg


2014-01-05 11.59.31 (Large).jpg


2014-01-05 13.12.53 (Large).jpg
 
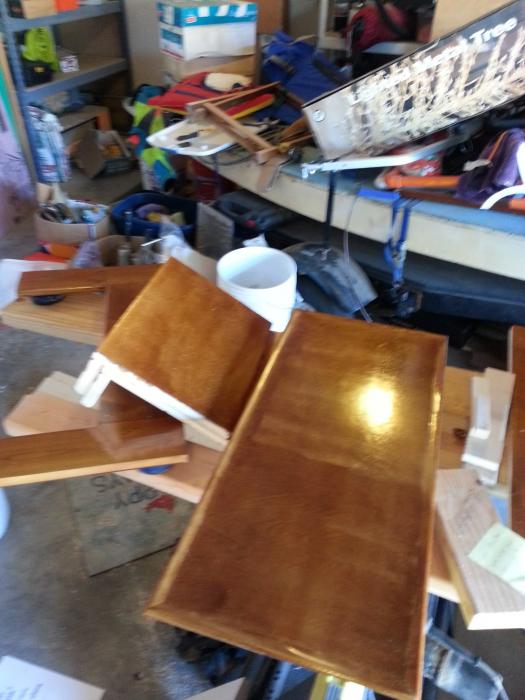
To build the top of the Coffin, I again used some 3/4 plywood. After cutting it to size, I used some pine molding to hide the plywood edges and give it a nice finished look. The first picture shows the profile of the molding. It's about an inch high. I attached the molding to the top using a brad nailer. This was one of the few places where I had to fill nail holes that would be visible.

I then started the staining process. The second photo shows the coffin in pieces after the first coat. I used two coats of Polyshades in the American Chestnut Gloss color.

http://www.homedepot.com/p/Minwax-1...nd-Polyurethane-in-1-Step-614750444/202061455

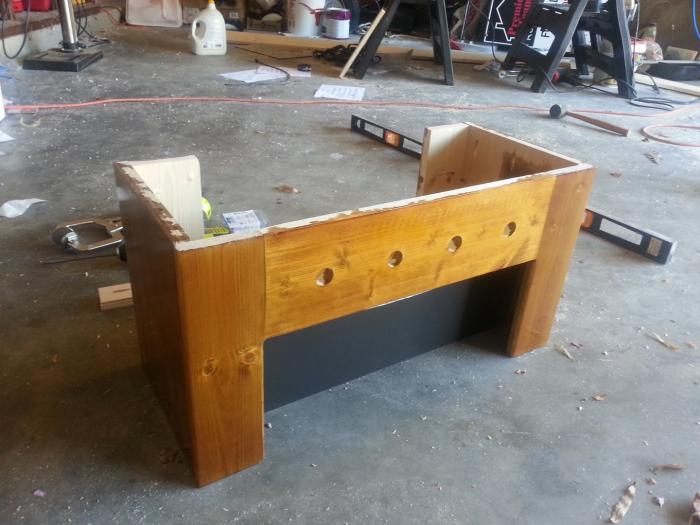
Jump ahead a bit, and I've now started to assemble the coffin. I used chalkboard paint on the piece of plywood that will go in the cove behind the taps. The entire coffin was plywood except for the two pillars on the side (1x4s), and the board that holds the shanks (1x6). I drilled the holes for shanks using a 7/8" paddle bit.

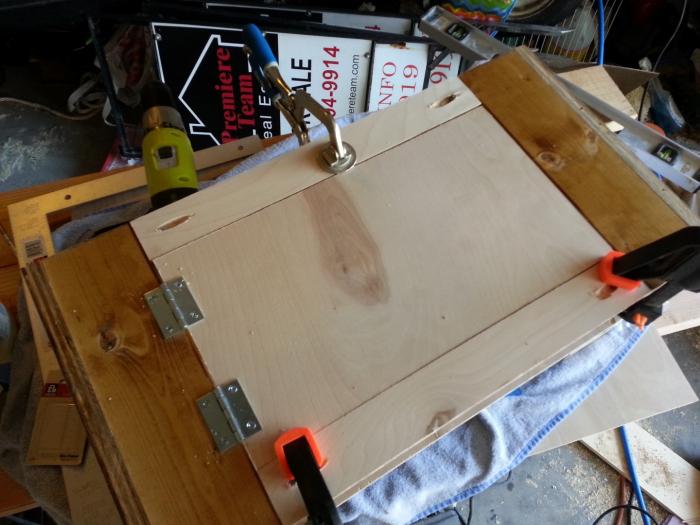
The second picture is of the inside of the coffin while upside down.

I added a hinged door to the back so that I would have easy access to the inside of the coffin. I later painted the back with chalkboard paint to keep track of things like when the kegs were inserted.

2014-01-02 08.59.35 (Large).jpg


2014-01-04 10.27.26 (Large).jpg


2014-01-04 13.59.34 (Large).jpg


2014-01-04 13.59.41 (Large).jpg


2014-01-04 15.46.15 (Large).jpg
 
This is the first time I have a picture that shows the base. I used a 2x6 and 2x4 to create a platform for the freezer to sit on. I had to use my router to remove some excess wood so that my freezer would sit level on it when I removed the screw on legs. On the bottom of the base, I attached six 3" wheels so that it would be easy to move around. Those also were inlayed with the router so that I could reduce the overall height as much as possible without cutting into my collar height. When I built the base, I left 1 1/2 inches on all sides so that I would have room to add bracing around the fridge for the side panels and for airflow around the freezer itself.

Everything has now been stained and the coffin was attached to the keezer bar top again using pocket screws. I have also fully insulated the coffin using two layers of the rigid insulation. Next was time to add the top to the actual freezer.

I found something called camper insulation which served as a nice cushion and seal between the freezer base and the coffin. I used two layers all the way around and it seems to be working quite nicely. I attached the collar to the freezer using the original hinges. I probably would have liked something a little more heavy duty, but they seem to be holding up.

The next picture is where I built the 2x4 frame all the way around the freezer. I chose to build them up into the collar so that the face framing would completely conceal everything and the lid would then cover any gap. I ended up adding a second brace on the front since I added some galvanized wire to the frame to support the lid while it was open. In the end, this turned out to be unnecessary since the front 2x4s rested against the edge, but I figured it wouldn't hurt anything.

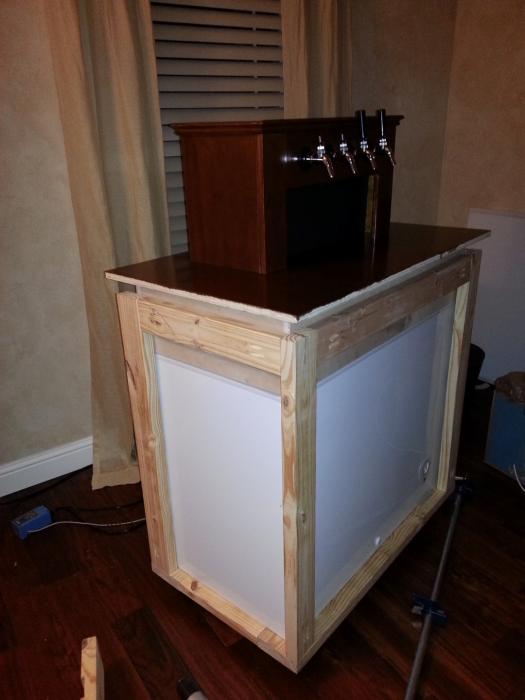
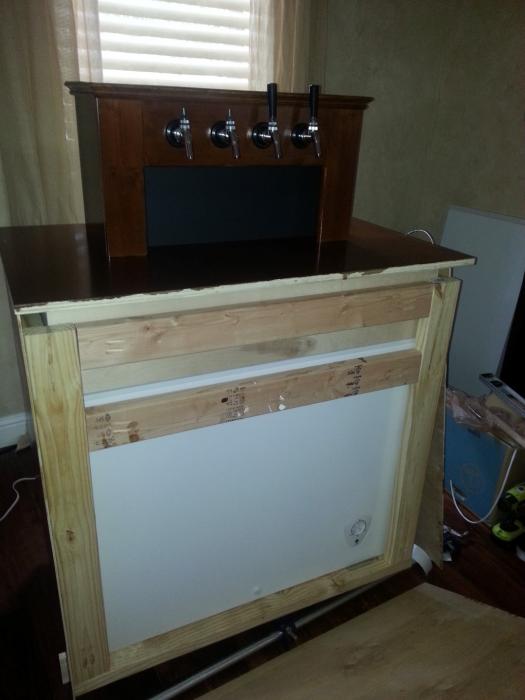
Jumping ahead a bit more, now, you can see I've attached my 1/4 plywood to the 2x4 supports and have used 1x4 pine lumber to hide all of the edges and build out the framed look of the keezer.

The last step then was to build the edge for the bar top to conceal the edges. I used a combination of "sanitary base" molding and the same molding as before for a nice finished edge.

In this picture, you can also see that I was working on my tap handles. I stained everything but one side and used chalkboard paint on the fronts. I cut some stair railing to length, drilled a hole and used these inserts to allow them to screw onto the taps. http://www.amazon.com/gp/product/B0026GZU0Q/?tag=skimlinks_replacement-20

The lighting is provided by a strip of LED lights mounted in the recess underneath the taps. I added a light switch on the back to allow me to turn them on and off. I also have a switch that allows me to turn the fans on and off as well.

I need to take a few more pictures of the inside, but hopefully this covers the bulk of it so far.

2014-01-07 07.54.51 (Large).jpg


2014-01-07 18.09.16 (Large).jpg


2014-01-10 15.37.59 (Large).jpg


2014-01-25 07.37.46 (Large).jpg
 
Last edited by a moderator:
Here are a few pictures from the inside.

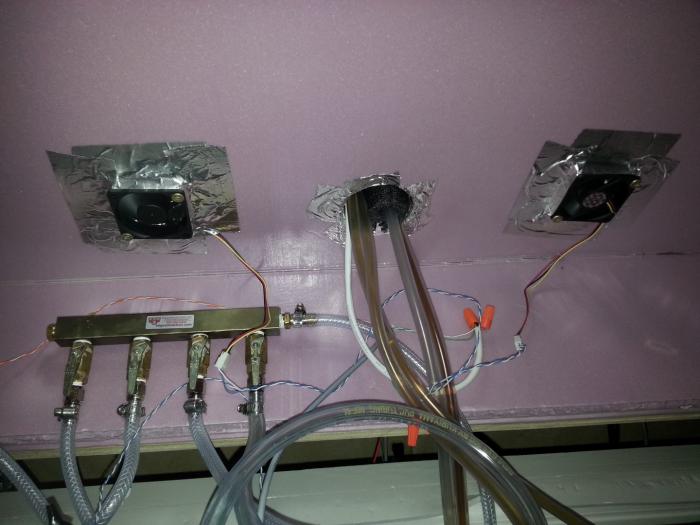
In the first picture you can see the Eva-Dry dehumidifier that I keep in the keezer. I didn't have bad moisture problems, but also figured that I don't want to have moisture problems. I have two PC fans circulating air in the main body of the keezer. One to blow air down around the base of the keezer and the other to pump air through the dehumidifier.

I have this model: http://www.amazon.com/dp/B000H0XFD2/?tag=skimlinks_replacement-20

The next two pictures show a zoomed out view of the lower portion of the keezer. Notice the camper seal around the edge. The second picture shows my air distributor and also has a good view of how all the insulation turned out. You can also see how I have the fans blowing air through the coffin. One is pointed up and the other is pointed down.

2014-02-19 17.36.54 (Large).jpg


2014-02-19 17.37.01 (Large).jpg


2014-02-19 17.37.10 (Large).jpg
 
Last edited by a moderator:
I also wanted to show a little bit of the back.

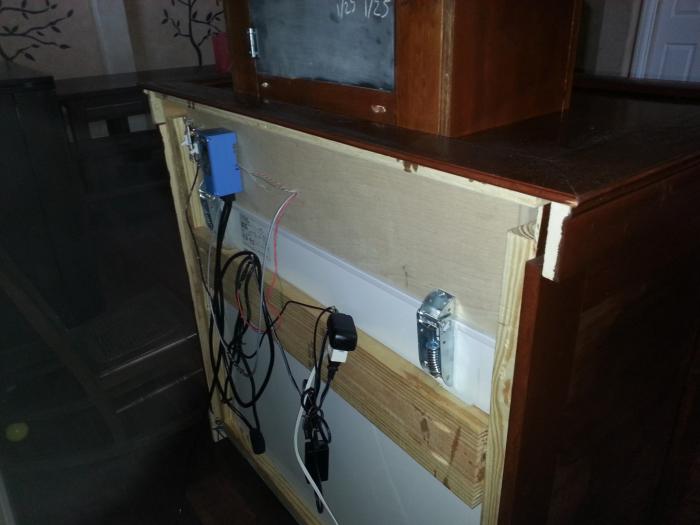
You can see the finished chalkboard paint on the back of the access door to keep track of when beer was placed in service and when things were last cleaned.

I then have two more pictures of the back a little more zoomed out. You can see the temperature controller and the switches I installed to turn the lights and main coffin fans off and on. I wanted to be able to turn them off to prevent them from blowing out the cold air when the lid was open. I also figured that I could turn them off during parties for a bit to eliminate the small noise that they generate. The lights and main fans are running on 12V DC. The coffin fans are running slower at only 5V.

2014-02-19 17.35.29 (Large).jpg


2014-02-19 17.35.40 (Large).jpg


2014-02-19 17.35.59 (Large).jpg
 
Did you use the original freezer lid at all? That's part of what's confusing me about all these keezer build threads. :) It sounds like you built a new top out of wood for your keezer.
 
Did you use the original freezer lid at all? That's part of what's confusing me about all these keezer build threads. :) It sounds like you built a new top out of wood for your keezer.

I didn't for my build, because I didn't want to mess up the lid in case for some strange reason I ever wanted to put the original freezer together. I thought on the off chance something went wrong with the freezer, drilling several large holes through the top would void the warranty. With that said, I also decided that it wasn't worth saving $100 by buying it used on Craigslist. I realized that the keezer was going to be built custom for this specific freezer, so I really didn't want the freezer dying on me in 6 months.

From a logistical perspective, I also didn't have any hole saws that would cut through metal so it was just easier all the way around.

OK. That makes sense. :) I was wondering about that. I know that a lot of folks making kegerators are using the standard hole saw to cut the metal, but it seems like a lot of work to me. I like your idea better. Now that I have a better idea how this works, I may go this route instead of buying a mini-fridge and making a kegerator. :)
 
Great! I'm happy to answer any other questions you might have. It's all still fresh in my mind, so that should make it a little easier to answer.
 
Thanks! I got to thinking that I don't have any real wood working tools/equipment so I'll probably stick with a kegerator, at least to begin with.
 
Sorry to resurrect a zombie thread...

Pretty sweet loking! I'm looking at making mine with a very similar design. How has the keezer been holding up without gaps for airflow?
 
I'll gladly revive this zombie!

All in all, I'm still really happy with the design. The two computer fans to a decent (read not perfect) job at keeping the top of the coffin cool. It's good enough that I'm not pouring a glass full of foam at first pour which is what I was going for.

If I have one complaint, it's that I struggle with humidity in the lower compartment. I'm not sure if that's caused by an imperfect seal in my collar or is just something unavoidable in the semi- humid Austin area. I do keep something in there to absorb some moisture, but at times I do need to bust out the shop vac to clear out what has accumulated.
 
I added a bottom wire shelf in my first keezer build about 8-9 years ago, and it was night and day for keeping even temps across kegs. I just had a small 4" desk fan at the bottom facing up towards my shanks (shanks came out front of collar, not a coffin design) and I never had foam issues. I like the PVC idea, I'm thinking it's a bit overkill though.

One comment on your build, man put those light switches in a box! Otherwise, it looks great!

Indeed, the switches are not ideal, but with the low voltage used for the computer fans and LEDs, I figured the risk was small enough to justify saving the space that would be required to put in a box.

After having it a few years now, the one thing I wish I had was a way to turn the CO2 on and off from the outside. After having a full keg leak out to a missing o-ring, I have started to turn off the CO2 which would be much easier with an external valve.
 
Could you run your gas line through a hole in the back of the keezer, run through a single manifold that you could turn on/off, then back into the keezer to your 4-manifold? Wouldn't help with a leak at the tank, but would help with any leaks at your 4-manifold/kegs.
 
Could you run your gas line through a hole in the back of the keezer, run through a single manifold that you could turn on/off, then back into the keezer to your 4-manifold? Wouldn't help with a leak at the tank, but would help with any leaks at your 4-manifold/kegs.

I've considered that, but I haven't taken the time to actually do it. Maybe one of these days!
 
Back
Top