My "K3" 14.8cf Keezer Build

Homebrew Talk - Beer, Wine, Mead, & Cider Brewing Discussion Forum

Help Support Homebrew Talk - Beer, Wine, Mead, & Cider Brewing Discussion Forum:

This site may earn a commission from merchant affiliate links, including eBay, Amazon, and others.

day_trippr

The Central Scruuuutinizer
HBT Supporter
Joined
May 31, 2011
Messages
44,285
Reaction score
31,976
Location
Stow, MA
Forward: I serialized this build in the "What I Did For Beer Today" thread in the General forum to pump some life into it, and since have been answering PMs about various details and referencing the pertinent posts - once I've found them again. I'm going to pull all of those posts together into this thread, if only to make it easier for me to find them.

And off we go!
================================================================================================

Officially started the build of "K3", my third keezer (RIP K1. And K2 is currently trying to bleed out, but I'm keeping it on life-support with periodic r134a top-ups). It'll be a 14.8cf unit on a rolling dolly like K1 and K2, but rather than run all the plumbing and wiring inside the oem lids as before, I'm building my own this time.

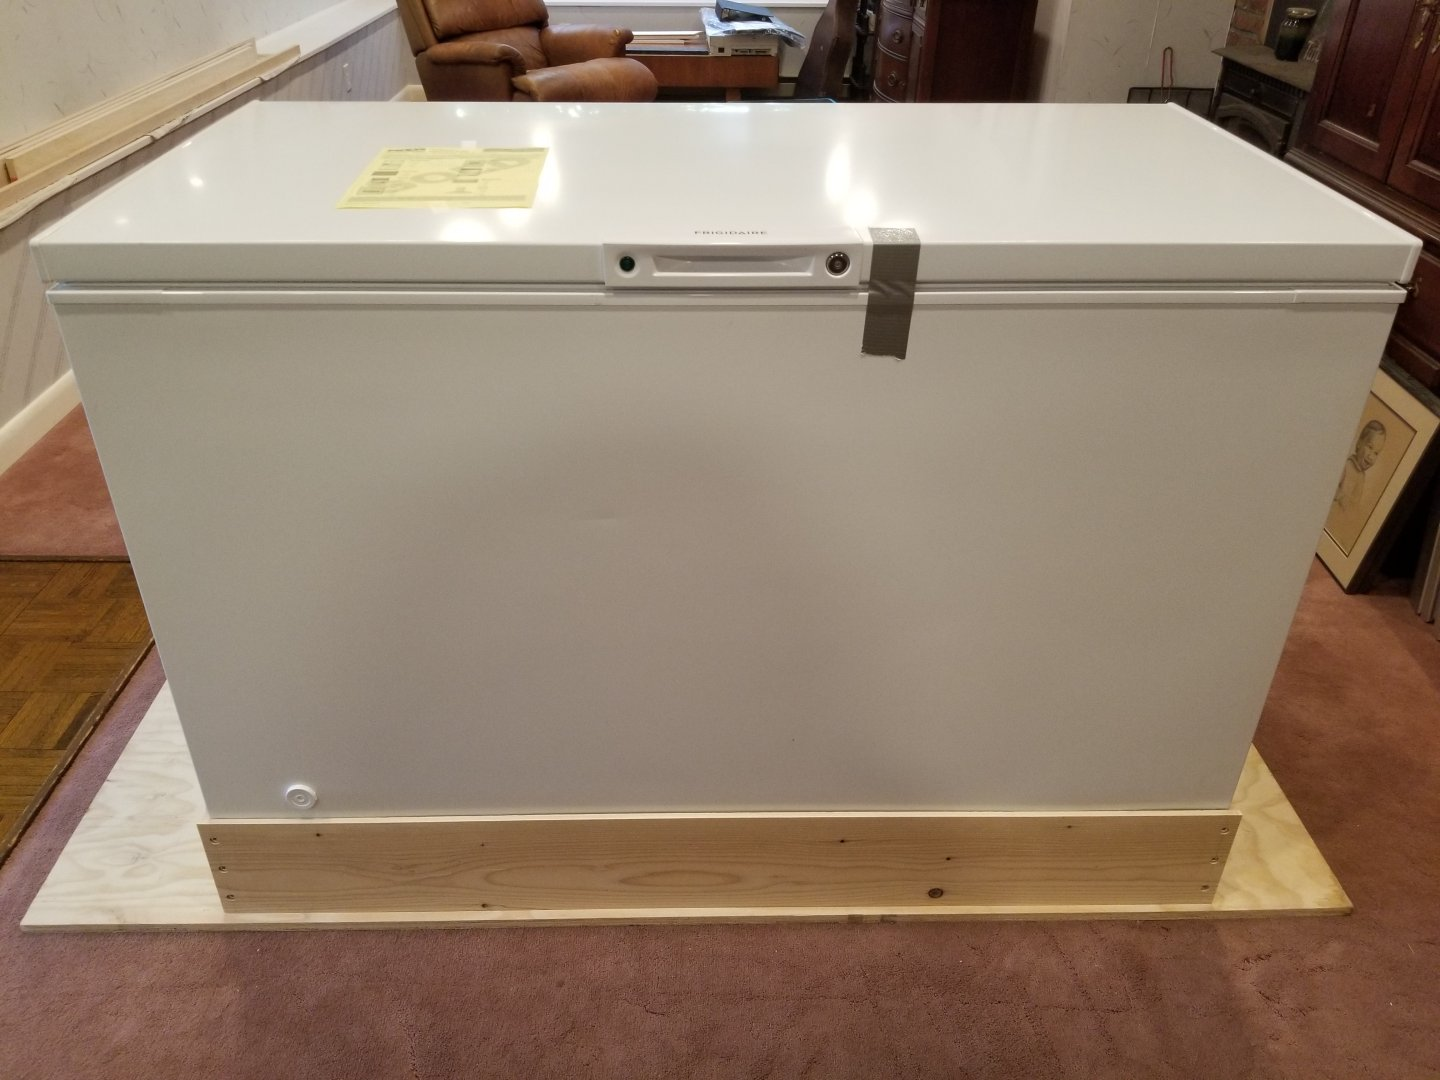
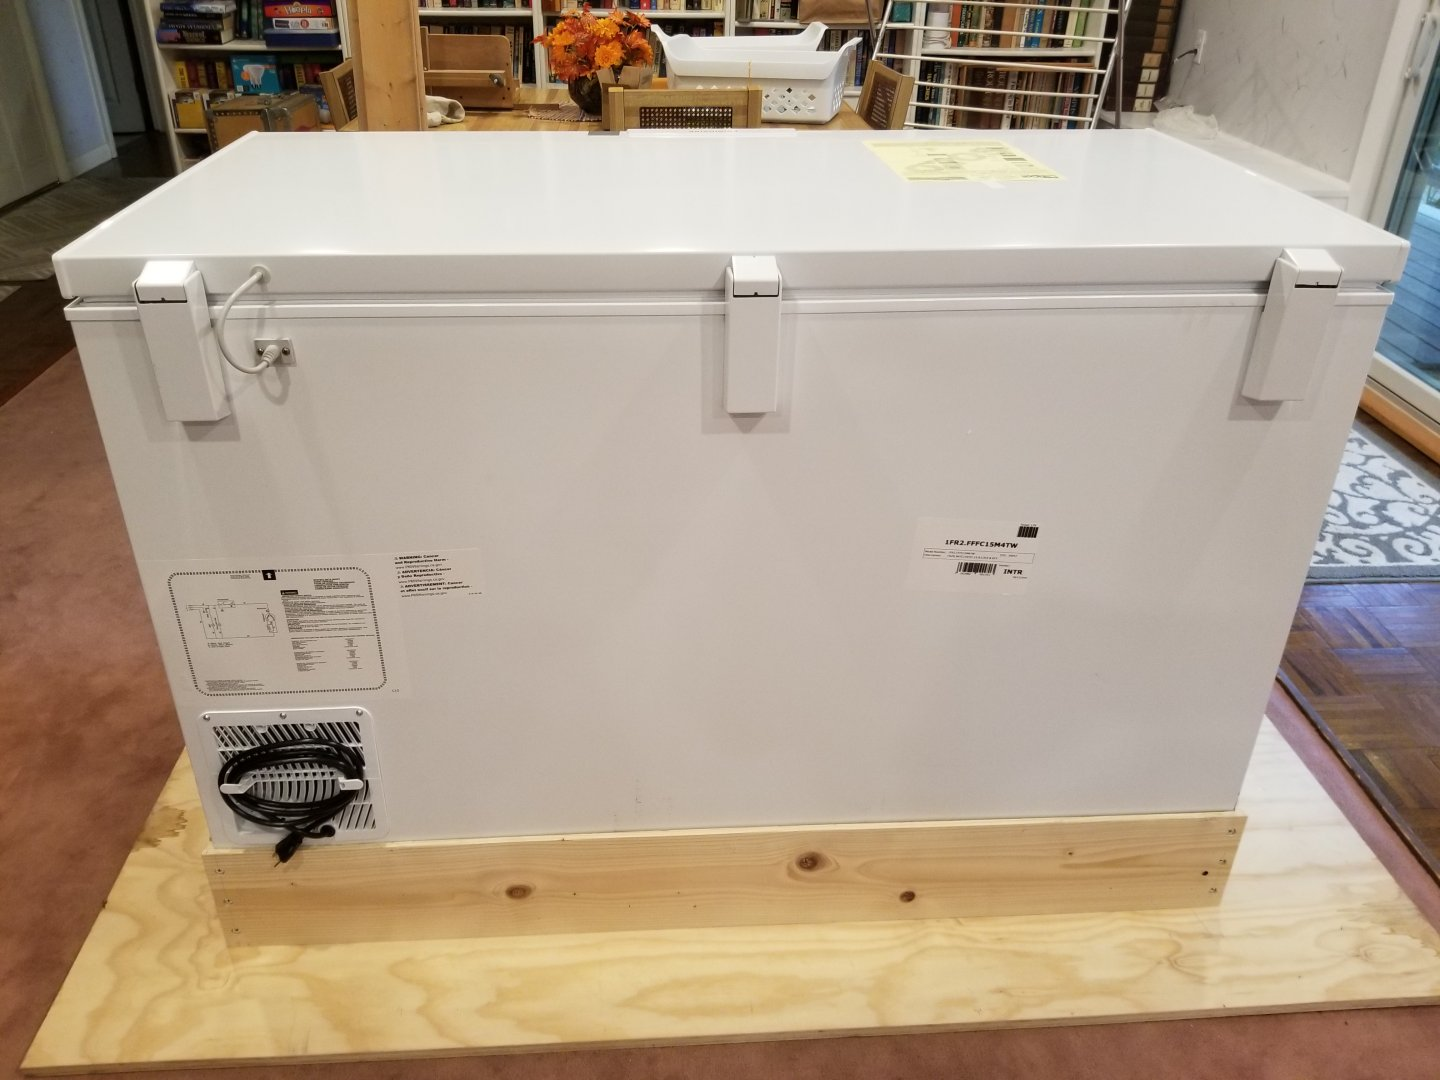
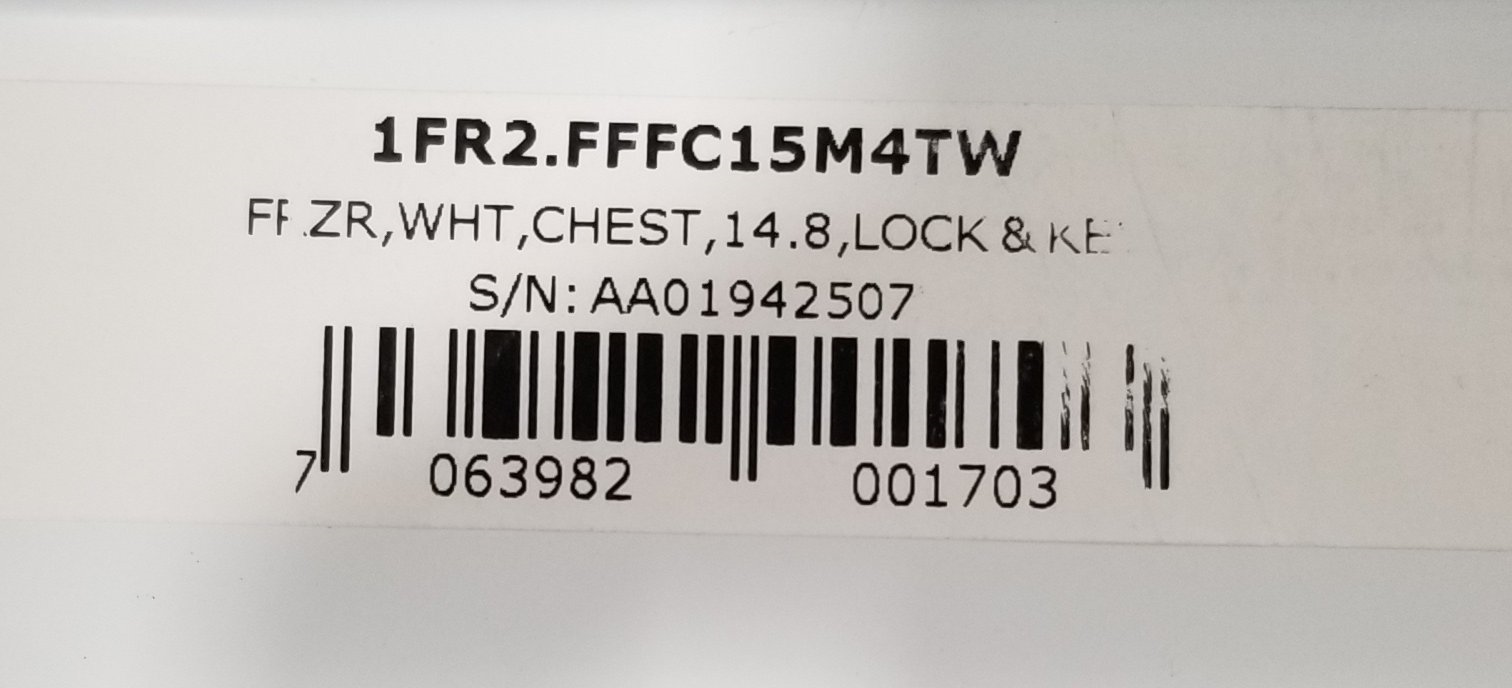
The chest freezer is a Frigidaire FFFC15M4TW, but the same unit is sold under a number of brand names.
1612843173005.png


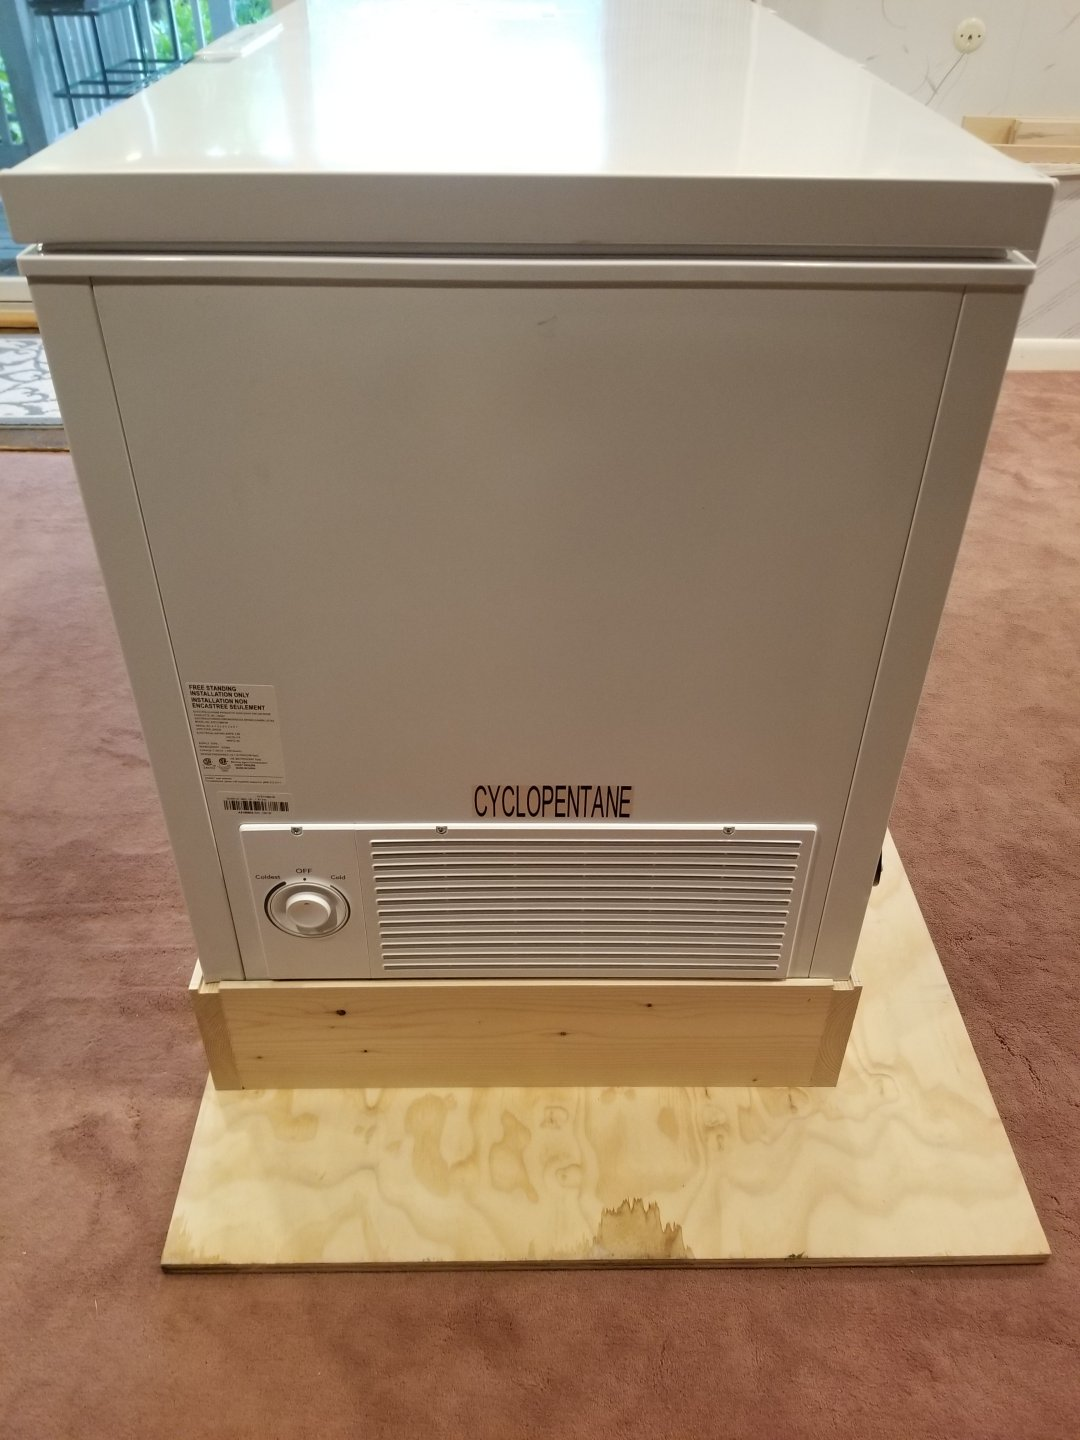
Here's is some basic dimensional data:
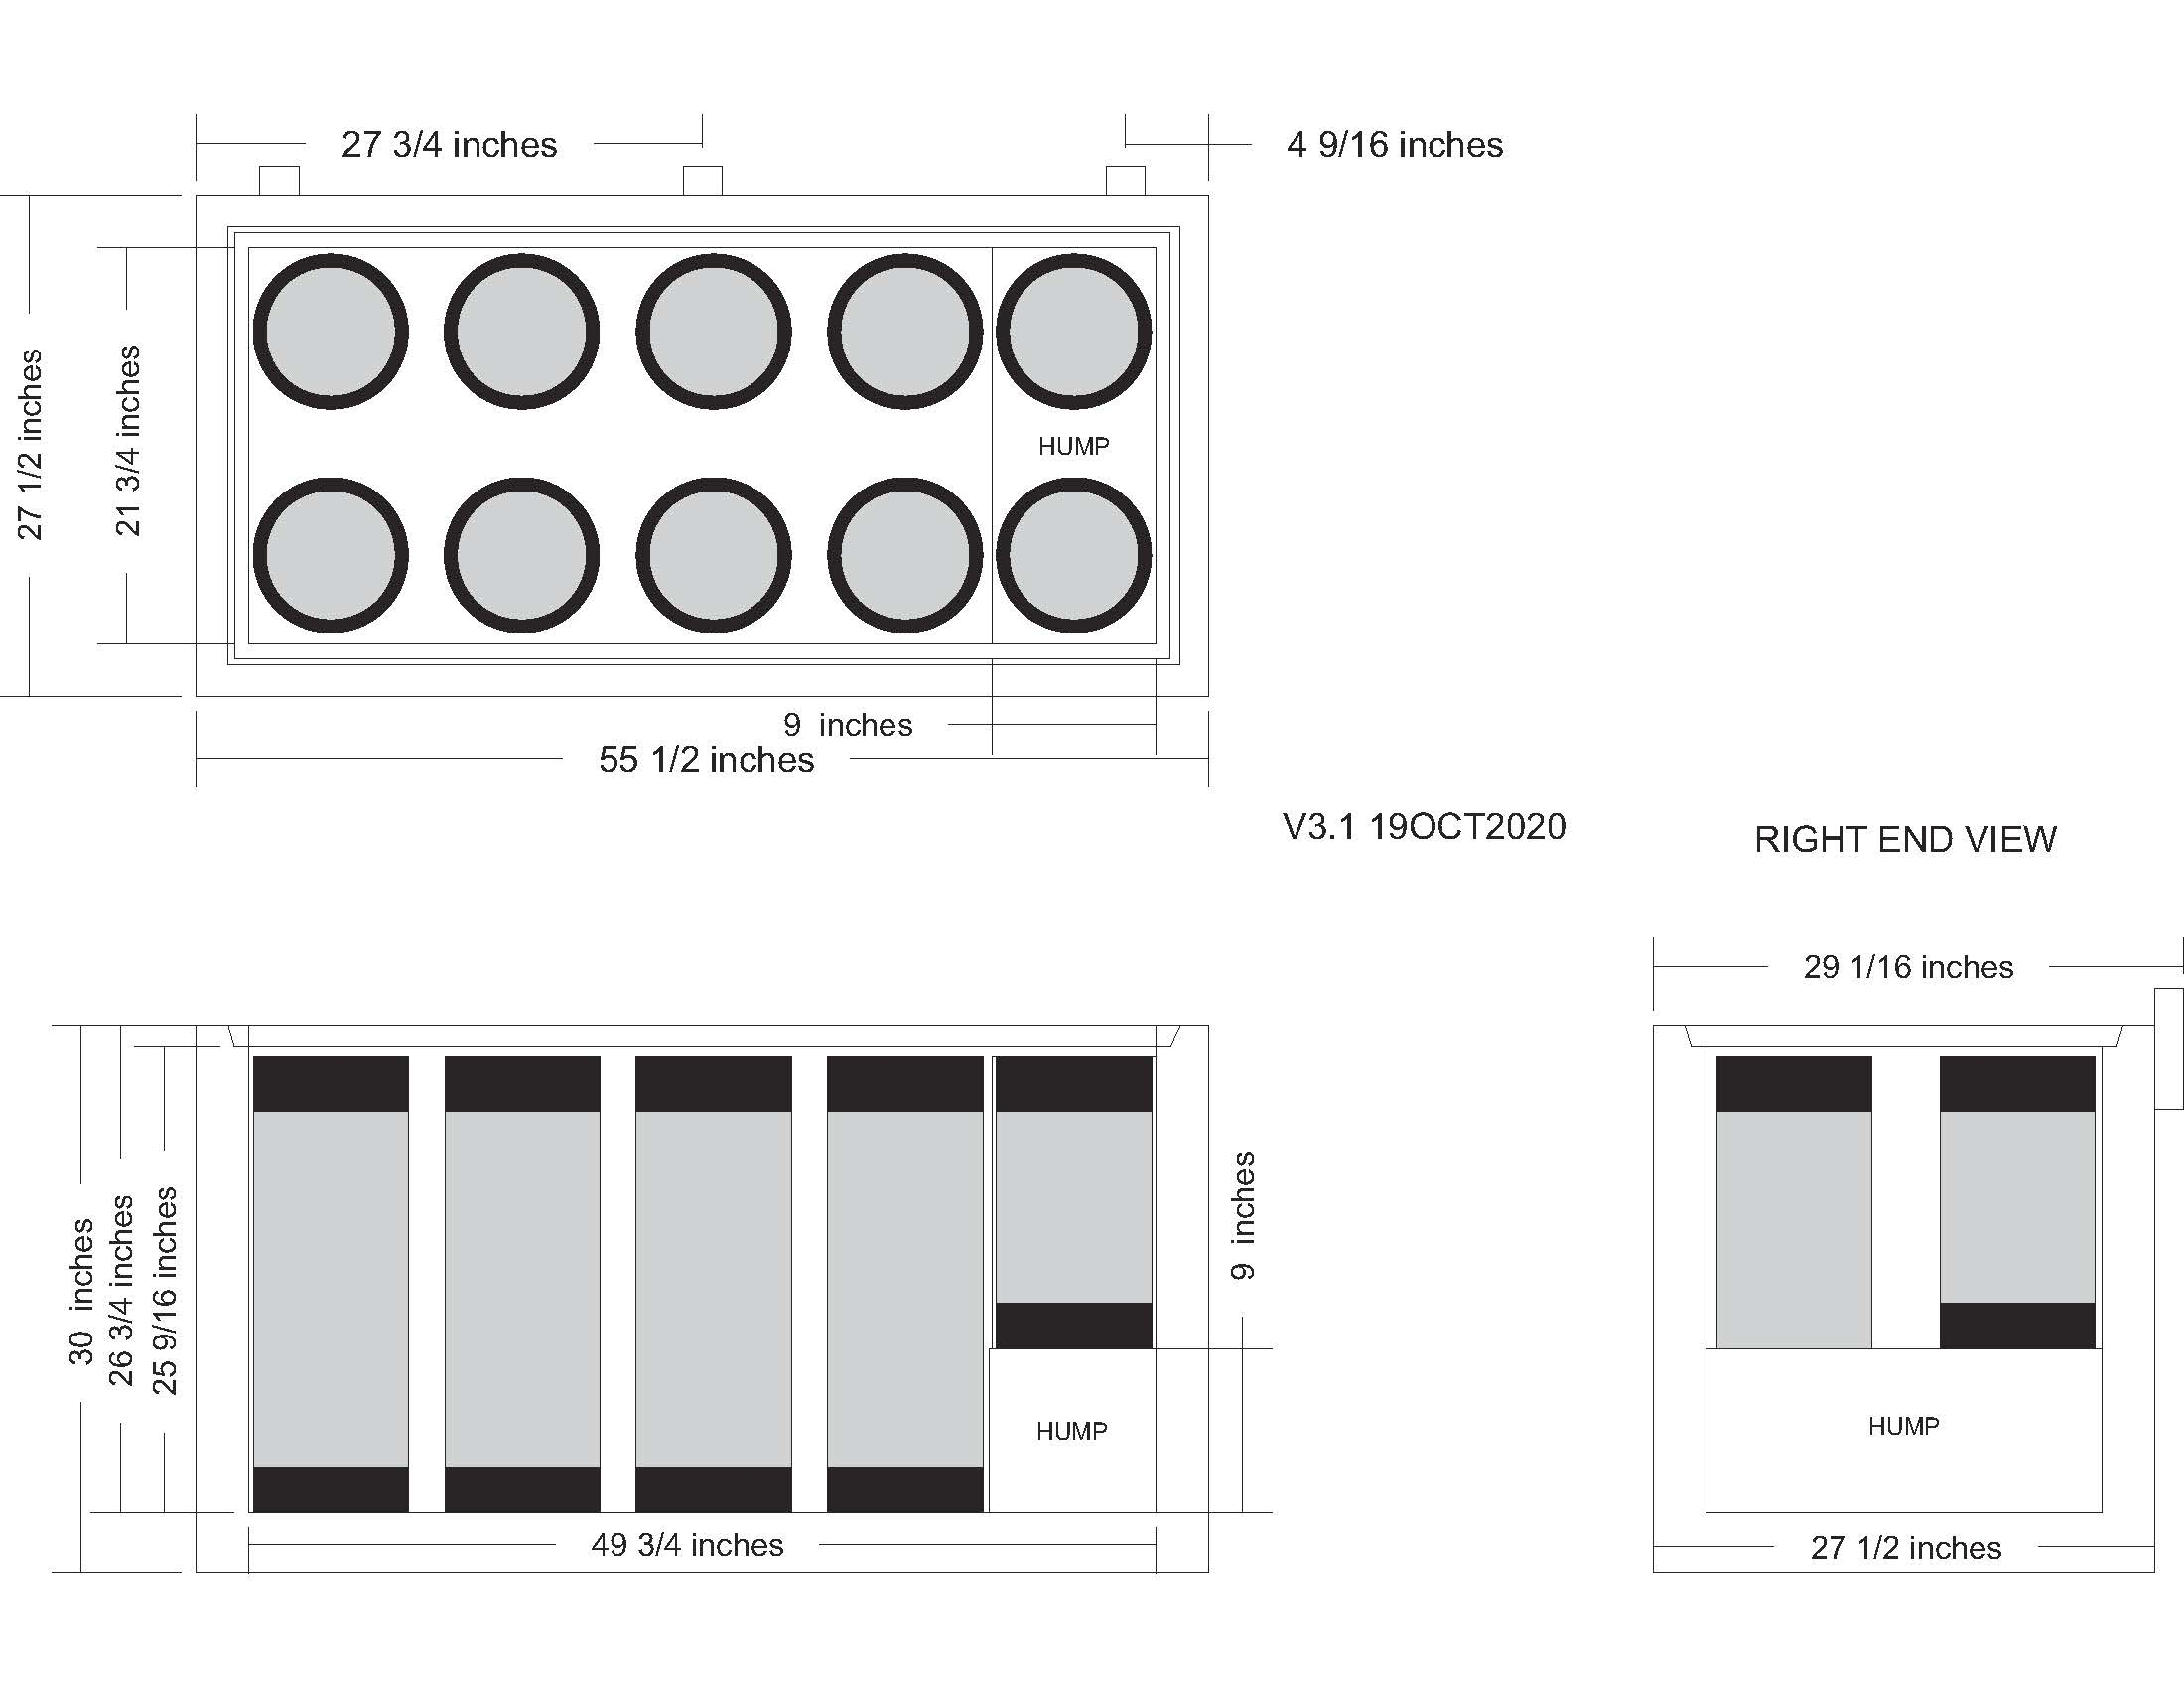
1612843455049.png


Note the scant air-gap between the top of the kegs and the underside of the lid liner (lid itself isn't shown but the beveled line is a projection of the liner). If a QD is plugged on a keg the lid will not fully close. Combined with the fact that the lid itself is assembled and then injection-foamed it's effectively glued together (I never found a single screw anywhere on that lid). It was pre-ordained that I was going to have to build a custom lid.

Also, I like to have the keezer top at bar height, and be movable. Both "K1" and "K2" used rolling dollies. K3 will be the same. And having the dolly provides a convenient place to tuck all the electronics chunks out of the way.

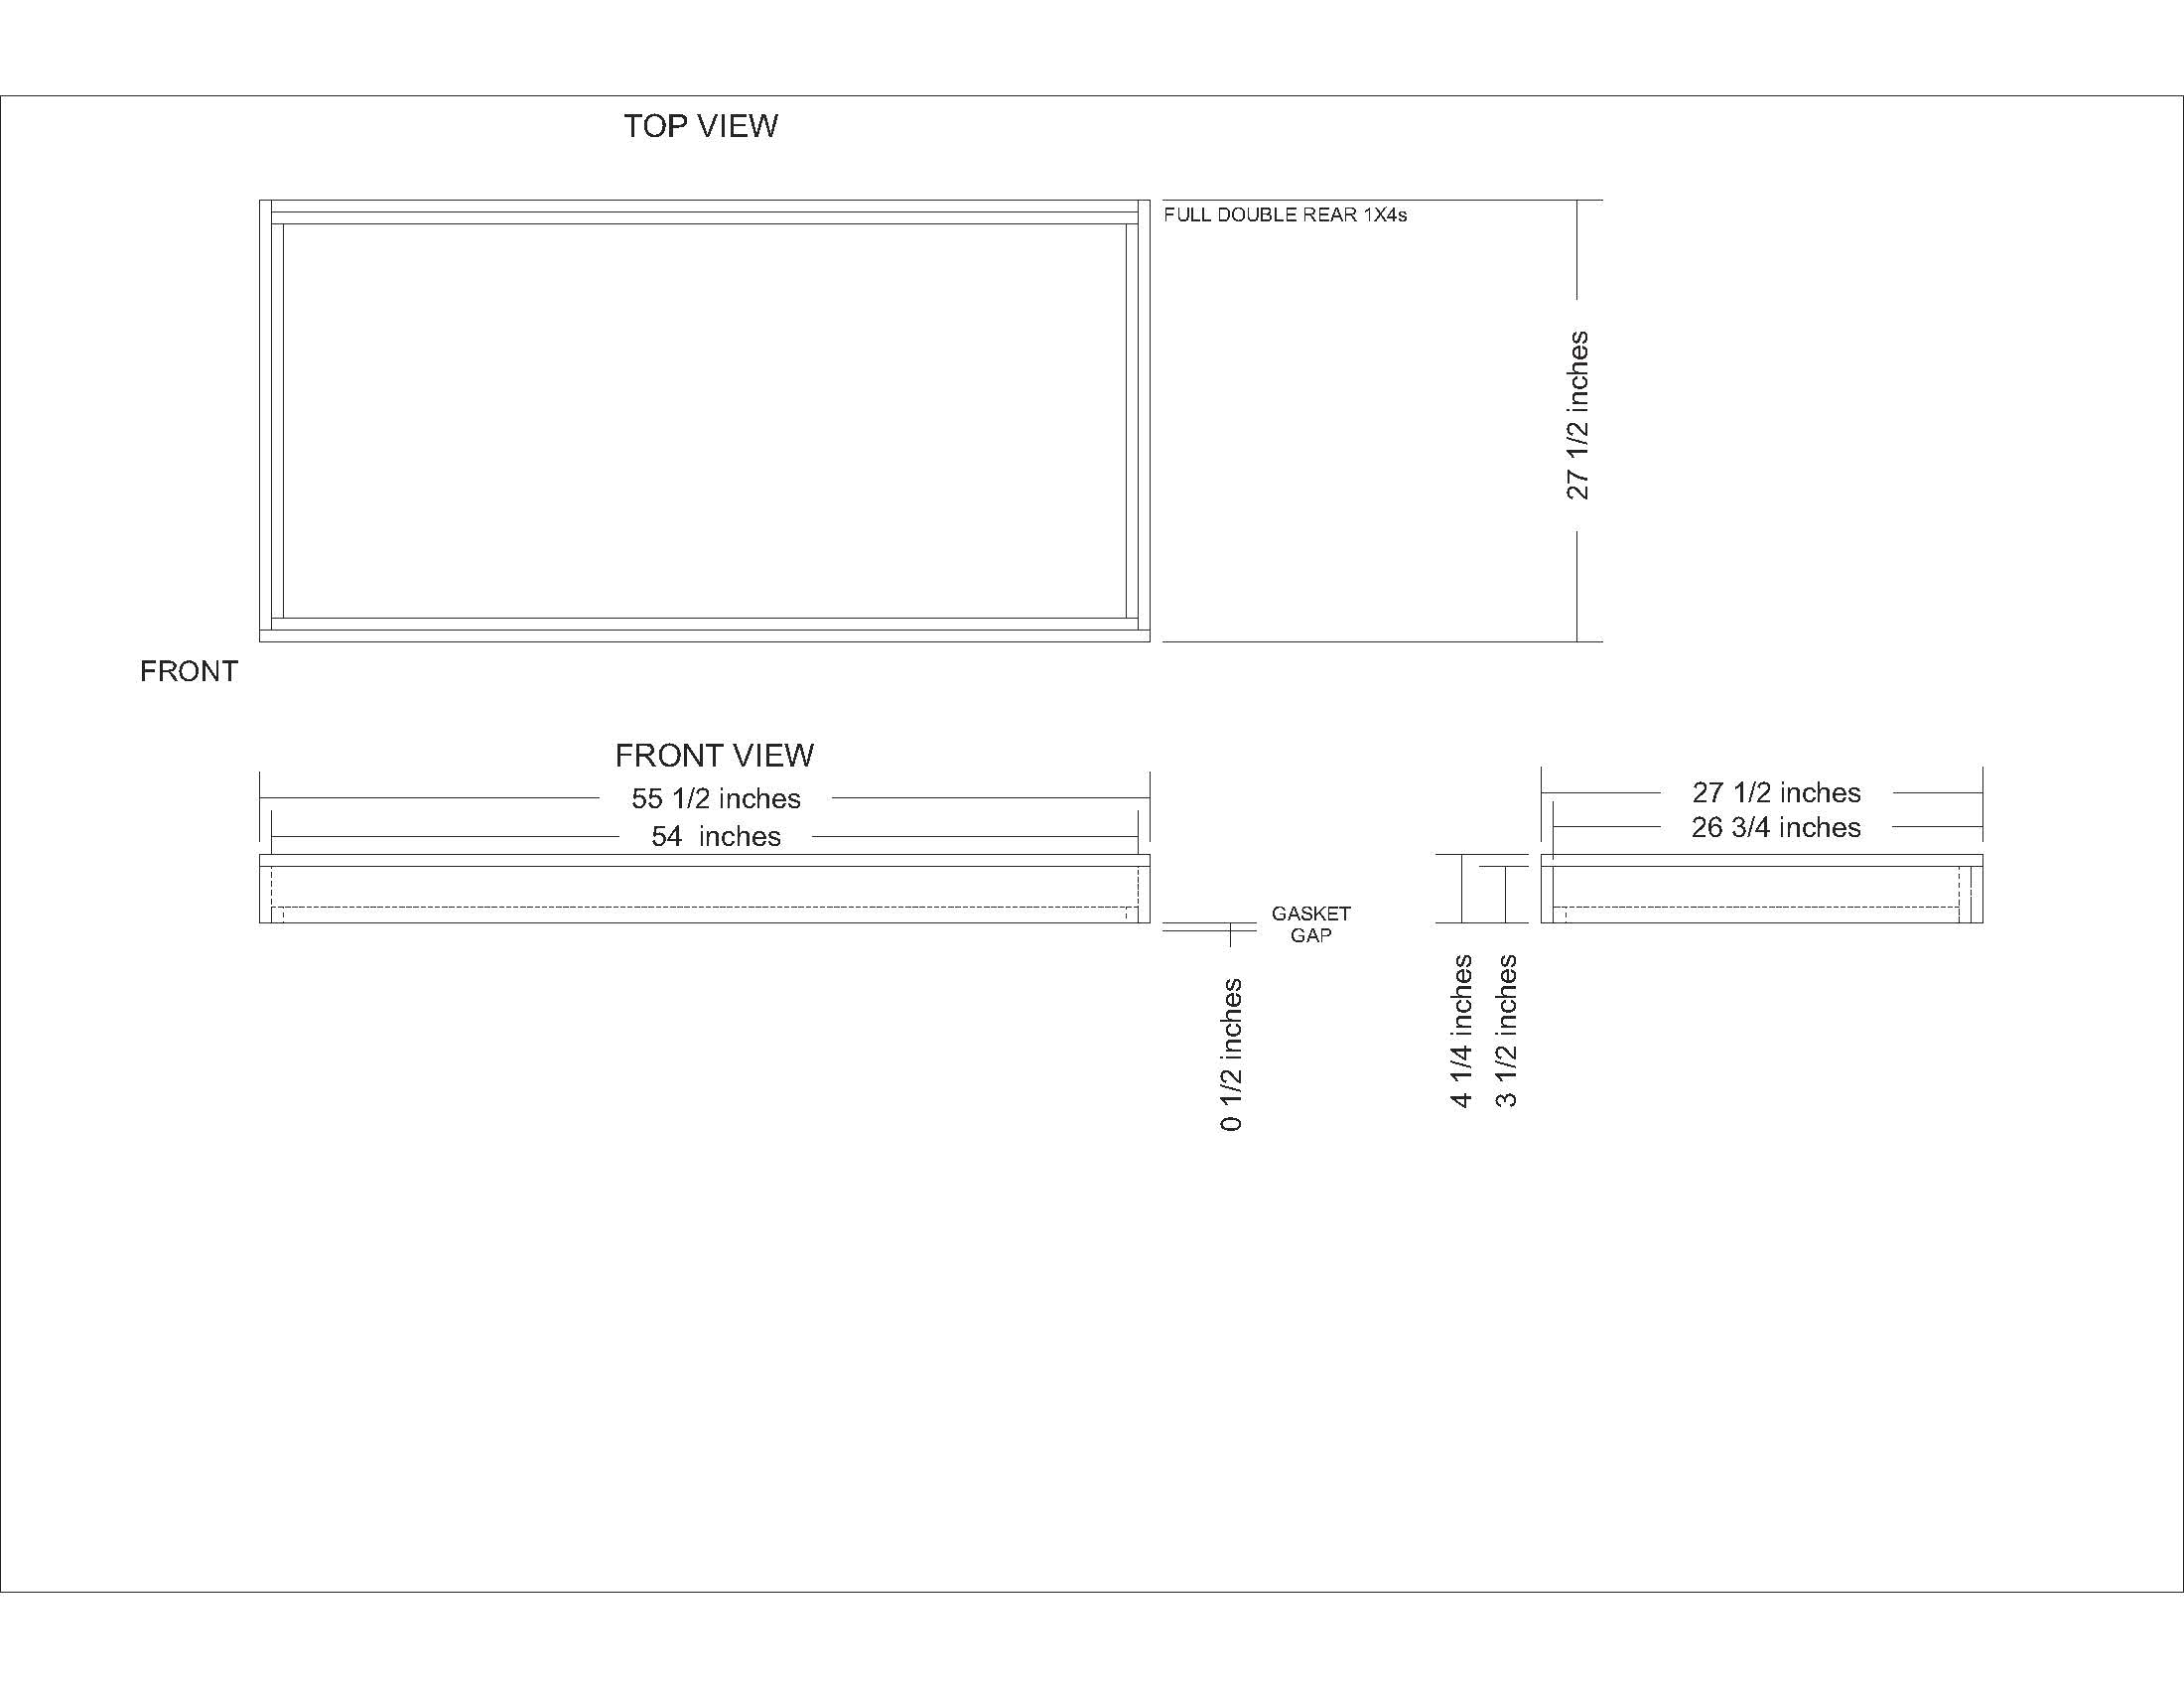
Here's a basic dimension drawing...

1612848700422.png


Just realized I never put the corner gussets in that drawing. Oh well, they'll show up later :)


So...with the prelim's out of the way, time to build something!

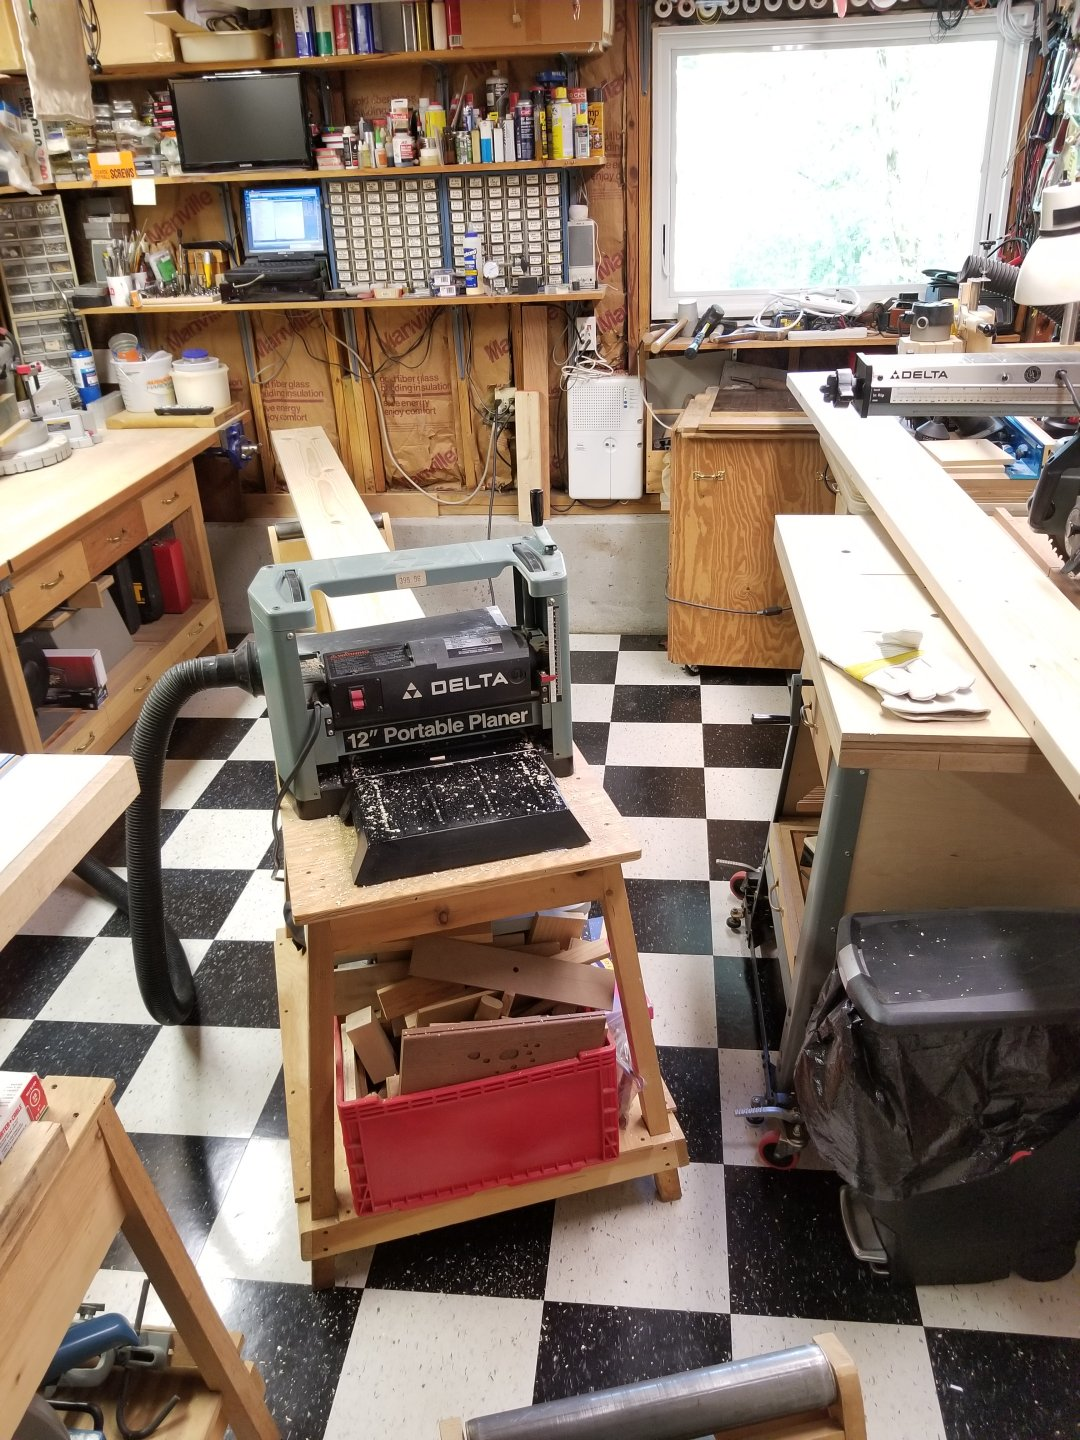
This afternoon I planed and squared up the 8' 2x8s for the dolly in my wee shop...
1612837693497.png


1612837727224.png


Was going to keep going but after a close inspection of the bottom of the freezer I spent the rest of the day doing a design revision to account for the way the chest freezer was built - which resulted in a decidedly non-uniform bottom.

Rather than insert the compressor and bolt it to an internal base plate in the conventional manner which would have maintained the otherwise flat bottom from end to end, this compressor was already attached to its plate - which was then attached to the underside of the base chassis. And as the plate has all kinds of bent "ribbing" for strength which project almost 1/4" below the rest of the chassis bottom, I'm going to have to account for that lest the whole thing sit at an angle.

But I have a solution...

Cheers!
 
Last edited:
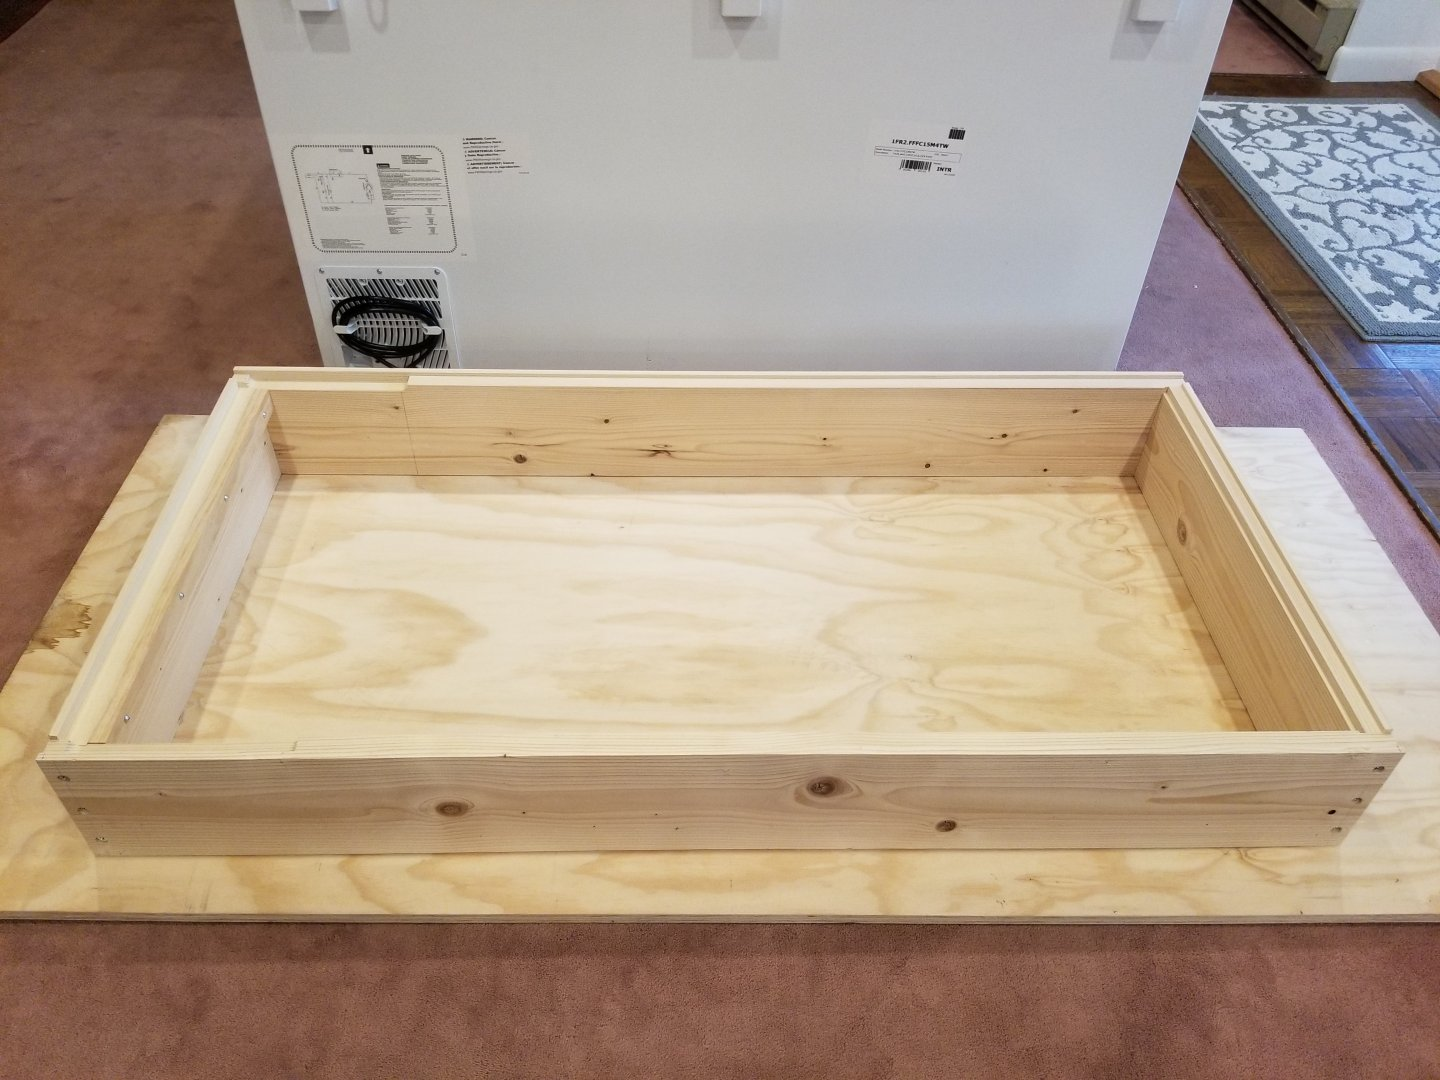
Got the basic dolly fabricated today. After cutting the squared stock to size I ran it through the router to cut a rabbet on the inside that the freezer carcass will rest in.

1612838688949.png


Here's what I was up against: that stupid compressor mounting plate attached under the cabinet. The tops of the ribs project 7/16" below the cabinet rails, so I had to accommodate that by cutting that area of the rabbet deeper.

1612838748710.png


The extra relief is shown here...

1612838776280.png


I'm home alone this week and my go-to neighbor is camping with his kids, so I had to come up with a way to get the ~150 pound freezer on top of the dolly for a test fit. Took awhile but I figured it out, and was pleased to see all my math worked :)

1612838803391.png


1612838823424.png


1612838842137.png


As the dolly will be painted (white) I didn't try to get cute ending the rabbets before blowing out the ends of the long rails. The pine end grain wasn't going to stand up to a bunch of chisel work anyway. I'll cut and glue fillers for those gaps and once painted nobody will ever know :)

Tomorrow I'll be adding the electronics drawers, corner bracing and casters...

Cheers!
 
Last edited:
Tuesday was "Vaccination Day" - in the afternoon I got whacked with both this year's flu shot in one shoulder and the second round of Shingrix in the other, both IM. Woke up Wednesday morning, both shoulders unhappy. Did what I could but it wasn't a lot. Much better today, thanks :)

First to-do was cutting openings for the electronics drawers in the back. Made a template and routed them out. Big fan of 1/4" MDF for templating - basically cut a rectangular frame sized for the largest opening, then fill it in with custom symmetric size pieces to match the task. I used this template four times so far on this job and it'll get used at least three more times before the build is done.

1612838922852.png


Et voila.

dolly_build_20sm.jpg


I've been a huge fan of the Kreg pocket screw system since Rockler first carried it forever ago. It's so freakin' handy.

dolly_build_23sm.jpg


I used it on the cross-members with full-extension drawer slides attached and used my backup system controller to check the fit.

dolly_build_24sm.jpg


dolly_build_25sm.jpg


Next, corner-bracing and casters...


dolly_build_26sm.jpg


Finished the day cutting and gluing plugs to fill in end gaps from the various rail routings. Tomorrow I'll sand and prime the beast and probably get one finish coat on it before the day is done. Then it'll be on to building the lid...

Cheers!
 
Last edited:
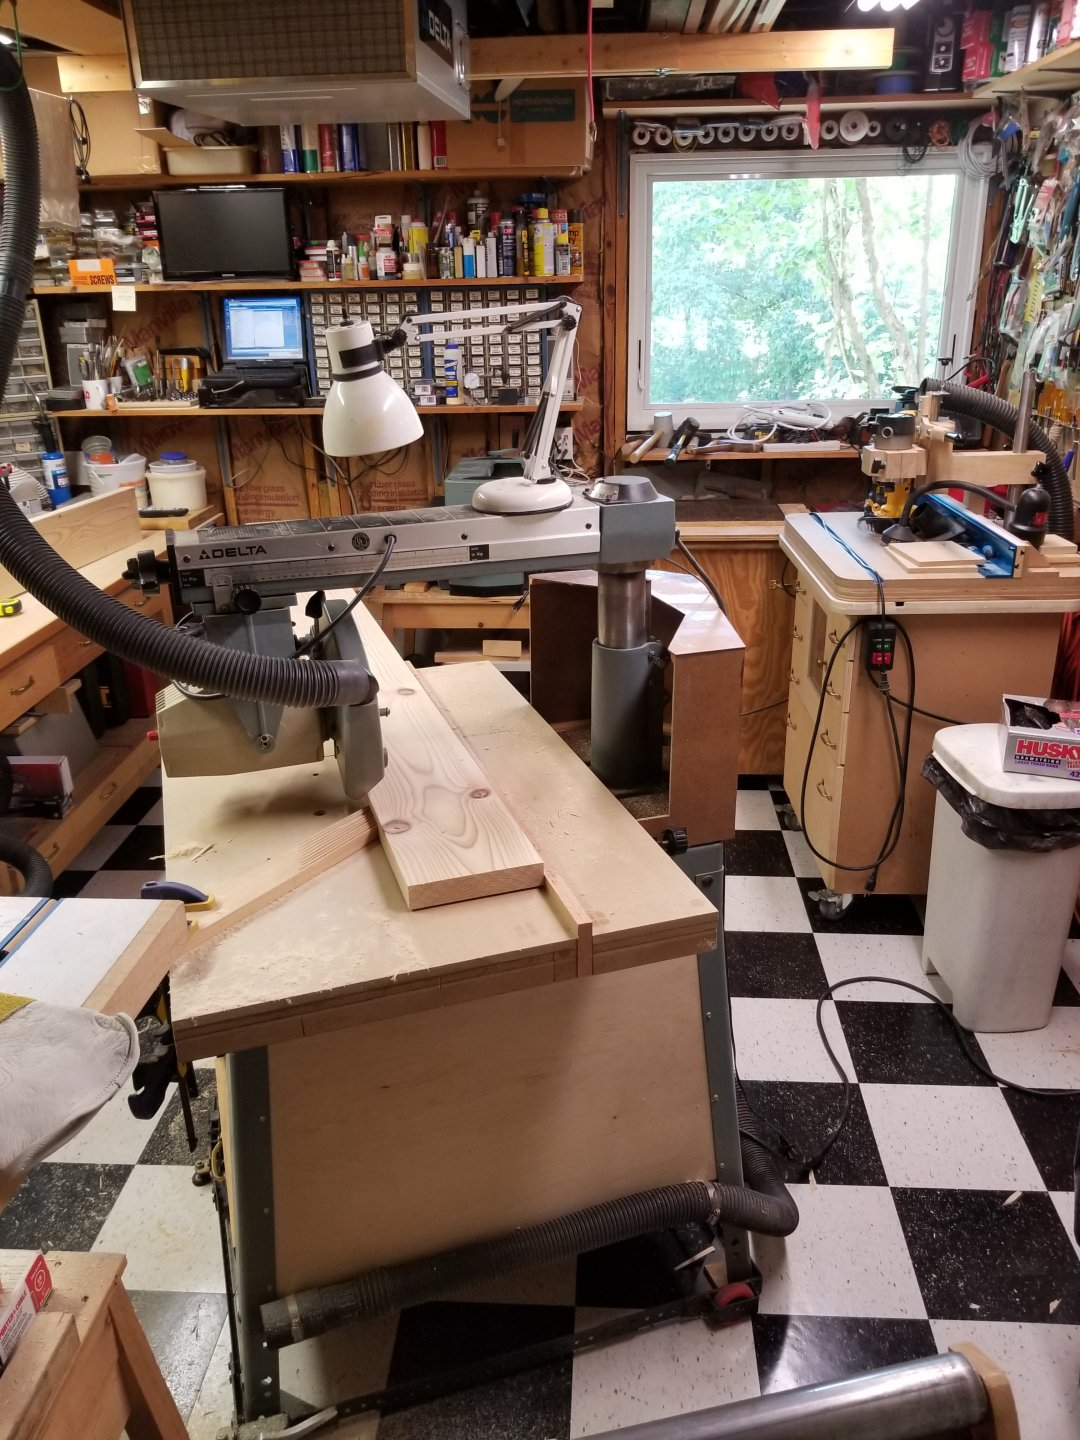
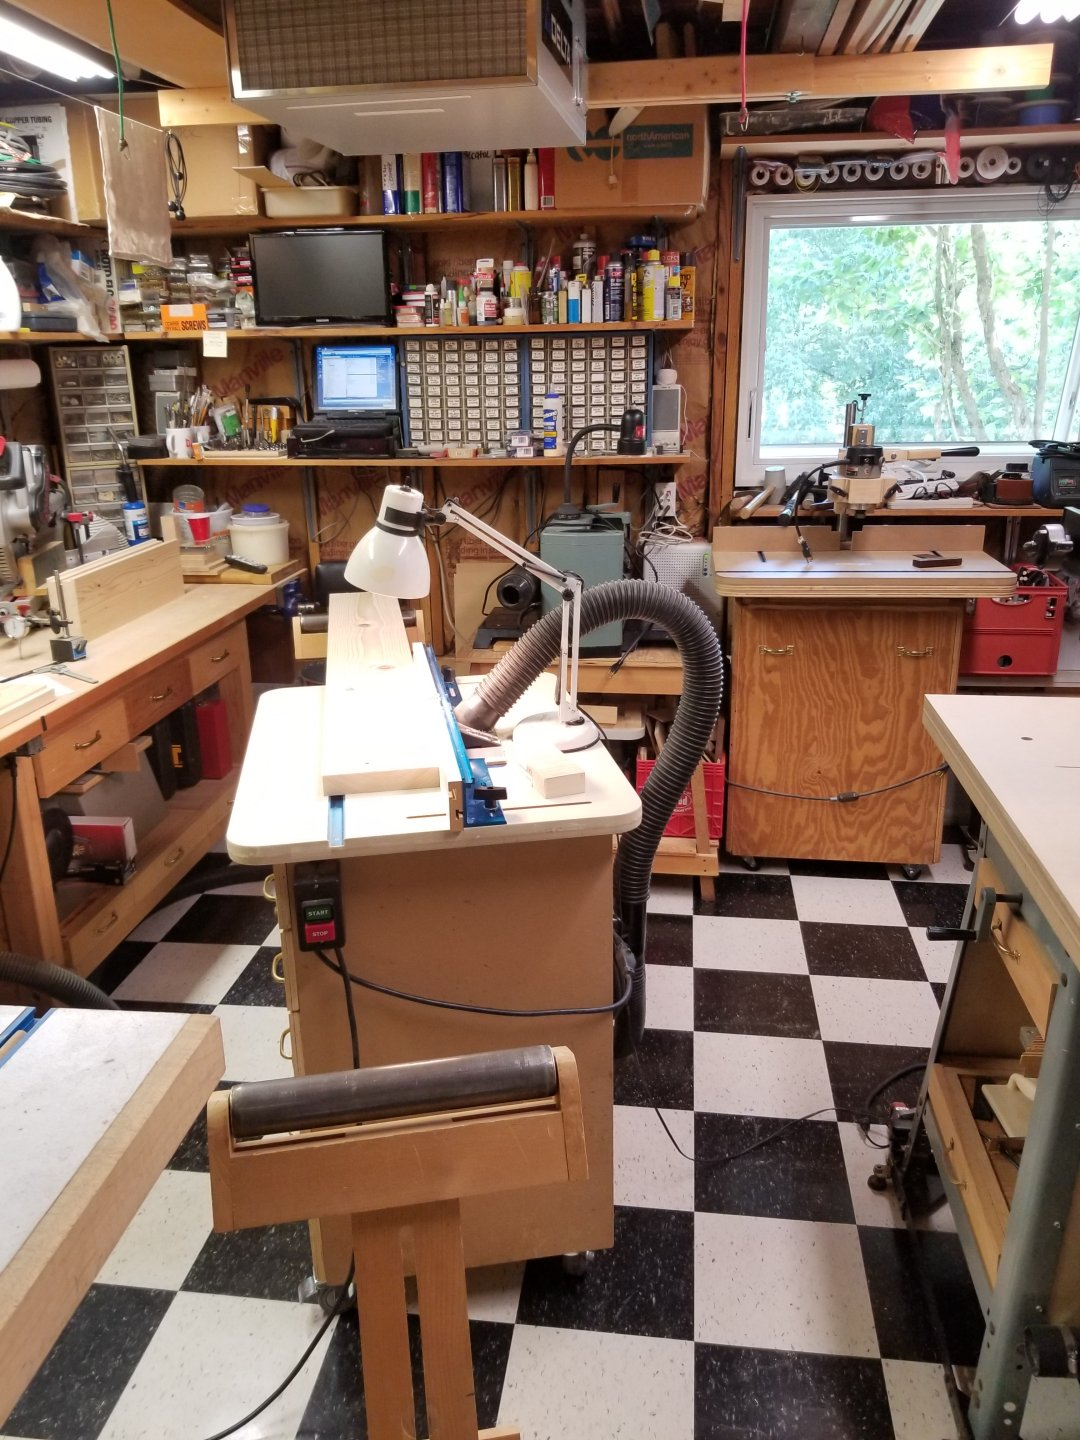
fwiw, y'all have only seen my shop from the door end, so here are a few shots from the other end.
Including the wood racks and air scrubber mounted to the ceiling there isn't much unused space...

dolly_build_14sm.jpg


dolly_build_15sm.jpg


dolly_build_16sm.jpg


Yeah, that's all pretty OC right there ;)

Cheers!
 
Last edited:
Nothing very exciting to show today, I had other tasks to deal with in the morning then spent the afternoon sanding, filling and priming.

dolly_build_27sm.jpg


Contrary to Zinsser, their primer isn't always ready for top coating in two hours, and it didn't feel "ready" by Beer-Thirty. Priorities :)
I wasn't going to get both top coats done today anyway, but I can tomorrow, so it's a wash.

Cheers!
 
Last edited:
I love fabrication. Doesn't matter the material, purpose or design, I just like building stuff. Always have, from scale modeling in my early yute through various cabinetry and furniture pieces to the 4 BR 1500sf salt box my dad and I built in the mid-80s, with a myriad of diverse projects in between and since. Explains the collection of tools, most of which weren't in any of the pictures (stashed in the bench drawers). I even have a plate joiner and actually use it - who does that anymore?

But I do not enjoy finishing. Especially with modern, low VOC/water based finishes. They're a pita.
Life was easier with oil based primers and paints that actually leveled, these days in the era of 100% acrylics everything flashes so fast they have a scant chance of laying flat.

Fortunately, as has surely been evident on HBT, when it comes to keezers I'm all about function over form - "High Tech/Low Art" :)

I did get the two coats of white paint on the dolly today - on either side of a lovely 5 mile hike through our neighboring conservation land - and it'll do fine, just like its two predecessors. I have to caulk the inside of the new freezer carcass next, then I'll set it on the dolly and move on to the lid...

Cheers!
 
Last edited:
Moving along...yesterday I built the basic lid frame, dry-fitted the big pieces together and plopped it atop the freezer to check the fit.
It sat perfectly flat around the entire perimeter, a good start.

lid_build_01sm.jpg


Here's a dimension drawing of the planned lid fabrication.

1612844640147.png


I went with 1x4 hard maple, doubled at the hinged side for strength. And as the flat top of the freezer chassis rim is exceptionally thick (2") I'll add 1x1 strips (shown, but not attached yet) to the other three sides to double the width at the interface allowing for a wider gasket than a single 1x4 edge would allow.

lid_build_02sm.jpg


After the test fit I took the framing apart to get ready to make holes. First transferred the important dimensions from my plans to the front and back pieces, which immediately caught a couple of problems that required design revisions.

lid_build_03sm.jpg


Revisions in place, I modified my router template for the recess around the electronics interface panel and did a test cut on a scrap of MDF...

lid_build_04sm.jpg


Green lighted, cut the recess into the rear stretcher...

lid_build_05sm.jpg


Modified the template yet again, this time for the deep relief for the connectors on the interface panel...

lid_build_06sm.jpg


Next to the drill press to knock a couple of holes the rest of the way through for the cables to pass.
Also drilled the five holes for the 1/4" MFL bulkheads.

lid_build_07sm.jpg


Tomorrow I'll finish up the back stretcher - I have to carve out a hole for the AC bulkhead - then start on the front...

Cheers!
 
Last edited:
Lost a bunch of time dealing with a tire that went down on the Big Road. Put the full-size spare on and when I got home took a close look at the tire and realized the whole set was definitely passed it's "Best Used By" date. Oh well...

Anyway, it was the final "router and template day" as I finished cutting both lid frame stretchers...

lid_build_08sm.jpg


lid_build_09sm.jpg


lid_build_10sm.jpg


Put the frame back together and perched it on the freezer. Still lays dead flat. Tomorrow I have to run out and pick up a sheet of 3/4" cab-grade plywood to make the top, and a sheet of 1" foil-backed polyiso foam board...

lid_build_11sm.jpg


lid_build_12sm.jpg


Cheers!
 
Last edited:
Today's progress...cut the 3/4" plywood top for the lid, always an adventure in my wee workspace. This was the next to last cut - I should have shot a pic of the first cuts on the full sheet but I'd have had to crawl under stuff to get to the doorway.

lid_build_13sm.jpg


Fits nicely...

lid_build_14sm.jpg


Laid out vertical lines from the oem lid mounting screw holes. For some reason the groups of four screw holes are not vertically aligned.

lid_build_15sm.jpg


I did a rubbing to pick up the offsets. Weird - no idea why they did that, but I have to deal with it.

lid_build_16sm.jpg


The oem lid gasket is a full 1/2" tall. I actually bought a replacement gasket, but it uses a back-side attaching rib with an extreme arrow-head profile that would be very tough to accommodate, so I'll be sending it back and using a more conventional, foam rubber gasket. But that will compress in the 1/8-3/16" ball park, so I can't mount the hinges to the lid using the same geometry as the original lid. My mount points have to be around 3/8" higher up on the lid edge.

There isn't a lot of adjustability in the hinge elevation relative to the cabinet - maybe a 1/4" - so I need to get the mounting right. Too low and the lid won't seal, too high and the lid won't full close. I finally decided to make a mechanical mock-up to give me something to visualize while not screwing up the actual lid.

lid_build_20sm.jpg


[Aside: Looking at that angle there's a small chance that once my tower is attached the lid will balance in the raised position.
Otherwise I'm looking at deployable prop arms.]

This is with the hinge mount points 1/2" higher than the oem lid. I think it will work.

lid_build_17sm.jpg


That was with the hinges bottomed on the cabinet ends; the only adjustability would be up.

lid_build_18sm.jpg


I stuck the end of the prospective gasket material under the back edge. It's almost totally compressed - adjusting the hinges up an 1/8" would be a perfect "crush".

lid_build_19sm.jpg


Tomorrow I'll summon up the courage to drill the lid frame for the hinges and hopefully all will be well there. Next I'll take the lid apart, drill pocket holes around the perimeter to attach the top to the frame, dry fit the frame to the lid and do some prep sanding before finally gluing and screwing it all together for the last time...

Cheers!
 
Last edited:
Huge day today!

The whole hinging thing had me tied up in self-doubt. Honest to god if you'd seen me today you'd think I seriously needed leveling meds. I must've laid out 10 full sets of lines, sanding each off in favor of the next, before I finally settled on a drill pattern and went to town on the doubled back stretchers on the press [sorry 'bout the fried pic]...

lid_build_21sm.jpg


Ok, so that cake was baked and whatever was going to happen when the lid was attached to the cabinet was going to happen. But next I had to drill a crapton of pocket holes in the lid framing - and almost every step of the way I kept thinking I had the pieces either upside down or I was drilling the wrong side. Even the last board freaked me out because looking at it made me think I'd drilled the other 4 pieces wrong. I actually broke a bit of a panic sweat at that point.

lid_build_22sm.jpg


BUT...somehow I managed not to doubt myself into an actual eff-up, and got the lid assembly glued and screwed together.

lid_build_23sm.jpg


So, on to the real drama: did I get the hinge mounting right or did I do something I was gonna have to fix?

Nailed it!

lid_build_24sm.jpg


lid_build_26sm.jpg


And the next bestest everest part: it stands up on its own!

lid_build_25sm.jpg


So...tomorrow I'll sand that puppy up nice, hit it with primer, and maybe get one coat of paint on it (or not, if past is prologue, in which case I'll do both coats on Sunday). Next will be fitting the insulation board, then starting to mount the gas hardware...

Cheers!
 
Last edited:
The supply chain gods have been messing with me the last week. The Formica top that was suppose to arrive today now won't show 'til next Monday, and meanwhile a package of 20 Tiny XLR connectors has been sitting 15 miles from me in a USPS sorting center since Thursday. Has not moved since. Combined they don't leave me much of a path to progress.

I did get the lid inside all painted, and had fun coating the shop with foam debris while cutting all the insulation board pieces to fit.

lid_build_27sm.jpg


I installed a riser for my gas beam...

lid_build_28sm.jpg


Started fabricating the inside connector panel that all of the flow meters and temperature sensors will plug into. I like using FR4 for such things though it is a bear on tools...

lid_build_31sm.jpg


lid_build_32sm.jpg


I have two other, smaller panels to fab, then I'll be waiting for the mail. Might have to go fishing or something :)

Cheers!
 
Last edited:
Cut the two small panels today, lots of drill press and some over-arm router time.
This is the IR sensor that will be mounted in the front. Left some room for who-knows-what.

lid_build_34sm.jpg


And this is the lid interface panel that goes in the back and is cabled to the controller in the dolly.

lid_build_33sm.jpg


Still don't have the Tiny XLRs to populate their panel positions so I can start wiring. Between that and the delay on the laminate for the top I'm pretty much at a hard stop until something gives. I may have to brew something...

Cheers!
 
Last edited:
With the newly received sheet of Formica in hand, the K3 build made some progress today.

I rough sized the laminate top using a saber saw with a 24 tpi blade, then commenced applying the contact cement to lid and laminate. I've found the cheap mini-rollers are the best bet and save the angst of trashing a good brush.

lid_build_35sm.jpg


Waiting for the cement to get that "dry gloss" look...

lid_build_36sm.jpg


My dad always used kraft paper as a buffer while lining up laminate to counter tops, but I've found dowels - or the moral equivalent in this case (a bunch of 1/2" quarter round scraps to go with the three actual dowels) is easier for one person to deal with...

lid_build_37sm.jpg


Top lined up. From here I removed the center spacer and pressed the laminate down by hand, then worked outwards in both directions, removing the spacers along the way.

lid_build_38sm.jpg


Then used a 3" J-roller, again working from the center outwards, and paying particular attention to press all the edges.

lid_build_39sm.jpg


Last step was trimming the laminate flush to the lid perimeter. It'd been so long since I used this antique Hitachi trimmer I had to review the manual, but it worked a treat. Only issue I had along the way was dealing with wrinkles in the protective plastic film atop the laminate - had to peel it back on the far end - but got it done. Followed with a palm sander to get everything dead flush.

lid_build_40sm.jpg


So...next step is running a modest oak band around the top to capture the edge of the laminate and cover up the raw plywood edge, then some paint, and I'll be able to start loading this lid with goodies :)

Meanwhile, "K2" is still hanging in there - every 8-9 days I hit it with another shot of r134a and it snaps right back to peak performance. She's a gamer :)

Cheers!
 
Last edited:
Made some progress today on my keezer build. I finished painting the lid...

lid_build_47sm.jpg


...then, because my bag of connectors is still in limbo within the bowels of the USPS in a facility 20 minutes from me - now Day 14 ffs! - I decided to steal connectors from the test panel for my brewery controller. Sucks, but had to be done if I was going to make any headway.

Populated the two panels with the connectors...

lid_build_44sm.jpg


...and started building cables.

lid_build_45sm.jpg


Lots of stuff still to do but at least there are no blockers now...

Cheers!
 
Last edited:
Good progress on "K3" today. Have almost all the wiring done - just need to mount the interior led light bars and the lid switch.

lid_build_52sm.jpg


lid_build_51sm.jpg

Made a significant ECO to the lid, moving the gas manifold from its original location to the opposite end, more like my current keezer lid. Although I had my reasons for the original location, I had created a big ass mess having it stationed above the edge of the hump, which slammed it against the gas bulkheads. And when I drop in the rinser it'd be Grand Central of tubing. No bueno.

nbd. If that's the worst change I made it's cake. And, ime, no worthy design ever makes it from start to finish without at least one good change :D

Tomorrow I'll mount the light bars and switch, then hook up my backup controller and test out all of the wiring, making sure all the flow meter runs go to the right places, and same with all the temperature sensor and fan power ports. At that point I'll be ready to pull off The Big Switch, where K2 is decommissioned, and I strip it for the tower, beer lines, drip tray, glass rinser system, and finally the primary brewery controller.

Speaking of K2, I've been steadily drawing it down. Aside from the stout there's about a six pack of beer left in it.

taplist_03oct2020.jpg


I do have four full kegs plus that stout for when K3 is commissioned, but this is literally the first time in fourteen years I've had one tap empty for more than the time to swap in a freshie, never mind five of them pretty much goners...

Cheers!
 
Last edited:
My "Let There Be Light!" moment. After debugging a mis-wired bulkhead power connector (I had to wire everything up-side-down and missed that one) I got the lid switch and cheap LED light bars mounted and working.

lid_build_53sm.jpg


lid_build_54sm.jpg


Cleaned up the wiring, tie downs and ties, added SS screws to the tie downs to pin them to the wood structure, which also holds all the perimeter foam pieces tightly in place.
All the basic wiring stuff is now checked out, so tomorrow I'll hook up my backup control system to check out the flow meters and temp sensors. Then it'll just be a matter of me pulling the trigger on "K2" to start harvesting the parts I need...

Cheers!
 
Last edited:
No Patriots game today so I completed the electrical checkout of my "K3" lid project. Started by doing a basic unpowered sanity check using the "known good" umbilical cable (borrowed it from a powered-down K2) to make sure I didn't left-right transpose or "end-around" the DB37 lid connector wiring.

lid_build_55sm.jpg

With that out of the way, time to plug everything in and power up the backup controller. No smoke!

Then I pulled up the Raspberry Pints tap list and walked a flow meter through all of the sockets, blowing through it and checking the tap list "poured ounces" count to make sure it incremented at each position...

lid_build_56sm.jpg


Next was running my home-rolled temperature logger to check out its five temperature sensors...

lid_build_57sm.jpg


Next was running the BrewPi instance that will actually control the keezer compressor, making sure all three of its sensors were registering properly.

lid_build_58sm.jpg


Last was making sure the motion detector worked. And with that, the lid is 100% electrically ready to go!

Have to go up to NH tomorrow for a couple of days, hoping to decommission K2 and harvest the parts I need later in the week. Just kicked another keg so there's just the last two with a scant pour or so in each, plus the half-keg of stout that'll go in one of the fridges for hopefully just a little while...

Cheers!

[edit] Before I start blowing big holes through the lid I wanted to see how it looks atop the cabinet. I'm feelin' pretty good right now :)

lid_build_59sm.jpg


lid_build_60sm.jpg


Aaand another keg kicked. Down to one...

[edit2] And the last keg just blew a hole in my glass. Nothing holding me back now - literally: exuberance has led me to pick up an integrated drip tray/rinser for a cleaner look - and the option to add one or two single tap towers in the future...

Cheers! (spending my kids' inheritance :D)
 
Last edited:
"The End Of K2"

I put my dying keezer to rest today. My second keezer, it didn't quite make it to its 9th birthday.
It was a great machine, reliable as hell (until it wasn't), always good pours...

k2_retired_02sm.jpg


Hoping the next build will be a little bit cleaner in the back...

k2_retired_03sm.jpg


...but it's definitely going to be much less cramped inside.

k2_retired_05sm.jpg


Totally stripped it clean of parts for the new build.
I'll eventually stuff the carcass in the back of my Durango and haul it to the same store that sold me its replacement for disposal.

k2_retired_18sm.jpg


k2_retired_19sm.jpg


Meanwhile...K3 gets ever closer to "done"...

lid_build_63sm.jpg


Cheers!
 
Last edited:
Having returned from a week in the mountains with my kids and grands - and away from my humble brewing - I was ready to dig back in and get this beast finished!

Today I installed the system controller and power module and ran another functional test on everything including the lighting (passed). Then I ran all of the tubing for the beer lines, gas lines, rinser water, drip tray drain, and catch tank vent.

final_assembly_01sm.jpg


final_assembly_02sm.jpg


Only thing left is installing the (8) temperature sensors. I'm going to take the time to pick out a matched set of ds18b20 probes from the ~dozen on hand that aren't being used elsewhere. I'm pretty sure one of the original 8 keezer probes was an outlier and being picky is kinda my thing ;)

final_assembly_03sm.jpg


Cheers!
 
Last edited:
Almost almost done! :)
All temperature sensors installed and working, motion sensor is tuned up, and K3 has assumed its rightful place in the house.
Only thing left is to install the lid gasket, then connect the compressor and get it chilled down enough to stick some kegs in it...

final_assembly_04sm.jpg


Cheers!
 
Last edited:
K3 is fully up and chillin' down! :ban:

Today I calibrated all (9) temperature sensors together to a tenth of a degree F, installed the lid gasket, filled and tested the rinser, drain and vent, then connected the compressor to the control system and turned it on. After nothing happened for a couple of minutes - and a split moment before panic could show its head - I realized I had the freezer thermostat set to the "Off" position (dumb ass ;))

So...I used a 3/8" thick inch-wide "dual D" closed cell foam weatherstrip recommended by a fellow HBT member - and didn't split the twin "D" strips, just applied them together for a double-course of stripping.

final_assembly_05sm.jpg


Went with 45° cuts at the ends and jammed the ends together. Hopefully they squish together tight where I can't see 'em.

final_assembly_06sm.jpg


final_assembly_07sm.jpg


With the gasket in place I set the lid down, then loosened the hinge screws and went around the lid with an inside caliper to get the gap set to a uniform 3/16" before tightening the hinge screws down.

Down in the luxuriously spacious bidness area I have two EVA Dry E-500s (with 40mm fans driving cabinet air into them for much better performance), a 120mm fan on the hump blowing lengthwise down the aisle, and a small plastic container with the "Lower Cabinet" temperature sensor tie-wrapped to it sitting on the floor.

The shorty kegs on the hump are the rinser water supply (2.5g) and the rinser tray drainage catcher (3g). Getting these both on the hump saves floor space for actual beer kegs :rock:

final_assembly_08sm.jpg


Filling the 2.5g rinser water keg with 2 gallons of fresh water. I use a scale tared with everything attached then fill to ~16.5 pounds, while using my spunding gauge to keep the head space pressure below 60 psi. This keg feeds an adjustable regulator (seen at the top of the previous pic) to drop the pressure at the rinser valve to 15 psi as recommended by the manufacturer. The "catch keg" is vented outside the cabinet through another bulkhead.

final_assembly_09sm.jpg


Rinser in action...


So, now I wait for the beast to get down to 36°F, at which point I can stick a few kegs of beer in it.
Then I'm gonna be brewing like a maniac to get my pipeline going again - I have 12 empty kegs, a turrible situation! :D

Cheers!
 
Last edited:
Hah! That was close - if I had miscounted you'd be surrounded by my build :D

My dad and I bought all of the big tools when we built our lodge up in the NH White Mountains in the 80s. Sears carried the tool lines we liked - Delta, Porter-Cable, DeWalt. I also grew to love Bosch routers and have a few of those.

It would be difficult to replace the quality of the collection with what's sold today - so much of it has become cheapified. I've taken to fabricating replacement parts to keep things going because most of it is waaay past any form of replacement parts support...

Cheers!
 
Missed this one: the day after the christening I made a modification to the lid, to change the 12VDC wiring for the fans from a hub and spoke scheme to a distributed layout.

The former was a bit ratty as four wires from both ends and the middle of the cabinet had to converge to a single location. Now I have an outlet (the four little boxes along the lid back) near each load so the wires are much shorter and aren't threaded through tubing etc.

final_assembly_11.jpg


Little things make Keezer Life easier :)

Cheers!
 
Did you use a pressure reducer for glass washer water feed? Micromatic recommends 15psi. Also, check valve?

I'm working on a build myself (not a keezer, but wet bar). I'm planning on a Micromatic washer/drain (into granite), but I think I'll do an inset. I'm pretty clumsy and I'd sure I'll roll many glasses off the lip of that washer.
 
No check valve, but yes, you'll note the regulator hanging off the supply tank (a couple pages back). I set it for 15 psi which surprisingly is plenty.
As this is a closed system (I fill the tank via a dedicated bulkhead port) I don't think there is need for a check valve anywhere as there's nowhere for the tank water to go but the rinser :)

btw, I have a Krome Dispense SS surface mount rinser from my old "K2" build. If you're going to build up your bar surface from a supporting substrate (like using tile over plywood) you could set it down and tile around it and it'd stand proud by ~1/4"...

Cheers!
 
So, I may have missed this because I’m not on the board very long - but what do you do or did you do for a living? This is just, I have no words besides beautiful.

It takes a lot to impress me, but here I am!

Amazing job!
 
Wow. Just wow. I'm a newbie to brewing and wine making, and even I can tell this is incredible. All your friends are going to want to party at your house now lol. Cool handle BTW.
 
That is quite an impressive job you did! I think that is about the best one that I have ever seen. Love your work space and there is a ghost in the photo in thread # 10 LOL. Again great job! Cheers :bigmug:
 
As a computer engineer who works in military vehicle cable harness design and electronics integration, I'm fascinated by your controller and electronics setup. Are you able to provide details on your brewery controller?

I gathered you're running Raspberry Pints and BrewPi. Is it a custom Raspberry Pi enclosure?

Also, do you have more details about the various in-out connections on the rear of the lid? LP CO2, HP, CO2, etc.
 
No check valve, but yes, you'll note the regulator hanging off the supply tank (a couple pages back). I set it for 15 psi which surprisingly is plenty.
As this is a closed system (I fill the tank via a dedicated bulkhead port) I don't think there is need for a check valve anywhere as there's nowhere for the tank water to go but the rinser :)

btw, I have a Krome Dispense SS surface mount rinser from my old "K2" build. If you're going to build up your bar surface from a supporting substrate (like using tile over plywood) you could set it down and tile around it and it'd stand proud by ~1/4"...

Cheers!

No, I need true flushmount. My bartop will be a sheet of 1.25" granite. I've having an opening routed into it for the flush-mount Micromatic. Like this:

1612902399327.png
 
Also curious about the different gas inputs and outputs on the lid and more detail on the rinser and drain set up please.

How hard is it to get the kegs in and out of there?
 
Thank you all for the kind words, I do appreciate them. I promise I will respond to all here once I am back home, but tonight I am up north at our saltbox with just a phone.

Very nice. Detailed and thorough. OK, when are we all coming over for homebrew?

When this pandemic ends :)
Having run an open establishment here for years, closing down hasn't been fun for anyone...
Cheers!
 
Back home! As promised:

So, I may have missed this because I’m not on the board very long - but what do you do or did you do for a living? This is just, I have no words besides beautiful.

It takes a lot to impress me, but here I am!

Amazing job!

You're very kind, thank you. My first job was designing memory systems for IBM mainframes in the early 70s, eventually went to Digital Equipment Corp and did memory system designs and processor architecture stuff during the Alpha chip era in the 80s, moved to Stratus Technologies doing fault-tolerant server board design in the 90s, then went independent in 2007 doing SSD designs that ended up in the hands of Micron and the like. Finally retired last year. Great timing, eh? ;)

Wow. Just wow. I'm a newbie to brewing and wine making, and even I can tell this is incredible. All your friends are going to want to party at your house now lol. Cool handle BTW.

Thank you :D My family and friends enjoyed the first two keezers, and hopefully soon more of them will enjoy K3. It's been quite sad that since March 6 2020 only my kids and their families have even seen it never mind pulled some pours. Trying to remain optimistic things will get better before the summer, for instance. We'll see.

btw, the nickname is from the CB radio era of the late 60s into the 70s. You know - the pre-cell phone Stone Age :D

OK - you are making me jealous on so many levels!

Beautiful build!

Thank you kindly :mug:

That is quite an impressive job you did! I think that is about the best one that I have ever seen. Love your work space and there is a ghost in the photo in thread # 10 LOL. Again great job! Cheers :bigmug:

Very kind of you to say so, thank you. But there have been many truly beautiful builds with lovely finishes and even very effective scene lighting shown on HBT - there have been some especially killer coffin tops - and this isn't any of those :)


As a computer engineer who works in military vehicle cable harness design and electronics integration, I'm fascinated by your controller and electronics setup. Are you able to provide details on your brewery controller?

I gathered you're running Raspberry Pints and BrewPi. Is it a custom Raspberry Pi enclosure?

Also, do you have more details about the various in-out connections on the rear of the lid? LP CO2, HP, CO2, etc.

Thanks! I am still running the "classic" (ie: original) RaspberryPints 2.0.1 for the tap list, moderately modified and including my five channel rolling temperature display integrated into the R'Pints gui; and multiple "instances" of the classic BrewPi (version 0.2.10), with one instance running the keezer and the other three controlling my three fridges. All running on a single RPi 2B, with an Alamode hat for the flow meters, and Unos for each BrewPi instance, with those in the three fridge controllers remoted via Bluetooth.

All of the control and comms hardware, along with power supply, powered 4 port USB hub, and software-controlled cooling fan, live in a custom drawer that slides into the dolly on glides. Here's a build shot with the drawer lid removed. The twin of this unit lives on my office desk, running the same SD card image, for use when I want to come up with something new.

1612997430922.png


The controller also has a manual switch that selects between the BrewPi instance for the keezer, and the MH1210 mounted at the front of the lid (with its digital display) for which actually controls the keezer compressor. I wanted the display on the front anyway, and it made sense to plumb it through for backup in case the BrewPi controller ever takes a dirt nap (bad SD card, whatever).

Finally, it also takes the PIR motion sensor sigal from the front of the lid to bring the system out of "doze" mode (basically, wake up the display, and play a welcoming sound). Eventually I want to have that function turn on the brewery lights as well.

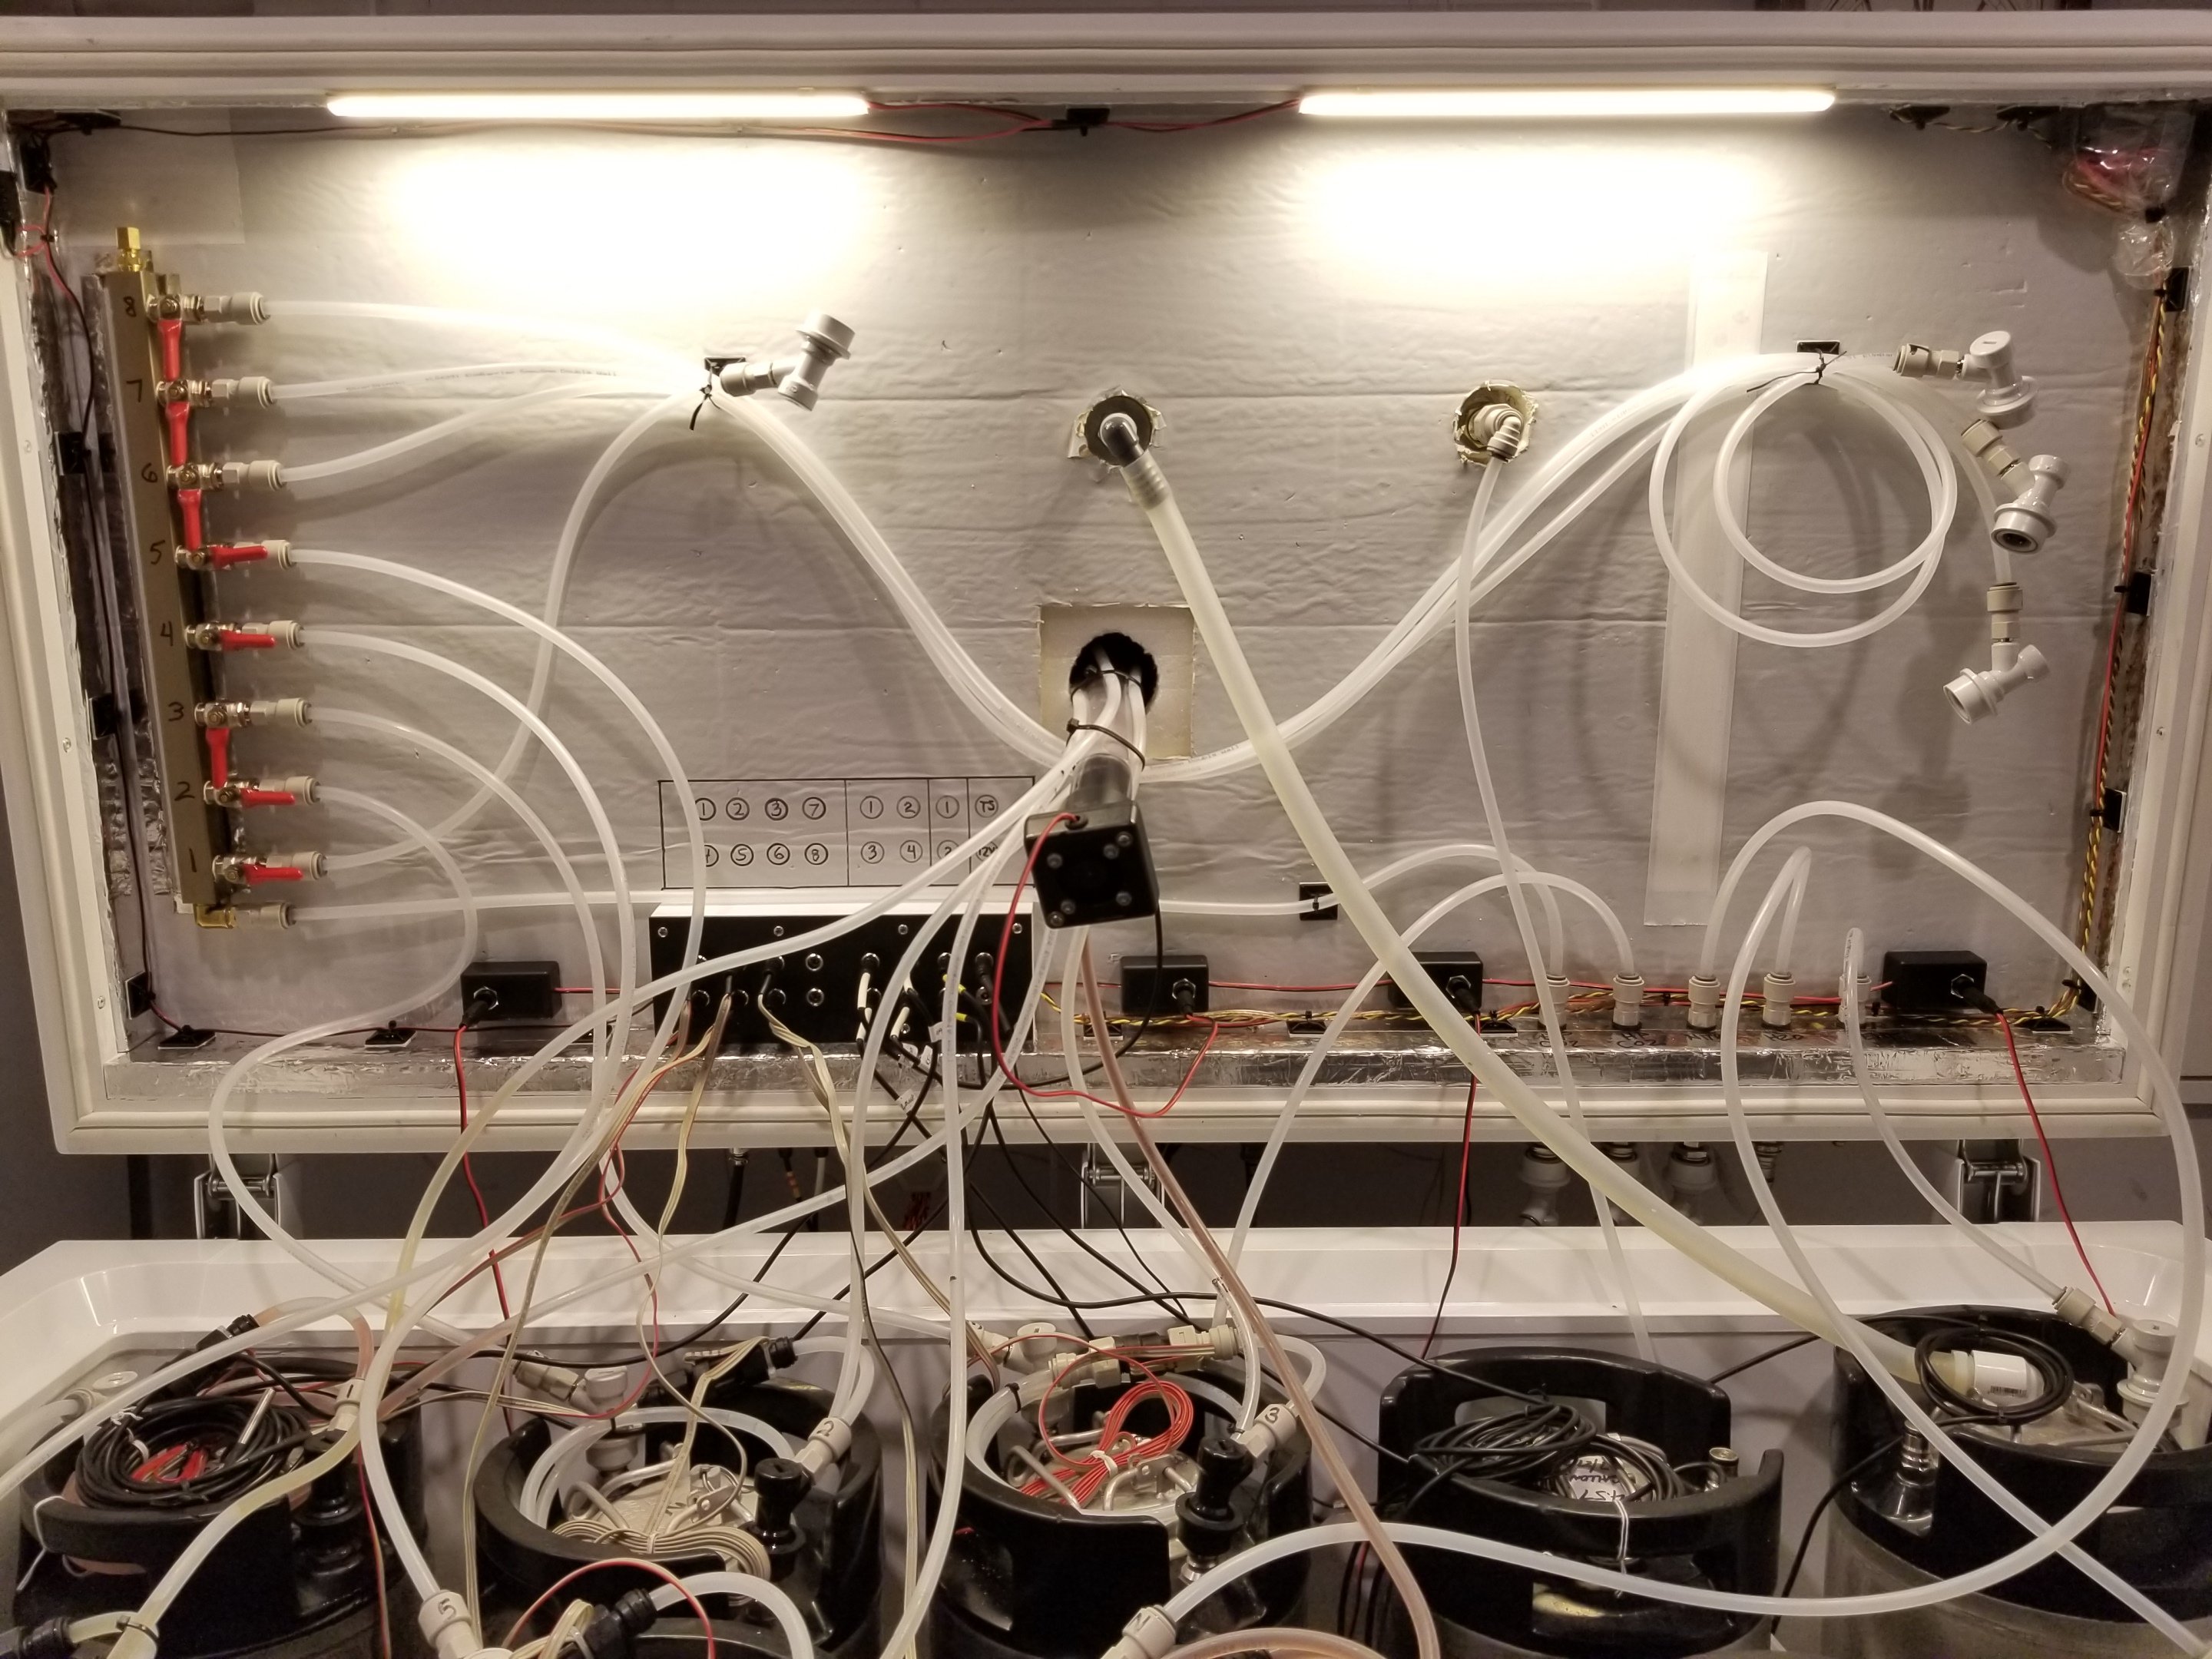
As for the bulkheads in the back of the lid: I carb probably 90% of the beers I brew to ~2.4 volumes, then things like wheat beers to ~3 volumes, and of course there's the stout on beer gas. So I bring both outputs from a dual-body Taprite primary regulator with the 8-way manifold fed from the 11 psi "LP CO2" port, and to a single gas drop from the 15 psi "HP CO2" port. Then there's a single drop on the "Nitro" port connected to my stout keg (70/30 at 35 psi), the "H2O" line to a QD on my rinser water keg "in" post, and finally a "Vent" line from a QD plugged on the "in" post on the drip-tray-catcher keg (I did not want to vent any moisture inside the keezer).

hth!


All I can say is WOW!

Cheers! :mug:

Also curious about the different gas inputs and outputs on the lid and more detail on the rinser and drain set up please.

How hard is it to get the kegs in and out of there?

While I've lost almost two inches from my peak I'm still a scoche over 6' 3" :) so it's not hard to heft fresh kegs over and in.
And sticking with just the eight beer kegs leaves plenty of space to get kegs in and out - it was much trickier on K2, where I'd have to remove lines from kegs to get others in and out. No need to do that anymore.

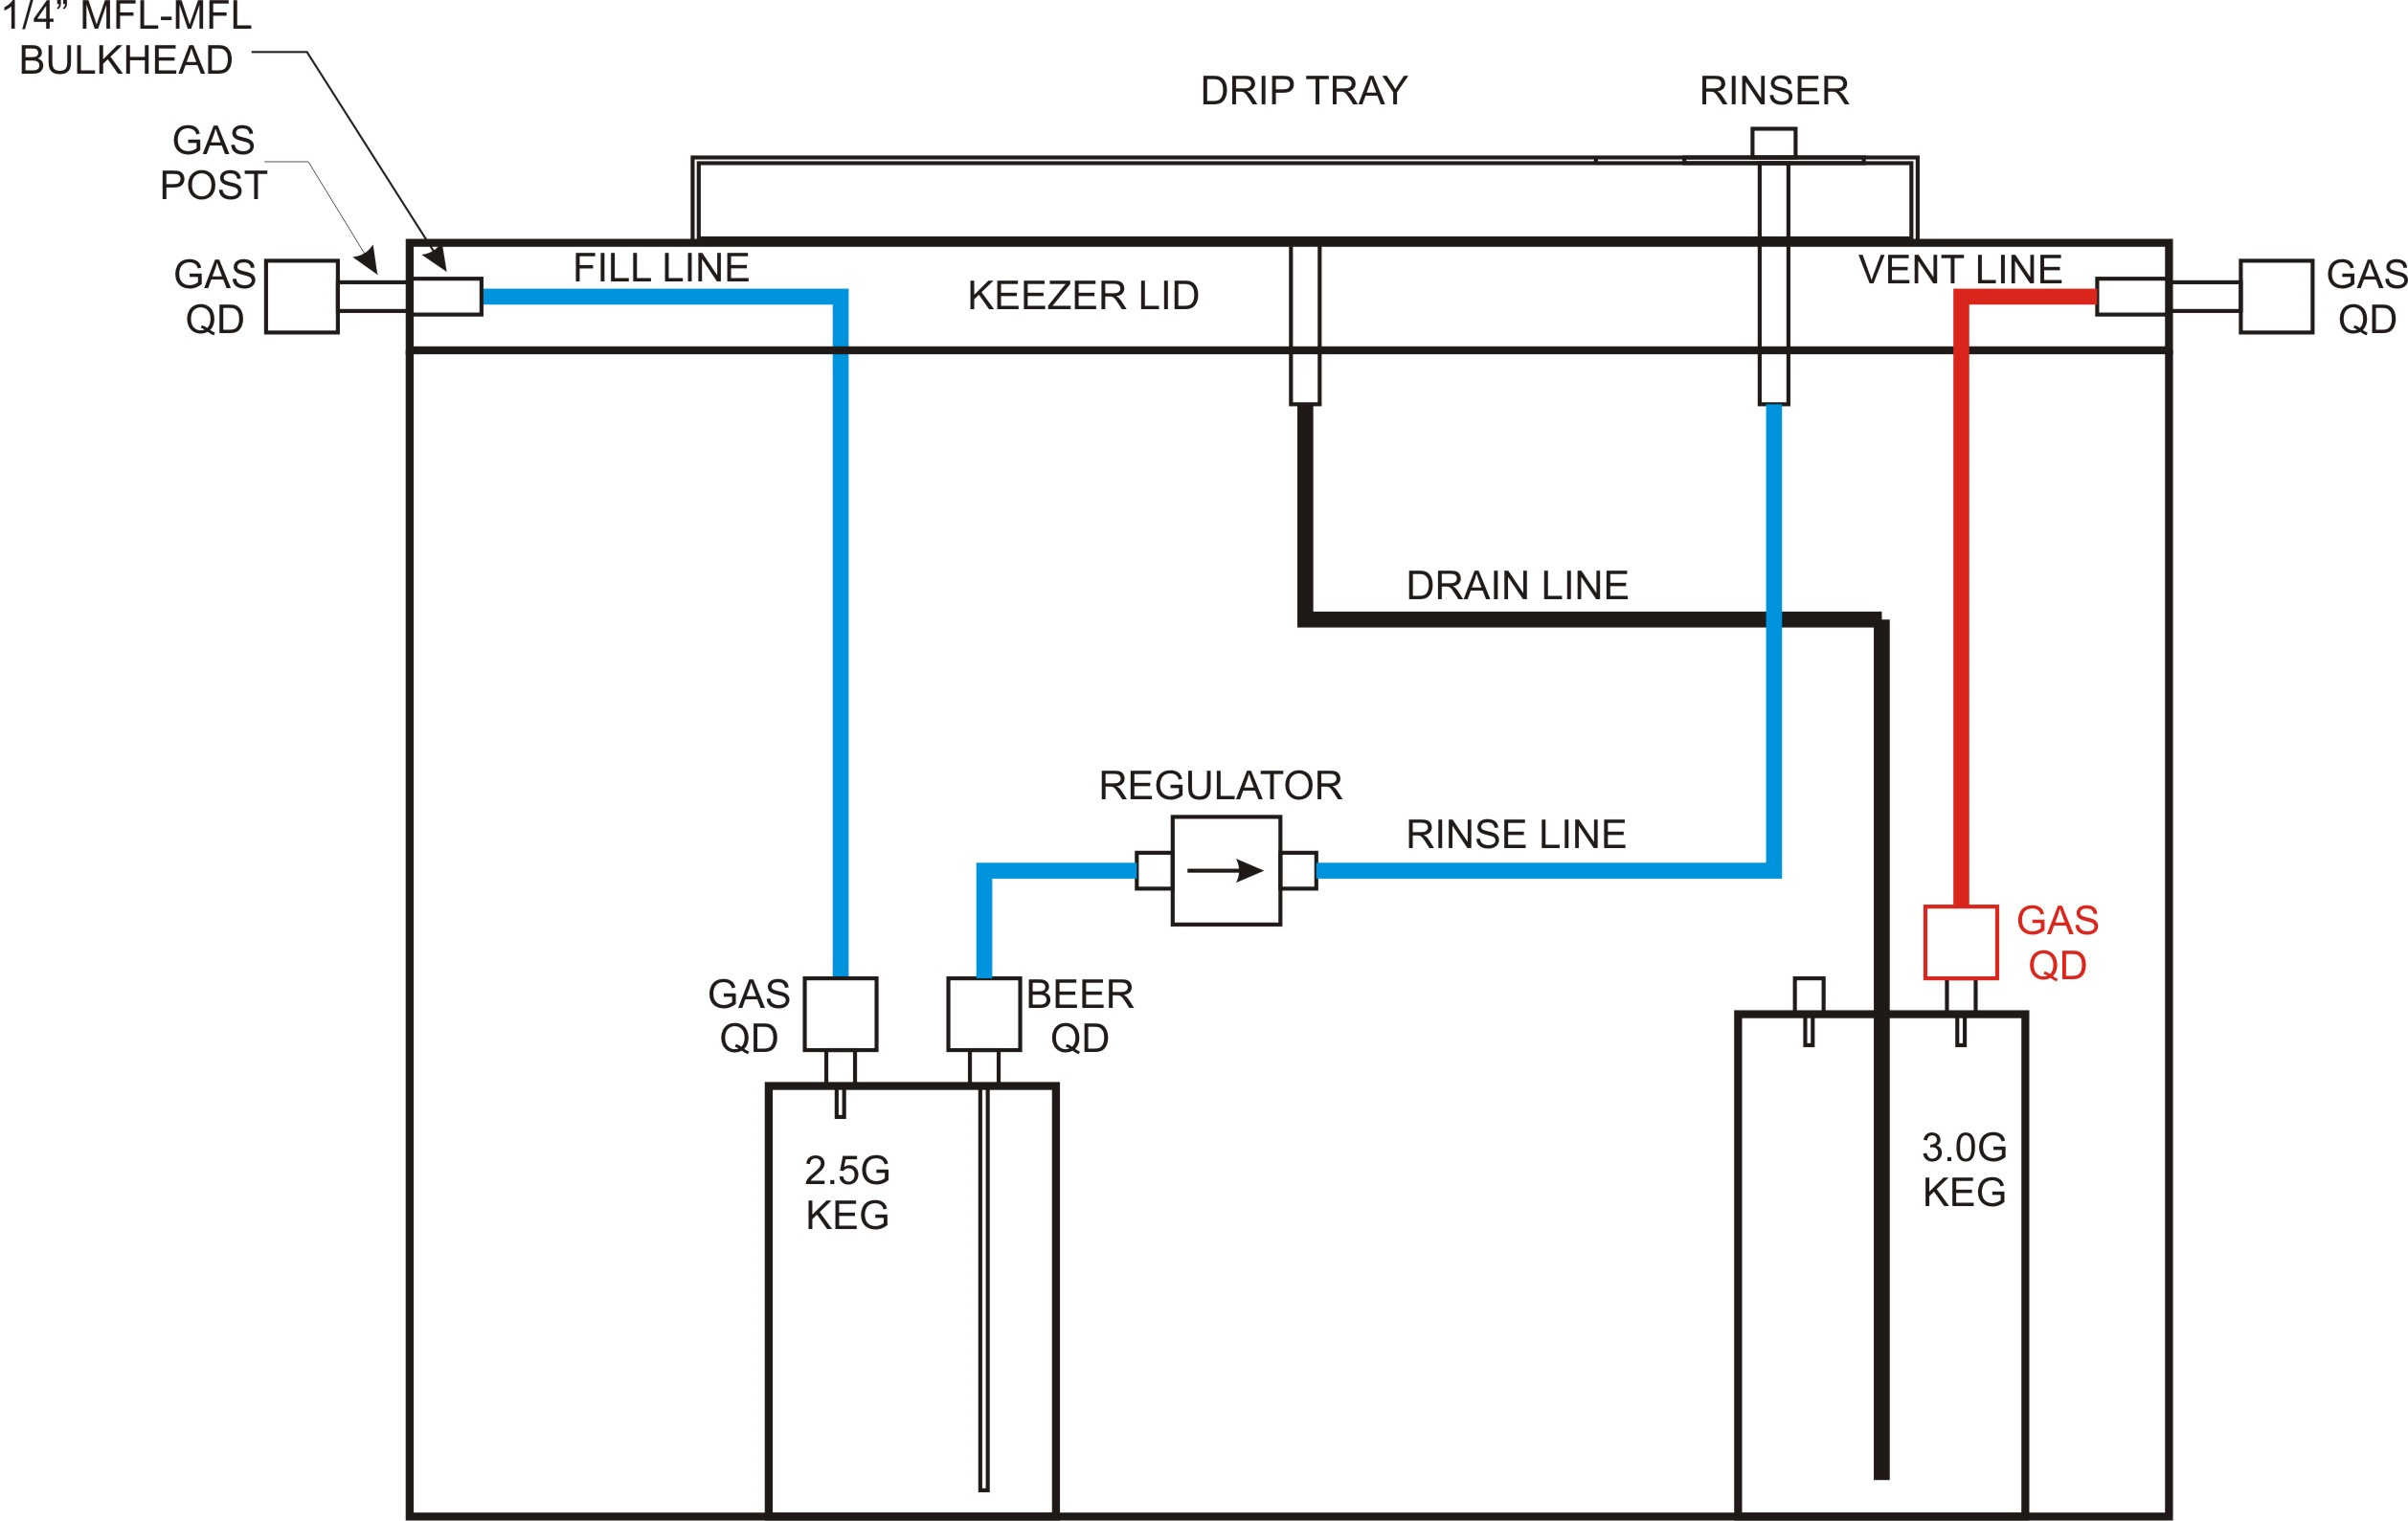
As for the rinser system: this schematic shows all of the related plumbing. In use I fill and pressurize the 2.5 gallon keg in situ via the H2O line, the drip tray drains through a port drilled in the 3 gallon keg lid, and that keg vents to the outside via a dedicated open bulkhead (no post/poppet).

1612999152871.png


Wow, what an amazing job!

Thank you kindly :mug:

Cheers, folks!
 
Last edited:
Back
Top