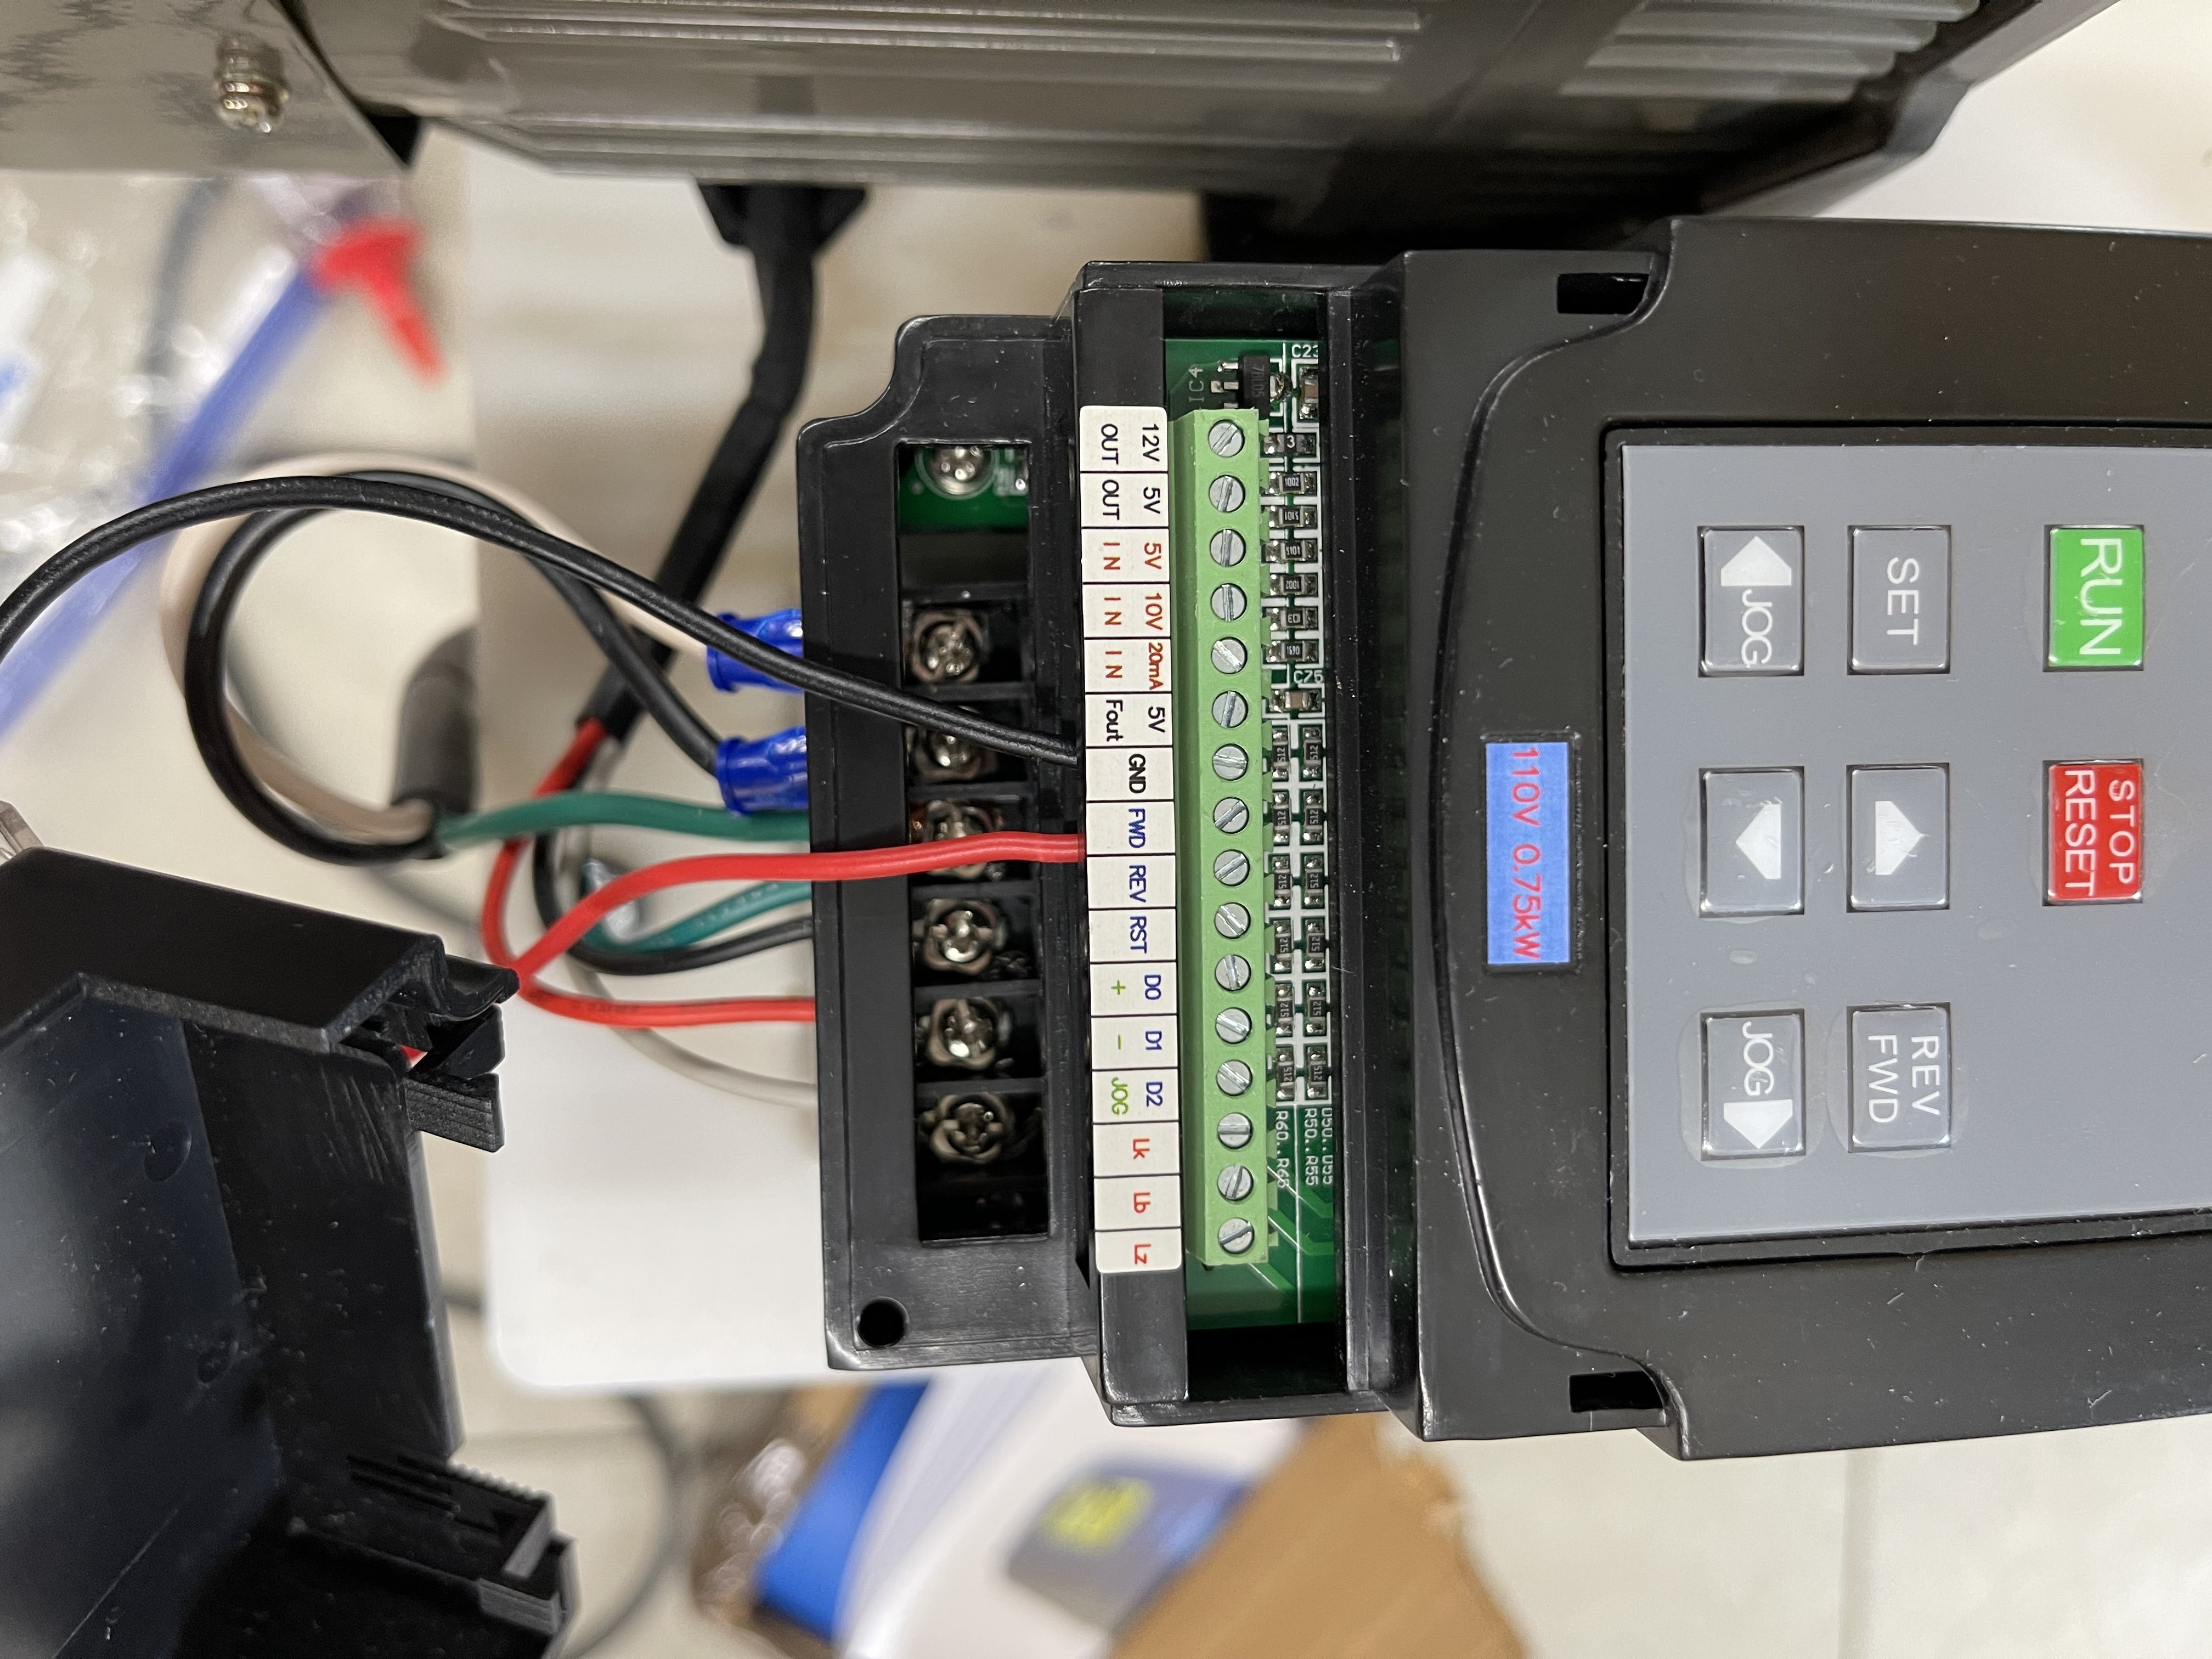
https://www.ebay.com/itm/124800199932This is what I purchased. It takes a little bit of programming but I can walk you through it if you like.
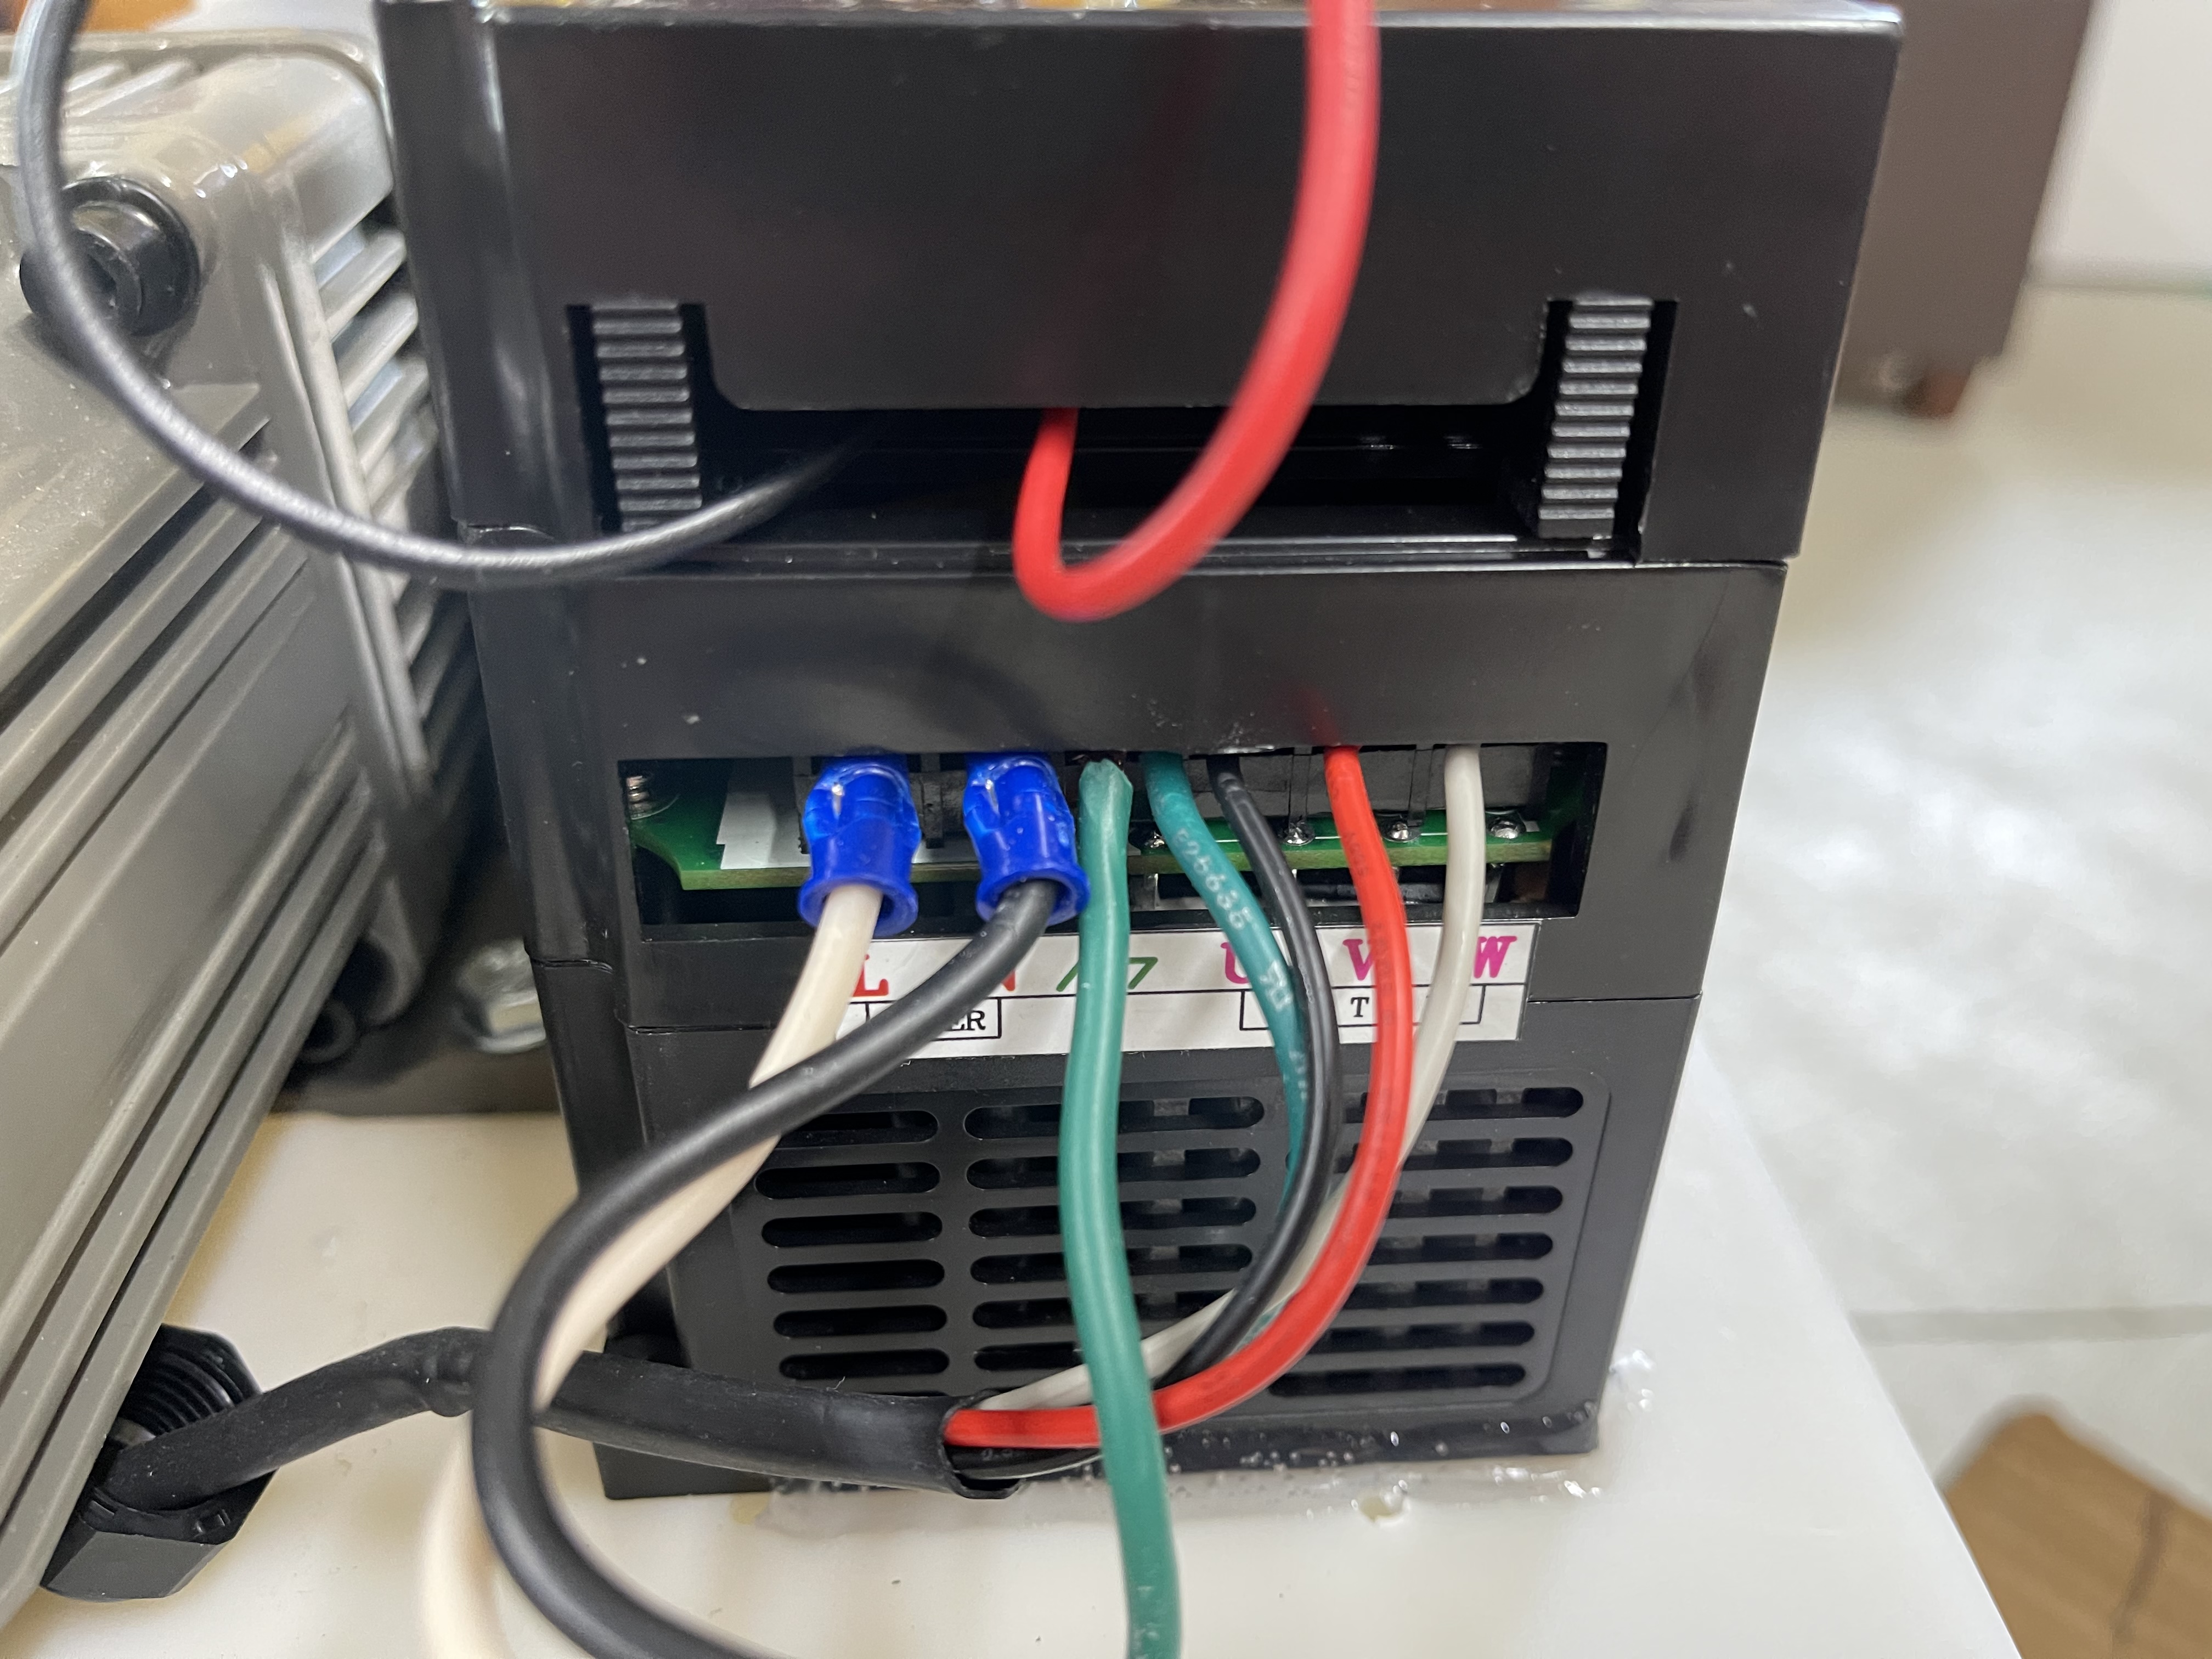
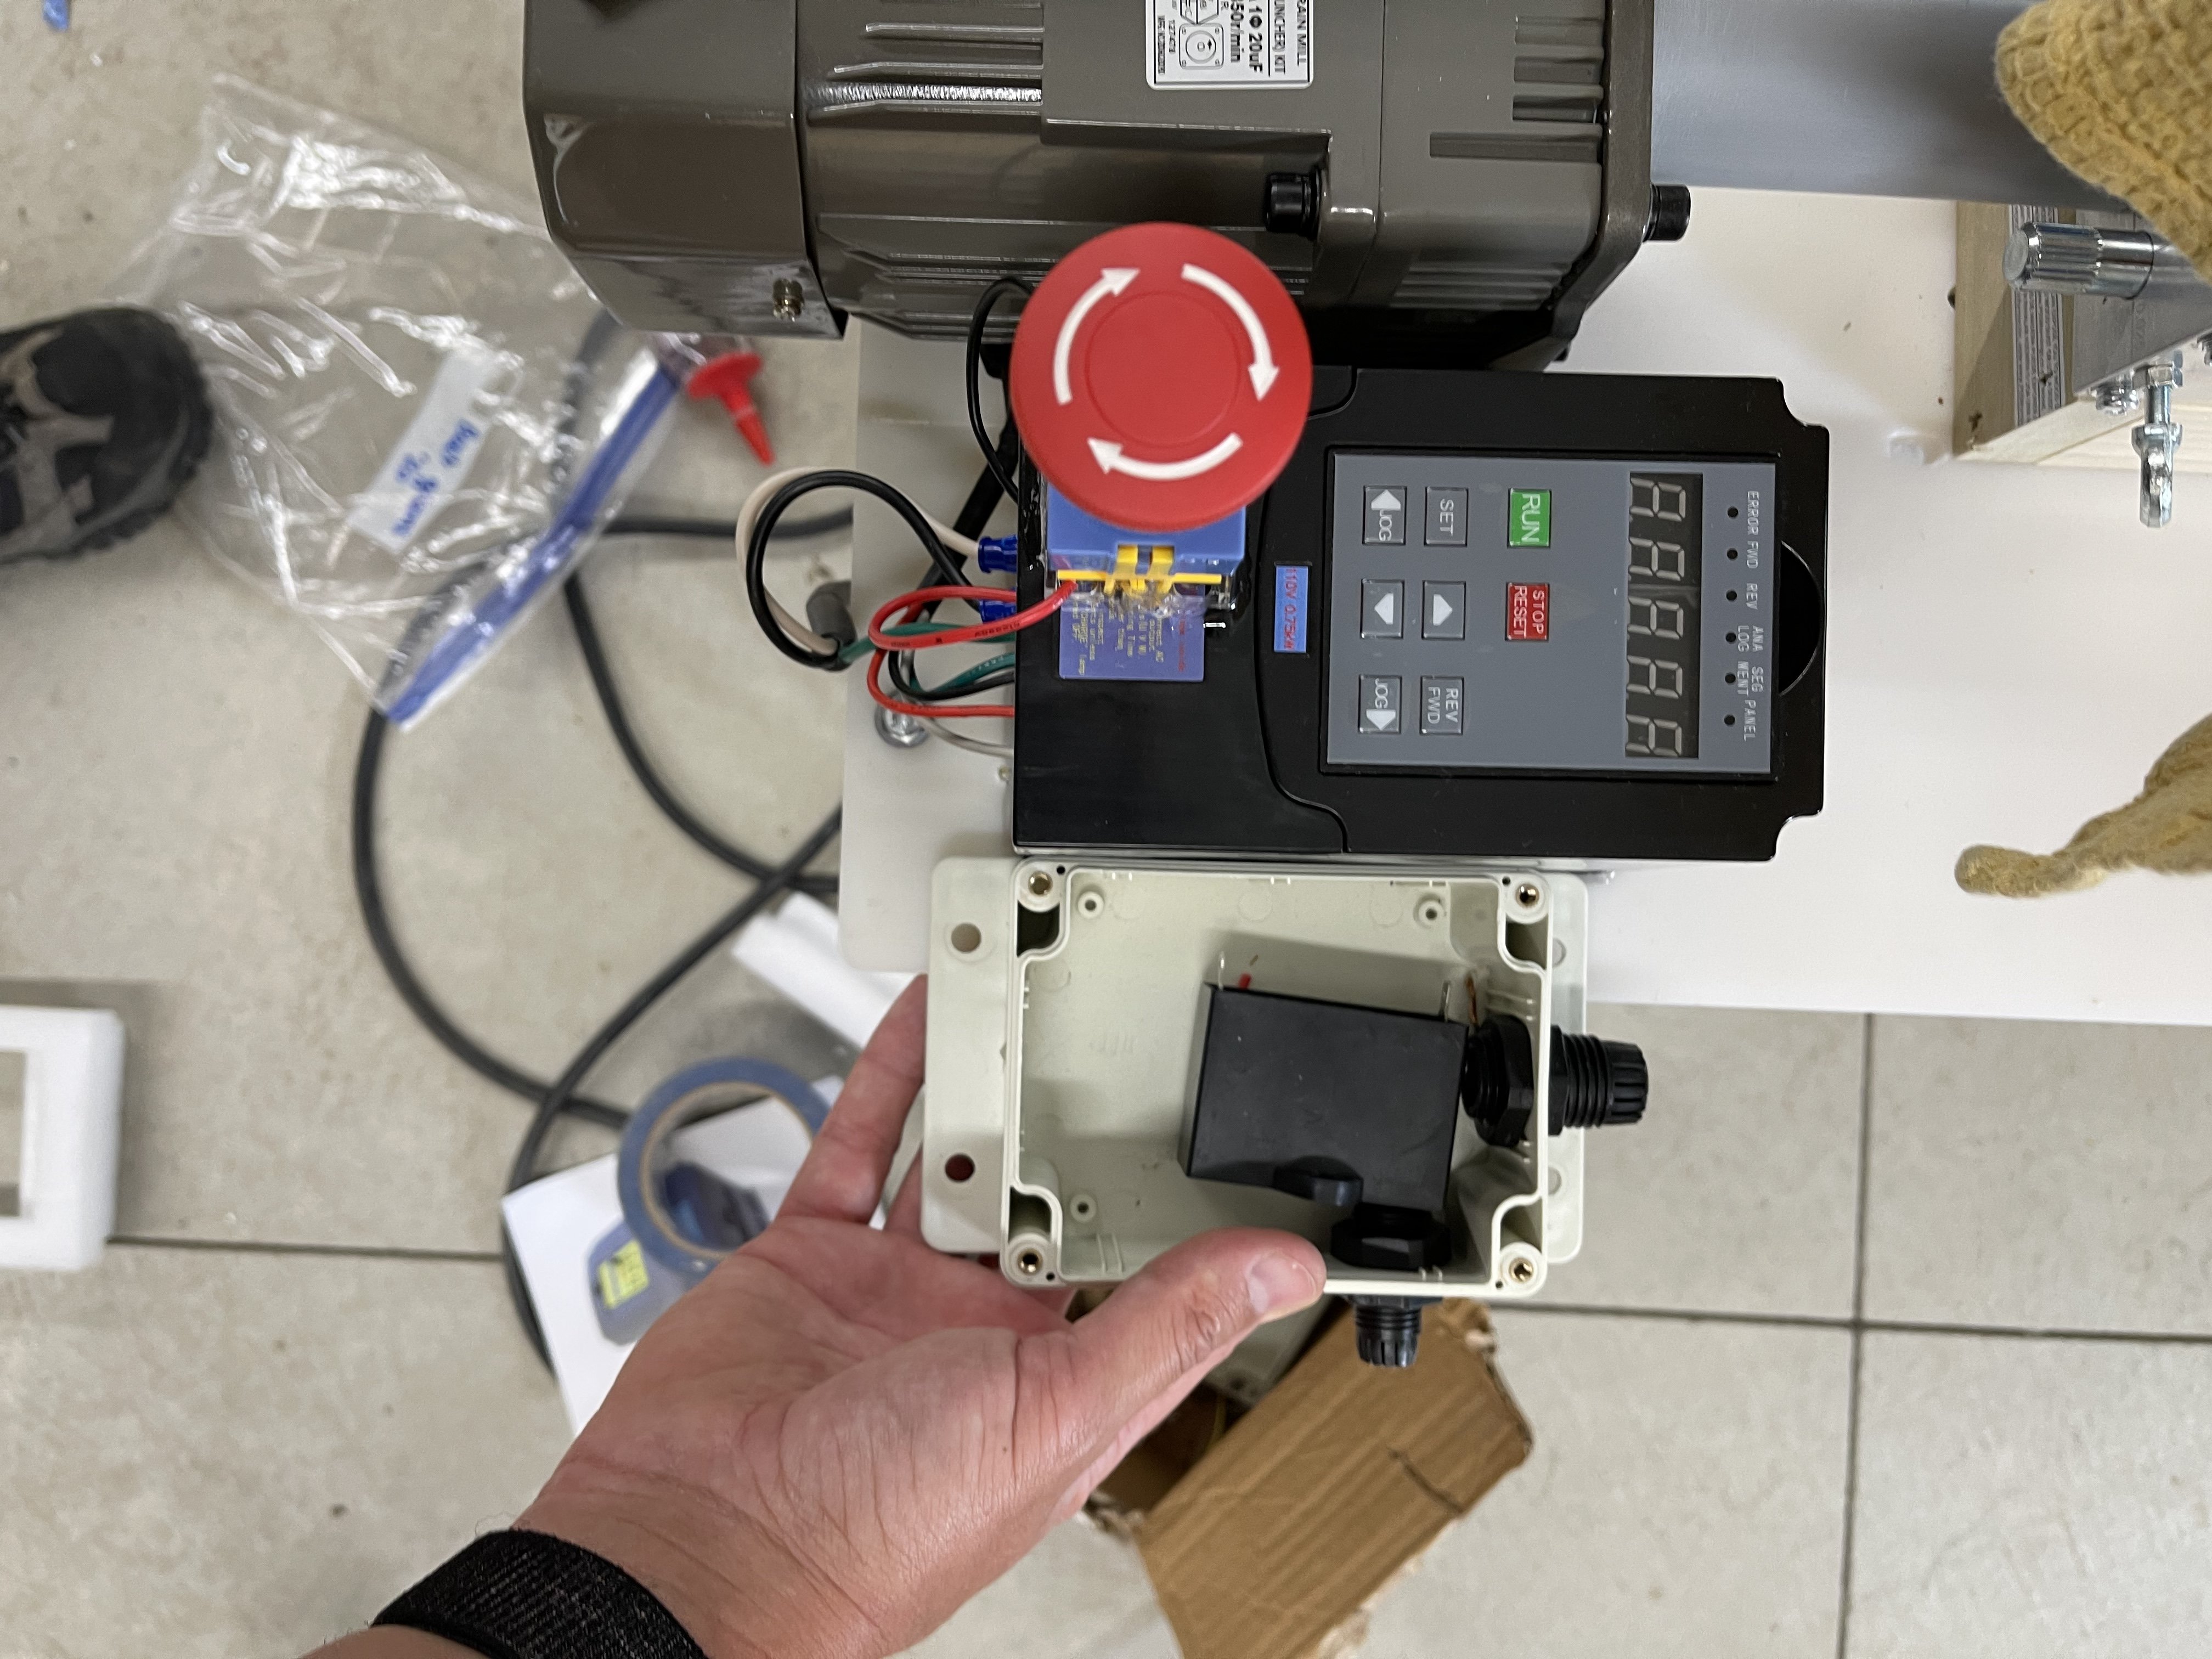
I also added the original kill switch for safety. I was playing with the frequency (Determines speed) and I think 60hz is the perfect setting for speed and decreased vibration. Wiring is straight forward as well.
Power is no longer a concern with this modification. The original designed used a static box that literally fired one time to get the motor started and then turned off. So the motor operated without the third power leg which caused 0 torque during that phase of the motor...which is why it always gets stuck. So going from 0% power during that portion of the rotation to 100% power is incredibly noticable! Plus, you have the added benefit of reverse as well as a speed controller. I'm going to keep making some changes to it but I'm liking it so much that I might consider building the system and making a turn key solution for those that want all the options without all the configuration and individual purchases. Until then, purchase the ebay item listed above and let me know what you think. I'll walk you through the setup and send you some pictures of what the wiring should look like.

")