• Please visit and share your knowledge at our sister communities:
  • If you have not, please join our official Homebrewing Facebook Group!

    Homebrewing Facebook Group

Minifridge to dual chamber fermentation cabinet

Homebrew Talk

Help Support Homebrew Talk:

This site may earn a commission from merchant affiliate links, including eBay, Amazon, and others.

sablesurfer

Supporting Member
HBT Supporter
Joined
Jul 21, 2013
Messages
1,317
Reaction score
305
Ok, there are lots of very fancy set ups here and I have been learning a lot from all the guys that have gone before. This one is not going to be fancy. This is not going to be high end, it is going to be my first experiment.

This is the kind of fridge I have been keeping my eye open for at the surplus/used appliance place.
20130521_175443.jpg

Saw this in one post, so I attempted to do the same, just cut a path to get the freezer section out of fridge.
20140125_134655.jpg

20140125_135549.jpg

20140125_140347.jpg

And then...TADA...freezer guts.
20140125_141140.jpg

Build Notes:(It appears I can still edit this post, so been planning to throw some lessons learned in this thread somewhere.)
Lessons Learned -
- I planned and build using 1" pink foam board. Took a while to realize that 2" foam board would have been less cost total, and I wouldn't have uneven front edges where the 1"'rs line up.
- I got hung up on trying to figure out how to get the door to fit into the sides, like on a fridge. That angle there. Instead I should have just build the door 2" deep. That would have allowed it to just close flush over the opening and still be insulated out past the interior foamboard. (Would have make hinges easier too.)
- Cutting foam board needs to take time! My first few cuts I tried to make in one shot. The bottom of the blade always flexed from pressure giving me weird angles and wobbly lines. I now use a hobby exacto knife. Three swipes total, one very shallow to set the line, second one to cut deeper, third one to make final seperating cut. MUCH straighter finish.

(more to come)
 
Then I set about building a cabinet. I need to have a dual chamber that is upright due to space in the house. Also, eventually I will copy the idea of this to build a small keg keggerator. This one doesn't need to end up super pretty/fancy.

First I had to figure out how the fridge guts were going to attach. I left the compressor mounted on it's bar because there were rubber dampers there. I took a wild guess about how high the first bit of wood needed to be. (The idea of a bottom and top piece of back panel came from other posts here.
20140125_165008.jpg

Sides on. This only has legs with plastic hammer in feet, no casters for me this time.
20140125_180513.jpg

Back finished up, added more pipe wrap. Cut the hole in second back panel with a 1" spade bit. Compressed the foam into it. Notice I kept the temp controller from fridge. Mounted it back out of way.
20140126_150220.jpg

20140126_150232.jpg

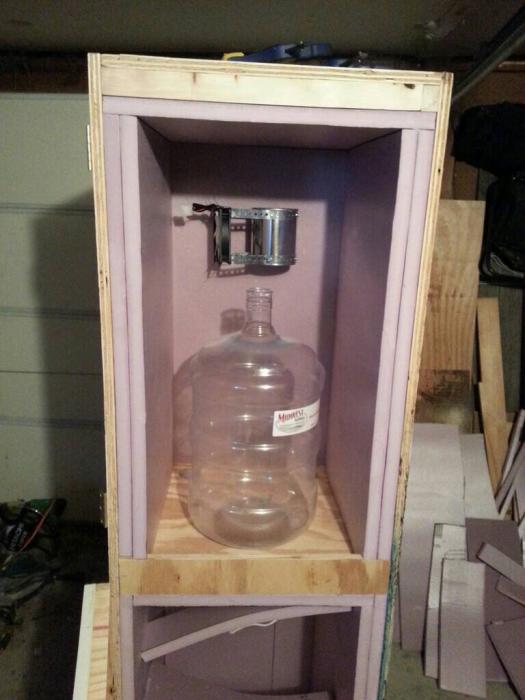
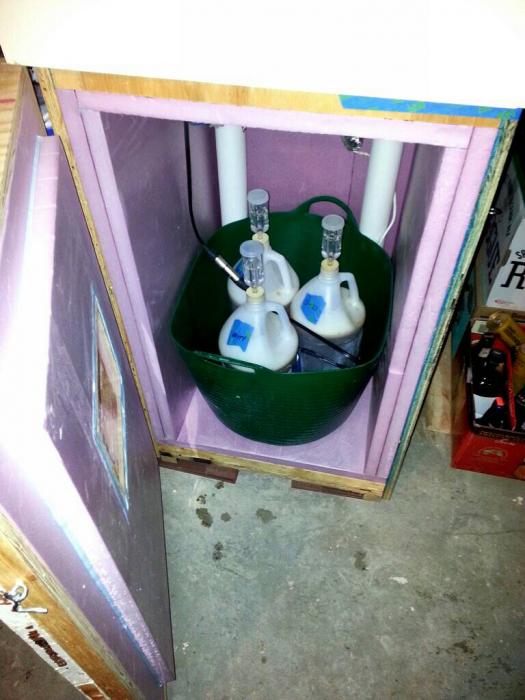
And with doors on. It looks cavernous now, but I plan to add two inches of pink hard foam all around. Should still have enough room for 6gal carboys and airlocks.
20140126_180238.jpg
 
One last pic. The plywood is all left overs from bathroom remodel, it was flooring so 3/4 thick heavy stuff. Ran plum out for the doors, so I found a stack of old shelves that got ripped out of house. And made up some doors.
20140126_180440.jpg

Next steps will be to get all the 1" pink foam board in. Going 2" total. Then putting a fan inside the freezer bit of fridge and need to get second fan to circulate are up into second chamber. I am going to assume that bottom chamber will always be coldest, and upper will be same or warmer so I can have different beers going.

Controllers will be stuff I picked up for my water baths.

Still not sure what to go with for heating in winter. I see the plans with lightbulbs but that seems complicated. I really just want some old timey heating pads without smart switches. I have also heard of hair driers, but not sure there either.

Oh, and the crazy bit of this is that I am hoping to cut some windows in the doors. I will be making them three ply plexi to try to keep some insulating factor going. I want to SEEEEE what is happening. :D
 
Ok, so it seems that triple pane windows for house are only R5-7 and up to 9 if super expensive. Still wanting windows into my fermentor, so I'll have to build these as a module so I can just pull out and seal up if the fridge compressor is working too often.
 
Interested to see how you make out. I built my chamber out of a similar fridge. I had hoped to be able to reach lagering temps, but I bottom out about 40 degrees F. The fridge was able to reach below that, but not when connected to my chamber. I didn't gut the fridge like you did...I just butted it up against the side.
I used 2" rigid foam like you....funny, it's better insulated than the fridge itself.
 
LOL bcrawefo2...I was just noticing same thing as I stared at the remnants of the fridge box. It was barely over inch thick. This will be 2" foam and 3/4" ply. Only thing is that we are increasing the volume so much that it probably won't lager. But plenty cool enough to cold crash I hope.

Have you ever tried frozen jugs of water as well as coolest temps? Just a thought that popped into my head. Hmmm.
I just got mine built. I'm only fermenting an existing Ale I had on the warm side. Doing some testing just trying to cool down some kegs full of beer I had laying around.

I may gut the fridge like you did (was $0 cost) and see if that helps any. I also need to try a fan to circulate a little.
 
I will definitely add a fan, already have it. (Wish I could remember name of the guy that made that knotty pine brewery.) But saw a fan on a build and definitely going that route. Instead of a ducted fan like he used, I am going to put a middling sized PC fan right in the U of the freezer portion to keep air moving through there.

Will also have a second fan to act as circulation up into top space that will be run off another controller.
 
Think I have enough new bits to continue on the build. We took vacation for over a week, so getting back to this build now. This is probably going to be overly engineered and too complicated. But that is the way I go....always has been.

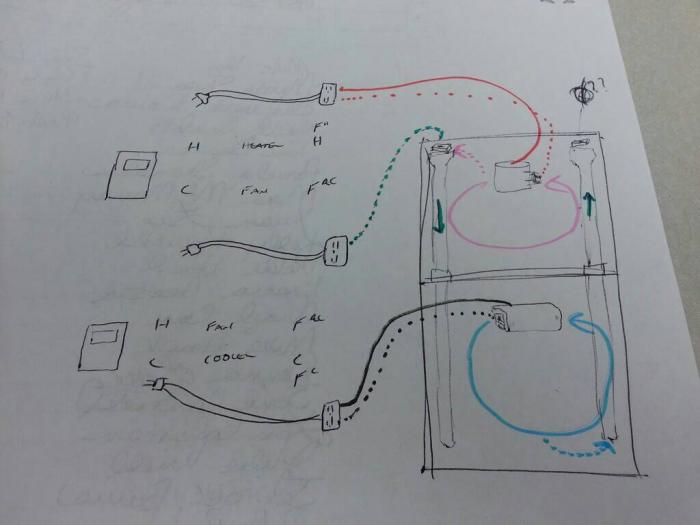
Upper chamber: Heat for whole unit, heat for just top chamber
Lower chamber: Cooling for whole unit, cooling for just bottom chamber

This gives me three settings if I recall correctly:
Option 1 - Warm ferment/Warm ferment
Option 2 - Warm ferment/Cool ferment
Option 3 - Cool ferment/Cool ferment
I cannot do a Cool ferment up top and a Warm ferment on bottom, just have to remember that.

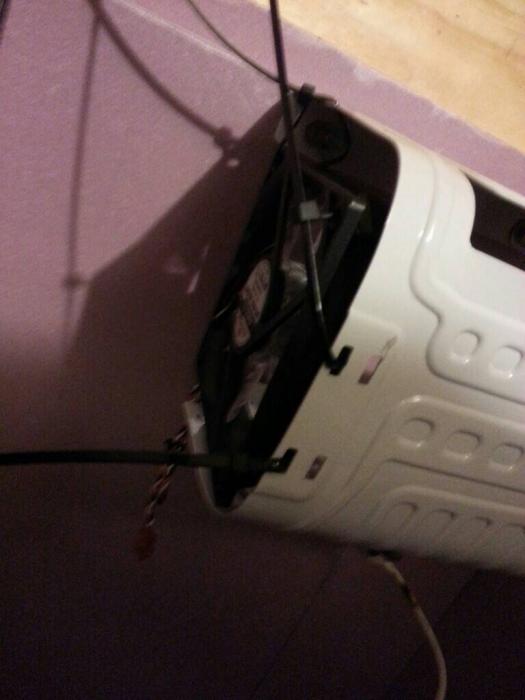
To achieve this, I am planning to put in some air circulation duct work between the chambers that will be controlled with additional fans. All totalled I am up to four pc fans...one on fridge parts, one on heat can, one in down duct and one in up duct. (Had to run to goodwill to pick up all the wall adapters to run them...:D )

Next I will have to rig up the plug/power system. Got an idea, but now to see if I can make it work. I have the two controlers already. I need each controller to operate in two settings, so this means four plug/power set ups...I think.

HAHAHA...see what I mean by over engineered? Hope to have pics up of progress this weekend.
 
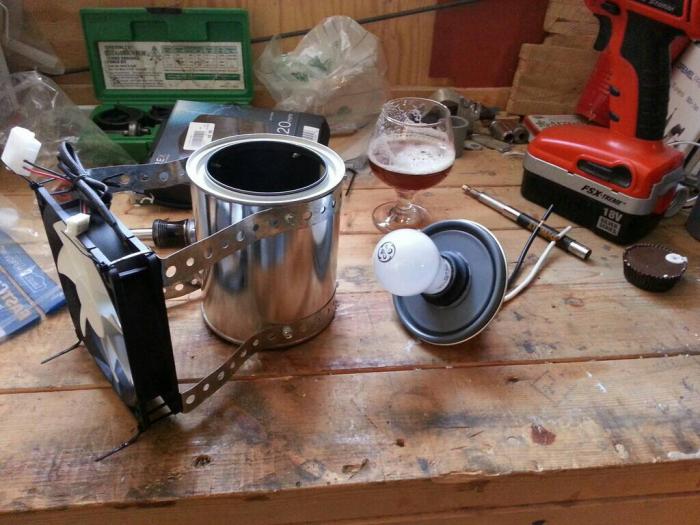
The heater can will be small paint can and an appliance bulb. Read another build that the 40w was enough. Since chamber not so big, decided to try it.
The IPA in glass is homebrew that just finished carb'ing up.
The velomilk was for energy as I was in garage for ~8hrs yesterday. :)

1392739759784.jpg
 
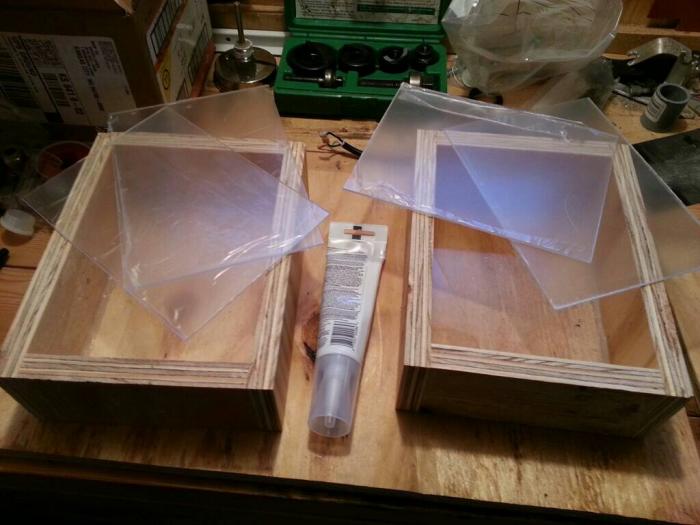
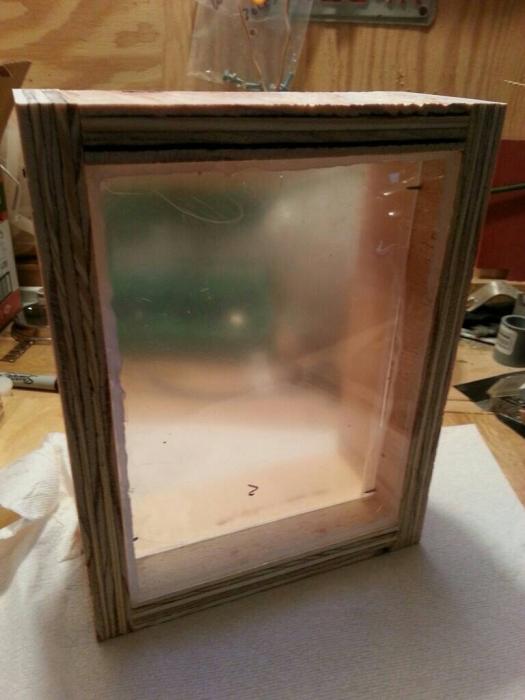
Oh, and the windows. I am attempting a three pane window for each chamber. Using plexi and silicone.
(Yes I know all the horror stories of R factor and condensation and whatnot, but I HAVE to see my fermentations. ) :-D The only other option was wifi internet cams and it would take me months to learn how to.do that. lol.

1392740828757.jpg


1392740849460.jpg
 
A completed window. Wondering if I actually managed to get all the pet hairs out of the window before each pane went in! LOL. Not super pretty, but turned out pretty clear.

20140219_071306-picsay.jpg

ps....according to all things window I read the panes should be no more than ~1/2" apart and better if something like 1/4". smaller spacing should have krypton gas and larger should have argon. everything should be low e coated and there should be 'non-conductive' spacers between the panes.

pps....yeah, i broke all those rules. however I may use the pin holes I made (put tiny nails through wood to support plexi while I siliconed inplace) to blow CO2 in there to dry it out...not sure yet how much a pain that will be.
 
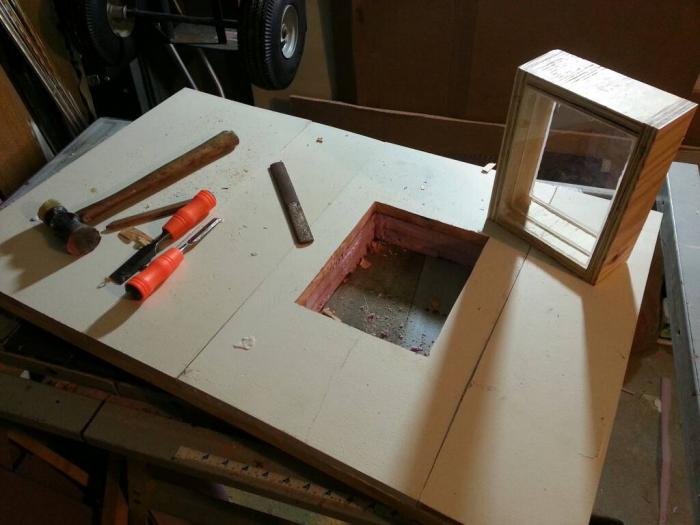
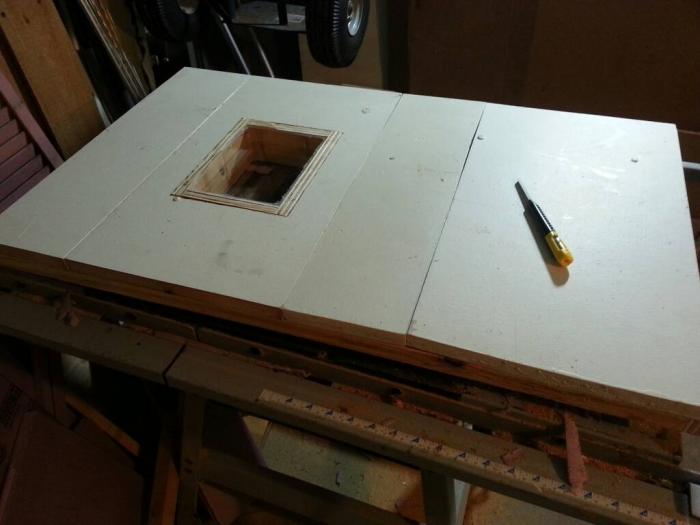
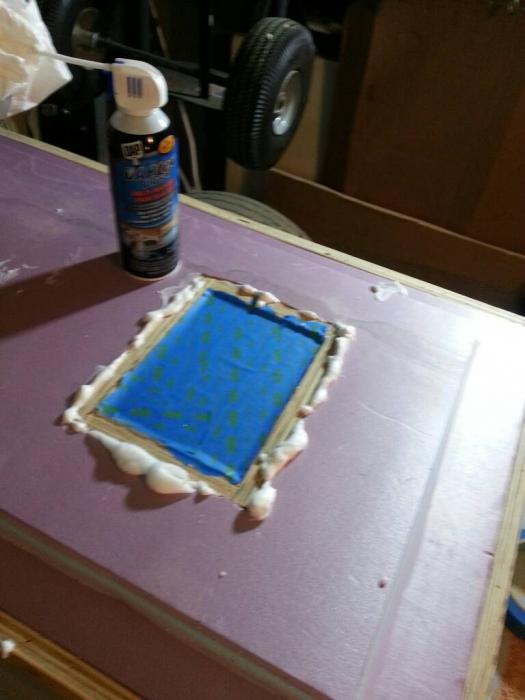
Got around to fitting first window. I kind of deliberately had both layers of pink foam installed before cutting. Figured it was easier cutting out then trying to fit around installed window.
I am trying out this new foam instead of the standard window door that is always a mess and any unused goes bad in can. The "water clean up" is true. Hoping it works ok as an insulator and glue.

1393342389601.jpg


1393342439219.jpg


1393342471692.jpg
 
This evening's progress. Along with this I got one experiment with using silicone spread out to maybe make an even sealing edge. I also got the new butane soldering pen to light finally for when I get to doing electrics.

Had to get some sturdier hinges. Edges of my door are just 1" ply, so not super sturdy themselves. These strap hinges allow me to screw into the front of door as well. Had to modify them a bit though...bent and relocated a screw hole. (Extra hole will now be jbwelded later...you know for looks. :) )
20140226_192834.jpg

Top door, window in, framed, foamed, and caulked on inside. Kinda closes too.
20140226_200455.jpg

20140226_200557.jpg
 
GAH...going on three months soon. Need to get this done, so I can get some brewing done. Progress has been slow slow slow as I work out wiring, and some control panel design ideas. Posting to keep my self focused on end goal. This weekend should have both doors on and temp test going. (Well pending if the GF's kid is with us for spring break or not.)

Still obsessing over the 'perfect' design for the control panel and wiring, so test will most likely be with just wires and plugs hanging around.
 
Still obsessing over the 'perfect' design for the control panel and wiring, so test will most likely be with just wires and plugs hanging around.

a "perfect" design is good and all, but did you do a prototype test with full carboys (preferably actively fermenting) to see if that size fridge could effectively cool that sized space? When I researched this type of idea as a DIY project I found that these dorm fridge aren't capable of cooling much more volume than the small boxes they were built for. Lager and cold crashing temps?...fugetaboutit...

I know you are neck deep in this project in both time and materials (considering you could have gotten a used fridge off CL on a Saturday afternoon and been done with it...sorry had to say it!:eek:), but some testing might be in order since you could be throwing good money after bad at this point. I hope I'm wrong.

Sorry for my assholey opinion...carry on.
 
HAHA....no, that is a valid point and one I did look into for a bit. The idea is that those mini dorm fridges only have about 1" of insulation on them anyway. All the builds I have seen here, and mine, are about 2" of insulation and then another 1/2"-1" of plywood. Mine is 3/4 left over subflooring (if I am recalling correctly). So general consensus is a final R of 8-10 where fridge couldn't have been more than 5 anyway.

Many builders have just taken door off minifridge and built a bigger box around it, I haven't seen any of those threads say they couldn't keep temps.

I never planned this to be a lagering fridge in summer, it would be super easy to lager in winter in my beer space (partial basement off a garage) and then I would just be using heat to keep temps right.

So, actual answer, this weekend will be my temp tests, hopefully. Basically tests will be: 1) can both chambers be kept at <64 and 2) can I get a +- 10 degree difference between the two chambers. If those are possible I will also have to monitor how often everything is running. I would not want the fridge compressor to run all the time and burn out anytime soon.

Now, the other benefit of this design over 'just by a fridge of craigslist' is that I can actually reduce the space by blocking my recirculation vents. Seriously. The vents are not permanent, I pull those out and then the bottom section becomes ~2sq/ft bigger than the original fridge anyway. So I am "hoping" that I could cold crash while still keeping the upper chamber regulated given certain circumstances.

Anyway....PSWAH on the planning too far ahead. This is all a big giant experiment with a lot of wishful thinking and a lot of 'should be' going on. Also, if this works out, then I have a plan for when I build an actual piece of furniture for the living/dining room. I envision a china hutch kinda thing with one whole side for hidden keggerator and taps.
 
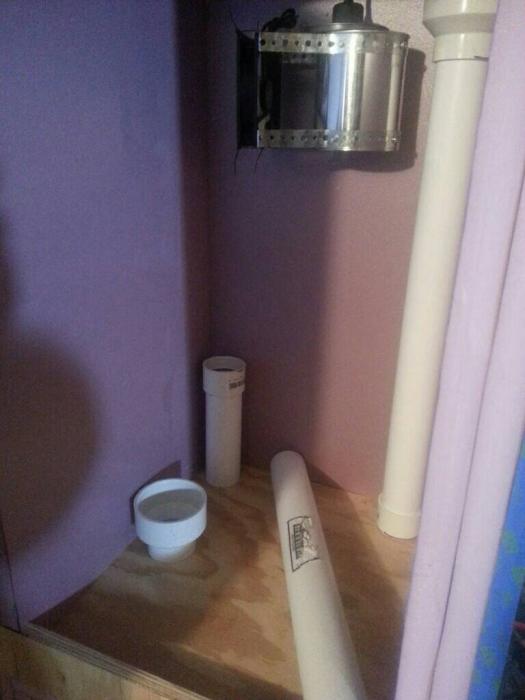
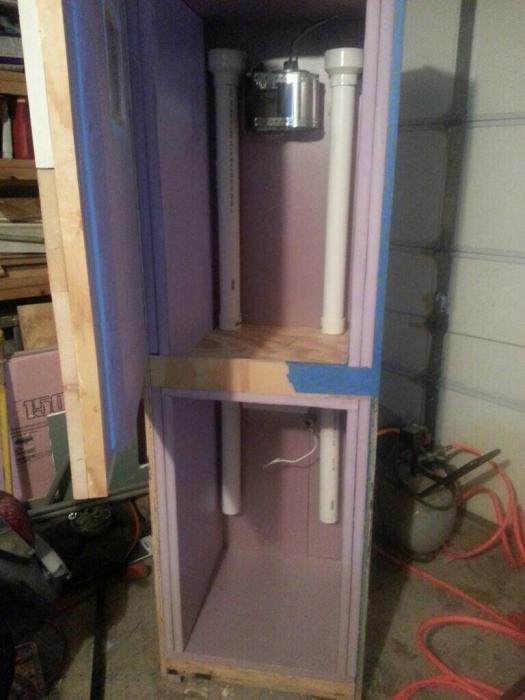
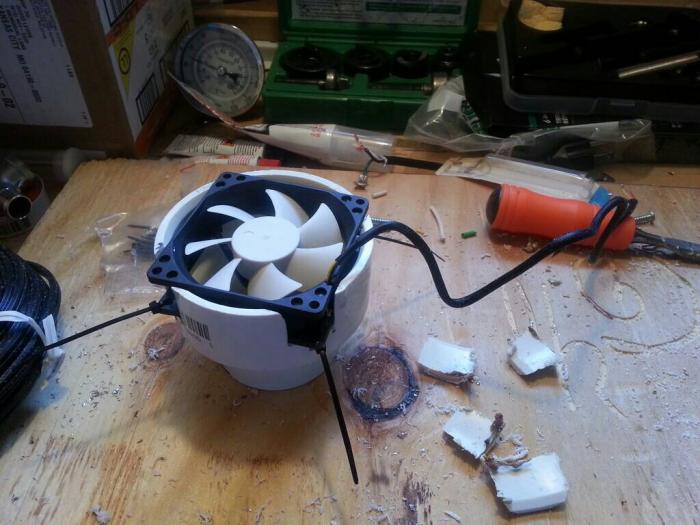
Since I am talking out of my hat about air recirculation, figure I can put up the pics of how I am going to implement the idea.

1394653025583.jpg


1394653049408.jpg


1394653067647.jpg
 
Progress today. Hoping to have it 'running' by this evening. Really want to brew tomorrow and would love to have it ready. Pics later, but I have all wiring harnesses set, upper chamber fully wired and the controller hooked up for a test.

Upper chamber went from ambient 59 to 66 in about 5-7 minutes. Just a fan and a 40W bulb. Sweet.

Taking a break and then to get the bottom chamber wired up. Got the door on and harness hooked up, just have to wire the fan and route the fridge cord, then I will throw containers of liquid in there to test over night.
 
Ok, heat and cool test completed. Not all the parts where I want them, but everything all hooked up. I know just in testing phase, but looked like I got bottom chamber to 51 and upper to 67. It was shooting for 70. If I can get a 15 degree difference, that would be amazing.
 
Ok, some last pics. Not much left to do other than rig some inside lighting. Already have that planned, to use a cheap LED battery operated light and solder in longer lead wires for the button, so it can be on outside of cabinet door.

But, everything is plugged, tested and calibrated. I swapped out the interchangeable temp probes to make sure both controllers read the same regardless of probe. (Did have a weird short that appears to be shorting through the shrink wrap? I cut that of and separate wires and I get a regular reading...odd.) Calibrated with ice water and both controllers were reading 33F. So they both got a -1 offset. This is reassuring that all the added wire/connecters are exactly the same so the increased resistance is same on both...whew.

Now all I have to do is resort the ENTIRE garage so that it can fit where I said it would months ago. LOL.

Both doors attached. I had to get some bulkier hinges than the little brass ones I started with. Bent them to fit and had to drill extra screw hole on side.

20140315_102617-picsay[1].jpg

For over a week I couldn't come up with anything for my wiring and controls on side of fermentor. I just had a thought and decided to go super old school, like all the rest of my case. This will probably cause the electonics guys to freak.
20140315_121741-picsay[1].jpg
 
Here are some pics about the controller and the probes. Basically I had to splice the 5" of wire that came with controller and add about 4' more wire. Then I decided I wanted to be able to attach the probe to carboy outside the fermentor and then just plug in.

The LUX WIN100 comes apart pretty easily. Also everything inside is pretty straight forward. I did have to modify the case a bit where the wire comes out.
20140309_160227-picsay[1].jpg

I went with the XLR (?) connectors from microphones. The female side is soldered onto the wiring harness inside each of the chambers.
20140310_183602-picsay[1].jpg

Some of the spaghetti I had to plan out ahead of time to make sure I could just wire stuff up later. This probably a result of too many teenage years dealing with automotive wiring harnesses, just used to it I guess.
20140308_203150-picsay[1].jpg
 
And a final look at the current situation, post power testing and temp testing/calibrating. I'll put this here to see how many people tell me I am going to die in my sleep and see how much longer I have to live. :D

1) My two LUX controllers that I already was using for waterbaths and to run space heater in my bottle conditioning room (aka - the kids room when she was visiting father.)
2) My color coded power wires for all the interior items. Red runs the heater and heater fan and is only used on right control for top chamber. Green runs the recirc fan and can be used on either controller. Blue runs the fridge guts and the fridge fan and is only used for left control to run bottom chamber
3) My power distribution panel. :fro: Three sets of plugs with the associated DC wall warts or power wire.
4) My GFCI plug that powers the two controllers and is wired to a long pigtail that will plug into wall.

20140316_115713-picsay[1].jpg
 
Having an issue with the heater set up. After getting fermenter into place it won't kick off. Had to rerig the chiller side to maintain 64f
 
Figured out why the heat chamber controller wasn't kicking off. There is a ribbon connector between two boards. One of the little tiny wires busted in the handling of my opening and closing so many times. CRAP. I got these on clearance two years ago for $25 a piece.
In order not to have the whole build go to crap, I had to order replacement off Amazon for $37. I got two just in case. Sigh.

Right now I am holding temps w/in 2f with just one controller, but it is extremely inefficient.

(I tried to repair, but I am just NOT set up for soldering circuit boards, made a mess of it.)
 

Latest posts

Back
Top