• Please visit and share your knowledge at our sister communities:
  • If you have not, please join our official Homebrewing Facebook Group!

    Homebrewing Facebook Group

Looking for budget friendly RIMs setup

Homebrew Talk

Help Support Homebrew Talk:

This site may earn a commission from merchant affiliate links, including eBay, Amazon, and others.
I made one but it's still sitting on the workbench. I just bought a couple of Harbor Freight moving blankets and insulate my mash tun cooler. I only mash for 45 min. and don't lose any heat from my set up.
I currently brew with that method, but looking to hopefully get a better efficiency with a RIMs setup.
 
this is what I used on my latest rims... two of these with two compression fitting mounted inside with elements in them. its for my 3bbl rims though.. I believe all the 3/4" compression fittings require 3/4" npt threads.

https://www.brewhardware.com/product_p/tc15f12nptdouble.htm
Interesting idea! I have been looking for a cartridge heater with a 5/8 diameter or smaller with a length of over 20' and around 1800w. I have not found one, they are starting to seem like unicorns lol.
 
that would work fine,
I have a couple theory's why I dont get build up of any kind and such good performance for the wattage in my setup though. I believe it has a lot to do with the longer contact time as well as the smaller passage between the 1" stainless pipe and 5/8" element in my home setup keeping velocity up with the lower 1.5/2 gpm flow rate coupled with the much lower watt density. I started with a 12" long 800w cartridge heater and experimented with 4 other size and wattage elements finding the longer I made the rims and element the better the performance. this is less likely to possibly denature any enzymes and it behaves more like a herms with gentle heat but with the speed and adjustibility of a rims.

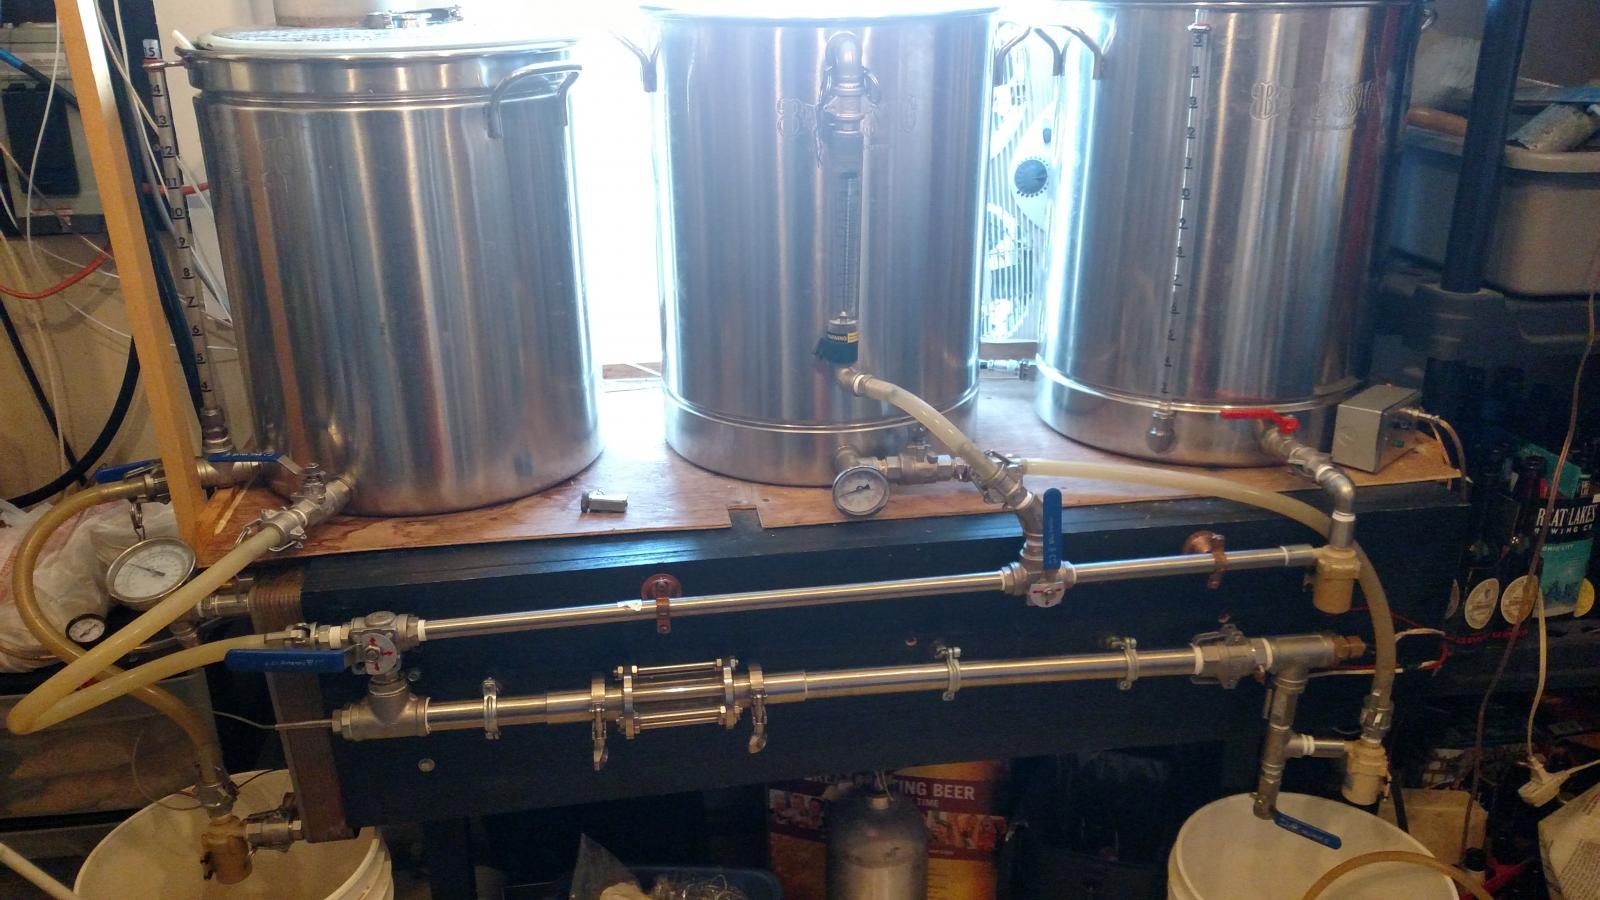
The first pic is my current rims with plumbing (I moved and changed my flow switch so its up by the flow meter now).

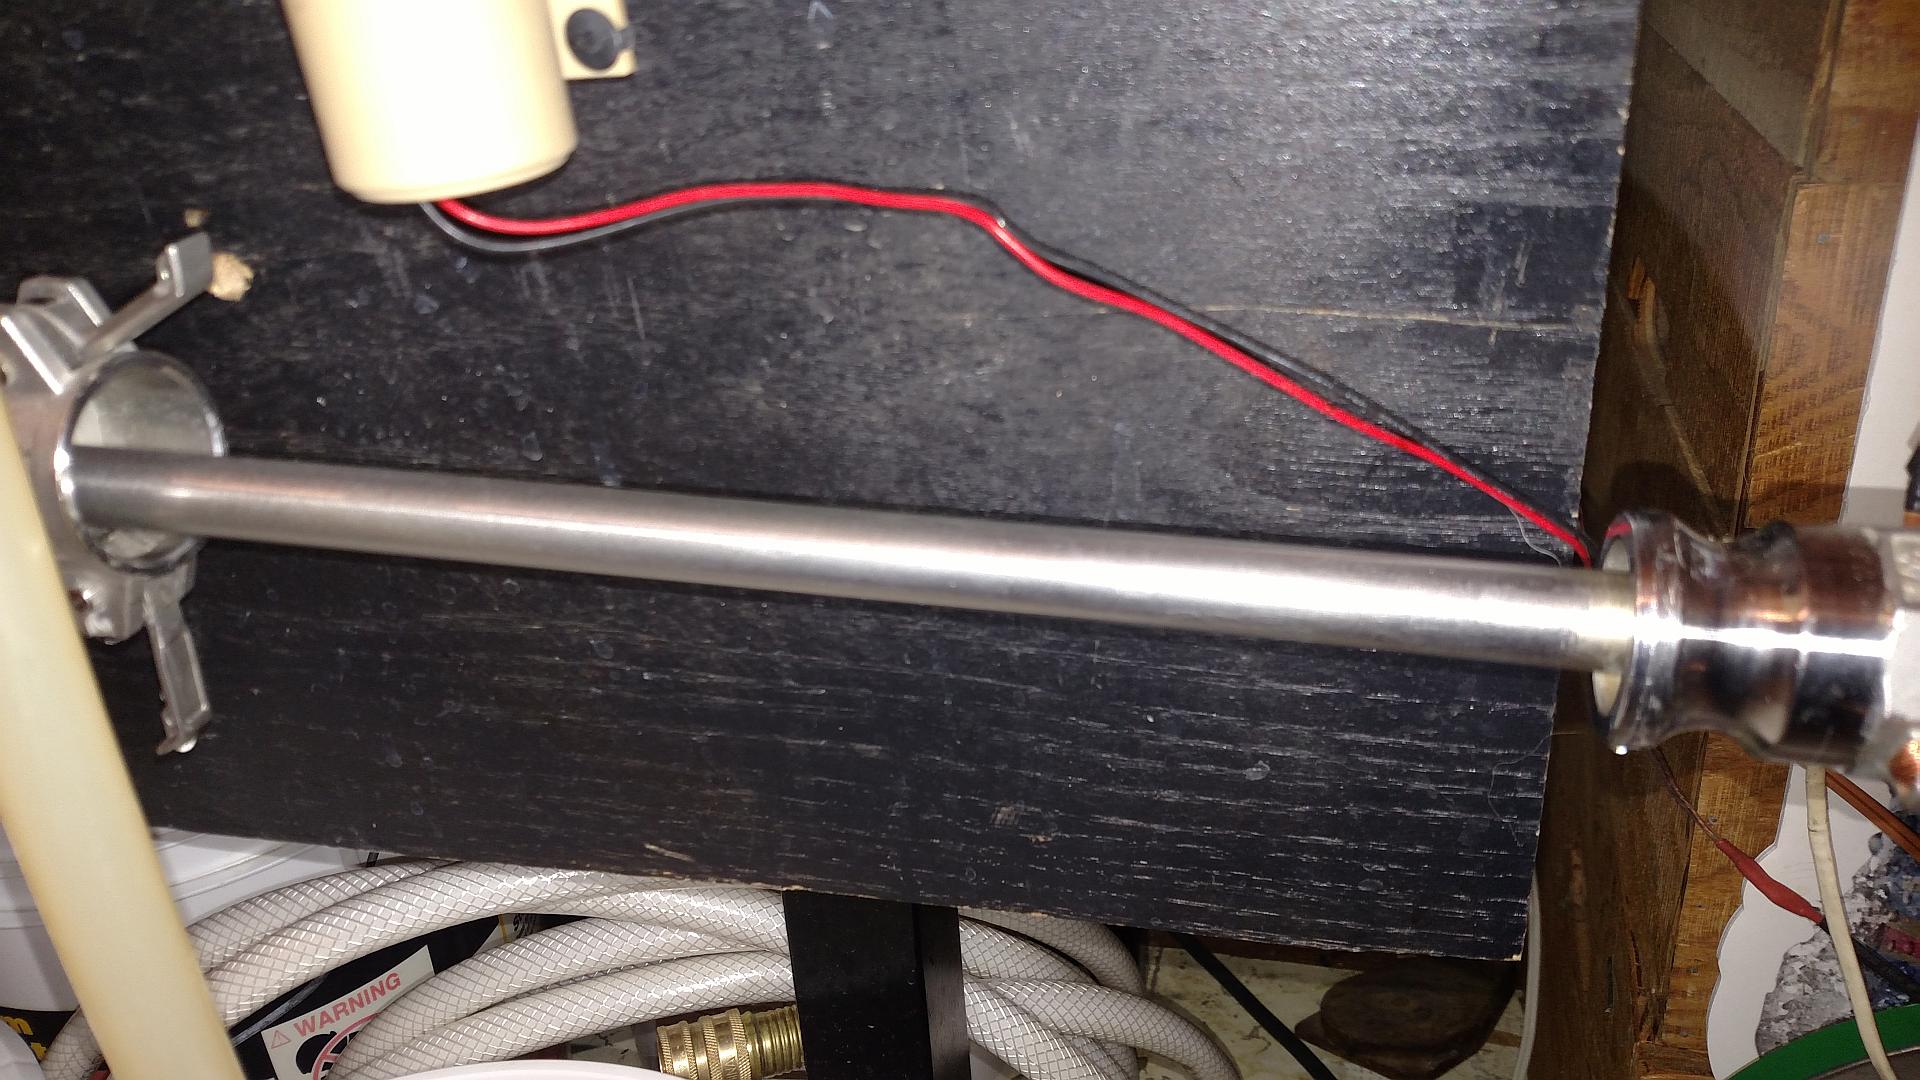
The second is what my element looks like right after running about 2 gallons of water through after use and not cleaning anything. as you can see I get virtually no buildup of any kind.
rims4.jpg
resizedrims.jpg
 

Thanks for the detailed response! I have seen most of these, but they are all 3/4 dia. Don’t you feel that a 3/4 element in a 1inch pipe is a little tight?
 
Last edited:
Thanks for the detailed response! I have seen most of these, but they are all 3/4 dia. Don’t you feel that a 3/4 element in a 1inch pipe is a little tight?
at least one of them was 1/2" and I think theres a 5/8 somewhere but no I dont think its tight at all.. its just liquid passing through my rims.. in fact like I mentioned the narrow path likely allows more even heat exchange and better movement across the surface imo. just like a radiator would be less efficient if the core channels were spaced out more..
 
at least one of them was 1/2" and I think theres a 5/8 somewhere but no I dont think its tight at all.. its just liquid passing through my rims.. in fact like I mentioned the narrow path likely allows more even heat exchange and better movement across the surface imo. just like a radiator would be less efficient if the core channels were spaced out more..

I really appreciate the help and insight on this. I’m looking to get one of these. Can you help me understand how you made sure it was water tight?
 
Last edited:
I really appreciate the help and insight on this. I’m looking to get one of these. Can you help me understand how you made sure it was water tight?
the compression fitting tightens to a watertight seal around the base of the element body this gives a threaded base to the element.. The wires come out the end which are not submerged in any liquid. theres actually a diagram of how mine is mounted in my build thread. but with the tc adapeters I linked above the element just sticks into the compression fitting which is mounted inside the 1.5" 38mm tc rims tube I made which it mounted on the wall.
 
the compression fitting tightens to a watertight seal around the base of the element body. the wires come out the end which are not submerged in any liquid. theres actually a diagram of how mine is mounted in my build thread. but with the tc adapeters I linked above the element just sticks into the compression fitting which is mounted inside the 1.5" 38mm tc rims tube I made which it mounted on the wall.

Did you use a stainless compression fitting with a silicone sleeve?
 
here is basically how I mounted the element into my homebrewing rims.. this is a 24" long element I tried before going to the less powerful 36" element which worked better.
https://www.homebrewtalk.com/forum/attachments/img_20170107_113353173-1-jpg.383556/

I had to drill the base of that compression fitting through so the element would pass completely through but I believe bobby might sell compression fittings that already allow this to pass through If im not mistaken.

I checked with Bobby, and the largest they go it 5/8. So I might have to do something similar.
 
here is basically how I mounted the element into my homebrewing rims.. this is a 24" long element I tried before going to the less powerful 36" element which worked better.
https://www.homebrewtalk.com/forum/attachments/img_20170107_113353173-1-jpg.383556/

I had to drill the base of that compression fitting through so the element would pass completely through but I believe bobby might sell compression fittings that already allow this to pass through If im not mistaken.

What I am thinking currently is using a 1” NPT x 3/4 OD compression fitting and this https://www.amazon.com/dp/B076CJTRJ1/?tag=skimlinks_replacement-20
 
Last edited by a moderator:
For $86, I think that's a good start to a custom build.
AliExpress 1.5: Tri Clamp RIMS Tube

I placed my order last night that included an RTD, tri clamp barb fittings, 1750w cartridge heater, and other miscellaneous parts for about $170, including shipping. Excluding the parts not directly related to the RIMS system, it comes out around $150.
 
Posting an update. I received the cartridge heaters yesterday. One was damaged and the other is 20mm not 3/4”. The cheapest fitting I can find is 85$ for it. I got my money back on the ones that were shipped, so now I’m in the market for a new one. This might end with me going a more standard route :)
 
Brewhardware.com is the way to go!! Best budget friendly device and they are great to work with. I had a ton of questions before purchasing and Bobby answered them all.


Posting an update. I received the cartridge heaters yesterday. One was damaged and the other is 20mm not 3/4”. The cheapest fitting I can find is 85$ for it. I got my money back on the ones that were shipped, so now I’m in the market for a new one. This might end with me going a more standard route :)
You have some bad luck with cartridge heaters.
 
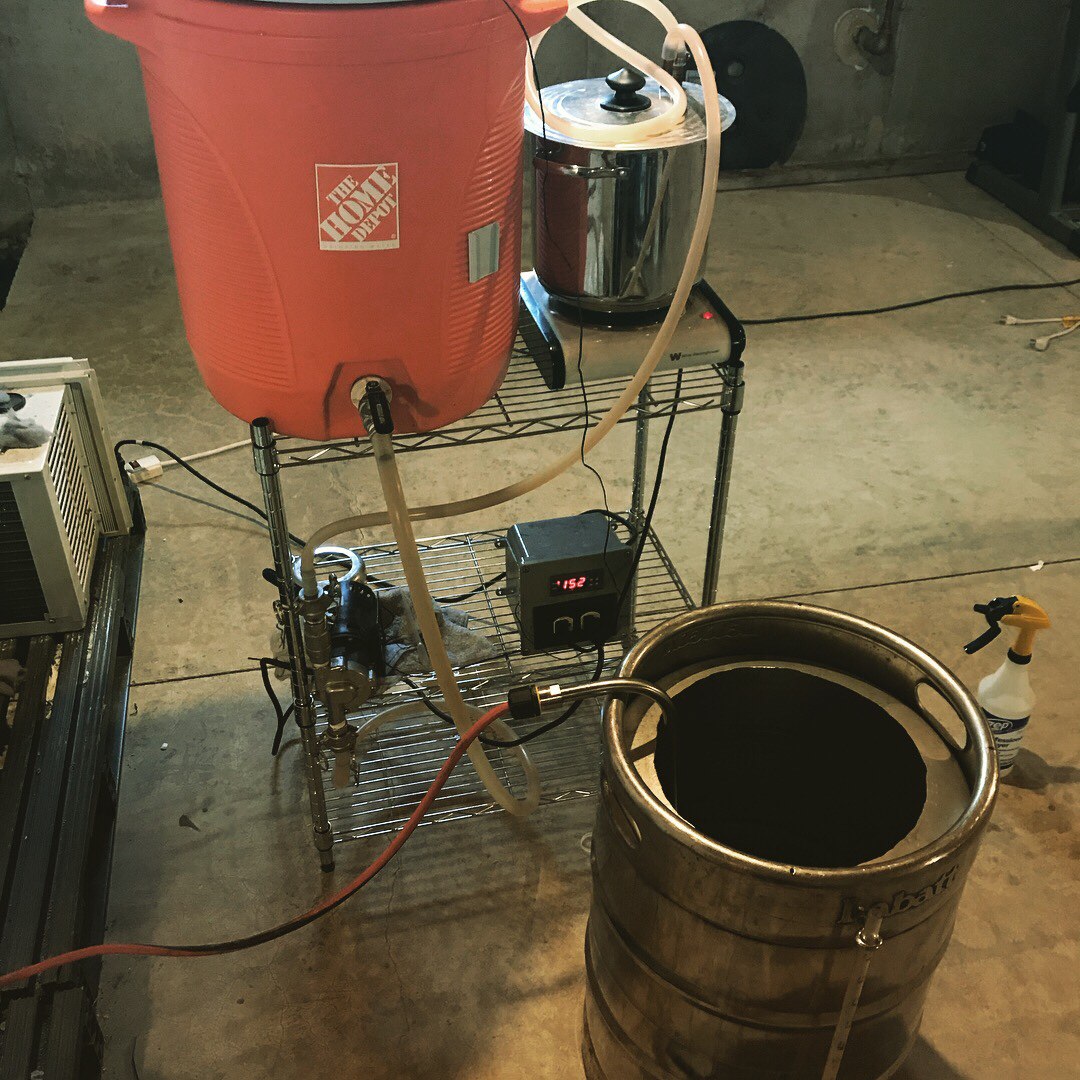
I'm late to this discussion but I wanted to share what I put together for a cheap temperature controlled recirculated mash system. I got the idea from Poptarts. It's essentially a Mini E-Herms set up utilizing a STC-1000, hot plate, small stock pot, pump and some copper tubing. Worked great for my needs before going to my electric set up.


Don't mind the keggle in the photo below. I was heating up strike water with my Hotrod Heatstick with 120v last spring. Essentially the mash is recirculated by the pump, into the mini-herms and the hotplate is controlled by the stc-1000 and I had the temp probe in a T (located out of the photo) going into the mash tun lid to read the temp.

LGJ44qF.jpg
 
Last edited:
I built mine in the build thread below out of 1" stainless pipe and used camlocks to be able to remove the 36" long 1800w 240v element (cartridge heater) for cleaning but the density is so low it stays clean after use. I was trying to keep it under $150 for everything. I also get over 2 degrees per minute rise out of it.
Do you have a link please?
 

Latest posts

Back
Top