KPBrews
Well-Known Member
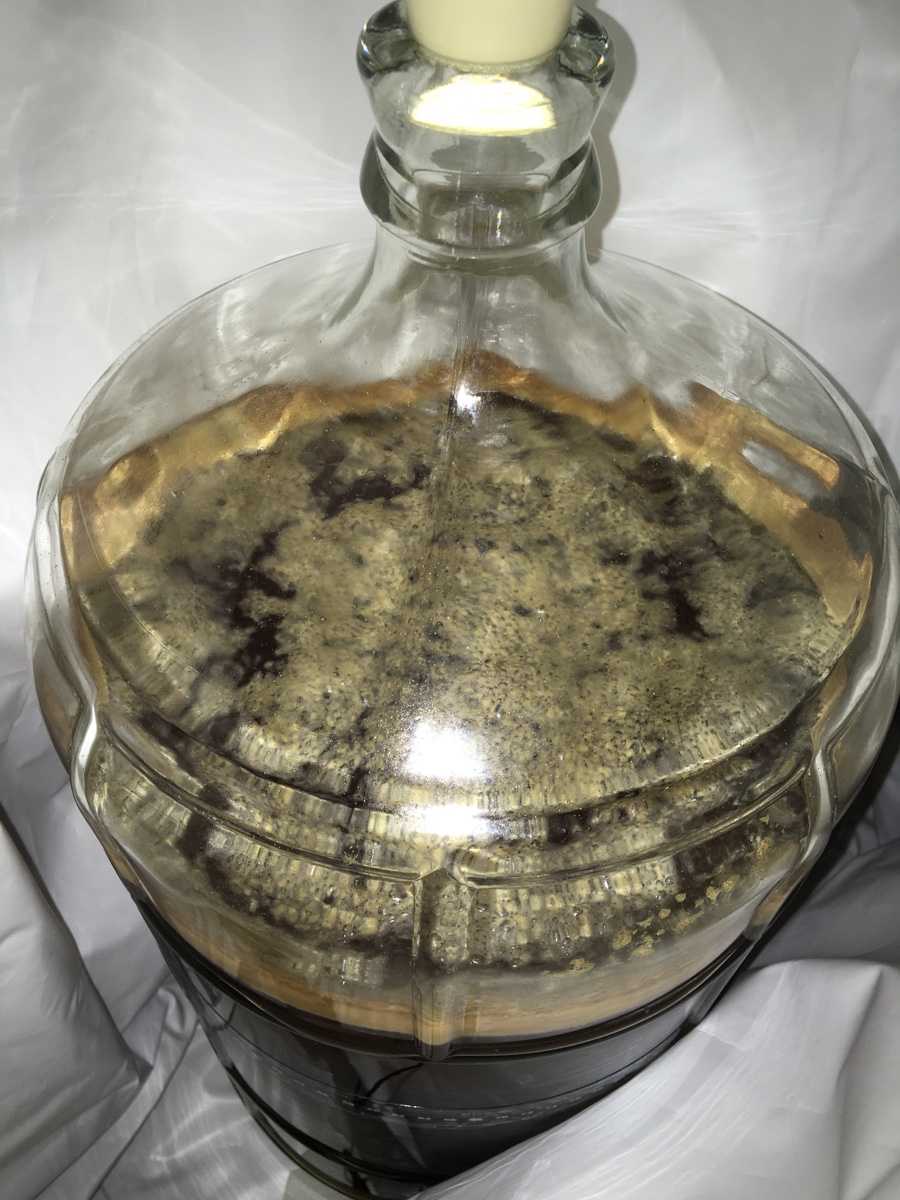
Well, today was the day. This was certainly an interesting experience. Mistakes were made, lessons were learned. I guess I'll find out in a couple of weeks whether or not the mistakes will cause an issue.
Today, I brewed a Blonde Ale from More Beer, using their full complete ingredient kit.
Start time: 1:50pm End time: 6:45. 5 long hours! That was truly a start to finish thing, however (other than cleanup). For instance:
Lesson One: Water source. My RO water system works great for filling water bottles and pitchers. Less great for producing 6 gallons of filtered water. It took 55 minutes to fill my bucket! Lesson learned: Get the water prepared a day in advance, to save an hour of my life on brew day. Not difficult, and easily planned for in advance, but that was an unexpected hour out of my brew day, today. Live and learn!
Lesson two: Better instructions. I have a pretty darned decent course I found online with "how to brew" videos, but it turns out they were missing a few small things (not many, but they causes some issues and took time to resolve), and worse, there were inconsistencies that I had to resolve on the fly. For instance: The instructions were unclear about steeping the grain packet. All agreed that the grains should be steeped for 30 minutes. But one video said fill the kettle and start the boil, take it to about 150, but then the next video in the sequence said turn on your stove (like, from the start) and put in the grain bag immediately. The instructions for the beer kit said to put it in cold as well. My video course made a big deal about keeping the temp to around 160 and never letting it go above 170 or you could get off flavors. In the end, I put the grains in at around 115 and let things heat up to 165, then I lowered the heat to make sure I didn't overshoot 170. I finished the last two minutes having just hit 170, with the temp still climbing, but never went over. There was much relief. I think I worked this out in the end, but there was definitely confusion and uncertainty involved. Lesson learned: Well, hopefully now that I've been through this once I'll be able to spot issues in advance? With experience this will be less of an issue.
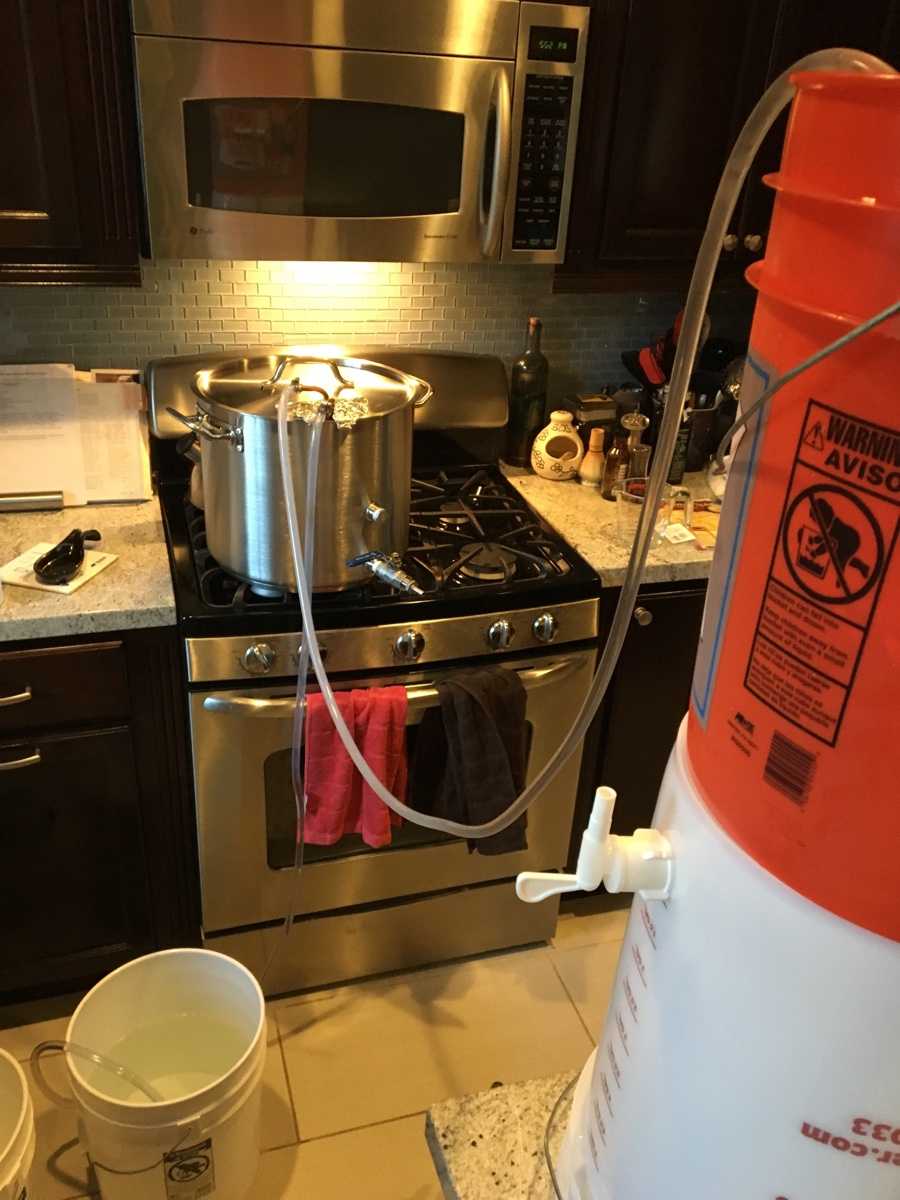
Lesson Three: Cooling sucks. The biggest issue, during the run, was the cooling stage. After boiling my hops for an hour, and adding the Whirlfloc tablet in the last 5 minutes, I was ready to cool the wort. My brewing kit came with a copper coil immersion chiller (25' coil), intended to connect to a kitchen faucet. The problem, it turns out, is SoCal is so darned hot that my tap water is 81 degrees. I was able to cool the wort from boiling to just under 100 in about 20 minutes (the hottest water ran down the drain, which was painful, but then it cooled enough to collect into buckets, instead, so at least the plants in my yard will be happy). But it quickly became clear that the temp wasn't going to drop much lower without some other technique. At that point, at least, it was cool enough that I was able to stack a bucket on the end of another, to get it up high, and fill the top bucket with about 5 lbs of ice and tap water, and running that COLD water through the chiller (and then dumping the bucket of ~65 degree water back up into the ice bucket, so reuse the same water over and over), then I was finally able to cool it down to 75. Lesson learned: Tap water this warm isn't going to cut it without extra gear. I'll spend some money on a better setup. I'm thinking of buying the Duda Diesel plate chiller. Then I can put my coil chiller into an ice water bucket to precool the water, and then run it through the plate chiller. That should finally adequately cool things at a nice brisk pace. Today's cooling session took an hour, and used ~30 gallons of water! (Yes, I watered plants with it, but still, there's is a drought!) People with similarly too-warm tap water, what's your method to work around this issue?
Lesson Four: Yeast. Again, I sort of blame this on my spotty brewing course instructions. Followed by a bonehead move on my part. The videos all demonstrated using liquid yeast, which they simply poured it in when pitching. No mention made of powdered yeast, which is what my kit came with, of course. (I later found a one-line mention buried in some text notes about the course) My beer kit's instructions, fortunately, had some instruction: To prep the powdered yeast, I was to stir it into in a 4oz cup of 86-92 degree water for 15 minutes. My mistake, and this is the one that may actually come back to haunt me in a couple of weeks, is I was rushed and not thinking, and I used 40 oz of RO water right from my tap (nuked to heat up, and then added more cool stuff to nail the temp zone). Did I just contaminate my entire batch? I guess only time will tell how effective my RO water filtration setup is, with regard to bacteria. It's a nice system, and only a couple of months old, so the filters are in great shape, so maybe there's a chance? Also, it's filtering municipal water that's heavily chlorinated so perhaps there's not as much living in there as there could be in other places? Lesson learned: Use liquid yeast, or prep boiled water in advance. Except now I'm seeing a thread that indicates I may not need to bother, and just sprinkle the dry yeast into the carboy, as long as it's above 68F? No, I think I'll rehydrate when using dry, and now I know to prep it in advance so no surprises on brew day.
Well, it's all over now, except for the cleaning. What's the prescribed cleaning methodology? I rinsed most things off with the tap, and then dipped them in StarSan again, and air dried. My transfer hose had some gunk caught in it, so I put it in the kettle with a few gallons of PBW water to soak for a while, then I'll air dry again, and put it away. Anything else that needs special treatment? I have no idea how I'm going to get the water out of my chiller coils, for instance... I don't have an air compressor.
Today, I brewed a Blonde Ale from More Beer, using their full complete ingredient kit.
Start time: 1:50pm End time: 6:45. 5 long hours! That was truly a start to finish thing, however (other than cleanup). For instance:
Lesson One: Water source. My RO water system works great for filling water bottles and pitchers. Less great for producing 6 gallons of filtered water. It took 55 minutes to fill my bucket! Lesson learned: Get the water prepared a day in advance, to save an hour of my life on brew day. Not difficult, and easily planned for in advance, but that was an unexpected hour out of my brew day, today. Live and learn!
Lesson two: Better instructions. I have a pretty darned decent course I found online with "how to brew" videos, but it turns out they were missing a few small things (not many, but they causes some issues and took time to resolve), and worse, there were inconsistencies that I had to resolve on the fly. For instance: The instructions were unclear about steeping the grain packet. All agreed that the grains should be steeped for 30 minutes. But one video said fill the kettle and start the boil, take it to about 150, but then the next video in the sequence said turn on your stove (like, from the start) and put in the grain bag immediately. The instructions for the beer kit said to put it in cold as well. My video course made a big deal about keeping the temp to around 160 and never letting it go above 170 or you could get off flavors. In the end, I put the grains in at around 115 and let things heat up to 165, then I lowered the heat to make sure I didn't overshoot 170. I finished the last two minutes having just hit 170, with the temp still climbing, but never went over. There was much relief. I think I worked this out in the end, but there was definitely confusion and uncertainty involved. Lesson learned: Well, hopefully now that I've been through this once I'll be able to spot issues in advance? With experience this will be less of an issue.
Lesson Three: Cooling sucks. The biggest issue, during the run, was the cooling stage. After boiling my hops for an hour, and adding the Whirlfloc tablet in the last 5 minutes, I was ready to cool the wort. My brewing kit came with a copper coil immersion chiller (25' coil), intended to connect to a kitchen faucet. The problem, it turns out, is SoCal is so darned hot that my tap water is 81 degrees. I was able to cool the wort from boiling to just under 100 in about 20 minutes (the hottest water ran down the drain, which was painful, but then it cooled enough to collect into buckets, instead, so at least the plants in my yard will be happy). But it quickly became clear that the temp wasn't going to drop much lower without some other technique. At that point, at least, it was cool enough that I was able to stack a bucket on the end of another, to get it up high, and fill the top bucket with about 5 lbs of ice and tap water, and running that COLD water through the chiller (and then dumping the bucket of ~65 degree water back up into the ice bucket, so reuse the same water over and over), then I was finally able to cool it down to 75. Lesson learned: Tap water this warm isn't going to cut it without extra gear. I'll spend some money on a better setup. I'm thinking of buying the Duda Diesel plate chiller. Then I can put my coil chiller into an ice water bucket to precool the water, and then run it through the plate chiller. That should finally adequately cool things at a nice brisk pace. Today's cooling session took an hour, and used ~30 gallons of water! (Yes, I watered plants with it, but still, there's is a drought!) People with similarly too-warm tap water, what's your method to work around this issue?
Lesson Four: Yeast. Again, I sort of blame this on my spotty brewing course instructions. Followed by a bonehead move on my part. The videos all demonstrated using liquid yeast, which they simply poured it in when pitching. No mention made of powdered yeast, which is what my kit came with, of course. (I later found a one-line mention buried in some text notes about the course) My beer kit's instructions, fortunately, had some instruction: To prep the powdered yeast, I was to stir it into in a 4oz cup of 86-92 degree water for 15 minutes. My mistake, and this is the one that may actually come back to haunt me in a couple of weeks, is I was rushed and not thinking, and I used 40 oz of RO water right from my tap (nuked to heat up, and then added more cool stuff to nail the temp zone). Did I just contaminate my entire batch? I guess only time will tell how effective my RO water filtration setup is, with regard to bacteria. It's a nice system, and only a couple of months old, so the filters are in great shape, so maybe there's a chance? Also, it's filtering municipal water that's heavily chlorinated so perhaps there's not as much living in there as there could be in other places? Lesson learned: Use liquid yeast, or prep boiled water in advance. Except now I'm seeing a thread that indicates I may not need to bother, and just sprinkle the dry yeast into the carboy, as long as it's above 68F? No, I think I'll rehydrate when using dry, and now I know to prep it in advance so no surprises on brew day.
Well, it's all over now, except for the cleaning. What's the prescribed cleaning methodology? I rinsed most things off with the tap, and then dipped them in StarSan again, and air dried. My transfer hose had some gunk caught in it, so I put it in the kettle with a few gallons of PBW water to soak for a while, then I'll air dry again, and put it away. Anything else that needs special treatment? I have no idea how I'm going to get the water out of my chiller coils, for instance... I don't have an air compressor.

")