Insulating keezer collar - best options

Homebrew Talk - Beer, Wine, Mead, & Cider Brewing Discussion Forum

Help Support Homebrew Talk - Beer, Wine, Mead, & Cider Brewing Discussion Forum:

This site may earn a commission from merchant affiliate links, including eBay, Amazon, and others.

Joeywhat

Well-Known Member
Joined
Feb 10, 2009
Messages
297
Reaction score
95
Location
Farmington, MI
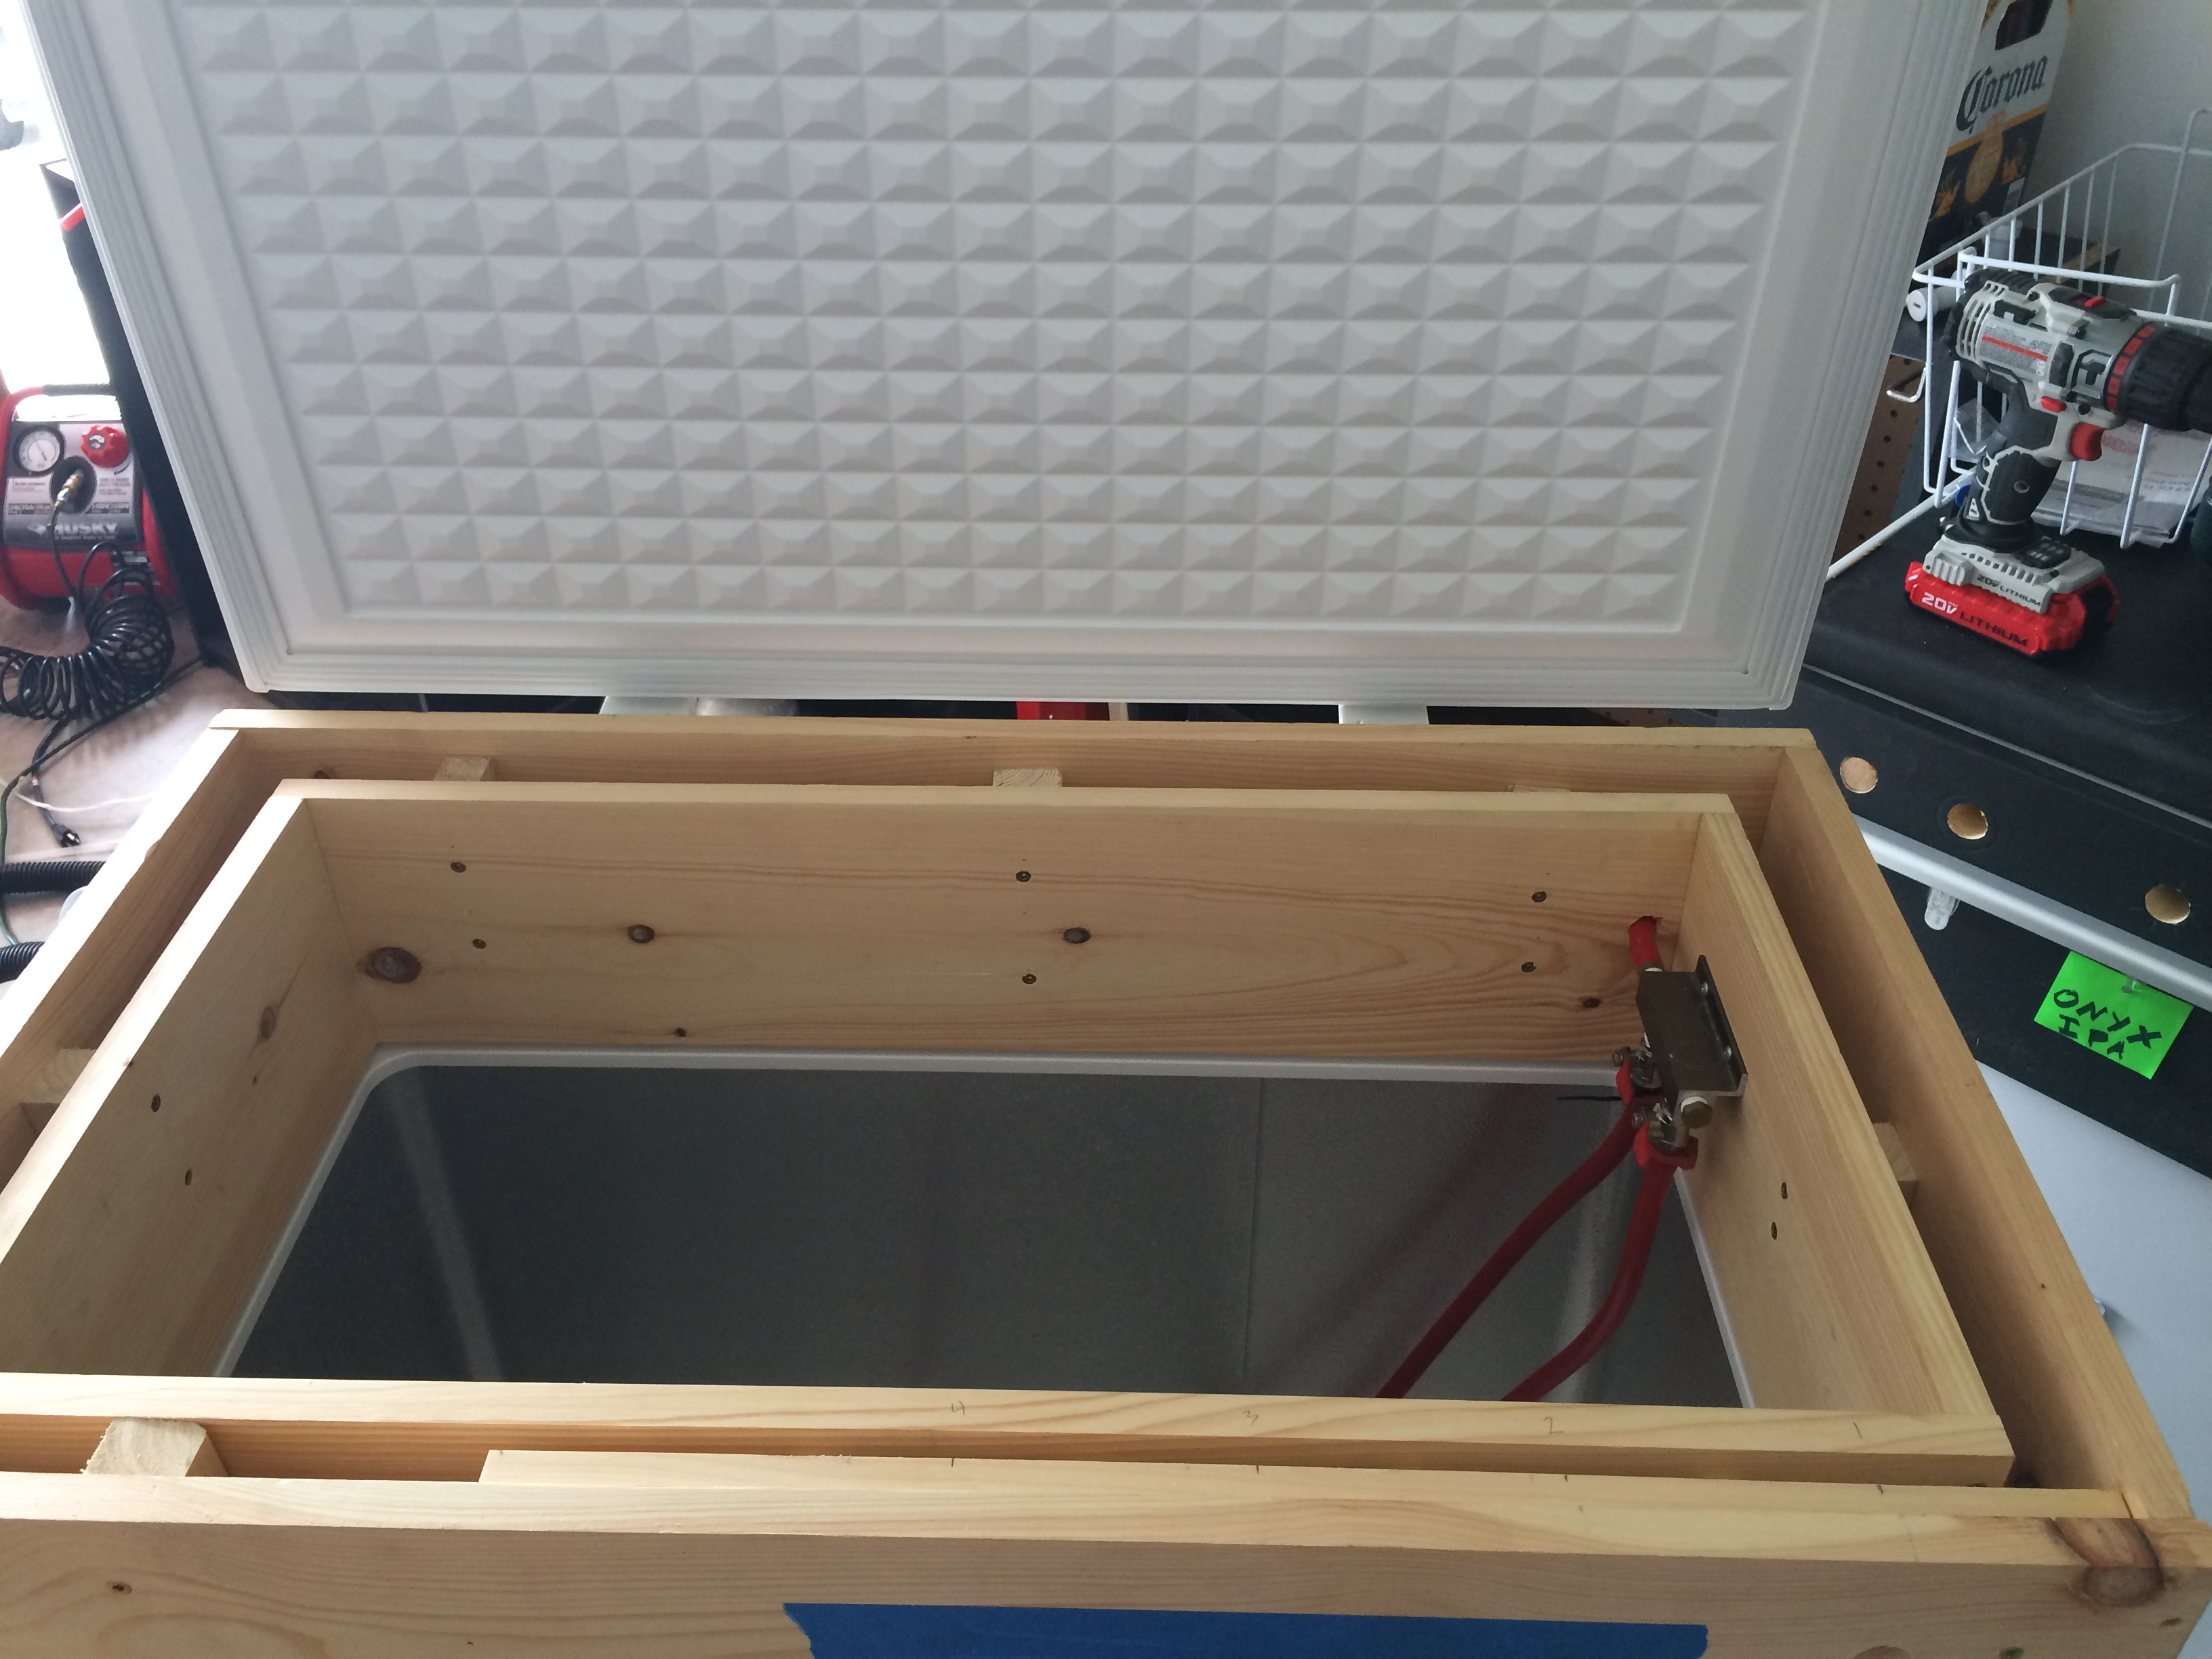
I'm about to pull the trigger on building a collar. I will be using 1x6" planks (probably cedar) for the exterior, and I'd like to use rigid foam insulation inside of that to keep my energy bill down. I have a couple snags that I need help with:

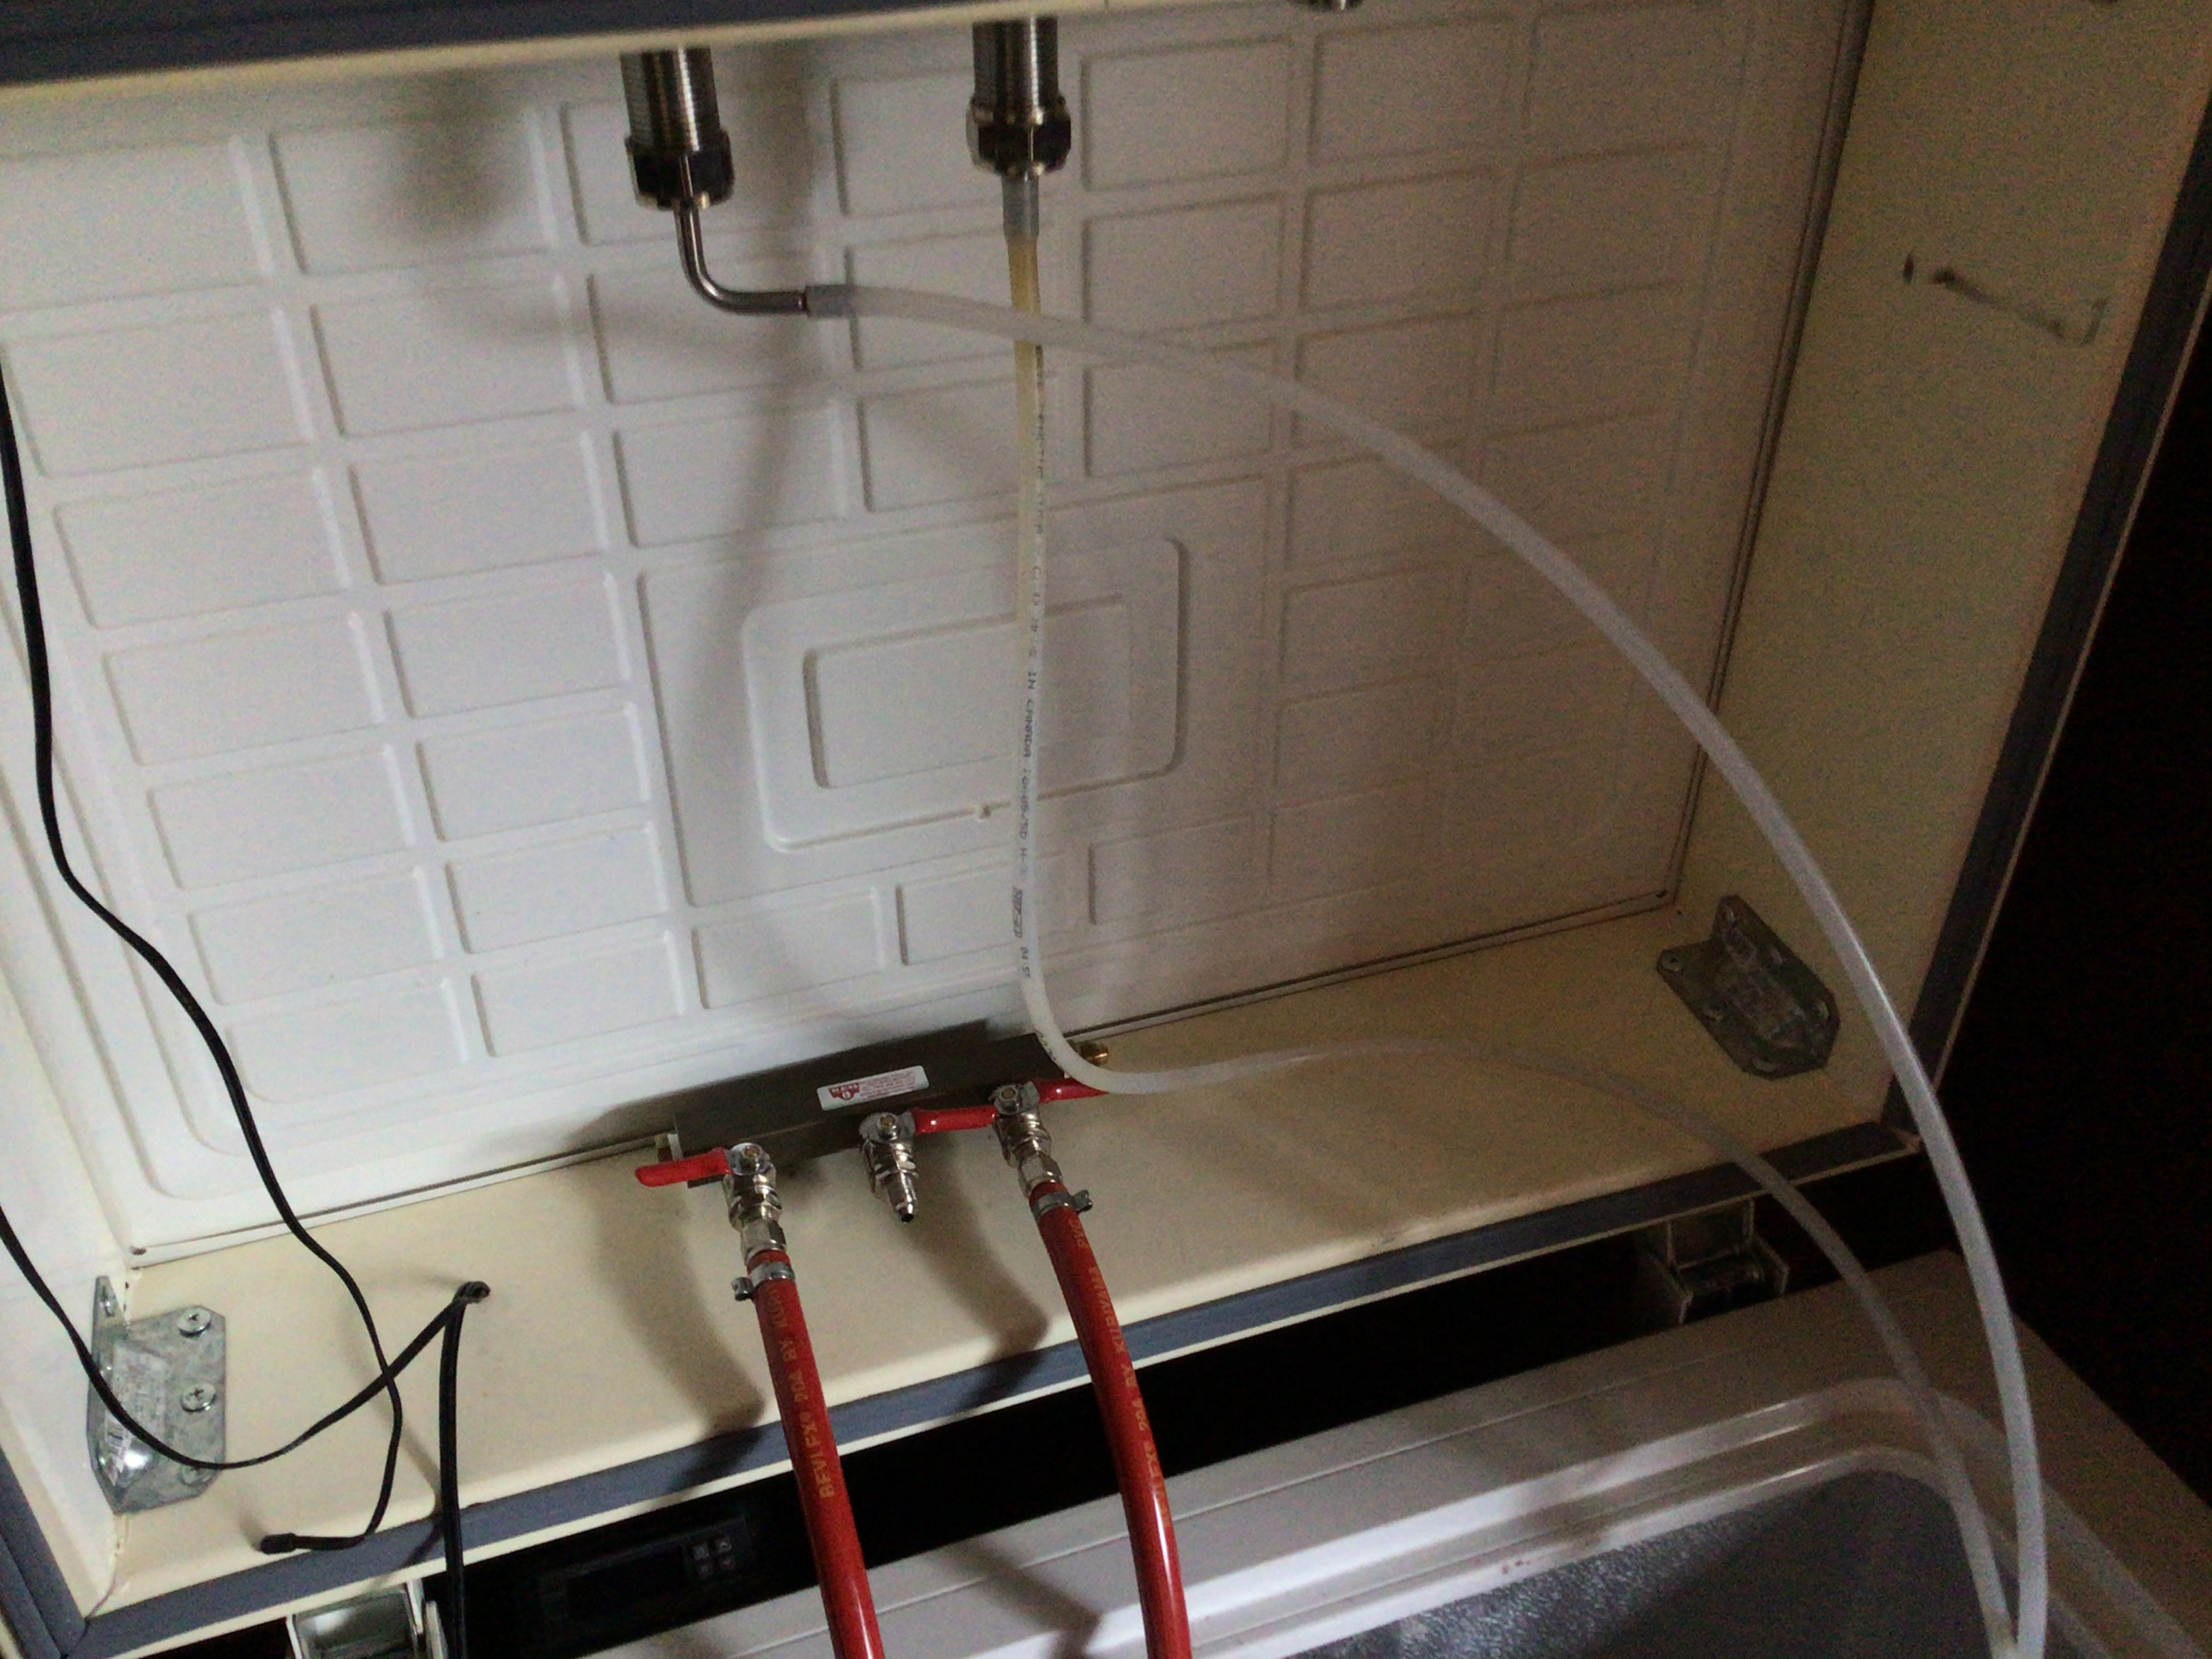
1) I was planning on also putting another 1x6 plank on the inside of the insulation to sandwich it in. My thought is that when I add taps and a CO2 bulkhead and whatever else I might have run through the collar, the wood on both sides will keep everything secure. Am I OK attaching shanks, bulkheads, etc. against the rigid insulation? Maybe use a big fender washer to keep from crushing it or having wobbly taps? Is it fine as is and I'm just overthinking it? The problem with adding the second plank inside is clearance with the lid, as it lowered right after the door seal, so the collar can only be so thick.

2) I'm planning on putting some sort of weather strip on both sides of the collar to help everything seal up. Not an issue between the collar and freezer, some adhesive backed foam strips are easy to install. Between the collar and the lid, it looks like the freezer door seal will land right between the wood and the rigid foam. My concern is that over time the rigid foam will deform and the seal will suck. Am I overthinking it again? Is there something I can attach to the top of the collar to make a smooth surface for the lid to seal on?

Thanks for the help everyone.
 
I used felt to seal the lid to chest on mine it's been operating for years with 0 issue, I did not run my taps through the collar though I would imagine you would be fine using a small piece of wood in front of the nut on the shank to increase the area of pressure and not crush your foam also making it a lot easier to remove or secure in the future.
 
That makes sense, I didn't think of just using a plate of some sort for the taps... I could probably find a piece of good sheet or plate steel/aluminum for that.
 
you could run a small piece of wood just where the taps are. or you could just install the tap shanks on the one piece of wood and tighten them down and install your rigid insulation after the shanks are in.
 
When I was constructing my keezer I read where wood is a decent insulator. However, to the inside of the wood collar, I glued styrofoam as an insulator. I punched holes where the shanks run thru the collar into the keezer.

However, I do believe the styrofoam was a waste of my time, as wood parts without styrofoam feel no different, temp wise, than wood parts with styrofoam. I need to verify my "touch test" with an infrared temp gun.
 
I did seal, with silicone, where the CO2 tubes route thru the collar.

I drilled a hole in the collar side large enough to pass a beverage tubing thru the hole. When it's time to clean the tubing, tap, etc, I do a clean in place. When not in use the hole is covered on the inside by a plastic cap. When I want to use, I remove the cap from the collar, route the beverage tubing and shut the keezer lid. Then I do the 30 minute clean, 15 minutes with cleaning solution and 15 minutes with hot water, with the keezer lid shut.
 
I think I might just try using a 2x6 instead of a 1x6 + insulation... I can add insulation later if I really want it, and I think having a good seal top and bottom will help a lot as well. In fact I just looked up the R-value of cedar, and it's 1.41/inch, which really isn't that bad.

I think this will make sealing the lid/collar easier anyways as I don't have to worry about the seal being right to top of the rigid insulation.
 
My plan is to stain and use poly or varnish to seal it up. I'm going to head to Menards this weekend and try and find some good looking 2x6 boards, or maybe double up on 1x6's since they seem to be better grade.
 
I think my dad has some poly and stain from a previous project so I'll use what he has and save a few bucks. I agree that water resistance is a must, even if it shouldn't get wet.
 
The insulation isn't that useful from a thermal perspective in this application and it will just get in the way on the inside. I used nice 2x6 or possibly 2x8 pine which I put through a thickness planer and finished with a water-based matte poly. The result is very clean-looking. Sort of Ikea-esque.
 
I used simple 2x4s for my collar and painted it white to “match” the white freezer. No insulation. No sealing. Been working great for many years.
image.jpg
 
I have no proof what the best is, but what I did and liked: an inner and outer collar made by 4x1 then the gap I filled with foam sealer. this allowed me to easily fill the contours of the lid and the body of the keeper. I also used silicone to adhere the wood to the plastic. Also, if you go with 2x4 they are not usually dimensional so you will need to square them to get a good fit/seal.
 

Attachments

  • IMG_3526.JPG
    IMG_3526.JPG
    1.3 MB · Views: 121
For mine, I used 2x6 cut to match the actual size of my freezer, 1x12 raised higher on the outside of the inner collar and 6x2 insulated foam on the inside. I used thick insulation foam for the collar to sit on and more on top of the collar for the original lid to seat into.WP_20160505_13_25_23_Pro.jpgWP_20160403_20_06_13_Pro.jpg
 
@Joeywhat We did similar to what you're talking about. We used 3/4" red oak plywood to build our collar and insulate with 1" rigid foam. The plywood was charred with a propane weed burner torch, then stained with 3 coats of blue dye stain, and finished with 3 coats of water-based poly. The sides and back received double layer of plywood for strength. The front only received a single layer to keep the thickness down to accomodate my 3-1/8" SS shanks. I screwed the shank nut down until it compressed the rigid foam. However, my taps still rotate quite easily and are frequently bumped out of alignment. I intend to go back in and use a hole saw to cut out the foam around each shank to allow the nut to tighten down on the plywood. We used foil duct tape to seal all gaps internally, mostly to prevent any beer spill from getting into crevices that would be impossible to clean and lead to mold growth.

As for your comment about using leftover poly, please make sure it's not very old. Poly is only good for 6-12 months once opened, if it's stored properly. Poly is cheap, like $15/quart which will easily cover your collar.

IMG_5340.jpeg
IMG_5339.jpeg
 
@rjbergen Very, very nice. However, I would have put the secondary regulator outside the keezer. Why? Rubber diaphragm in the valves. Also, moisture, condensation on the gauge and metal parts of the secondary regulator.

Also, why open the keezer to adjust the secondary regulator psi?
@Tobor_8thMan, challenge with secondaries outside is then I’d need 6 CO2 bulkheads to bring CO2 in. I have an Eva-Dry E500 in there to keep humidity down. The cold may still affect the rubber diaphragms though.
 
2x6 PVC fence rails stuffed with foam insulation. miters on the edges, silicone caulk. Works and looks great, no painting required.
 
I'm trying to visualize. Possible to post pictures?
I don't have a picture, but I imagine he's using hollow PVC fence rails. They basically look like 2x4/2x6 wood, but thin, hollow PVC.

Seems like a solid idea, I might have to try that if I ever redo mine.
 
I'm trying to visualize. Possible to post pictures?
Can’t find original pics, but it’s like Joeywhat said. I cut the 2x6 Vinyl fence rails at a miter, stuffed insulation inside, screwed corner braces on, caulked the seams, and used the original hinges plus new hinges so I could open only the top for dealing with gas or taps, or lift the cooler too for dropping kegs in. Nice thing about thedesign is it is reversible.

you can also see the gas manifold and the taps in these pics.

Unfortunately, the freezer just quit on me, and I couldn’t find a new one with the same dimensions. So I’ll be designing and building a new one all over again.
 

Attachments

  • 1BFE6B10-C7B1-4D22-BE1A-0FC3933F4BAD.jpeg
    1BFE6B10-C7B1-4D22-BE1A-0FC3933F4BAD.jpeg
    1.5 MB · Views: 79
  • A8BC8DD4-DE84-4C48-95E5-8957EBD85525.jpeg
    A8BC8DD4-DE84-4C48-95E5-8957EBD85525.jpeg
    2.1 MB · Views: 76
Back
Top