You are using an out of date browser. It may not display this or other websites correctly.
You should upgrade or use an alternative browser.
You should upgrade or use an alternative browser.
HERMS build
- Thread starter kevy
- Start date

Help Support Homebrew Talk - Beer, Wine, Mead, & Cider Brewing Discussion Forum:
This site may earn a commission from merchant affiliate
links, including eBay, Amazon, and others.

Hi, yes I think I followed the same plans and everything worked great! I will say that I bounced back and forth between his plans and Kal's at Electric Brewery, just to see if there was a different way of doing a specific thing. After obtaining all of the parts it took me a couple full days of installation/wiring. With anything electrical, the one thing I'd recommend is checking continuity throughout the installation. Here are some pics of the panel and my setup in action yesterday.
Inside complete:

Outside complete:

I strayed from his plans a bit on the pump indicator lights and alarm switches. You'll also see that for the mash temps I used the Auber SYL-2802B. I went this route because I didn't want another PID controller just to display the temperature of the mash and I really liked the idea of knowing what the temp is in and out of the HERMS coil (overkill? maybe. but whatever!") ). I also used the Auber EZ Boil Controllers for the HLT and BK, so far they have been very easy to use.
). I also used the Auber EZ Boil Controllers for the HLT and BK, so far they have been very easy to use.
Here is the system in action yesterday:

Happy wiring!
Inside complete:
Outside complete:
I strayed from his plans a bit on the pump indicator lights and alarm switches. You'll also see that for the mash temps I used the Auber SYL-2802B. I went this route because I didn't want another PID controller just to display the temperature of the mash and I really liked the idea of knowing what the temp is in and out of the HERMS coil (overkill? maybe. but whatever!
). I also used the Auber EZ Boil Controllers for the HLT and BK, so far they have been very easy to use. Here is the system in action yesterday:
Happy wiring!
Nice. Thanks for sharing. Your wiring is pretty clean. I’m hoping to avoid a tangled mess Well seeHi, yes I think I followed the same plans and everything worked great! I will say that I bounced back and forth between his plans and Kal's at Electric Brewery, just to see if there was a different way of doing a specific thing. After obtaining all of the parts it took me a couple full days of installation/wiring. With anything electrical, the one thing I'd recommend is checking continuity throughout the installation. Here are some pics of the panel and my setup in action yesterday.
Inside complete:
View attachment 712483
Outside complete:
View attachment 712484
I strayed from his plans a bit on the pump indicator lights and alarm switches. You'll also see that for the mash temps I used the Auber SYL-2802B. I went this route because I didn't want another PID controller just to display the temperature of the mash and I really liked the idea of knowing what the temp is in and out of the HERMS coil (overkill? maybe. but whatever!
Here is the system in action yesterday:
View attachment 712485
Happy wiring!


Yep. I’m just using the dremel to get the cut on the line then jigsaw the rest.Nice! Looking good. When I was building my panel, I started off using my dremel and quickly used up the cutoff wheel. Ended up using a jigsaw for most of the straight cuts instead.
those little cutoff wheels don’t last long

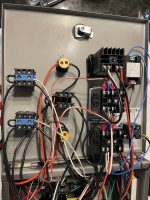
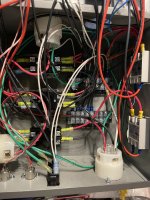
Well. Life got busy and I sold my house and moved. But I’m back at it and have made some more progress. I have finished all the cutting on the controller box and painted it up. Have a most parts mounted. It’s looking good.
I think I may need to learn to solder or find someone. I seen a post where someone had a bad connection and melted their SSR. I do t want that.
I think I may need to learn to solder or find someone. I seen a post where someone had a bad connection and melted their SSR. I do t want that.
Attachments
RufusBrewer
Well-Known Member
Isn't Skill the guy that relied on tripping your GFCI as an Emergency Stop.
There ere several better ways to implement an E-Stop and I cannot think of a worse way.
There ere several better ways to implement an E-Stop and I cannot think of a worse way.
What do you mean? Tell me moreIsn't Skill the guy that relied on tripping your GFCI as an Emergency Stop.
There ere several better ways to implement an E-Stop and I cannot think of a worse way.
No, Mike Skril did not use tripping the GFCI as an E-stop. In fact Skril's design did not even have an E-stop - a practice I agree with, as long as you have one switch that will shut down everything in your control panel (if that's the case then the E-stop switch is redundant.)Isn't Skill the guy that relied on tripping your GFCI as an Emergency Stop.
There ere several better ways to implement an E-Stop and I cannot think of a worse way.
PJ was the guy who liked to use a current limited short-to-ground to trip the GFCI. Unfortunately, P-J is no longer with us.
Brew on

RufusBrewer
Well-Known Member
What do you mean? Tell me more
A few years ago there was an HBT remember that was very prolific and very helpful and a good guy. He submitted electric brewing designs that were full of good ideas.
But for one thing.
For an Emergency Stop (one button that would halt all activity), his design was to induce a Ground Fault Interrupt error, trip the breaker and shut down the electric activity. A design feature I think is a bad idea.
IIRC he placed resistor from one hit leg to ground. While it is a good demonstration and illustration of how and why a GFCI breaker trips, it is a poor design to implement.
I had confused Mike Skril mention in the OP with PJ, the GFCI trip circuit guy.
Where you said “I had confused mike skril mention in the op with PJ, the GFCI trip circuit guy” has me confused. LolA few years ago there was an HBT remember that was very prolific and very helpful and a good guy. He submitted electric brewing designs that were full of good ideas.
But for one thing.
For an Emergency Stop (one button that would halt all activity), his design was to induce a Ground Fault Interrupt error, trip the breaker and shut down the electric activity. A design feature I think is a bad idea.
IIRC he placed resistor from one hit leg to ground. While it is a good demonstration and illustration of how and why a GFCI breaker trips, it is a poor design to implement.
I had confused Mike Skril mention in the OP with PJ, the GFCI trip circuit guy.
What do you mean. Is this a bad design? If so, what change do you recommend?
RufusBrewer
Well-Known Member
I am a "use the right tool for the job" kind of guy. For me, using a protection "tool" as an Off Switch "tool" violates that principle. I guess you can make the argument, "Well it works, that is all I care about." You can say the same thing about using the breaker as an On/Off switch. It works, but I am not going to endorse the design.
You are buying an extra switch to act as your "Oh crap! Shut everything down button." anyway. Why not deploy it in the design in what I believe is more sensible.
How best to integrate a master kill switch depends on your panel's design. Generally you want it as close to power coming into the panel possible. You can get red mushroom switches that are designed for you to reach over and slap the button shut everything down. Think Family Feud face off table.
If you have a lockout circuit that is promoted on these pages, you can put a NC switch in the latching circuit to act as a kill switch.
If you do a search here in electric brewing for "alternative-e-stop-design" or search thread 529694, you will find a thread (5 years ago to this day) started myself that details an old industrial control E-stop circuit. Granted, it is not for everyone to implement, it has advantages and disadvantages.
ETA Here is my thread on an E-Stop Design.
https://www.homebrewtalk.com/threads/alternative-e-stop-design.529694/
See if that works
Last edited:
I agree that the "trip the GFCI" e-stop is the least desirable way to implement an e-stop.I am a "use the right tool for the job" kind of guy. For me, using a protection "tool" as an Off Switch "tool" violates that principle. I guess you can make the argument, "Well it works, that is all I care about." You can say the same thing about using the breaker as an On/Off switch. It works, but I am not going to endorse the design.
You are buying an extra switch to act as your "Oh crap! Shut everything down button." anyway. Why not deploy it in the design in what I believe is more sensible.
How best to integrate a master kill switch depends on your panel's design. Generally you want it as close to power coming into the panel possible. You can get red mushroom switches that are designed for you to reach over and slap the button shut everything down. Think Family Feud face off table.
If you have a lockout circuit that is promoted on these pages, you can put a NC switch in the latching circuit to act as a kill switch.
If you do a search here in electric brewing for "alternative-e-stop-design" or search thread 529694, you will find a thread (5 years ago to this day) started myself that details an old industrial control E-stop circuit. Granted, it is not for everyone to implement, it has advantages and disadvantages.
ETA Here is my thread on an E-Stop Design.
https://www.homebrewtalk.com/threads/alternative-e-stop-design.529694/
See if that works
However, I don't believe that most homebrew installations even require an e-stop, as long as they have a switch that will shut everything down. In most designs, this would be the main power switch.
E-stops were developed for industrial equipment, where there are moving parts that could represent a hazard for injury (or an equipment failure poses a risk for cascading equipment damage.) For large pieces of equipment the control panel will be 10s of feet away from where operators are positioned during normal operations. In such situations, you need a way to shut things down immediately, that are within easy reach of the operators. Not many homebreweries will have this kind of situation.
That said, there is no real downside to including an e-stop switch, if it makes you feel better.
Look at the commercially available brew controllers. Most of them do not have a separate e-stop switch.
Brew on
RufusBrewer
Well-Known Member
Certainly an E-Stop is not mandatory. I know what you mean about moving parts. The first time I saw the E-stop top circuit, I worked at a company that made stuff that moved along conveyor belts and motors that pushed and shoved stuff around. We needed to be able to shut down the line when the control panel was 25 feet away.
I know when I am brewing sometimes I get in a position where I want to shut everything down so I can stop all activity and restart the process. Maybe I am a minority on this. A user could put one of the E-Stop circuit on their boil kettle relay with button next to the boil kettle and kill a potential boil over.
I have experience designing different systems. When going through the design process with customers, I talk about what I call the nickel postage design principle. If a proposal was the size of a postage stamp and cost a nickel, most times the proposal would be an easy choice.
Is the cost adding an E-Stop/Kill Switch "worth it"? Home brewers tend to be frugal group. Myself included. That is up to each home brewer to choose.
If you want to locate an e-stop button remote from the control panel enclosure, then you should be using low voltage (less than 24V) wiring between the panel and button. This complicates the circuitry in the panel a bit, as well as costing more than just the switch and wire alone.Certainly an E-Stop is not mandatory. I know what you mean about moving parts. The first time I saw the E-stop top circuit, I worked at a company that made stuff that moved along conveyor belts and motors that pushed and shoved stuff around. We needed to be able to shut down the line when the control panel was 25 feet away.
I know when I am brewing sometimes I get in a position where I want to shut everything down so I can stop all activity and restart the process. Maybe I am a minority on this. A user could put one of the E-Stop circuit on their boil kettle relay with button next to the boil kettle and kill a potential boil over.
I have experience designing different systems. When going through the design process with customers, I talk about what I call the nickel postage design principle. If a proposal was the size of a postage stamp and cost a nickel, most times the proposal would be an easy choice.
Is the cost adding an E-Stop/Kill Switch "worth it"? Home brewers tend to be frugal group. Myself included. That is up to each home brewer to choose.
And I have never seen a brew panel design with a remote located e-stop - they all have the e-stop in the panel close to the main power switch.
Brew on

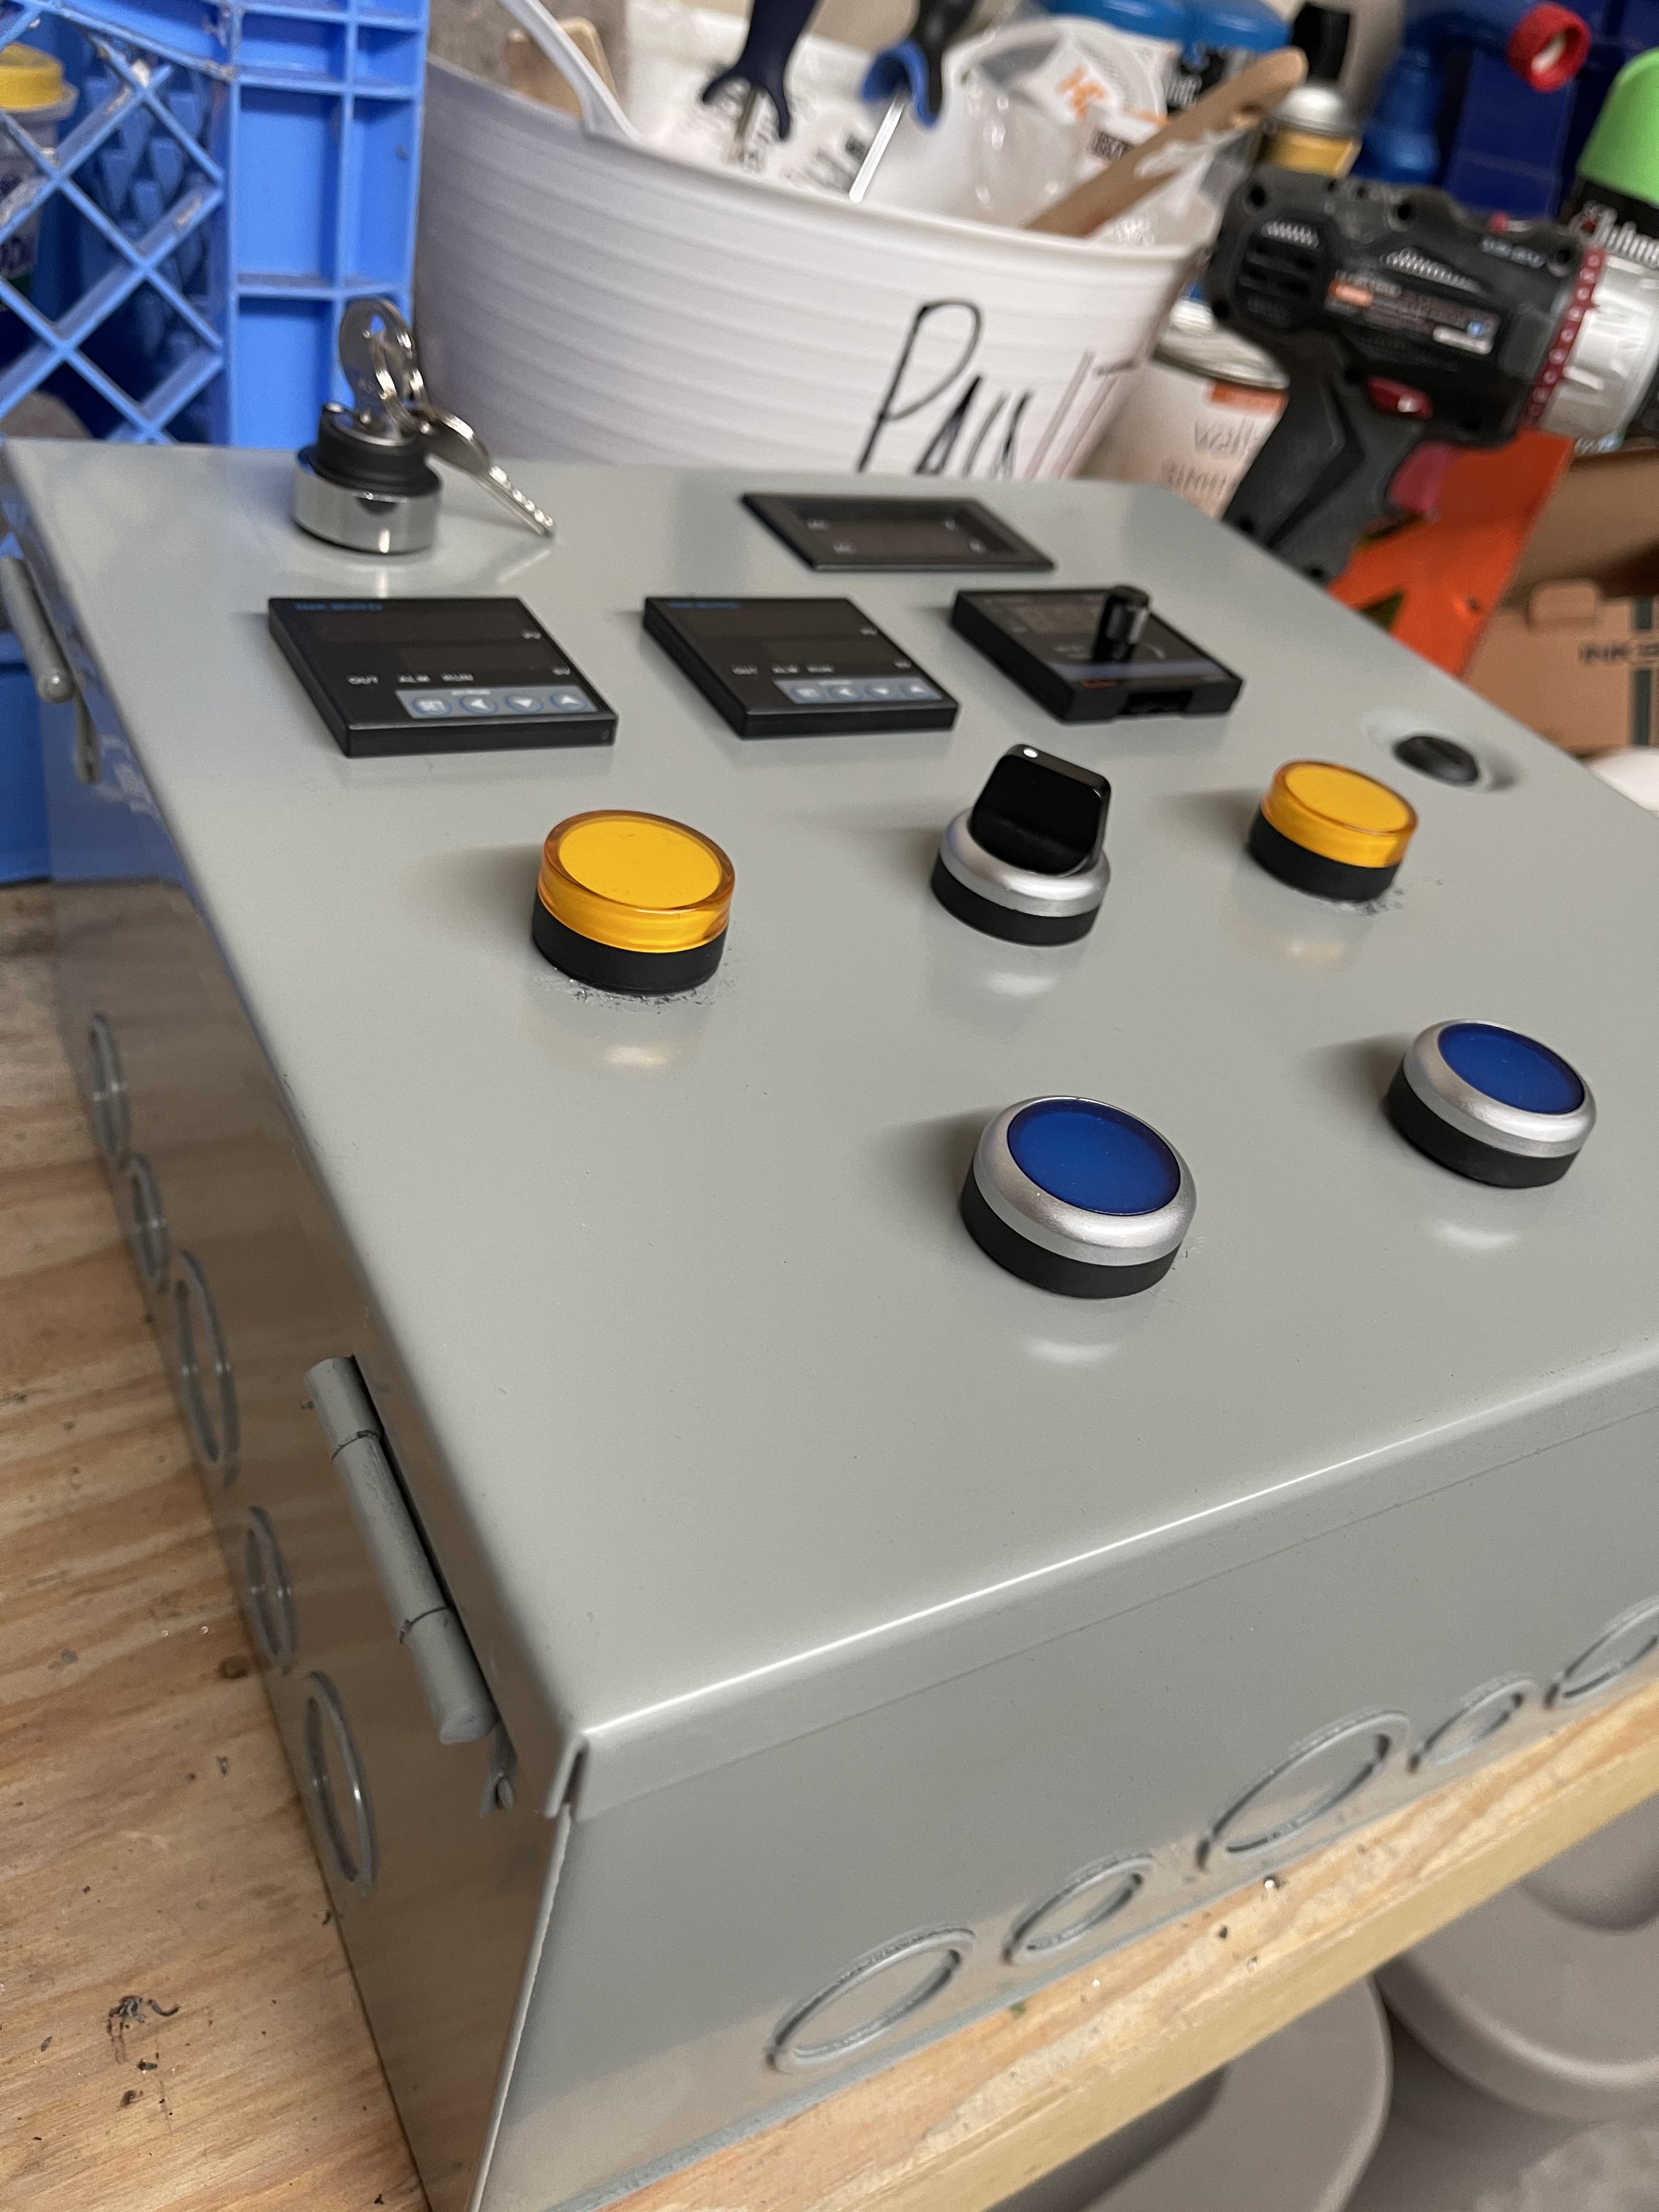
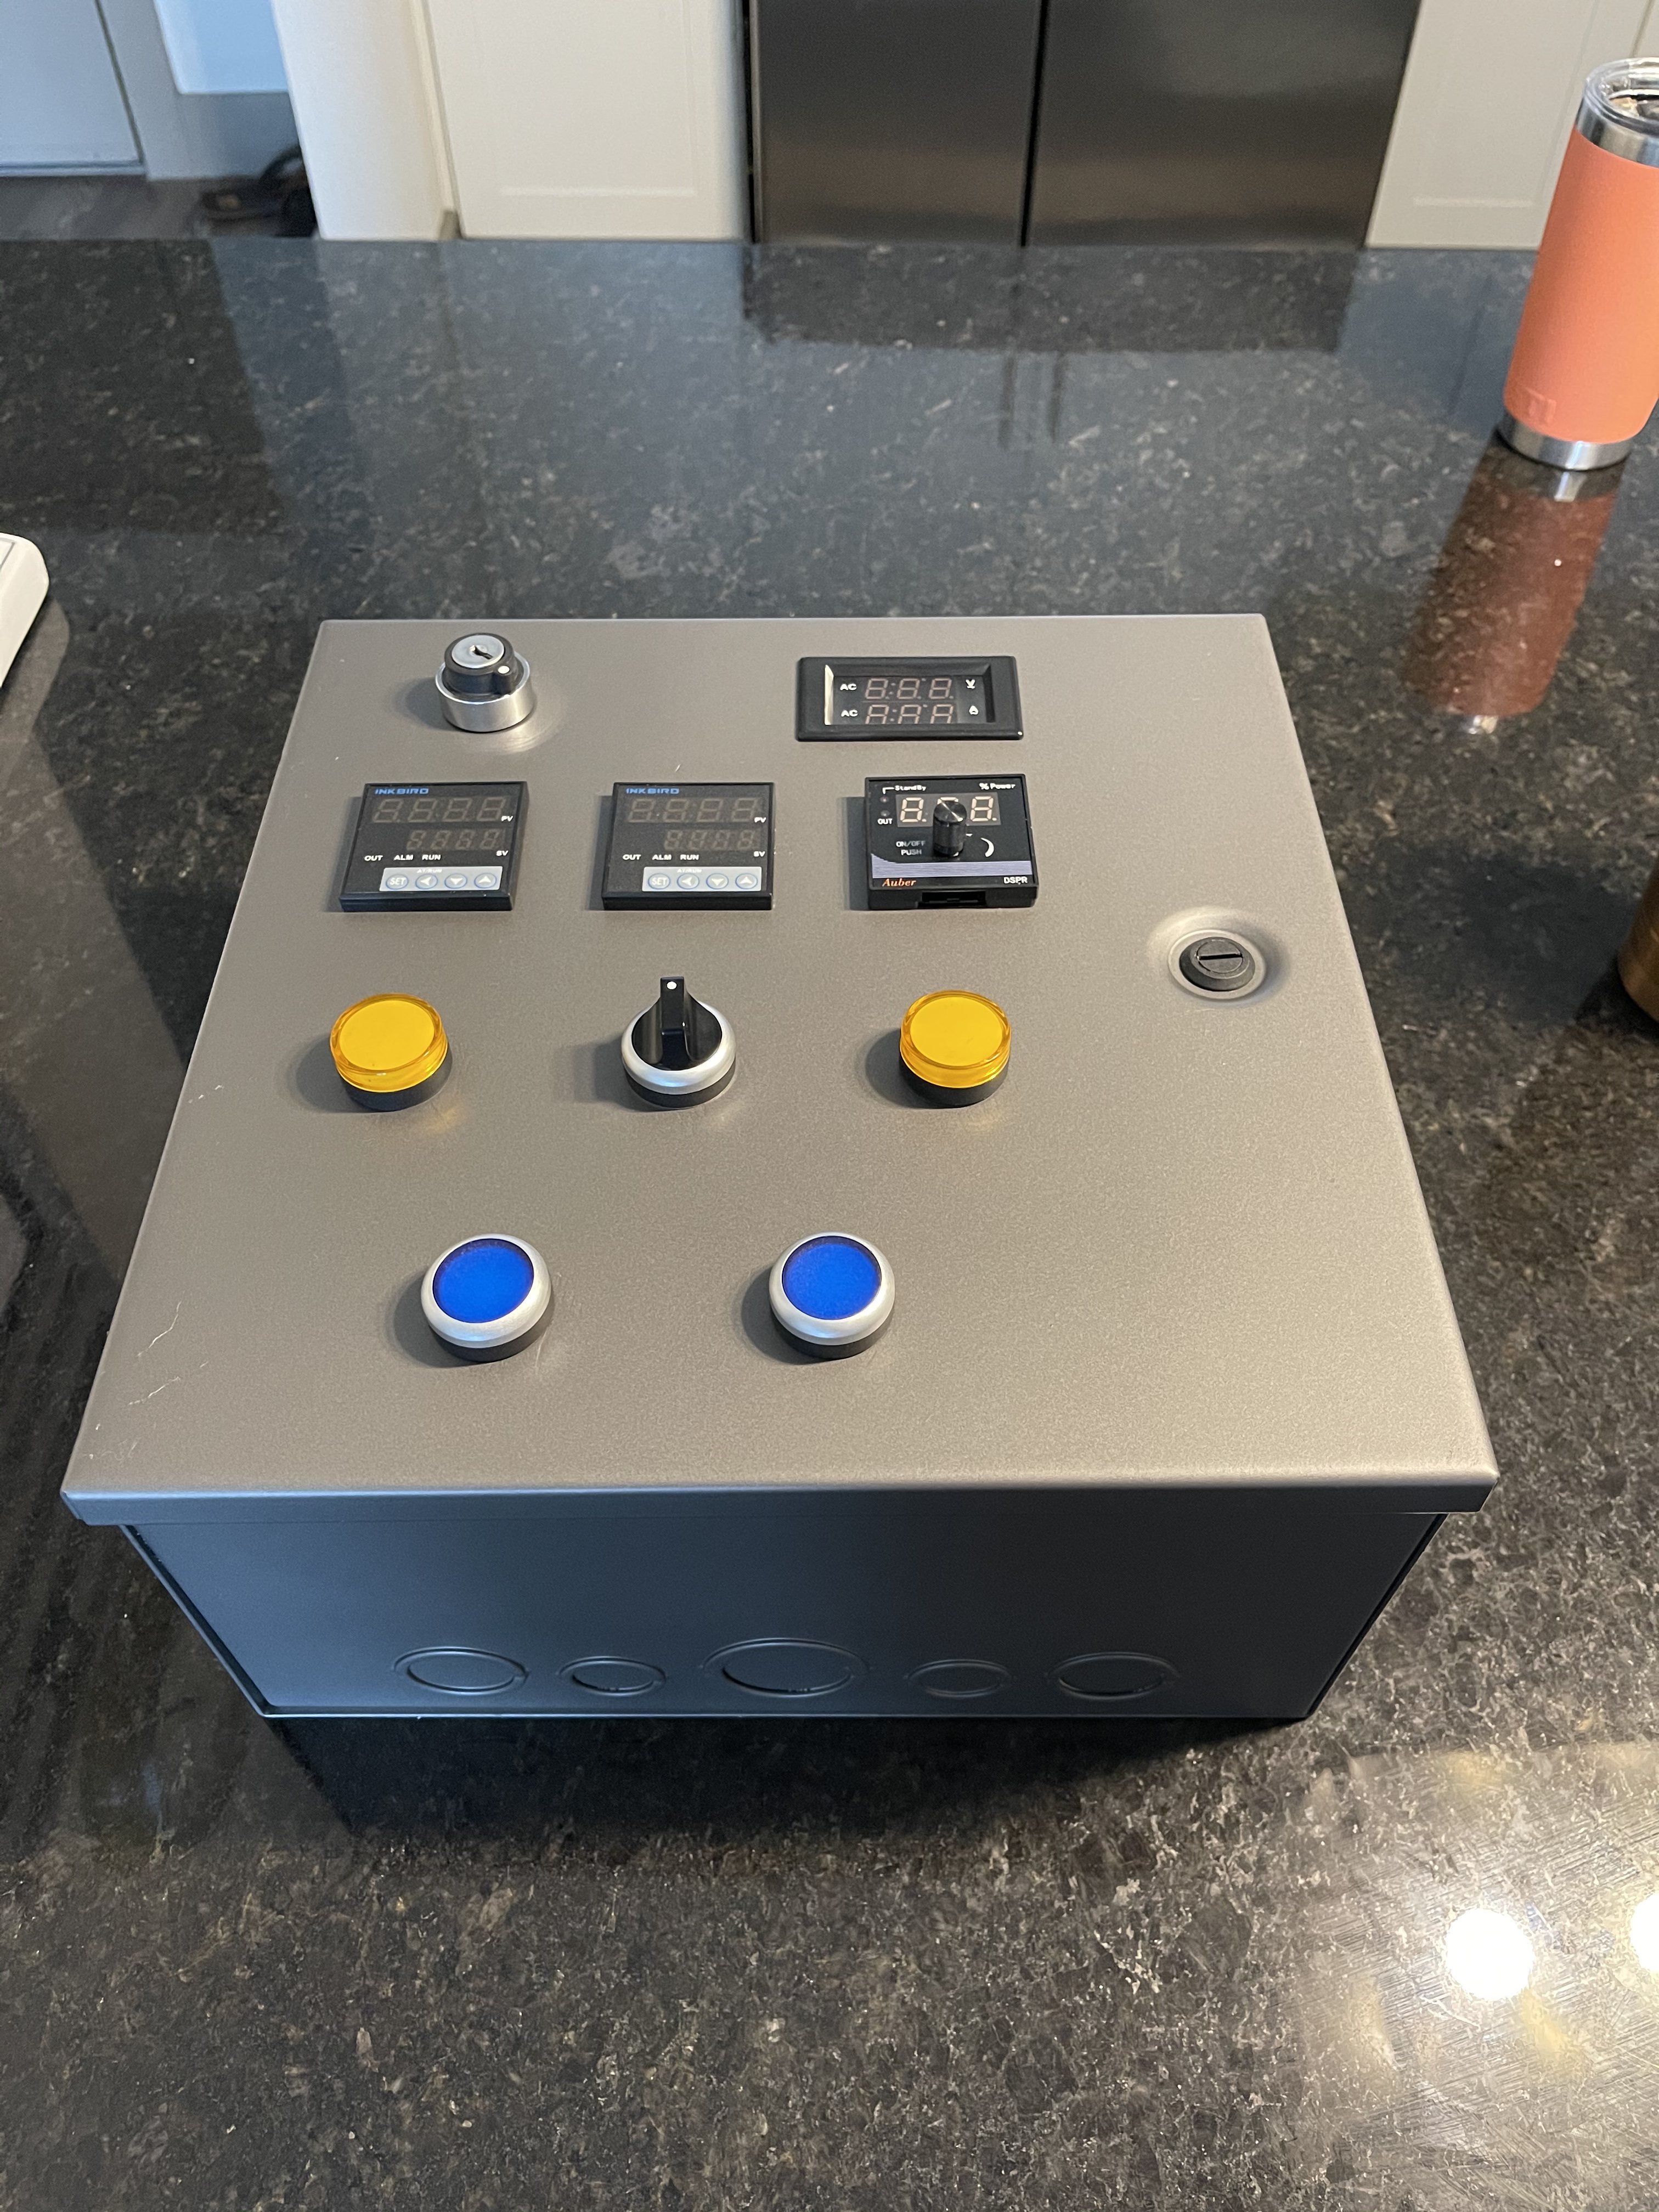
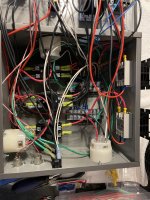
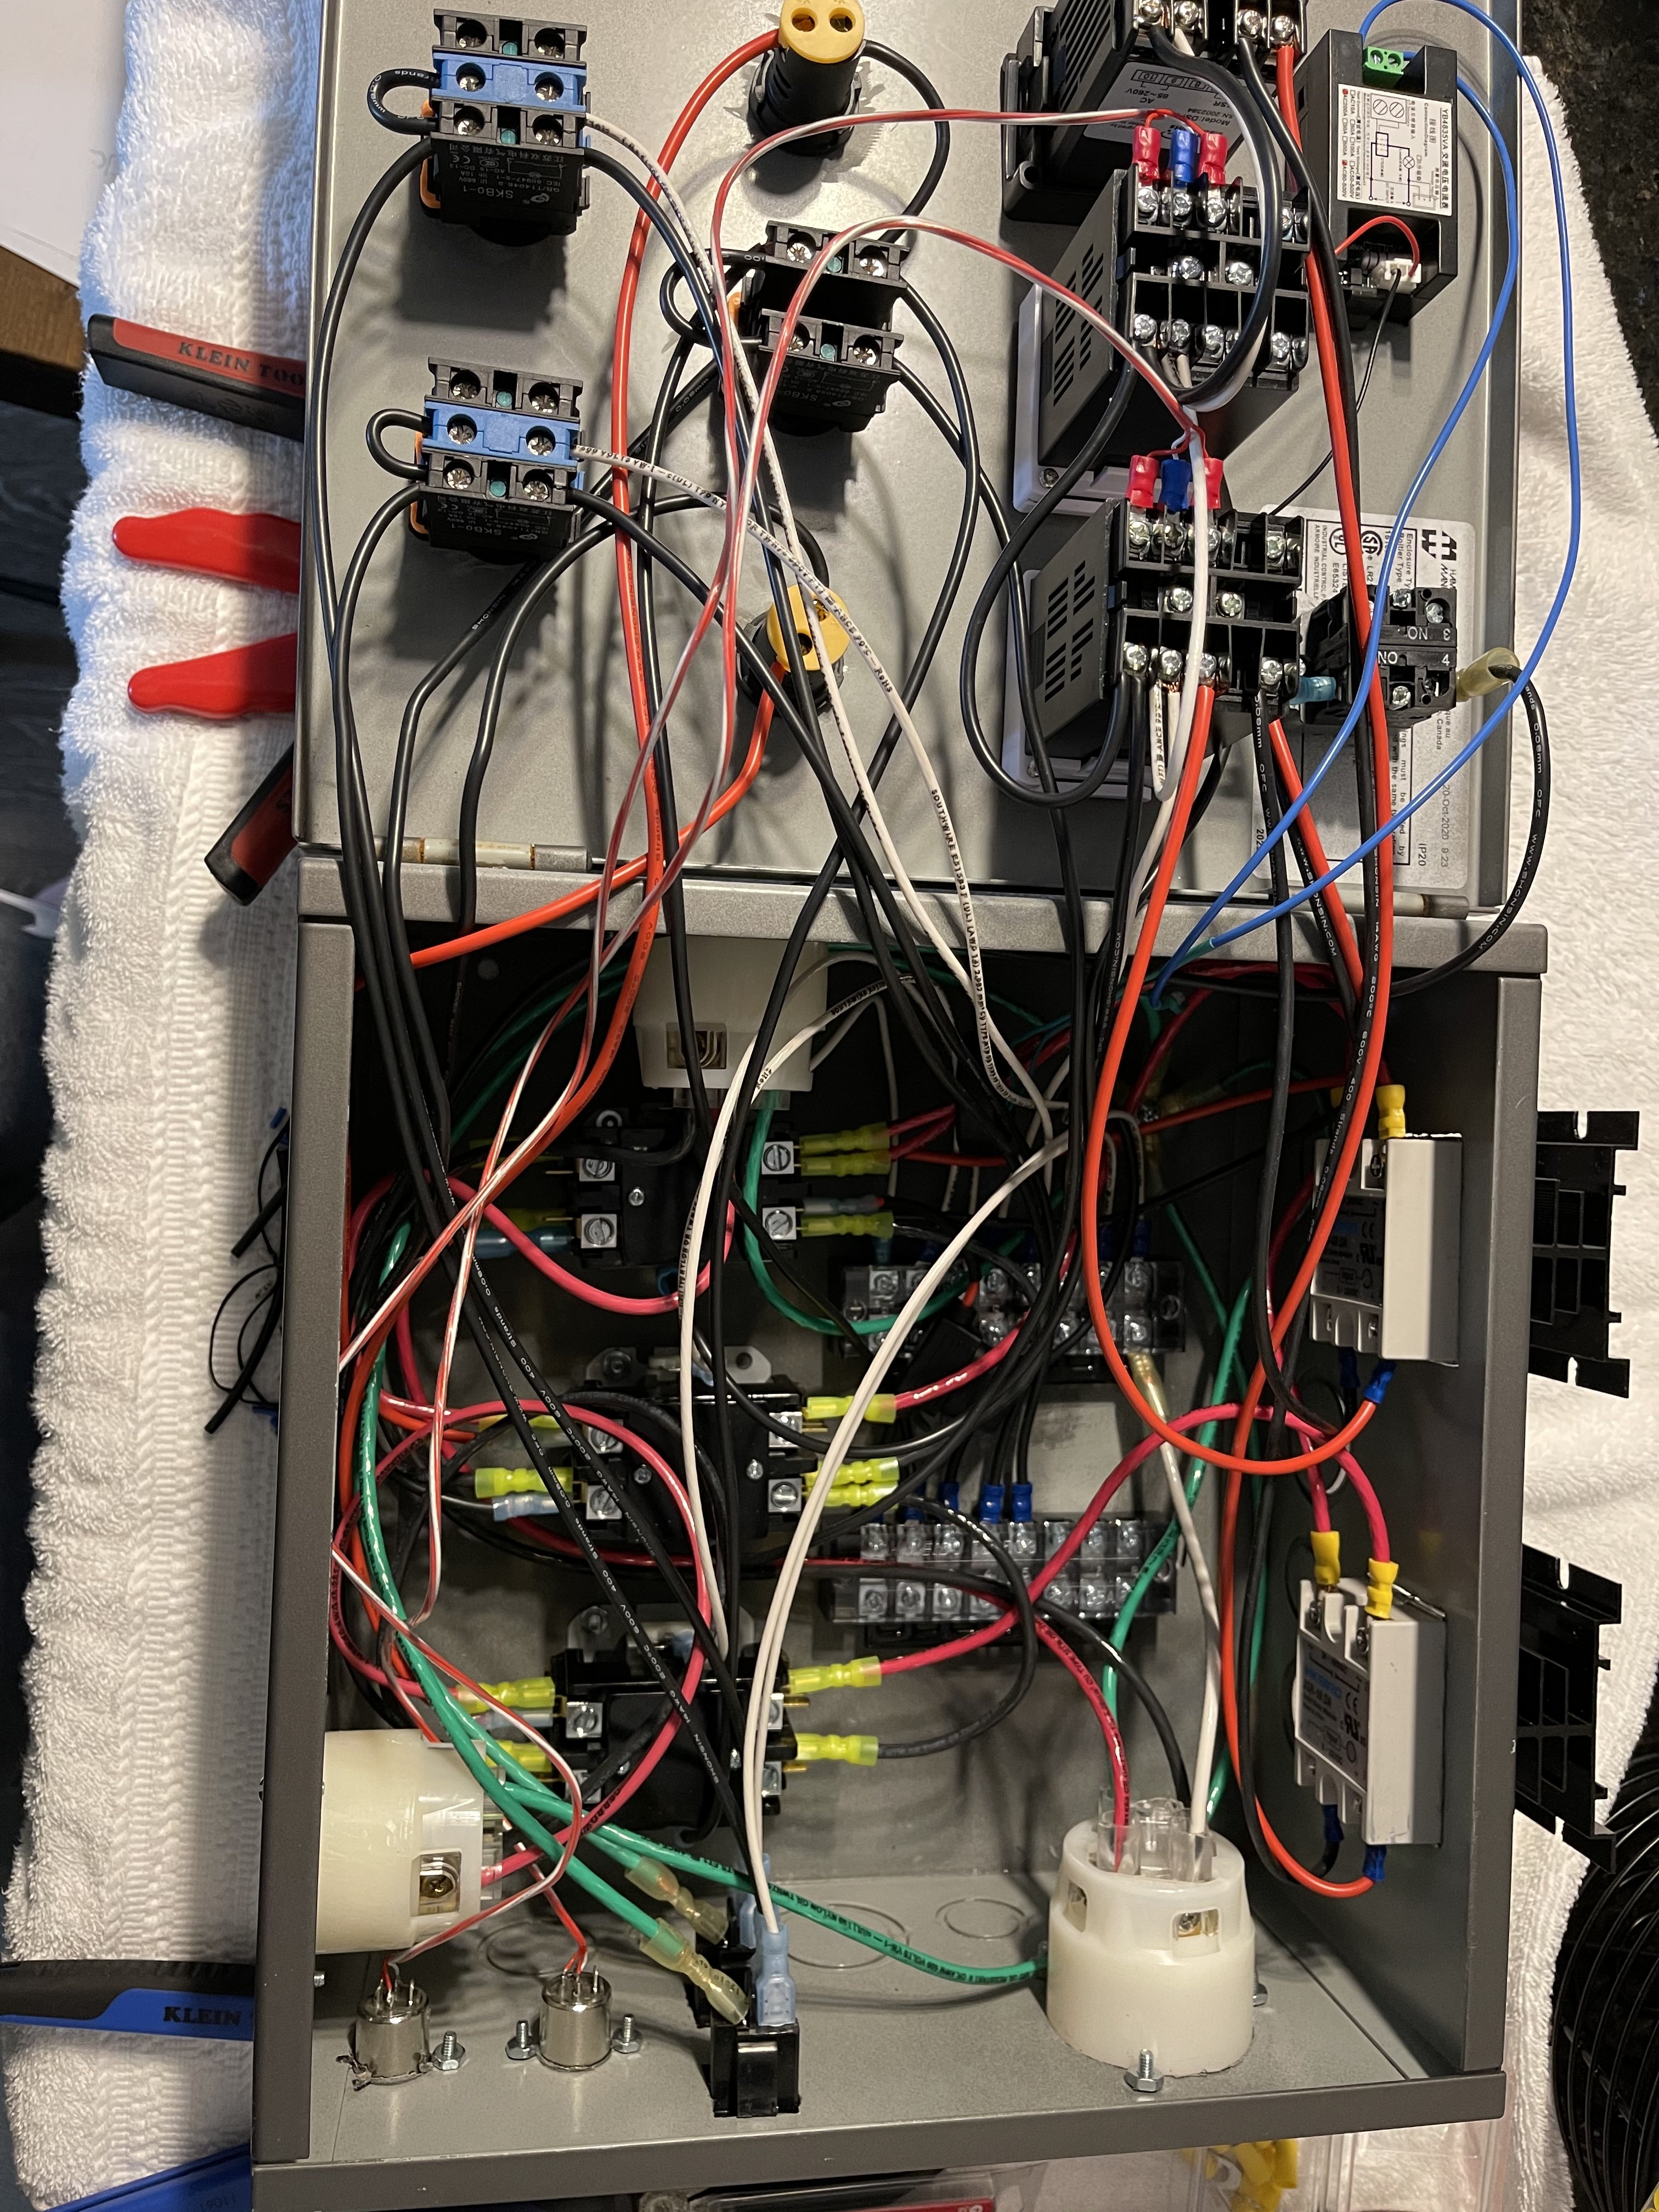
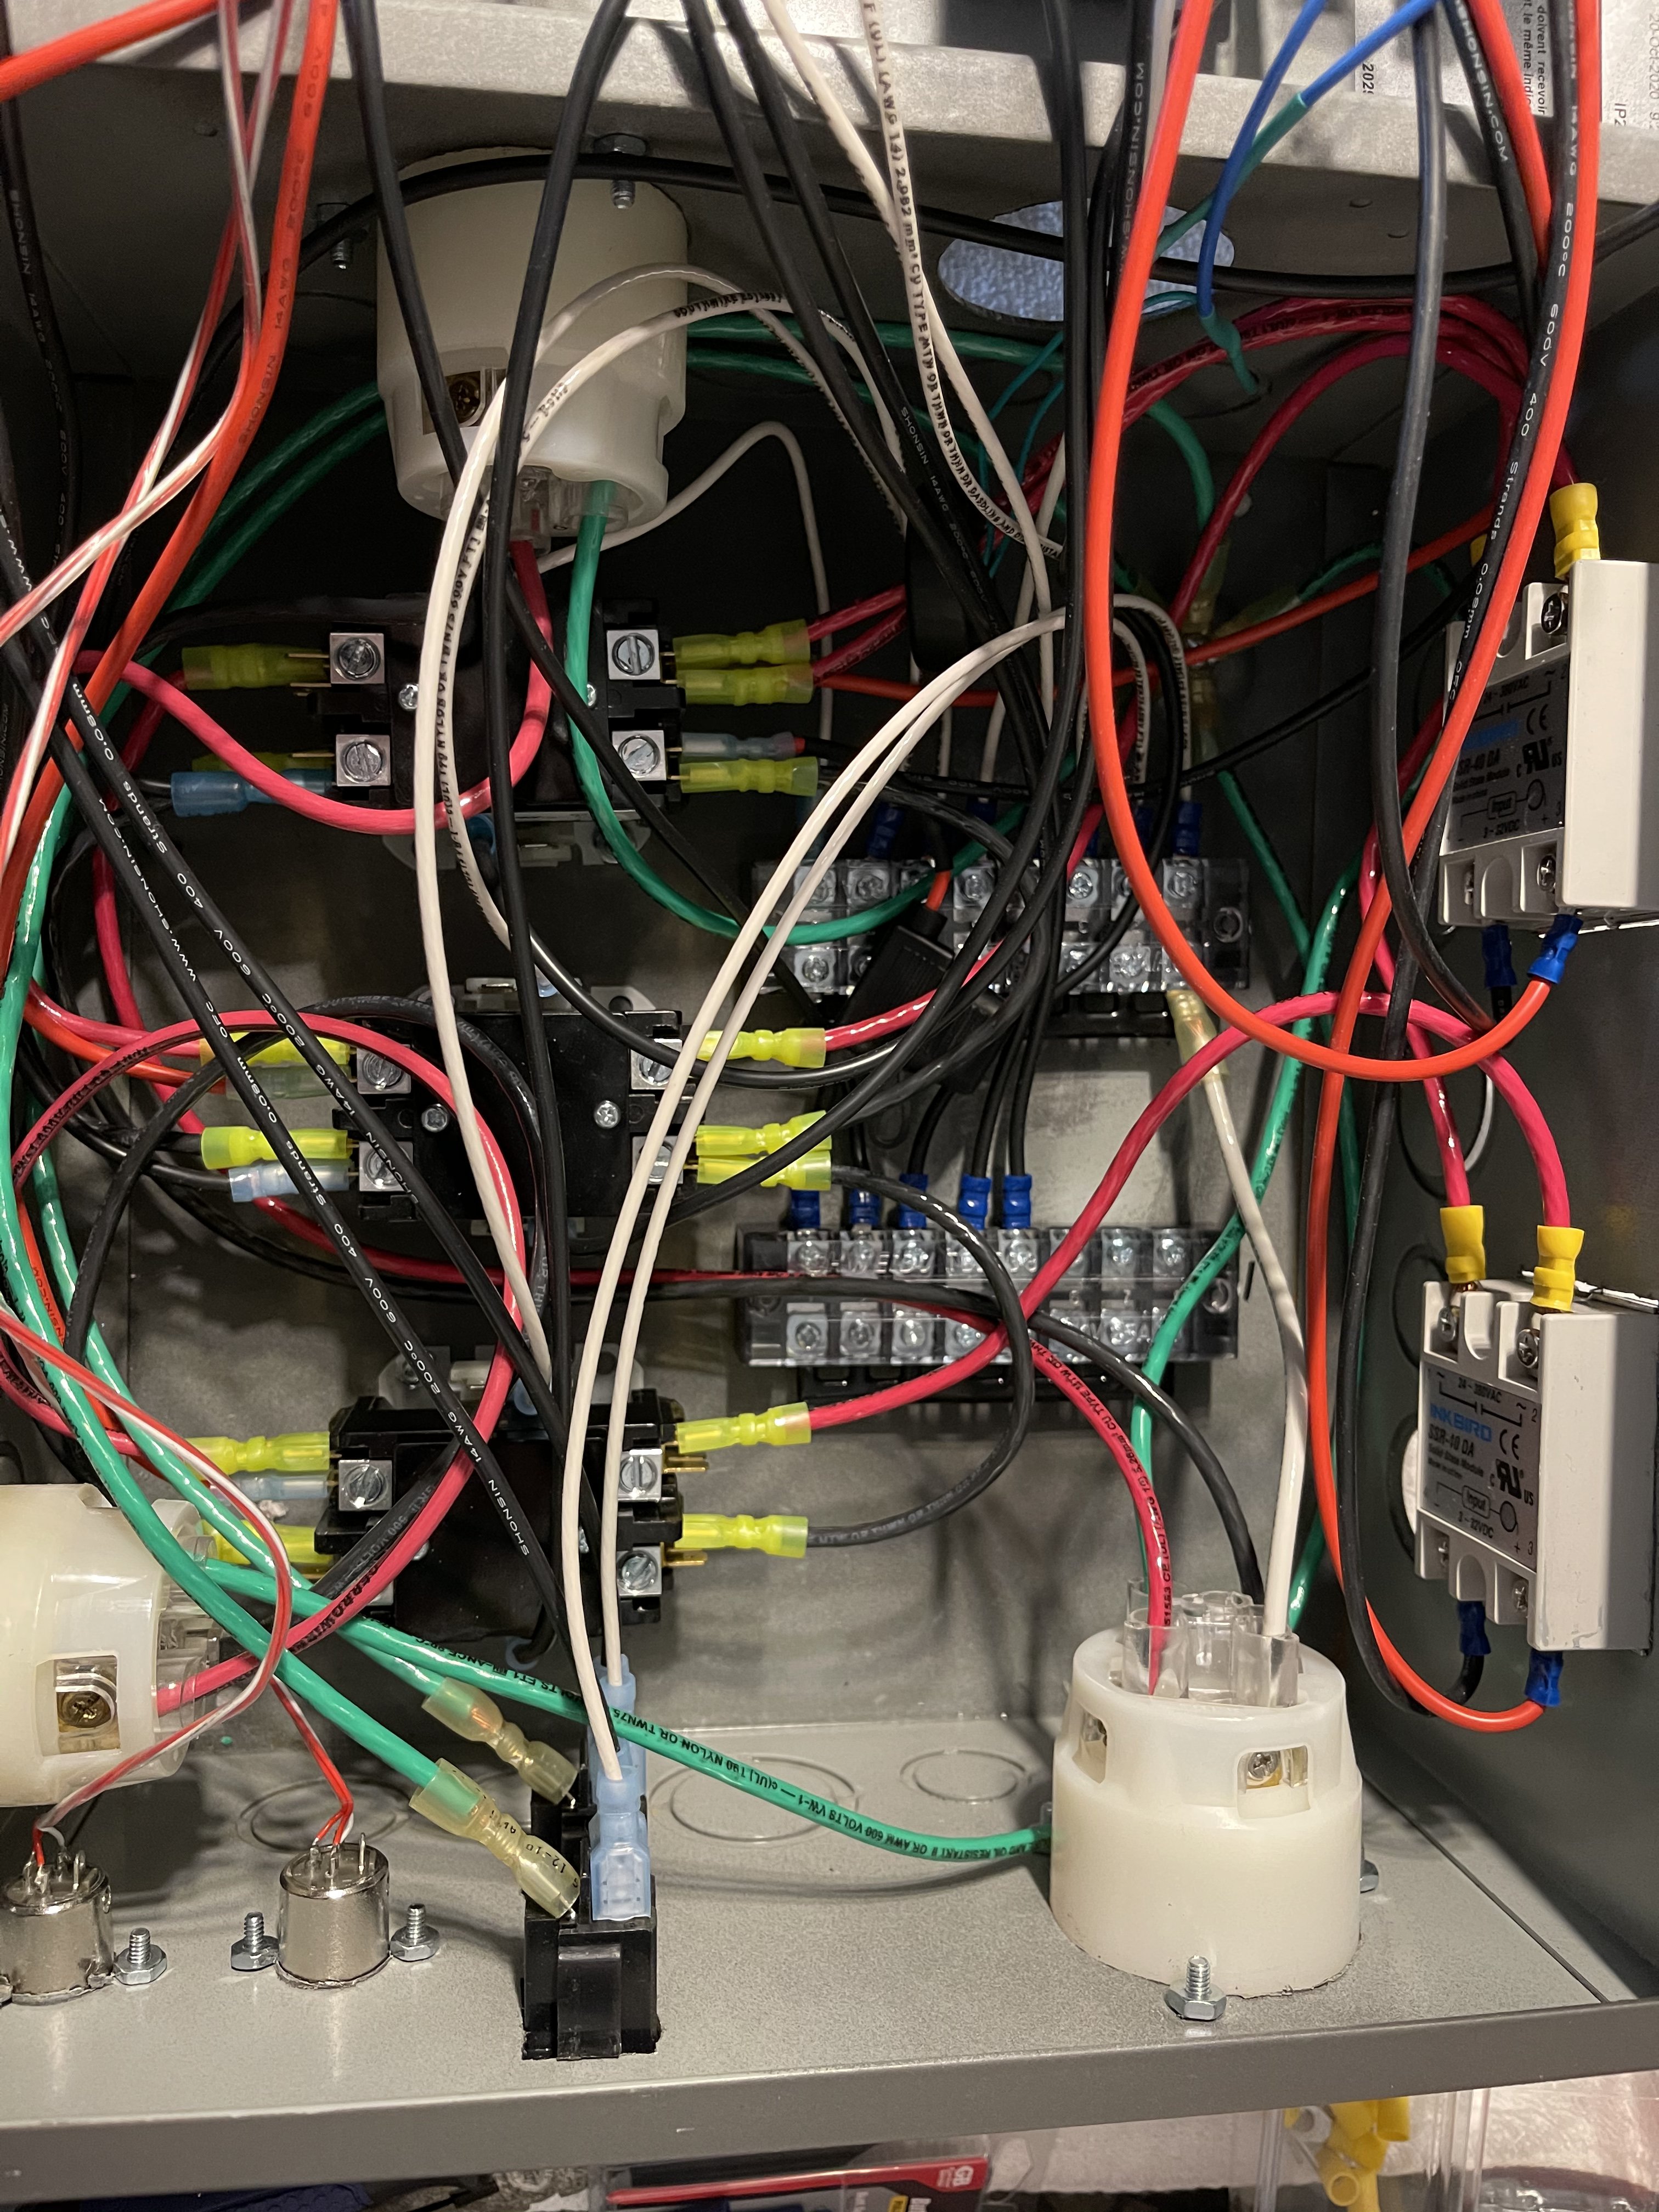
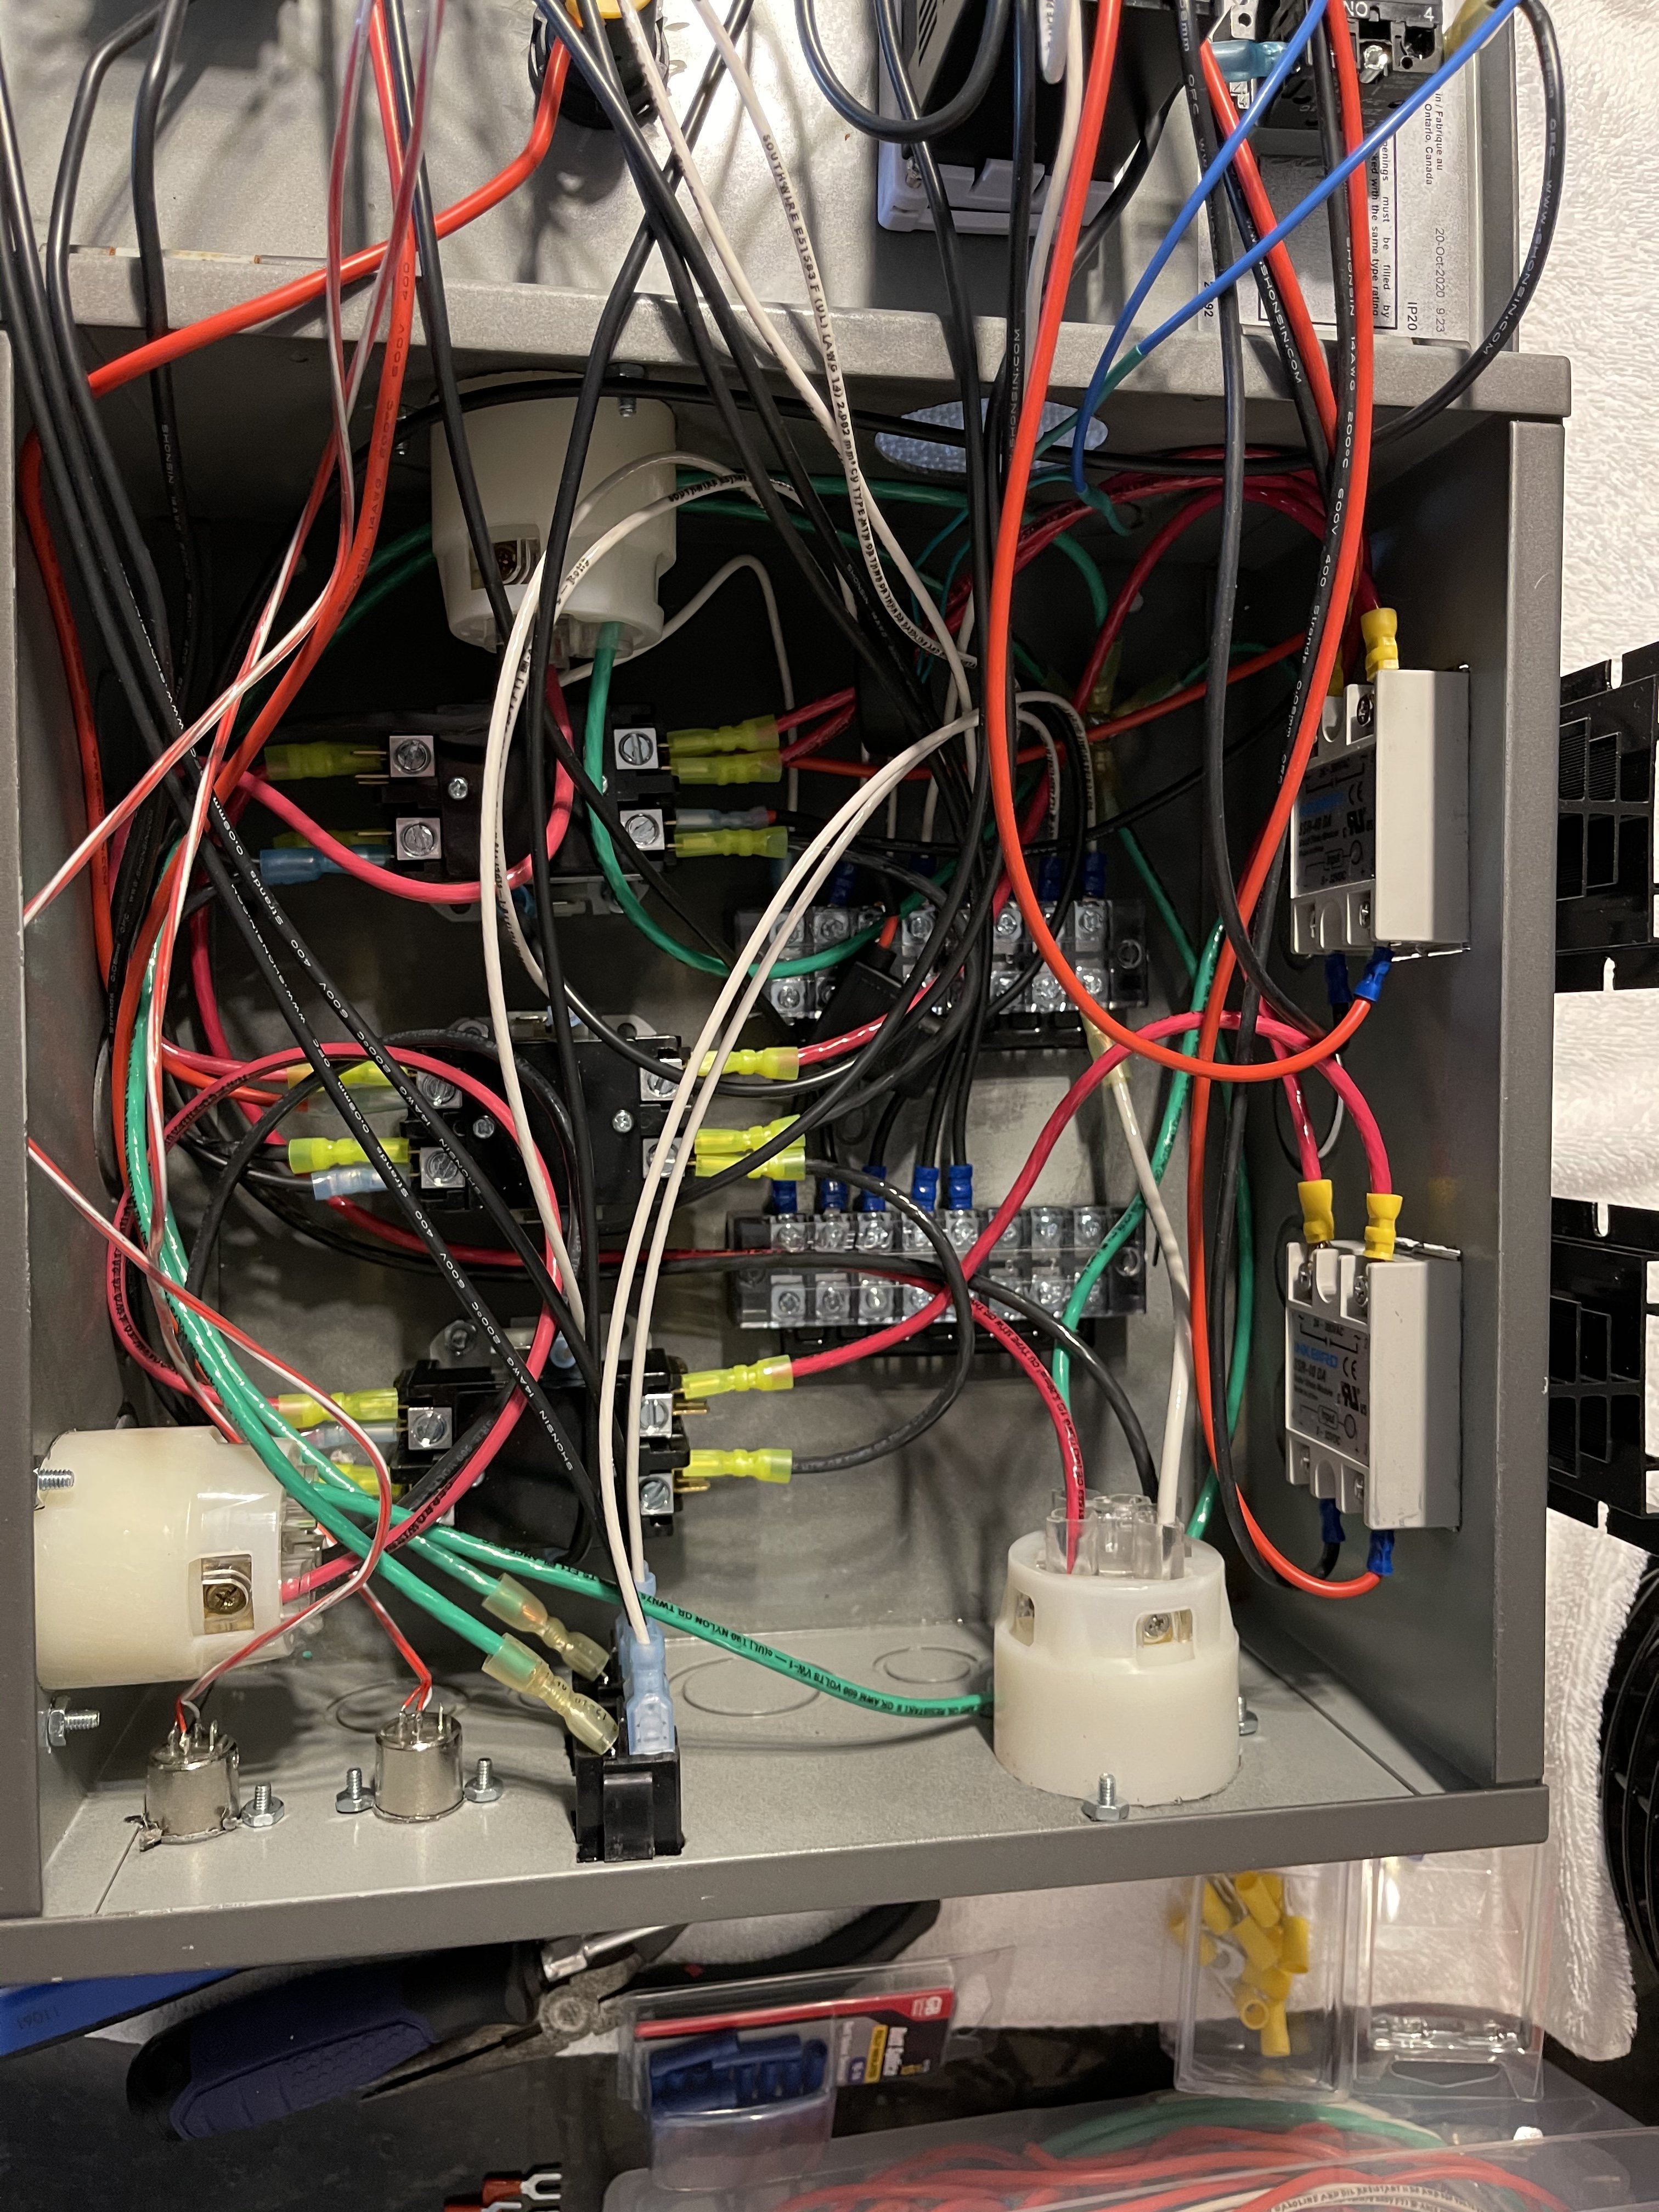
Well. I finally finished it. I still have to get the cord to plug it in. I will let y’all know how it goes. Yes, I will have a class C fire extinguisher on standby
Attachments
-
 4F0FFCE2-77BD-482A-A5D7-2E55424793FA.jpeg2 MB · Views: 33
 -
 3AD1664B-13CA-4DC9-9CED-A63489F98E0B.jpeg2 MB · Views: 33
 -
 B1DD9E1E-88B1-4B55-A174-17A07D446AA0.jpeg1.7 MB · Views: 31
 -
 D9184AE5-0D57-4252-AF73-746983AD9096.jpeg1.9 MB · Views: 31
 -
 69F8EC46-6B75-4F8E-8F84-25AE7F5DF259.jpeg1.8 MB · Views: 30


user 298779
Well-Known Member
- Joined
- Aug 1, 2021
- Messages
- 232
- Reaction score
- 147
LOL! I just noticed I have 3 class 3’s in my garage right now...Well. I finally finished it. I still have to get the cord to plug it in. I will let y’all know how it goes. Yes, I will have a class C fire extinguisher on standby

Looks great Kevy! Nice job

Haha. Nice. Thanks for kind wordsLOL! I just noticed I have 3 class 3’s in my garage right now...
Looks great Kevy! Nice job
