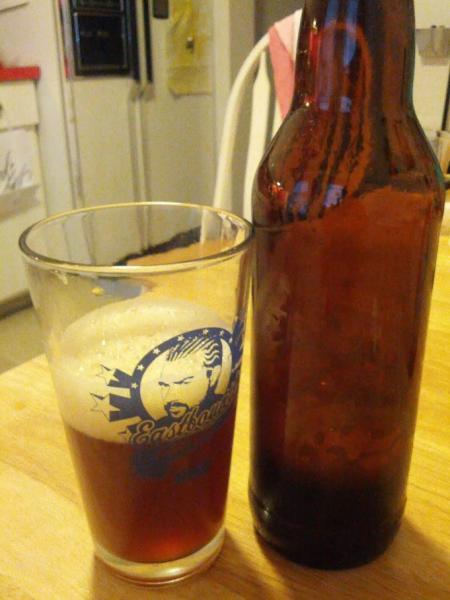
first batch problems please help

Homebrew Talk - Beer, Wine, Mead, & Cider Brewing Discussion Forum

Help Support Homebrew Talk - Beer, Wine, Mead, & Cider Brewing Discussion Forum:

This site may earn a commission from merchant affiliate links, including eBay, Amazon, and others.
Congrats on what sounds like a successful bottling run!

Let's see: Yes, ideally, keep the bottles someplace dark and around 65-70. I know for 12oz bottles the typical recommendation is to put them away for 3 weeks for ideal conditioning/carbonation, but it could be slightly longer for bombers.

Yes, during transfer there is a slight risk of contamination. But it's one that everyone faces going through this phase of the process, and very few folks run into infections at this stage, so it's a very, very small risk.

As for the "gunk" at the bottom of the bucket... There's a few things you can do. Typically, I'll just wash it right down the drain (wasteful, I know). But I have, on occasion, remembered to prepare a couple of sterilized mason jars in advance (see, this is one of those times where you DO want to try to prepare something sterile) and then tried to harvest some of that "gunk". That's healthy yeast that you can re-pitch in a future batch. If you plan to brew again very soon (as in, within 2-3 days), you can get away with packaging up some of the yeast cake for a day or three in the fridge, then pitch it into your next beer. If it'll be longer than that, there are threads here about yeast washing, which is a process you can use to better separate the yeast from the rest of the trub in your fermenter, so you store it longer term.

EDIT: Darn your roxbob, beating me to the punch on yeast washing!!!
 
I just checked the online for both Home Depot and Lowes for that copper tubing. HD has that tubing for about $58, but Lowes has the same thing for $39.99. However, Lowes also lists that part as 50' in one place, but 50" in another.

I am about to start my first brew, and this thread has been very helpful, thanks in advance!

Swill
 
So 3 days left until the "official" tasting day. Just threw one 22 oz. in the fridge now, for a basis of comparison :). I am considering purchasing a wort chiller for our next batch off someone I found on craigslist.

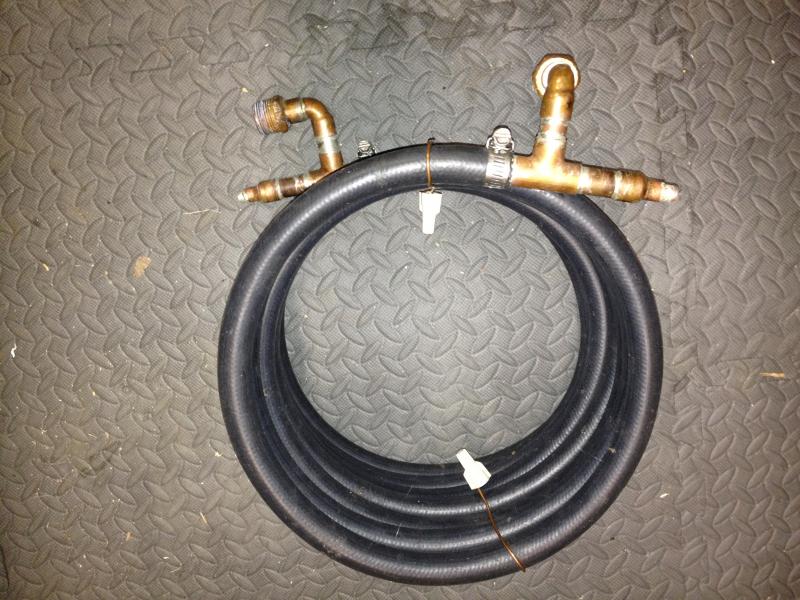
It's made with the best rubber hose you can buy. My rubber hose alone was like $50 (which I only used half of it). The copper in it alone is worth like $40. The hose, copper, and fittings are easily worth more than $60.
I am paying $70 which includes $20 in USPS shipping charges. Do we think this is a good buy? Also still need to get a fridge to convert for fermentation, and conditioning. Any suggestions with that?

photo (1).jpg


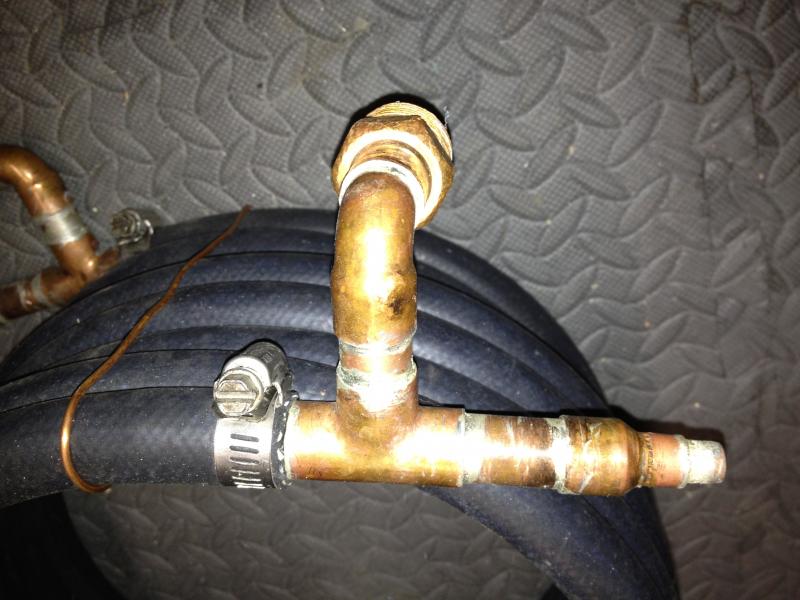
photo (2).jpg


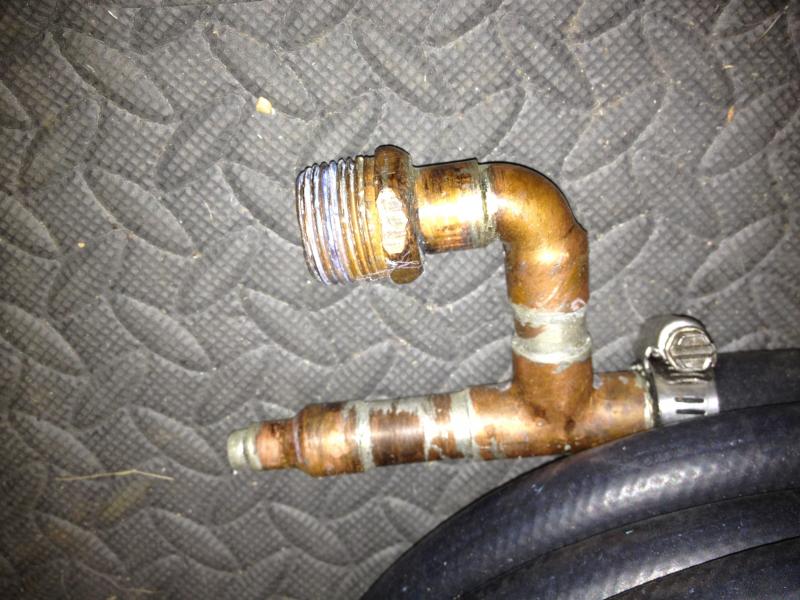
photo (4).jpg
 
It looks like a good deal, but just be warned that you could have a $70 pile of rubber and copper on your hands. Its hard to tell if the line is punctured just from pictures. However, if you do get it. Plug up one end of the wort tube, and then fill it with Starsan solution, and let it sit overnight. And then dump it, it should ensure the copper tubing inside is nice and clean. (I tried it just on a CO2 nozzle, and now it looks brand new).

Also, did the listing say how long it was? This will matter for how many times you will have to run it through.
 
Here is what I found out.

The hose is about 20 feet long, but it's coiled up. I coiled it around a sixtel keg. Yes it has been tested. There are no leaks or anything. That's why I used the highest quality rubber hose. Most people use cheap ones from home depot that end up losing their strength. I have brewed with it twice and it works awesome. The only reason I'm selling is it is when I bought the supplies I bought a 50 foot hose. I also had a ton of fittings (my dad is a plumber). So I figured why not make two and sell one.
 
Oy, thank you very much as I almost made that mistake. I need a wort chiller, and a way to regulate my temp in fermentation & conditioning. Back to the drawing board I guess. On a side note last night we cracked open a test bottle from the crate, and threw her in the fridge. Had mixed feelings as to how it would taste, but to my surprise it was delicious! See pics, and follow our journey on our new FaceBook page https://www.facebook.com/WanserAveBrewery. Now need to figure out this wort chiller, (not counterflow) and refrigeration. One thing we forgot to do, which we hope to help at least one other first time home brewer is to take hydrometer readings both before and after fermentation. This way you can accurately determine the precise ABV%.

306861_469654983044533_1090400175_n.jpeg


521970_469654903044541_253877008_n.jpeg


283622_469655189711179_1578851927_n.jpeg


603443_469656126377752_1885695765_n.jpg
 
Glad your beer came out well!

As for the wort chiller, I would still go with just making your own out of copper coil, and then you just hook it up to the sink and let it run. Its easy to make. I just modified mine, and took some 16 gauge wire and wrapped it around the coils to make them more sturdy, but its not necessary.

As for the fermentation chamber to control the temps, I will shamelessly plug the chamber which I just made, It costs ~$94 with the temp controller ~70 otherwise.

https://www.homebrewtalk.com/f51/cheap-fermentation-chamber-335729/
 
I need a wort chiller, and a way to regulate my temp in fermentation & conditioning.

Well referring to this, is what I was trying to answer, now you are bringing up a MLT. Are you wanting to go all grain? Because that is why you would need a MLT. I do all grain but I do BIAB, which eliminates the need for a MLT, and I use an immersion wort chiller.

I am not sure what type of wort chiller you are trying to make with a cooler, or if you have an aversion to immersion chillers. The immersion chiller is just the chiller that is a set of coils and you run cold water through the coils and put the coils in your wort, and it chills it by exchanging the heat from the wort with the cold water inside the copper coils.

The way to better regulate your temperature during fermentation is to build a fermentation chamber, and is what I linked you a DIY page for.
 
I eventually would like to get into all grain, but for now I am still trying to fully understand the process, and are fine using the extracts. What I am trying to do is buy stuff that I will be able to use now, as well as in the future when we may try some more advanced methods. I wasn't shopping for that cooler, but came across it on a deal site and it was the first thing I thought of. Your DIY fermentation fridge looks like the answer for my next project. As well as a basic cooper wort chiller. The seller of the chiller I was going to purchase explained that,
It's a counterflow wort chiller. No pump necessary.
Not sure how that works, or if that changes anything?
 
You don't HAVE to have a pump with a counterflow chiller, but you will have to pull the wort through some how and a pump helps out greatly, and if you don't have a kettle with a spout on it, you will have to use a siphon of sorts, and when you do that, you are not able to regulate the speed at which the wort travels through very well so you may have to run it through a few times.

IMO, go with the simple immersion chiller. It is cheap, (less than what you would pay for the CFC), efficient and then when you dump out your pot, you will get some additional aeration. (Yes you can still aerate it other ways, if you want to use the CFC).
 
so it's been a while, but just got batch two done last night. brew a wheat beer kit from True Brew. anyway this morning around 7 am i went out to look at it, and she was bubbling, looked great

IMG_20120921_073023.jpg

IMG_20120921_073305.jpg


few hours later she looks like shes gonna blow

IMG_20120921_085227.jpg

IMG_20120921_085233.jpg
.

do i open the lid to release the pressure? why is she so angry!
 
few hours later she looks like shes gonna blow

do i open the lid to release the pressure? why is she so angry!
certain yeasts are more "violent" than others and produce a lot of krausen. opening up the top isn't ideal, but if it looks like she's going to blow then that might be your only option. how long has it been since pitching? what temp is the bucket at? cooling might help with the level of activity. otherwise, sanitize a stainless ladle/serving spoon, open the bucket, and carefully scoop out some of that foam. FYI this is called top-cropping, what you are scooping out is excellent yeast that can be re-used in another batch... ideally right away but it can also be stored. if you're going to save it then scoop into a sterile container, otherwise dump it into a bowl for disposal (be careful not to contaminate the spoon while scoopin' n' dumpin').

ideally you should set yourself up with a blow-off tube. if you don't already have a BOT, search the forum here for details on how to make one.
 
The brew is in the garage it is around 63 degrees outside. Yeast went in around 8-9PM last night? The odd thing to me is that this morning she was crystal clear and bubbling nice. I may or may not have slightly carefully dragged the bucket 6" back, now shes whistling dixie out the air lock. Should I take the cap off the air lock maybe? There is def some foam that came up through the airlock already.
 
^ Yep, get a blow off tube, I'd put it in the airlock wrapped with duct tape, and put the other end of the tubing in a bucket of water, and let it bubble all it wants........Good luck.
 
The brew is in the garage it is around 63 degrees outside. Yeast went in around 8-9PM last night? The odd thing to me is that this morning she was crystal clear and bubbling nice. I may or may not have slightly carefully dragged the bucket 6" back, now shes whistling dixie out the air lock. Should I take the cap off the air lock maybe? There is def some foam that came up through the airlock already.
in my experience, the most violent/blow-out phase of fermentation lasts 2 or 3 days, obviously this is highly variable depending on OG, yeast type, amount of headpsace, etc. so you may well be in for continued spewing.

removing the cap to the airlock isn't a great ide unless you can replace it with something else that will keep the inner "upside-down crown" (what is that part called, anyways?) in place. if you simply take off the cap then the spewing krausen will push off the "crown", it'll end up on the floor (and dirty) and your brew will have a direct line of contact between itself and the outside world. as long as the krausen is being actively pushed out you're likely fine, since nasties will have a hard (but not impossible) time getting in. a sudden change in temps and you could have suck-back - nasties and all.

that's exactly why you want a blowoff (and, in calmed time, an airlock). if the pressure changes and there is suck-back, it's the sanitized content of the blowoff/airlock that gets sucked in.

foam through the airlock is exactly why 3-part airlocks like yours are better than "S" locks: you can take 'em apart and clean them.
 
This thread got me to thinking about my brewday last weekend. I just realized I forgot to sanatize the airlock! OOPS Oh well, hopefully it will be ok.
 
Ok, surgery went well. Everything was thoroughly sanitized, and filled the blow off bucket with some sanitizer and water too. Thanks! Only question now I guess is what do I do when its fill dump jar, add more water and start again? It is important to start with some water and sanitizer with the tube submerged correct? Good thing I bought two air locks, now I can keep one like this. Great quote I read on another thread by @Poolplayer:
Nothing like running down to Home Depot and running into a group of "helpers" and saying "I need a 4' section of blowoff tube before my bung explodes out of my primary and I have Krausen everywhere!!"

IMG_20120921_112951.jpg
 
Good on you for the blowoff tube. Looks like a lot of suds there. Also no need for fluid in the lock now that the blow off is connected. And yes the tube needs to be submerged. If water level gets too low just add more.
 
A lot of the suds in the growler are sani star. I used the sanistar and water to fill the growler before putting in the BOT. I figured the fluid in the air lock was a fail safe.

IMG_20120922_085918.jpg
 
OK so I figures I'd keep this thread going as it has been very helpful this far.

The new title should be 3rd batch problems!

We brewed a Northern Brewer Imperial IPA last night and sat it out in our garage to ferment.

When I went out this morning and checked I saw no activity in the airlock and the thermometer on the bucket reads 56. Is that too cold for the yeast to preform?
 
Ok, another lesson: that's not simply "dry ale yeast," that's Safale US-05. Every strain has its own properties, dry ale yeast is not universal, so you need to be specific about what strain you're using to get the best info. If you we're using Nottingham, for instance, which is another strain of dry ale yeast, the temps you're seeing might be on the low end of OK. But for US-05, you're just a few degrees too cool.

Now, if you can get the fermenter somewhere about 10 degrees warmer, just long enough for the fermentation to start off, you should be ok to move it back out to the garage again (remember fermentation creates 5-10 degrees of heat, which should move this beer right into the low range for this yeast, at least while the yeast is really active). But you'll want to watch for the ferment to slow down again - at that point you'll want to bring it back again to someplace about 10 degrees warmer to keep the yeast active so they can finish up completely.
 
I think you'd be better off with a more positive method of temperature control. A swamp cooler is a little crude and requires some attention, but it can keep the temperature pretty stable. You control the temperature by adding ice jugs as needed - also by the size of the ice jugs.
 
Ok so its time to transfer the Imperial IPA into the secondary fermentation jug. I was supposed to do this a week ago but just purchased a glass 6.5 gallon carboy. Will this delay in the transfer effect my bottling date? It really was ready to transfer on the 2nd. Any advice would be appreciated.
 
Bought a 6 gal glass carboy, air lock, & carboy carrier. Any advice for the transfer?
 
Ok so its time to transfer the Imperial IPA into the secondary fermentation jug. I was supposed to do this a week ago but just purchased a glass 6.5 gallon carboy. Will this delay in the transfer effect my bottling date? It really was ready to transfer on the 2nd. Any advice would be appreciated.
why are you transferring to secondary? because the instructions tell you to?

there is some debate about the need for secondary. since this is your first batch, i would recommend skipping secondary altogether. i'm assuming that you will be dry-hopping this beer - just do it directly in primary. one of the reasons to transfer is to aid in clarity. if you're going to dry-hop, clarity shouldn't be a concern anyways (it'll make the beer hazy). another is to aid in the re-use of the yeast, but a hoppy IIPA's yeast isn't a good candidate for re-use.

moving everything to another vessel only increases chances of infection and oxidation (the former being an issue with IPAs/IIPAs - oxygen removes hop aroma). if you're going to use a secondary, it should be a 5-gallon carboy - that way when you siphon into it there will be little to no headspace (a 5.5 gallon batch should ideally fill a 5-gallon carboy almost completely to the top).

you wrote "It really was ready to transfer on the 2nd" - kit instructions of ten provide instructions like "rack after X days", but yeast follows its own schedule. "X days" is usually a conservative guess, there is no harm in going longer.

i would leave your beer in its current container, dry-hop it in there, and rack to bottling bucket or keg it when ready.
 
Back
Top