Experience Using Chapman Fermenters?

Homebrew Talk - Beer, Wine, Mead, & Cider Brewing Discussion Forum

Help Support Homebrew Talk - Beer, Wine, Mead, & Cider Brewing Discussion Forum:

This site may earn a commission from merchant affiliate links, including eBay, Amazon, and others.

ScrewyBrewer

ezRecipe - The Easy Way To Awesome Beer!
HBT Supporter
Joined
Jun 5, 2010
Messages
2,043
Reaction score
624
Location
New Jersey
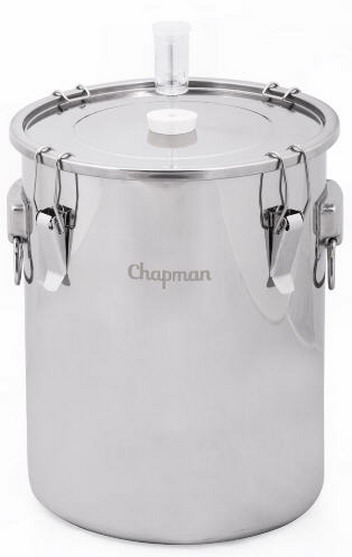
I am looking at Chapman seven and fourteen gallon fermenters to use for closed transfer kegging. Is anyone currently using either size?

Advertised as a seven gallon fermenter having a twelve inch inside diameter and 16 inch height should hold 7.83 gallons. At this point any information about using these fermenters will be helpful.
 
Never used one. One particular thing I'm intrigued by is that they say it can double as a boil kettle. Assuming one isn't bothered by trub, one could boil, chill, put the lid on, and ready to ferment.
 
You can do closed transfers with a Bigmouth Bubbler plastic fermenter, so there's nothing about this one that is especially notable.
Good to know, thank you. Now it’s down to fitting them in my chest freezer and fitting them with gas posts and ball valves.
 
Good to know, thank you. Now it’s down to fitting them in my chest freezer and fitting them with gas posts and ball valves.

I do pressure transfers in big mouth bubblers. The only tricky part is getting the lid to stay on, but I just use an old regular carboy hauler and some velcro straps connected to the hauler across the lid.

I put a gas post on the lid (which I connect a blow-off tube setup to during fermentation), and then use a 2 hole #7 stopper (one hole has thermowell and the other has a ss 24" racking cane with liquid post that stays in throughout fermentation). I never open the fermentor after pitching.
 
It'll be a tight fit in my small freezer but I'm nearly convinced I can fit two of the seven gallon fermenters in it.

chap-7.jpg
 
I've got two of the 14 gallon ones. I bought them at different times though, so I have two different styles, they made the second version more squat.

I've been very pleased with mine, and they work exactly as I wanted them to. I don't do closed transfers, but I do know others have modified theirs to be able to. It should be fairly easy to silver solder on fittings.
 
I'm not setup to silver solder these days so I rather not go that route. I was thinking about drilling holes and using bulkhead fittings for the valves and gas disconnects. I've heard the fermenters are a bit thin but they can be ordered with valves mounted to bulkhead fittings. I'm just not sure how I can add a few pounds of Co2 pressure for transfers without popping the airlock and stopper out of the lid.
 
I use several that I modified up with a triclamp, gas in and thermowell. They work great for me and with some tweaking I can have them hold 3psi with little issue. I have capped the fermenter and let it partially spund in there. I close transfer with little issue.
 
I use several that I modified up with a triclamp, gas in and thermowell. They work great for me and with some tweaking I can have them hold 3psi with little issue. I have capped the fermenter and let it partially spund in there. I close transfer with little issue.
Great to hear and thank you. If you don't mind sharing. Do you have the fermenters with a hole for a #10 stopper in the lid? That's the part I'm trying to figure out. What's a good way of keeping the stopper in place when pressurizing the fermenter with 3psi of Co2.
 
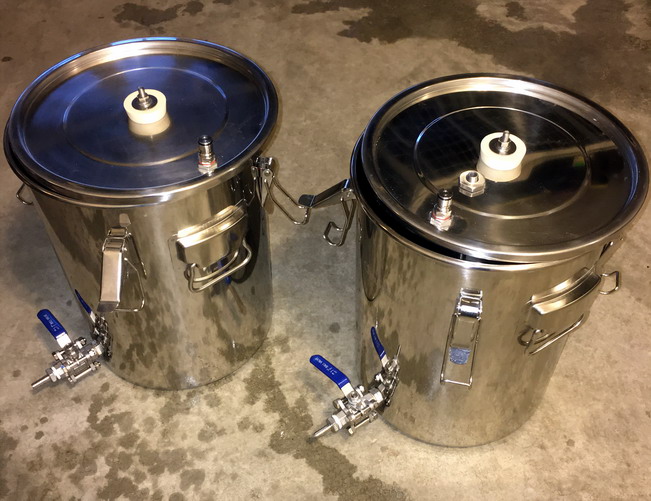
Two seven gallon Chapman fermenters with ball valves are on their way. They have 1.75 inch holes in the center of the lids. I would like to use 1.5 inch weld-less tri clamp bulkhead fittings if they fit.
 
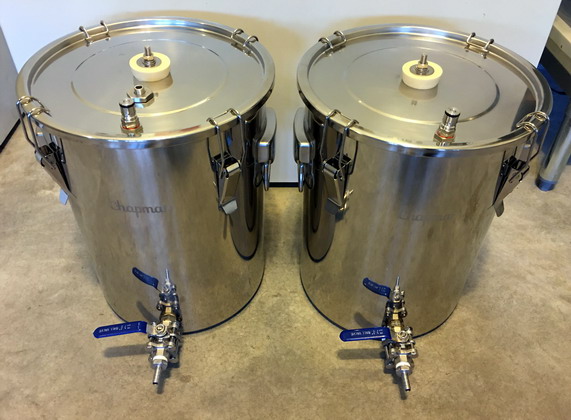
I finished setting up the fermenters with ball valves, thermowell and gas bulkhead fittings so I can do closed transfers. They're clean and pressure tested and this weekend I'll use them to ferment a Kolsch I'm brewing.

10sml.jpg
 
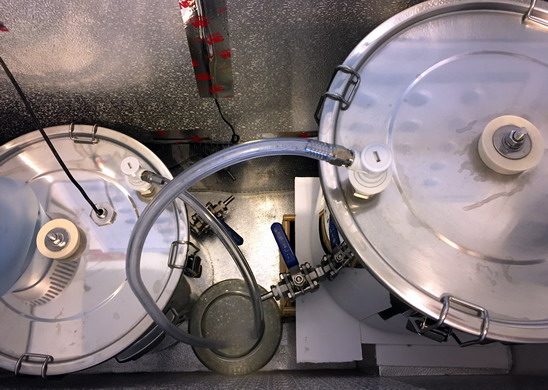
Everything working as expected while fermenting 10-gallons of a Kolsch style beer. Not very colorful but here's a picture of the modified fermenters bubbling away this morning.

ferm1.jpg
 
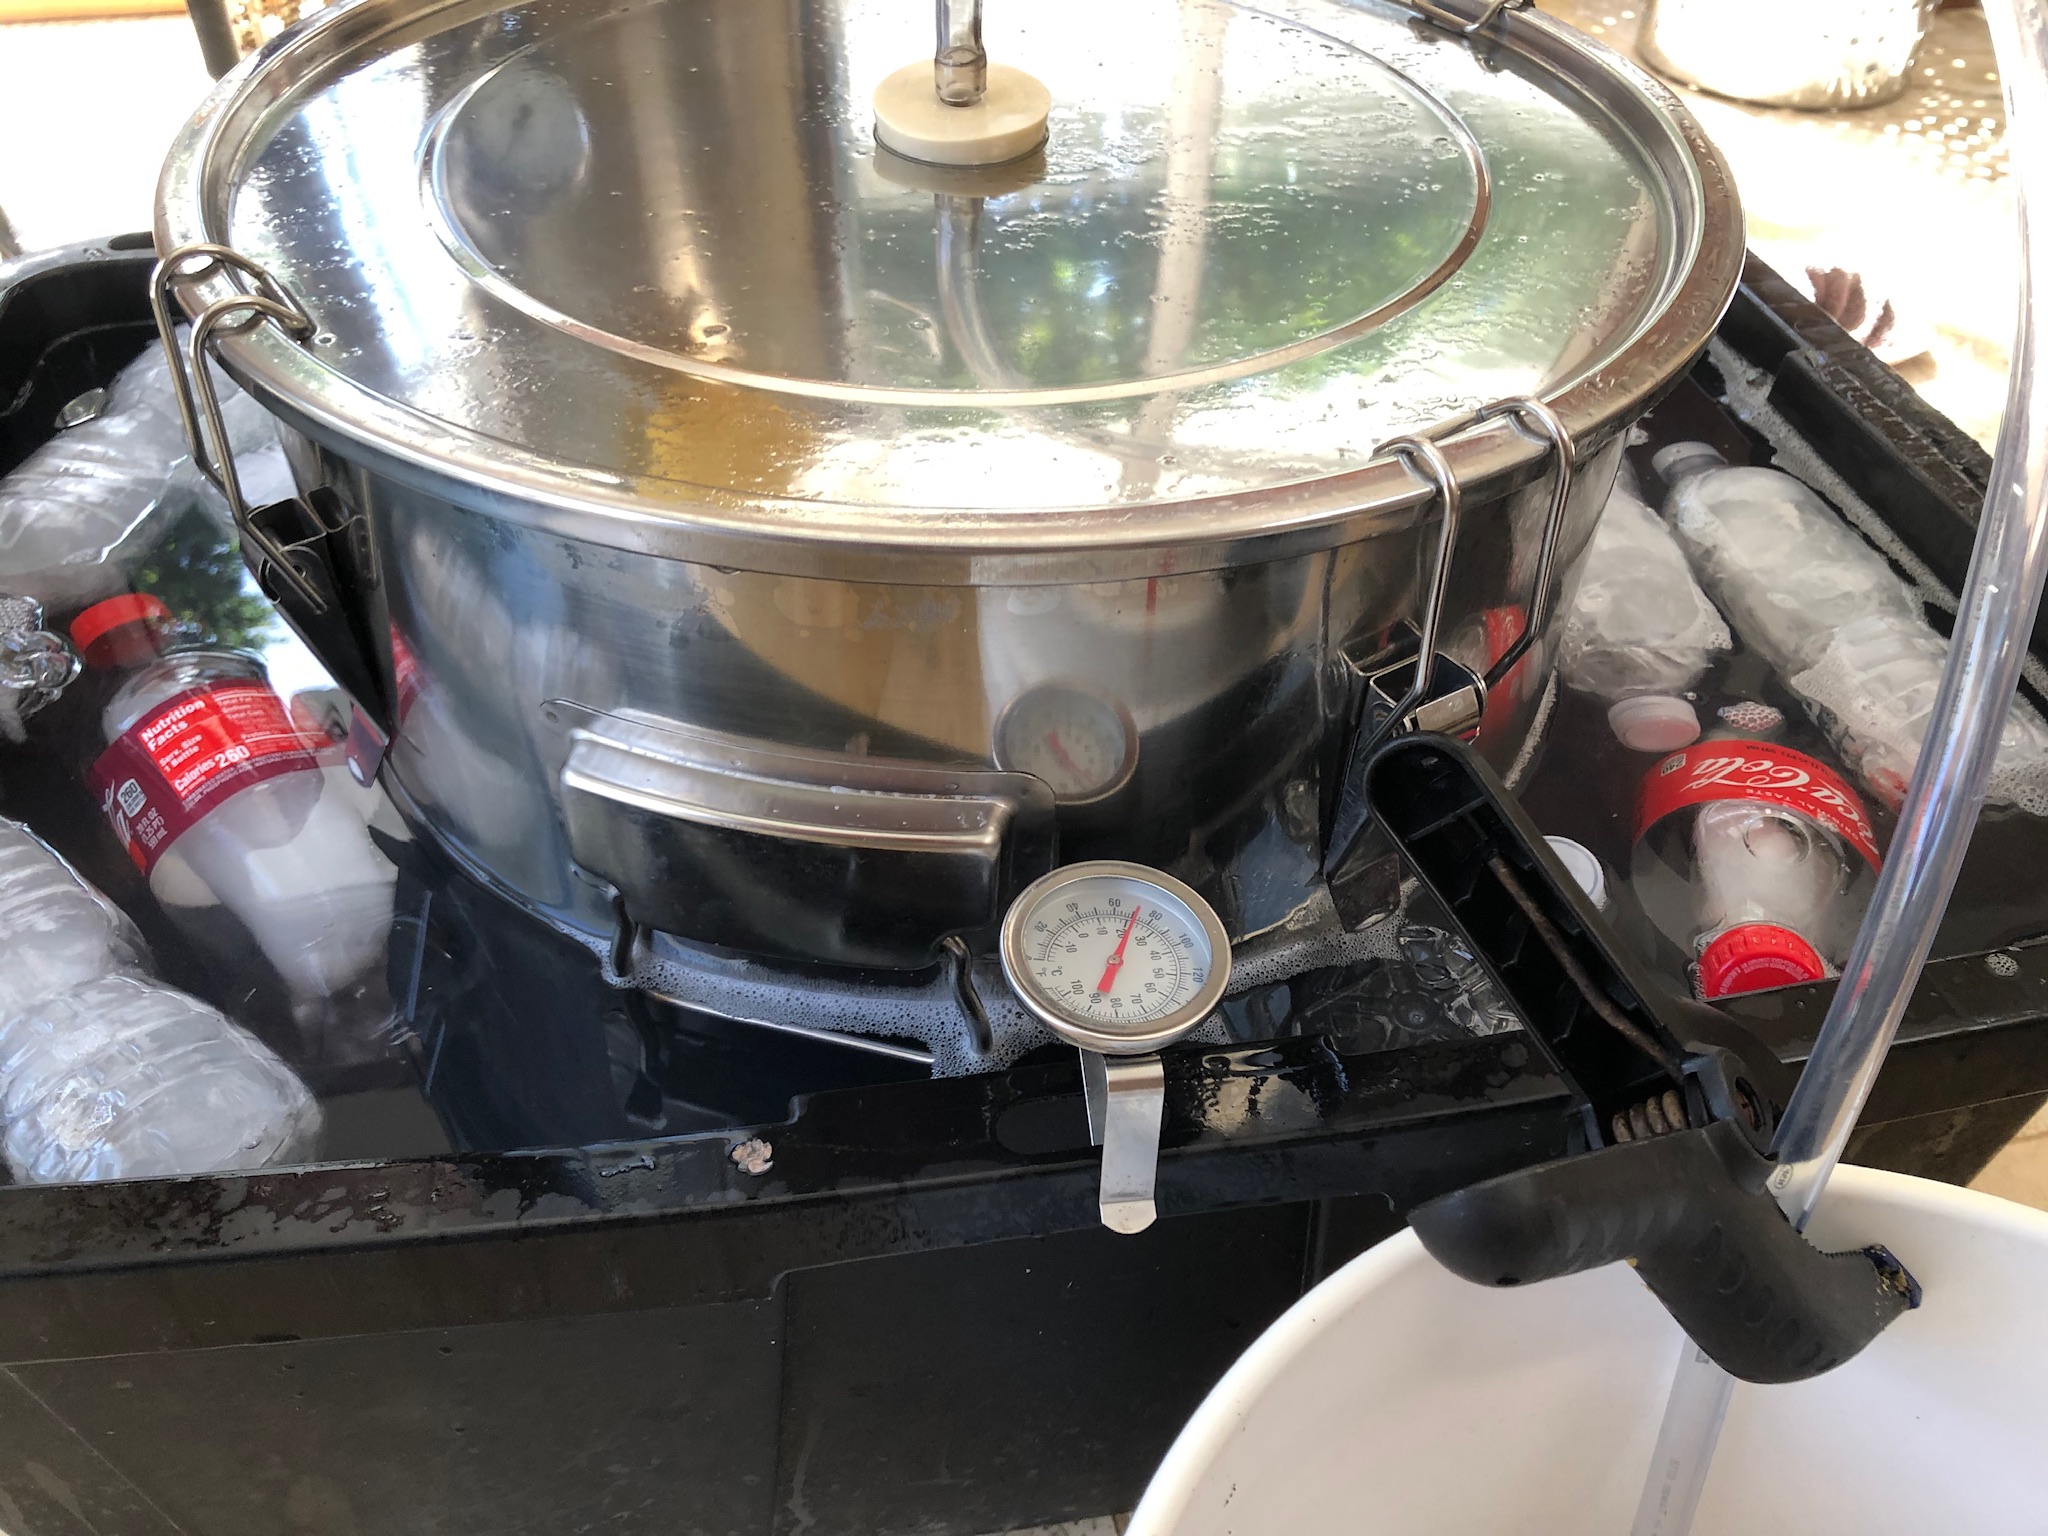
Yesterday morning I disconnected the two gas connects from the fermenter lids. I used them during primary fermentation to connect blowoff tubes from the fermenter to a jar of StarSan. Before cold crashing the fermented beer I used the gas ball locks to push 3 psi of Co2 into each fermenter. The positive pressure created by adding Co2 would compensate for any shrinkage in beer volume as the temperature dropped from 67F to 36F [19.4C to 2.2C].

Today I plan to do my first closed system beer transfer using Co2 pressure to fill two corny kegs. Fining gelatin will be added before purging the kegs with Co2 then cooling them to serving temperature. Using the modified Chapman fermenters to ferment my beer has worked without issue. Today I'll confirm how well they work doing a closed transfer from fermenters to kegs.

secndry-sml.jpg
 
Today I plan to do my first closed system beer transfer using Co2 pressure to fill two corny kegs. Fining gelatin will be added before purging the kegs with Co2 then cooling them to serving temperature.
I assume you're transferring into 100% liquid pre-purged kegs. Then you open them up briefly to add gelatin and repurge the headspace after closing them up?
 
I assume you're transferring into 100% liquid pre-purged kegs. Then you open them up briefly to add gelatin and repurge the headspace after closing them up?
Not quite there yet. I've added gelatin to the first keg, sealed the lid and with the relief valve open purged it with 10 psi of Co2 for over a minute. Next I'll take the keg out of the refrigerator and start the pressure transfer.
 
Not quite there yet. I've added gelatin to the first keg, sealed the lid and with the relief valve open purged it with 10 psi of Co2 for over a minute. Next I'll take the keg out of the refrigerator and start the pressure transfer.
The whole closed fermentation/transfer rigamarole is to reduce/eliminate air (oxygen) from getting into your beer at any point after fermentation starts. You've done everything right so far, don't blow it on filling "empty" kegs. ;)

You can't purge an empty keg to any low oxygen standard. Look into 100% liquid pre-purging those kegs first. It's really easy and once you've done it, you'd never want to go back.

Then fill the keg through the liquid out post with a QD on it. Either have the PRV open or return the keg CO2 to your fermenter. When the keg is full, add the gelatin. In that scenario, you can stream 10-15 psi CO2 into the now relatively small headspace through the gas post while removing the lid (PRV open), and pouring in the gelatin solution. That way air can't get in (or not much). Replace lid while still streaming, close the PRV and re-purge that headspace at 20-30 psi a few times, for good measure.

Or add gelatin to your fermenter at some point, perhaps right before pressurizing for the cold crash.
 
I
The whole closed fermentation/transfer rigamarole is to reduce/eliminate air (oxygen) from getting into your beer at any point after fermentation starts. You've done everything right so far, don't blow it on filling "empty" kegs. ;)

You can't purge an empty keg to any low oxygen standard. Look into 100% liquid pre-purging those kegs first. It's really easy and once you've done it, you'd never want to go back.

Then fill the keg through the liquid out post with a QD on it. Either have the PRV open or return the keg CO2 to your fermenter. When the keg is full, add the gelatin. In that scenario, you can stream 10-15 psi CO2 into the now relatively small headspace through the gas post while removing the lid (PRV open), and pouring in the gelatin solution. That way air can't get in (or not much). Replace lid while still streaming, close the PRV and re-purge that headspace at 20-30 psi a few times, for good measure.

Or add gelatin to your fermenter at some point, perhaps right before pressurizing for the cold crash.

I add gelatin by using a very large syringe and a section of silicone tubing connected to a swivel fitting with a gas QD on it

I connect the gas QD to the keg and let the CO2 in the keg purge the line, and then push the gelatin solution straight into the gas post with the syringe. Hook CO2 back up and purge a couple times to account for any leaks around the keg lid while there was 0 pressure in the keg.
 
Ok I'm getting ready to transfer to the second keg in a little while. I topped it off with StarSan and now pushing all the StarSan out using Co2 as recommended. I may as well extend today's experiment to include this step since everything needed is setup now.
 
Ok I'm getting ready to transfer to the second keg in a little while. I topped it off with StarSan and now pushing all the StarSan out using Co2 as recommended. I may as well extend today's experiment to include this step since everything needed is setup now.
Excellent! Leave the lid on while transferring, it's essential.
 
I add gelatin by using a very large syringe and a section of silicone tubing connected to a swivel fitting with a gas QD on it

I connect the gas QD to the keg and let the CO2 in the keg purge the line, and then push the gelatin solution straight into the gas post with the syringe. Hook CO2 back up and purge a couple times to account for any leaks around the keg lid while there was 0 pressure in the keg.
Ohhh! I like that method, it's brilliant!

I doubt anything would be seeping in around the lid, there's no pressure gradient there, while it's for such a short time too.
 
Both closed transfers went well yesterday. I added gelatin to the beer in both kegs and they are in the refrigerator carbonating now. The first keg was purged with Co2 for over a minute before the transfer and the second keg filled with StarSan and then purged with Co2 before transfer. Tired of lifting fermenters full of beer out of a chest freezer my initial goal was to use Co2 instead to push the beer into kegs, saving my back in the process.

Not a lot more effort was needed to reduce exposure of beer to oxygen though. This recipe I've brewed many times before. Using gravity to fill open kegs right from the fermenters. Bursting Co2 into the kegs as they're filling then burping with Co2 once filled. Time will tell as I share this beer with friends and family if there are perceivable differences between this and prior batches. But I am very happy with the results of my closed fermentation and transfer experiment. I will be using this process from now on whenever I brew.

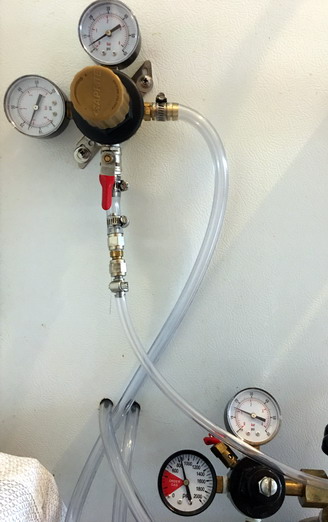
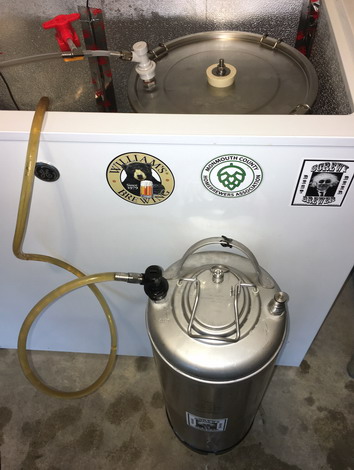
Here's a picture of the Chapman seven gallon fermenter and the setup I used.
closedtransfer-sml.jpg


Here's a hydrometer sample taken from one of the fermenters.
kolsch-sml.jpg
 
I wonder how breweries fill thier kegs and serving tanks? hbt is the only place ive really seen kegs filled this way. kinda curios what the pros do. I guess because they use sankes , oxygen never gets introduced into the keg to begin with short of whats been absorbed into the cleaning solution.... at least thats the way it works when we clean them at the brewpub...
It could be a good arguement for home brewer to abandon the soda kegs and go sanke.. they are not really all that hard to clean.
 
Last edited:
The breweries I know of first hand clean and sanitize their empty their kegs prior to filling right from the bright tank. I'll ask around and find out if they use Co2 to push the sanitizer out of the kegs.
 
The breweries I know of first hand clean and sanitize their empty their kegs prior to filling right from the bright tank. I'll ask around and find out if they use Co2 to push the sanitizer out of the kegs.

When I worked at a brewery we used CO2 to purge the sanitizer from the kegs and then pressurized them to 10ish PSI. Filled directly off the brite tank under pressure.

I will say there is also no "hand cleaning." Kegs are cleaned/sanitized via a kegwasher which can be manual or automated but everything runs through the spear using air/CO2 depending on where in the process you are. Having the automated keg washer was great. Load it up and come back 3 mins later, or whenever, and you had a clean and pressurized keg ready for filling.
That explains a lot, thanks!
 
I will say there is also no "hand cleaning." Kegs are cleaned/sanitized via a kegwasher which can be manual or automated but everything runs through the spear using air/CO2 depending on where in the process you are. Having the automated keg washer was great. Load it up and come back 3 mins later, or whenever, and you had a clean and pressurized keg ready for filling.
I never meant to imply the kegs are cleaned by hand using a brush or something. Smaller breweries typically won’t have automatic keg washers. But I have seen cleaned kegs tagged with green labels to show they are ready for filling and not dirty kegs in need of cleaning.
 
Last edited:
The breweries I know of first hand clean and sanitize their empty their kegs prior to filling right from the bright tank. I'll ask around and find out if they use Co2 to push the sanitizer out of the kegs.
Well thats what we do at my brewery and while we use co2 to purge the sanitizer, we never fill the keg completely with any liquid but beer.(but we never put any gas into it either except c02). thats not how any keg washers that Iknow of work either. you connect the keg to the cleaner coupler and tip it upside down and the cleaners spray out the diptub and cascade down the sides of the keg and out the drain at the top..
 
While planning my next brew day I had a chance to clean up some stainless hardware using Bar Keepers Friend. I have to say it did a great job making everything look as good as new. I'm glad I bought the two-pack.

chpm-1sml.jpg
 
I like the mods that you’ve made to your fermenters, as the center stopper seems like one of the bigger issues with the Chapman design. Closed transfer is nice as well, bravo.

do keep an eye on your seals. My 14-gal Chapman does not seal on the main gasket unless I add a mess of spring clamps around the lip. I first noticed this while making a 12-gal batch of ale and wondering if I’d encountered a stuck ferment for the first time in my life but it was just the fermenter leaking the CO2 from under the lip—those four buckle clamps are insufficient for much more than locking the lid in place.

hopefully you have better luck with the little versions. Cheers and thanks for sharing your experiences.
Carl
8E9F78D3-528F-4439-A0F0-0F228D0613F5.jpeg
 
@Haole when doing closed transfers using 2-3 psi of Co2 neither of the seven gallon univessle fermenters leak. Although I can see where the fourteen gallon model is more likely to leak. The seven gallon model is twelve inches in diameter where the fourteen gallon model is seventeen inches in diameter. A worthwhile change Chapman could make is to add a fifth buckle clamp to their larger fermenter in the future.

I have a second batch, a Spruce Tip Honey Amber Ale, bubbling away like mad now.
sprtip-1-sml.jpg
 
It’s really close to being an excellent large batch fermenter. A fifth (and perhaps sixth and seventh) clamp would help quite a lot, as well as losing the 2” hole in the lid for a tri-clamp or other stopper arrangement. Those number 10 stoppers get expensive as re-seating them in the thin lid slices them up until they no longer make a perfect seal either. I like that you clamped yours in place via expansion. That’s clever.
 
I use a section of 1/2 silicone hose under the clamp to put more pressure on the lid and have not had any issues since. This is wiht both the 7g and 14g.
 
It’s really close to being an excellent large batch fermenter. A fifth (and perhaps sixth and seventh) clamp would help quite a lot, as well as losing the 2” hole in the lid for a tri-clamp or other stopper arrangement. Those number 10 stoppers get expensive as re-seating them in the thin lid slices them up until they no longer make a perfect seal either. I like that you clamped yours in place via expansion. That’s clever.
Thanks. Using some stainless steel hardware to squeeze the stopper is a quick and easy fix that works.
 
Early next week, for the second time using a closed transfer, I'll be kegging ten gallons of beer. This time I plan to fill both kegs with StarSan and use Co2 to empty them prior to filling with an Amber Ale. The first closed transfer of Kolsch is still lagering and should be ready to sample in three weeks. It's amazing how easy it is adopting closed transfers and low oxygen transfers into the brewing process.
 
I’d be doing that for every mead, wine, and beer that I brew though CO2 costs us a lot out here. Instead, a bit of purging and capping is good enough for now.

As for the Chapmans, I ordered a second 14-Gallon unit despite the design flaws because it’s the most cost effective stainless fermenter that I can get shipped to the Big Island and it works quite well for 12G batches. This should allow me to brew a good sized lager in step with every ale or three from the first fermenter. Not sure how to address the leaky lid problem for longer lagering where a complete seal will be critical, though I’m open to suggestions.
Cheers everybody,
 
My second closed transfer from fermenter to keg went well the other day. When cold crashing it's important to inject a few psi of Co2 into the sealed fermenters as the beer volume inside contracts. To prevent creating a vacuum that could suck air or sanitizer from blow-off tubes back up into the fermenter. Or worse yet cause the lid to bend and in the process damaging the airtight seal.

trsfr-2sml.jpg


Fermenting a five-gallon batch in the seven-gallon size leaves plenty of room for krausen for the 6% abv beers I brewed. Clean up was easy enough to do using hot water and a small cotton cloth. And the ball valve outlet near the bottom was high enough above the yeast and trub pile to promote clear beer transfer.

frmtr-1sml.jpg


I filled the kegs with StarSan then used Co2 pressure to empty them before transferring the beer. To prepare to transfer the beer I removed the blow off tube and connected the Co2 line to the fermenter gas post to add 2-3 psi of pressure. Connecting one end of the beer transfer line to the ball valve and loosening the disconnect fitting on the other end. I opened the ball valve a little until beer ran clear from the other end then tightened the disconnect and attached the beer out connector to the keg.

trsfr-1sml.jpg


With the Co2 gauge set to 2-3 psi the beer transfer to the keg was easy to do. I opened the pressure relief valve on the keg to release Co2 from the headspace as the beer filled the keg. It took about fifteen minutes to fill each keg and once filled they went into the refrigerator to carbonate. At the end of the day after cleaning the Chapman fermenters looked good as new again.

frmtr-2sml.jpg
 
Last edited:
Not sure how to address the leaky lid problem for longer lagering where a complete seal will be critical, though I’m open to suggestions.
Cheers everybody,
@Haole I ordered a dozen of these 2 inch wide by 1 inch Large Binder Clips to help seal the lid in between the clamps. I found two of them in a desk drawer and tried them. They fit the lid perfectly and applied plenty of pressure to keep the lid sealed.
 
@Haole I ordered a dozen of these 2 inch wide by 1 inch Large Binder Clips to help seal the lid in between the clamps. I found two of them in a desk drawer and tried them. They fit the lid perfectly and applied plenty of pressure to keep the lid sealed.

Thanks for the idea. I use small spring clamps from my shop, three per section between the four buckles.

Plot thickens: I ordered a second 14G Chapman in order to help me run some additional batches for the holidays. Hit the RMA button the moment I opened the box. Shame, as I really wanted to fill this this weekend. It has three cracks in the primary weld, the patina was not polished on the seams, and it is scratched to hell on the inside where sanitation is most important. Last bit of money that Chapman will be getting from me. Stay away from these fermenters unless you want to deal with the return game. I bought four 30L buckets to replace this piece of trash.
 

Attachments

  • 24ECB530-0643-4228-BF47-4DDD72200968.jpeg
    24ECB530-0643-4228-BF47-4DDD72200968.jpeg
    155.7 KB · Views: 47
  • B4D68C83-1B59-4B9E-92AC-E7A05DD61F8D.jpeg
    B4D68C83-1B59-4B9E-92AC-E7A05DD61F8D.jpeg
    126.7 KB · Views: 47
  • E95F1BD0-C55D-43DA-87D1-B6762C7E8A67.jpeg
    E95F1BD0-C55D-43DA-87D1-B6762C7E8A67.jpeg
    90 KB · Views: 45
  • D57F6698-1679-4018-9425-BFA8340099AD.jpeg
    D57F6698-1679-4018-9425-BFA8340099AD.jpeg
    128.2 KB · Views: 46
  • 50CEC4D1-7D4E-478A-8D86-512BE6B64497.jpeg
    50CEC4D1-7D4E-478A-8D86-512BE6B64497.jpeg
    141.7 KB · Views: 46
  • DE4EFDB3-24FD-4644-85A3-CA354FDE2B4E.jpeg
    DE4EFDB3-24FD-4644-85A3-CA354FDE2B4E.jpeg
    79.9 KB · Views: 45
  • E999F1E5-059A-4977-B04A-C04FACC0AAE0.jpeg
    E999F1E5-059A-4977-B04A-C04FACC0AAE0.jpeg
    205.6 KB · Views: 45
Back
Top