Economical RIMS Control Panel Build

Homebrew Talk - Beer, Wine, Mead, & Cider Brewing Discussion Forum

Help Support Homebrew Talk - Beer, Wine, Mead, & Cider Brewing Discussion Forum:

This site may earn a commission from merchant affiliate links, including eBay, Amazon, and others.

modernlifeisANDY

Well-Known Member
Joined
Apr 20, 2010
Messages
565
Reaction score
26
Location
Plymouth
Hello all - I come seeking some advice.

I am a brewer on a budget, but one that still wants to make some upgrades to his system. I am in the process of designing and putting together a two vessel, one pump hybrid RIMS system. The plan is for two stainless steel kegs - MT and BK. The MT will be hooked up to a RIMS tube with a 1500 element - enough to maintain mash temperatures. I'll likely use the propane-fired BK to heat the majority of my water volumes and my pump to transfer between vessels.

I plan on alternating the system between no-sparge volumes using my MT, RIMS, and pump, and batch sparging using a bucket as a holding tank for the sparge water.

Herein lies my dilemma - building my control panel for the RIMS system. I plan on mounting all of the electrical components in a metal toolbox, similar to this one. I want to try and straddle the line between "flashy" and "functional" for my control box elements, but I don't want to break the bank. At a bare minimum, I want to run an Auber PID and temperature controller, have a full power on switch, a switch and indicator light for the pump, a switch and indicator light for the element, and some sort of emergency stop. I really like the illuminated push-button switches used in many builds here, but I'd like a cheaper solution - but not as bare-bones as a light switch. I'd like SOME flash.

Is a kit like this one the best bang for the buck? What are the bare minimum internal components I would need to run what I plan to?

I know this is a catchall question, but I'm clueless when it comes to electricity - that's why my electrician friend is going to help with the heavy duty stuff - I just want to make the beer machine work.

Thanks everyone.
 
Last edited by a moderator:
I am in the same boat as the OP. I want to go electric but not break the bank and still be safe. The 'extras' that you have to have to run the system (the thermocouples, and endless fittings) really do add up.

I did find an economical version of an RTD thermocouple yesterday. It may not work for everyone's application but it should work for me. And only $17 shipped compared to Auber's $50. Of course it will take a month to get to me, but I am patient. See it here at: http://www.amazon.com/dp/B00FHVBKC4/?tag=skimlinks_replacement-20
 
Last edited by a moderator:
I just built mine on a budget.... used my pin td4 pid from eBay for the boil kettle and the cheaper Ta7 (or ta4 would work) for the hlt I made a herms system using my ol d immersion chiller.
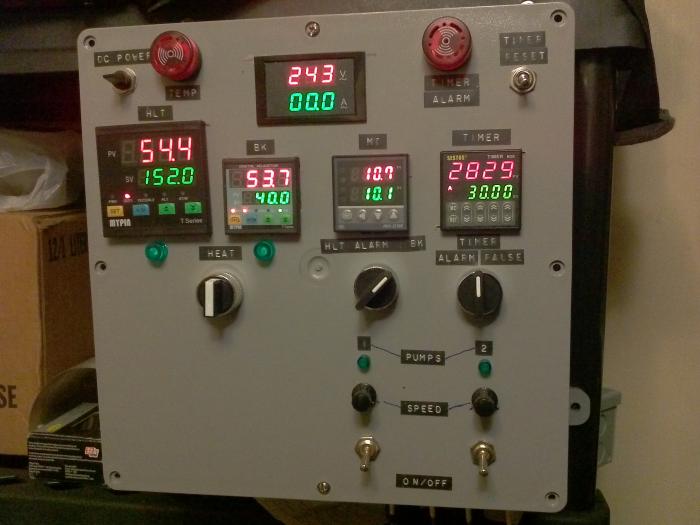
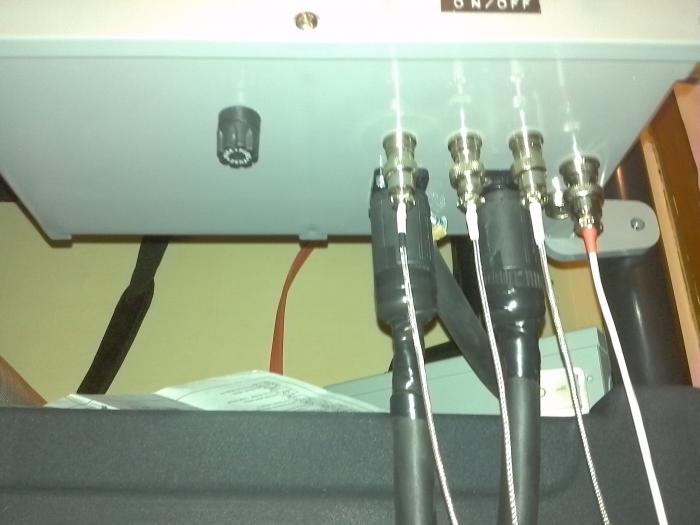
For the control box I used a $30 plastic electrical box from the home depot but almost bought a cheap aluminum harbor freight tool box to use.... as far as contractors or relays there's may cheap options in the forums under $10 and switches and lights were purchased from china on eBay by sorting by price.... took a few weeks to get everything but I built the whole control panel with 3 pid controllers and a sestos timer for under $200.00.... I also used switch craft connector for the element cords and "xlr" connectors for the sensors.
I used pwm controllers for speed controlled of the cheap food grade 12v pumps I use instead of a march or chugger (pumps are $21 as opposed to $140-200 for the latter) so far they have worked great.
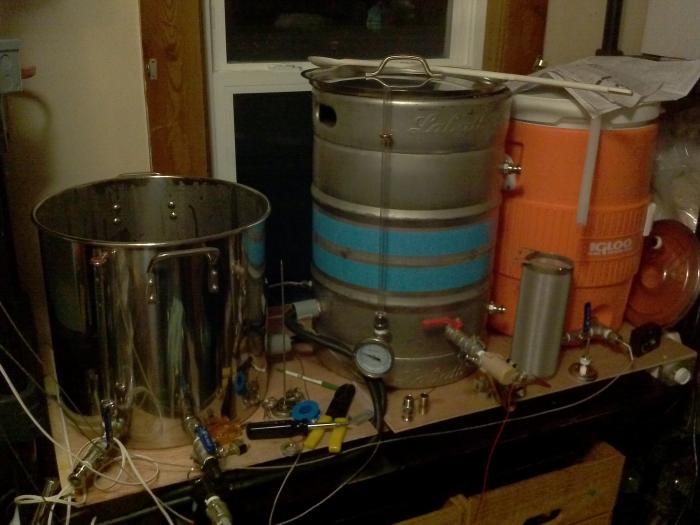
My entire setup including the b23-20 duda diesel plate chiller (works amazing btw) and cerial killer grain mill has cost me less than $700.
I built an exhaust hood out of some old foam board last night and have yet to test it but I'd say I have been very budget conscious the whole way... spending where is important.
I don't regret spending what I have one bit.

IMG_20140109_183422.jpg
 
Would you be able to post a few photos of your control panel up close and maybe the internals? I'd love to also hear your experience as to the reliability of your temperatures. Have you had good luck with the MyPin and your temperature sensor?
 
Would you be able to post a few photos of your control panel up close and maybe the internals? I'd love to also hear your experience as to the reliability of your temperatures. Have you had good luck with the MyPin and your temperature sensor?

I will take more pics of the inside of my panel when my replacement pid comes for my mash temp readouts (I bought a Rex c100 originally but like the my pin so much more I decided to replace it to do away with having celcius readouts)
I may start a built thread yet even though I'm pretty much done as well...
Here's some pics of my build I had on my Tablet...
I built a stir plate for my hlt because I had the stuff to do it laying around and it seems to work well from the testing I did with three thermometers at different places in the hlt. I've only brewed with it one time so far (pumpkin ale kit) but everything went well and I figured out how to dial in my mash temps well towards the end of the mash.
I will add that I spent a lot of time reading here and learning from others before building my setup.... got a lot of tips that saved me a bundle.

IMG_20140102_190322.jpg


IMG_20140108_084754.jpg


IMG_20140102_190352.jpg


IMG_20140102_190339.jpg
 
Thanks for the pictures and the vote of confidence on the Mypin PID. I found a combo Mypin TA4-SSR PID that included an SSR and a PT100 probe for relatively short money. I think that will be the route I go for this build.
 
To save a few bucks on the panel, consider the following:
* Use a single estop or on/off switch that can handle full current, don't need a contactor.
* HD plastic enclosure
* Regular outlets instead of twist lock.
* Use seperate indicators and switches (instead of illuminated switches)
 
To save a few bucks on the panel, consider the following:
* Use a single estop or on/off switch that can handle full current, don't need a contactor.
* HD plastic enclosure
* Regular outlets instead of twist lock.
* Use seperate indicators and switches (instead of illuminated switches)
I assume you mean for a main power switch? I myself just use the breaker on the nearby spa panel...
There's something to be said for using a direct 220v load bearing switch
In an environment that could be loaded with steam and condensation and the safety of it but that being said if you have the steam under wraps and have dry hands it should be safe enough...
I used the switch craft outlets because they are UL rated at 30a.... one less thing to fight with the insurance company with if there ever was an accident.... 30a outlets and plugs are locking for a reason...
I totally agree with the indicators and plastic box and went with both.
 
I find the toolbox enclosure to be relatively on the cheap end - $14 bucks for a steel toolbox that is portable will be very helpful when it comes down to transporting the system around whenever need be. Since I am planning a hybrid system, transportability is key. My gear is in the basement and I brew outside, so the only thing that stays outside will be the stand with a grill cover over it.

In terms of internals, outside of the cost of the illuminated switches themselves, what is needed to drive an illuminated switch versus an indicator light and a toggle switch?
 
Back
Top