Docbruw's E-HERMS build (yup another one)

Homebrew Talk - Beer, Wine, Mead, & Cider Brewing Discussion Forum

Help Support Homebrew Talk - Beer, Wine, Mead, & Cider Brewing Discussion Forum:

This site may earn a commission from merchant affiliate links, including eBay, Amazon, and others.

Docbruw

Well-Known Member
Joined
Jul 27, 2013
Messages
117
Reaction score
11
Location
Nashville
Well I've been browsing this electric brewing section for a long time now. Researched all the regular electric brewing sites. Watched all the you tube videos I could fine. Saved most of my beer brewing money and slowly purchased all the pieces and parts I would need to upgrade my brew house to electric. I big thanks to: Kal and theelectricbrewery.com, Bobby and all his stainless parts at brewhardware.com and Ryan at ebrewsupply.com. I also have to mention Hunter306 and his build as I "borrowed" a lot of his layout mainly because it was exactly what I was looking at doing anyway.

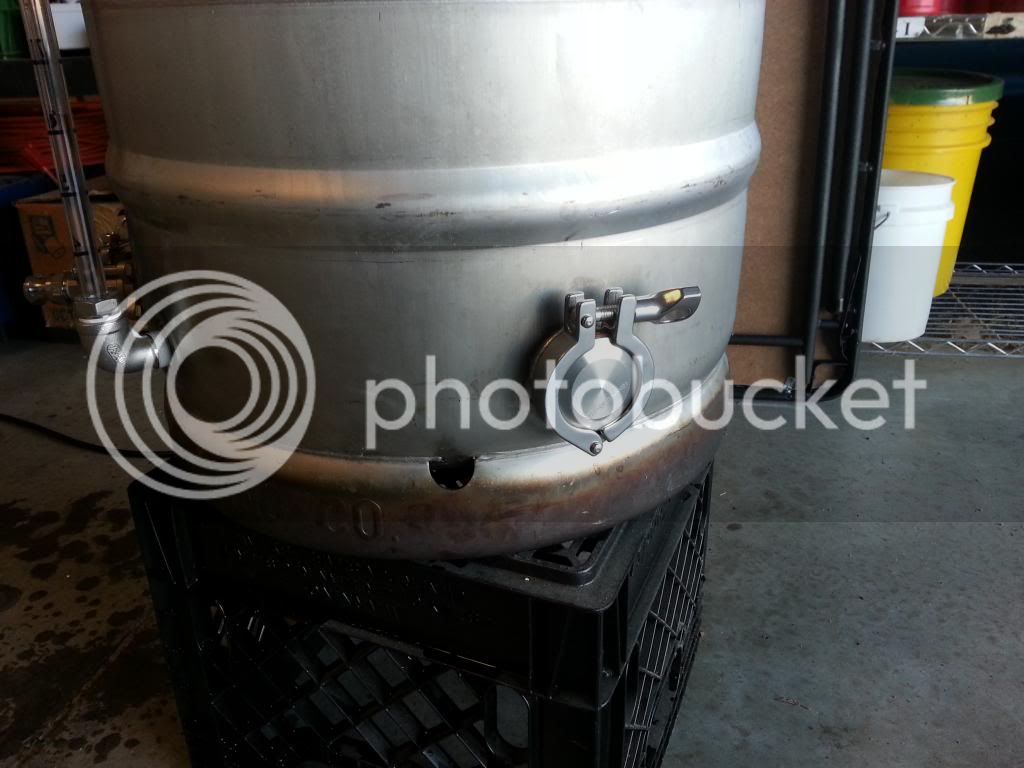
Last summer I upgraded all my keggles to full stainless and got rid of all the weldless fittings I had and silver soldered all couplers in. These are Bobby's 1.5" tri-clover silver solder element mounts. I will be polishing the bottom of the kettle once I'm full electric.
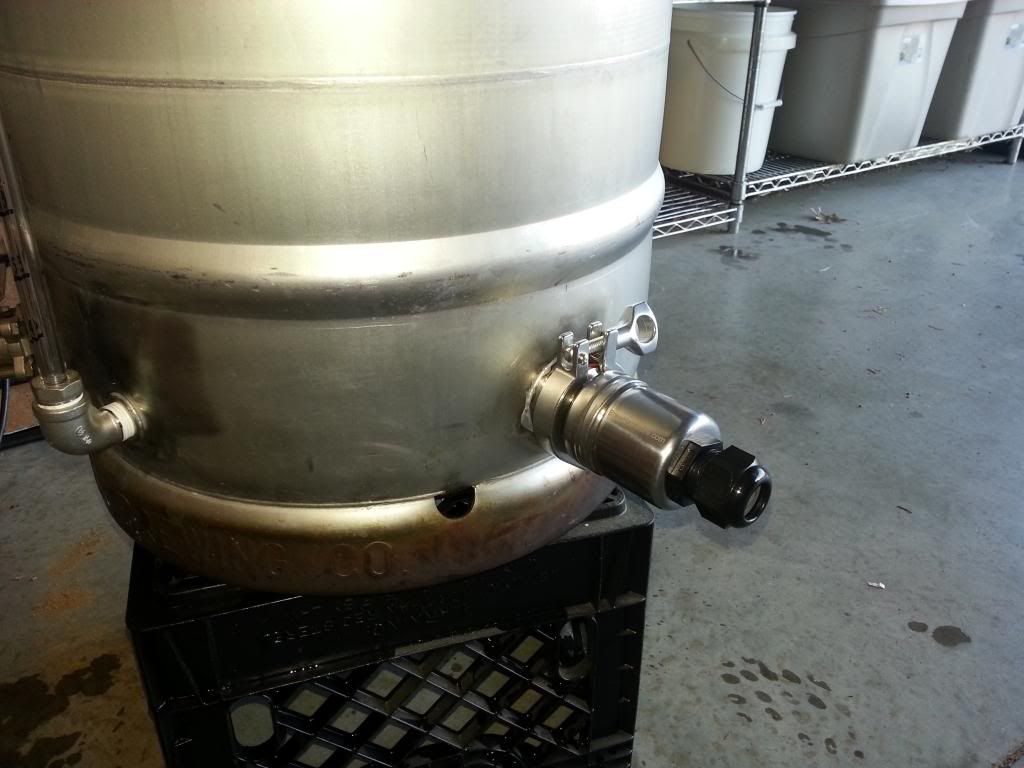


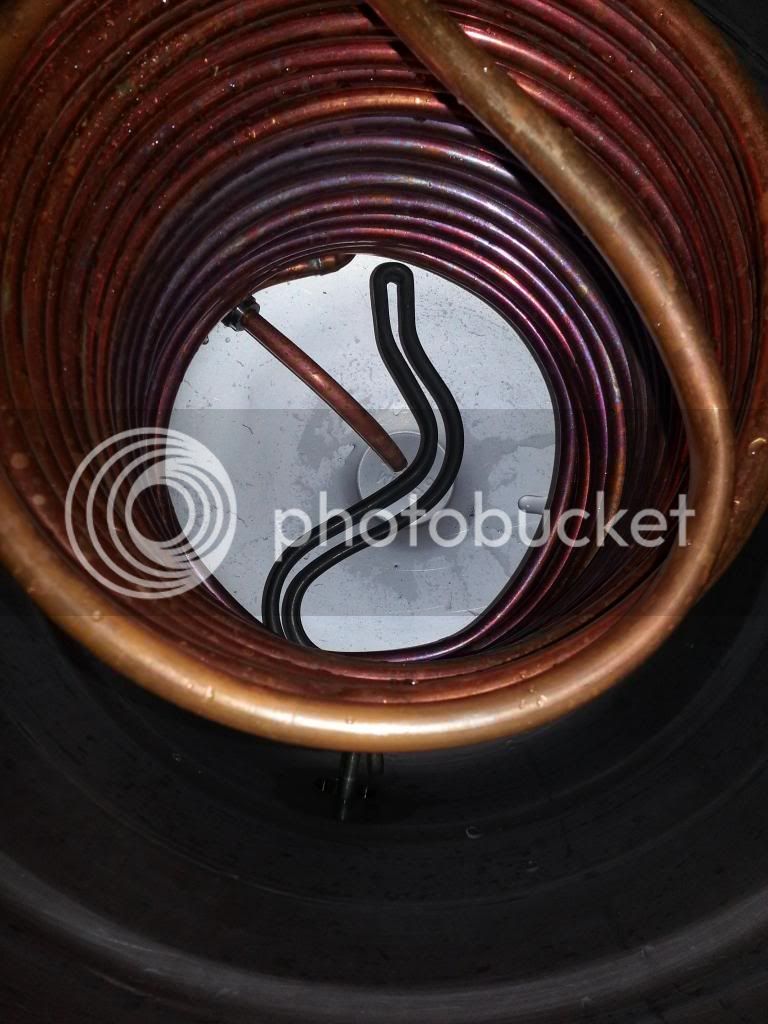
I got in on the HD copper close out. 50' HERMS coil installed in the HLT.

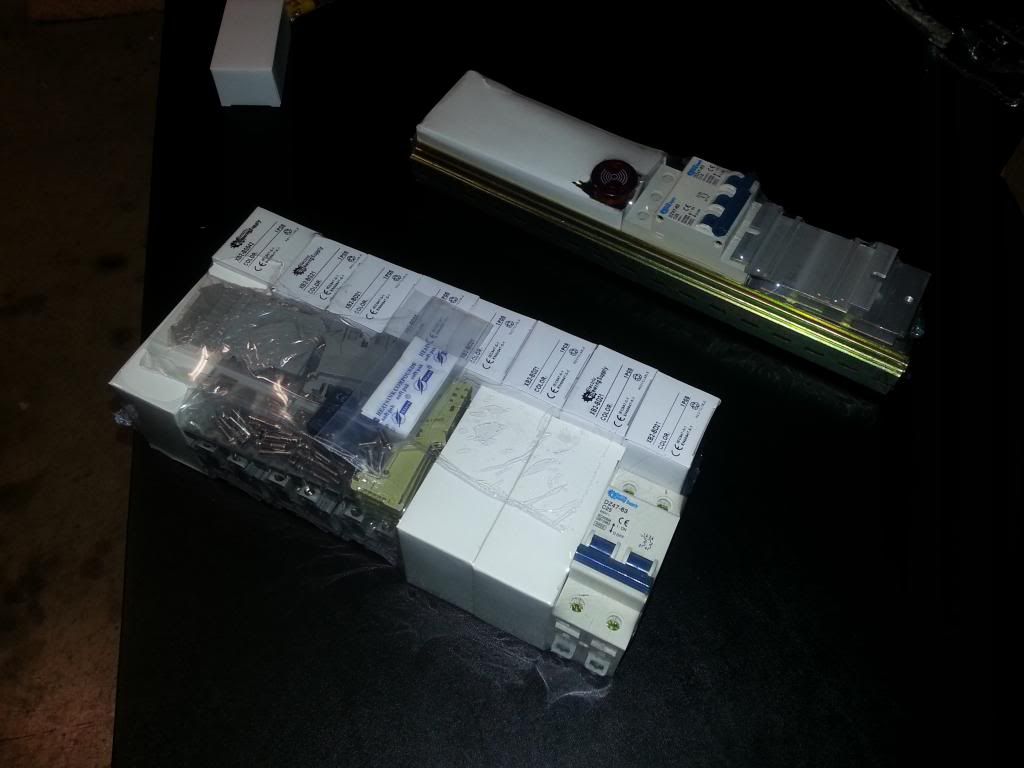
Got to say I'm very impressed by the packaging that Ryan @ ebrewsuppy did. Both packages are wrapped in shrink wrap. Nice and neat so nothing was rattling around in the box when I received it. That's the DIY 50amp PID kit.

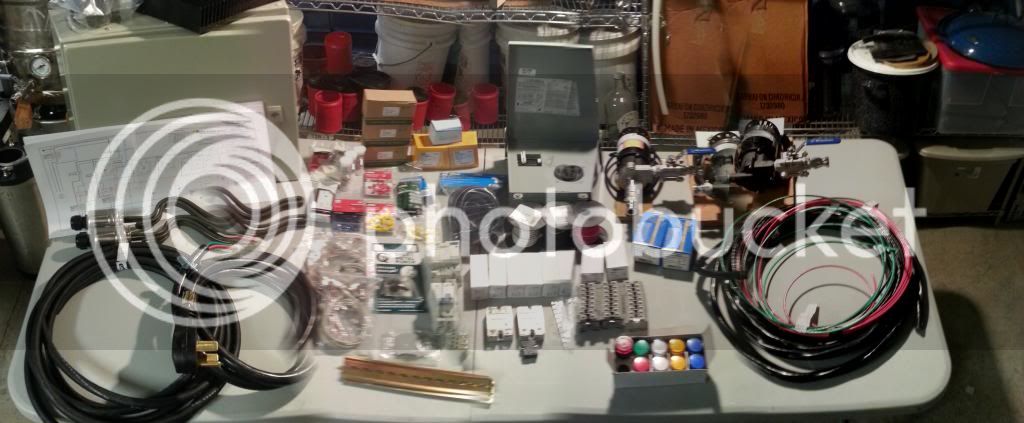
And the big shot! Everything laid out on the table. This is everything from the pumps ,20' of 6/3 wire for the spa panel wiring to the crimps, temp probes and SSR heat sink. Sorry for the bad picture I had to do a panorama shot.

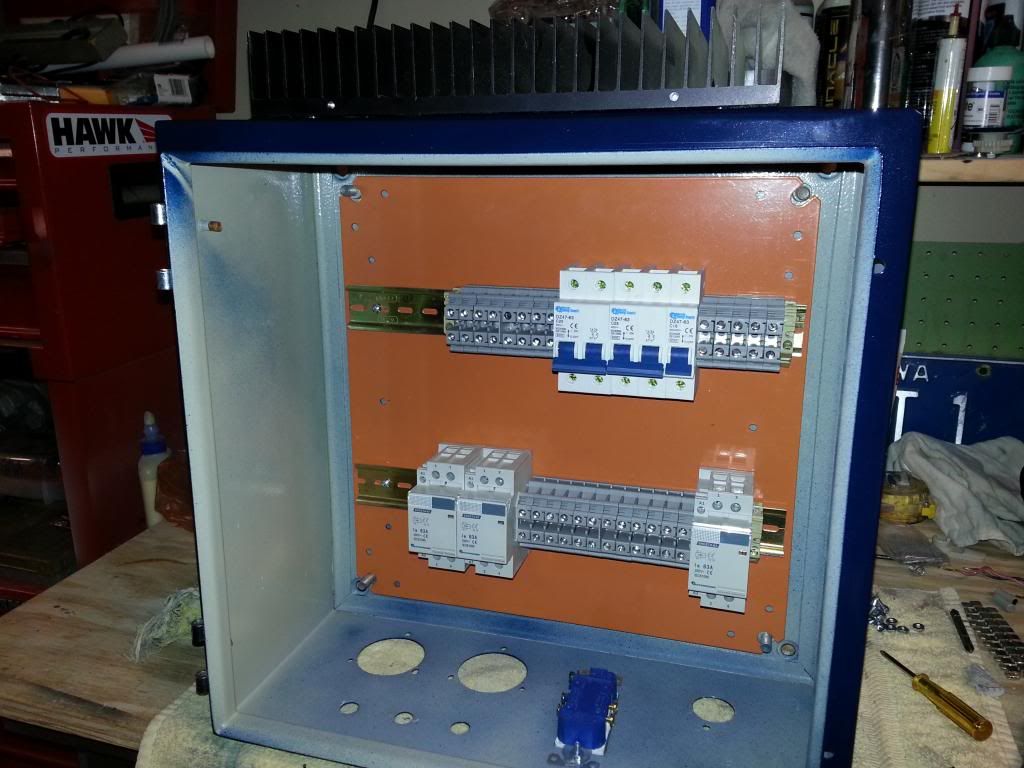
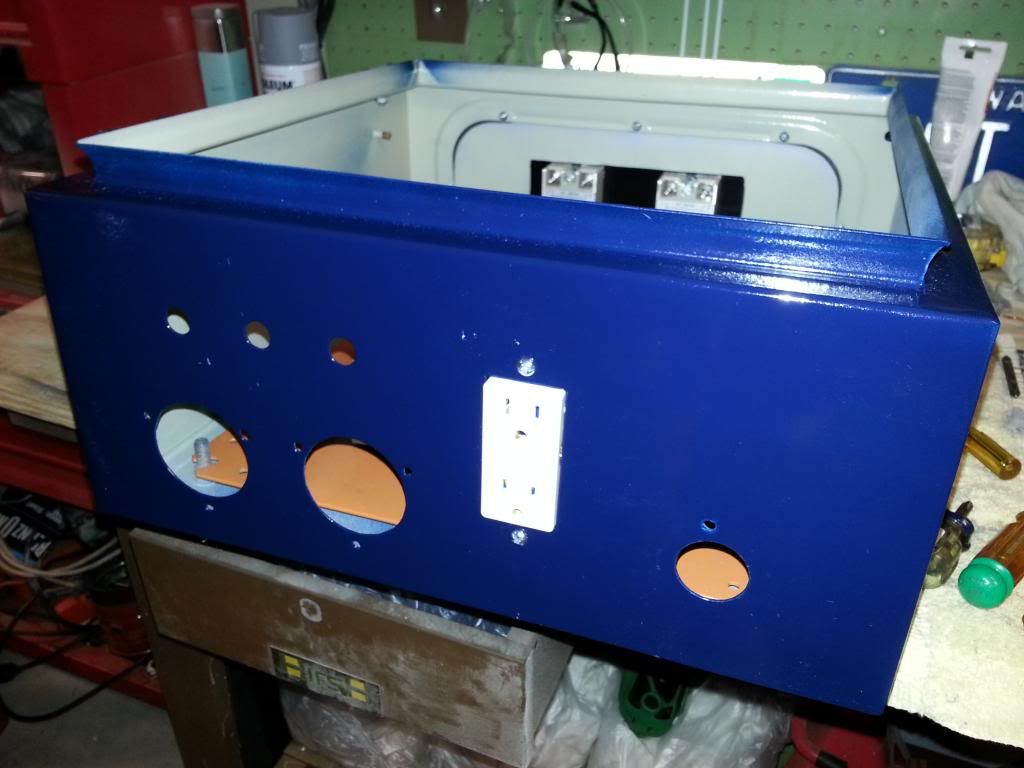
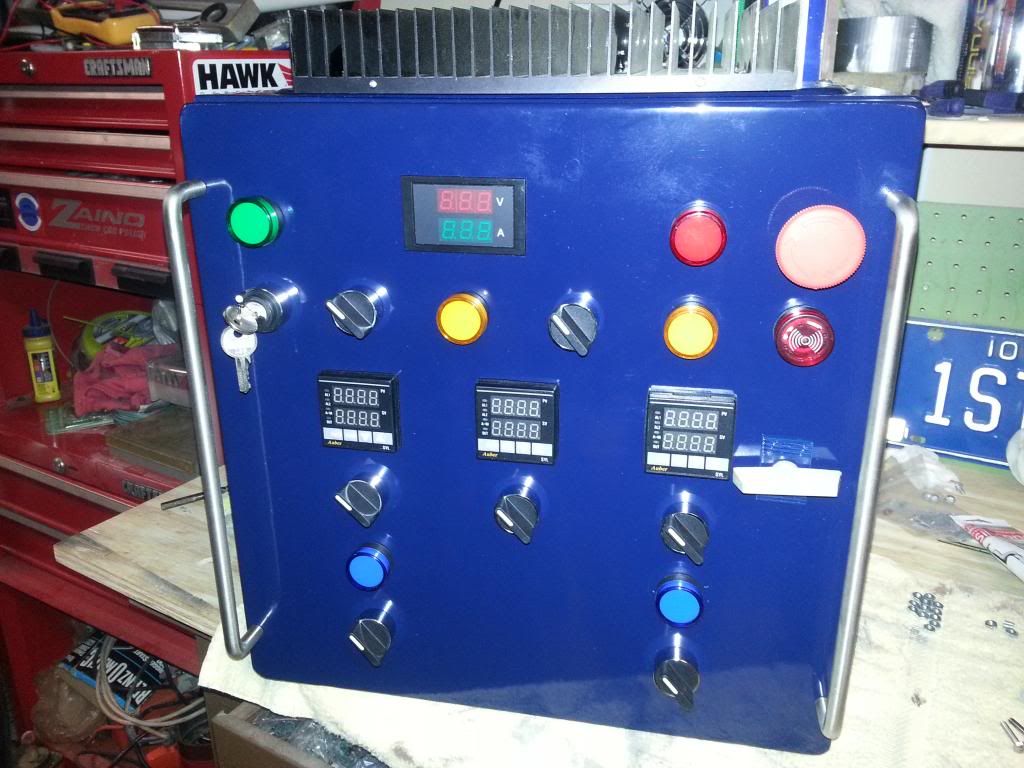
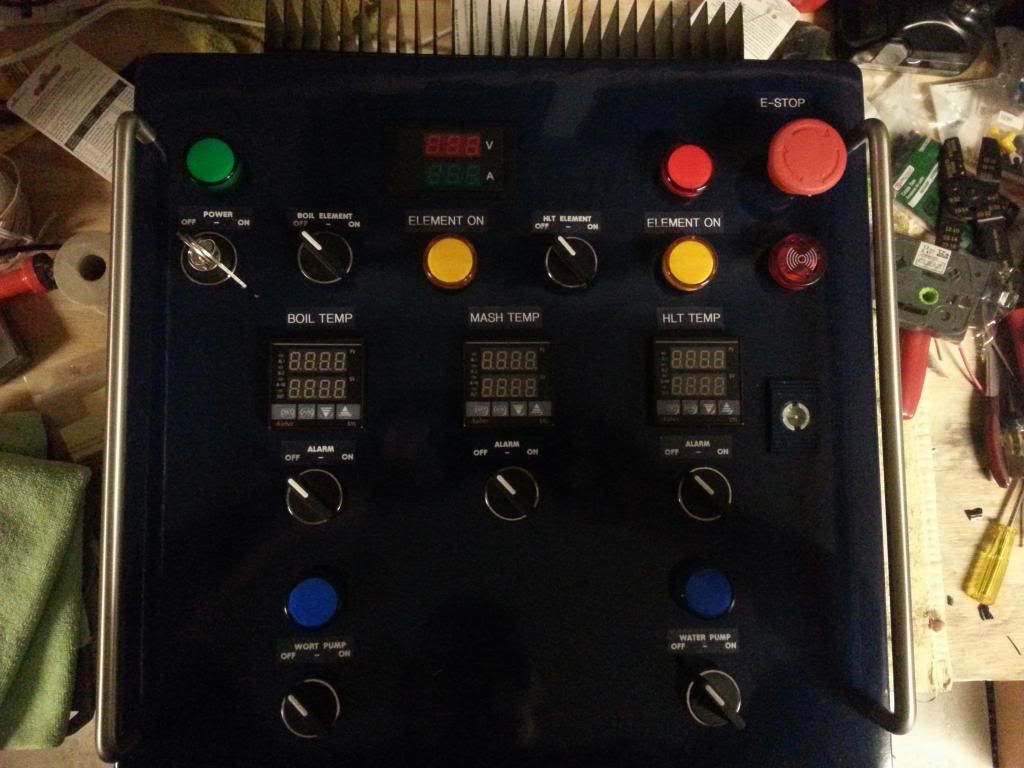
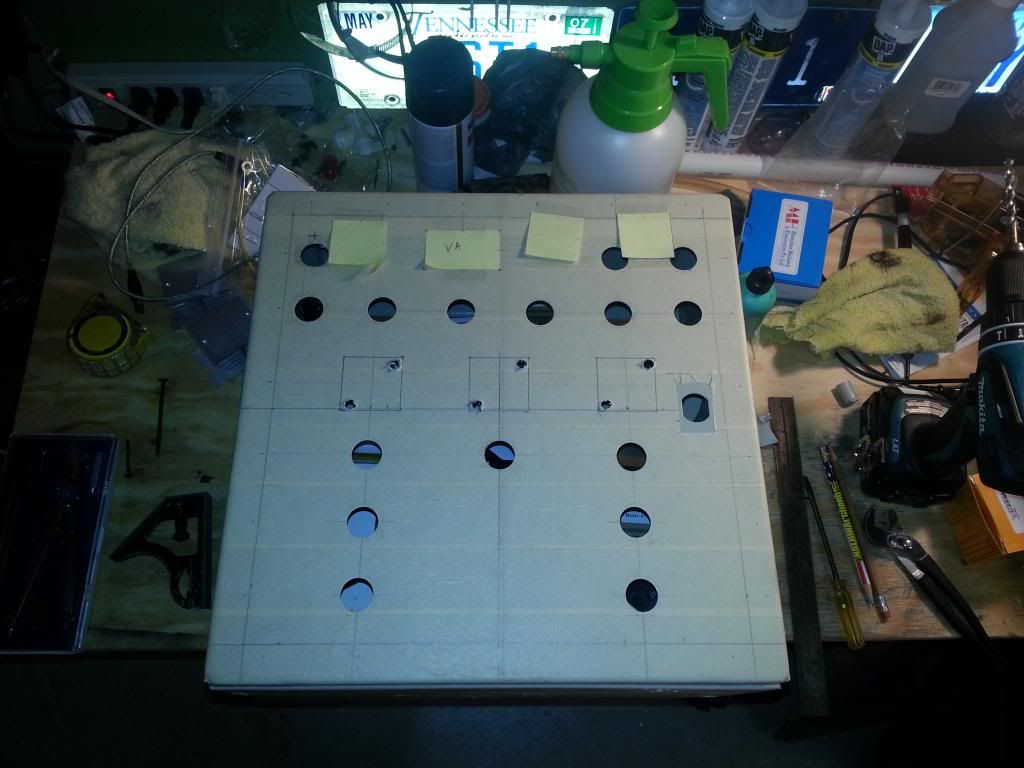
Here is the panel layout. It's Kal's layout with a few minor tweaks. Since I'm not using the panel timer I only have 3 holes for the PIDs. I'm also not using separate volt and amp meters. BTW that 7/8" q-max punch was the best $15 I spent on this build.

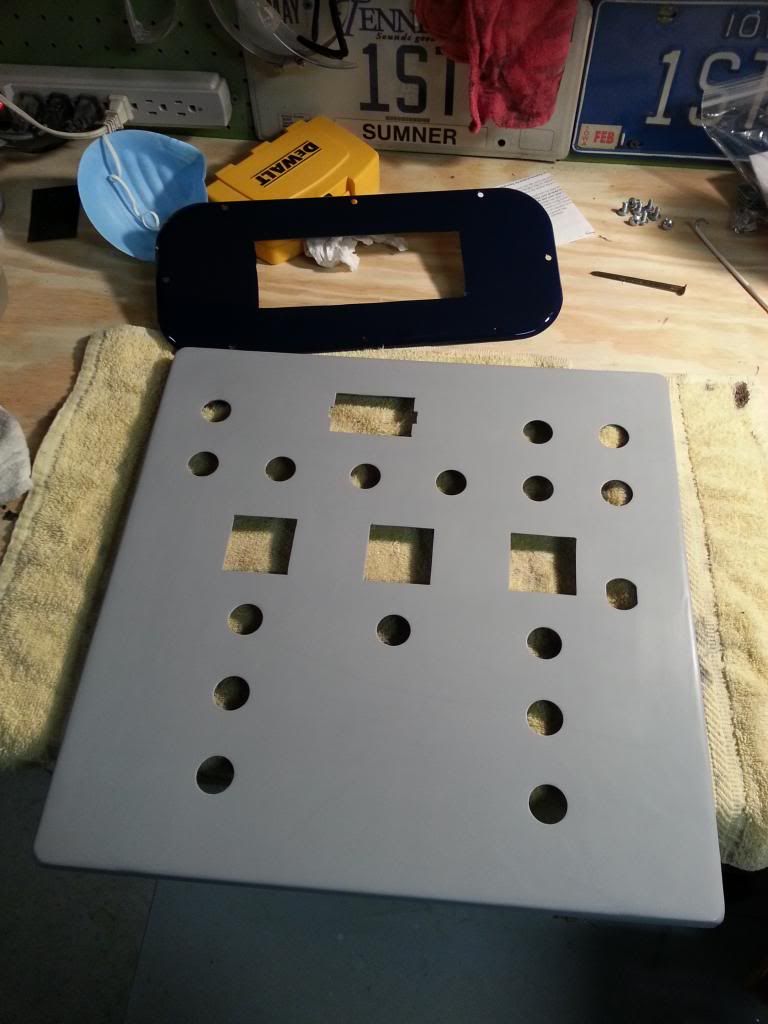
Primed and ready for paint. I used a jig saw with a metal blade to cut the PID and ammeter holes.
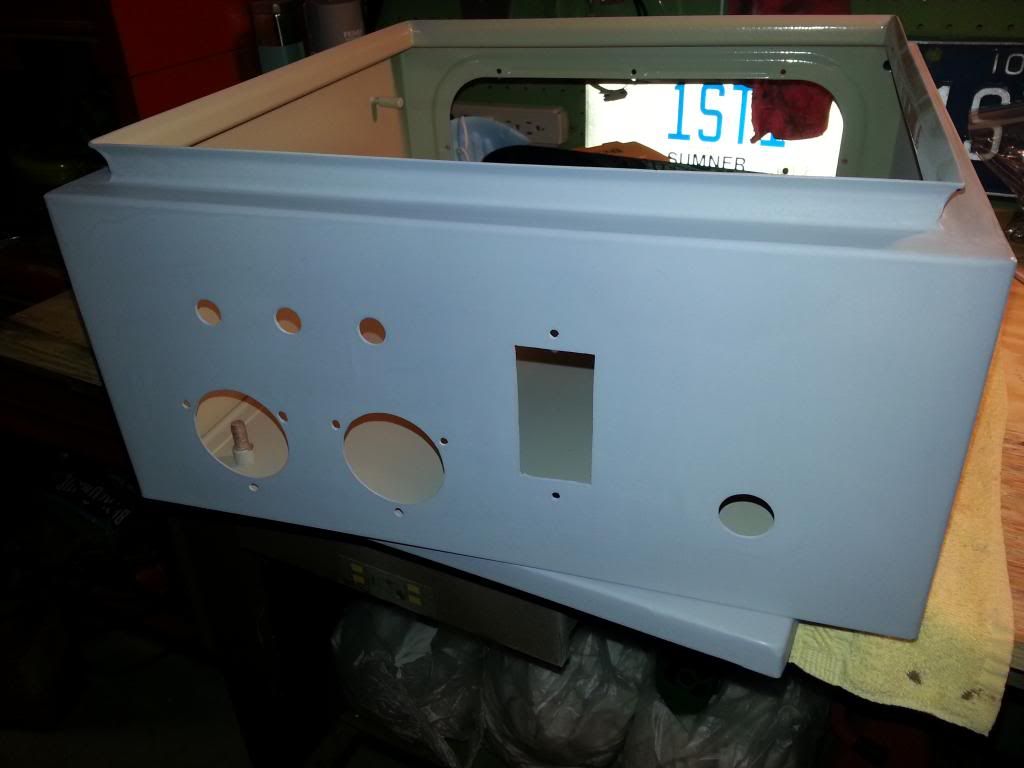
 
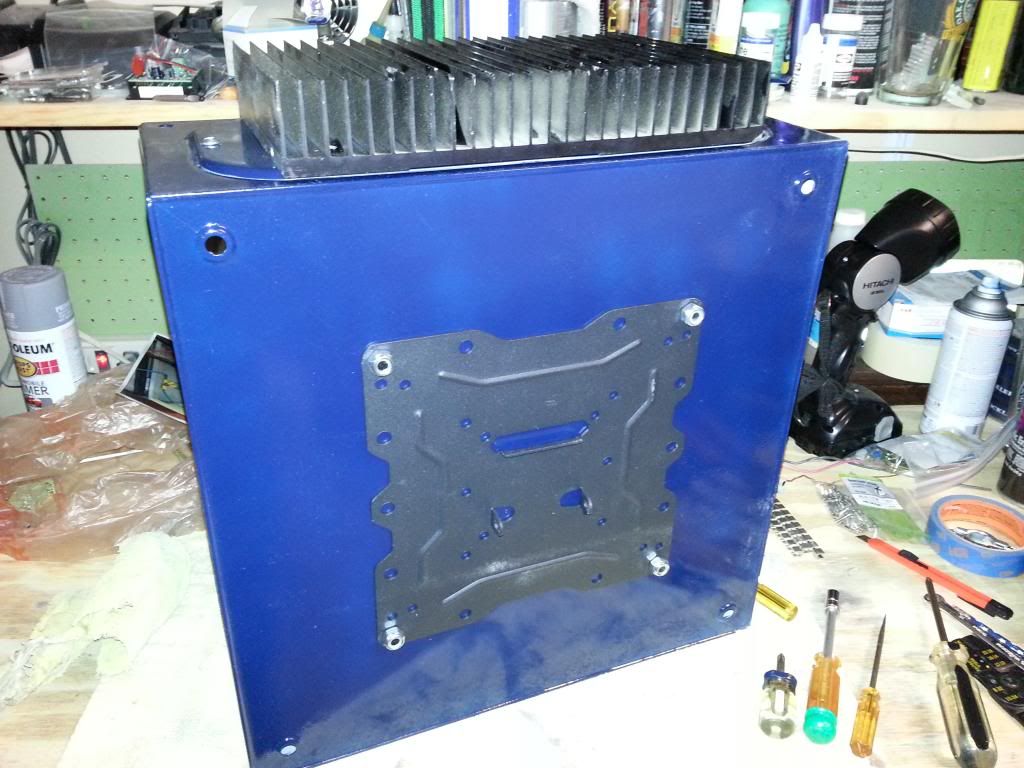
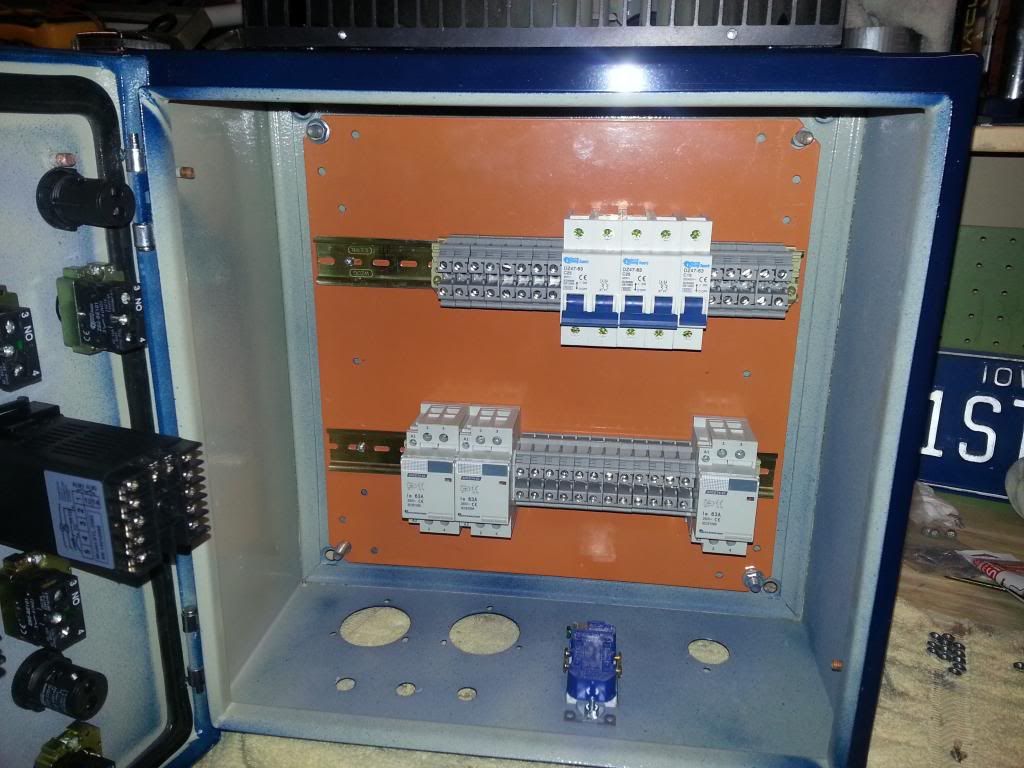
Testing the inside panel layout. Ebay heat sink and SSRs mounted.


88lb. Flat panel TV mount attached to the back. My favorite color is blue and so is the panel.


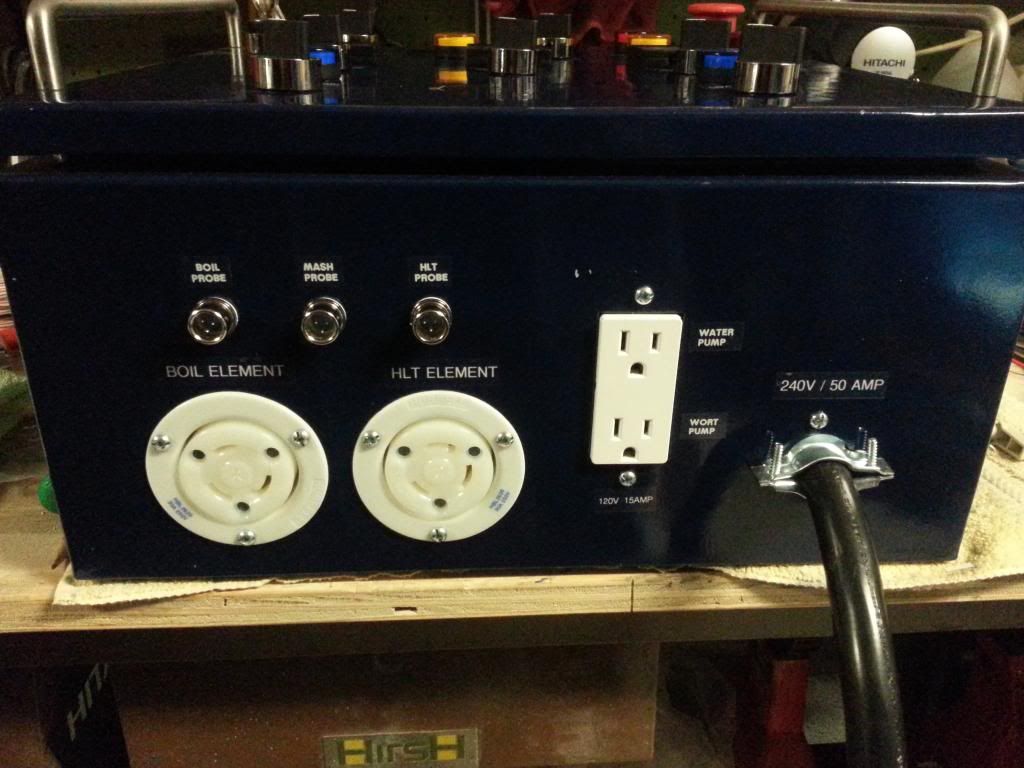
I didn't feel my pumps needed the extra expense of the twist locks so a regular 15amp outlet was used. I also couldn't justify the cost of the 50amp main connector so it's going to be hard wired.


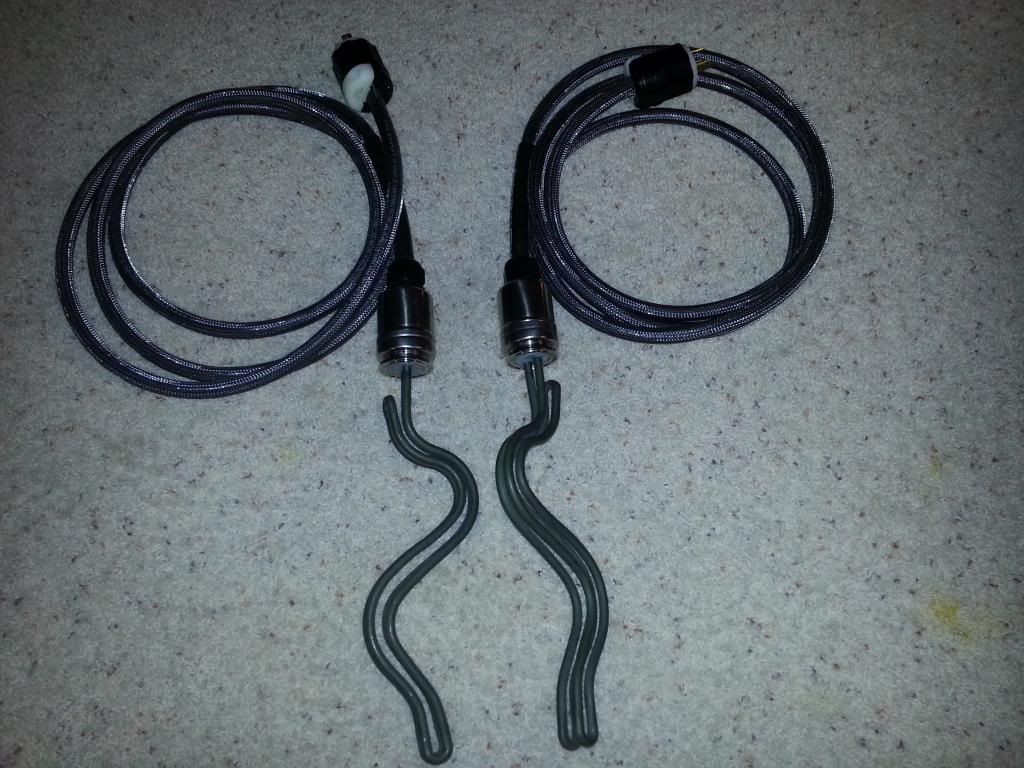
Took a break and wired up the elements, cables and plugs.


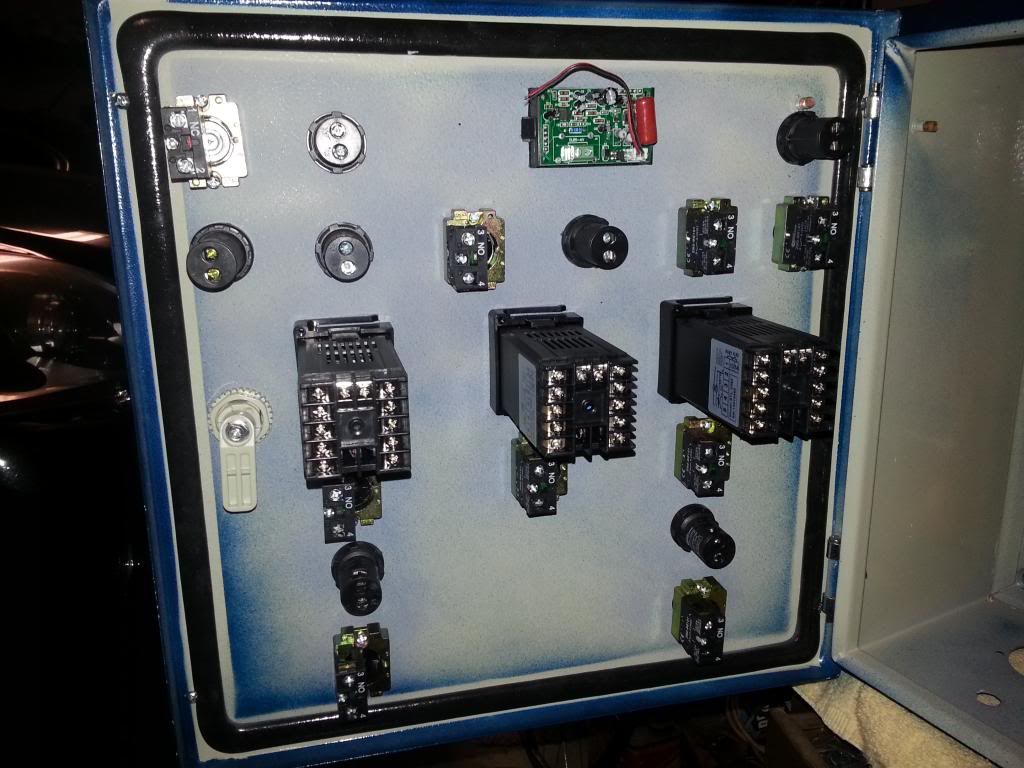
Panel components mounted and installed.


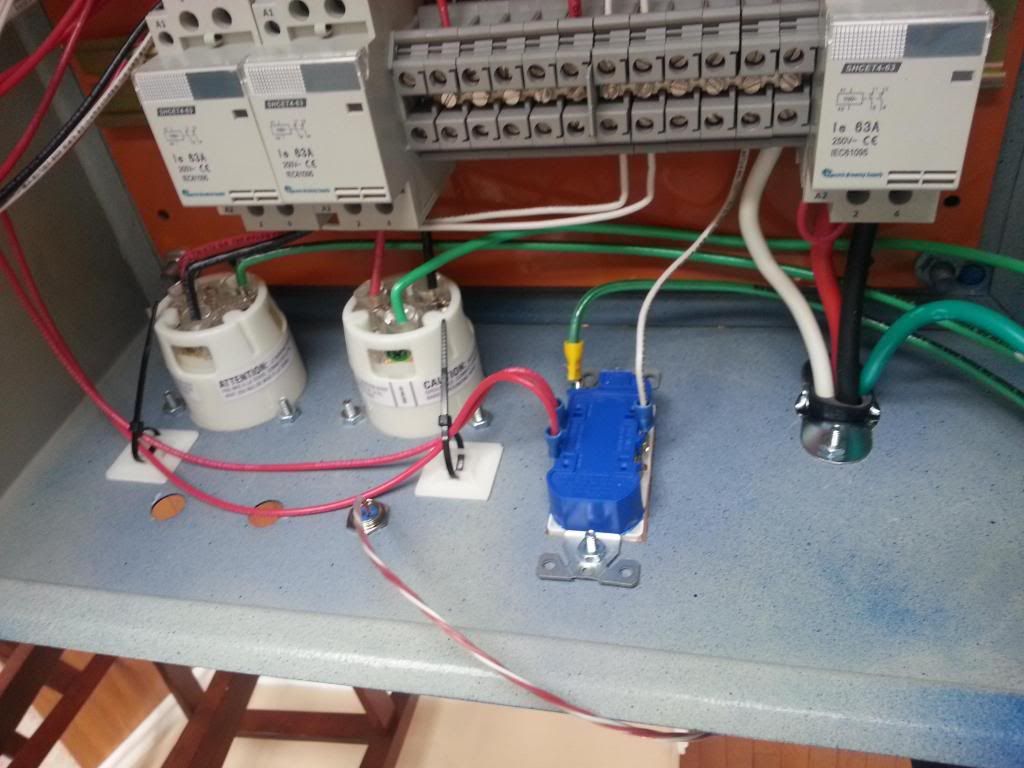
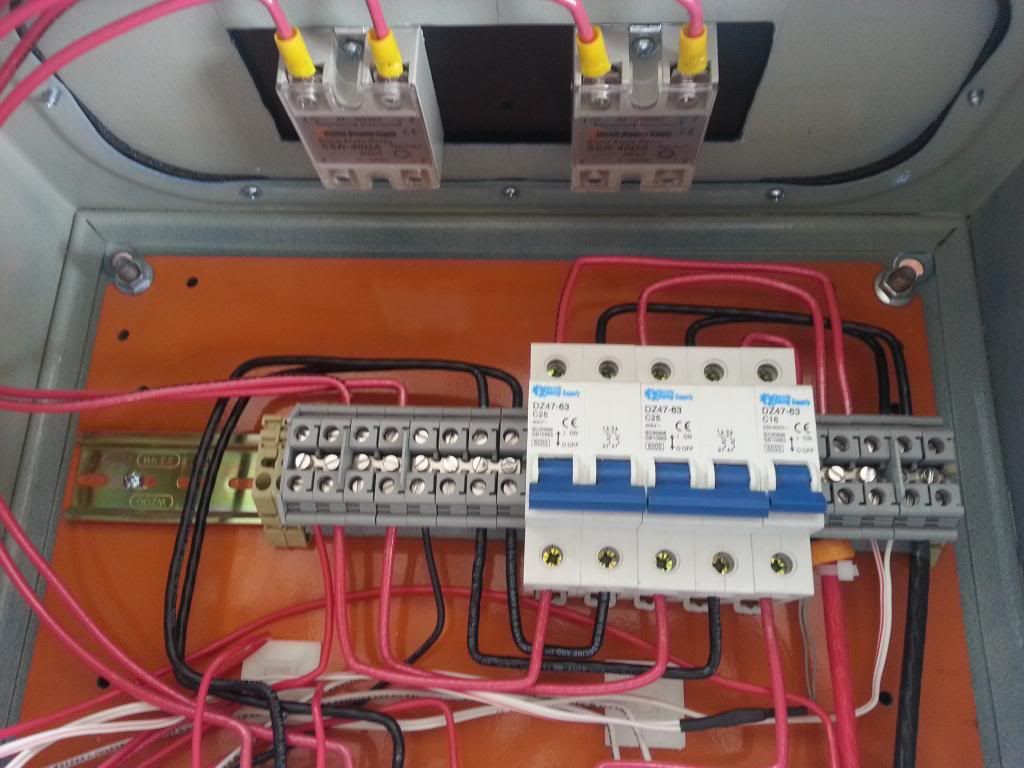
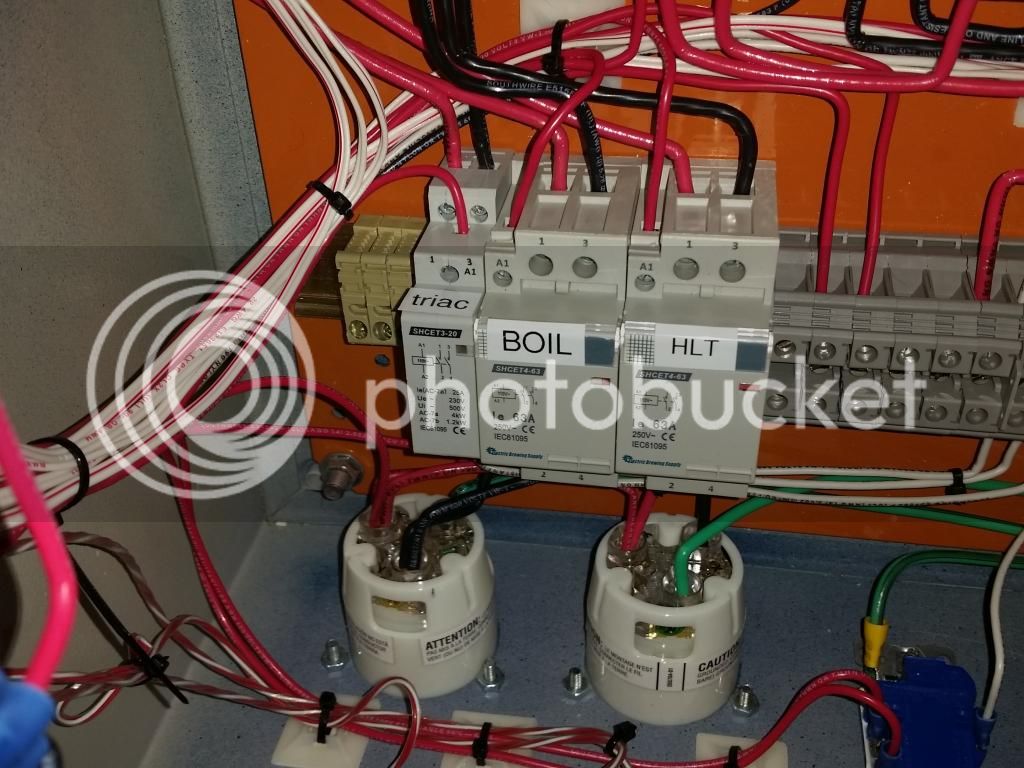
Some of you may notice. The element contactors are not 25amp. Those would be 63amp. Props to Electric Brewing Supply again. If I had to guess they were out of the 25amp contactors when I ordered so they upgraded these to big ones to get my order sent out.


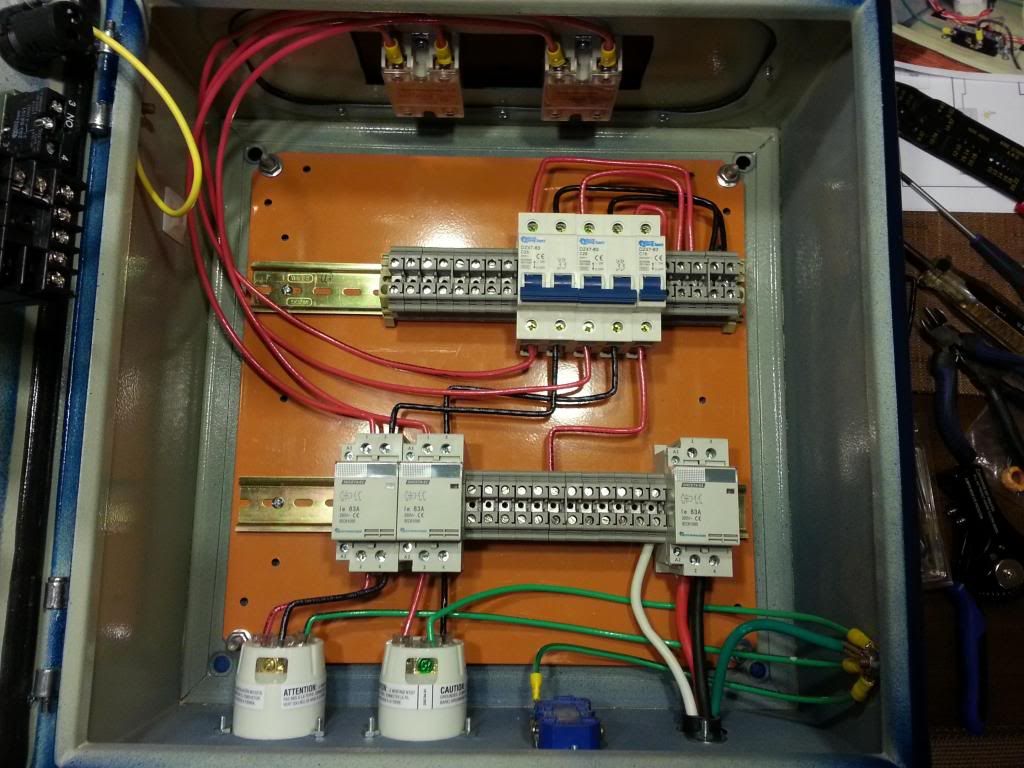
Ground wires installed and most of the 10g high current wires run.


6g wire is not fun to work with. I also reworked the 10g wiring to the SSRs.


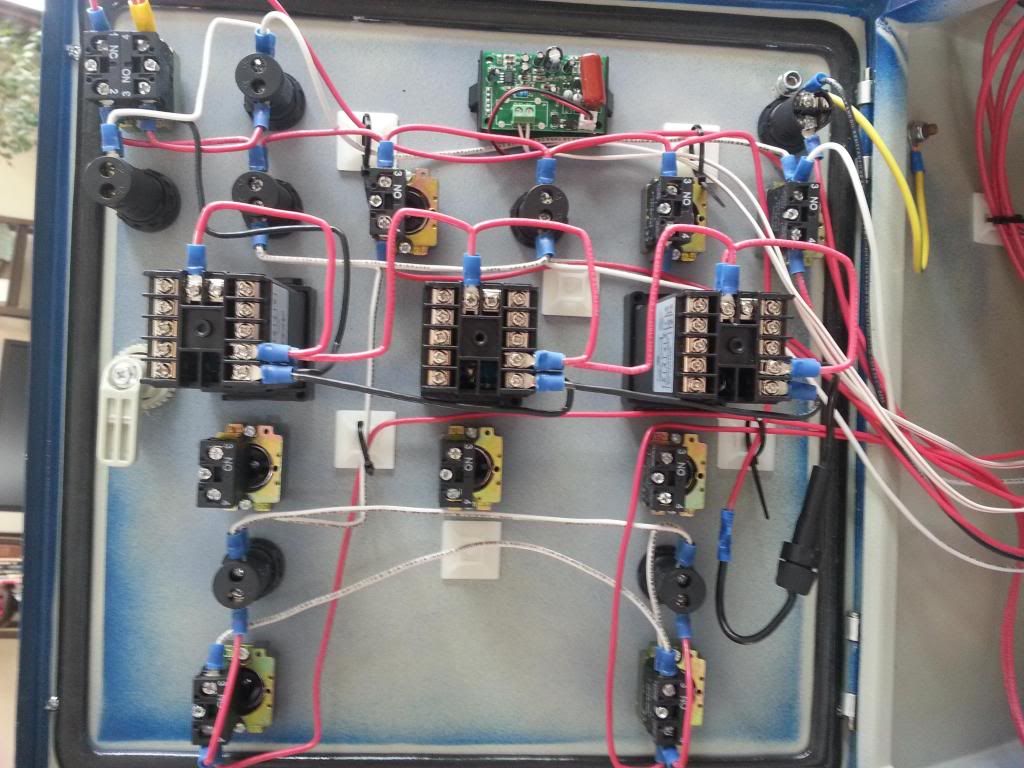
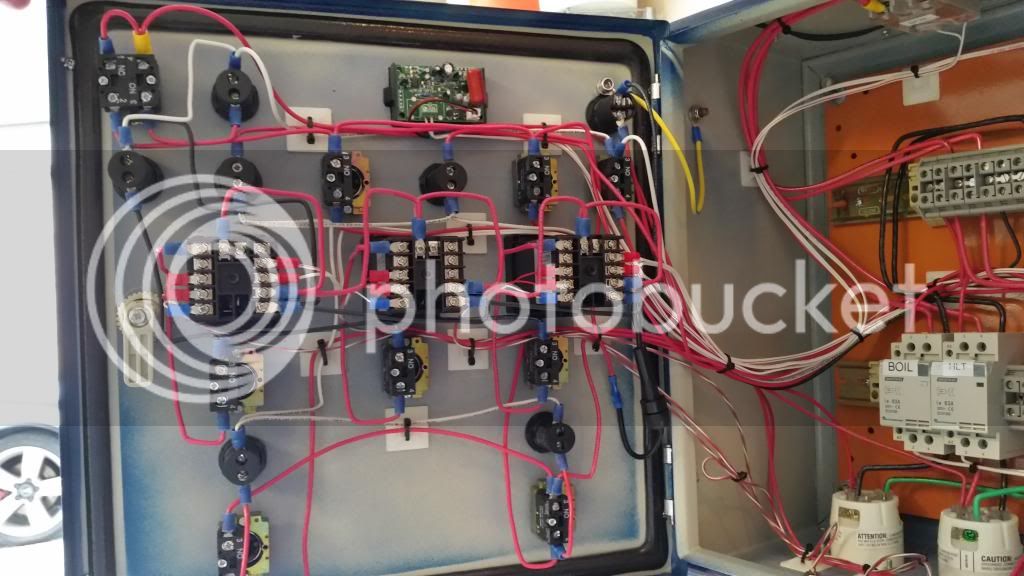
Door wiring. I've reworked it a few times since this picture. BTW that's a 1a fuse protecting all 3 PIDs. I don't think I need one for each one.


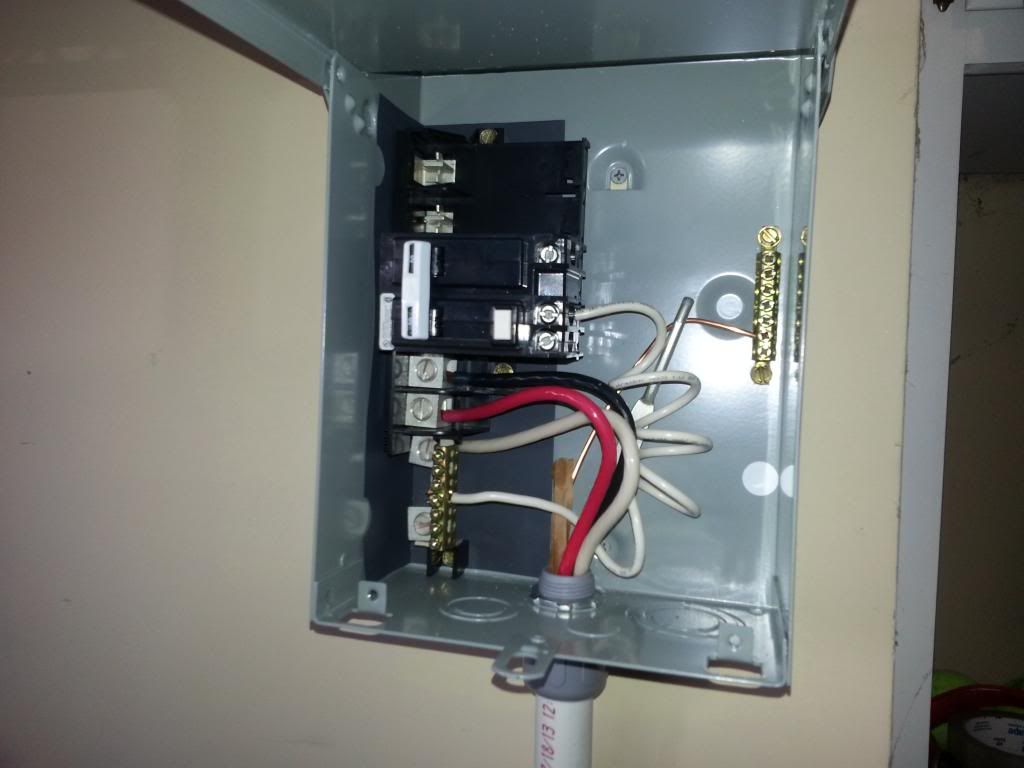
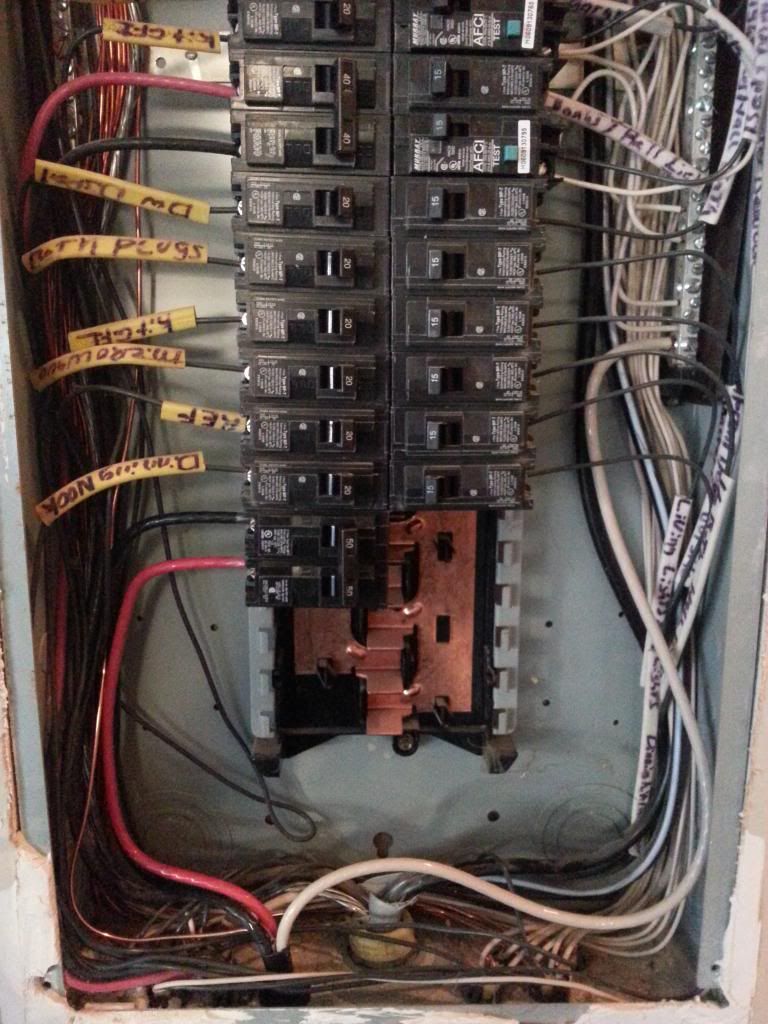
Ran the 6/3+g wire from the main panel to my spa panel this past weekend.


NOTICE: This main is turned off when this work was being done. 50 amp breaker installed on the bottom left.


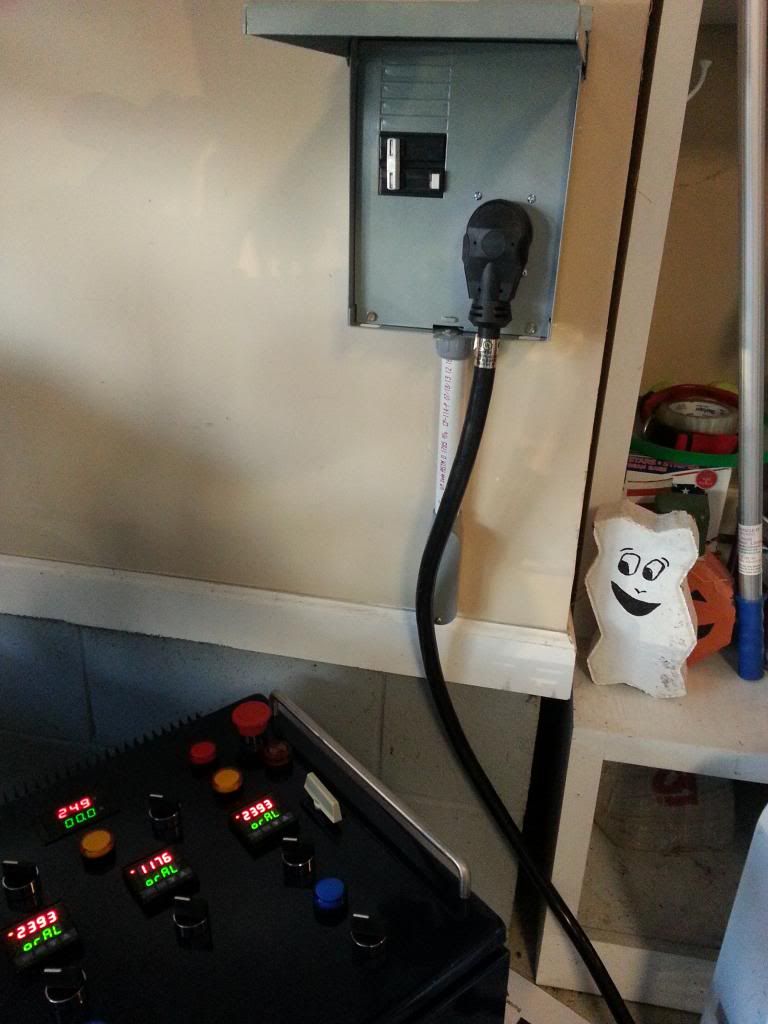
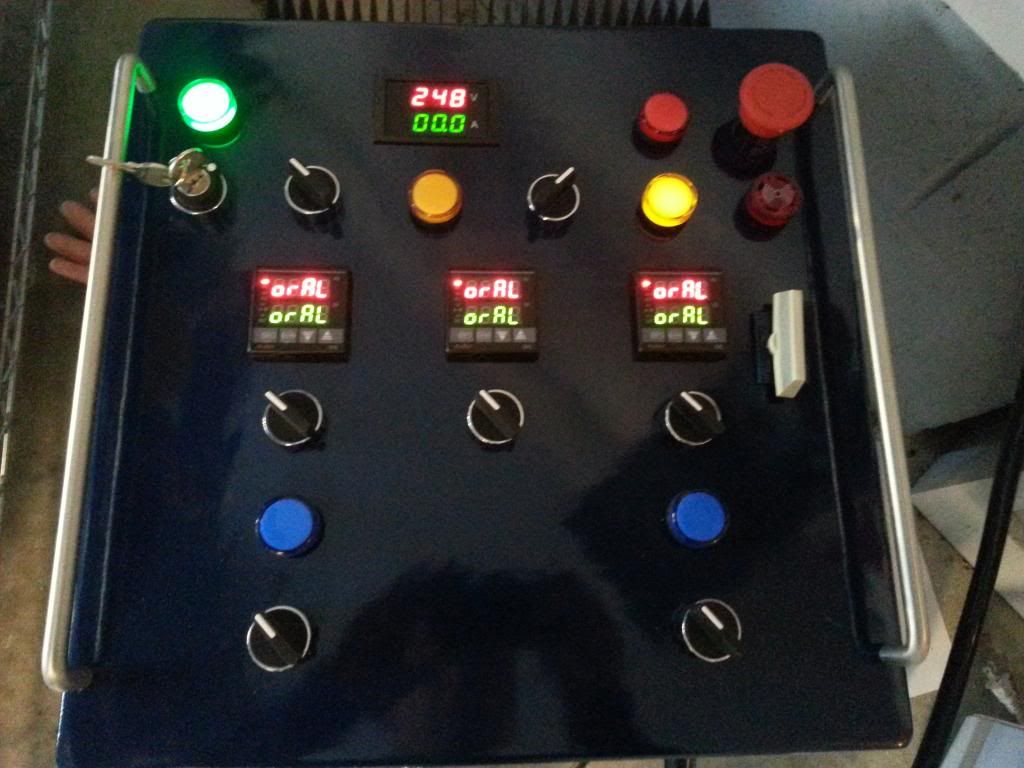
Panel plugged in and tested for the first time.


Yes I am getting 248 volts to the panel. Voltage in the main panel was 249 with my multimeter. The voltage at the panel bounces between 248 & 249.


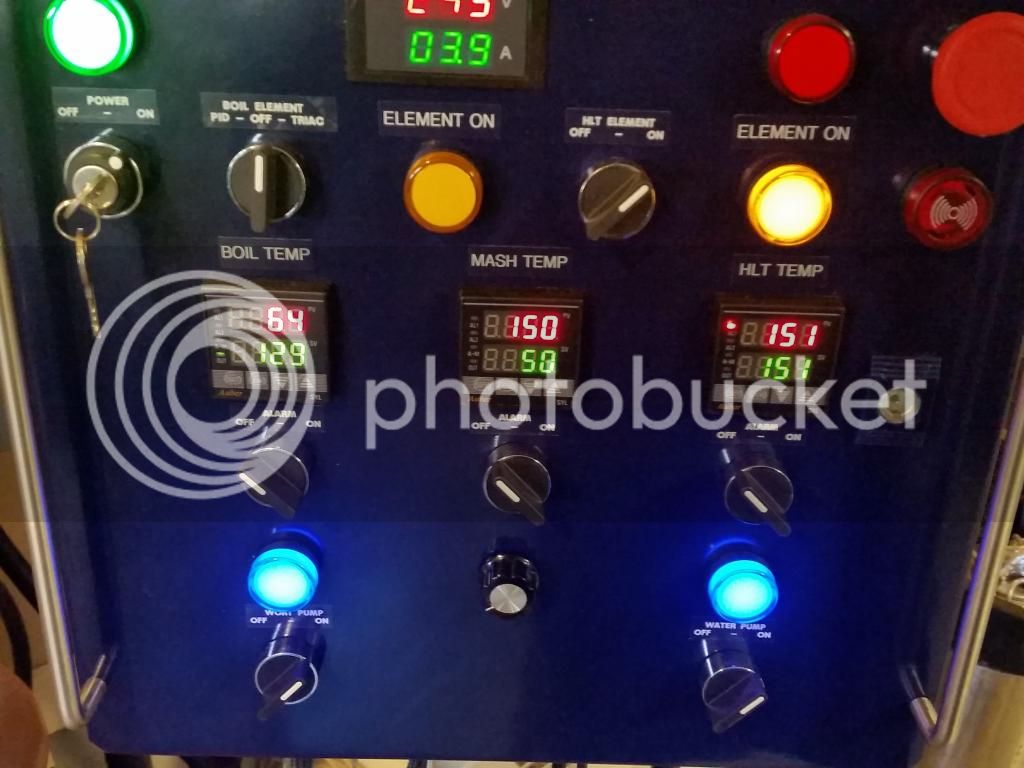
Labels added.


The only thing I have left to do is tidy up the wiring inside the panel. I wanted to get my 220 outlet installed so I could test the panel before finalizing the wiring.

I did get antsy and had to test it out. Plus I needed to configure the PIDs so I put 5 gallons of water in the kettle and set the PID at 150F and off it went. This also gave me time to run auto tune on the PID. I was very surprised how fast it took 50f water to 150f and then to boiling.

Up next: Brew stand. Nothing has been purchased for this yet but I've got a good idea what I want it to look like. I'm also on the hunt for a utility sink also.
 
I'm in the process of building my brewstand now. Should be finished sanding and staining by this weekend. Hopefully in a few weeks I can install my utility sink. Then it's time to start the enclosure.

Your enclosure looks really good!
 
I'm super impressed when I see builds like these. Maybe one day I'll have the extra time, energy and money to dedicate towards a project similar. At least, that's the dream. Well done! It looks awesome.
 
Thanks. I made the decision to start down this path almost a year ago. It took me some time and decide on what type of system I wanted and where to source everything. The longest part was slowly gathering parts. Once I had everything it only took about a week to do the panel and wire the 220. With some luck my honee-do list will be short enough this weekend I can build the stand. I need to brew I'm getting low on beer. :D
 
I'm in the process of building my brewstand now. Should be finished sanding and staining by this weekend. Hopefully in a few weeks I can install my utility sink. Then it's time to start the enclosure.

Your enclosure looks really good!


What kind of stand are you building? Any pictures or a thread to check out?
 
I'm modeling everything after http://www.theelectricbrewery.com/

I finished sanding the stand down last night. I'm sure my neighboors really enjoyed the electric sander going off till about 10PM. Hopefully I can start staining tonight and then add the tops and finish the weekend.

bench.jpg
 
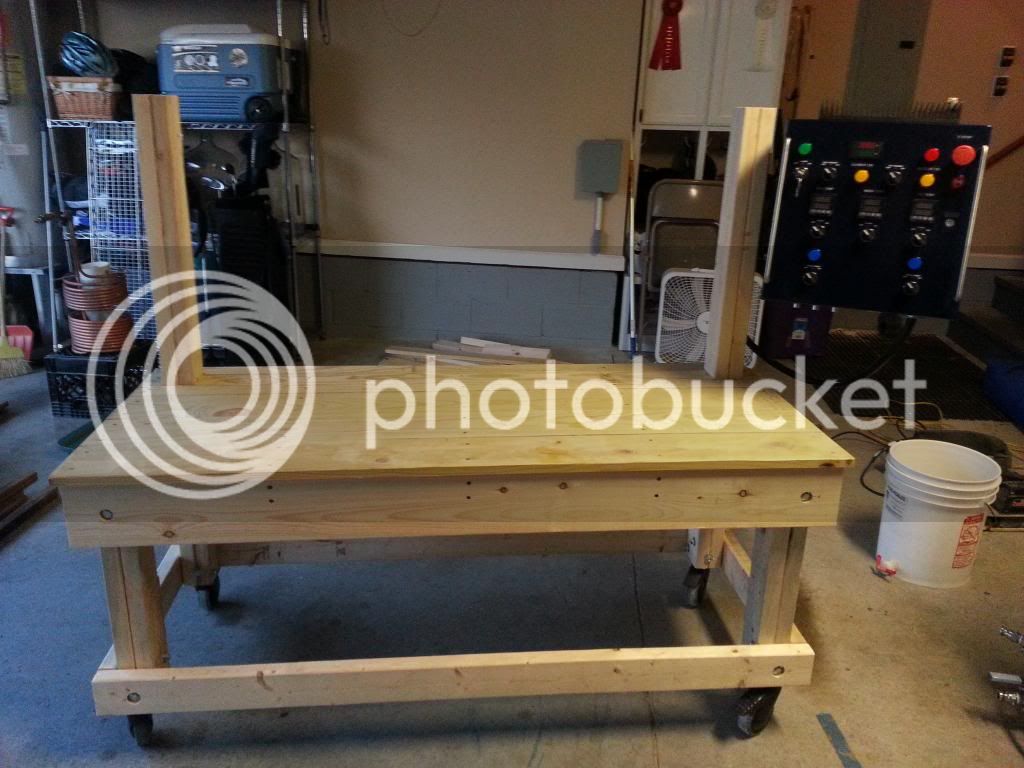
Ahh excellent. I'm using the same design but with a few changes. I'm going to lower the height of it so I can just see into my kettles. I'm also going to extend the back two corner legs up to just over the height of my kettles. One, I want to hard plumb water lines into the stand and run up the arms so I can fill/clean the boil, HLT and the chiller. Second, that flat panel TV mount will get attached to the right side arm to hold the panel. Which I can't say is a new idea I borrowed it from a forum member cheez. https://www.homebrewtalk.com/f170/e-herms-build-50-amp-393717/index2.html#post5304051
 
Ahh excellent. I'm using the same design but with a few changes. I'm going to lower the height of it so I can just see into my kettles. I'm also going to extend the back two corner legs up to just over the height of my kettles. One, I want to hard plumb water lines into the stand and run up the arms so I can fill/clean the boil, HLT and the chiller. Second, that flat panel TV mount will get attached to the right side arm to hold the panel. Which I can't say is a new idea I borrowed it from a forum member cheez. https://www.homebrewtalk.com/f170/e-herms-build-50-amp-393717/index2.html#post5304051

I like the idea of the arms.

I made a few modifications to the size of the table. Mine is 60x24x30. I added wheels to make it easier to move and I am going to use a sheet of plywood for the top and bottom shelves. I had to cut costs somewhere and I figured that was the best place.

Good Luck!
 
I like the idea of the arms.

I made a few modifications to the size of the table. Mine is 60x24x30. I added wheels to make it easier to move and I am going to use a sheet of plywood for the top and bottom shelves. I had to cut costs somewhere and I figured that was the best place.

Good Luck!

I picked up some heavy duty casters here at the office for my stand as well. It's amazing what some departments throw out.

Question: When I did my test boil the SSR had this high pitch whining noise. If I wiggled the twist lock plug to the element the pitch would change. I turned the panel off and back on and now the noise is gone. Has anyone else experienced this? I haven't tested the other SSR yet.
 
Thanks. I made the decision to start down this path almost a year ago. It took me some time and decide on what type of system I wanted and where to source everything. The longest part was slowly gathering parts. Once I had everything it only took about a week to do the panel and wire the 220. With some luck my honee-do list will be short enough this weekend I can build the stand. I need to brew I'm getting low on beer. :D

Did you use a drill press or hand drill for the holes in the enclosure? How difficult was it?
 
Did you use a drill press or hand drill for the holes in the enclosure? How difficult was it?

I used a q.max 7/8" sheet metal punch. link

It really didn't take that long to get here from the UK (maybe 10 days). As many holes of that size that I needed to do $15 was well worth it. Plus you don't have to de-bur anything.

The bigger twist lock holes on the bottom I used a drill press with a bi-metal hole saw. I did have to spend some time with the dremel cleaning those up.
 
I would NOT recommend try to use a hand held drill with holes saws to cut the holes. Trust me. I did that on the receptacle holes and they ended up bigger than they should've been due to "float" of the bit while trying to hold it steady. One of these days I'll get around to documenting it but in hindsight I should've bought a press as I know I have other needs for one.


Sent from my iPhone using Home Brew
 
Man your PID holes are very nice for using a jigsaw. I tried a jigsaw on a control panel years ago and it didnt go well at all. I suck ass at jig saws. Tonight I just cut some with my friends plasma cutter, lol. Insanely overkill but it worked great. Cleaned it up with a rotary tool.
 
I would NOT recommend try to use a hand held drill with holes saws to cut the holes. Trust me. I did that on the receptacle holes and they ended up bigger than they should've been due to "float" of the bit while trying to hold it steady. One of these days I'll get around to documenting it but in hindsight I should've bought a press as I know I have other needs for one.


Sent from my iPhone using Home Brew

I completely agree. I tried using a hand held drill with a hole saw when I cut the outlet hole on the spa panel. It was a disaster. It took forever to do and I was exhausted when it was done. The drill press was way better.
 
New brew stand built. I put the bottom shelf in last night after this picture and did a good sanding on it. Next is to stain/seal it. After that I'll hang my filter on it and plumb it for water. Also starting working on a new CF chiller. It will not be your regular coiled copper tube wrapped in a hose. :D The HLT and stand will get used this weekend for sure. I'm running out of beer! I'll have to boil on propane one more time until I get the chiller finished.
20140320_185639.jpg
 
Hi Docbruw,

Love what you've done and I've picked up a kit recently from ebrew as well... I was wondering if you would mind posting another shot inside the panel and if you had a wiring diagram that you went from. The pics you have on the first page look amazingly clean... but I also noticed that it looked like the PIDs and SSRs weren't completely wired up yet.

I'm also struggling with the daunting step of converting the wiring diagram into a completed panel and so any pointers or advice would be a godsend! I noticed that you have the fuse protecting the PIDs and so I'm guessing that you've merged some of the content in P-J's diagrams with what Ryan at ebrew provides (ebrew doesn't include fuses in any of their diagrams). Was there a final wiring diagram that you based your panel from? I'm only doing a 30A, 3-PID, 2-pump panel so the two element switches get swapped out with a single three-way.

Thanks in advance!

-Chad
 
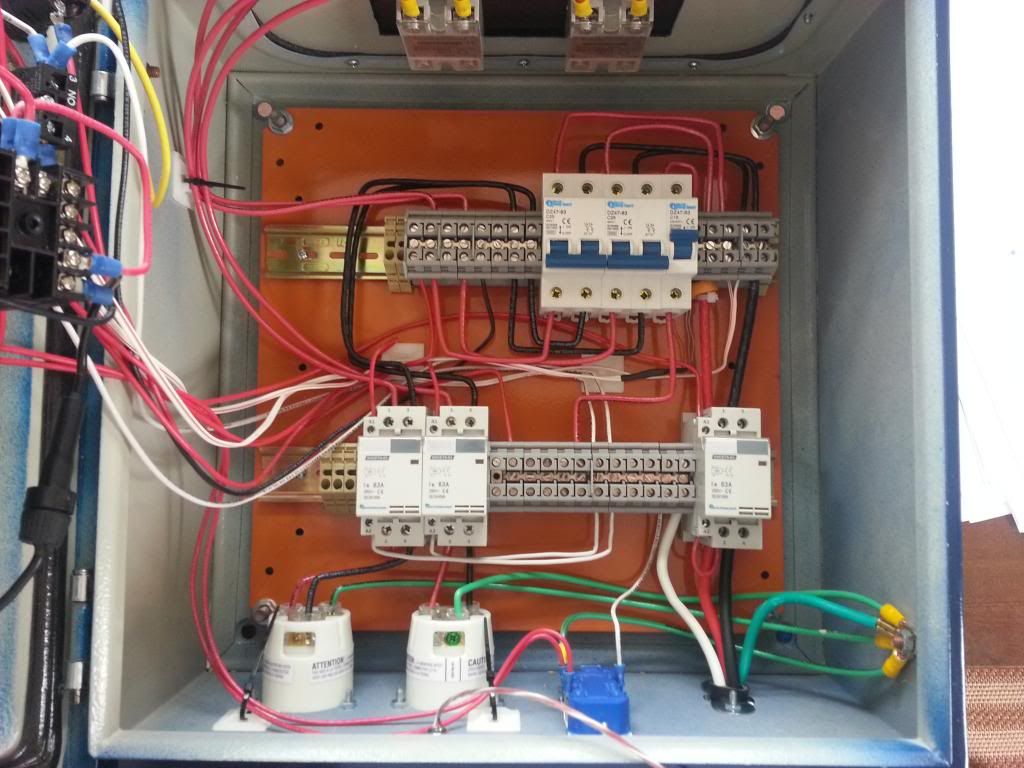
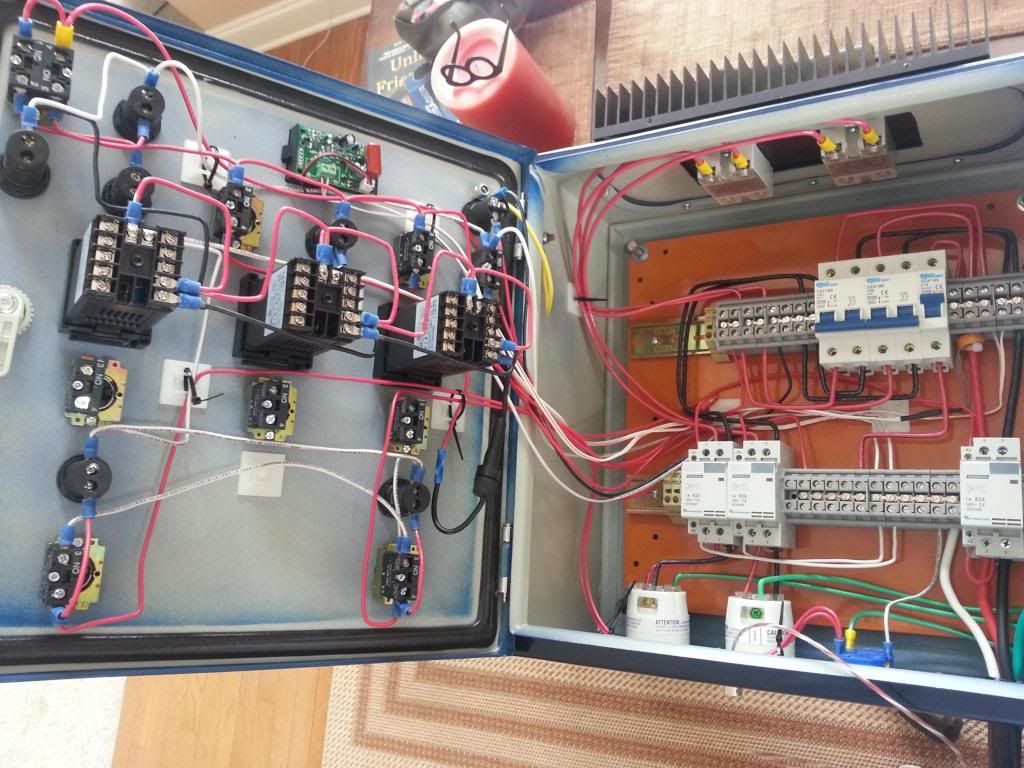
Here are some final pictures of the inside. I've been using it for the past few months with out any issues besides my process tweaks.

[URL=http://s65.photobucket.com/user/docbrew/media/E%20Brewery%20build/20140531_180514.jpg.html] [/URL]

20140531_180543.jpg
[/URL][/IMG]

20140531_180624.jpg
[/URL][/IMG]

As far as the schematic I used mostly the one provided by ebrew supply. I did wire as many of the low voltage components in parallel to save home runs. I added the fast blow fuse on the PIDS from PJ's schematics for protection. The only real issue I had was the e-stop button. I wired it exactly as ebrew had it wired and I'm satisfied that it will for what I would need it for.

Advice: To reduce confusion break down the wiring as ebrew has done. Ryan gives you a complete schematic and then break downs of each section. Wire each section double and triple check them then move to the next. When you get everything wired double and triple check again. Even then I had a few /facepalms after plugging it in but it they were all very easy fixes.
 
Docbruw,

Just wanted to say thanks for going to the trouble of posting the pics. I've just completed cutting/drilling on the panel and I have all of the components installed so I'll be putting your pics and advice to solid use in the coming few days.
 
Docbruw,

Just wanted to say thanks for going to the trouble of posting the pics. I've just completed cutting/drilling on the panel and I have all of the components installed so I'll be putting your pics and advice to solid use in the coming few days.

Not a problem. If you have need any more pictures or have anymore questions let me know.

How's the build going anyway?
 
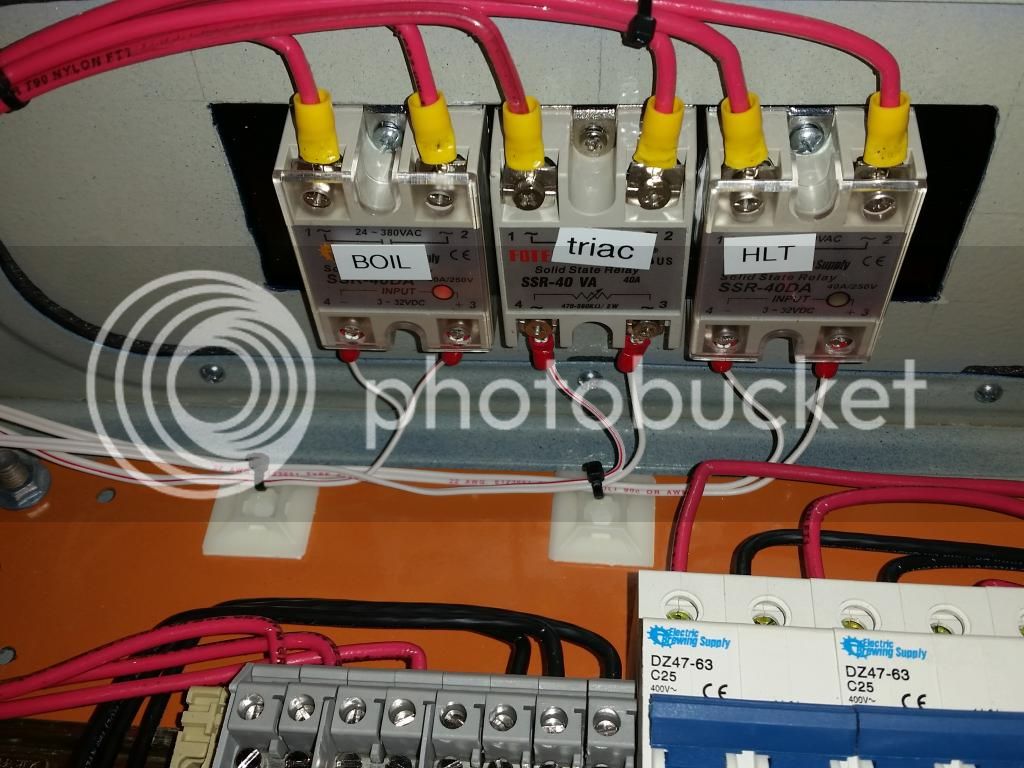
Small update. Due to another project I'm working on the surge from the manual mode boil would not work. But I also use my boil kettle to heat strike water so I wanted to keep the functionality of the PID. So I added a TRIAC controller. I swapped out a 2-way switch for a 3-way switch to flip between the two. I also mounted the potentiometer in a nice open area.
20141102_083258.jpg


When I build the controller I mounted the 2 SSRs just far enough apart to fit another one in between "just in case". Glad I did.
20141102_083342.jpg


I added a second contactor to turn the triac on or off.
20141102_083333.jpg


Since triac controllers do not have liner power out put I didnt think labeling the potentiometer was to important. Repeat ability is easy with the ammeter.
 
New brew stand built. I put the bottom shelf in last night after this picture and did a good sanding on it. Next is to stain/seal it. After that I'll hang my filter on it and plumb it for water. Also starting working on a new CF chiller. It will not be your regular coiled copper tube wrapped in a hose. :D The HLT and stand will get used this weekend for sure. I'm running out of beer! I'll have to boil on propane one more time until I get the chiller finished.
20140320_185639.jpg

Is there a sheet of ply under those 1x6's, and on top of the upper frame?
 
Small update. Due to another project I'm working on the surge from the manual mode boil would not work. But I also use my boil kettle to heat strike water so I wanted to keep the functionality of the PID. So I added a TRIAC controller. I swapped out a 2-way switch for a 3-way switch to flip between the two. I also mounted the potentiometer in a nice open area.

Since triac controllers do not have liner power out put I didnt think labeling the potentiometer was to important. Repeat ability is easy with the ammeter.


If you are using SYL-2352's, you have to change the "P" setting to 1 in order to be able to set "t" to 1 and eliminate the surging during manual control.

Great job on the control panel, super clean wiring!
 
If you are using SYL-2352's, you have to change the "P" setting to 1 in order to be able to set "t" to 1 and eliminate the surging during manual control.

Great job on the control panel, super clean wiring!
I had to change the "i" to 1 as well with my "mypin" pids or they would overshoot their temps in regular auto mode.
 
This thread is EXACTLY what I have been looking for! I am in the process of ordering a 50a PID kit from Ryan now. Between his schematics and your thread, my anxiety should be kept to a minimum. :mug:
 
I have built a system based off of mostly electricbrewsupply's pid kit and have had great success. PIDs and relays make more sense to me as an electrician than the pcboard network systems. the wiring diagrams provided are extremely helpful. I mostly followed electricbrewery's kettle and probe placement design with great success. thanks for the write up, looks fantastic!
 
I am trying to decide between a PID or BCS panel. I'm curious why any of you chose one method over the other.
 
I chose PID since I didn't want to mess with a pc or tablet in the brew area.
 
I had the same thoughts as schelden. I'm an "IT guy" by trade dealing anything from computer hardware trouble shooting to network VPNs. That being said a BCS seemed much more difficult to build and setup. It probably isn't but turning a physical switch or punching a button to set a temperature seemed more straight forward to me.
 
IT here as well. You would think I'd embrace a touch pad in the shop. For me it's stepping away. Both would work and the geeky part of BCS is appealing.
 
Back
Top