Sean_SA
Well-Known Member
- Joined
- May 24, 2020
- Messages
- 46
- Reaction score
- 6
Hi guys
I am converting a 12000BTU portable AC into a glycol chiller.
The AC unit I'm converting seems to be pretty identical to the unit used in this post Making a DIY 12000 BTU/hr Glycol Chiller - a BrewUnited blog entry
I've successfully bent the evaporator into the right position. All I need to do now is bypass the stock thermostat. Which in some ways seems easy enough but as this AC can heat and cool and had multiple modes, I just need to make sure I understand how the wiring works 100%. I also don't want to cut power supply to other components that will need it.
Below is the thermostat board. The fan that blows the evaporator has been removed and disconnected from the board.
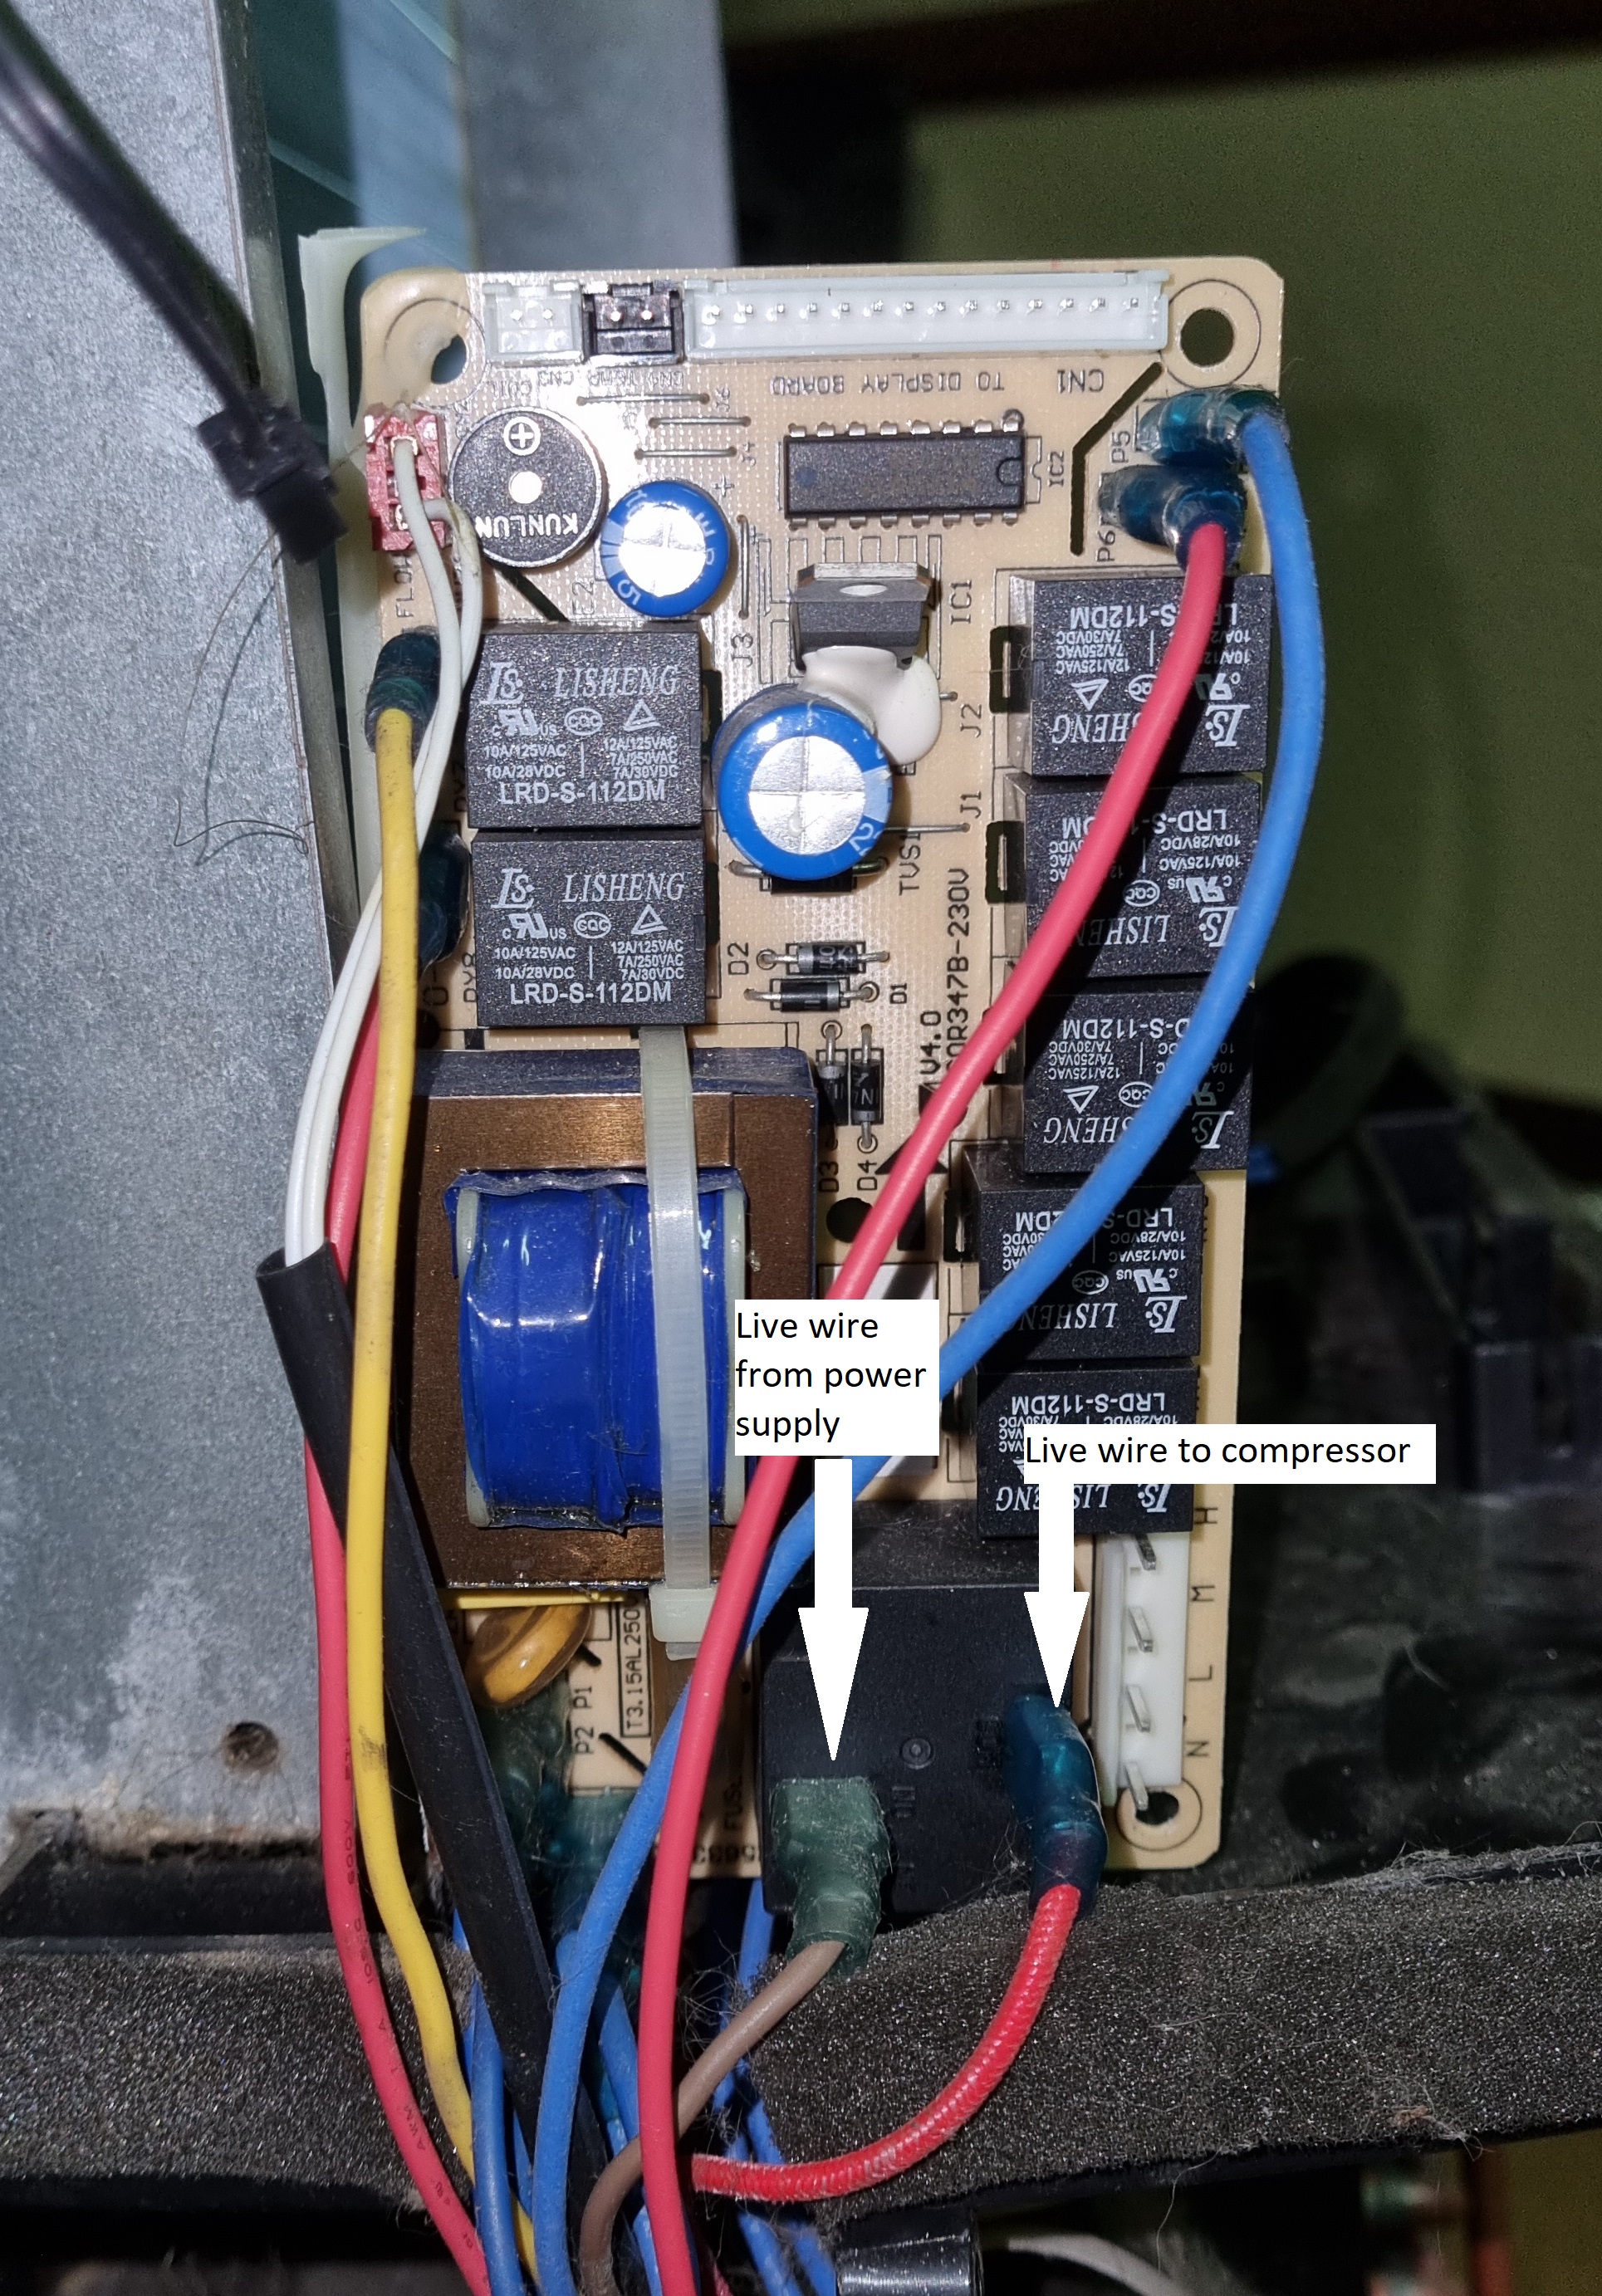
As indicated above, the live brown wire comes from the main power supply cable. The red wire next to it runs to the compressor. First instinct is to get a temp controller in between the brown wire and the red but it looks like there are other important components connected to this board, that require the power supply as well, such as the condenser fan.
So the crux of this post is to find out what needs to stay connected or get rewired in order for this function properly when controlled by a temp controller.
If it makes it easier I'll illustrate the routing of the wires below:
Starting with the condenser fan...
The red and yellow wires from the condenser fan are connected to the ports shown on the board. Labelled O-H and O-L ... is the one for low fan speed and the other for high fan speed?


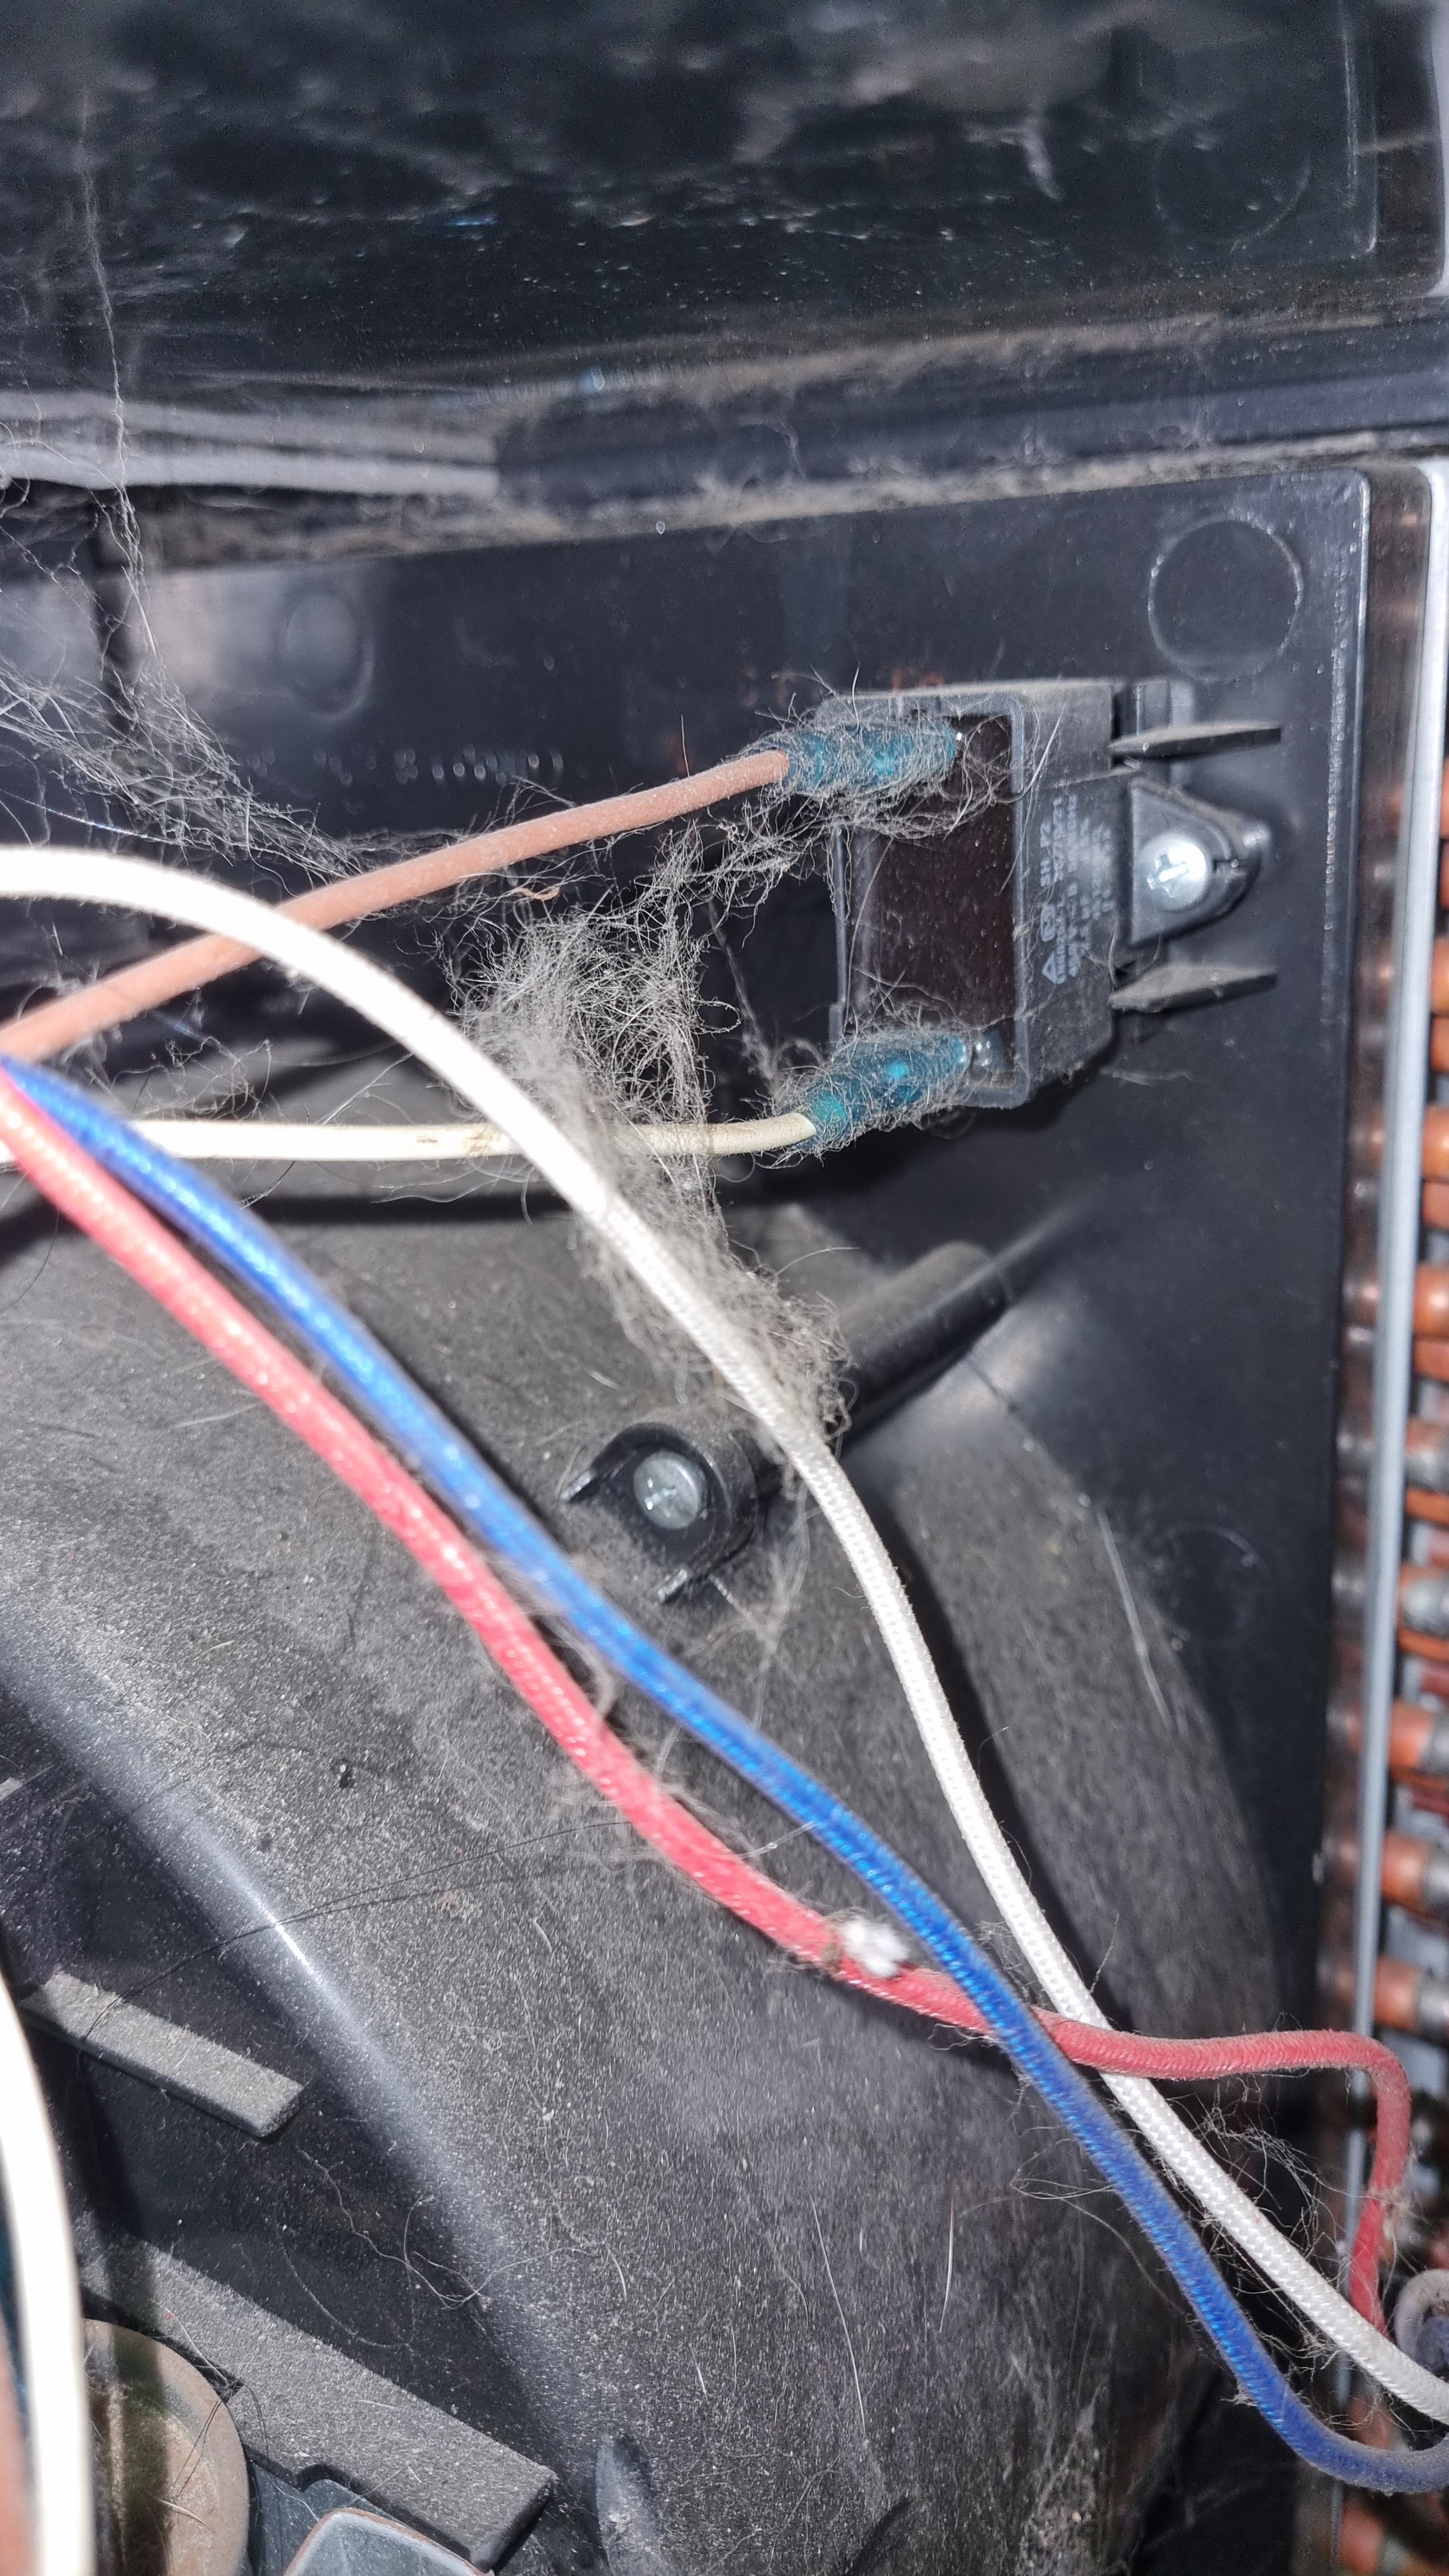
Then there is a brown and white wire for the condenser fan and they both go to this block which sits above the condenser fan. I'm not sure what it is, a fuse maybe?
The blue wire from the condenser fan goes into port labelled P3 on the board (shown with arrow below)

Thats the condenser fan covered... now for the other parts.
The red plug with 2 split white wires shown below...

...goes to this component behind the condenser fan, don't know what it is. Perhaps the water tank level detector .Just a wild guess.

The red wire indicated below with the white arrow, which connects to port P6 and is also labelled PUMP

...goes to this component here. Also unsure what it is. There is also a blue wire coming from this component connecting to port P2 on the board.

Then there is this part with 2 blue wires coming from it
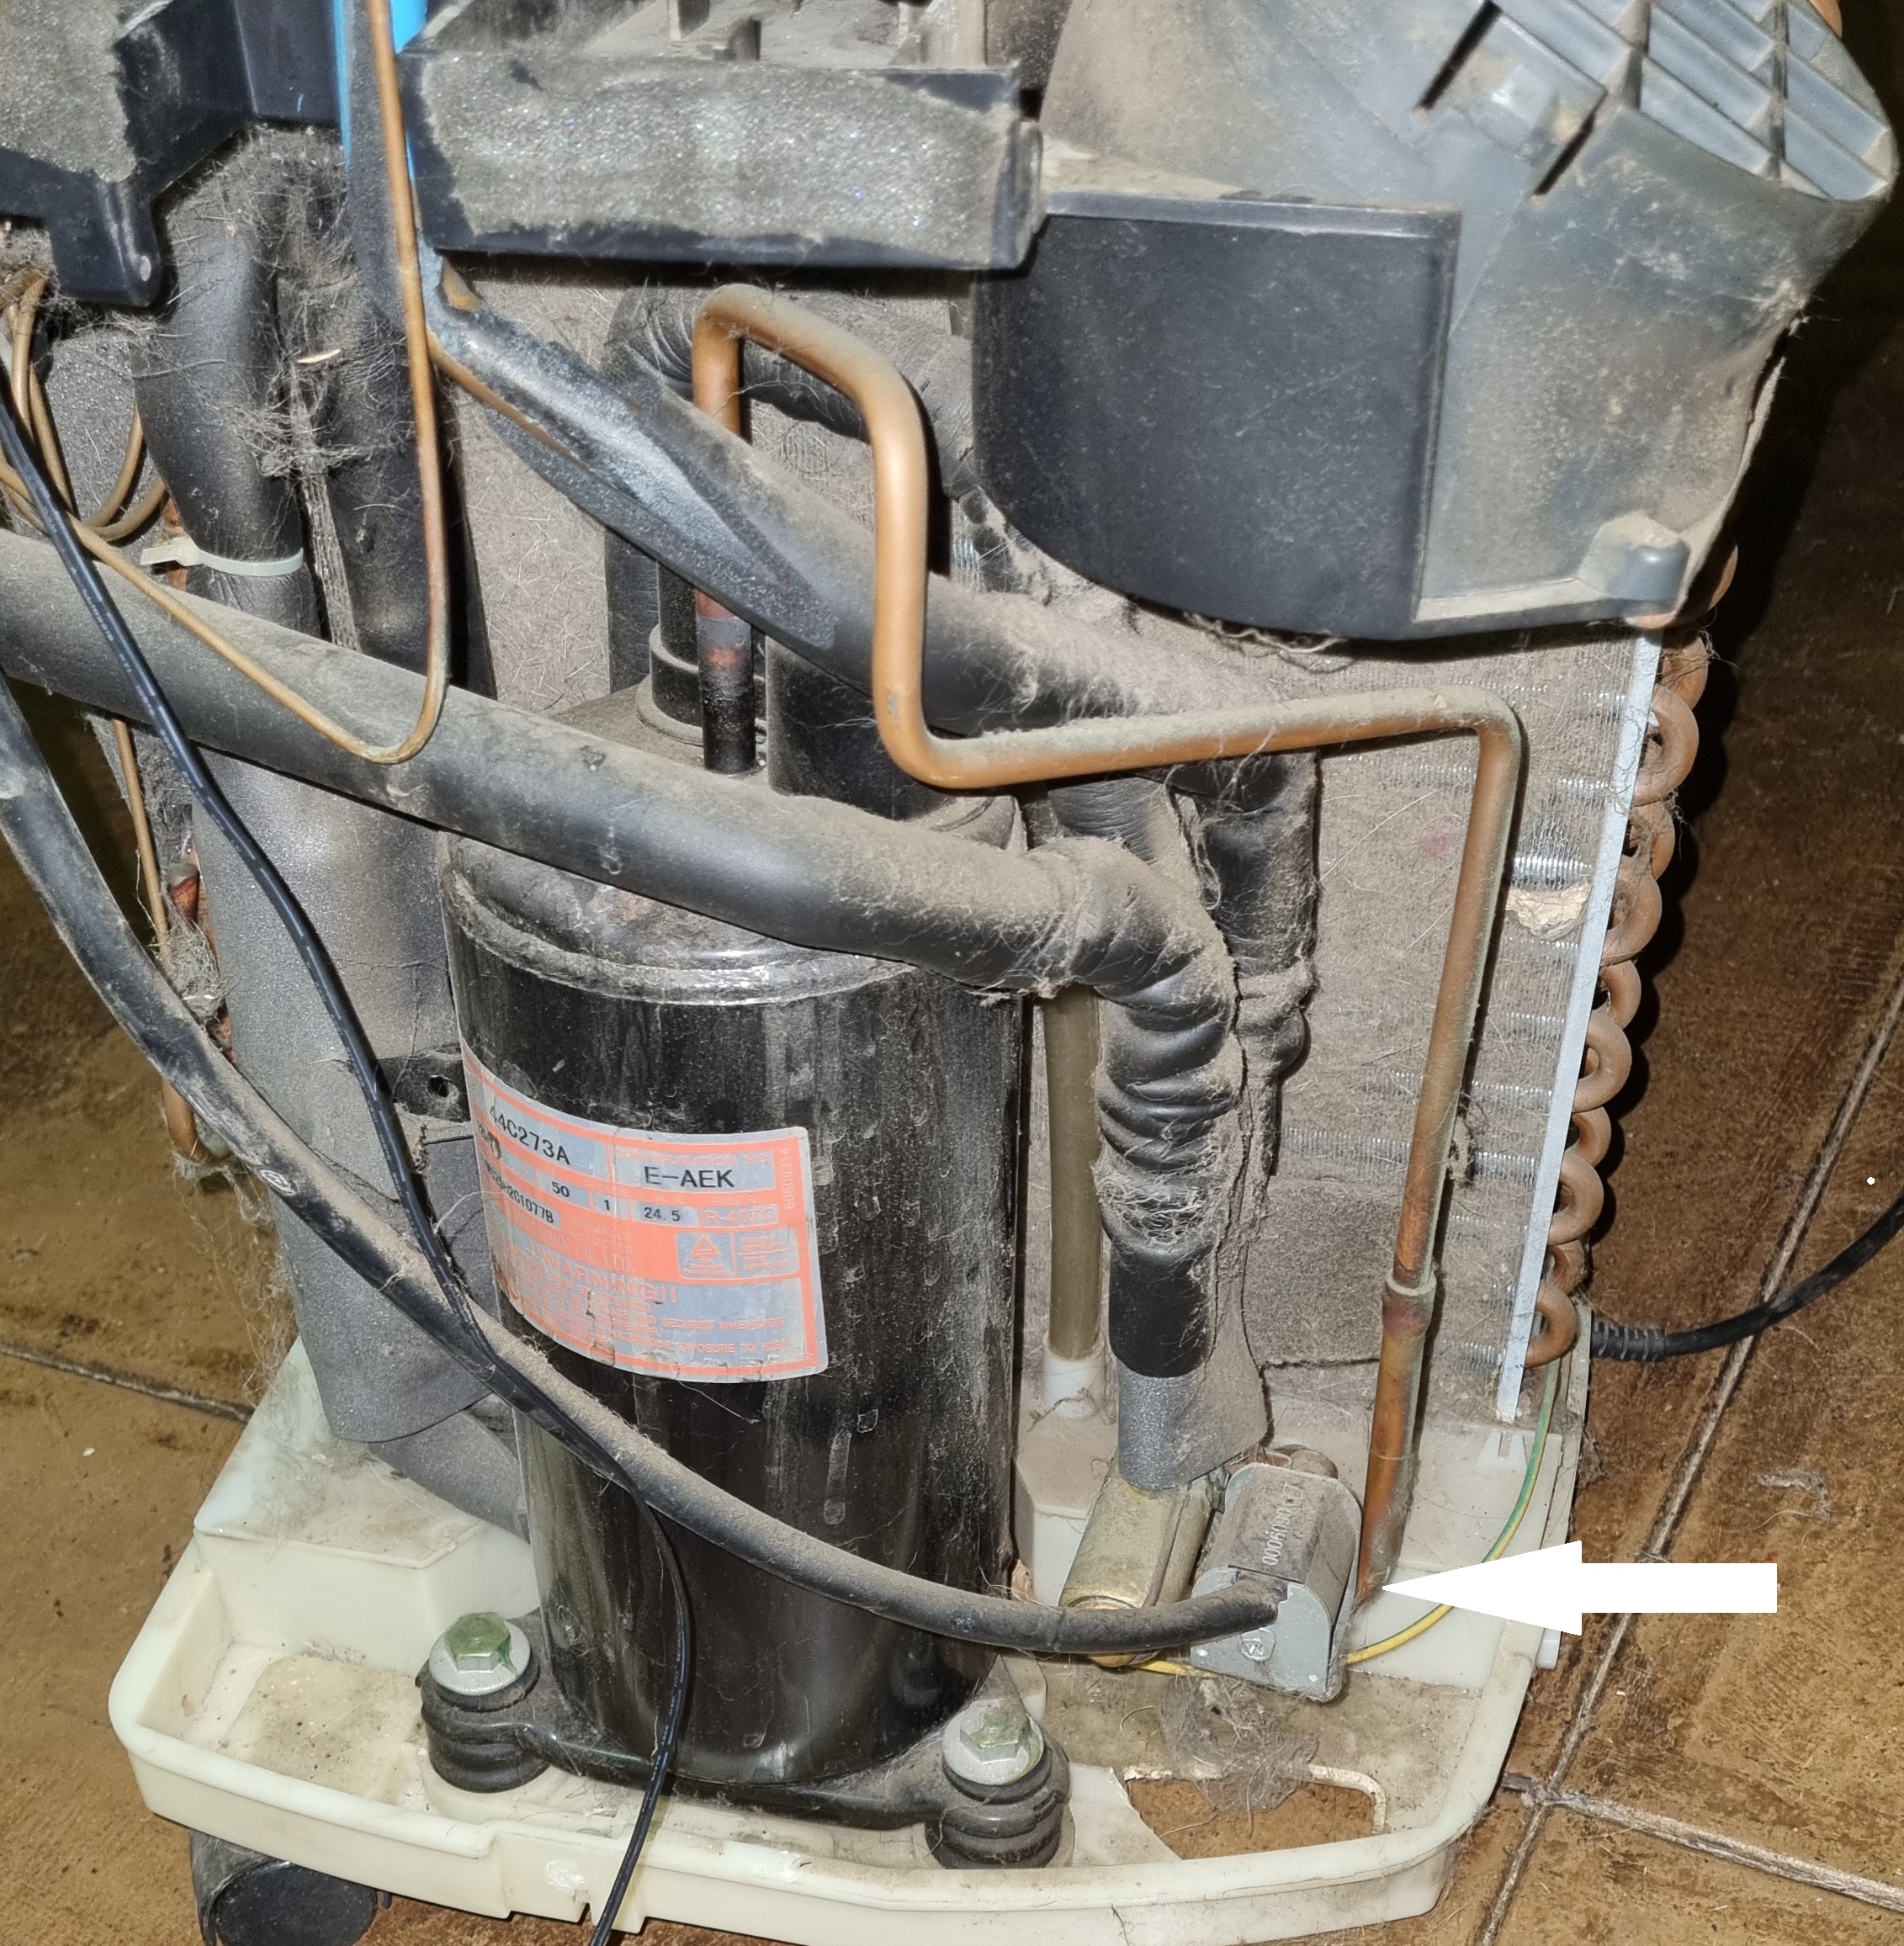
The one blue wire goes into port P4 on the board and the other blue wire goes into a port labelled P5 and 4 WAY as shown below
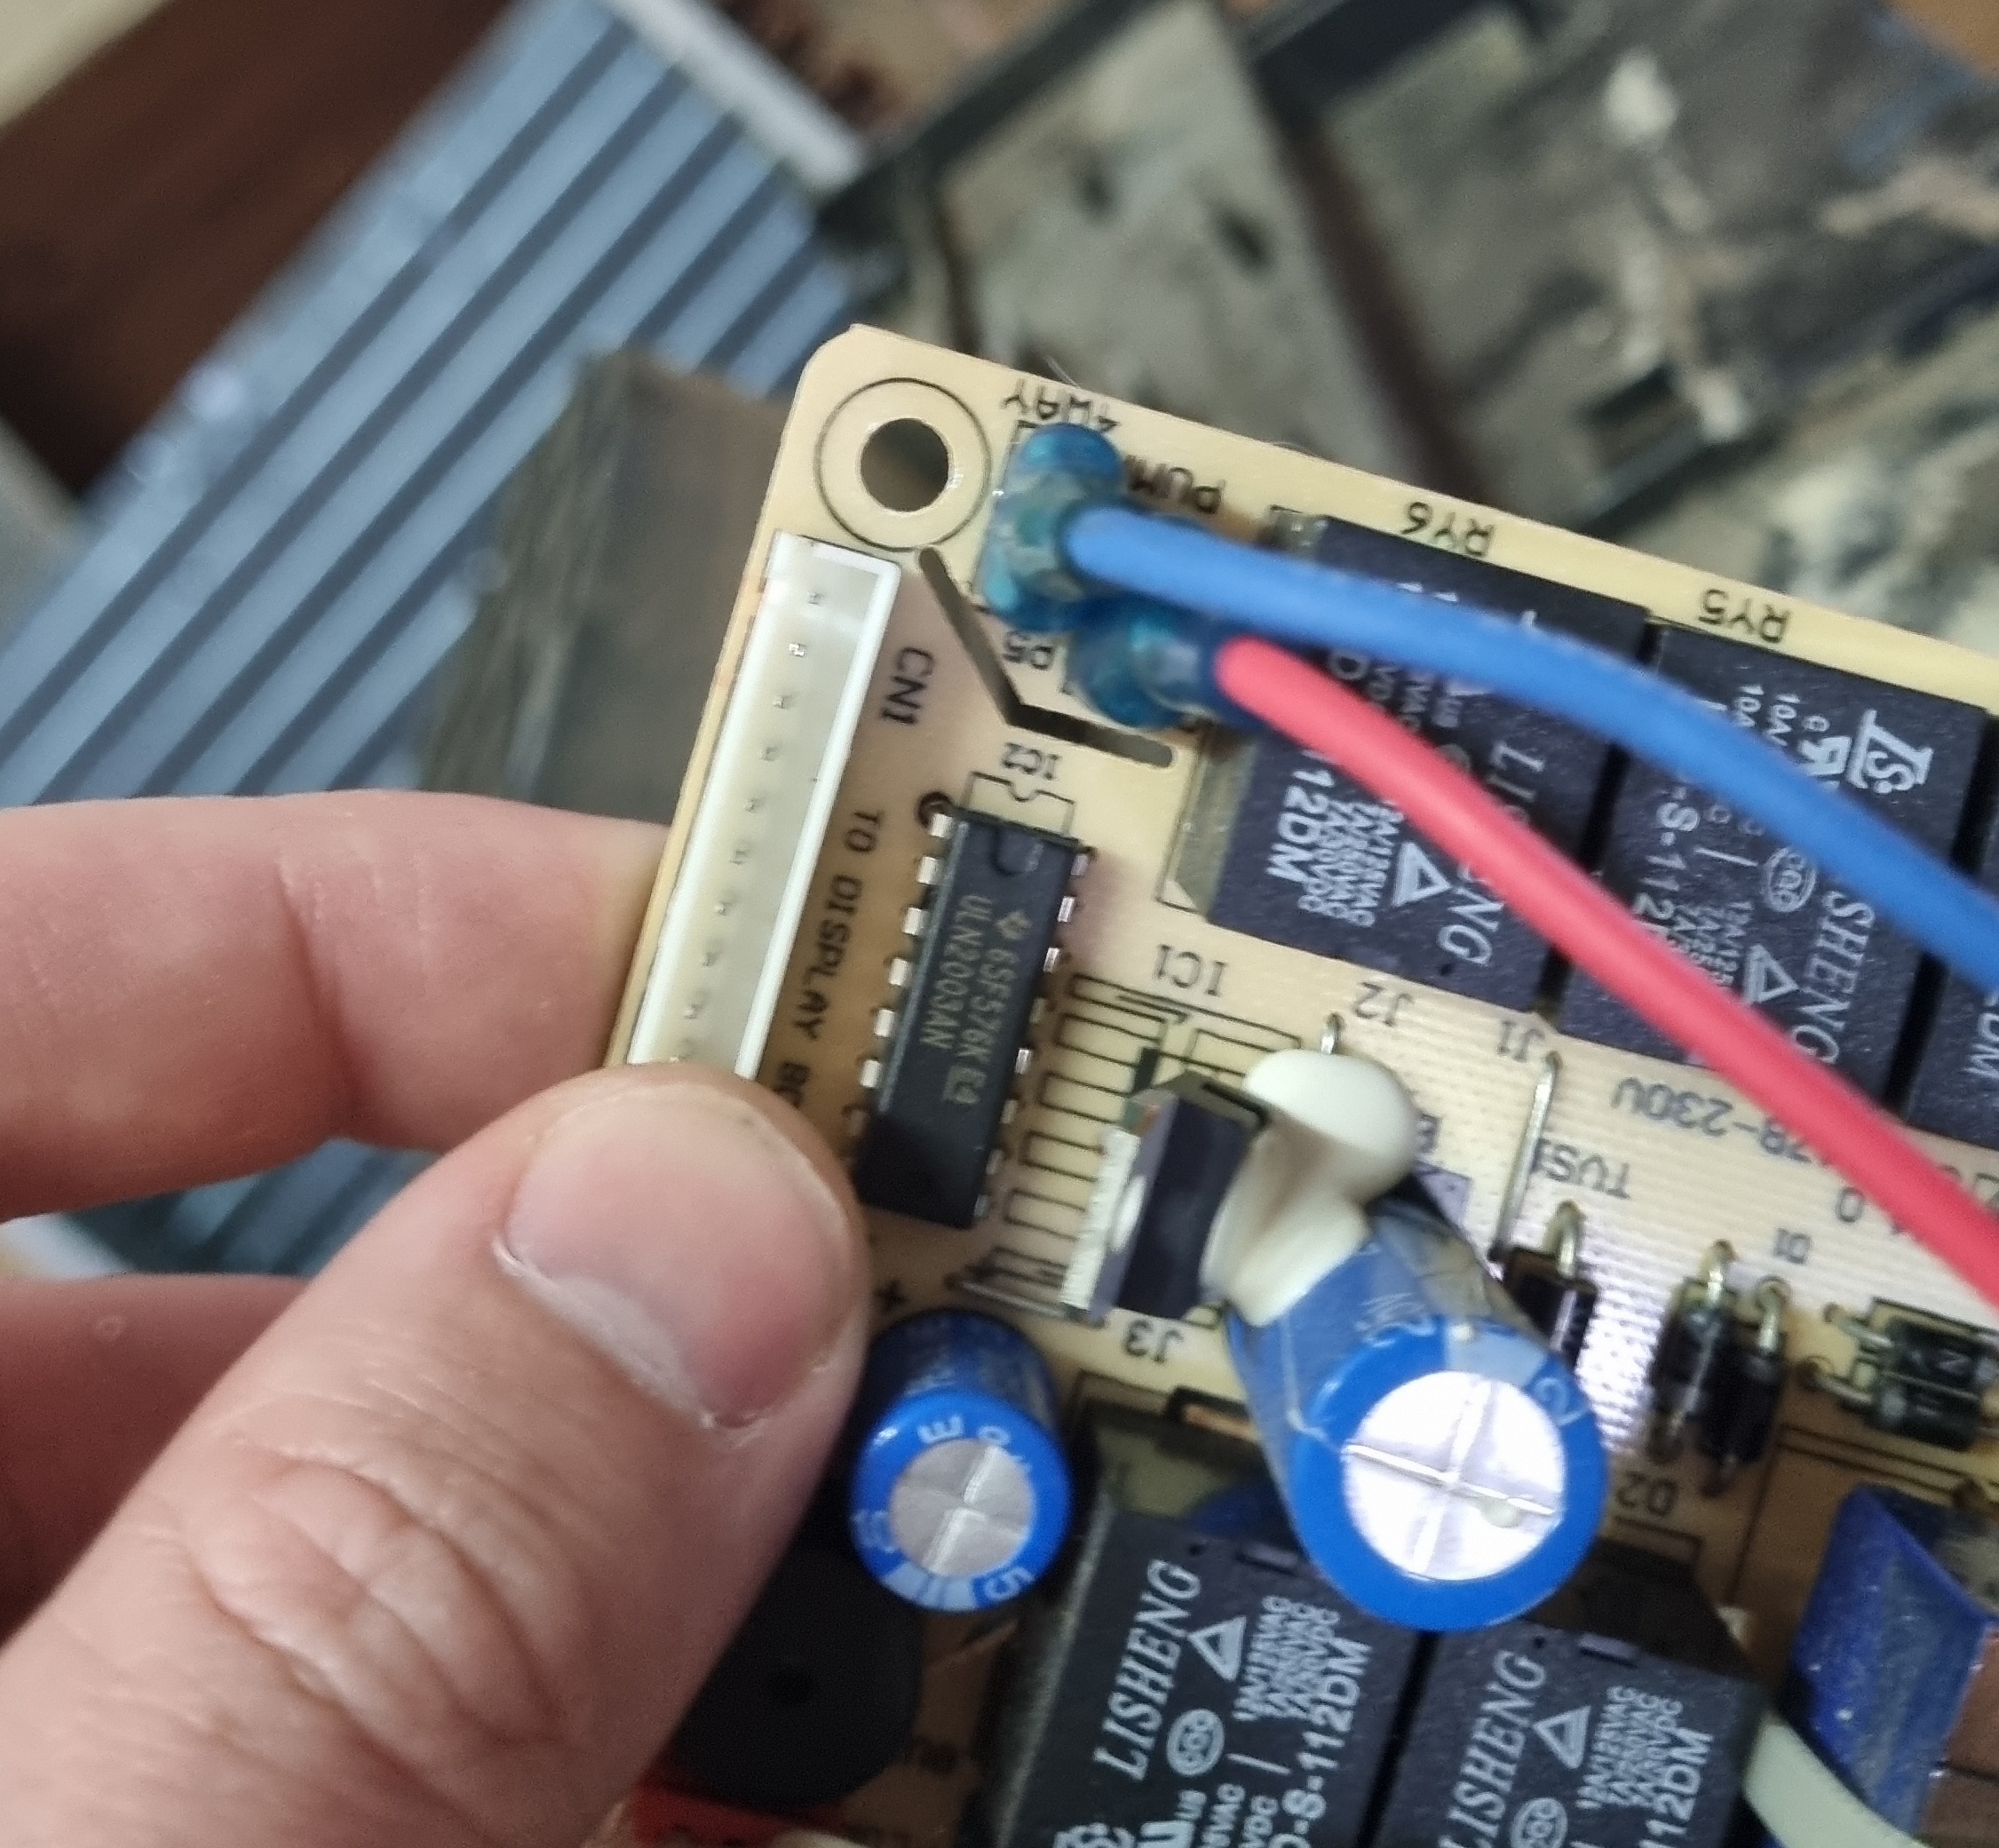
Otherwise what hasn't been shown here is the neutral wire that comes from the main power supply which goes into port P1
From port P4 as well there is a blue wire that goes to the capacitor and from the capacitor there is a blue and white wire which both go to the compressor.
Bit of a tedious post and I hope some of you have read through it and understand what I was trying to get across. Hopefully you guys can help me understand everything here better so I can bypass the thermostat with no issues.
Any help is always appreciated on this awesome forum,
Cheers
I am converting a 12000BTU portable AC into a glycol chiller.
The AC unit I'm converting seems to be pretty identical to the unit used in this post Making a DIY 12000 BTU/hr Glycol Chiller - a BrewUnited blog entry
I've successfully bent the evaporator into the right position. All I need to do now is bypass the stock thermostat. Which in some ways seems easy enough but as this AC can heat and cool and had multiple modes, I just need to make sure I understand how the wiring works 100%. I also don't want to cut power supply to other components that will need it.
Below is the thermostat board. The fan that blows the evaporator has been removed and disconnected from the board.

As indicated above, the live brown wire comes from the main power supply cable. The red wire next to it runs to the compressor. First instinct is to get a temp controller in between the brown wire and the red but it looks like there are other important components connected to this board, that require the power supply as well, such as the condenser fan.
So the crux of this post is to find out what needs to stay connected or get rewired in order for this function properly when controlled by a temp controller.
If it makes it easier I'll illustrate the routing of the wires below:
Starting with the condenser fan...
The red and yellow wires from the condenser fan are connected to the ports shown on the board. Labelled O-H and O-L ... is the one for low fan speed and the other for high fan speed?


Then there is a brown and white wire for the condenser fan and they both go to this block which sits above the condenser fan. I'm not sure what it is, a fuse maybe?

The blue wire from the condenser fan goes into port labelled P3 on the board (shown with arrow below)

Thats the condenser fan covered... now for the other parts.
The red plug with 2 split white wires shown below...

...goes to this component behind the condenser fan, don't know what it is. Perhaps the water tank level detector .Just a wild guess.

The red wire indicated below with the white arrow, which connects to port P6 and is also labelled PUMP

...goes to this component here. Also unsure what it is. There is also a blue wire coming from this component connecting to port P2 on the board.

Then there is this part with 2 blue wires coming from it

The one blue wire goes into port P4 on the board and the other blue wire goes into a port labelled P5 and 4 WAY as shown below

Otherwise what hasn't been shown here is the neutral wire that comes from the main power supply which goes into port P1
From port P4 as well there is a blue wire that goes to the capacitor and from the capacitor there is a blue and white wire which both go to the compressor.
Bit of a tedious post and I hope some of you have read through it and understand what I was trying to get across. Hopefully you guys can help me understand everything here better so I can bypass the thermostat with no issues.
Any help is always appreciated on this awesome forum,
Cheers


