DrBrewlittle
Member
For some time now, I've been wanting to keg my brews, as there is not enough fridge space in my wife's and my apartment for a 5 gal batch of bottles, besides the obvious chore of bottling and waiting 2-3 more weeks to drink the product. Plus, I greatly disliked sharing bottles with friends and having to carefully decant off the yeast. Kegging had all the answers, but there isn't a good spot in our apartment for a free-standing kegerator that would please both SWMBO and myself.
There is a built-in desk area that we don't use as a desk, but it is too short to slide anything but a 1.7 cu ft fridge underneath, and I want to use 5 gallon kegs ideally. Using a store-bought fridge would not work. After looking at all of the custom fermentation chamber and kegerator builds on here, I arrived at the idea of creating my own with the guts from an old mini fridge and some rigid foam panels and building it all underneath the desk. There already was a 2" hole drilled in the center rear of the granite intended for power cords for the desk. I decided that hole would be the perfect spot for a draft tower and lines.
SWMBO normally lets me use the area underneath the desk for fermentation. I've been fermenting a double IPA using a Coleman cooler as a cool water reservoir for the SS Brewtech FTSs along with my Brew Bucket. I'll build the fridge so there remains space on the side to fit the brew bucket, and run the cooling lines for the FTSs into a water reservoir inside the fridge, removing the need for the cooler.

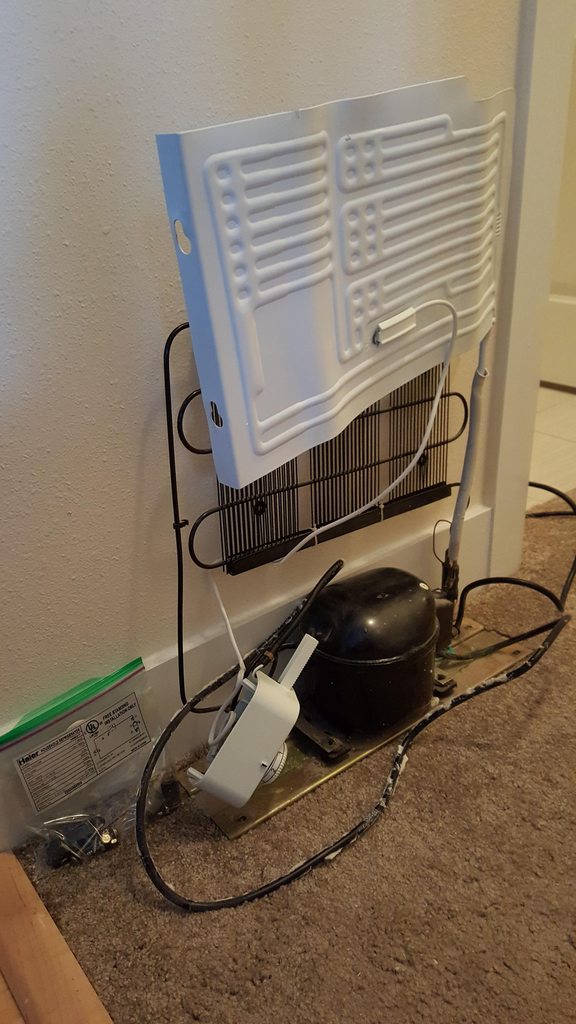
First, I acquired an old mini fridge with an ice chamber as the cooling element and the condenser on the back as black coils. This made the extraction much easier than it would have been on a newer fridge with the condenser coils built into the sides of the fridge. Here's the guts of the fridge all removed and waiting to be used.
I made trips to Home Depot and Menards for supplies. Bought two 1" thick sheets of aluminum-faced polyisocyanurate foam, foil tape, and some tools and extras to complete the project. I used a jigsaw and a knife-edge blade to cut the foam out. I doubled up the sheets to make all sides 2" thick. I made a few test fits as I was cutting out the panels.
Here's one of those test fits with the top, bottom, and left side panel in place. Fridge guts on the right.

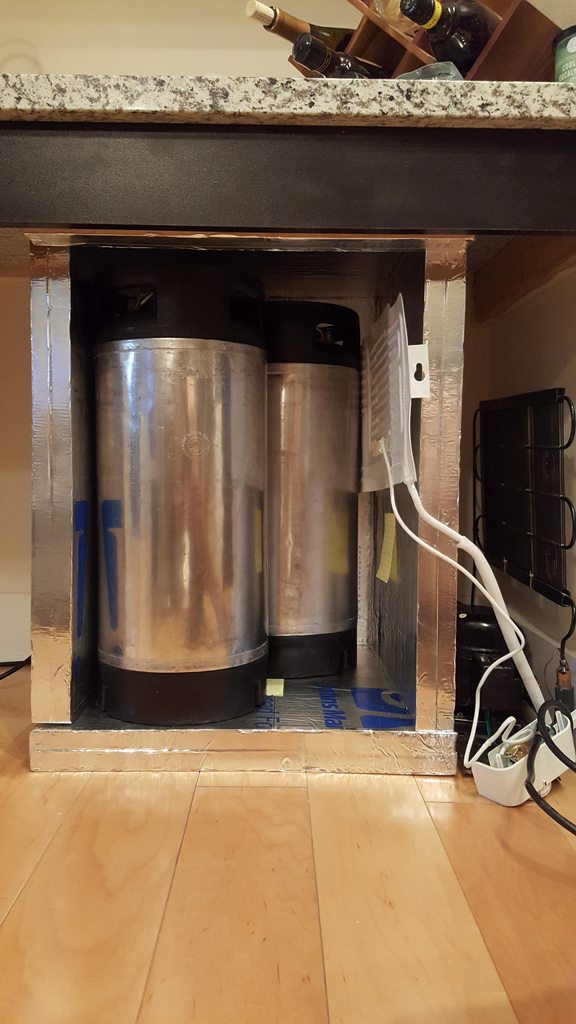
Here's a test fit with all side panels together except for the door, with two pin lock kegs (could not use ball locks due to their height).
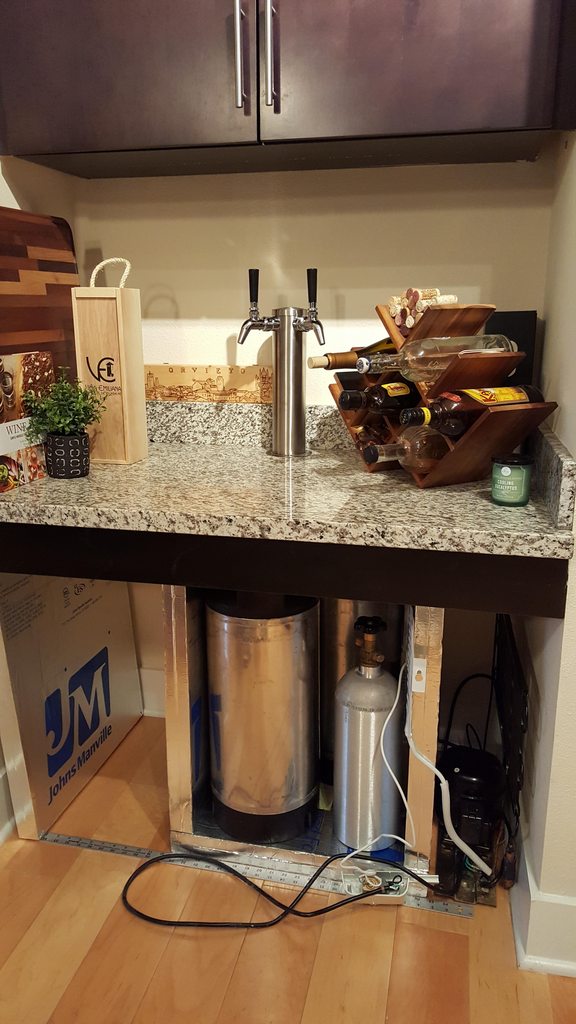
And with the tap tower set in place! This is where it really starts to look like a kegerator.
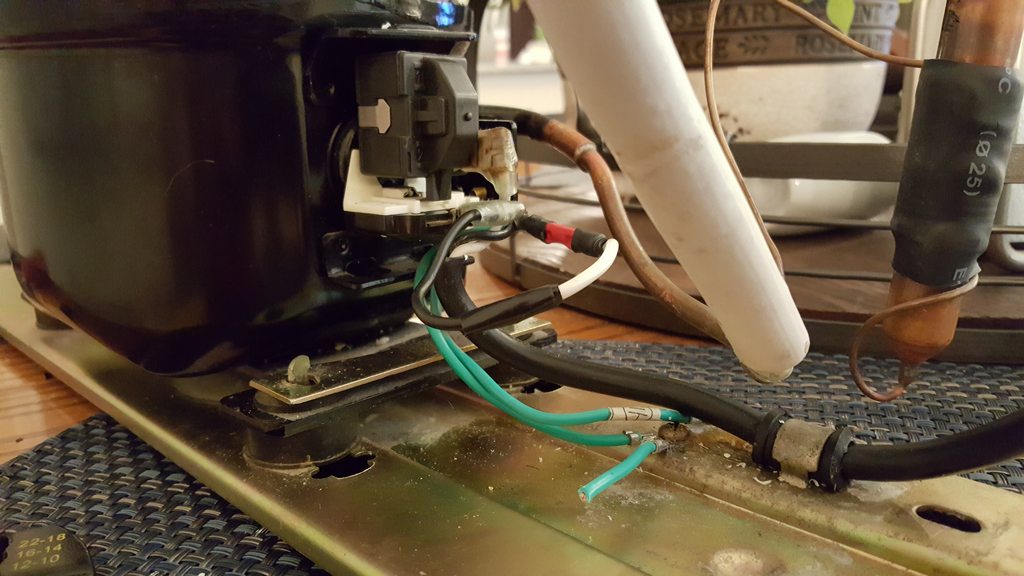
I wanted to wire in a digital temperature controller to replace the old fridge's dial and chose the STC 1000 because I could wire it in and easily be able to have access to the controls from the front. It was a bit of a challenge wiring it in, but I basically removed the old thermostat that acted as a switch and spliced those positive and neutral wires together, then wired in the STC 1000 at the power cord using another tutorial/diagram on this site (https://www.homebrewtalk.com/showthread.php?t=385792).
Fridge wiring up close

Spliced the hot and neutral wires together from the fridge's thermostat.
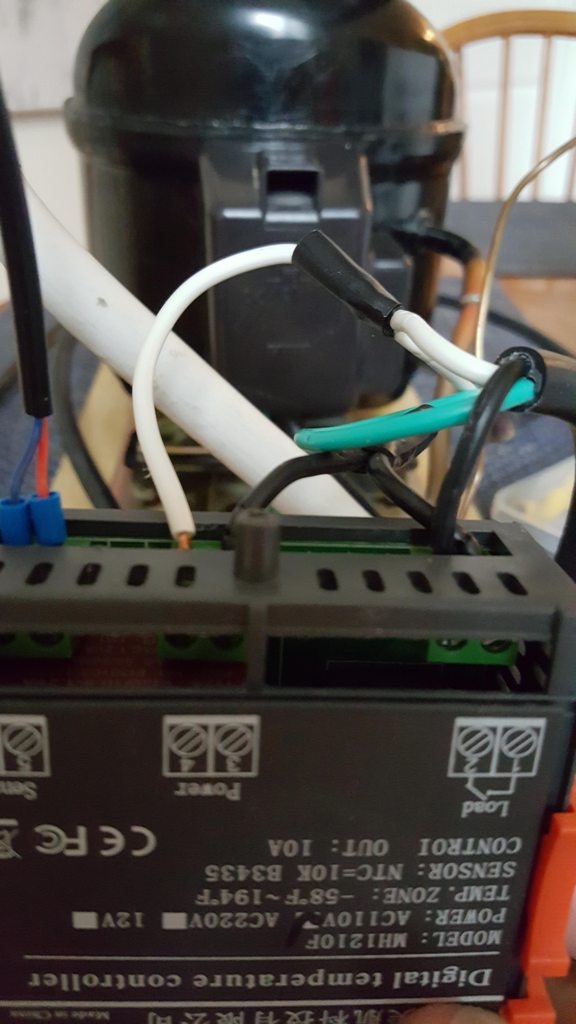
Wired in the STC 1000 according to the diagram in the other thread.
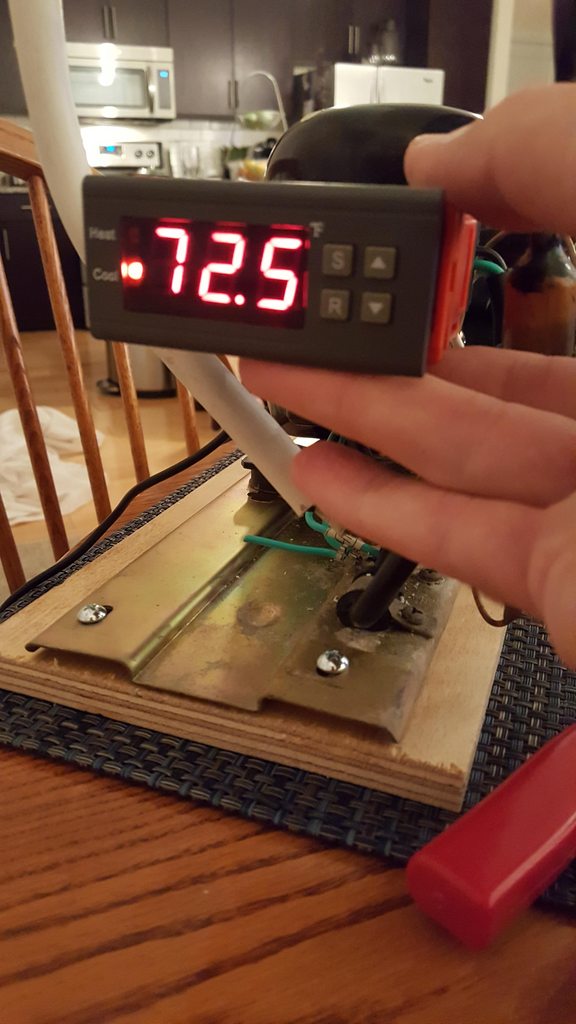
It works! (72.5 is the current temp)
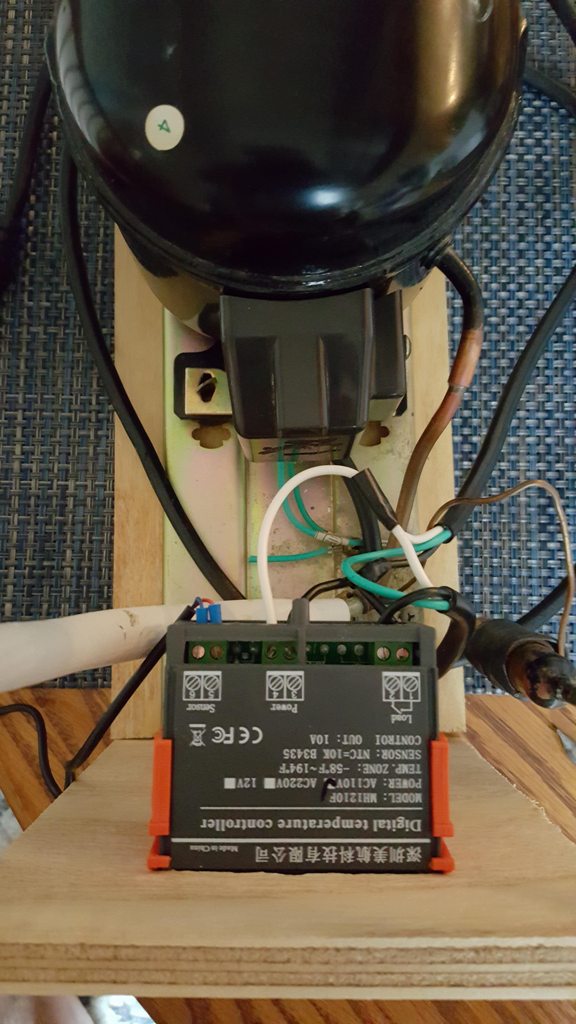
Used a jigsaw to cut out a pocket hole in some plywood and slid the STC 1000 into it.
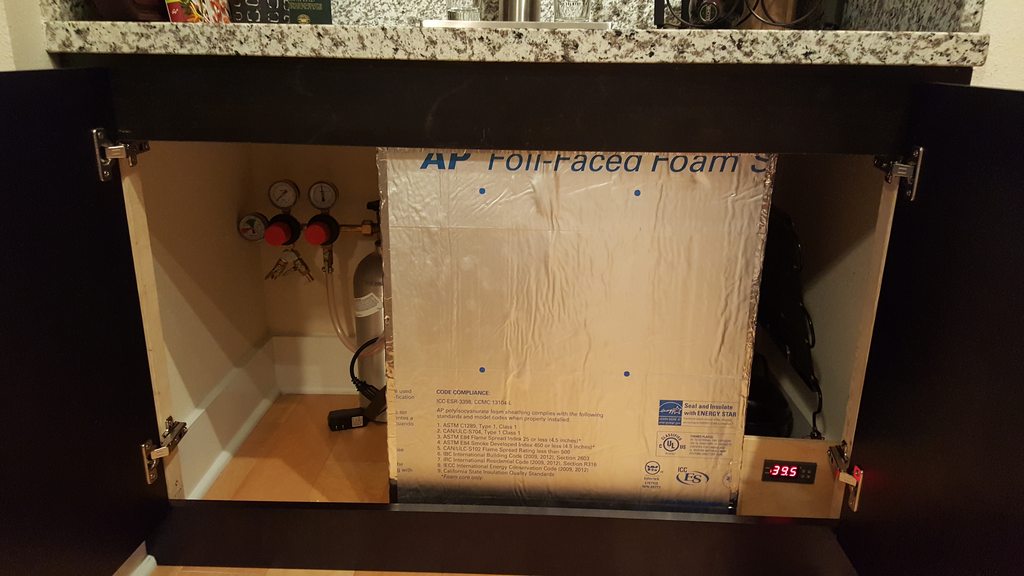
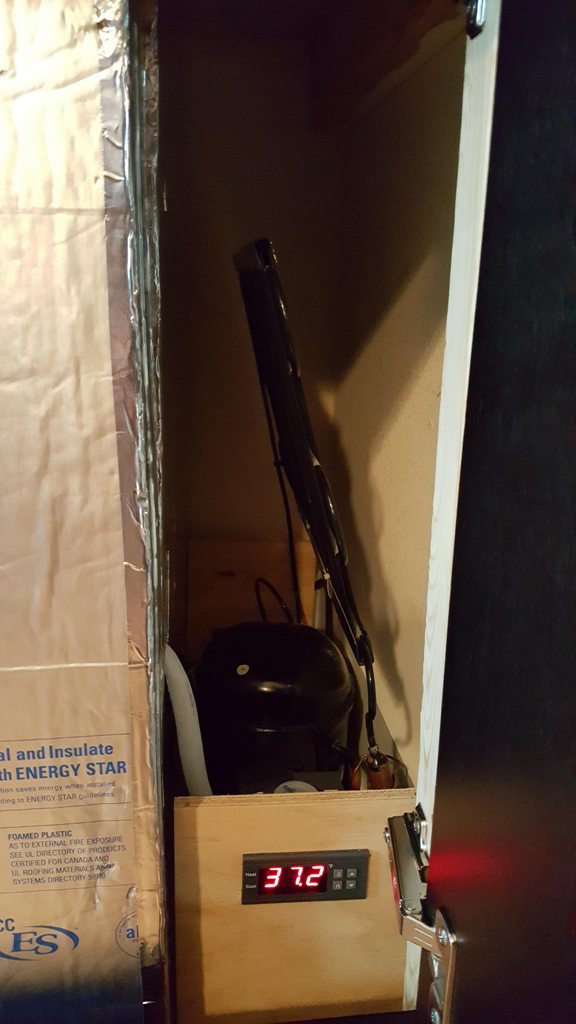
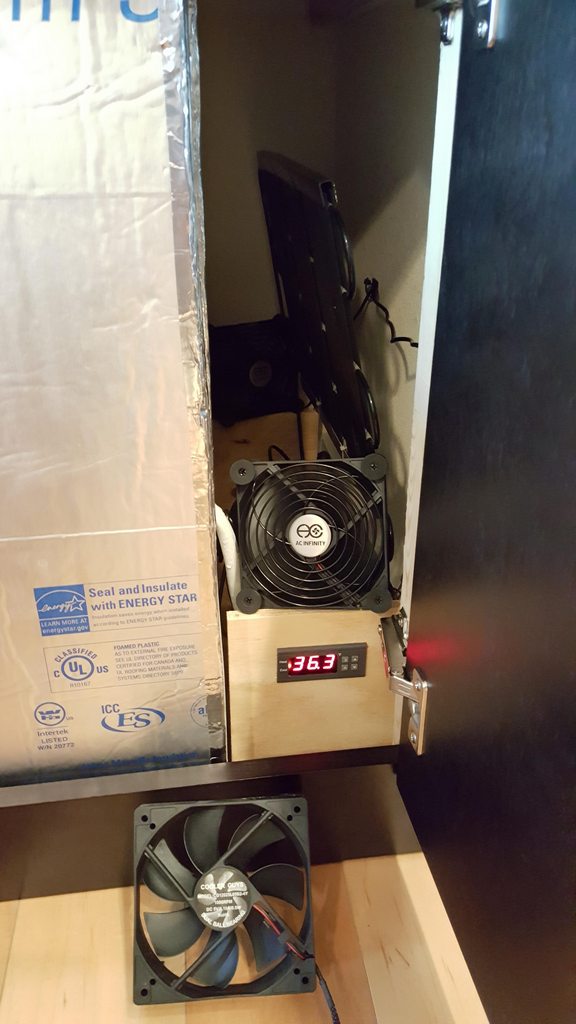
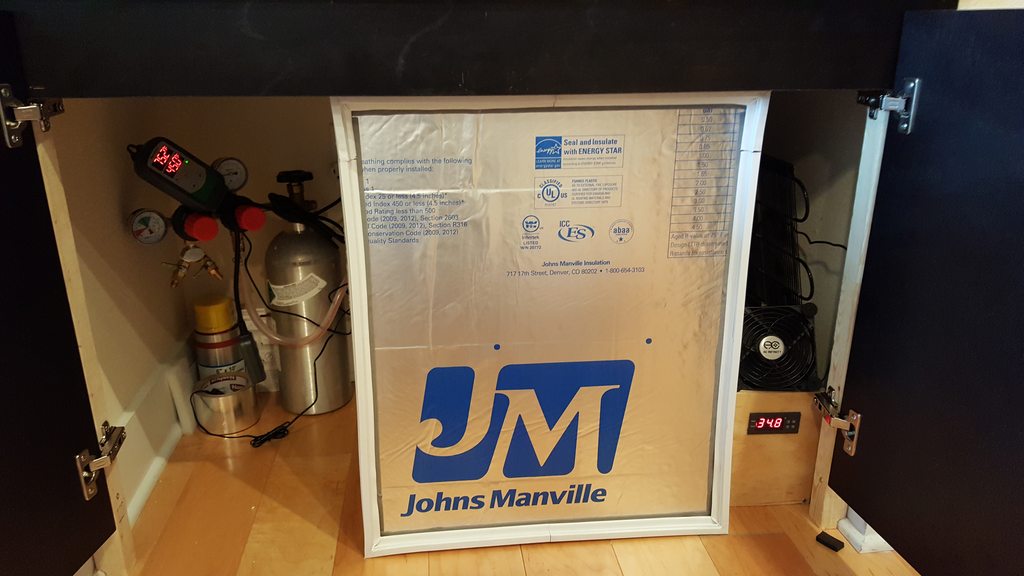
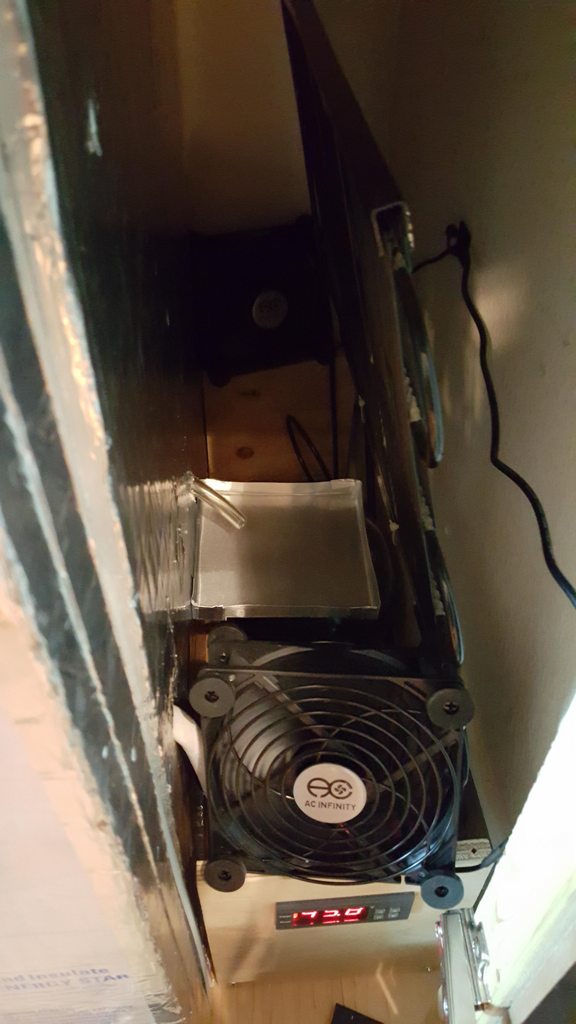
I built a surround for the fridge compressor and placed the 5# CO2 bottle and regulator on top of it. I used foil tape and friction pressure to join all of the foam panels to finish the box. I carefully cut holes for the CO2 lines, the fridge evaporator line, and the power cord for the tower cooling fan, then blocked off any exposed foam with foil tape. I used weather stripping tape to line the door and make it as air-tight as possible.
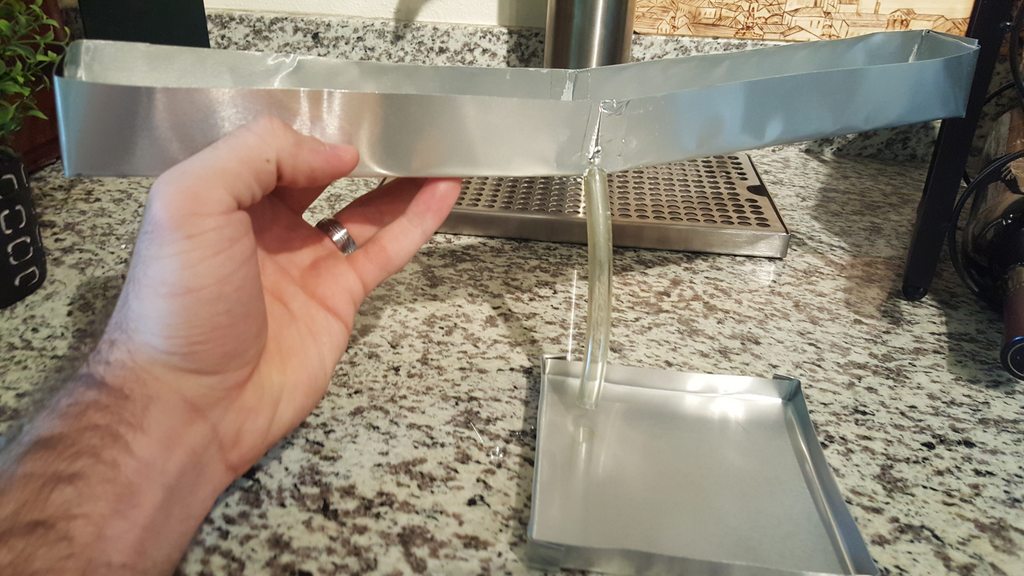
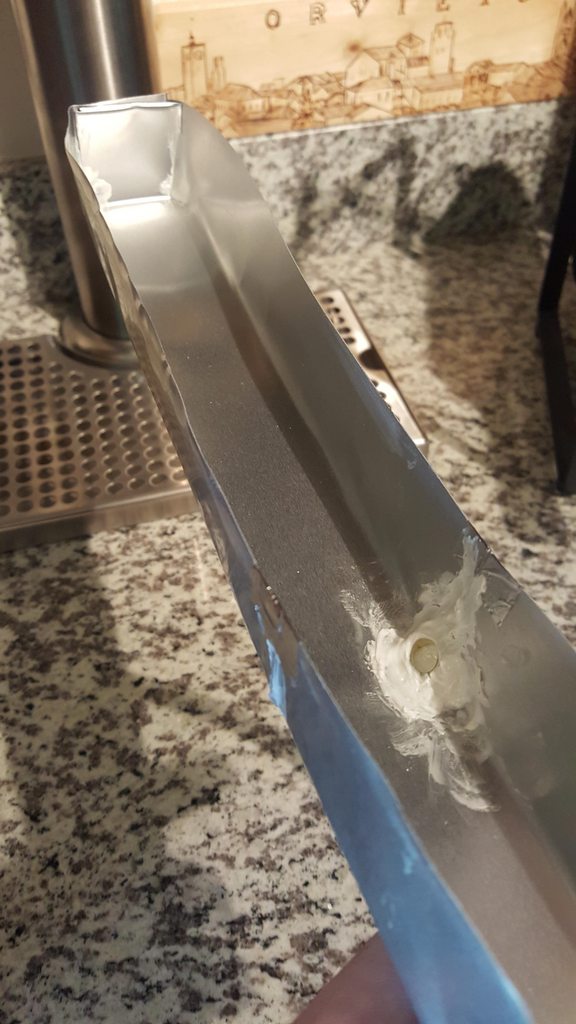
Since this is an apartment and not my own house, I wanted to minimize the damage/alteration of the actual apartment property itself, and there was no way I was going to drill through the granite countertop. I used a bunch of small command strips (12 of the tiny ones) all along the bottom of the flange to attach the draft tower to the countertop. It's a solution that works, but not perfect. The tower is secure as long as you don't yank on it. I added a 12" drain plate with a cutout for the tower and stuck small rubber feet to the bottom of it to prevent sliding. To conceal the entire thing, I found a source for the same exact cabinet doors and panels that are in the rest of the kitchen and test-fit them in front of the fridge.
I took some 2x2's and some angle brackets and attached the cabinet doors.
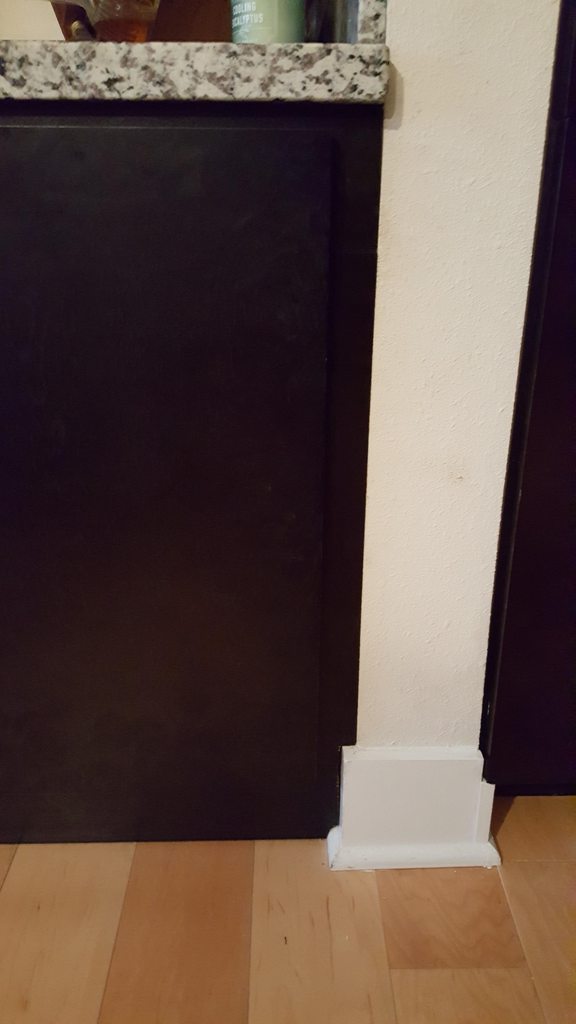
I took the matching cabinet panels and used the jigsaw to carefully cut out pieces that fit the border around the doors perfectly.
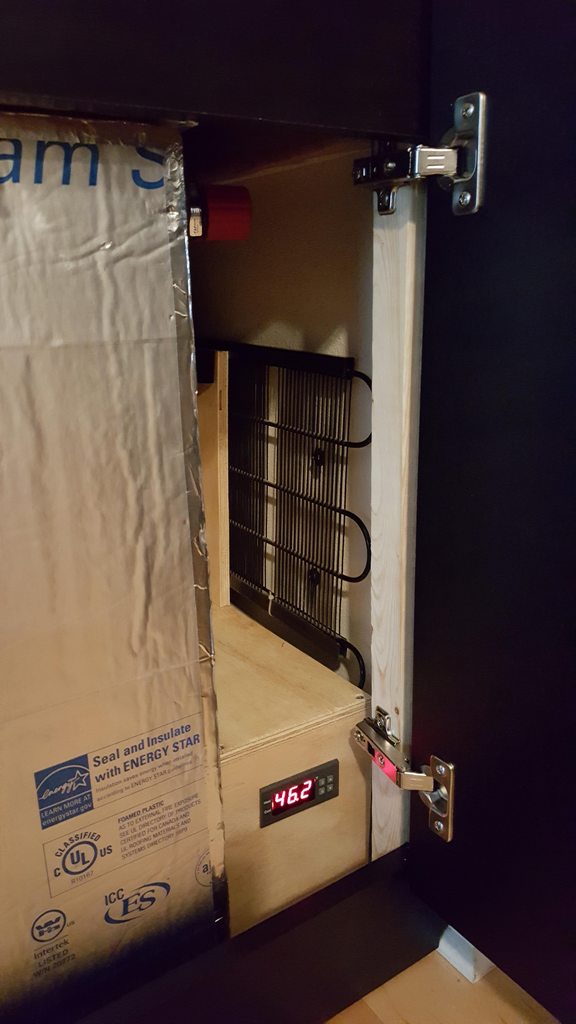
The hinges work! I also made a floor panel that isn't fastened in so I can remove it to open the fridge door and slide the brew bucket in on the side.

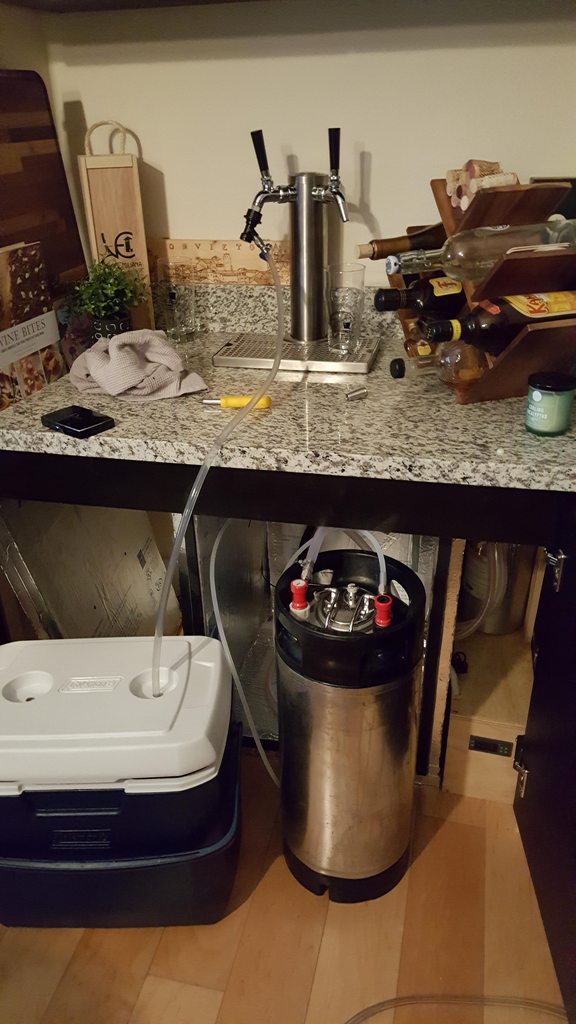
Purging the keg with CO2 while running Star San through the whole system. LOVE the Intertap faucets for their versatility. Hooked up a ball lock fitting to the spout and drained my sanitizer back into the cooler to use for sanitizing other parts.
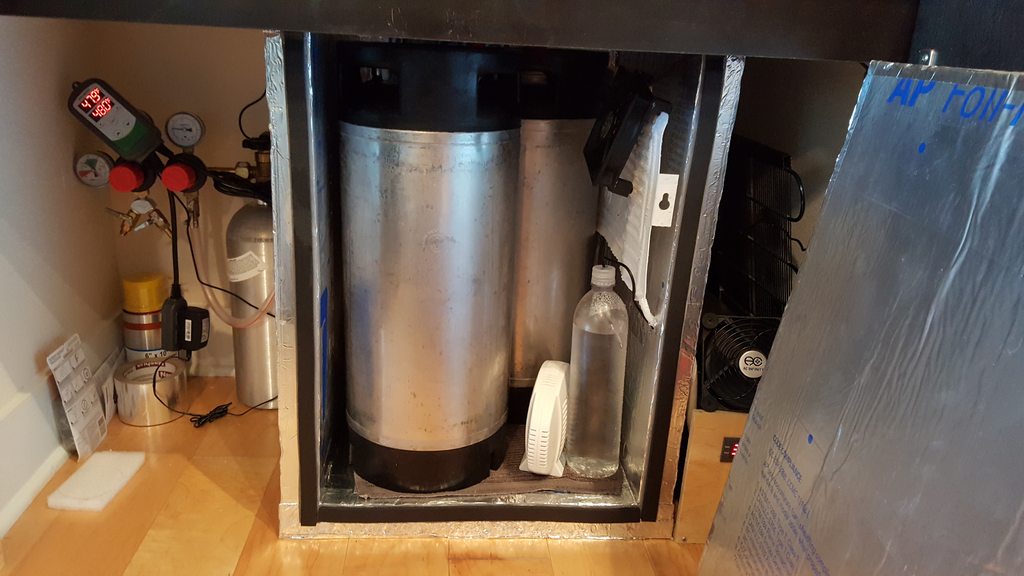
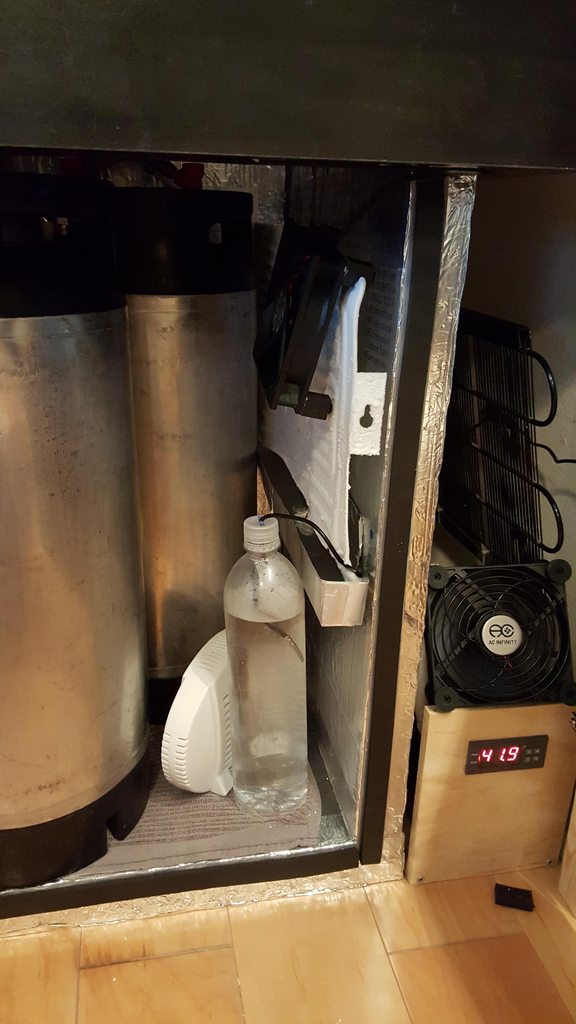
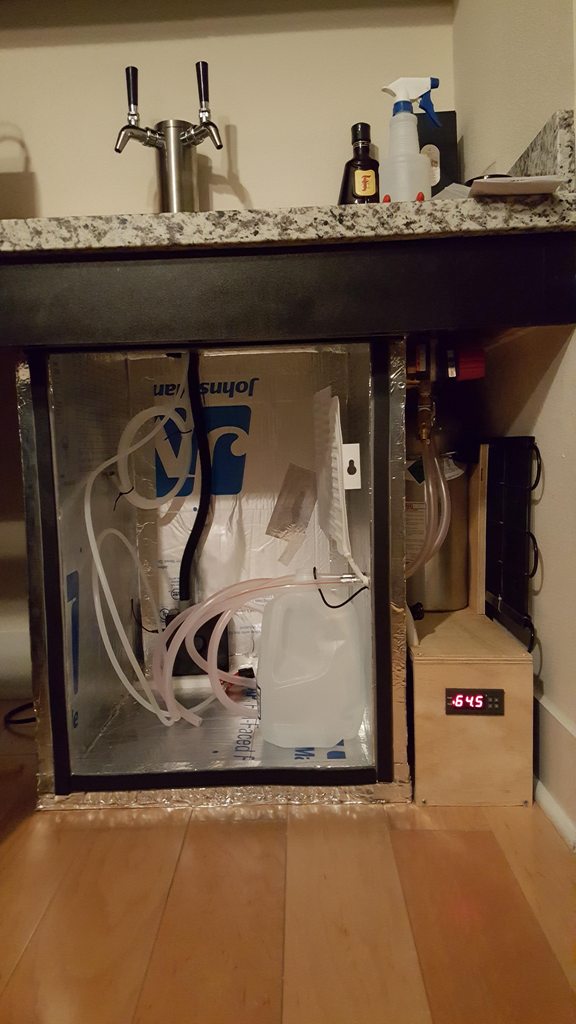
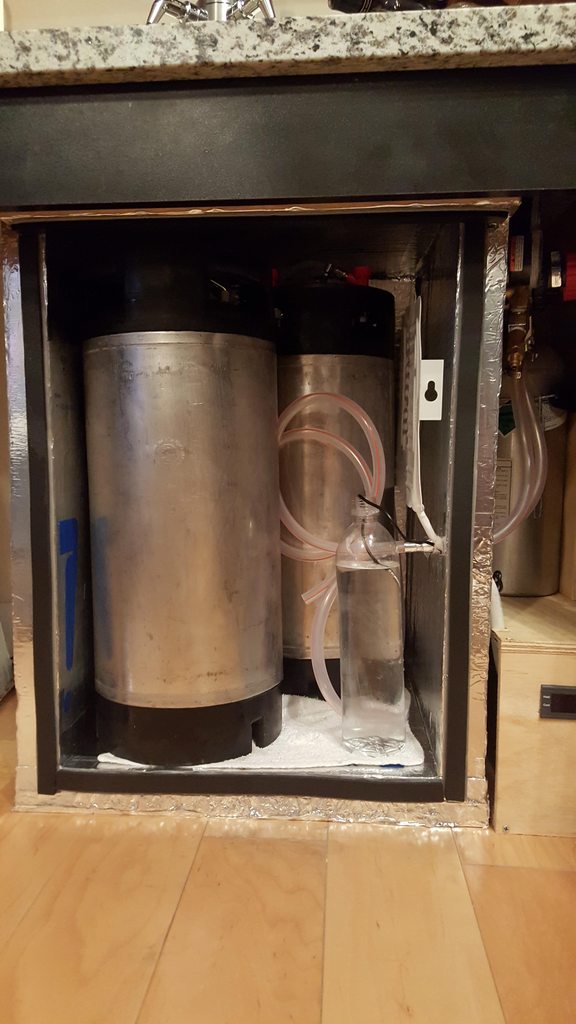
Two kegs in the fridge! Filled one with ice water to aid in cooling so the compressor isn't overworked. Placed the temperature probe inside the water bottle to modulate the temperature values read by the STC 1000.
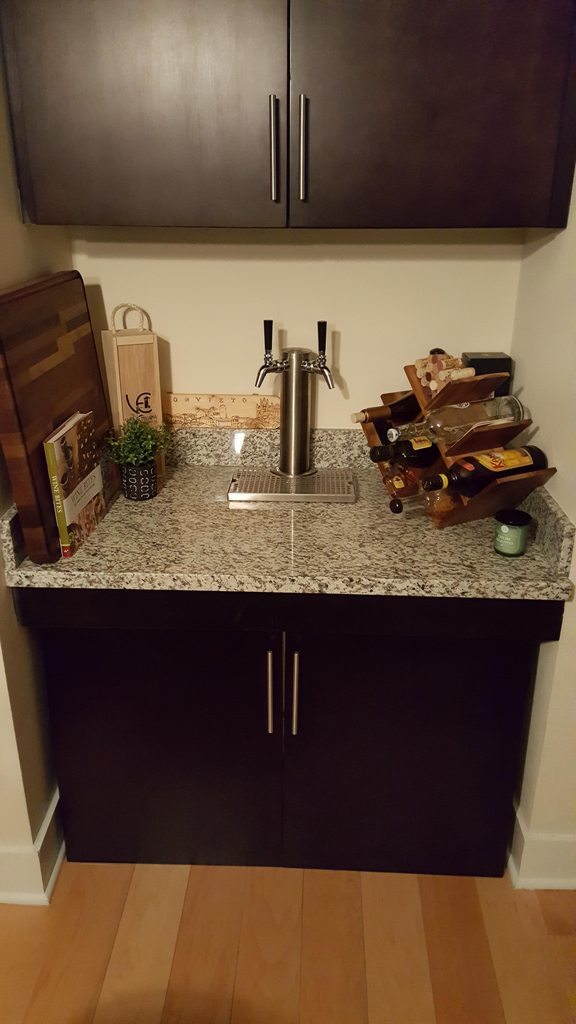
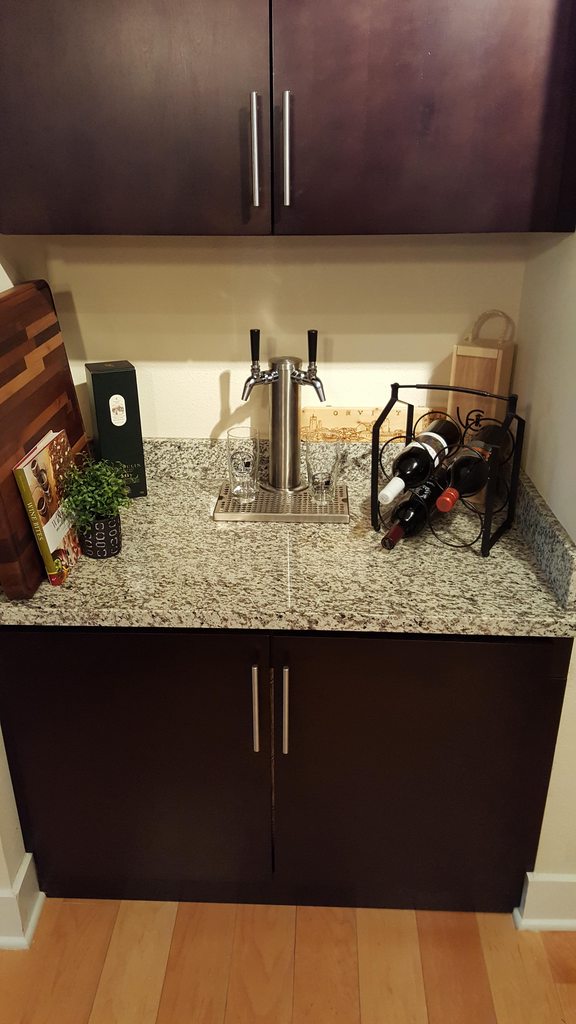
Done! My goal going into this was just to make a functional kegerator that passed SWMBO's approval, but I am truly pleased and impressed with how this turned out.
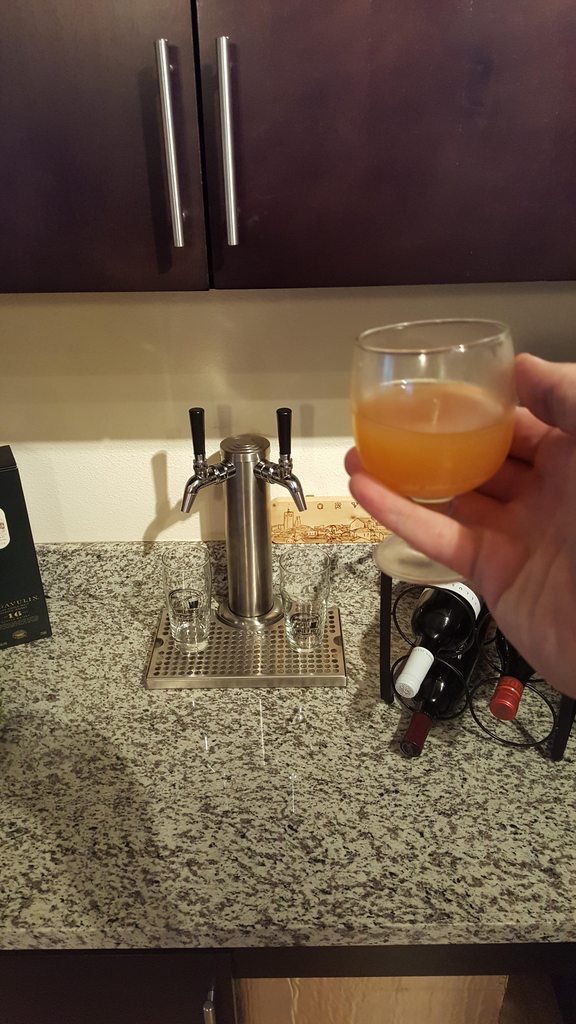
Cheers! It may be still cloudy and uncarbonated, but I couldn't resist pouring a small glass for myself. I'd love to answer any questions or help to encourage others to take on a project like this! I am not particularly skilled with home improvement projects or tools, but I found that a little bit of planning and research (and a lot of browsing previous HBT threads) gave me the confidence to complete this build. Thanks for reading!
There is a built-in desk area that we don't use as a desk, but it is too short to slide anything but a 1.7 cu ft fridge underneath, and I want to use 5 gallon kegs ideally. Using a store-bought fridge would not work. After looking at all of the custom fermentation chamber and kegerator builds on here, I arrived at the idea of creating my own with the guts from an old mini fridge and some rigid foam panels and building it all underneath the desk. There already was a 2" hole drilled in the center rear of the granite intended for power cords for the desk. I decided that hole would be the perfect spot for a draft tower and lines.
SWMBO normally lets me use the area underneath the desk for fermentation. I've been fermenting a double IPA using a Coleman cooler as a cool water reservoir for the SS Brewtech FTSs along with my Brew Bucket. I'll build the fridge so there remains space on the side to fit the brew bucket, and run the cooling lines for the FTSs into a water reservoir inside the fridge, removing the need for the cooler.
First, I acquired an old mini fridge with an ice chamber as the cooling element and the condenser on the back as black coils. This made the extraction much easier than it would have been on a newer fridge with the condenser coils built into the sides of the fridge. Here's the guts of the fridge all removed and waiting to be used.
I made trips to Home Depot and Menards for supplies. Bought two 1" thick sheets of aluminum-faced polyisocyanurate foam, foil tape, and some tools and extras to complete the project. I used a jigsaw and a knife-edge blade to cut the foam out. I doubled up the sheets to make all sides 2" thick. I made a few test fits as I was cutting out the panels.
Here's one of those test fits with the top, bottom, and left side panel in place. Fridge guts on the right.
Here's a test fit with all side panels together except for the door, with two pin lock kegs (could not use ball locks due to their height).
And with the tap tower set in place! This is where it really starts to look like a kegerator.
I wanted to wire in a digital temperature controller to replace the old fridge's dial and chose the STC 1000 because I could wire it in and easily be able to have access to the controls from the front. It was a bit of a challenge wiring it in, but I basically removed the old thermostat that acted as a switch and spliced those positive and neutral wires together, then wired in the STC 1000 at the power cord using another tutorial/diagram on this site (https://www.homebrewtalk.com/showthread.php?t=385792).
Fridge wiring up close
Spliced the hot and neutral wires together from the fridge's thermostat.
Wired in the STC 1000 according to the diagram in the other thread.
It works! (72.5 is the current temp)
Used a jigsaw to cut out a pocket hole in some plywood and slid the STC 1000 into it.
I built a surround for the fridge compressor and placed the 5# CO2 bottle and regulator on top of it. I used foil tape and friction pressure to join all of the foam panels to finish the box. I carefully cut holes for the CO2 lines, the fridge evaporator line, and the power cord for the tower cooling fan, then blocked off any exposed foam with foil tape. I used weather stripping tape to line the door and make it as air-tight as possible.
Since this is an apartment and not my own house, I wanted to minimize the damage/alteration of the actual apartment property itself, and there was no way I was going to drill through the granite countertop. I used a bunch of small command strips (12 of the tiny ones) all along the bottom of the flange to attach the draft tower to the countertop. It's a solution that works, but not perfect. The tower is secure as long as you don't yank on it. I added a 12" drain plate with a cutout for the tower and stuck small rubber feet to the bottom of it to prevent sliding. To conceal the entire thing, I found a source for the same exact cabinet doors and panels that are in the rest of the kitchen and test-fit them in front of the fridge.
I took some 2x2's and some angle brackets and attached the cabinet doors.
I took the matching cabinet panels and used the jigsaw to carefully cut out pieces that fit the border around the doors perfectly.
The hinges work! I also made a floor panel that isn't fastened in so I can remove it to open the fridge door and slide the brew bucket in on the side.
Purging the keg with CO2 while running Star San through the whole system. LOVE the Intertap faucets for their versatility. Hooked up a ball lock fitting to the spout and drained my sanitizer back into the cooler to use for sanitizing other parts.
Two kegs in the fridge! Filled one with ice water to aid in cooling so the compressor isn't overworked. Placed the temperature probe inside the water bottle to modulate the temperature values read by the STC 1000.
Done! My goal going into this was just to make a functional kegerator that passed SWMBO's approval, but I am truly pleased and impressed with how this turned out.
Cheers! It may be still cloudy and uncarbonated, but I couldn't resist pouring a small glass for myself. I'd love to answer any questions or help to encourage others to take on a project like this! I am not particularly skilled with home improvement projects or tools, but I found that a little bit of planning and research (and a lot of browsing previous HBT threads) gave me the confidence to complete this build. Thanks for reading!