Complete DIY eHERMS build

Homebrew Talk - Beer, Wine, Mead, & Cider Brewing Discussion Forum

Help Support Homebrew Talk - Beer, Wine, Mead, & Cider Brewing Discussion Forum:

This site may earn a commission from merchant affiliate links, including eBay, Amazon, and others.

BLANK1911

Well-Known Member
Joined
Oct 26, 2010
Messages
47
Reaction score
2
Location
Brighton
Hey all, I have been hanging out for a while asking a few questions here and there but mostly learning. Well I recently decided to pull the trigger on my build. I have found it very difficult to find the time to drag all of my equipment up from the basement to the garage for an all grain brew day.

I was totaling 7 hours on average with setup, cleaning and tear down. I just don't have that kind of time anymore with a 2 year old and another on the way so I'm going electric!

My thought is that everything will be set up and ready to go in my large unfinished basement with a large sink next to it. I will be going eHERMS with PID's so I can walk away from it at certain times in the brew if I have to.

Here is the cool part that I am excited about (I still have not decided weather I enjoy engineering brewing equipment, or actually brewing beer more) I will be making everything in this system!

I will be using keggles, and a P-J diagram that I like. Another element will be budget, so I will be coming up with parts wherever I can find them cheaply. Some things I may splurge on because I really want them or because I'm just lazy sometimes.

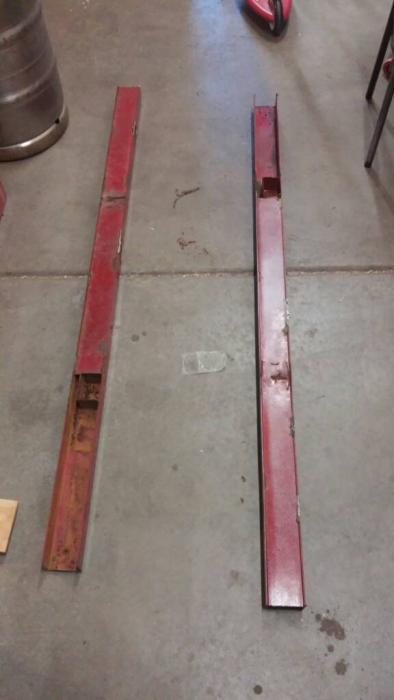
I have already started on my stand that I am building out of steel salvaged from an old broken harbor freight trailer. I thought some may be interested to see this because it will be heavily DIY and on a budget... Let's see how well I can do! Thanks everyone for inspiration.

Sent from my Nexus 7 using Home Brew mobile app
 
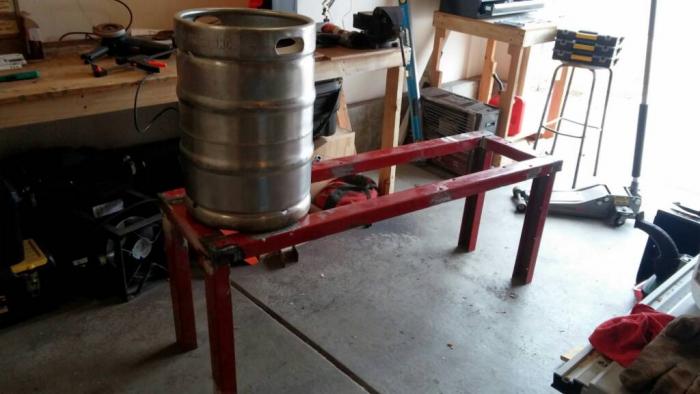
Here are some pics of the stand in progress. I'm welding with a Chicago electric 90A flux wire welder that I picked up for under 100$ with a coupon a while back. I don't have hardly any welding experience and this I my first welding project. I seemed to get the hang of it and the welds seem strong and nothing that a flap wheel on the old grinder can't touch up.

I weight 250 and and jumped on top of this thing after hitting all of the joints with a dead blow hammer... Seems sturdy enough.

Sent from my Nexus 7 using Home Brew mobile app

1393383445802.jpg


1393383459978.jpg


1393383481331.jpg


1393383501781.jpg
 
I would add some type of cross bar or support on the legs. just 4 joints seem like it might not be strong enough for me. with up to 2 full kegs of hot beer/water/grain on there and you stiring or messing with whatever in the pots. better safe than sorry (IMHO) Cheers on the build though, will be awesome when your done
 
Thanks, I'm planning another 2x4 between the legs and something that runs between those to support a shelf underneath for pumps and what not.

Sent from my VS980 4G using Home Brew mobile app
 
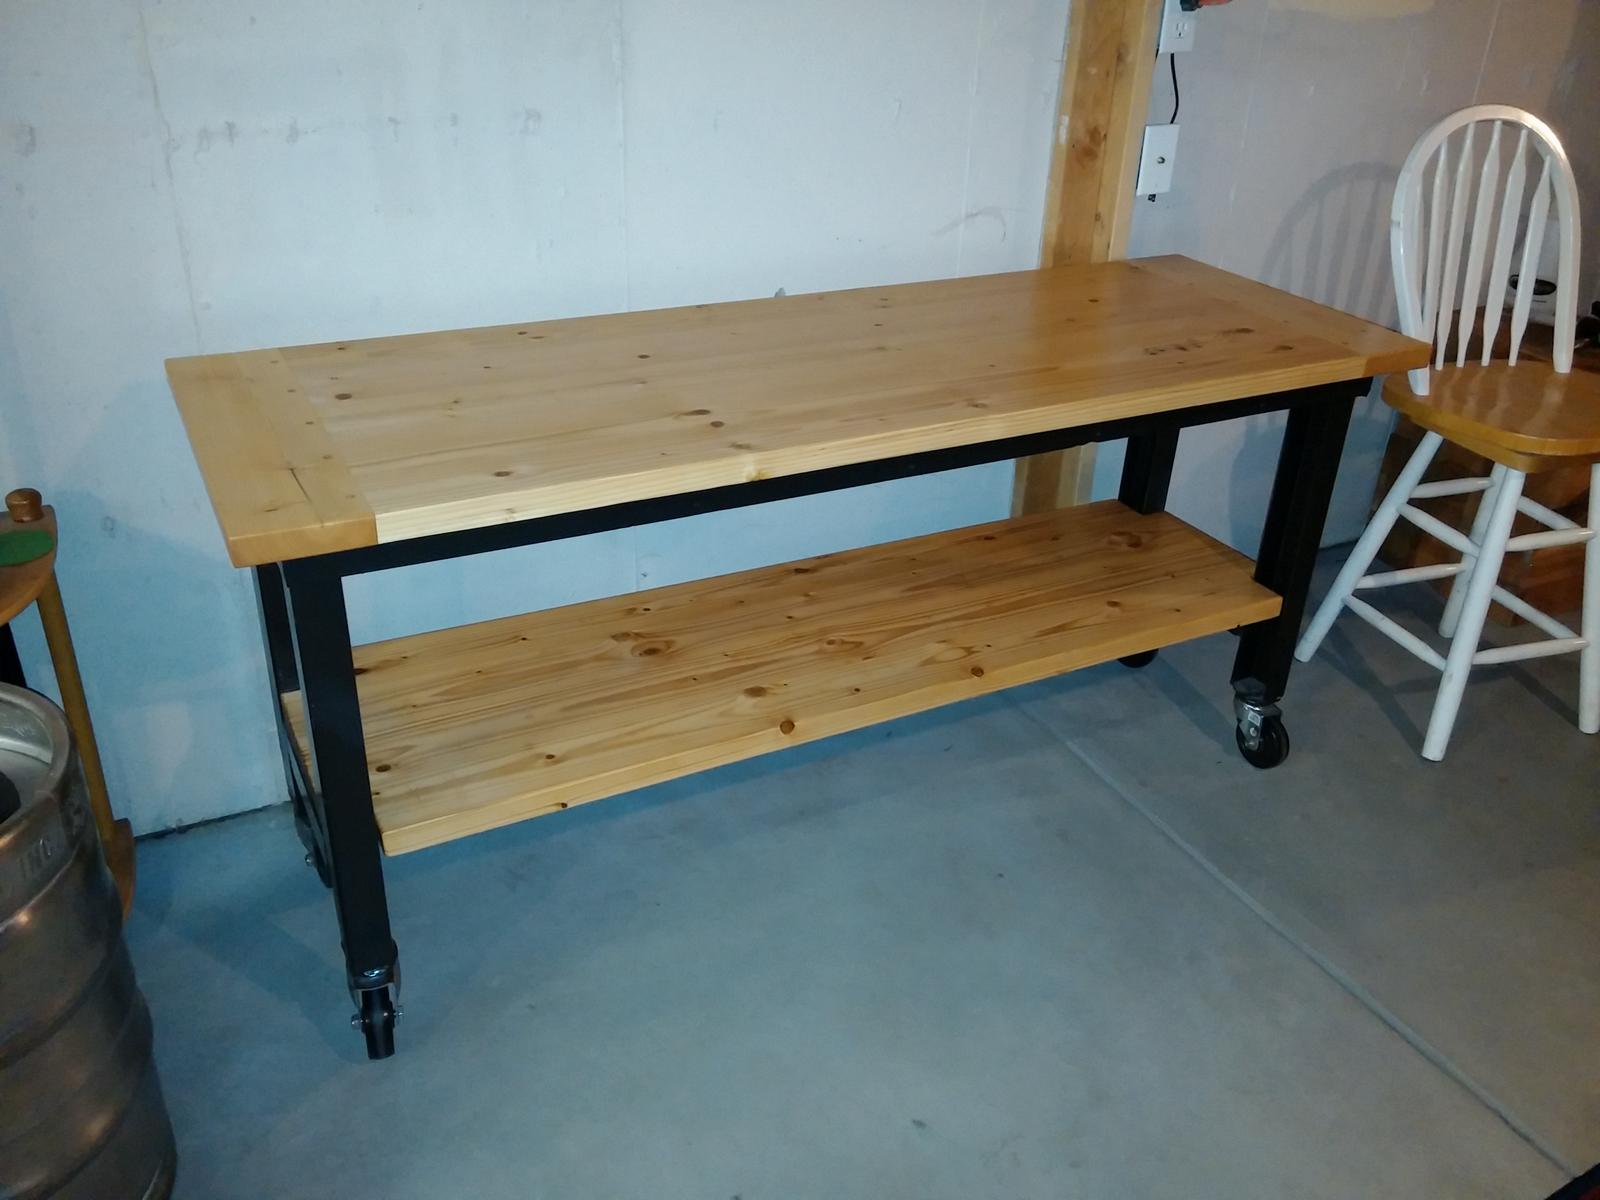
Well, after having a baby this spring my progress really slowed down but the stand is finally finished :ban:

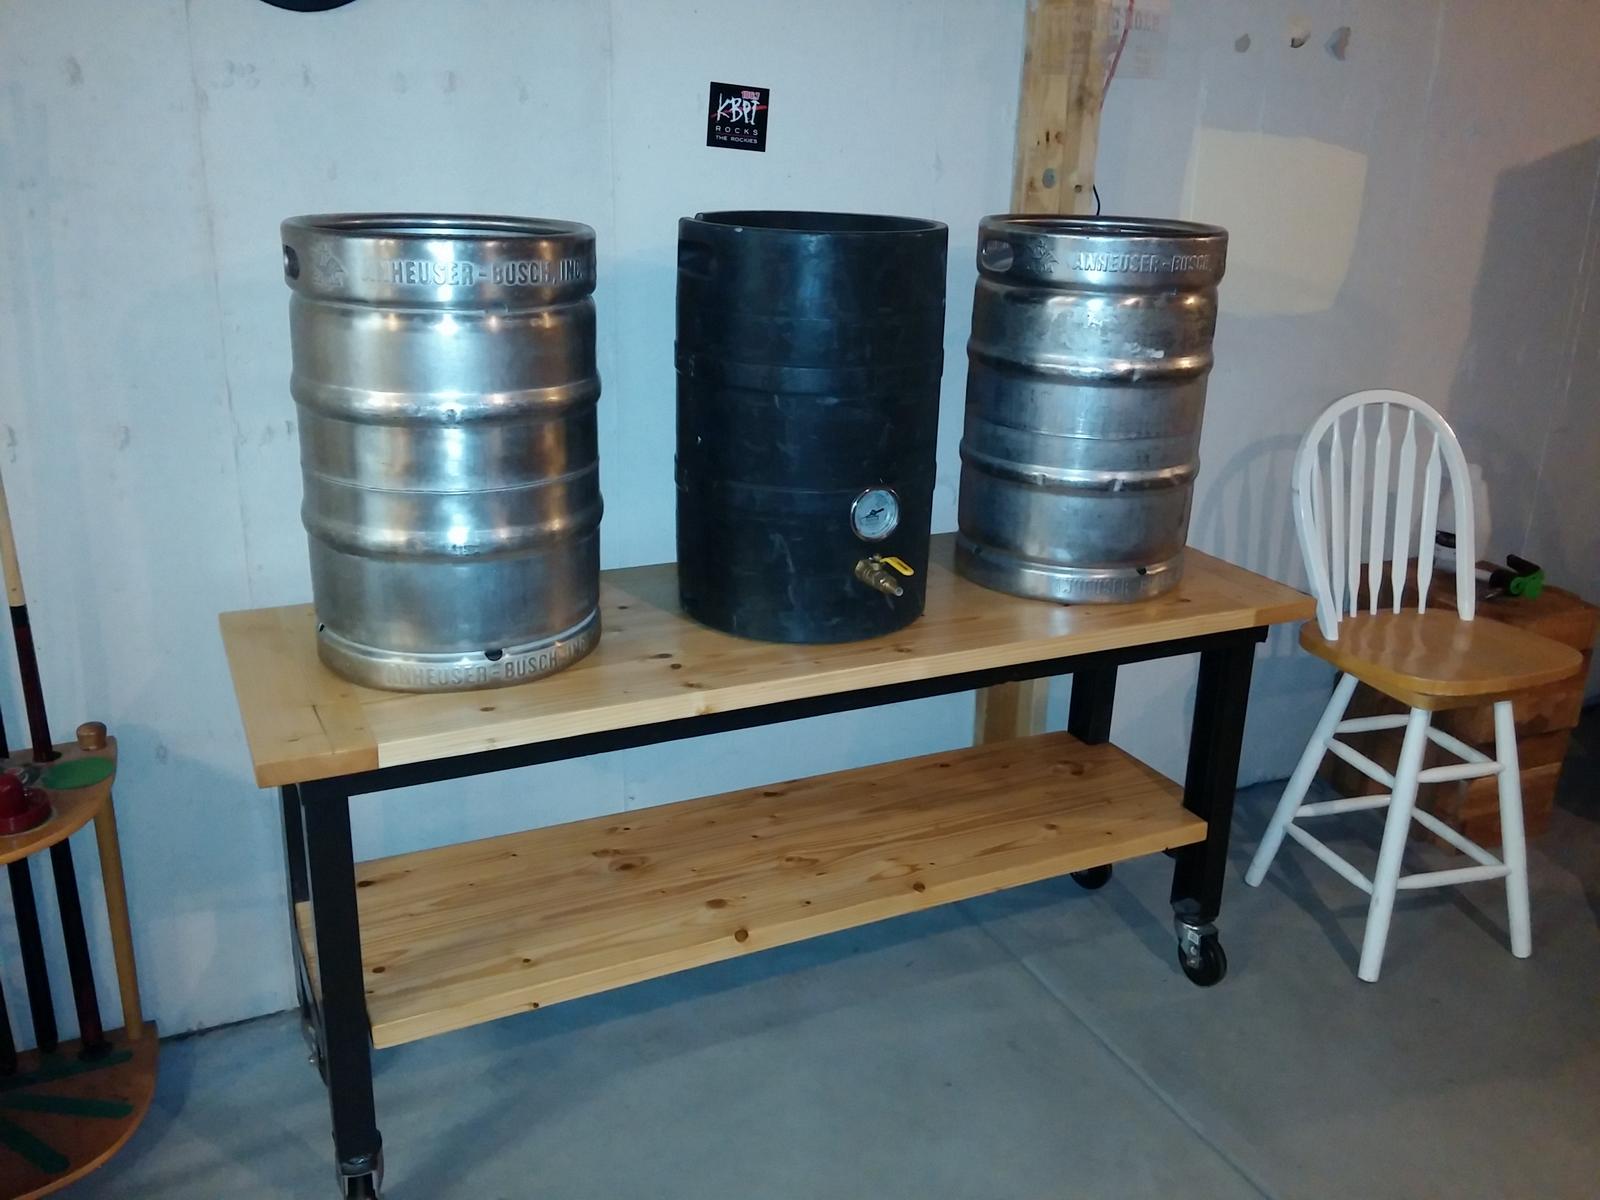
the shelf and top are made of cheap whitewood 2x6 from home depot that I planed down, and cut to width to fit the stand. I then use biscuits in the joints and glued them up. I breadboraded the ends of the top and pinned it with wood dowels which I think looks awesome. I finished them with a generous amount of outdoor oil for a durable waterproof finish.

I am very pleased with the way this turned out, although i'm questioning my use of the casters on the legs. This thing is quite heavy and they work great to help move it but the center of gravity is a little high and i'm a little concerned with it tipping with the added weight to the top when full. I guess Ill just come up with a way to anchor it to the wall that is easy to disconnect if i want to move it.

0911141028a.jpg


0911141028.jpg


0911141029.jpg
 
So I was finally able to get some work done on this. I collected some parts and decided to get my power supply set up but ran into a small problem that someone might be able to help with.

I am lucky enough to have an existing 50 Amp line running to a spa panel for a hot tub that no longer exists. The line runs from a 100 Amp sub panel that is in my basement.

The plan was to bring the spa panel inside and install a 30 Amp breaker in the place of the 50 Amp in the sub panel. Unfortunately the wire used to run the 50A is 6 awg I believe and does not fit into my new 30A breaker. So I took the 50A GFCI out of the spa panel and put it into the sub panel and installed the 30A in the spa panel and Ill run my 4 prong outlet off of that.

Unfortunately when i fired everything back up the test button on the GFCI would not trip the breaker. I tested all of the lines and they are as should be. The only thing I can think that might be wrong is either the GFCI is bad. Another problem that might be is that the ground and neutral have a jumper across them in the sub panel... could this cause the GFCI to not trip when tested. I know the jumper should not be there but when I tried to remove it the screws on the busbar started to strip.

Any thoughts?

the GFCI is wired correctly... Pigtail to neutral and neutral and 2 hots out. I dont want to order a new GFCI online and have to return it if its something else. Can the GFCI be tested any other way?
 
It has been a while since I have updated this thread but I have got a bit of work done in that time and im pretty proud of it. I milled the box on a friends mill and that worked prety well. I got it painted, all of the components mounted and wired up. To my surprise, today I finished the wiring, plugged her in and she fired right up without a single hiccup! Now im excited. Now I just need to give a little love to my kettles and Im in business.

View attachment 1422593899059.jpg

View attachment 1422593924253.jpg

View attachment 1422594067567.jpg

View attachment 1422594086800.jpg

View attachment 1422594128583.jpg

View attachment 1422594149314.jpg

View attachment 1422594164544.jpg

View attachment 1422594194062.jpg

View attachment 1422594222453.jpg

View attachment 1422594236656.jpg
 
Looks great, will be looking forward to seeing a final cost tally.

I can relate also I stovetop brew full boils and have a 4 year old, a 15 month old and one due in may. This is a constraint on time and budget obviously
 
Thanks guys, I was doing really good at keeping track of the cost of pieces and parts until Christmas when I got a bunch for gifts. I need to get back on that so people can see how much it cost me. Its really hard because of the multiple trips to the hardware store for odds and ends.
 
Thanks guys, I was doing really good at keeping track of the cost of pieces and parts until Christmas when I got a bunch for gifts. I need to get back on that so people can see how much it cost me. Its really hard because of the multiple trips to the hardware store for odds and ends.

This is what keeps costs all in limbo are those big box store trips..I bet I made 20 trips to pick up that "one other thing" I needed for my build..
I just picked up my last pot and all the fittings and I can tell you the fittings for everything including the hoses and quick disconnects are not cheap.
Scour ebay if you want to find cheaper SS fittings..I think I saved about $100 bucks getting some SS valves and compression fittings from China. I checked and they are identical to the ones I get at my LHBS for 4 times as much $$$..
 
I just picked up my last pot and all the fittings and I can tell you the fittings for everything including the hoses and quick disconnects are not cheap.

You are not kidding! I just maped out my keggles to figure out what fittings I need and put an order together on bargain fittings and it was about $500! I may have to set them up in stages in order to be able to afford it.:mad:
 
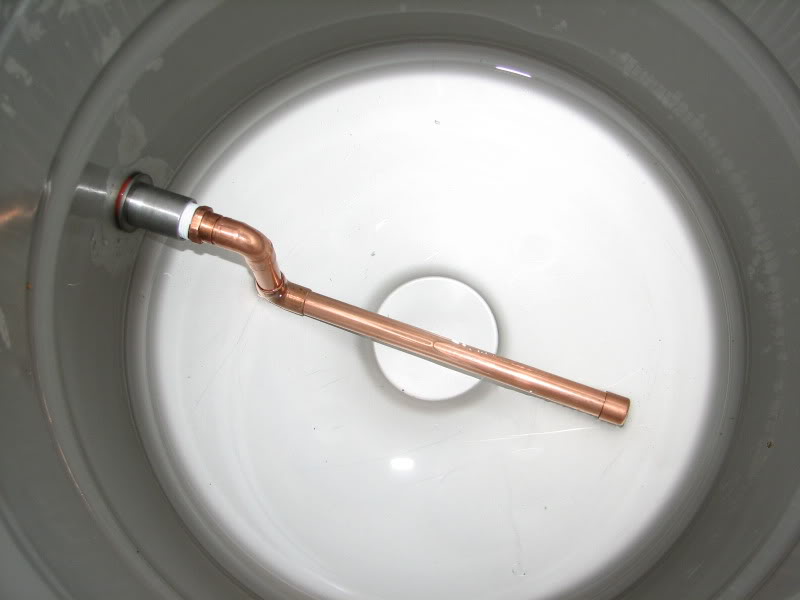
Here is a crazy idea to save some money... And I have no idea if this would work well, maybe someone has tried it and can advise. Could one use 1/2 in ridgid copper pipe and cut it into say 2 inch pieces and braze them into the kegs to be used instead of couplers or weldless bulkheads. Then use copper fittings and brass valves to create the rest of the plumbing.

The more I think about it id really be interested in some of your thoughts on this.
 
You are not kidding! I just maped out my keggles to figure out what fittings I need and put an order together on bargain fittings and it was about $500! I may have to set them up in stages in order to be able to afford it.:mad:

Check ebay for the ss valves and elbows you need..I picked up all mine for 4.99 per valve shipped. The exact same ones at bargain fittings are 10.99 per valve.. It adds up.
I also found my ss compression fittings for my herms coil on eBay as well. Got them both for $15 shipped.
Just gotta be diligent and make a list of your fittings you need and look every day on there and check em off as you find them. I did that for about 3 weeks and found most of what I needed and picked up the rest at bargain fittings. All in all it cost me about $300 for all my fittings.
Just make sure you clean em up good to get any grease, etc off em.
 
Here is a crazy idea to save some money... And I have no idea if this would work well, maybe someone has tried it and can advise. Could one use 1/2 in ridgid copper pipe and cut it into say 2 inch pieces and braze them into the kegs to be used instead of couplers or weldless bulkheads. Then use copper fittings and brass valves to create the rest of the plumbing.

The more I think about it id really be interested in some of your thoughts on this.

Could work I reckon..I suck at soldering or welding. I outsourced all my temp probes to a guy at work to make for me as I cannot solder worth a damn. With that said, I will stick with weldless. I also tend to trust stainless steel on my stuff more than anything else. It's just bulletproof.
Personal preference though...
 
Check ebay for the ss valves and elbows you need..I picked up all mine for 4.99 per valve shipped. The exact same ones at bargain fittings are 10.99 per valve.. It adds up.
I also found my ss compression fittings for my herms coil on eBay as well. Got them both for $15 shipped.
Just gotta be diligent and make a list of your fittings you need and look every day on there and check em off as you find them. I did that for about 3 weeks and found most of what I needed and picked up the rest at bargain fittings. All in all it cost me about $300 for all my fittings.
Just make sure you clean em up good to get any grease, etc off em.
Strange, I bought 4 of the 4.99 ball valves from eBay about a year ago and they were much more restrictive with a small opening... I did but one from eBay later which was the same as bargain fittings but it was more than $5.... I also later bought my 3 way valves from both dude diesel and China on eBay... They are both very nice valves and almost identical.
I have also bought a lot of stainless fittings from both eBay and bargain fittings... EBay is cheaper but takes a week or two lingers and the quality isn't as good... I had to use a ton of Teflon on my rims tube build and some of the eBay camlocks needed modifications with a grinder to even fit each other... Still I ordered about $10 more fittings from the same seller (daily deals) from there just Friday so it wasn't that bad I guess...
 
Thanks Sparty. The enclosure is 10" wide, 8" deep and 12" tall and I think it was the perfect size for this setup. Here are some more pictures of the panel. I got my PID set up and confirmed that everything in the panel was working correctly and added some finishing zip ties and wire wraps to clean it up a bit. Now, it's not as clean of a wiring job as some I have seen here or as I had hoped but this is my first project of this type and i'm pretty proud and satisfied with it.

I used a little larger wire in most applications because it was given to me for free and I tried to color code as best I could not having the standard black, red, white, and green.

I have decided to go ahead with stainless weldless bulkheads and valves and the plastic QD's on bargainfittings.com to save a little money but also buy parts that I would not want to change in the future as far as the bulkheads and valves. This has brought the total from Bargainfittings down from $550 to $360 including the poly tubing. Now I just have to wait for the goahead from SWMBO to place the order. I have the elements and parts to mount them and build cords according to Kal's instructions so that will be my next step. I still have a keg to cut the top off of.

SO close but still so far away... this is killing me, im so excited, this has been in the works for what seems like forever.

View attachment 1423779950238.jpg

View attachment 1423779975530.jpg

View attachment 1423779993689.jpg

View attachment 1423780019891.jpg

View attachment 1423780041479.jpg

View attachment 1423780056710.jpg
 
Next issue... If anyone has experience with this and can help a guy out. I am currently running a manifold like the one below in my mash tun, the only difference is I have it surrounded in 1" ss braid. I am tempted to try to use this when the herms is completed but I am worried that my mash will stick due to the small surface area.

any opinions? I have been reading forum posts all morning and have not found anything that really applies to my setup.

Thanks

KegManifold.jpg
 
Yes, I have an opinion. Stainless steel braids are awful and people should stop using them.
 
Yes, I have an opinion. Stainless steel braids are awful and people should stop using them.

Why? i have great luck using them they work as a very good secondary filter when used inside a bazooka tube or under a false bottom...

without it I would likely get grain sucked into my small dc pumps and have issues.
I have never had a stuck sparge while using it. I only get a mashing recirculation flow of 1.6 gallons perminute through my grainbed and falsebottom/braid setup with the dc pumps but thats proven to be more than enough to maintain and even step mash as I've done over 40 beers this way. and my wort is always completely clear (not cloudy) when going into the boil kettle.
I use a 30" long stainless braid in my boil kettle to catch anything that makes it past my stainless hop spider when my wort is on its way to my plate chiller and had no issues even though I dont whirlpool.
 
Why? i have great luck using them they work as a very good secondary filter when used inside a bazooka tube or under a false bottom...

without it I would likely get grain sucked into my small dc pumps and have issues.
I have never had a stuck sparge while using it. I only get a mashing recirculation flow of 1.6 gallons perminute through my grainbed and falsebottom/braid setup but thats proven to be more than enough to maintain and even step mash as I've done over 40 beers this way.

Mine would clog withe the full HERMS recirculation flow...

My crush from my corona may have had something to do with that also though... I was using only a bazooka tube..
 
Mine would clog withe the full HERMS recirculation flow...

My crush from my corona may have had something to do with that also though... I was using only a bazooka tube..
or your flow level... I always start my flow extremely low with my pumps pwm speed control and ramp it up to full over the course of the first minute... this helps things slows settle and develops a stronger filtering grainbed without all the fine stuff being sucked to the bazooka tube. too much flow and the small particles are more likely to be pulled into the filtering device directly and block it. I recirculate through a rims tube at 1.6 gpm and my rims element is on about 30-40 percent of the time to maintain temps in an uninsulated 16 gallon stainless mashtun ....my rims is only 1000w...efficiencies are almost always over 78% sometimes in the 90's

faster moving wort does not extract of convert anything any quicker except maybe oxygen on surfaces which is not a good thing.
 
Apparently most people seem to think they need way more powerful flow than they really do to make beer...look at how little flow a coffemaker uses to brew coffee... granted the small of an amount would take longer for transfering but thats not my point... 2-3gpm is plenty fast enough for that..
 
If doing stepped decoctions on a HERMS, you need the flow if wanting to do them quickly..

If you have a RIMS, a different matter obviously.
 
If doing stepped decoctions on a HERMS, you need the flow if wanting to do them quickly..

If you have a RIMS, a different matter obviously.

again 1.5gallons perminute is still plenty to raise the temps quickly...especially since the liquid in the grainbed is draining slowly and more evenly layered in temps as the cooler wort drains down and the hotter liquid comes in... the limiting factor is still how quickly you can raise the temps in the HLT.... since the herms Should raise the temps just as effectivly from the input side to the output side as a rims would as long as the HLT is the correct temp right? ESPECIALLY when the flow is slow enough to allow complete temp conversion.

BTW I used a herms system with my setup and I was unimpressed because of stratification and uneven temps in my hlt as well as the small 3/8 25ft herms coil I used... if I kept stiring the hlt or ran a pump to mix it the herms would work ok. but rims is much more effective for step mashing regardless.

Mine ramps much faster than that but I have a 50' 1/2" coil & a secondary recirculation pump on my HLT to eliminate stratification.

I am using a cooler as a MLT so I stop the pump momentarily, raise the HLT to the next mash temp & then turn the pump back on. It ramps very quickly that way... I usually raise the step on the HLT to + 5 degrees of that step.. By the time it recirculates the mash water 2-3 times (10-15 gallons) it is at the next mash step.
 
wow, thanks for the input. Aguie, so you are running a bazooka as your sole filter in your mash tun? The one thing I have read is what you said about starting the flow slow to set the grain bed before opening it up. If you have success with just the tube as your filter ill give it a try and see what happens. Do you use rice hulls as well? A stuck mash would suck on the maiden voyage of my system.
 
wow, thanks for the input. Aguie, so you are running a bazooka as your sole filter in your mash tun? The one thing I have read is what you said about starting the flow slow to set the grain bed before opening it up. If you have success with just the tube as your filter ill give it a try and see what happens. Do you use rice hulls as well? A stuck mash would suck on the maiden voyage of my system.

currently I use a false bottom as well as a bazooka tube under that with the stainless braid inside the bazooka tube to catch the fine particles that get through but I brewed 20 or so batches with just the bazooka tube and stainless mesh in my igloo cooler MLT before getting the bayou classic stainless kettle with false bottom and it works very well also. the key here is flow I think... the more you increase your flow through the grainbed the larger filtering surface you need to overcome plugging up it seems. starting the pump at a very low speed may overcome this to a point though. I have only use DC pumps and the flow has been 3gpm or less however ironically before I added the inner braided filter I got a stuck sparge with my very two fisrt all grain brews by just letting them gravity drain with a long piece of braid and no outer course filter like the bazooka tube so I suspect this is why so many are against using it alone.
 
ironically before I added the inner braided filter I got a stuck sparge with my very two fisrt all grain brews by just letting them gravity drain with a long piece of braid and no outer course filter like the bazooka tube so I suspect this is why so many are against using it alone.

Makes sense...

This caught my eye, and would be easy and cheap to make as I already have the parts sitting around.

Any thoughts?

2cs9bt2.jpg
 
all of the copper is only $25-30 at H-D

This is easy to clean as well since you can pull everything apart to clean (no need to solder if you just squeeze each fitting slightly to hold together once) Many people use and love these slotted copper manifolds... One thing I dont care for is you have to dump the grain and clean them right away... I have been known to leave my MT full of spend grain for a day or two since I'm usually beat when cleaning up and dumping it in my compost bin at night doesnt sound as appealing as doing it the next day. (especially with recent subzero temps around here) The grain and acid from the wort will eat the copper and make it a mess. I stopped using my copper upper sparge manifold for this reason as well... otherwise it works great.
 
I might give this a shot! but may solder it into a few larger pieces that can be taken apart to simplify cleaning (less tiny parts). I might also might put an angle on the pipes going from the outer ring to the center so it contours the bottom of the keg. I do not have bottom drain keggles so basically ill flip it over, angle the center down and come off the center to my bulkhead.
 
Now Im excited! I placed my order last night through Bargain Fittings for all of the plumbing for the system. Right now he has a killer deal on 3 piece stainless ball valves that could not be ignored. I went with the Kent plastic QD's and was able to get the final cost down to $360.00. Bummer though they were out of stock of the male QD halves so I hope the come in soon. These are the final parts of the system itself and I should be able to test soon!

The only things I need now is a cheap temporary/moveable ventelation system because the brewery may move in the future when I finish the basement. also a sink. Where I have built the system the boil kettle is right next to a large window. I am hoping that I can put a fan in that window to suck the steam out. Has anyone tried this? does it work ok?
 
Why not make the manifold a cross t design instead of just 1 small 1/2" pipe it would be cover the bottom better. Or you could look in to using a stainless spring.

https://store.brewpi.com/mashing/filtering/brewpi-matmill-lauterhexe-kit

Im glad you suggested this. I found something similar in How To Brew and elseware on this site and people seem to really like them.

https://www.homebrewtalk.com/f257/all-grain-mash-tun-need-ideas-my-30gal-blue-barrel-352476/
 
Back
Top