insanim8er
Well-Known Member
I edited this main post from a build in progress to a completed product, sorry for any confusion with the below responses.
The parts needed are:
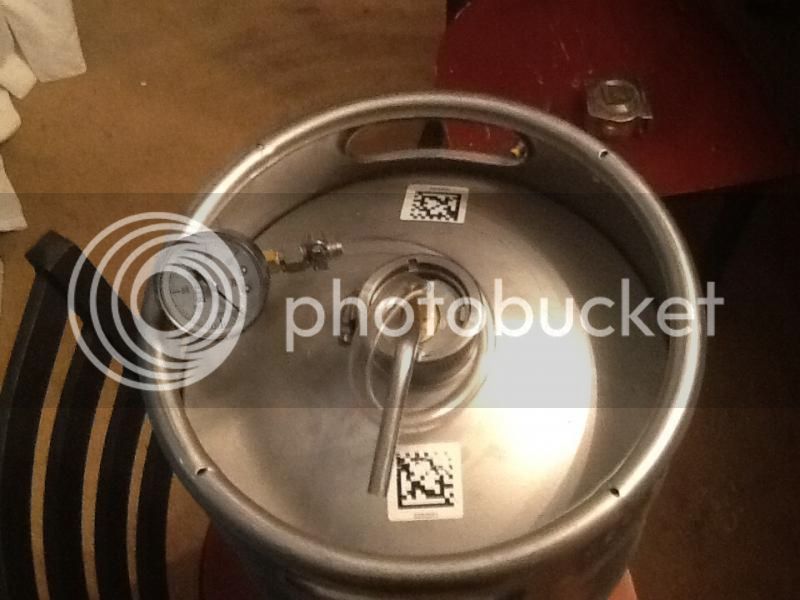
A keg
A keg stem
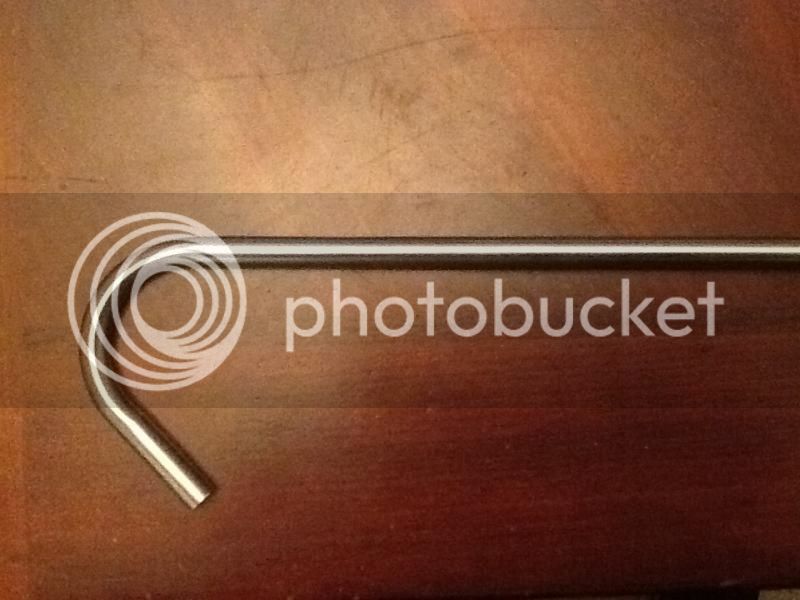
A racking cane Here's a good source for inexpensive ones
A metal hanger (or similar thickness wire)
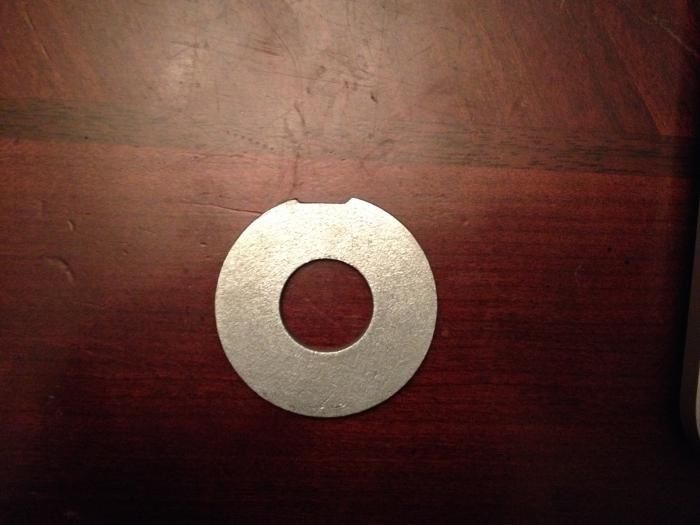
A large washer that fits the inside of the keg stem
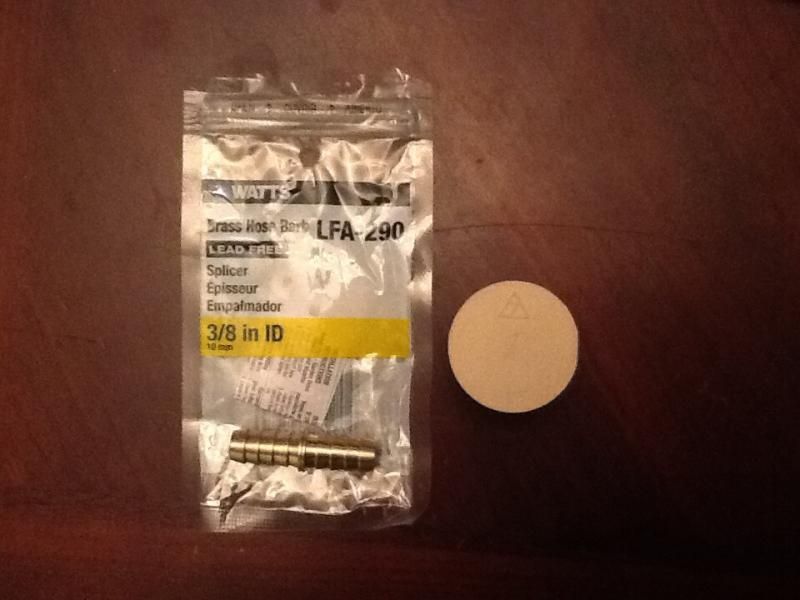
A #7 blank rubber stopper (no holes drilled)
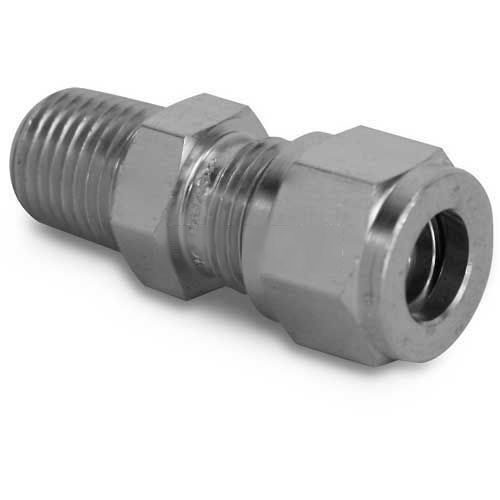
And a hose barb (used for connecting spliced hose/double sided)
Tools needed:
Drill
Drill bit
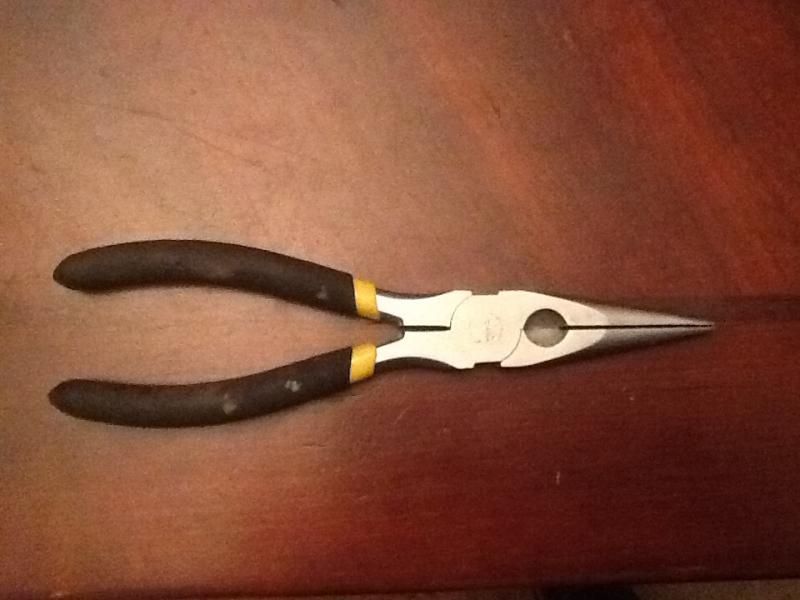
Needle nose pliers
Grinding stone

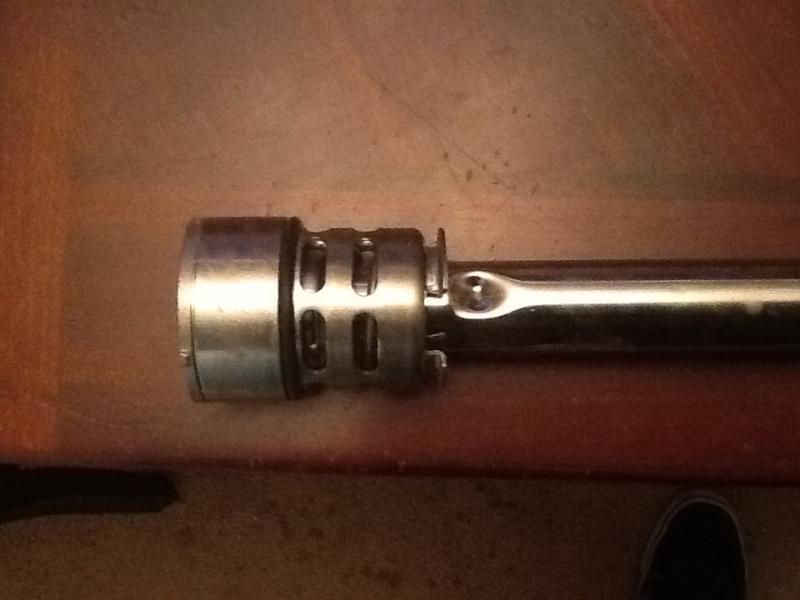
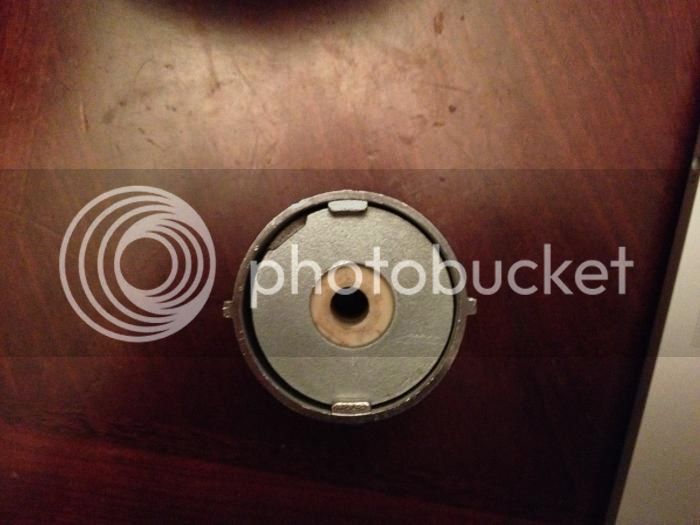
First take the keg stem apart.
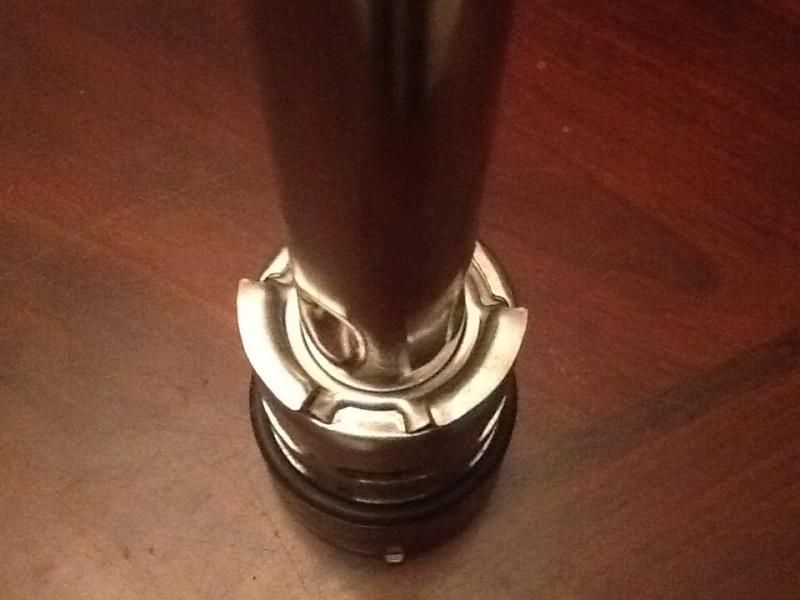
You'll need to press down on those wings and twist. I used a pair of pliers like this
Use the back part to press down and twist
It'll pop up

Take all the pieces apart
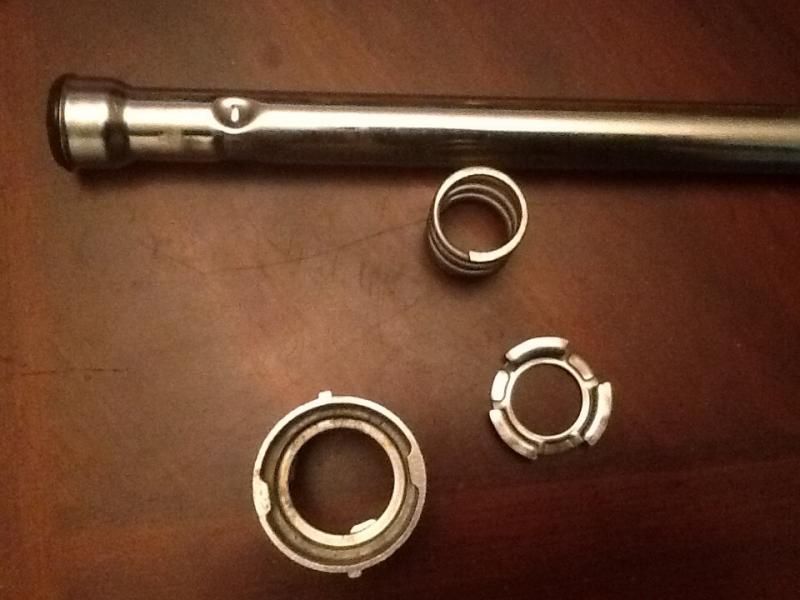
Use the grinding tool (or other method) to cut the small slot out from the washer
Use the same grinder (or other method) to widen the center hole enough for the two holes and fittings.
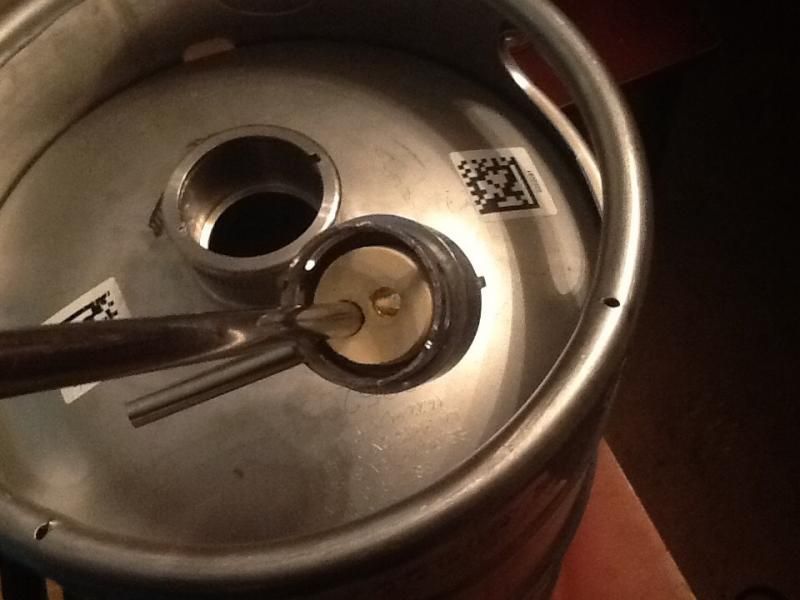
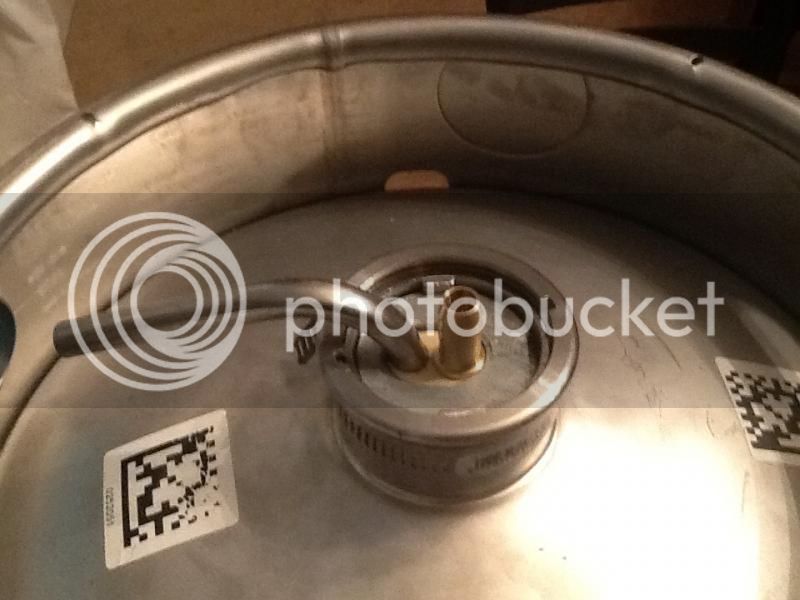
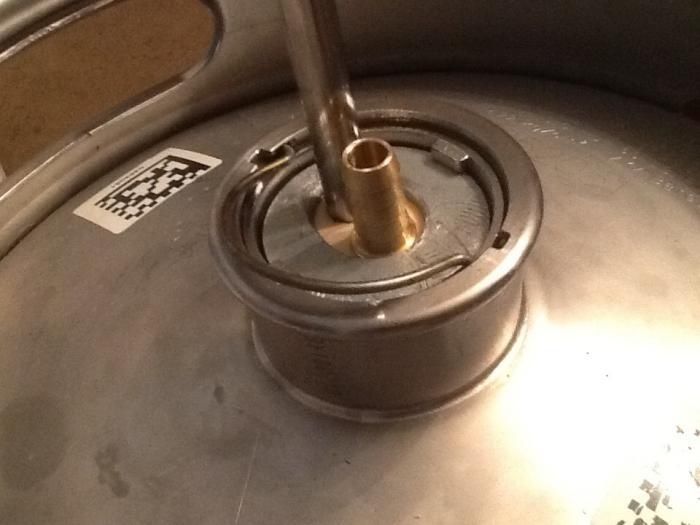
Push the rubber stopper into the center of the stem piece. I use star San to get it to slide in easy. I press it in too far in order to get the washer into place with ease, then I push it back the other way snug up against the washer. I then drilled the holes into the rubber stopper. Use a drill bit smaller than the barb and racking tube but large enough to be able to get the pieces into place (this step is important since this is where any air will leak if it's too loose.
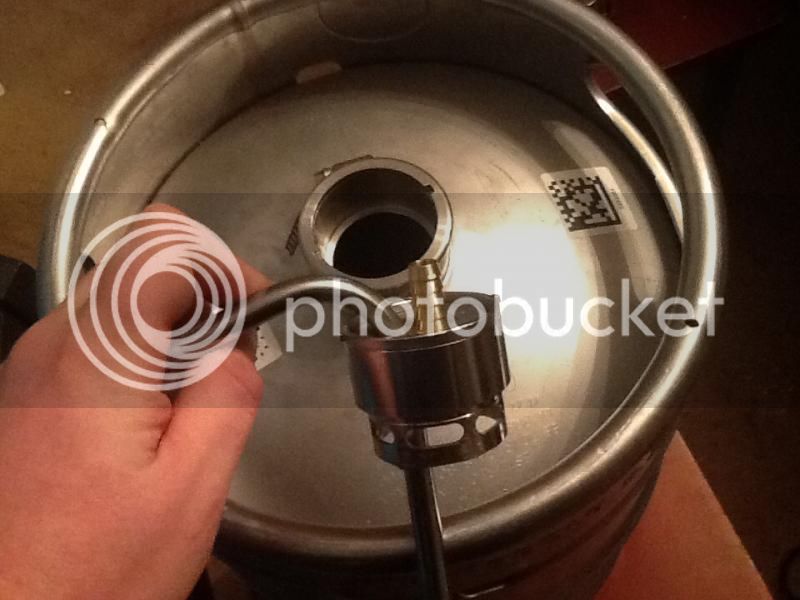
I drilled both holes, then I added the barb to one hole, then re-drilled the other hole for the racking cane (since the barb adds pressure) I then use star san to slip the racking cane into place.
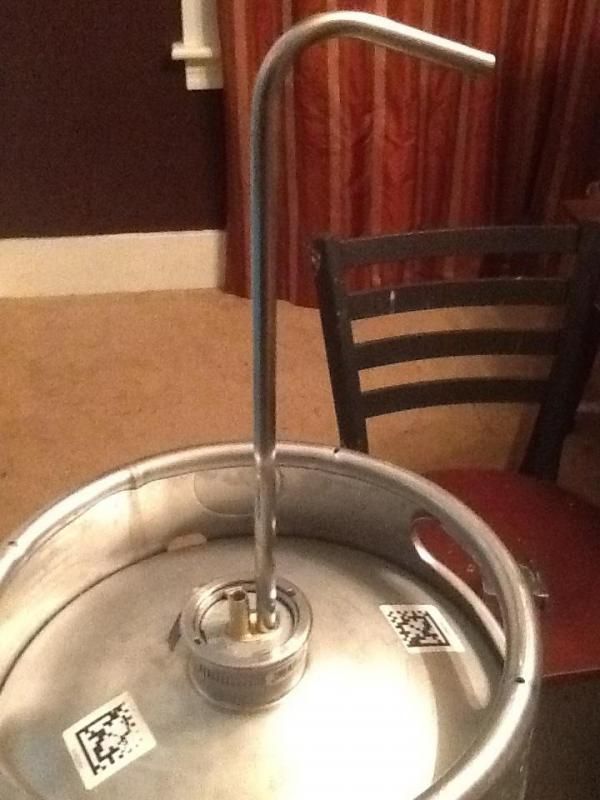
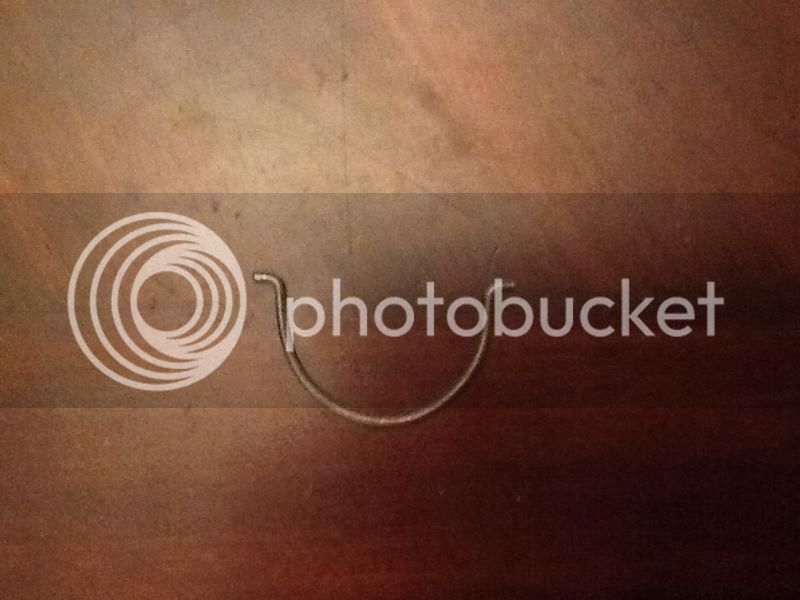
Bend a section of the metal hanger to this shape
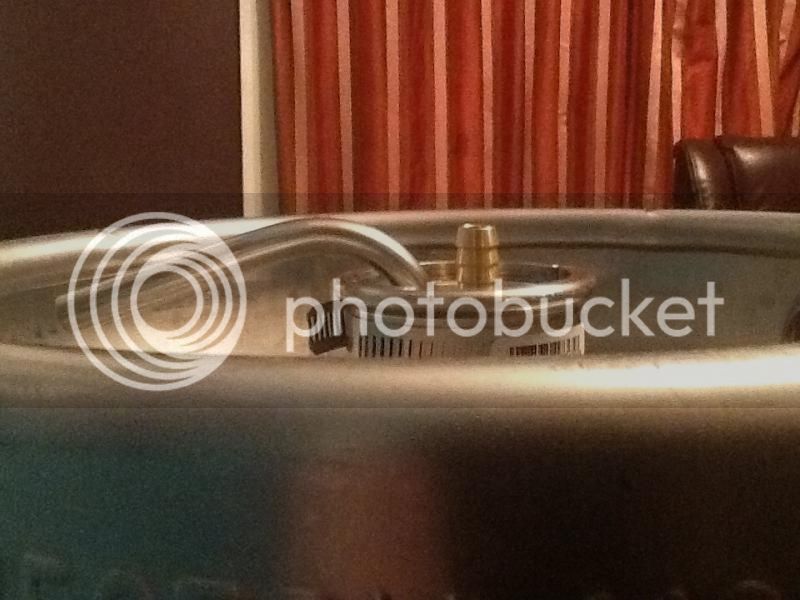
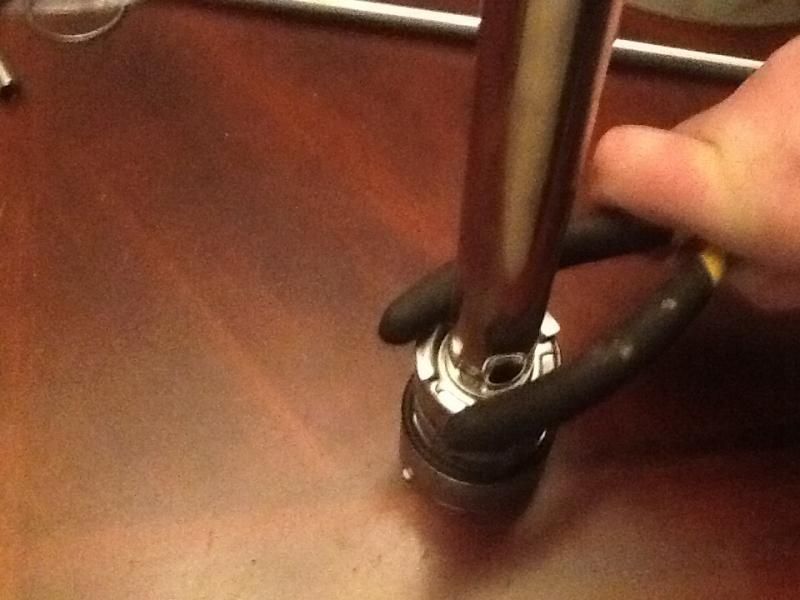
Assemble everything and use the coat hanger to keep the unit into place. It's important for it to apply pressure to the gasket to keep everything sealed (an alternative option is to use the keg ring you removed to get the stem out, but that's a pain)
I use a nail head to pry down the unit to get the hanger in place. Then I use players to make sure its pressed in well.
That's it...
There are more photos in posts below...enjoy
Also, You can add a 3rd hole with a SS tube for a thermowell.
Here's a good source for long thermowells
I'm also planning on adding quick connects. I'll update once I do.
***** As requested, I am working on some videos on how I assembled mine. *****
DIY Racking Cane - How I was able to make some SS racking canes for much less $ than buying one.
Taking apart the keg stem
[ame]http://youtu.be/Itzi0KdTO6A[/ame]
The parts needed are:
A keg
A keg stem
A racking cane Here's a good source for inexpensive ones
A metal hanger (or similar thickness wire)
A large washer that fits the inside of the keg stem
A #7 blank rubber stopper (no holes drilled)
And a hose barb (used for connecting spliced hose/double sided)
Tools needed:
Drill
Drill bit
Needle nose pliers
Grinding stone
First take the keg stem apart.
You'll need to press down on those wings and twist. I used a pair of pliers like this
Use the back part to press down and twist
It'll pop up
Take all the pieces apart
Use the grinding tool (or other method) to cut the small slot out from the washer
Use the same grinder (or other method) to widen the center hole enough for the two holes and fittings.
Push the rubber stopper into the center of the stem piece. I use star San to get it to slide in easy. I press it in too far in order to get the washer into place with ease, then I push it back the other way snug up against the washer. I then drilled the holes into the rubber stopper. Use a drill bit smaller than the barb and racking tube but large enough to be able to get the pieces into place (this step is important since this is where any air will leak if it's too loose.
I drilled both holes, then I added the barb to one hole, then re-drilled the other hole for the racking cane (since the barb adds pressure) I then use star san to slip the racking cane into place.
Bend a section of the metal hanger to this shape
Assemble everything and use the coat hanger to keep the unit into place. It's important for it to apply pressure to the gasket to keep everything sealed (an alternative option is to use the keg ring you removed to get the stem out, but that's a pain)
I use a nail head to pry down the unit to get the hanger in place. Then I use players to make sure its pressed in well.
That's it...
There are more photos in posts below...enjoy
Also, You can add a 3rd hole with a SS tube for a thermowell.
Here's a good source for long thermowells
I'm also planning on adding quick connects. I'll update once I do.
***** As requested, I am working on some videos on how I assembled mine. *****
DIY Racking Cane - How I was able to make some SS racking canes for much less $ than buying one.
Taking apart the keg stem
[ame]http://youtu.be/Itzi0KdTO6A[/ame]
Last edited by a moderator: