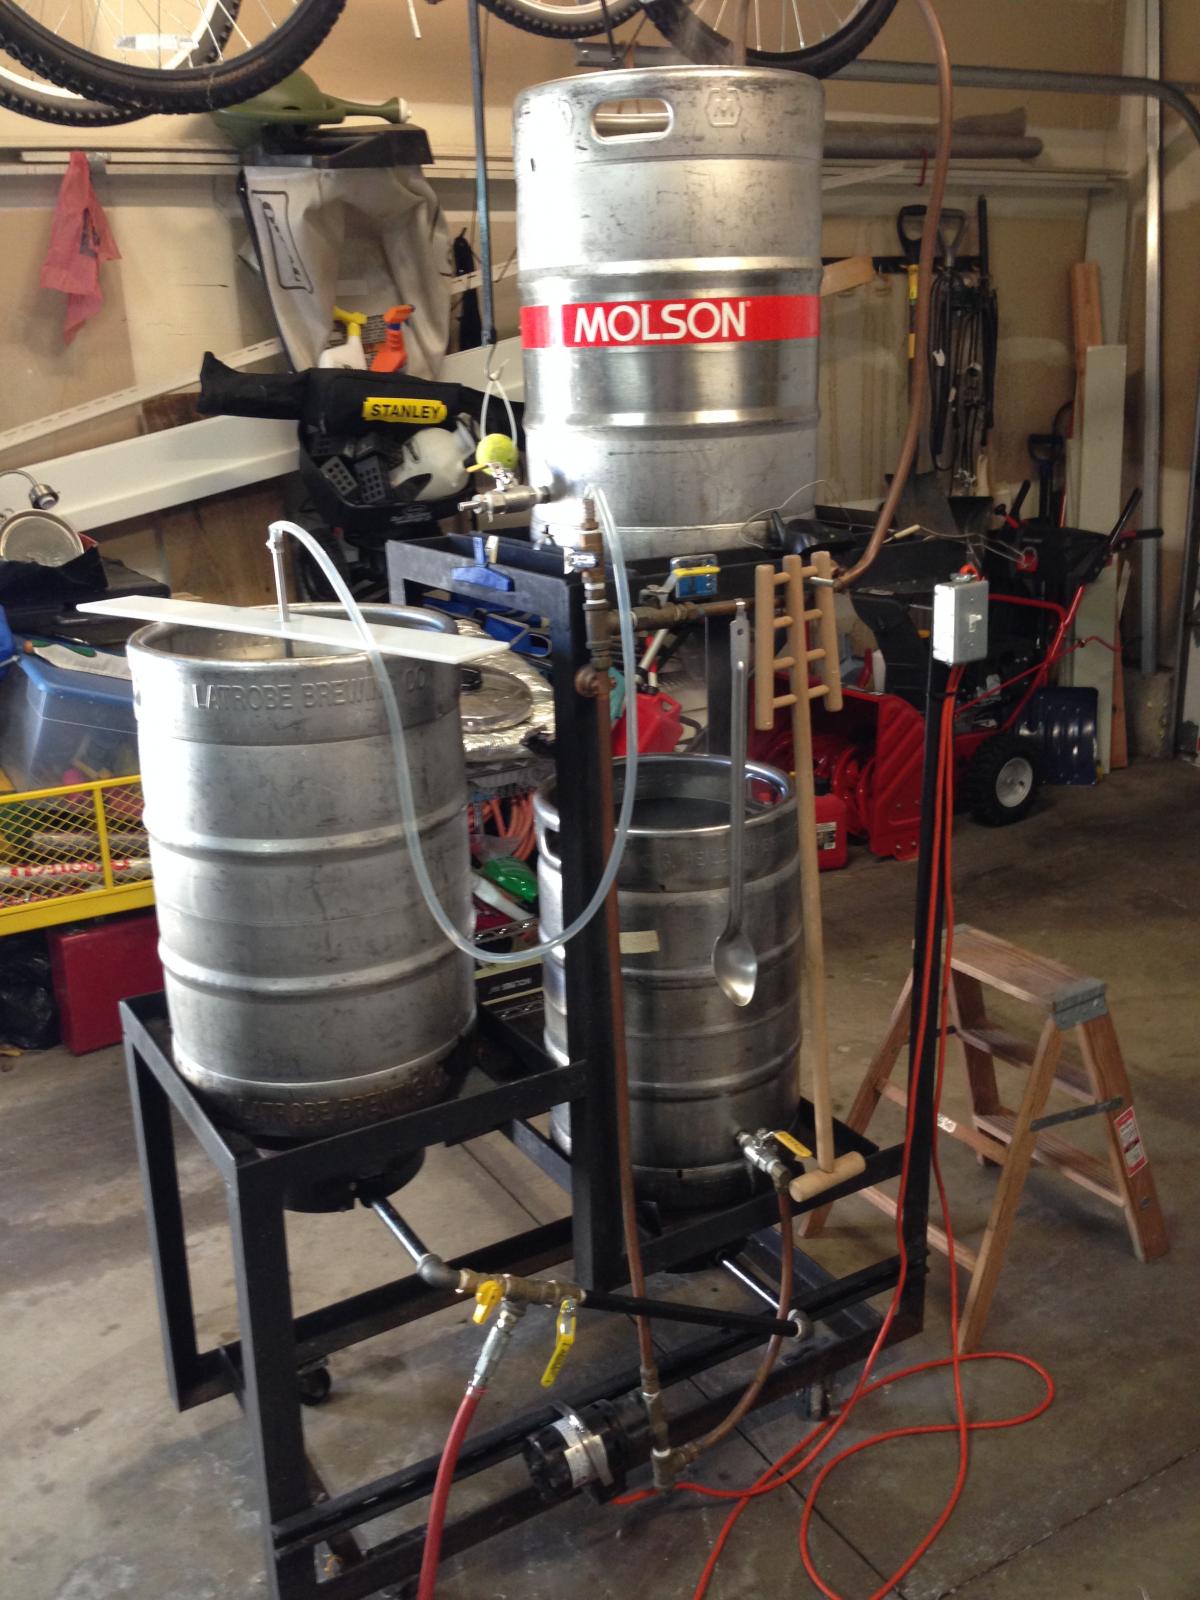
Building 3 tier stand

Homebrew Talk - Beer, Wine, Mead, & Cider Brewing Discussion Forum

Help Support Homebrew Talk - Beer, Wine, Mead, & Cider Brewing Discussion Forum:

This site may earn a commission from merchant affiliate links, including eBay, Amazon, and others.

vsanchez949

Well-Known Member
Joined
Sep 16, 2009
Messages
138
Reaction score
4
Location
Orange County
So, I've finally decided to pull the trigger and build a stand after 4 years of brewing. I hadn't had a real stand before, just used a banjo burner and folding tables/milk crates or whatever I could get to transfer liquids.

The stand I'm building is small and compact because all of my kids power wheels, bikes and what not take up all of my precious space in the garage. I copied the design from gbrewing.com.

Since I work for a machine/weld/electrical shop I have all kinds of goodies at my disposal. I was able to pick up some 16ga. 1.5" x 1.5" square tubing for really cheap. As soon as I get some extra cash I will be adding pumps, for now I'll use gravity as best as I can to transfer my liquids, I'm only brewing 5 gallon batches so far with a 7 gallon pot and a 10 gallon Rubbermaid mash tun with false bottom.

I'm gonna start cutting up my pieces today and hopefully get it welded together by the end of the week. Let me know what you guys think! Thanks!! 😄 ImageUploadedByHome Brew1414003448.411720.jpg


Sent from my iPhone using Home Brew
 
Nice small footprint.

If only using gravity you might want the HLT on top, MLT in middle, and BK on bottom.

Look forward to seeing it come together.
 
Nice small footprint.


If only using gravity you might want the HLT on top, MLT in middle, and BK on bottom.


Look forward to seeing it come together.


I was actually just thinking of that. I'll probably try it that way for my first batch.


Sent from my iPhone using Home Brew
 
So I'm just barely getting to put some time in on my stand. Work is getting in the way of its completion. Here are a few pics of my slow progress.
ImageUploadedByHome Brew1415982216.208081.jpg
Pieces all cut and ready to be fitted.
ImageUploadedByHome Brew1415982248.263865.jpg
Here they are mocked up.
ImageUploadedByHome Brew1415982271.224365.jpg
One sided tacked
ImageUploadedByHome Brew1415982292.323221.jpg
Both sides tacked and ready to be finish welded. My welding skills suck! I'm using a Lincoln mig welder, didn't have a lot of practice. My plan was to have nice purdy welds and just leave them, but after practicing on some scrap, I'm definitely gonna grind them down. Has anyone left their stands bare? I couldn't splurge on SS so I thought about leaving it bare, not sure how it will hold up though. If anyone wants the plans I have them on sketch up.


Sent from my iPhone using Home Brew
 
You are going to want to paint the stand with high temperature paint. It won't take long to start rusting.


Sent from my iPhone using Home Brew
 
How is the stand coming? I'm starting mine soon. (I've been say that for the last 6 or so weekends and haven't been able to do much of anything on it.)
 
Burner height question. So I finally got around to mounting my burners and attempting to get the preface size correct. It seems okay to me but I thought I'd ask you guys for input and opinions.

The burners are bg12's
It is mounted 3.5" below the bk
And I'm using a bayou 10psi regulator.

Testing today I was able to get a rolling boil in about 30 min. Is that decent?

If I move the burner closer will it reach boil faster?

My stand also creaks a lot, I assume that it's just settling from all the heat?

Here's a pic. Thanks!

View attachment ImageUploadedByHome Brew1424032056.607887.jpg
 
I drilled some holes in the base of my keggles to let some of the heat escape. Be sure not to drill directly under valves and thermo's and such. I still have not made much progress on mine. It's making me nuts, not being able to brew.
 
Burner height question. So I finally got around to mounting my burners and attempting to get the preface size correct. It seems okay to me but I thought I'd ask you guys for input and opinions.

The burners are bg12's
It is mounted 3.5" below the bk
And I'm using a bayou 10psi regulator.

Testing today I was able to get a rolling boil in about 30 min. Is that decent?

If I move the burner closer will it reach boil faster?

My stand also creaks a lot, I assume that it's just settling from all the heat?

Here's a pic. Thanks!

View attachment 256737

How many gallons were you boiling? I use BG10 burners with a 20psi regulator and it takes me 30 ish mins to get 13+ gallons to a boil. I'm pretty sure the BG12's put out more BTU's so a half hour sounds about right. I have mine mounted 5" from my keggles.
 
I drilled some holes in the base of my keggles to let some of the heat escape. Be sure not to drill directly under valves and thermo's and such. I still have not made much progress on mine. It's making me nuts, not being able to brew.


Will the escaping heat take my boil longer to get up and going? I know how you feel, I've passed by mine for weeks not being able to do anything and now I might find some time to actually brew!! Thanks for the input.. I hope you get going on it soon! 👍
 
How many gallons were you boiling? I use BG10 burners with a 20psi regulator and it takes me 30 ish mins to get 13+ gallons to a boil. I'm pretty sure the BG12's put out more BTU's so a half hour sounds about right. I have mine mounted 5" from my keggles.


I did 6 gallons of water for my test.
 
Hmmm.. Didn't think of that. I might consider that, although I'm afraid of weakening the structure since my tubing is on the thin side to begin with.

They don't need to be large at all, just need somewhere for the expanding air to go. Won't structurally weaken the metal. Stick 1 hole in the bottom of each (keep any water out by being on the bottom).

Todd
 
Will the escaping heat take my boil longer to get up and going? I know how you feel, I've passed by mine for weeks not being able to do anything and now I might find some time to actually brew!! Thanks for the input.. I hope you get going on it soon! 👍
I had to drill mine to allow for more combustion air. It helped the burner and hence the boil be more efficient. (I have BG-14's).
Have you brewed with your new setup? I was wondering if you would make any changes or do anything different now that it is up and operational? I have my plan and have built the frame but have not been able to finish the assembly.
Thanks,
 
Ah. I see.

I have not brewed with it yet, I plan to hopefully get a brew in tomorrow. I think the only thing I would have done differently is use SS for the frame. I like the bare look, and I really don't want to deal with painting mine, and having to re-paint it every so often. Other thank that I'm pretty happy with the overall design of my stand. It's nice and compact. 😄
 
Oh. Are you welding your frame? If you are, tack as much of it together as you can, small tacks. I used too much heat a couple of times and got things out of square.
 
Thanks, I had a welder friend weld mine for me. I don't have a welder and probably wouldn't trust my rusty skills on something that will be seen. I'll post some pics when I get it on the wall. Good luck with your brew day.
 
Looks like something I built years ago (and still use regularly) I love the adjustable burner height idea. I just switched to natural gas and I've been trying to find the perfect height. The top mash tun on mine tips right into a garbage can or bag. I've added a few goodies since this picture so I'll have to get some updated pics. Its an all in one, easy to roll around unit.

2013-12-28 08.26.17.jpg
 
Looks like something I built years ago (and still use regularly) I love the adjustable burner height idea. I just switched to natural gas and I've been trying to find the perfect height. The top mash tun on mine tips right into a garbage can or bag. I've added a few goodies since this picture so I'll have to get some updated pics. Its an all in one, easy to roll around unit.


How was it with the BK underneath? Enough room to stir and such?
 
The BK is the one that's accessible. The one under I use to heat water for mash and mash out. I pump it to up to the mash tun directly above. The sparse arm was just sitting on my BK.
 
Back
Top