Brunken Dastard's Big Bad Brewery! 10gal eHERMS

Homebrew Talk - Beer, Wine, Mead, & Cider Brewing Discussion Forum

Help Support Homebrew Talk - Beer, Wine, Mead, & Cider Brewing Discussion Forum:

This site may earn a commission from merchant affiliate links, including eBay, Amazon, and others.

onelegout

Well-Known Member
Joined
Feb 17, 2009
Messages
248
Reaction score
6
'ello!

I've been working on this for a few months now, it's been a huge learning experience! I've so far learned the basics in:

Welding
Angle grinding
Using power saws
Wiring
Basic electrics
Basic electronics
plumbing
control systems

and advanced skills in:
Making cups of tea
Swearing
Bodging
spending far too much money
Justifying the money spending to the girlfriend
forumwhoring


Ok, so on to the pics!

My first weld attempt - I bought a welder and equipment for welding, had never tried it before!
r21d7a.jpg


Backer elements arrived. These are a ripoff as they dont come with the cables, and when you ask for them they try to charge you over twice the amount that the element cost, just for one cable! I eventually got some on ebay for cheap.
334p1rq.jpg


Bought some PIDs from italy second hand
bis1g0.jpg


Initial design was quite complicated welding/cutting wise
w979eq.jpg


Steel arrived in 3m lengths - cost £99GBP. A friend of mine helped me cut it up at his dad's workshop (hes a farmer)
1z2kbgh.jpg


First welds on the actual stand, it's 3mm thick box section and is hard to weld with a 90 amp gasless welder!
25psrap.jpg

a2u9t0.jpg

f9gx0o.jpg


Girlfriend helped me:
14jstwz.jpg

25p4l12.jpg
 
Flux core wire welder?

You can put multiple layers of aluminum foil around your weld site to catch that ugly splatter. The hot bits pick up some aluminum on the way through the foil and won't stick to the base metal.
 
Thanks for posting. Looking good!
Cheers Layne! Your brewhouse thread has been a big inspiration!

Good ol' eBay, huh?
Got a pretty lady helpin' out - you're a lucky man.
Good welds for flux core.
Thanks for posting some good beer porn.
Heheh yeah she's great : ) I've got a load better at welding, annoyingly I only got the hang of it by the last few welds where I learned enough control to do the 'half moon' method - ended up with way better penetration and less lumpyness.

Flux core wire welder?

You can put multiple layers of aluminum foil around your weld site to catch that ugly splatter. The hot bits pick up some aluminum on the way through the foil and won't stick to the base metal.
Yeah it is a flux core welder, I couldn't justify spending more cash to get a better one without trying with a basic one first. I used an angle grinder to flatten the welds down and painted the frame black, so the splatter wasn't too much of a problem, will use the foil method next time I weld though thanks for the tip!

More pics will come tomorrow, I promise!

- Henry
 
LOL thanks for that fineexampl! :D

got so much to do on the brewery to get it ready but I've totally run out of money :( Pay day's either tomorrow or tuesday, I REALLY hope it's tomorrow!
 
Quick question....

I'm getting some quickconnect hose fittings, and I've got the choice between stainless steel and aluminium.

Aluminium: £31.96
Steel: £79.20

Aluminium will be fine... right? Please say it will!
 
Aluminum is softer and less compatible with some brewing cleaners, it also dissipates heat faster, but would work. Stainless would be ideal.
 
A quick warning, Backer charge around £35 per cable, (about $50usd I think) - they're an absolute rip-off. Check ebay you might get lucky like I did!
 
'ello!

I've been working on this for a few months now, it's been a huge learning experience! I've so far learned the basics in:

Welding
Angle grinding
Using power saws
Wiring
Basic electrics
Basic electronics
plumbing
control systems

and advanced skills in:
Making cups of tea
Swearing
Bodging
spending far too much money
Justifying the money spending to the girlfriend
forumwhoring
hahaha this really made me laugh! :D

congrats on the build! hope it brings you much enjoyment.

cheers
 
Haha! yeah the clue which gives it away is the 'making cups of tea' in my advanced skills list :) I am indeed a jolly old uk chap! :D

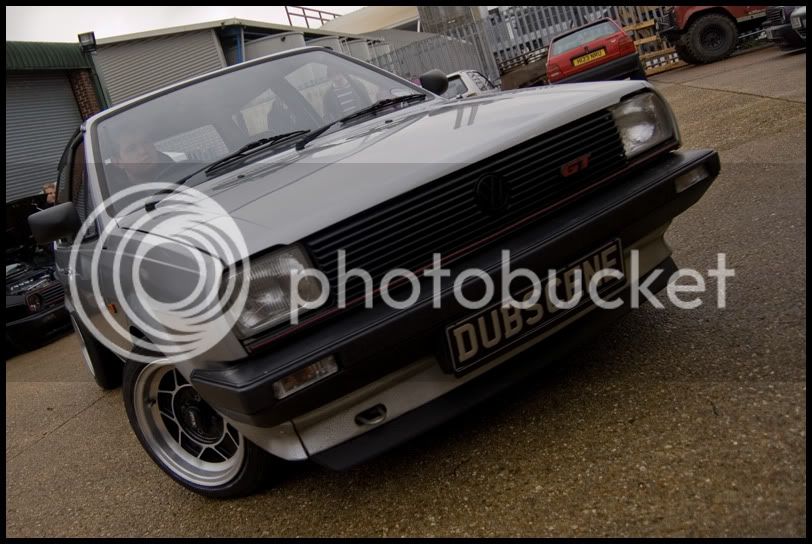
After a day of screw ups, there was one thing which made it all great... I finally sorted out the front end of my other 'project'!

It's a 1987 mk2 VW Polo, with quite a few modifications... Much like this brewery, I took on the project with absolutely none of the skills needed to finish it, but with a hell of a lot of great help from friends, I saw it through to the end - hopefully this brewery will be as successful!
nzoy35.jpg

Modifications:
*1.3L GT, Fuel injected engine conversion, 81bhp fully rebuilt (used to be 40bhp 1 litre)
*Widened arches by 3" to fit the wide ATS Classic wheels
*Subtle audio build in the boot/dash
*Mk3 polo dashboard & steering system.
*60mm Lowered sports suspension
*Custom stainless exhaust system with tubular 4-2-1 manifold (sounds like a group B rally car!)
*Lots of other minor modifications.
DSC_1093.jpg

DSC00531_small.jpg
 
Norton's, Matchless 500 & 600 Thumpers, Velo 500, 95 Disco 5 speed 4.6 powered, chipped, cammed. One in storage that had your country really pissed off,brand new in storage DMC, LOL! I won't hold it against ya driving on the wrong side iof the road. Cheers mate.
 
Ok so the pressure's on to finish this, deadline is the weekend!

Silicone hose is here, and I've done about 50% of the control box. I've never wired anything like this up before, in fact I've never really done any 240v wiring as such... If you see something that's not right, PLEASE let me know!
x4iufd.jpg

o9ihrk.jpg


Left to do:
*Finish control box wiring
*Weld in mounting brackets for pump & Control box
*Cut holes for keg fittings
*Fit the fittings to the kegs.
*Test brew with water (no grain).
 
Do you have a schematic for this? It's hard to tell what's going on with the distribution strips and all the wires coming in and out of the box on the two ends.
 
Ok thats easier.

The top terminal block is for the outputs. In blocks of 3 (+ - G) they are:
Element1
Element2
Element3
Pump

The bottom terminal block is for the power in. In blocks of 3 (+ - G) they are:
1. Element1 & PID1
2. Element2 & PID2
3. Element3 & Pump

I have only wired up the SSRs so far.
Next I need to wire up the PIDs, third element, and pump with the switches.

The third element is just to be used to acheive a boil quickly. It isn't controlled by PID.
 
Ok. Makes more sense now. I was expecting to see one large power input instead of three smaller ones.

What wattages are your heater elements?
 
aah ok yeah sorry I forgot to say - I've got to use three small inputs at the moment, because I can't run a dedicated line for it. The reason for this is the brewery is at my mums house (I live in a flat with my girlfriend and there's definitely no room for a brewery here! :D)

My elements are 2750w Backer elements, hence having to run each one off a seperate plug socket : )
 
Ok I need some advice.

I have two choices for the thermocouple setup on this rig.

1. Buy some thermocouples that are made to go through a bulkhead and be attached with a wingnut on the other side. The problem with this is that it will only sense the temp from around 10mm from the edge of the keg.

2. Construct my own thermowell....

The idea is to have a tank connector for 8mm copper pipe, with an 8mm pipe compression fitting. The pipe would go into the tank as far as I wanted, and have an end cap soldered onto it. I would then simply slide my type J thermocouples into the pipe from the outside until they touched the end cap. The benefit to this is that I can sense it from the middle of the tank, and don't have to spend more money on new sensors.
bi1942.jpg

Will this work?
 
Oh no! You can't combine Dubs and brewing! I had to get out of the Dub scene in order to keep brewing... The wife will not be happy about this at alllll haha.

Here's mine! (In it's prime)

DSC_0322.jpg
 
I think you will want some stainless washers to hold the silicone down, and I don't know what "tank connector" is though. You also might want to use putty or something to keep outside air from your probe.
 
Great dub dude! Epic stance :D
Bendavanza yeah I plan to use some washers if I need to, but will try it without. It turns out actually that the company I bought the original dodgy thermocouples from is going to replace them free of charge without me needing to return them, which is great as I'll be getting some of the ones that fit through a keg wall.... I'll try both systems and see which works best for me.

Today I got to work making a thermowell for the coil output, I used a 15mm to 8mm reducer on a 15mm tee peice, with a length of 8mm pipe running into the top of the tee peice with an end cap on it. It seems to have worked ok but I think I might need to replace it with a 22mm system around the 8mm pipe as it looks like it's going to restrict the flow a lot!
8vt0zm.jpg

epeyjs.jpg

2ue5zk0.jpg

wjcms4.jpg


Please excuse the terrible soldering, I've only done it once before and forgot that with solder-ring fittings I needed to do all of the joints at the same time :D
 
Yeah, I'd suggest going larger on the 'T' fitting so that you don't have too much restriction.

As for your soldering... my opinion is that if it doesn't leak, you did it perfectly. :D
 
I'm going to try it with just the 15mm fitting - The reason for this is that I figure that slower transfer times mean more complete temp transfer in the HEX coil. If I need to upgrade it in the future I can, but got to take into account the fact that the hex coil is 10mm pipe anyway.

Talking of the HEX coil...
Here's a pic of it before it was finished, I just soldered it to the back of the tank connectors, and realised that this wasn't strong enough as only the solder was holding it together.
ne88lu.jpg

I had an old IC that I had built ages ago, just bent and cut it to fit. If you want to solder the coil to the back of two tank connectors, you will need to drill out a 15mm hole using a blacksmith's drill. I don't have a vice so I fitted the connector backwards into a keg. This meant that I could drill it and if it spun round it would tighten up and stop. The result was superb, it soldered together fine (be sure to heat the brass tank connector more than the copper pipe as it has to get hotter to accept the solder).


More pics soon!
 
What is the outside diameter of that coil? I am guessing 9mm or 10mm?

If so, I wouldn't worry about the temp chamber diameter. It think it will have no more flow restriction that your coil will have. Making the probe chamber larger won't change anything from the pump's point of view.
 
What is the outside diameter of that coil? I am guessing 9mm or 10mm?

If so, I wouldn't worry about the temp chamber diameter. It think it will have no more flow restriction that your coil will have. Making the probe chamber larger won't change anything from the pump's point of view.

Yeah that's what I figured : )
got to take into account the fact that the hex coil is 10mm pipe anyway.

I've been working on the electrics today, just got the control box pretty much finished - needed to swap it around so that the mains input went in on the right hand side, and the control output went out on the left hand side, luckily this was just a simple case of switching around the MDF mounting panel and swapping the wires around. I also took this opportunity to install some cable glands that I bought online from ebay for SO cheap, theyre great quality and work fine! :)
 
Ok today is a good day!
I'm picking up some of the last few parts for the brewery today, a couple of ball valves for the inlets to the kegs, a couple of bits and bobs like elbow fittings for the plumbing, washers etc.

Got to work out how to make a manifold or false bottom for the mash tun now!


To Do:
1. Test fit all valves, elements and fittings
2. Build mash tun's bottom manifold (going to adapt the previous one that I had for my coolbox I think)
3. Drill out the 22mm tank connectors when the drill bit arrives.
4. Solder up those tank connectors.
5. Build a return manifold for the mash tun
6. Grind or file down the lips of the kegs which are still all jagged
7. Cut hose to fit round the lips of the kegs.
8. Cut hose to length
9. test and Fit new thermocouples
10. Ground everything, and have it inspected by an electrician friend.
11. Test run, tune PID as best as possible.
12. Take everything apart, clean and sanitise everything thoroughly, including all fittings, pipework, etc.
13. Put everything back together with fresh washers.
14. Another test run
15. Brew day!

Then future to-do's are:

1. Buy another pump, adjust system to work off two pumps so I can fly sparge.
2. Make any adjustments needed to the brew stand
3. Have brew stand sandblasted and powdercoated
2. Drink lots of homebrewed beer!

So, that's my lists done, looking forward to working on it after work! :)

Today was also a good day as, like a lot of homebrewers/beer enthusiasts, I've been trying to lose weight.... I started on the 12th of april, when I weighed 201lb, I'm 20 and 6ft, so this was overweight for me and I was feeling it! Now it's the 12th of May, exactly a month later and I've lost exactly 1 stone! I think it's got something to do with not drinking any homebrew recently :D

- H
 
Haha! yeah the clue which gives it away is the 'making cups of tea' in my advanced skills list :) I am indeed a jolly old uk chap! :D
What area would you be near?

I lived in the UK for a total of about a year in places around RAF Bentwaters, RAF Woodbridge, RAF Mildenhall and RAF Lakenheath. And yes, I've been to Sherwood Forrest. The last time I was in the UK was nearly 20 years ago. I always had a wonderful time there, even with the weather. Car boot sales usually had some goodies and pub crawls rock! A trip to the coast was always an eye opener. On a sunny day, the light reflecting off of the average englishman at the beach could hurt the eyes of a blind man.;)
 
Back
Top