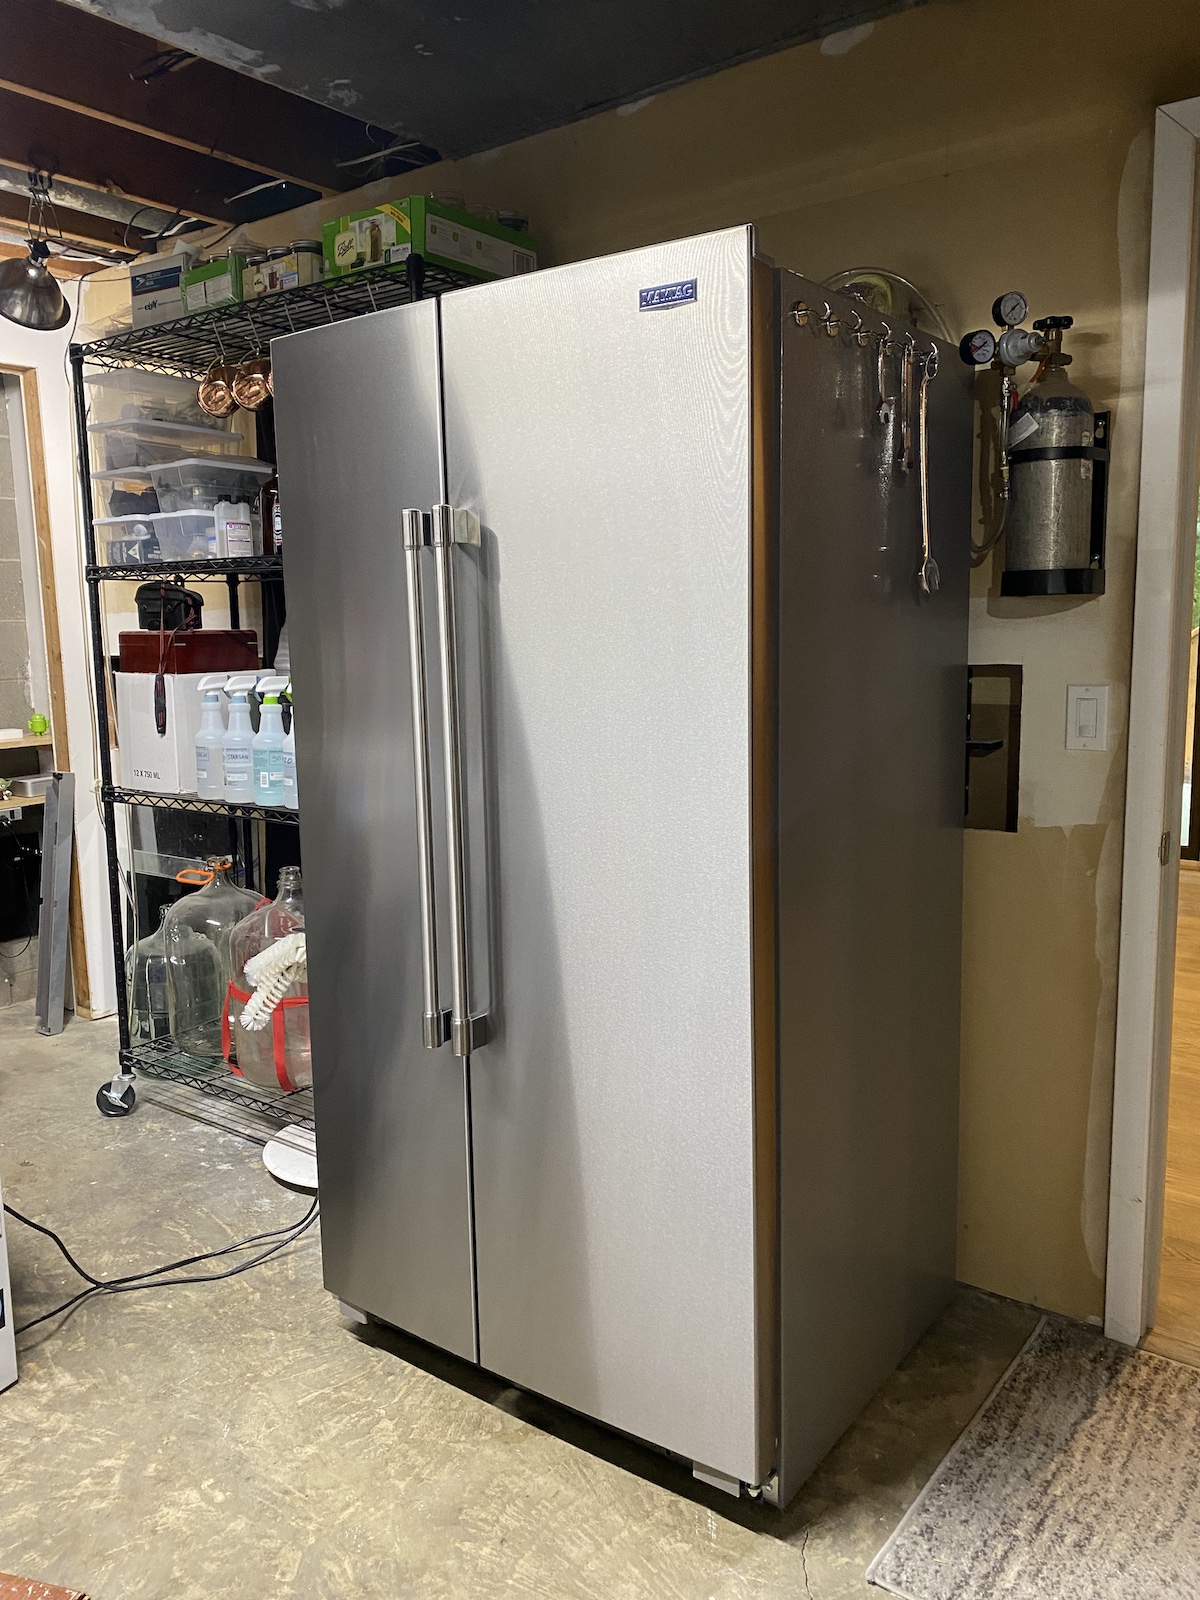
broox's side-by-side kegerator plumbed to in-wall taps

Homebrew Talk - Beer, Wine, Mead, & Cider Brewing Discussion Forum

Help Support Homebrew Talk - Beer, Wine, Mead, & Cider Brewing Discussion Forum:

This site may earn a commission from merchant affiliate links, including eBay, Amazon, and others.

broox

Member
Joined
Nov 11, 2018
Messages
19
Reaction score
5
Location
Des Moines
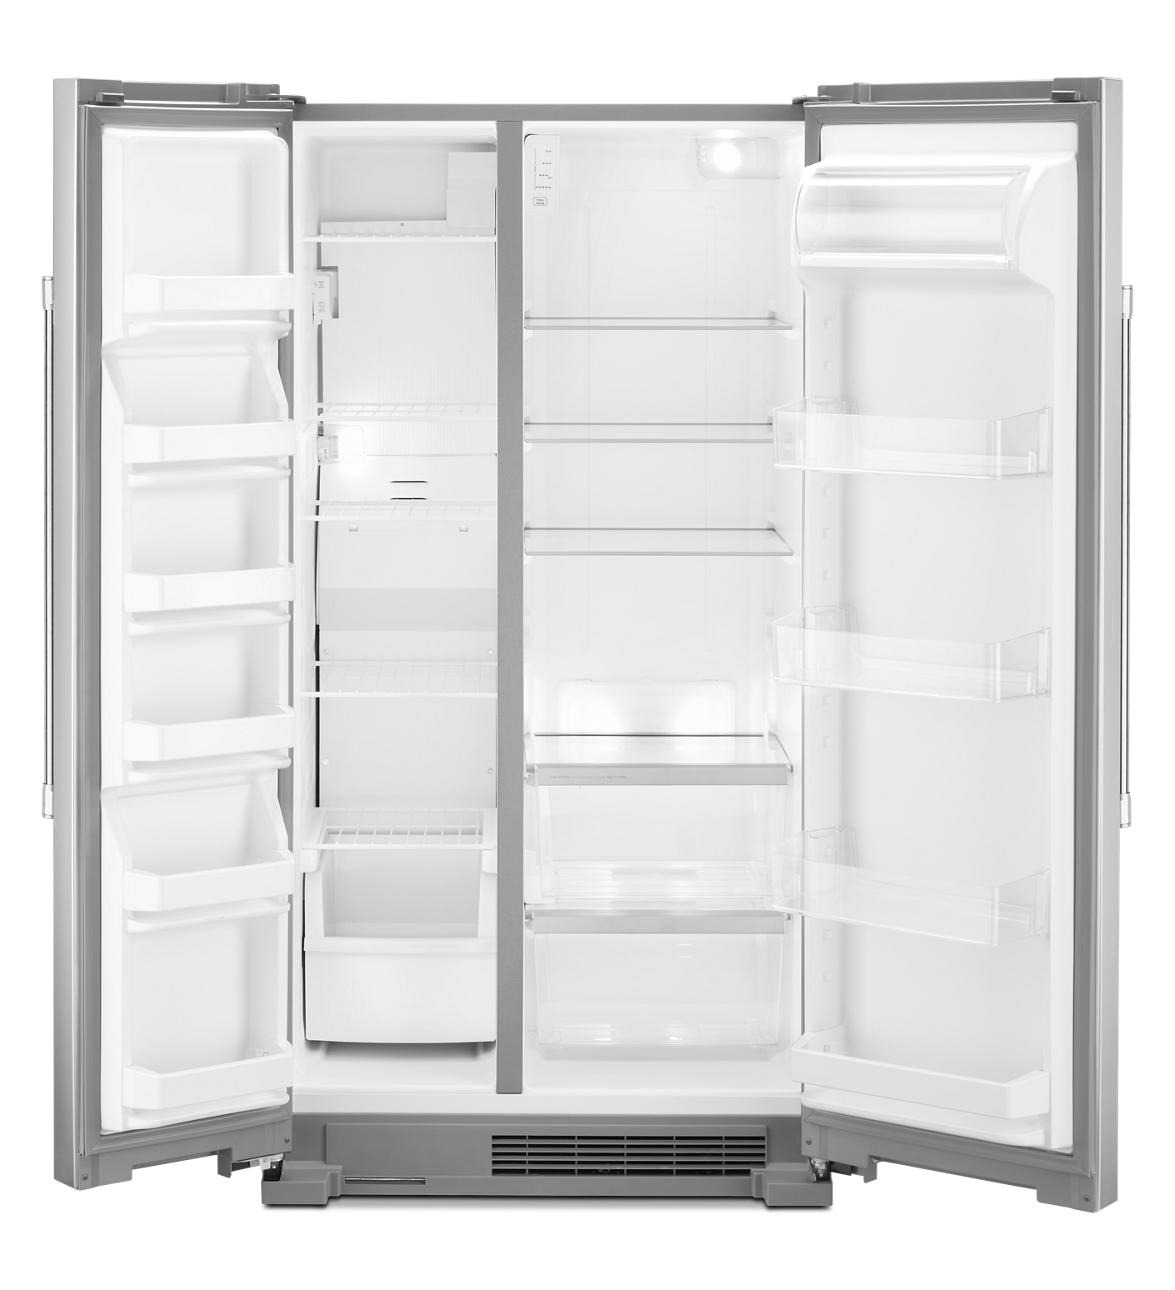
I just picked up a Maytag MSS25N4MKZ side-by-side refrigerator to replace my small keezer setup, so I'm starting a build thread!

I went with the side-by-side because my wife and I wanted more general refrigerator and freezer space alongside the homebrew kegs... The keezer was kind of annoying for throwing extra drinks in, and the side-by-side configuration just seemed like the best use of space for storing extra stuff.

MSS25N4MKZ_Standalone_1600X1600.jpg


SO... I'm planning to store kegs in the bottom half of the fridge, but I would like to plumb the tap lines into the wall that sits behind the refrigerator - with taps on the other side.

I highly doubt I can plumb lines straight through the back of the fridge, as I'm pretty sure this is where most of the coolant lines are. I don't really want to plumb out of the side of the fridge, just because the plumbing will be in the way.

I'm thinking the best way to do this would be to plumb the lines out of the top of my fridge, into the wall behind it to an insulated tap-box that sits between the studs.

Doing this provides the shortest amount of plumbing at around 2-3'... so I should be able to pretty easily get away with 2 - 2" air ducts, and I'm planning to run 3 taps.

I've never seen anyone run lines out the top of a full-sized fridge, so far starters, does this seem sane? Think I'll have any problems cutting 2" holes in the top of my brand new, full-sized side-by-side? Most new fridges keep all the fragile stuff in the back, right?

In case my description wasn't clear, here's a terrible sketch with even worse proportions:
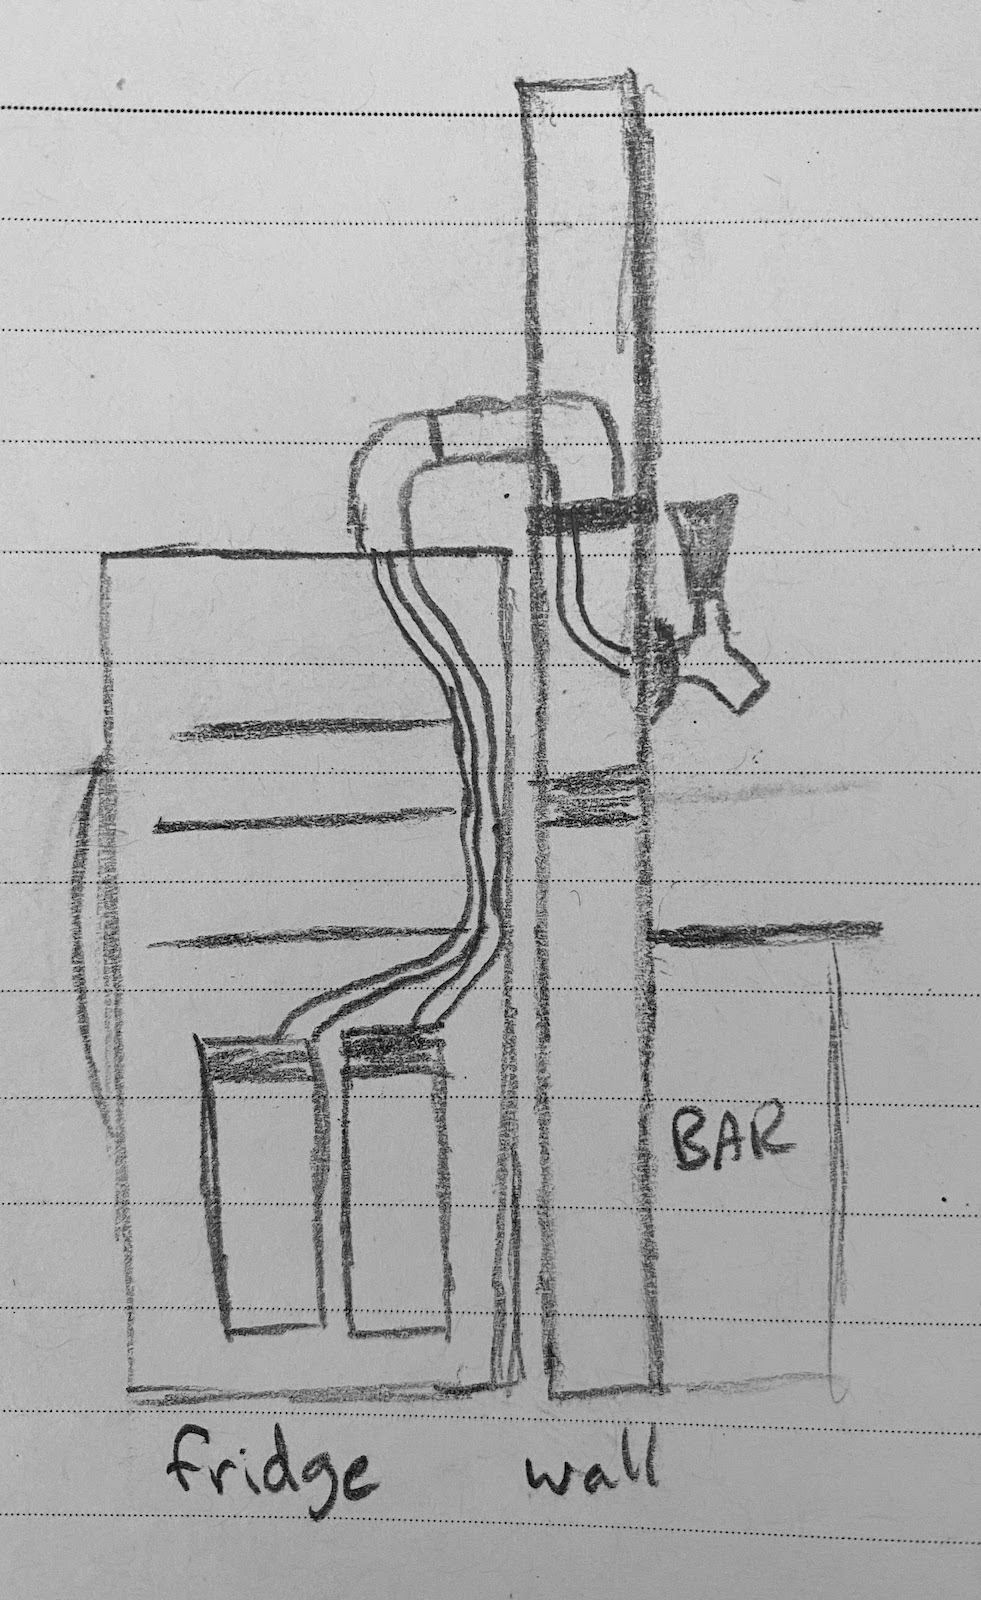
IMG_9298.JPG


For searchability, I'm pretty sure the Maytag MSS25N4MKZ is the exact same as the Whirlpool WRS315SNHM / WRS315SNHB / WRS315SNHW
 
Last edited:
Where is the freezer? In the top?

Also, must insulate the lines running from the top of the fridge to the taps. If not, then loss of cooling will occur. Loss of carbonation will occur. Or, will cause foaming at the tap.

What will happen to the beer sitting in the lines between the top of the fridge and the taps when not serving?
 
Would it be possible to rotate the fridge 90 degrees? Then you could run the lines through the side of the fridge.
 
Where is the freezer? In the top?

Also, must insulate the lines running from the top of the fridge to the taps.

It’s a side-by-side. The fridge and freezer are beside each other and run from top to bottom on their respective sides.

MSS25N4MKZ_Open_1175X1290_p191430mr-002z.jpg


I plan to run 2” PVC conduit (which itself is an insulator) and blow cool air from the fridge through the pipes. But I’ll probably add some extra insulation to prevent condensation.

Would it be possible to rotate the fridge 90 degrees? Then you could run the lines through the side of the fridge.

Unfortunately not without sacrificing accessibility. Side-by-side fridges need room on both sides to fully open the doors.
 
Last edited:
You could shift it away from the wall the 2-3" to allow the door to open. Then add some insulation to the line between the fridge and the wall. Of course this really only helps if the fridge is close to the corner of the room. If it's in the middle of the wall, then it would look funny.
 
Yeah, I totally could shift the fridge away from the wall, but like you suggested, it sits in the middle of the adjacent room and I want the back of the fridge against the wall.

So, I plan to drill 2 - 2" holes in my full-sized side-by-side fridge.

I'm curious if anyone has tips, concerns, or experience with cutting those holes in the top of said fridge. I'd love to drill straight through the back, but I think that's likely not an option.

When I get around to tackling it, I plan to try to locate any lines in the top/sides with my IR thermometer. If that doesn't yield anything, I'll try the alcohol plus corn starch method. Then I'll try the shallow drill + feel around method for safety.
 
Last edited:
Man, it feels so sketchy drilling giant holes through the walls of a brand new fridge... but, I got it done!

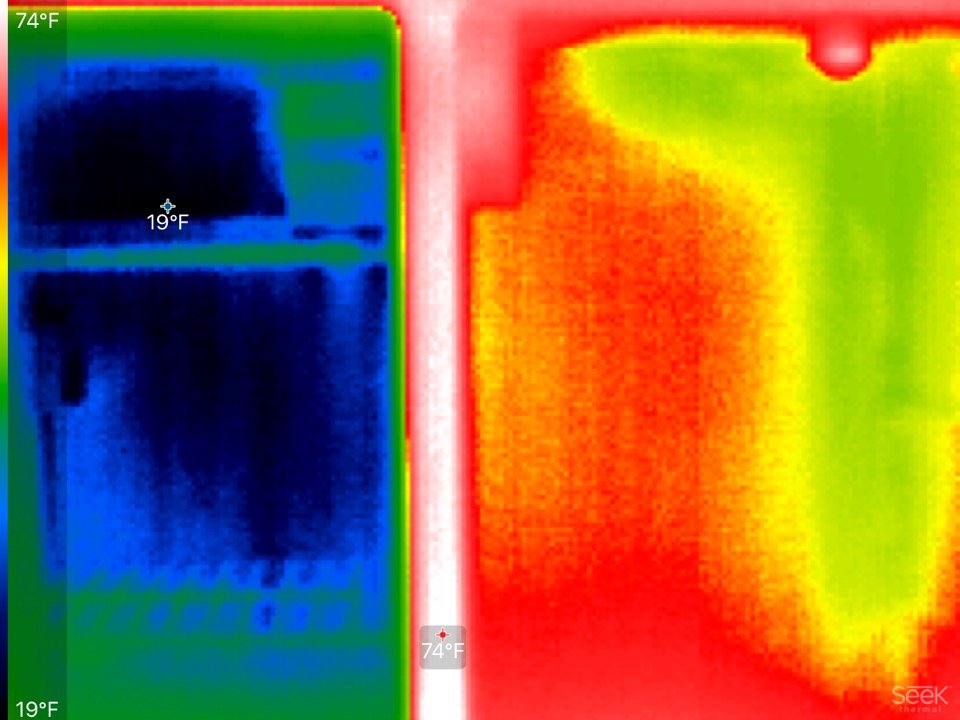
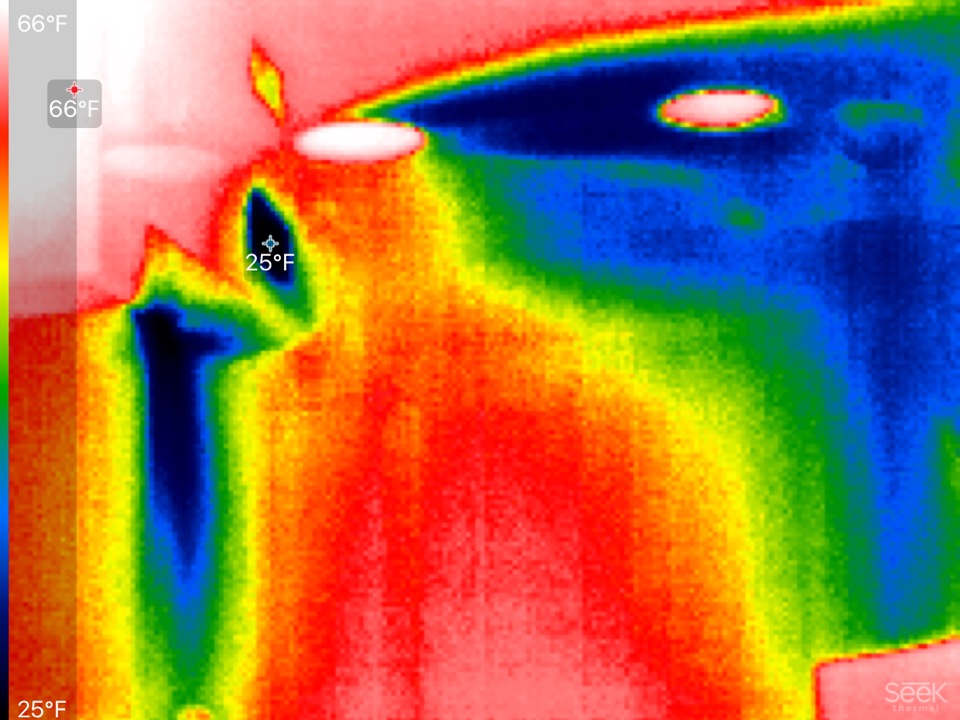
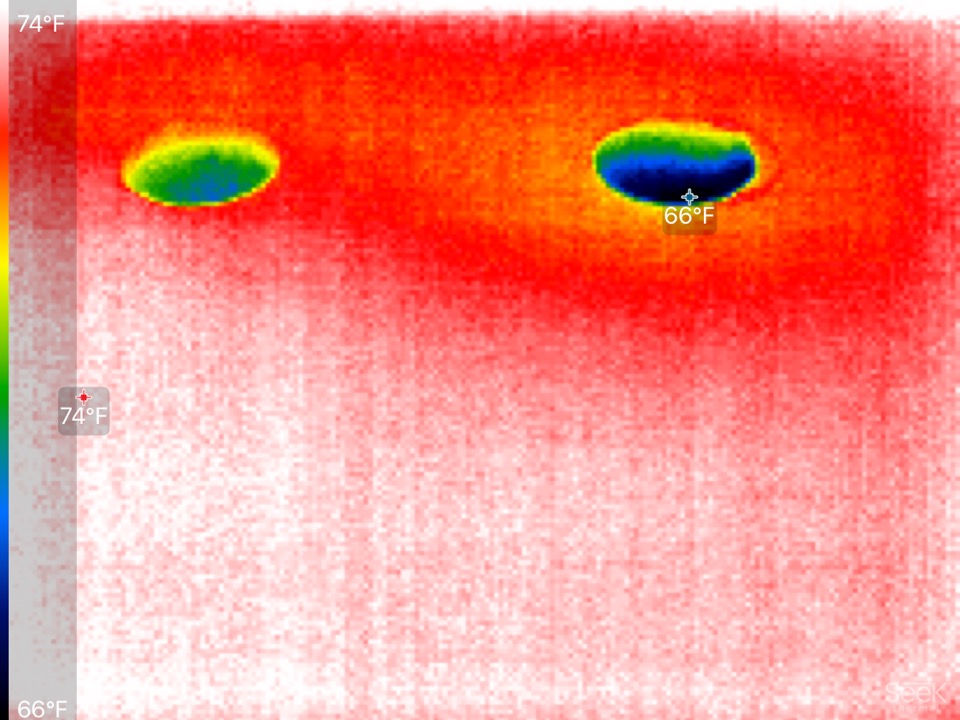
Before drilling, I tried waving an IR thermometer all around the fridge, which didn't show me a whole lot... so I borrowed a buddy's thermal camera as an additional sanity check. This led me to believe that all of the cooling was happening on the freezer side, with only a fan and some vents pumping air through the fridge side. It's a little hard to make out, but here, you can see the cold freezer on the left pumping cool air through a vent and across the top of the fridge side.

IMG_0016.jpg


Aside from the controller, fan, and LED light, I couldn't find anything else on the top of the fridge... So I did some measuring and dove in.

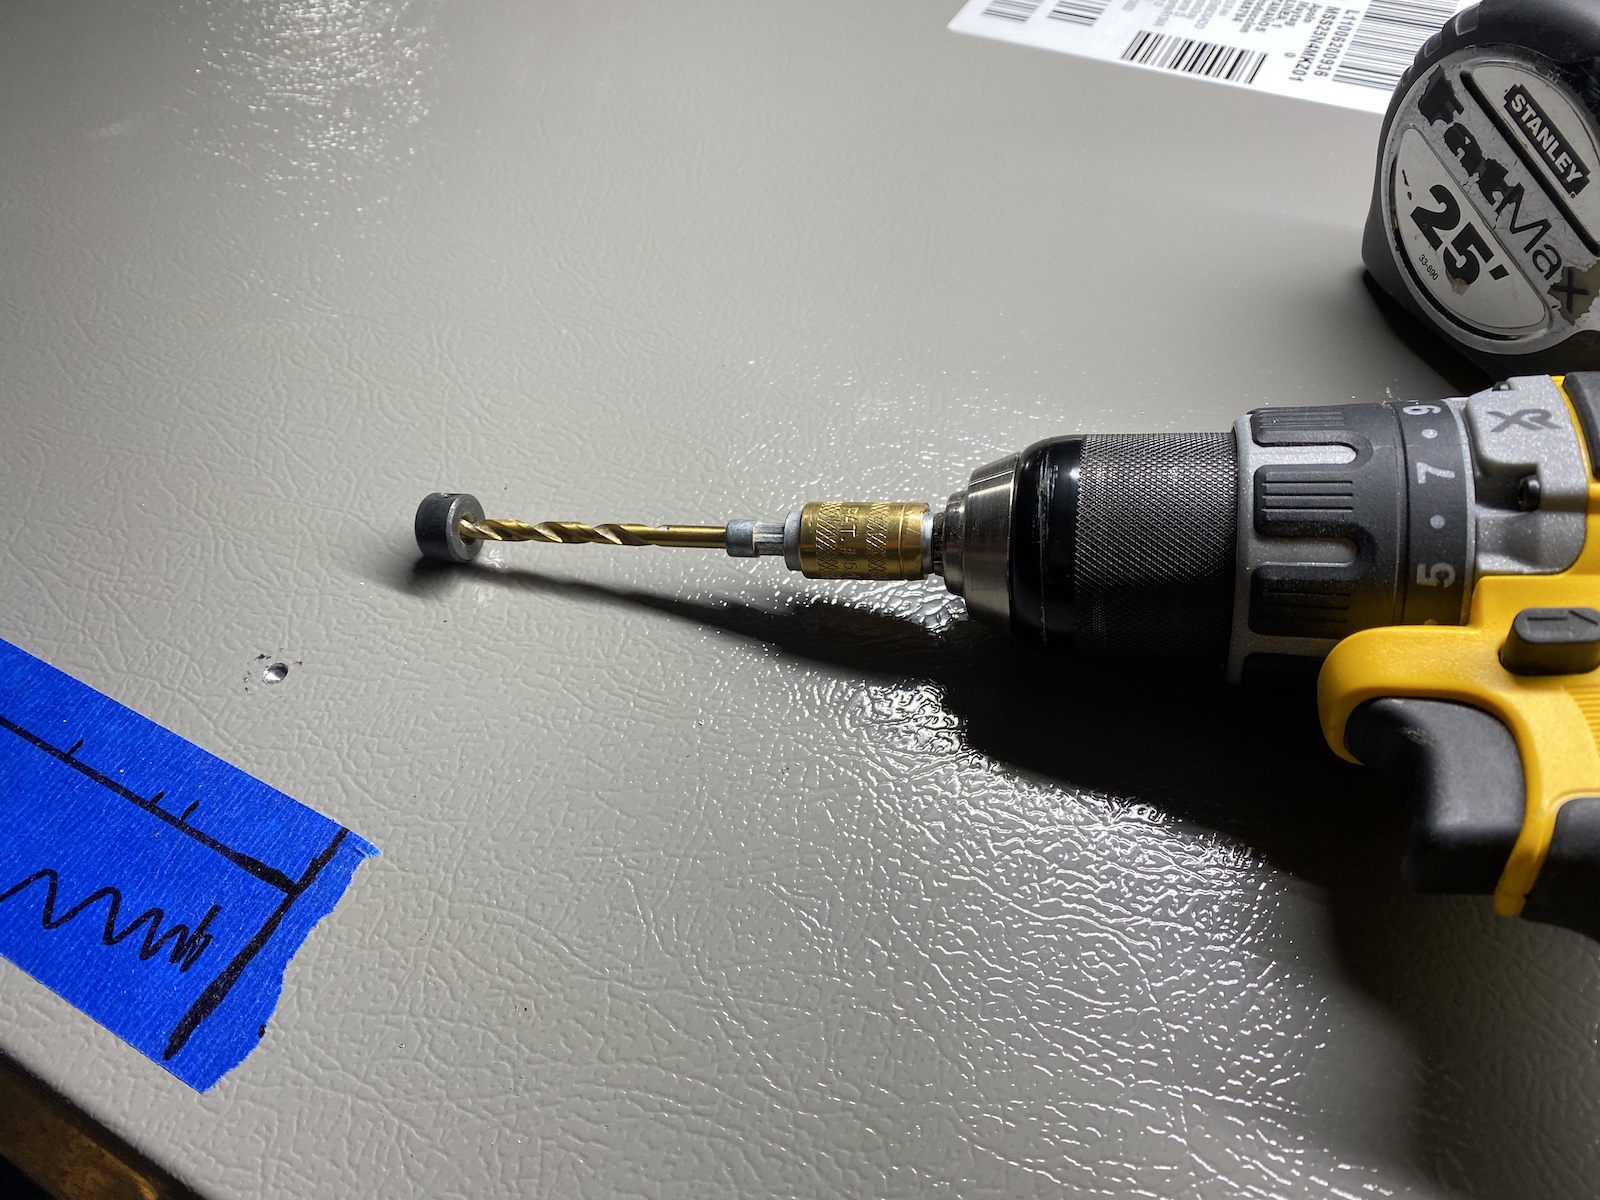
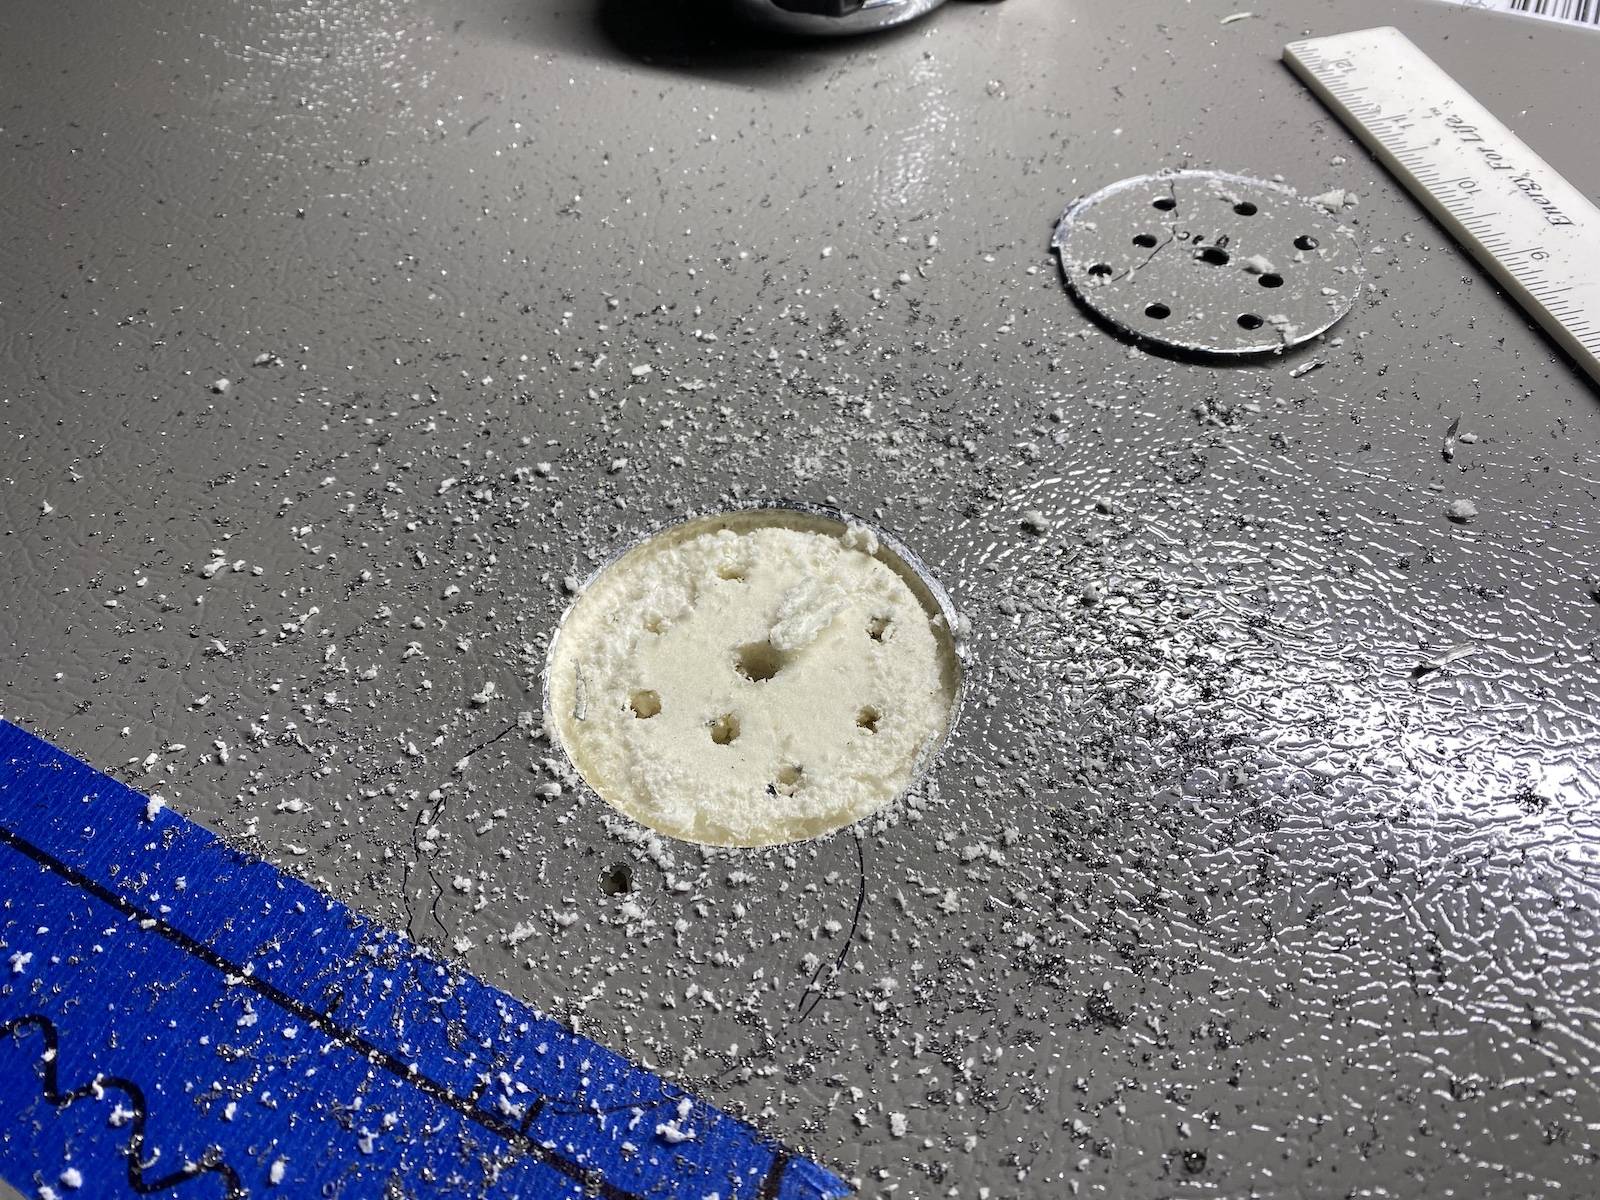
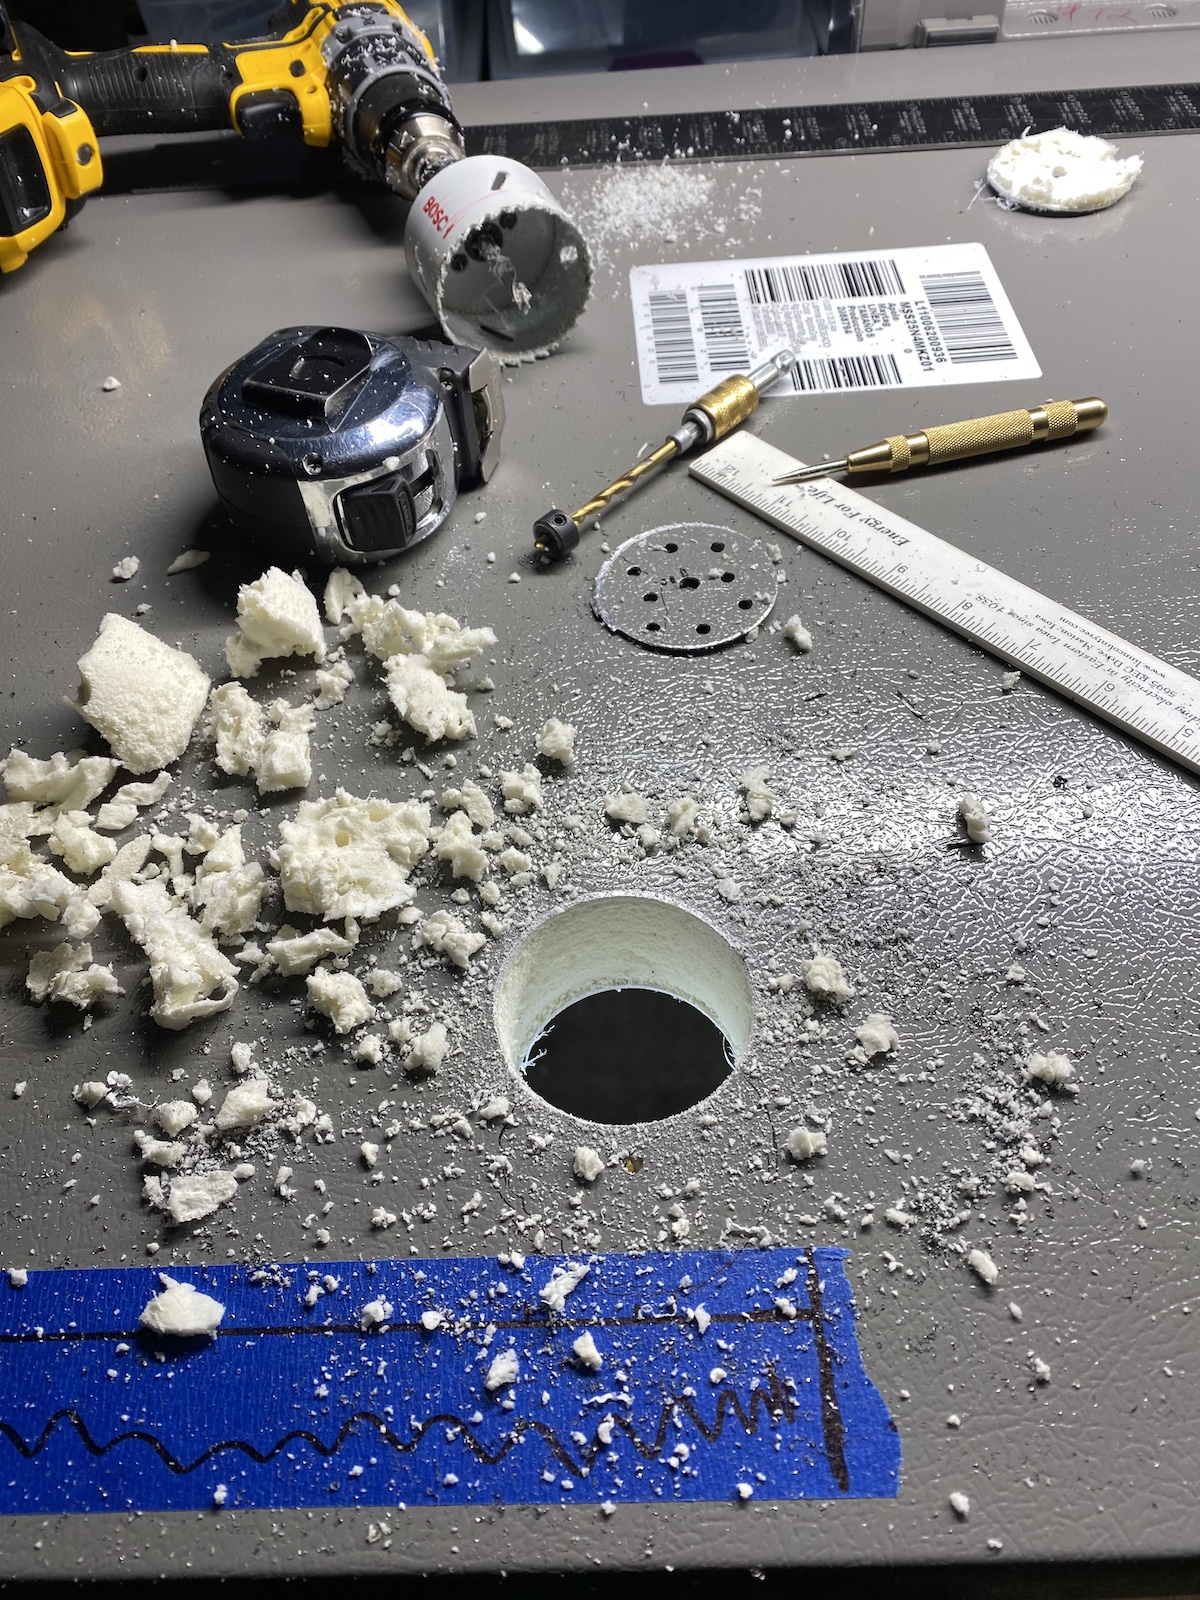
First, I used a collar on my drill bit to puncture the outer skin and feel around. In the center of my first hole, I found something in the insulation.

IMG_9397.jpg


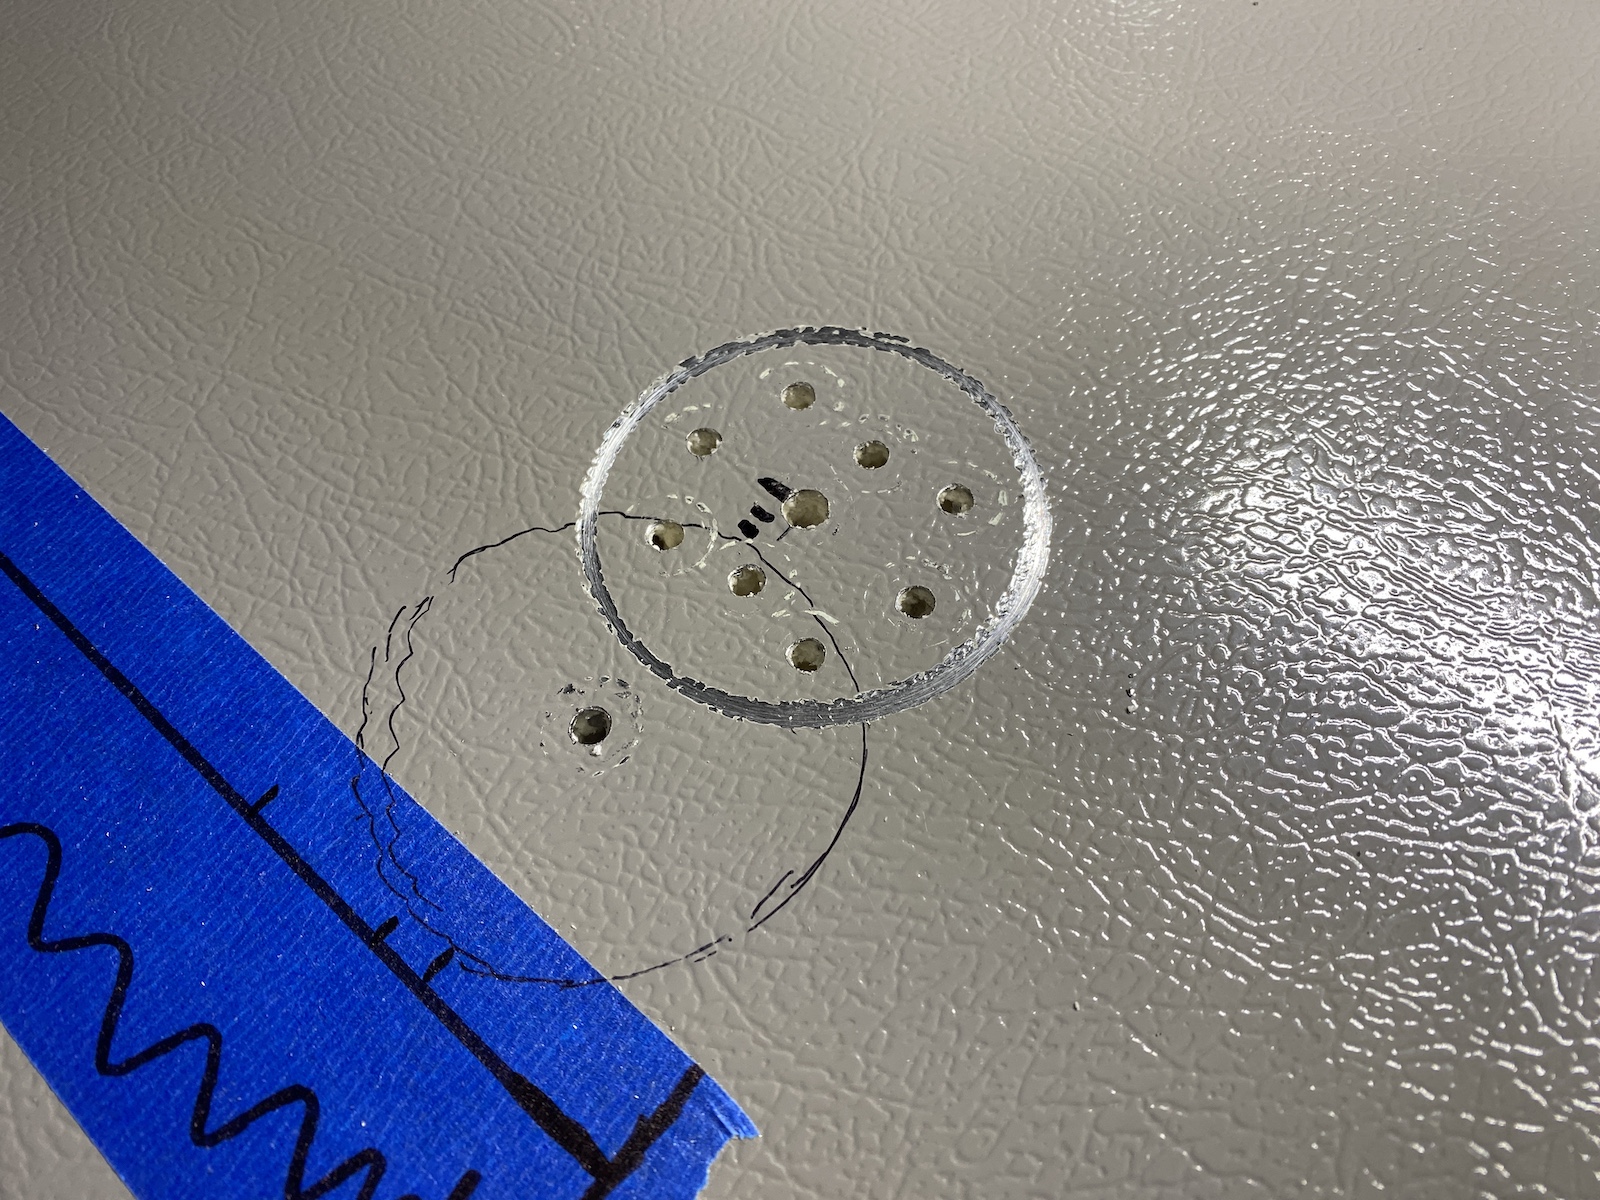
I couldn't tell if it was some kind of line or a piece of the inner-liner to add rigidity... Either way, I moved the hole, plunged a few more check points, was able to feel all the way to the liner, and went through.

IMG_9399.jpg

IMG_9400.jpg

IMG_9401.jpg


For the second hole, a similar thing happened. I thought I was good, but as I drilled more holes to feel around, I realized that I would've hit a piece of the fridge light mounting brackets... so I moved it a bit as well.

IMG_9404.jpg


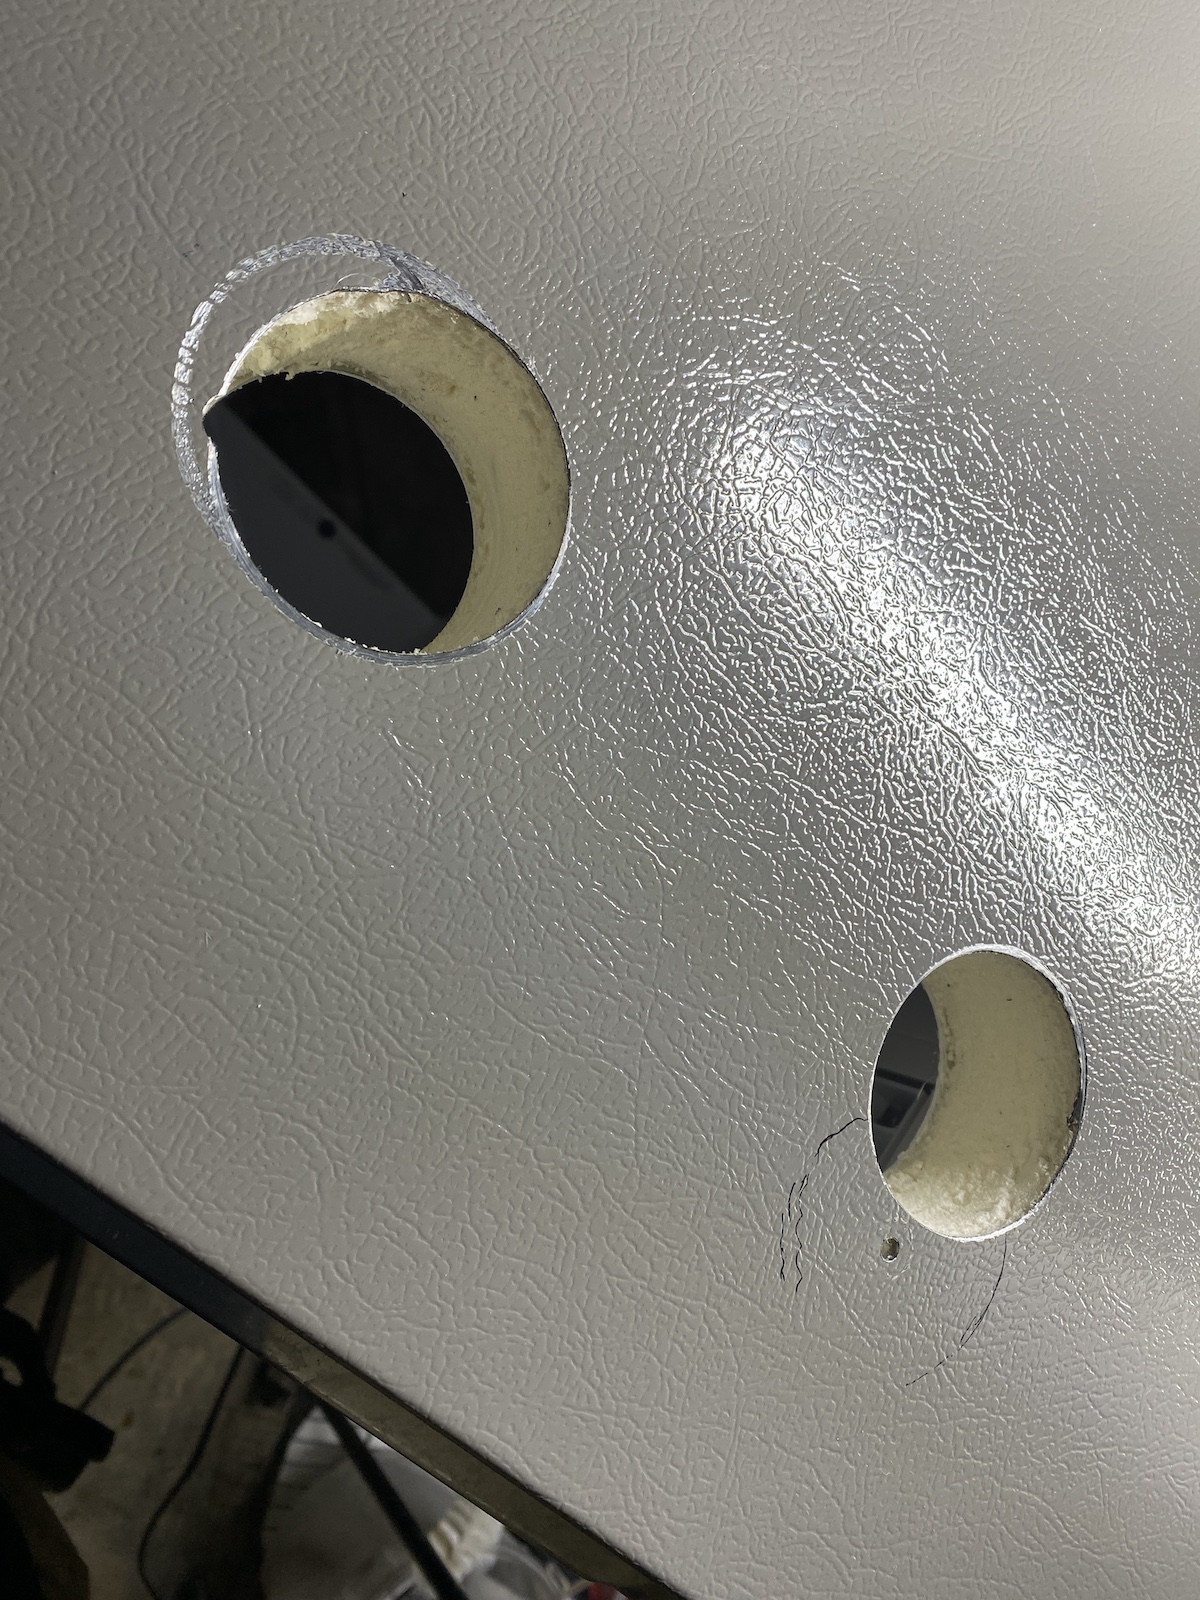
I wound up with some scratches and an extra hole on the skin, but no one will see 'em since they're on the top.

IMG_9405.jpg


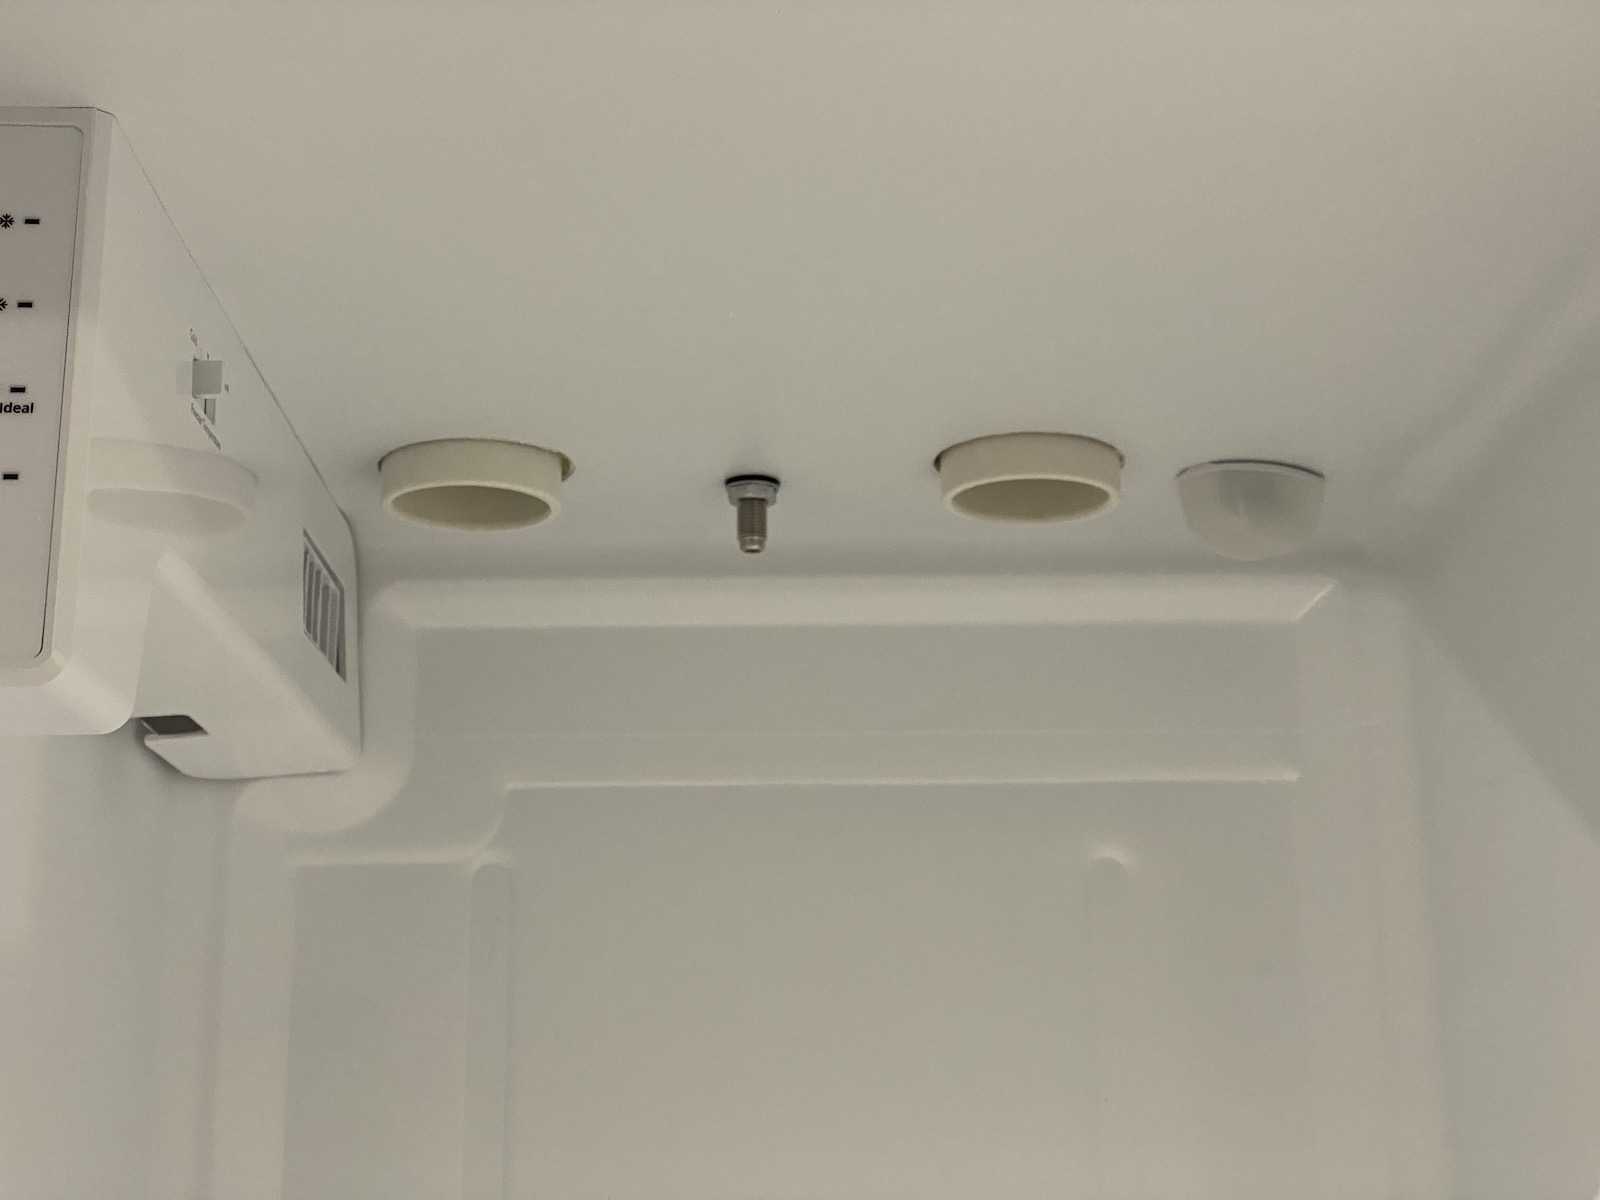
At least the inside looks nice and clean. :D

IMG_9406.jpg


With the holes being right by the fan that pumps cool air over, I'm hoping that I can mount some kind of deflector to push some of the air up through plumbing... or maybe just allow the PVC to hang down a bit on one side with an angle on it so that some of the air gets deflected into the tubing.

I don't want to be too aggressive with pushing all of the air through there, because, like I said, it's coming directly from the freezer and might be a bit too cold for the beer lines.

Here are some thermal images of the cooler air being blown across the new holes.

IMG_0006.jpg


And from the top of the fridge...

IMG_0005.jpg
 
Last edited:
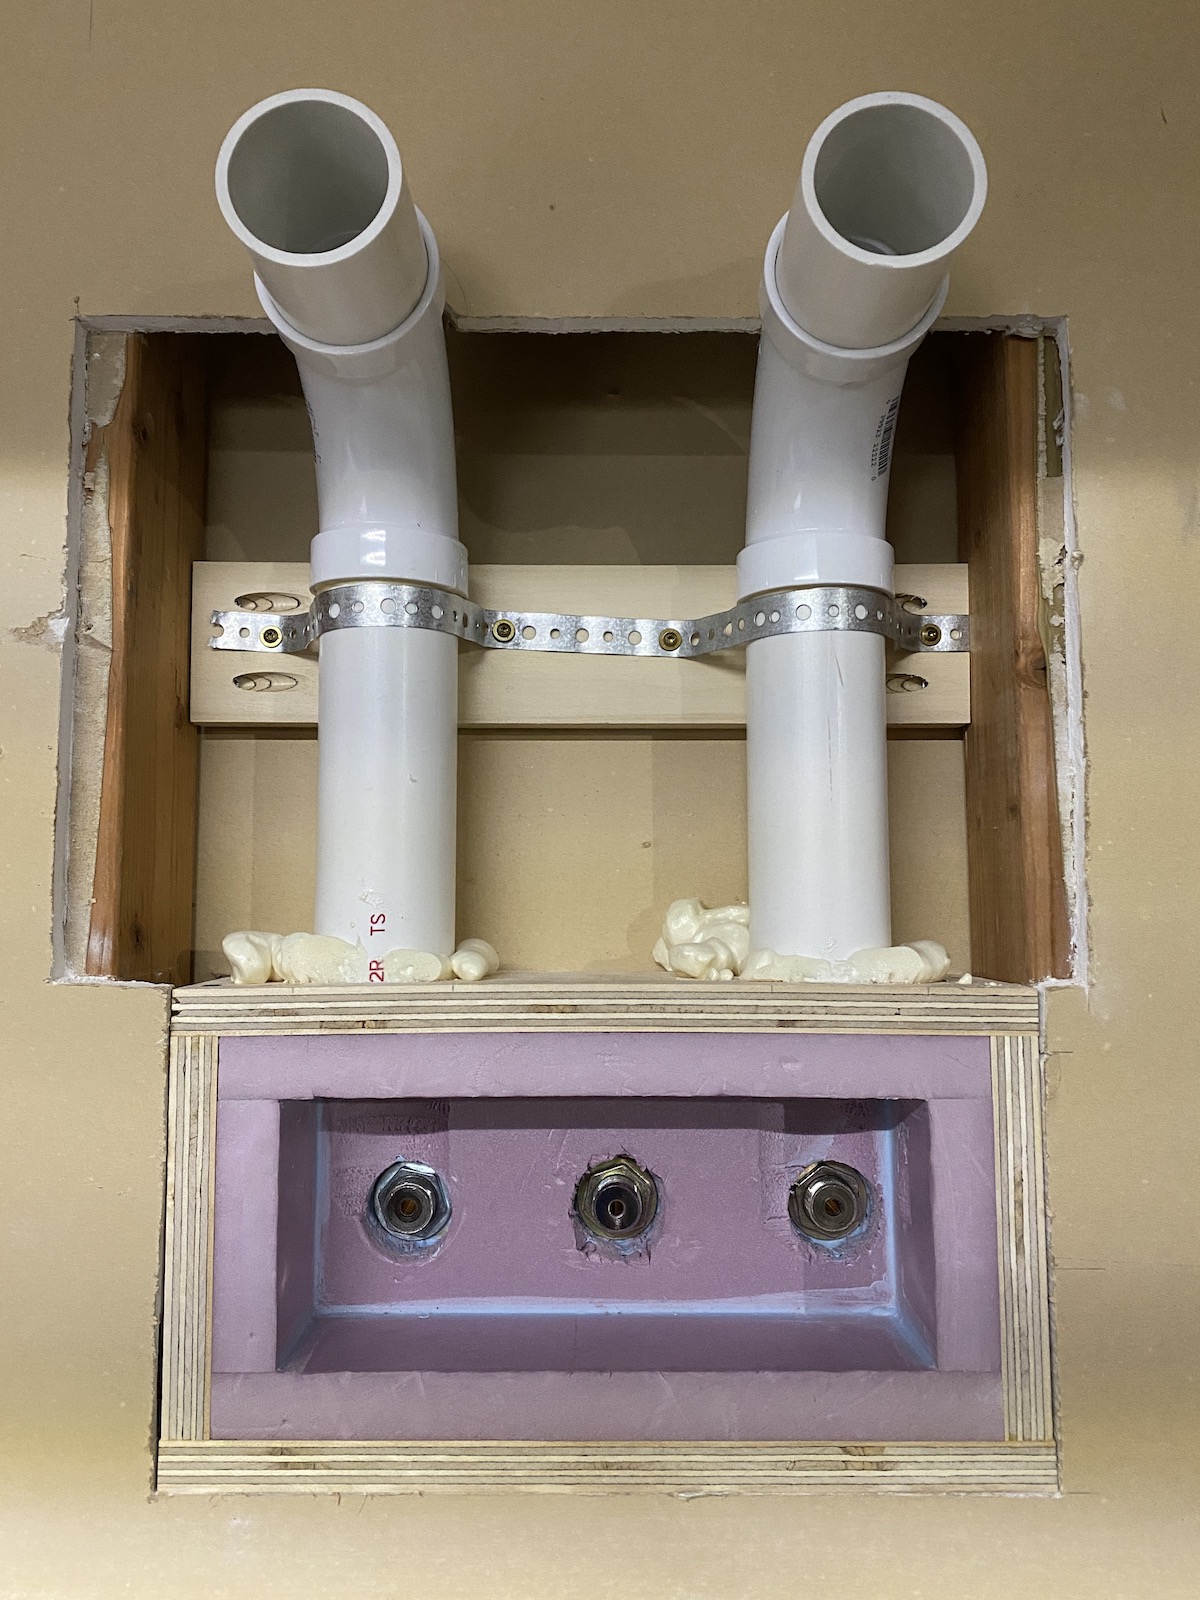
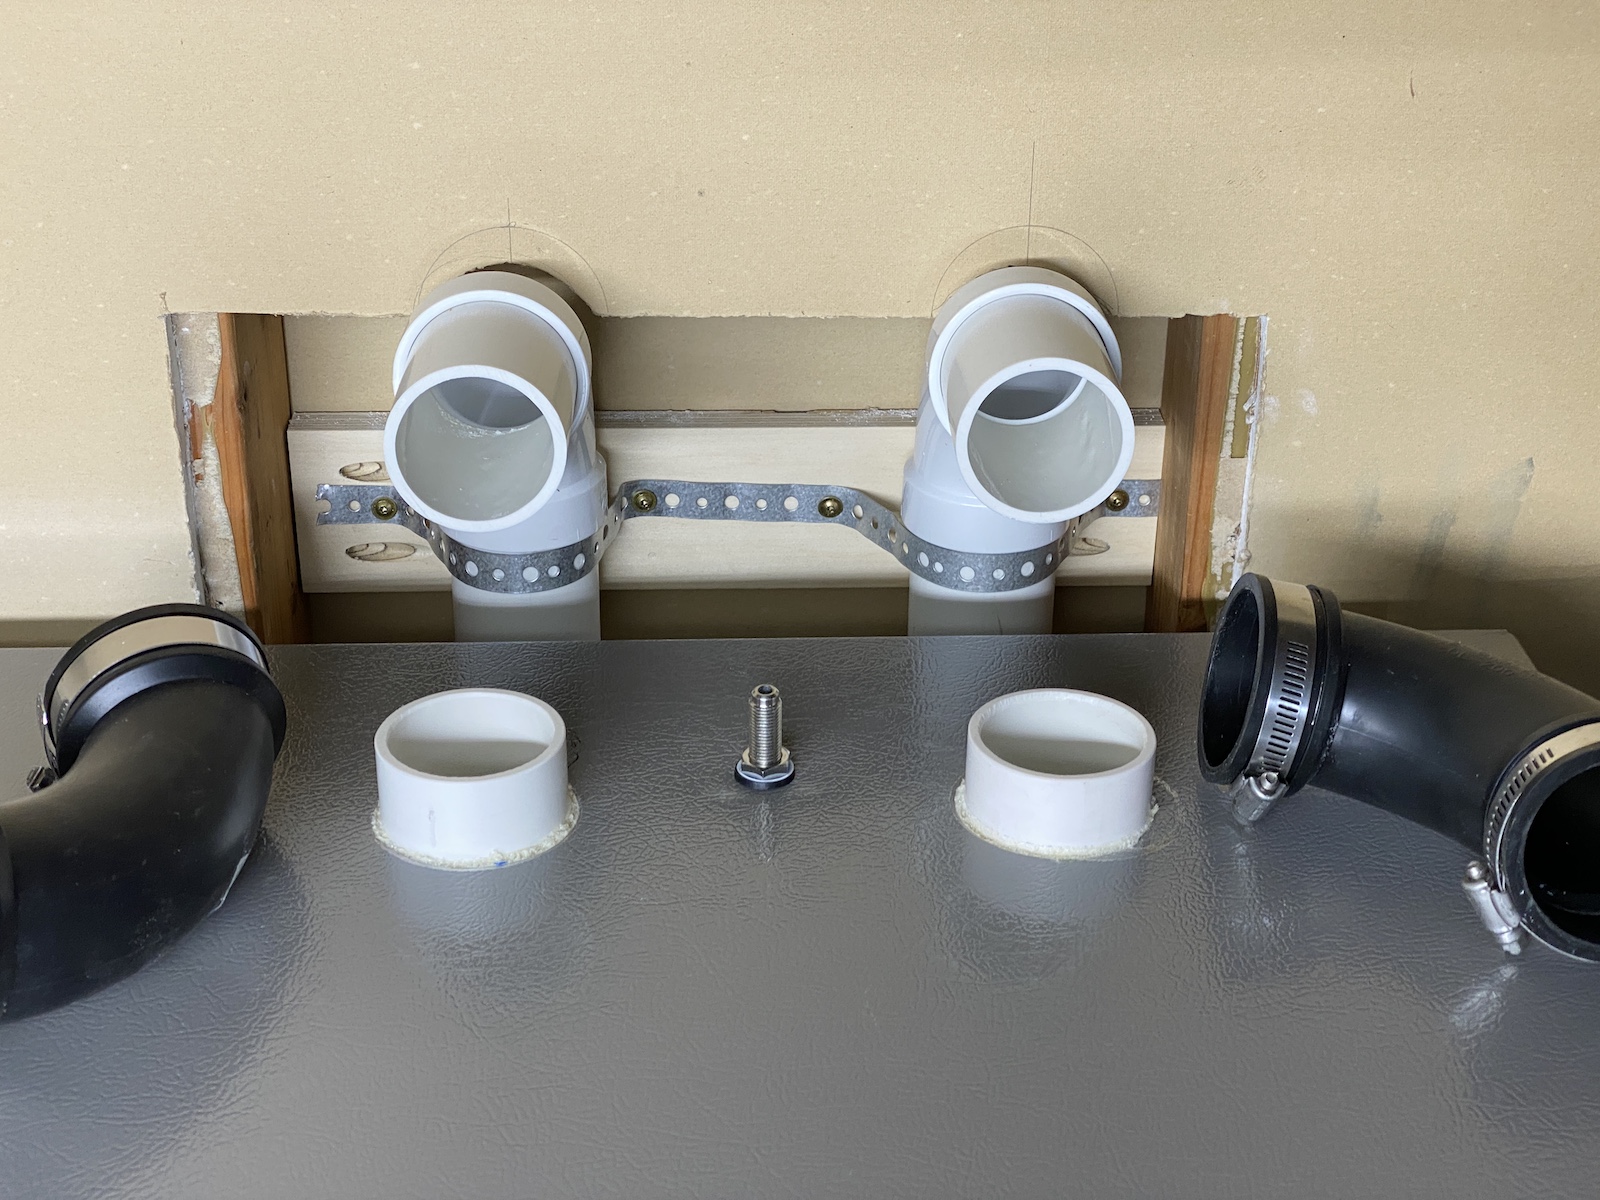
I got the in-wall tap-box built and plumbing mostly finished up. I'm planning to use rubber elbows to connect the fridge to the wall so it's easy to move/service things if we ever need to... and also so that nothing breaks if the fridge gets bumped or whatever.

IMG_9518.jpg
IMG_9520.jpg
IMG_9521.jpg


I didn't even really plan for this, but I lucked out with the location of my holes (heh). Since my fridge already has a fan in the top, I figured that I could try to push half of that air immediately through the lines with an elbow. Fingers crossed that this works and that it won't be too cold!

IMG_9524.jpg
 
This is amazing, keep us posted! I got the green light from the wife to have my keezer in the garage but run lines into our kitchen so I'm eagerly waiting to see how this turns out. Cheers!
 
Got everything pretty much wrapped up over the weekend!

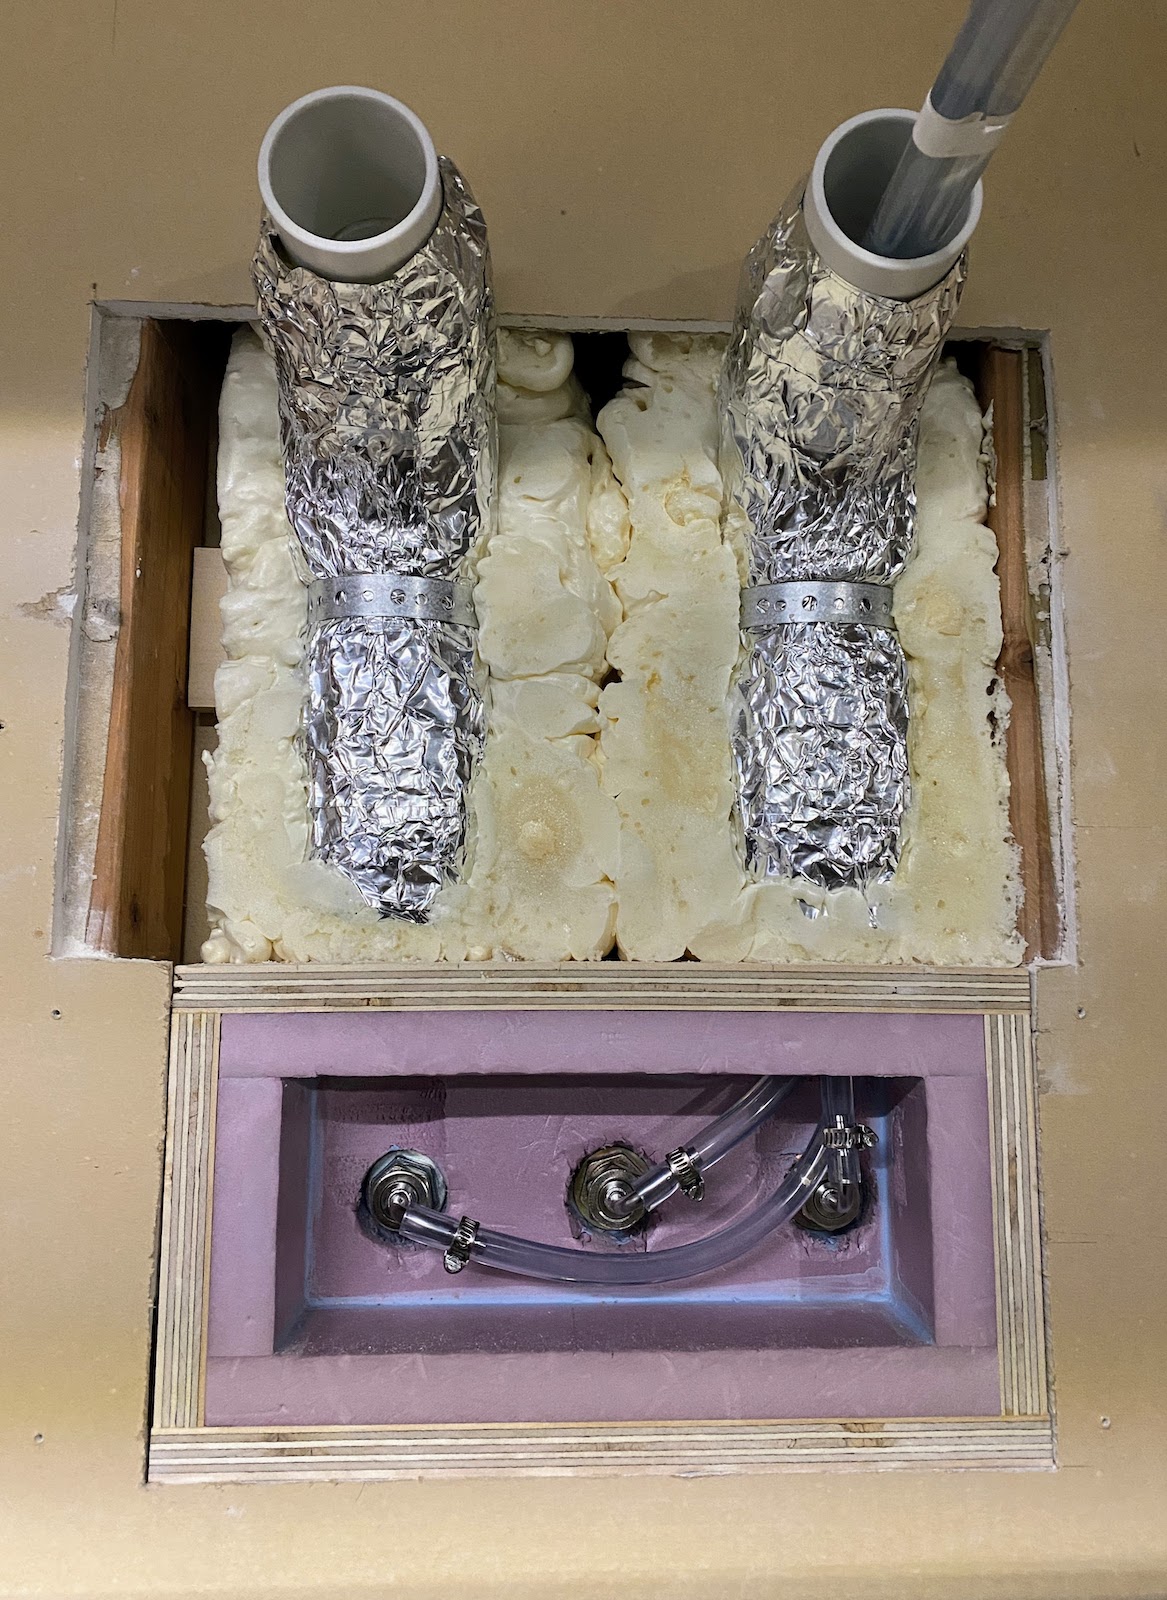
First I insulated the pipes and closed up the in-wall tap box (I went a little crazy with the spray foam, heh). It was tight, but I'm really happy that I managed to fit all of this inside a 2x4 wall.

IMG_9589.jpg

IMG_9591.jpg
IMG_9590.jpg


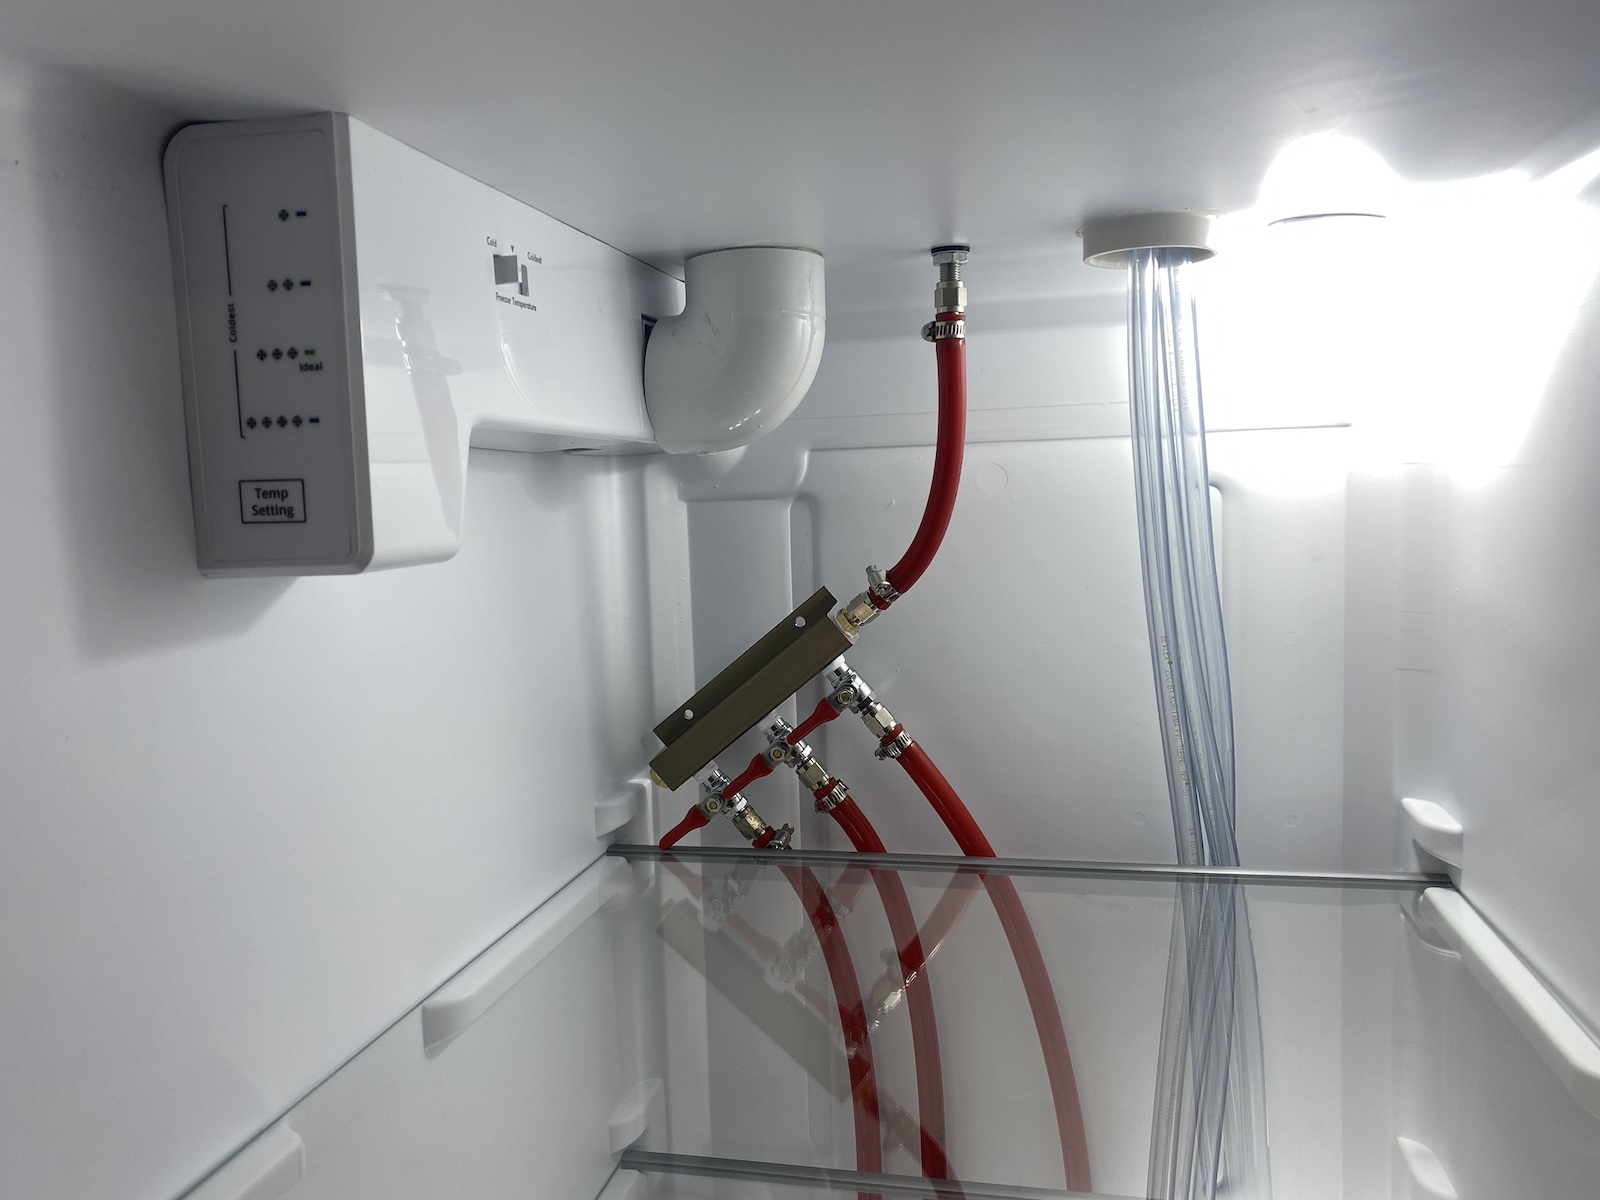
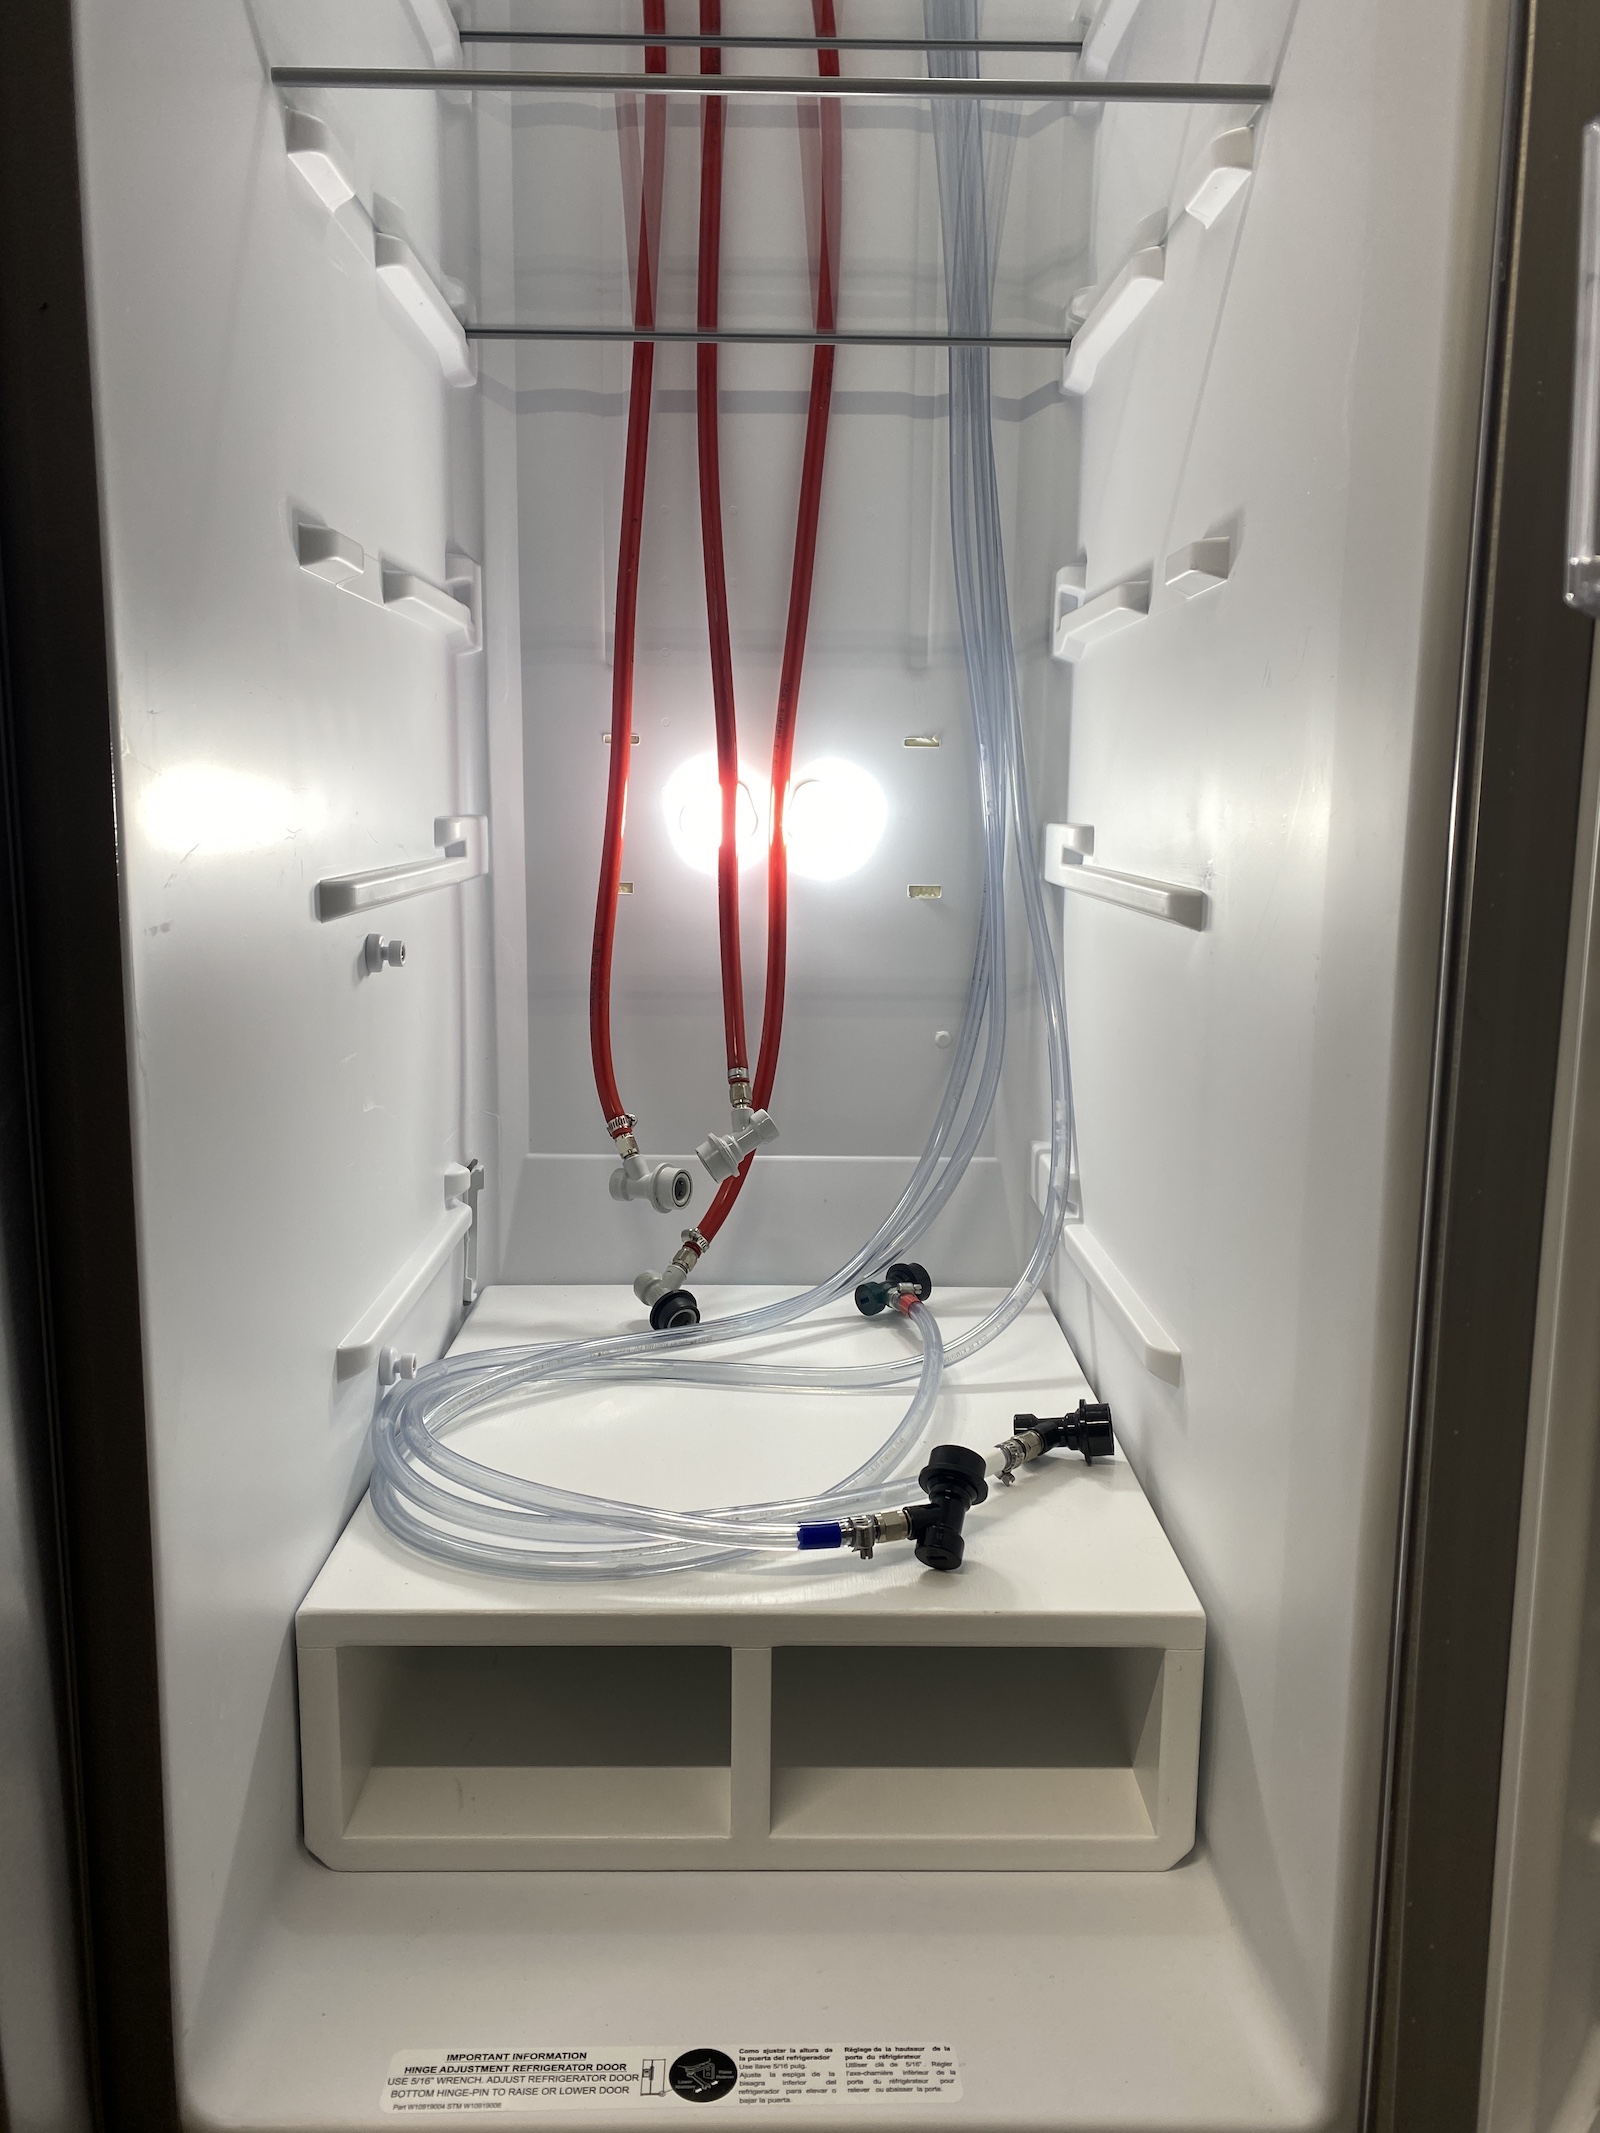
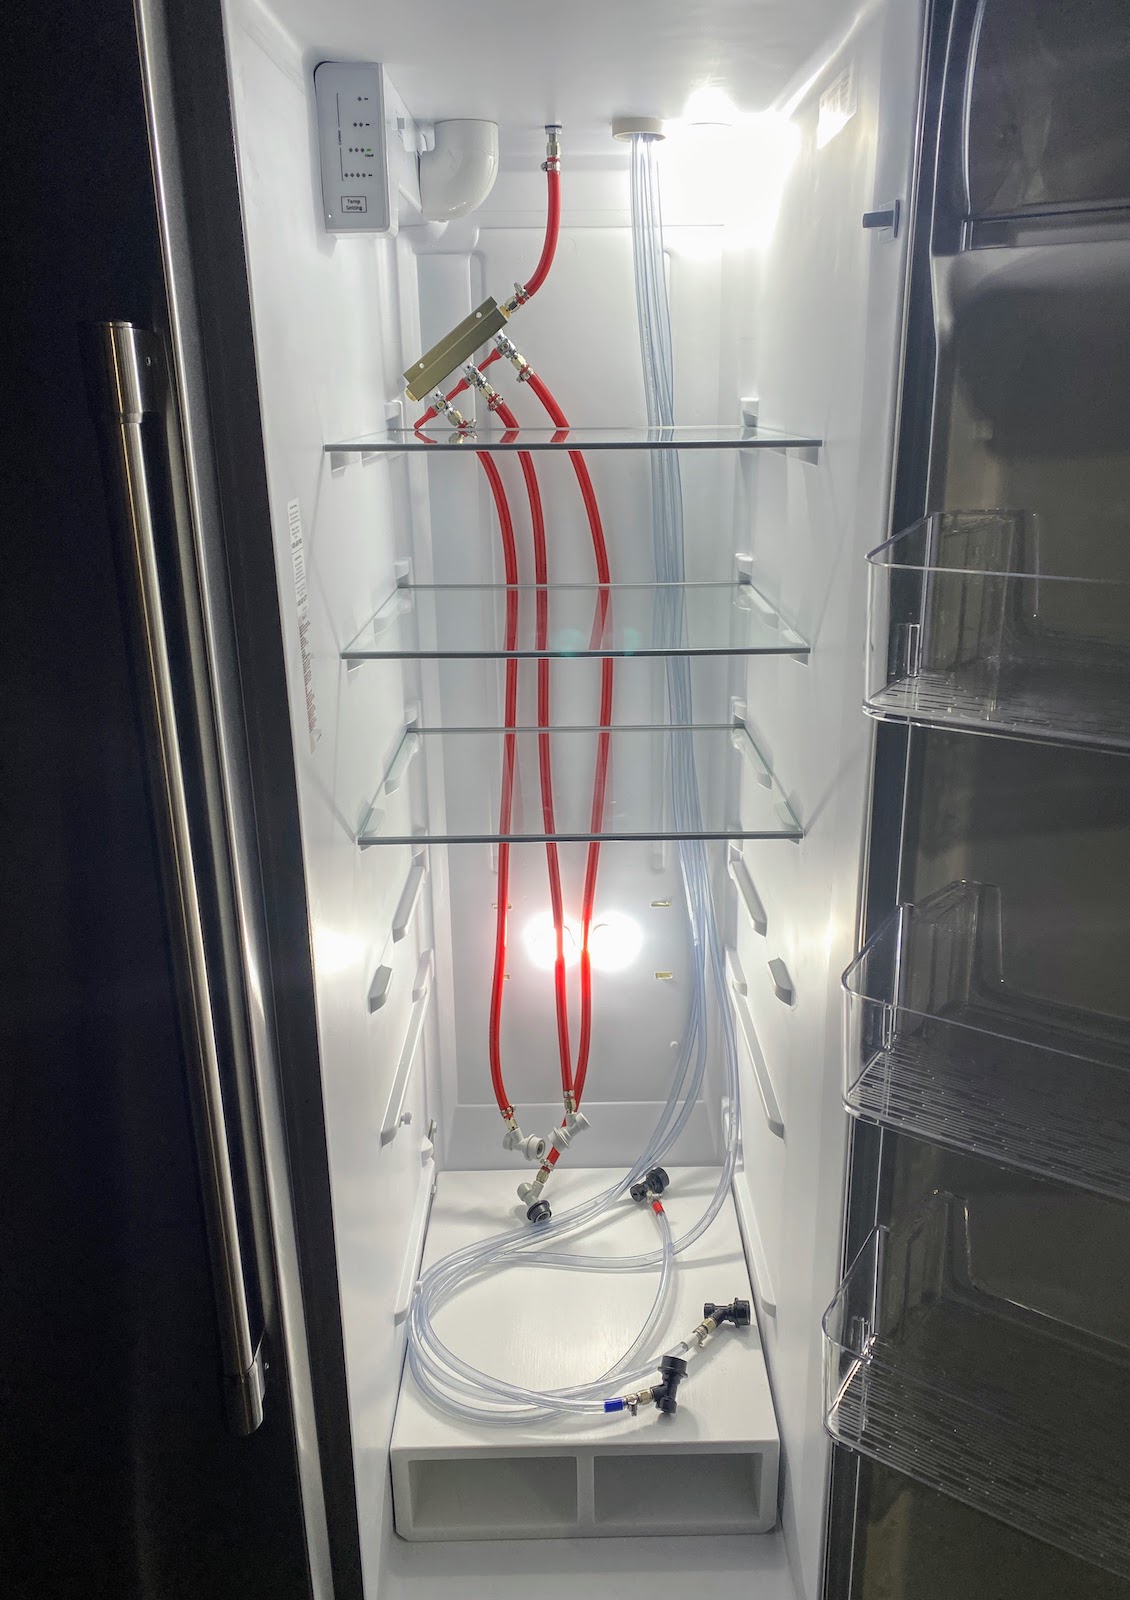
Next, I got the gas and beer lines ran to the fridge, along with the keg shelf I built. I still need to mount that gas manifold...

IMG_9594.jpg
IMG_9595.jpg
IMG_9592.jpg


Here are the insulated elbows that connect to the wall as well as the gas hook up. I'm glad to finally have my CO2 tank mounted to the wall instead of on the floor to get knocked over... I think I've replaced each of those gauges at least twice.

IMG_9599.jpg
IMG_9596.jpg


And the finished product. I'm super happy with how clean it came out.

IMG_9597.jpg
 
Dumb question, and this may have already been covered so I apologize in advance. Is the elbow without the bevline running through it just there to act as a cold air return to the fridge as if you're running the lines into a tower? Also, what is the wrench in the middle??

Sharp, clean build that I'm insanely jealous of! Any pics of the faucets inside?
 
It's a beautiful build!

Now I'm going to smack myself for saying this now and not mentioning it earlier...
Your lines... they are vinyl.
I really wish one of us had mentioned to use EVA Barrier line for both beer and gas.
 
Is the elbow without the bevline running through it just there to act as a cold air return to the fridge as if you're running the lines into a tower?

You're exactly right. the secondary elbow is just so i can circulate air through the tap box and back.

Also, what is the wrench in the middle??

That second wrench is actually a Craftsman 44500 bottle opener. It's the most sturdy bottle opener I've ever had!

Any pics of the faucets inside?

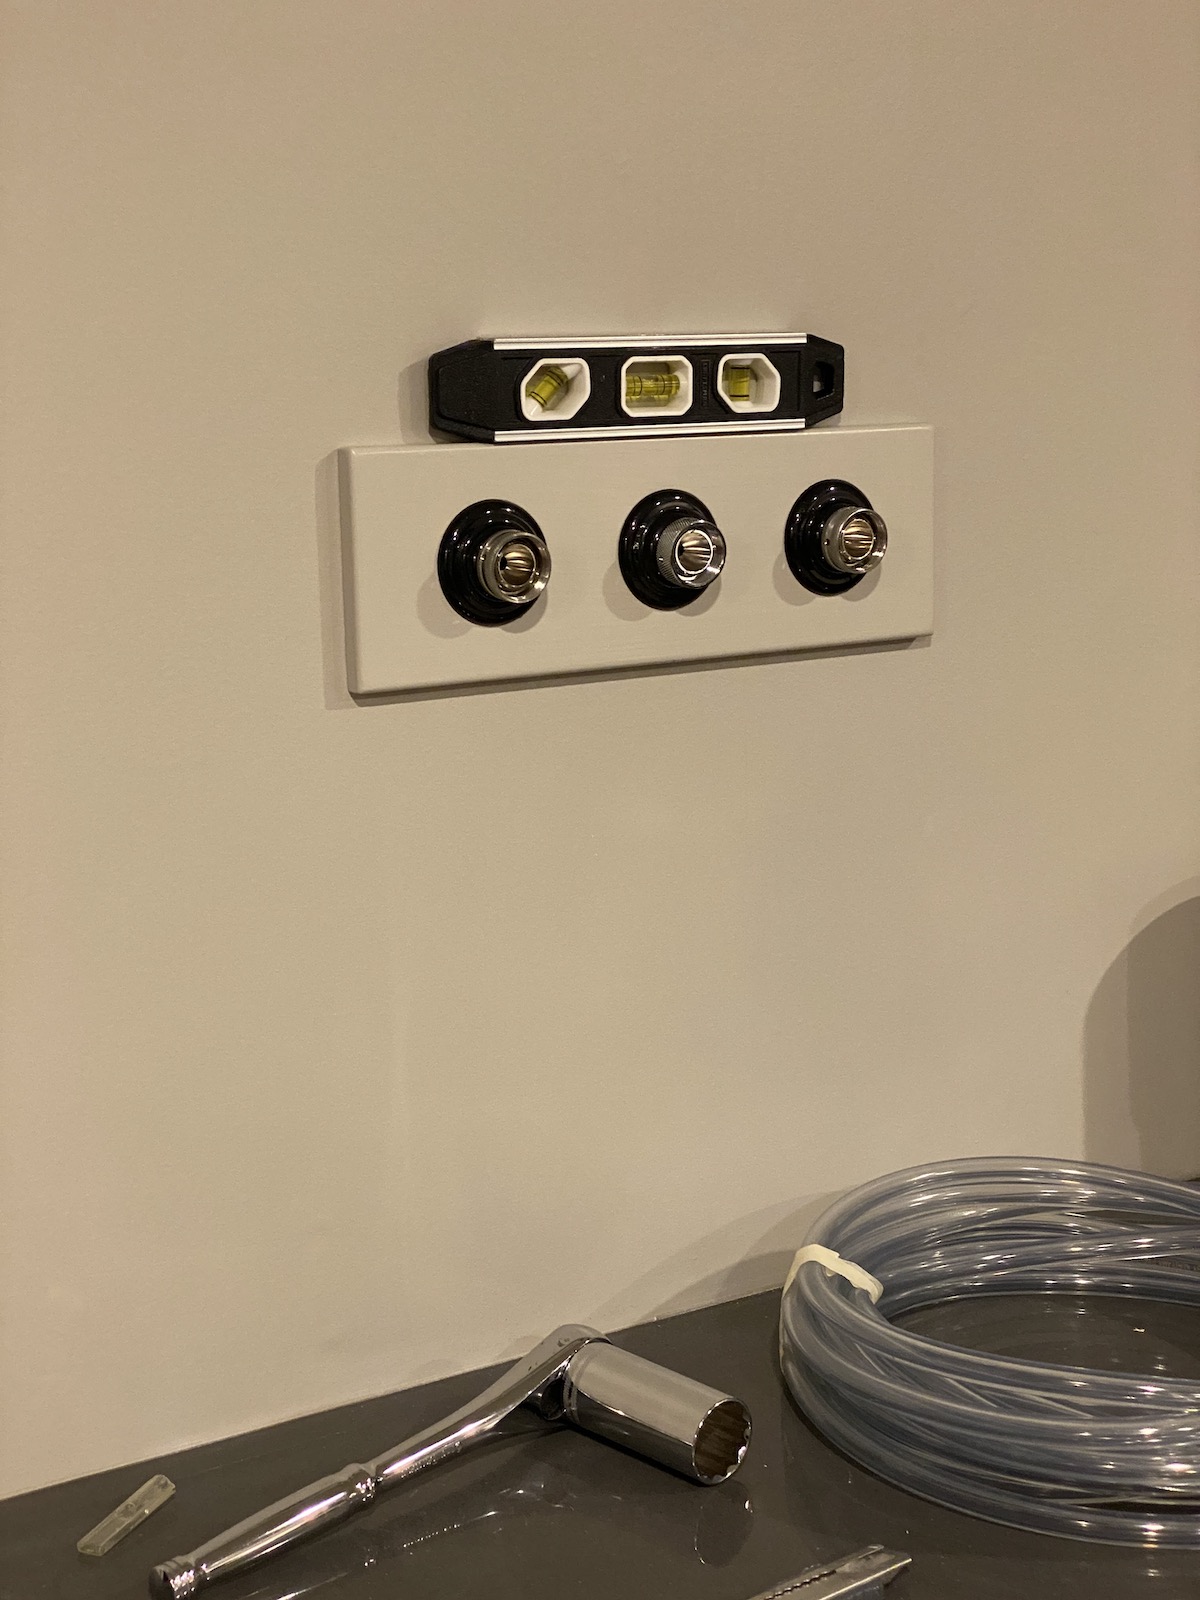
Here are a couple in-progress photos of the taps... I've got a larger drip tray on order. And I'm still trying to find the right album for the frame above the taps... I've been going back and forth on something like The Beatles - White Album... so that I can use the frame as a sort of white board to write the beers on tap on it ... or some other beer themed album art.

IMG_9522.jpg
IMG_9543.jpg
 
It's a beautiful build!

Now I'm going to smack myself for saying this now and not mentioning it earlier...
Your lines... they are vinyl.
I really wish one of us had mentioned to use EVA Barrier line for both beer and gas.

Thanks! I definitely saw some of that EVA Barrier line on the forums and considered going that route. It certainly looks nice, but I just figured that since I already have all the tubing and fittings from my last keezer build that I'd stick with the same stuff.
 
You're exactly right. the secondary elbow is just so i can circulate air through the tap box and back.


That second wrench is actually a Craftsman 44500 bottle opener. It's the most sturdy bottle opener I've ever had!


Here are a couple in-progress photos of the taps... I've got a larger drip tray on order. And I'm still trying to find the right album for the frame above the taps... I've been going back and forth on something like The Beatles - White Album... so that I can use the frame as a sort of white board to write the beers on tap on it ... or some other beer themed album art.

View attachment 691226View attachment 691227

Thanks for the quick response. This build has truly been a pleasure to watch! I'll try and find some time to thumb through my vinyl collection to see if I can't help find a cover that would be appropriate for the frame.

Awesome build and thanks for the help/inspiration. Cheers!
 

Latest posts

Back
Top