Here are my step by step instructions for building your own boiling kettle using a converted keg that requires NO welding.
Good luck
I took a piece of string and made a loop, adjusting the length to match a predetermined width that matched a couple of lids I had for other pots.
I took a Sharpie and using the string as a guide, drew a circle around the edge.
Quick safety tip, drill a hole in the scrap part first like I did, the escaping gas was impressive, and STINKY.
Also, when using the grinder, be sure to wear ear protection, it was amazingly loud. Neighbors came out for 4 houses to see what I was doing.
I bowed tword Mecca just to screw with them.
I then took my 4 inch angle grinder and using the Sharpie line as a guide, ground down through the top, being generous on the inside. Remember, you can always grind more but you can never add back. Using the lids as a guide I soon had a perfect fit. I used the grinder to smooth it all out then turned the keg on its side.
I changed the head on the grinder to a corse cone wire wheel and sprayed it down with WD40 to help get the gunk off and went to work.
In about 20 minutes it looked like this
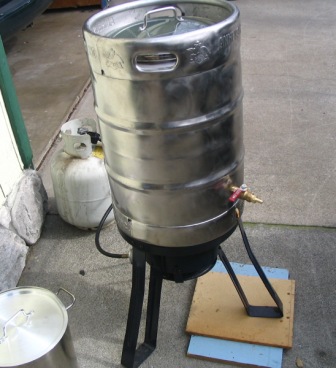
I then went to Home Depot and got a standard brass ball valve.
I drilled a hole in the keg, measuring up just above the bottom weld by 1/2 inch, that matched the diameter of the male end of the valve. There was a flattened portion on the keg that was convienantly at the same site of the hole so it was a no brainer although I did take care to ensure that there would not be a drain hole in the keg rim that would exit hot propane gasses on the valve.
Here is the tricky part.
I got a piece of this stuff that was about a foot long.
I scraped around in the hardware section and found two washers that were sturdy and with the desired hole size
I formed it up around the washer as described in the literature, taking care to overlap well and using a brass nut I got while at The Depot, I cinched it down tight, about 90 ft/lbs or more.
It perfectly conformed to the gentle curve of the keg and with baited breath I filled the keg with water and started a boil.
It weeped about 1 tablespoon before it slowed and then stopped.
I have been using it ever since, and have eventually added a pickup tube to help drainage.
I will try to get some pics but honestly there isnt much to look at.
Its all in the gasket.
If anyone has additional questions, feel free to ask.
Cheers,
knewshound
Homebrewing 101