Auber Instruments CUBE - Review

Homebrew Talk - Beer, Wine, Mead, & Cider Brewing Discussion Forum

Help Support Homebrew Talk - Beer, Wine, Mead, & Cider Brewing Discussion Forum:

This site may earn a commission from merchant affiliate links, including eBay, Amazon, and others.

jsharp4684

Novice
Joined
Oct 4, 2016
Messages
71
Reaction score
39
Location
Dayton
After making the decision to go all-grain, I initially wanted to go all out and do a Kal clone 3 vessel system. Over the last six months, I had a lot of time to consider my choice and other options during my deployment. I ultimately decided to go single vessel eBIAB. My decision was largely influenced by Brulosophy and the builds on this forum.

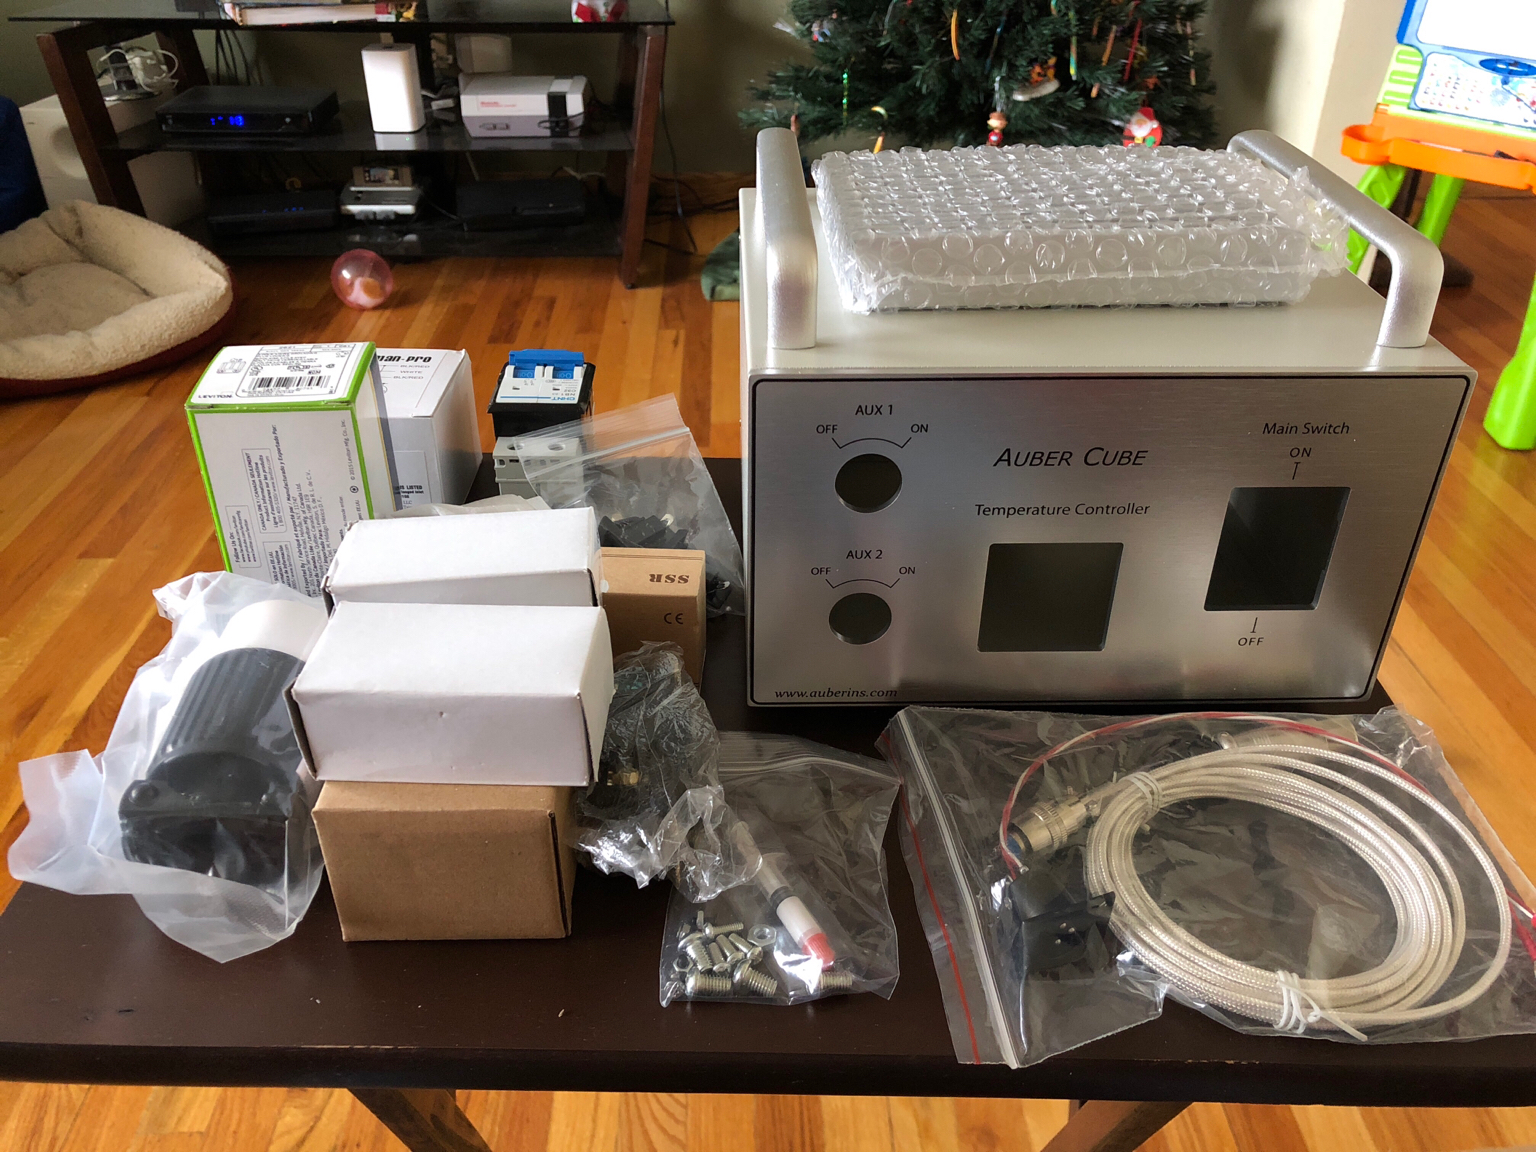
After making the decision to do eBIAB, I wanted an affordable and simple control panel, that I could assemble myself, but not spend a bunch of time sourcing parts. I started looking at Auber's various options and happened on their DIY CUBE kit. For a bit over $340, I got the longer probe cable, a 35mm long 1.5" TC temperature probe, and the L6-30P output connector. It comes standard with the EZboil step mashing PID. They don't include wires or terminals, but that was easily remedied with a trip to Lowes.

Assembly was fairly straightforward. The provided documentation does leave a little to be desired, but if you're reasonably handy, it's not hard to fill in the gaps. They do recommend some terminal ends that aren't properly sized for the PID, but the terminal kit I bought had some that were smaller and better suited. All told, assembly took about 4 hours.

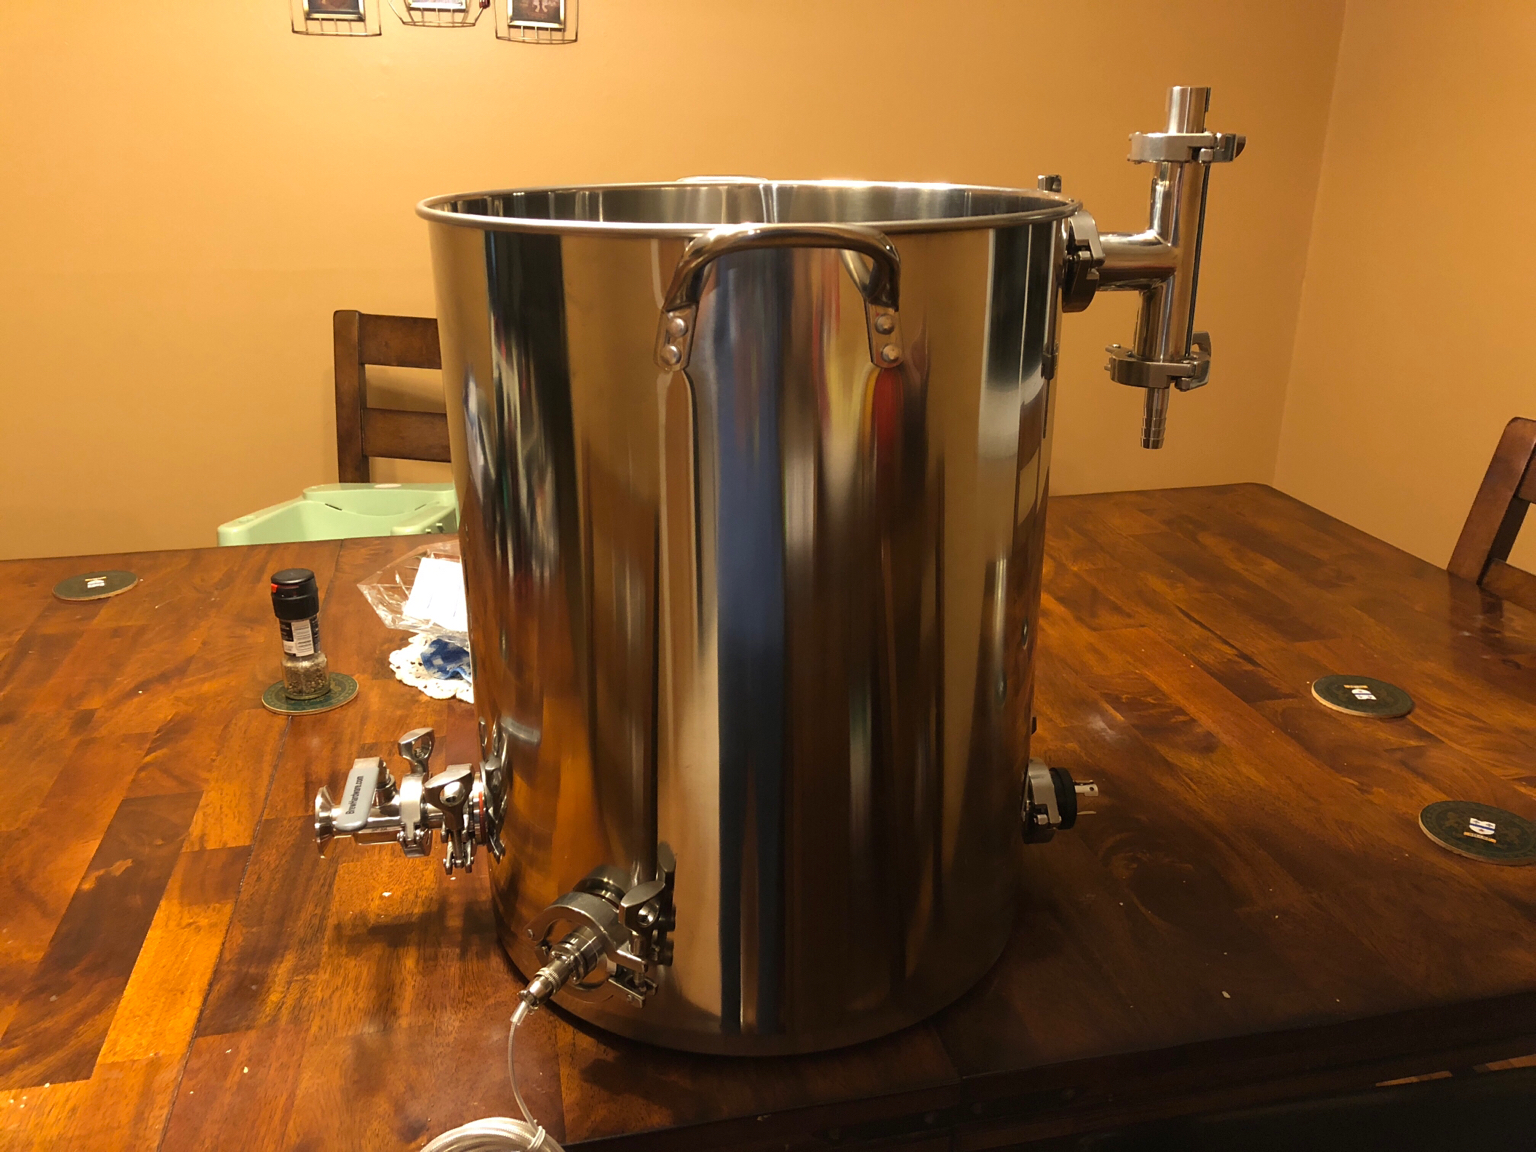
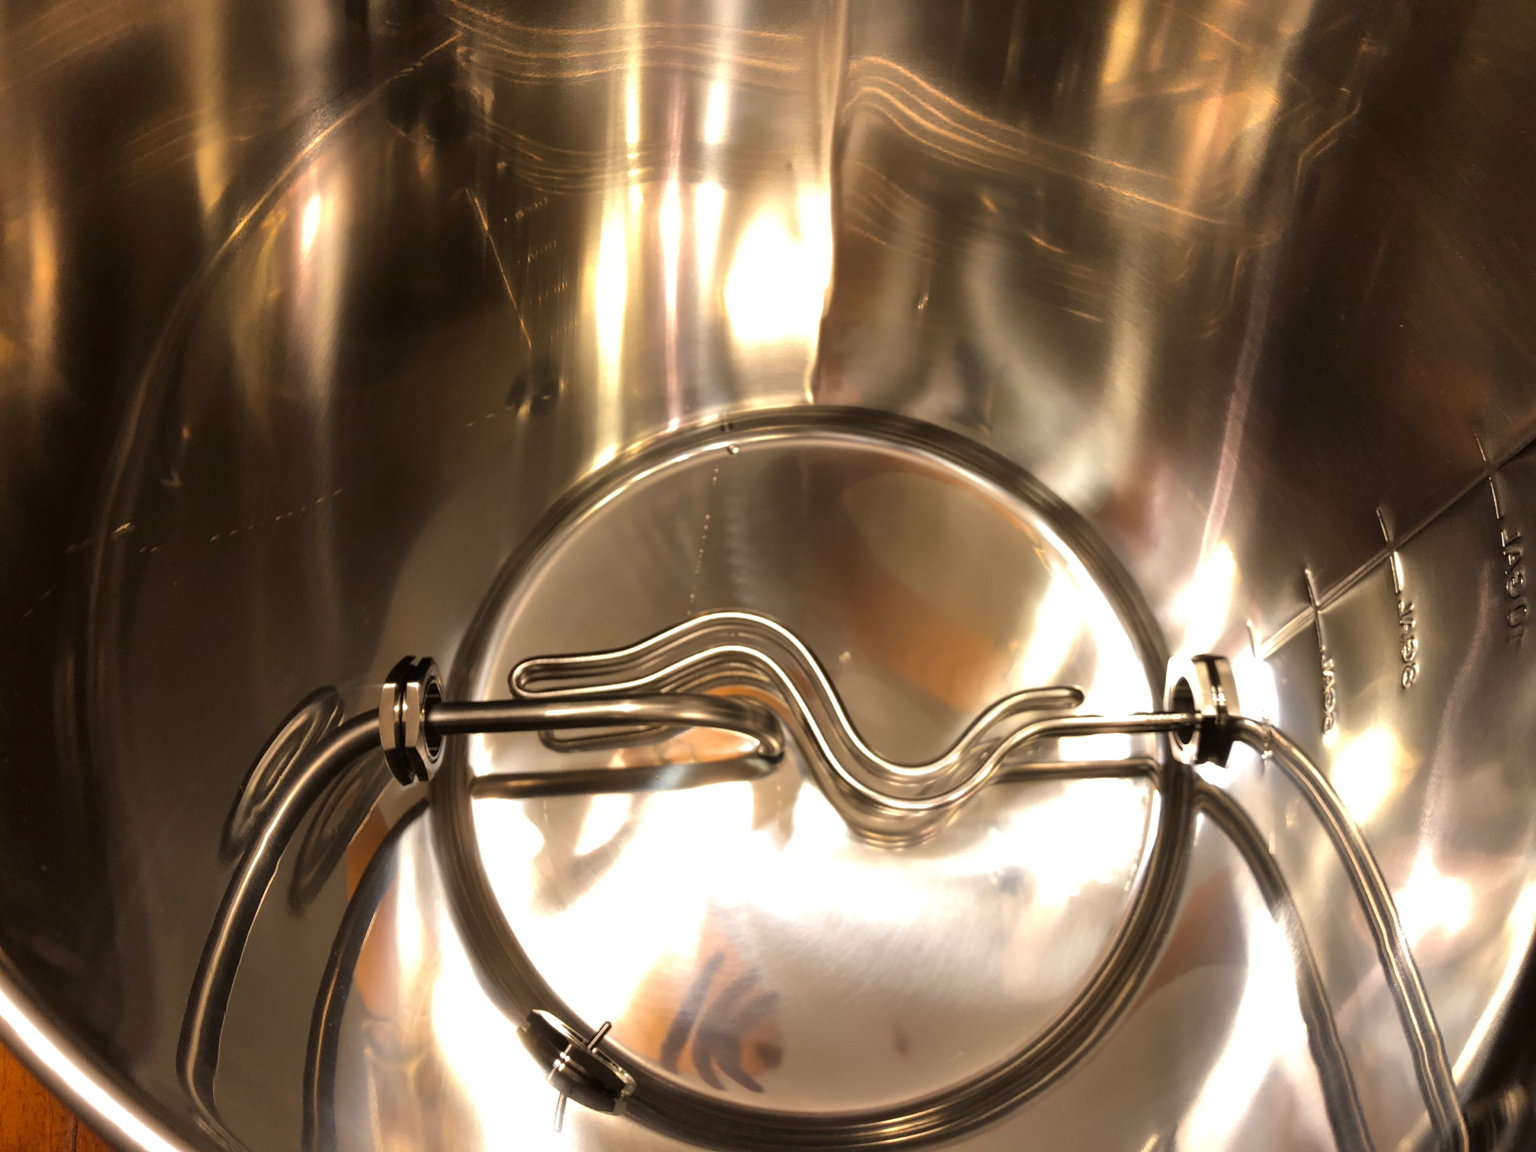
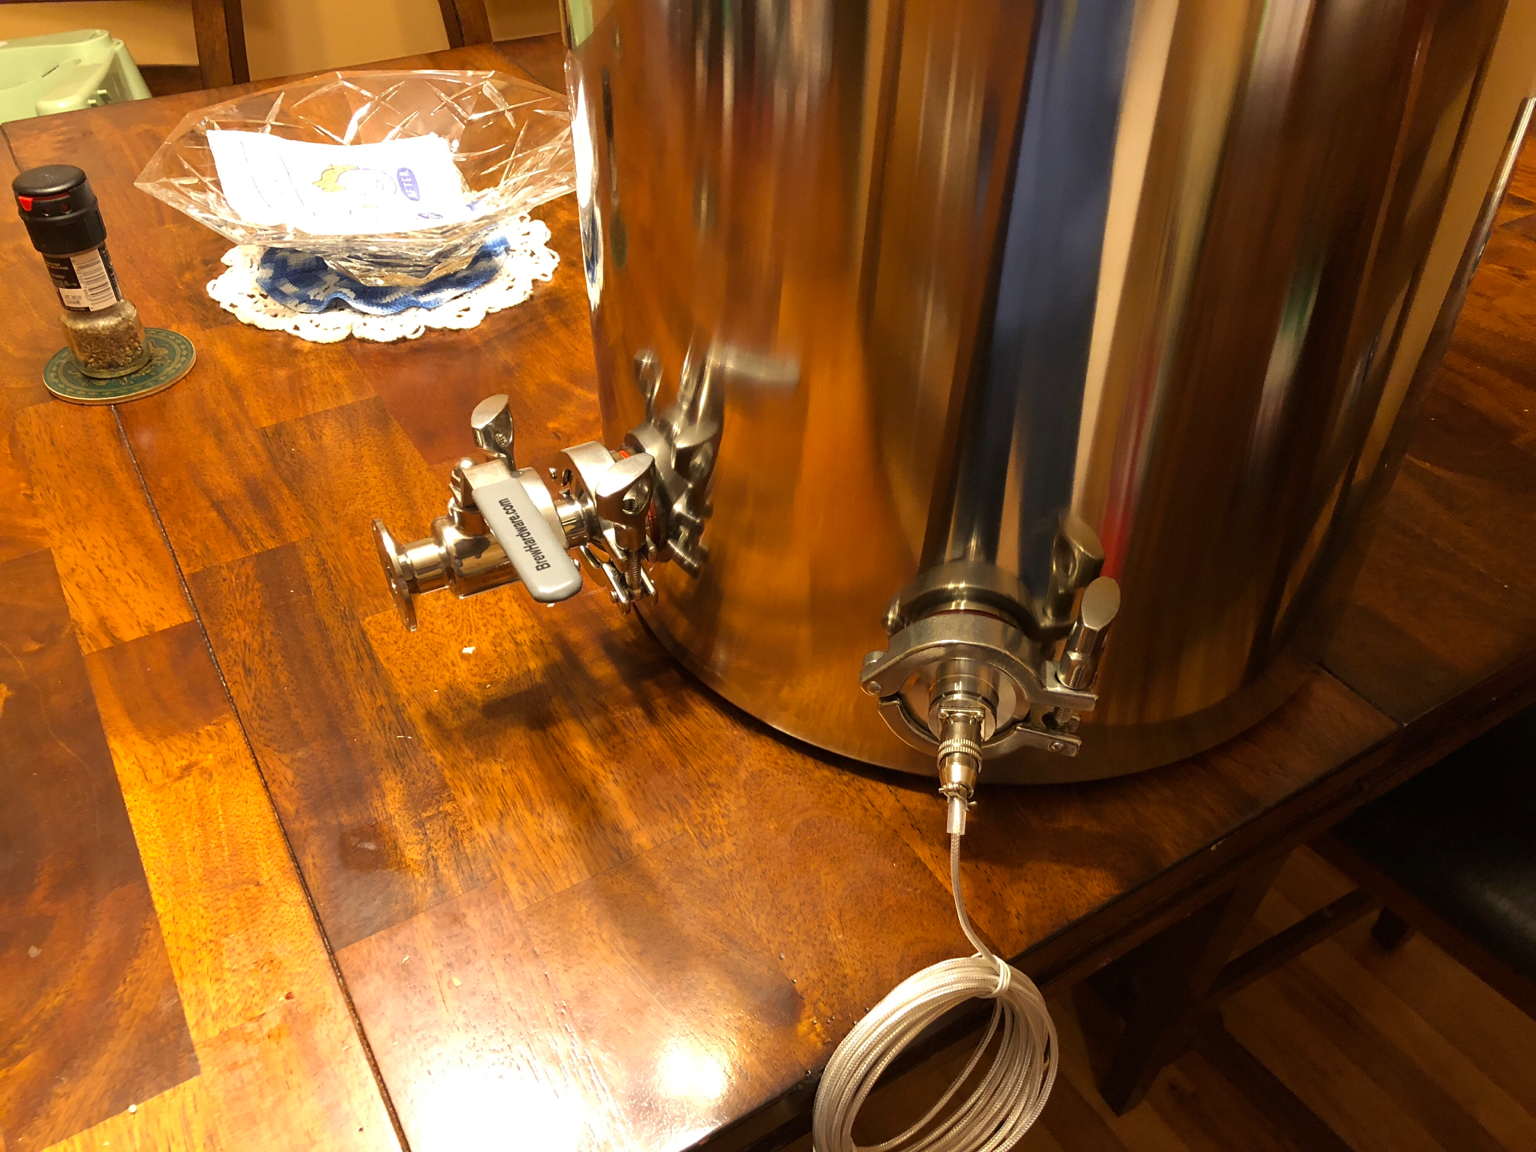
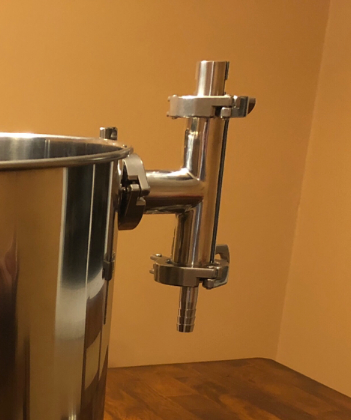
After finishing the control panel assembly, I had to put my kettle together. I punched 4 holes in a generic 15-gallon kettle, sourced from my LHBS. I installed four 1.5" TC weldless fittings. The 5500w element, brew hardware dip tube, temperature probe, and Brundog clone steam condenser were all installed. Time for a test run.

I gave the PID's quick start guide a brief review, filled the kettle with 6-gallons of water, and plugged in the element and temperature probe. Then I crossed my fingers, plugged the CUBE into my newly installed spa panel, and flipped the breakers on. The factory smoke stayed in all the components and the PID lit up. I proceeded to bring the room temperature (70F) water to a simulated mash temperature of 154F, which took 15min. Once the designated temperature was reached, it automatically started a 30min timer. The temperature was checked against my candy thermometer that I used for my extract brews and found that the temperature was reading 4 degrees low. I then set the PID to boil and it brought the 154F water to boil in another 15min. I made some duty cycle adjustments to see how low I could go and still maintain a fairly vigorous boil (70% was good). I let the boil go for 30min, so I could determine the lid-off boil off rate.

At the end of the day, I was able to make the necessary adjustment for the temperature probe accuracy and can make the adjustments for the auto timers. I'll be performing an actual brew day this Saturday, a chocolate rum milk stout.
 
Some pictures

IMG_0023.jpg


IMG_0041.jpg


IMG_0042.jpg


IMG_0044.jpg


F6B63BE9-B153-4A19-97B1-6E792CE3CF64.jpg
 
Thanks for making this write up. I am actually pretty close on buying this as well (although I am not going to do BIAB, I have am building a 2 vessel counterflow HERMS). Please let us know how the brew day goes!
 
Brew day went pretty well. Beer was made and a few lessons learned. This was my first all-grain brew, ever. Also, the first time I made a yeast starter.

The chosen recipe was a modified version of Bill's Double Chocolate Milk Stout

One of the lessons learned was in the batch size. I wanted 6 gallons in the fermenter, instead of 5.5. I knew my boil off rate is a bit high and I was working with 14lbs of grain, so I started with 8 gallons of water. I ended up light on the gravity at 1.054 instead of the recipe's 1.066. I probably could have hit the gravity if I boiled it down the extra half gallon.

The system did a great job of maintaining temps. It was so easy to monitor and easy to get to temp, then mash out, then boil. I stirred the mash every 15 minutes because I don't have a pump for recirculation. A pump and the appropriate tubing are on my shopping list, for purchase very soon. This could be another reason I didn't get closer to the recipe OG. I do like this no-sparge BIAB, though.

I had to make some adjustments to the pulley system to get the grain bag out. Once I got it out, though, I twisted and squeezed the crap out of the bag. After the day was done, there was maybe another 8oz of wort that dripped off in the bucket.

I transferred to the fermenting bucket using my auto-siphon racking cane and then dumped in the last half gallon or so. I don't mind kettle trub, so in it went. There would've been hardly any trub if I had remembered to use the hop sock I bought. LOL

I'm looking forward to another brew day in a week or so.

View attachment 556587
 
Thanks. Glad to hear the controller worked well for you. I hav been using my 2 vessel setup for quite a while, just with propane. The Minnesota winter has me down so I am am converting to electric to brew indoors. I may go ahead and buy it.
 
I know this is all about the Auber, but I really like the looks of that kettle you made.

Thanks. I used the drill bit and bulkheads supplied by SS Brewtech. Did one at a time and leak checked as I went. Doesn’t take much torque to create a water tight seal.

The temp probe is from Auber. The diptube and element are from Brewhardware.
 
Hey looks great! Anyway I can get some details of your element install, I really like the male plug and tri clamp combo to keep it short and manageable. Also looks way better than the ugly utility box I keep seeing everywhere. What pieces do you have there? I'm guessing the 1.5 inch weldless triclamp bulkhead from ss brew tech but what else? Thanks!
 
Hey looks great! Anyway I can get some details of your element install, I really like the male plug and tri clamp combo to keep it short and manageable. Also looks way better than the ugly utility box I keep seeing everywhere. What pieces do you have there? I'm guessing the 1.5 inch weldless triclamp bulkhead from ss brew tech but what else? Thanks!

aha found it! https://www.brewhardware.com/product_p/element5500_ripple_tc.htm that is slick.
 
Yeah, I went with retailers I knew I could trust. A tip for drilling the holes for the fittings: go slow and “pulse” the drill. The bit will want to bite into the relatively thin sheet metal and can create rough spots. I also filed the edges clean to prevent cutting the o rings.
 
I have thoughts of going electric later this year since discovering brudogs thread today. Great low cost alternative to setting up a vent system. Now this controller looks great as well. Could probably go electric all in for around $1000. Just for curiosity going to wait and see what ss brewtechs new electric systems look like, but this cube could be in my future.
 
I have thoughts of going electric later this year since discovering brudogs thread today. Great low cost alternative to setting up a vent system. Now this controller looks great as well. Could probably go electric all in for around $1000. Just for curiosity going to wait and see what ss brewtechs new electric systems look like, but this cube could be in my future.

That’s about where I’ll be at, once I get a pump and some more fittings. You could trim out some cost by doing permanent installs instead of TC fittings, but they’re really convenient.
 
I have thoughts of going electric later this year since discovering brudogs thread today. Great low cost alternative to setting up a vent system. Now this controller looks great as well. Could probably go electric all in for around $1000. Just for curiosity going to wait and see what ss brewtechs new electric systems look like, but this cube could be in my future.
I did it for far less than $1000.. The old panel in my avatar cost less than $300 to build with ebay and amazon sourced parts. Since then I have gone to brundogs brucontrol software which ends up being cheaper and has a lot more flexibility. this becomes a whole different hobby all together for many... Its all about how fancy you want to get really.

I believe the ss system will be very "fancy" I got an email from them saying a 70% downpayment is needed to even place an order if I read it right... Their 1 bbl electric system costs more than my 3bbl sungood nano kettles did with customs and freight from china..

Another way to save a bit would be to go with camlock fittings on the hot side... They are a bit cheaper and much easier and quicker to use only requiring one hand and no fumbling for seals and rings.. tcs are great for the cold side though (JMO)
 
Last edited:
I ordered mine from the yuling company in the center link just over a year ago... They were $31 each with shipping I decided to just buy 2 and have a backup for $62 but I guess that not much different than paying $80 or so for one and having a company warranty it for much longer... Its a common practice today and it all depends on how the consumer looks at it. (Id rather have the backup on the shelf to swap out and finish my brew if something goes wrong.)
No complaints with mine at all but they have just redesigned them a bit as well as obtained ce certification for them I see..
 
Last edited by a moderator:
Subbed. Trying to decide between the auber cube, a brew boss, or DIY for my eBIAB. I have same goals as you. I have too many diy lighting commitments in my house the next 12 months, so it seems like buying the auber prebuilt might make more sense, it's $440 now on their site. I like the fact that brewboss allows wifi monitoring if I run out during the mash, but honestly I don't see the need for BCS monitoring. Does this condenser really work, or will the entire basement (and laundry) smell like beer? If so, this may make decision for me to set up in the basement rather than garage....was going to save the upgrade for fall, but feel myself getting pulled down the erabbithole.
 
I like the fact that brewboss allows wifi monitoring if I run out during the mash, but honestly I don't see the need for BCS monitoring.

My experience is that there are more than a few ways to stick a mash while you're recirculating, and in most cases that stuck mash will result in an overheated impeller and a dry-fired element. There are as many or more ways to keep the mash from sticking, but even after finding the "sweet spot" for my system I prefer to keep the lid off the mash so I can watch it since I don't have a level sensor in place.

For me, I'd want some sort of sensor that would cut off the pump and element if the mash stuck. I use a basket so a float type sensor between the basket and the kettle should work well, I just haven't put much time into it.
 
I would suggest doing plenty of research about the pros and cons of the two designs featured in these links and ask the vendors what they have done to ensure the ground pin stays connected over repeated disconnections. I know how this post will look to those who value the price wars but I can guarantee that my elements cost more for a reason.
 
Last edited by a moderator:
My experience is that there are more than a few ways to stick a mash while you're recirculating, and in most cases that stuck mash will result in an overheated impeller and a dry-fired element. There are as many or more ways to keep the mash from sticking, but even after finding the "sweet spot" for my system I prefer to keep the lid off the mash so I can watch it since I don't have a level sensor in place.

For me, I'd want some sort of sensor that would cut off the pump and element if the mash stuck. I use a basket so a float type sensor between the basket and the kettle should work well, I just haven't put much time into it.
I use one of these now... its completely stainless and the reed sensor is behind the stainless so its more sanitary than my last solution. I have it wired as a simply switch to cut the power to the SSR if flow drops below .5 gallons per minute.


https://www.ebay.com/itm/Liquid-flo...m=222859334294&_trksid=p2047675.c100037.m2107
 
I would suggest doing plenty of research about the pros and cons of the two designs featured in these links and ask the vendors what they have done to ensure the ground pin stays connected over repeated disconnections. I know how this post will look to those who value the price wars but I can guarantee that my elements cost more for a reason.
With all due respect and not to discredit the good advice your giving here but it would be fair to also mention one reason yours cost more could also be because you get them third party though/from brewboss or his supplier (who im sure collects a markup fee for selling them to you) and they started supplying them when they were the only supplier and they set their price with no competition. (Much like pricing on name brand drugs before generics come out)

I also remember seeing a thread where a new element was shipped with the ground lug broken off of an element internally (maybe the design has since changed?)I am probably wrong here but I thought it was purchased from you and you took care of it immediately which I think would go further than anything to justify buying them from you. Thats were I first learned of the issue and the only time I saw it reported here.

I bought mine directly from another Chinese manufacturer later when all the others started copying the design (i did not know this at the time) a bit over a year ago and I unplug mine after every brew session and Ive had no problems with it despite the manufacturer (Yuling) telling me they have improved the design last summer on the 2" based elements that I bought for my 3bbl setup. I assumed the change was the fact that they narrowed the diameter of the outlet so the tc clamp ring had more clearance at the time but maybe they had reports of the ground breaking off.

PS,
I really dont want this to go off topic or turn into a heated debat on these I just felt it fair to mention there are multiple reasons why one item could cost more than another... Aubers prices on some of the generic product they resell are proof of that. It doesnt necessarily mean one product is superior to another. As Bobby mentioned with his sound advice its up to the consumer to do his homework if he cares to..
 
Last edited:
With all due respect and not to discredit the good advice your giving here but it would be fair to also mention one reason yours cost more could also be because you get them third party though/from brewboss or his supplier (who im sure collects a markup fee for selling them to you) and they started supplying them when they were the only supplier and they set their price with no competition. (Much like pricing on name brand drugs before generics come out)

I also remember seeing a thread where a new element was shipped with the ground lug broken off of an element internally (maybe the design has since changed?)I am probably wrong here but I thought it was purchased from you and you took care of it immediately which I think would go further than anything to justify buying them from you. Thats were I first learned of the issue and the only time I saw it reported here.

I bought mine directly from another Chinese manufacturer later when all the others started copying the design (i did not know this at the time) a bit over a year ago and I unplug mine after every brew session and Ive had no problems with it despite the manufacturer (Yuling) telling me they have improved the design last summer on the 2" based elements that I bought for my 3bbl setup. I assumed the change was the fact that they narrowed the diameter of the outlet so the tc clamp ring had more clearance at the time but maybe they had reports of the ground breaking off.

PS,
I really dont want this to go off topic or turn into a heated debat on these I just felt it fair to mention there are multiple reasons why one item could cost more than another... Aubers prices on some of the generic product they resell are proof of that. It doesnt necessarily mean one product is superior to another. As Bobby mentioned with his sound advice its up to the consumer to do his homework if he cares to..
I won't get into a debate but again my elements are different than the ones in the links and they cost more due to additional manufacturing costs for safety and longevity. Please don't speak in absolutes if you are not sure.
 
I won't get into a debate but again my elements are different than the ones in the links and they cost more due to additional manufacturing costs for safety and longevity. Please don't speak in absolutes if you are not sure.
To what are you referring to about speaking in absolutes exactly? I would say ditto here unless you intend on demonstrating how you came to the absolute conclusion that the element you sell is safer and superior (and costs more to manufacture) than all the other manufacturers (and versions) of similar elements out there?

I'm looking at the ground connection point on one of my $16 elements now and I dont see a problem or a weakness. In fact the post thats threaded directly into the TC base as well as the other four screws that mount the base plate to the plug appear to be pretty strong and holding perfectly well. It looks as that would take some serious abuse to compromise it in any way.
 
Last edited:
Then I crossed my fingers, plugged the CUBE into my newly installed spa panel, and flipped the breakers on.

What spa panel did you use? I was planning on using a 50A spa panel for a different build, but I'm changing things up to use this controller and I'm wondering if that is overkill.
 
I went 50A, from Lowes, to make sure I had the overhead to go larger or 3 vessel if I wanted to later.
 

Latest posts

Back
Top