And so it begins! My E-Herms build

Homebrew Talk - Beer, Wine, Mead, & Cider Brewing Discussion Forum

Help Support Homebrew Talk - Beer, Wine, Mead, & Cider Brewing Discussion Forum:

This site may earn a commission from merchant affiliate links, including eBay, Amazon, and others.

RocketBrewer

Supporting Member
HBT Supporter
Joined
Feb 26, 2012
Messages
604
Reaction score
219
Location
Garden Valley, CA
I've been brewing for 20 years on and off now (mostly all-grain). I've been using a simple propane fired gravity system with a cooler mash tun and brewed many good beers but I set out to build a better system. My goal was to build a system that would have much more precise control and something that I could operate by myself. I decided that I liked the HERMS idea more than a RIMS and after much research I decided to go all electric.

Now, I'm no electrician so initially I decided that I would buy a ready-built controller but after doing tons of research on the forums and sites like ebrewsupply.com and theelectricbrewery.com I came to believe that I could build a controller myself. I liked different ideas from all the systems I saw and wanted to incorporate those ideas into my own design. P-J's wiring diagrams were also a HUGE inspiration to me. Thanks go to P-J and Kal and all the others for all your contributions to the brewing community :mug:.

As for the system, I wanted a 50A two element back-to-back set up. My plan is to use a 30 gal stainless drum for my HLT and modified keggles for MLT and BK. I will be using 2 stainless head center inlet Chugger Pumps to move things around. As for the controller I am using 3 SYL-2352 PID's and a JSL-73B multi-event timer from Auber Instruments. I also liked Kals use of volt/amp meters, but found one in another build thread that matched the PID displays, was very simple to wire, and was lless than $10 shipped! I'm very happy with it and you can find it HERE.

As of this moment, the controller is basically done although I have decided to add a float switch to the HLT circuit that should be here next week. I have done what little testing of the controller that I can (can't test my elements untill I get the TC ferrules welded into my pots) and everything seems perfect thus far. My elements are ready (I used the 2" Tri-Clover mounted elemnt guard kits from StillDragon and love them thus far). I have sourced at least 95% of the parts for the build but have not done much of the modifications to the pots yet (still waiting on some parts to arrive).

Thanks again to all of you who contribute your knowledge and experience on these forums and to HomeBrewTalk too! without all of you, this and many other builds would never happen :mug:.

Here are some pics of the build up to this point, I will add more pics as I go along.

Mock-up of the controller
mockup.jpg

Inside door ready for touch up paint
doortouchup.jpg

All parts mounted
parts mounted.jpg

Inside Door
door.jpg

Inside Back
back.jpg
 
Here's a few more pics...

Beginning the wiring
start wiring.jpg

Finished wiring in door
finished door.jpg

Finished wiring in back
finished back.jpg

Fired up for the first time!
its alive.jpg

Elements are ready
elements.jpg


Can anyone offer some advice on linking pictures. I tried to link to photos I uploaded to an album here on HBT but they just appeared to show broken links? :confused:
 
Neat! You don't typically see people build control panels with the PIDs oriented vertically like that. It look good!

What's that little post (or is it a button?) to the left of the volt/amp meter?

Kal
 
Just thought it was about time to update progress on the build. Life seems to get in the way sometimes. Just had to put down the best dog and cat I've ever had within a couple weeks of each other. Now it is time to rebuild fences before I can get a new dog (cat's only know that a fence will stop a dog!). I have found it is just as much work taking down a wire fence as putting one up! I will be putting up about 1/4 mile of fence in the next few weeks. Sorry, back to the build......
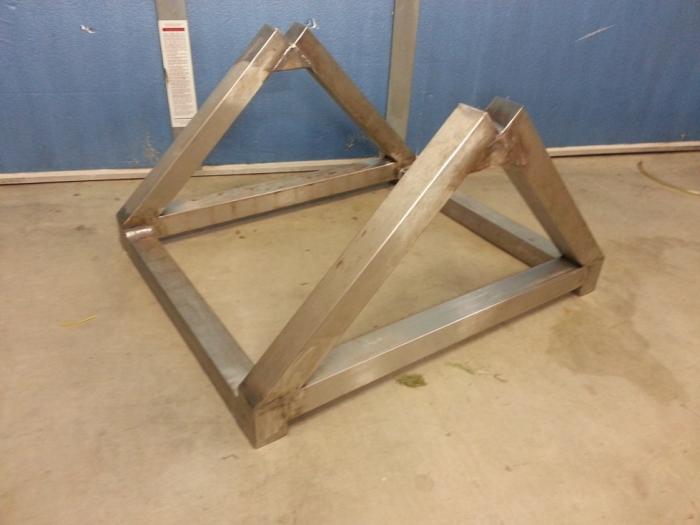
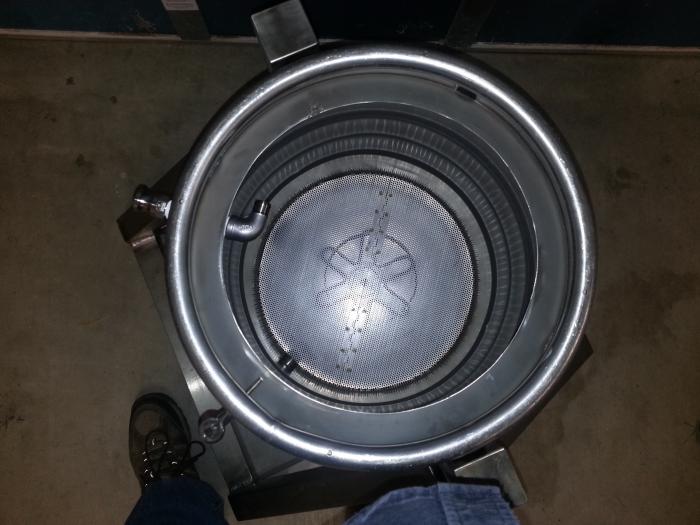
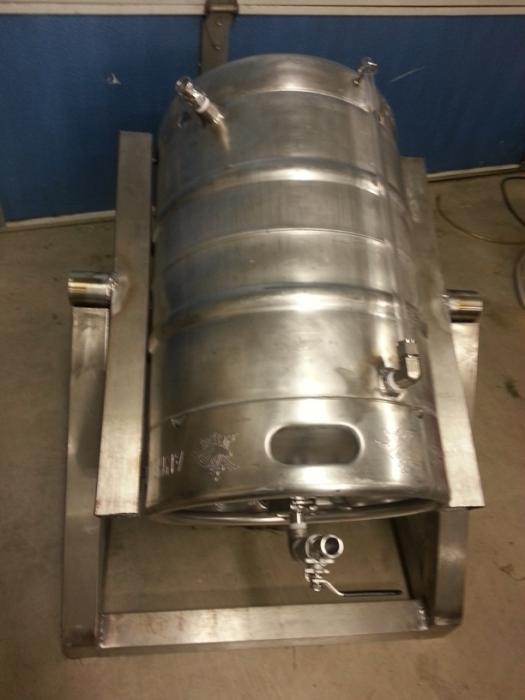
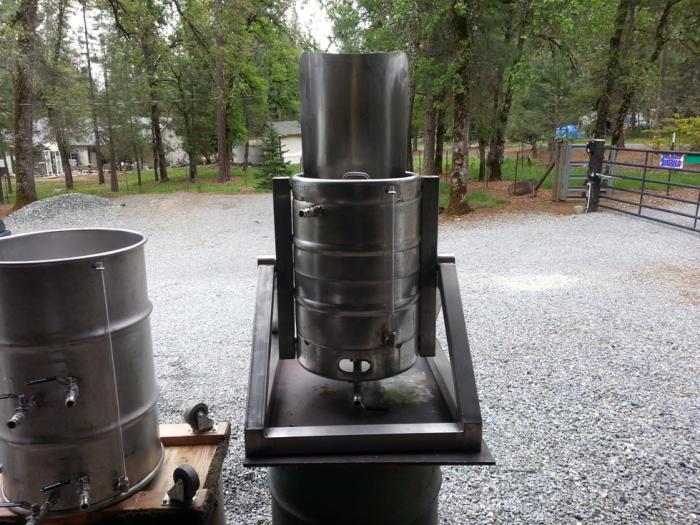
I've made a little progress since my last post and thought I should post some pics. Here's some pics of the mash tun and tippy-dump stand I built for it. The tun is bottom draining with a 15" false bottom. Still have some clean-up to do and while I have the table/work bench that the system will reside on, it needs some modification.

20140326_193334.jpg


20140326_193552.jpg


20140326_193825.jpg


20140427_110259.jpg
 
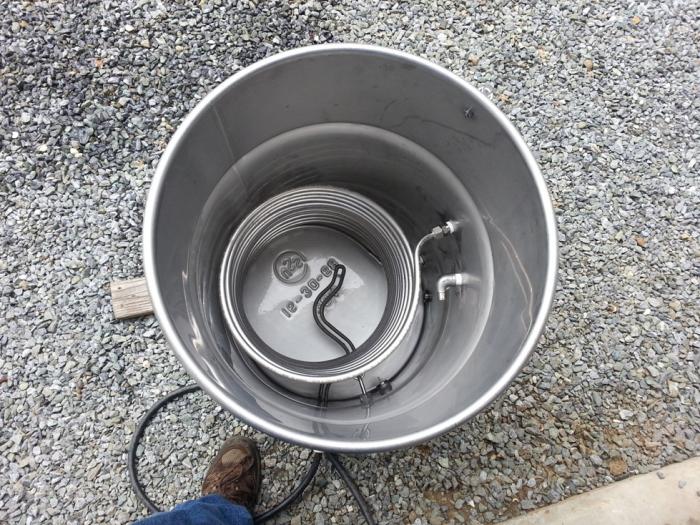
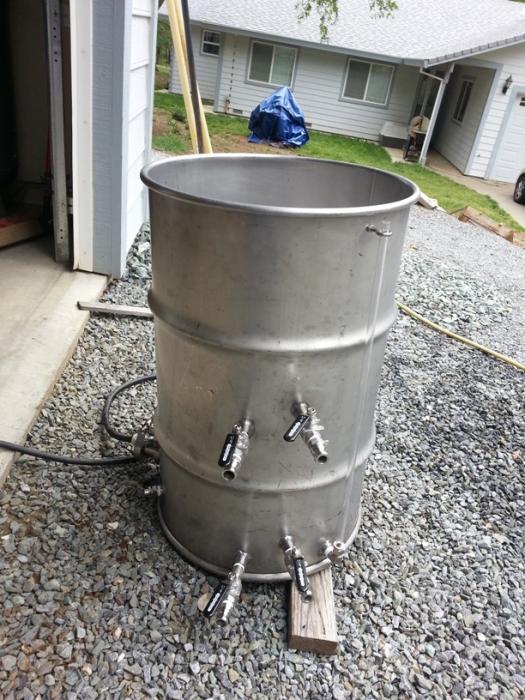
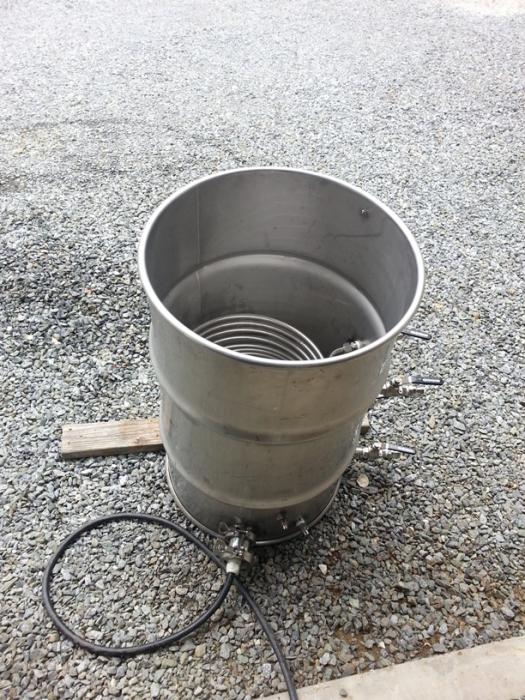
Here's some pics of the HLT. It's a 30 gal drum outfitted with a 5500w Camco element in a StillDragon enclosure, a float switch from Auber to prevent dry-firing, and 50' of 1/2" stainless HEX coil from Stainless Brewing. My TIG skills are still lacking, but improving as I go I think!

20140427_103117.jpg


20140427_103134.jpg


20140427_103123.jpg
 
Thanks, I got the drum from a friend. I actually have three of them but decided to only use one for the HLT because the I felt the crimped seam at the bottom would be too hard to keep clean in a BK or MLT.
 
Just for your info, our "club" brew system uses 3 of those drums, and they are no big deal to clean...........Emptying spent grains from the mash tun, yes!

But your tippy setup will help alleviate that!
 
I've been making some progress on this build (just not as fast as I'd like). My kettles are pretty much done (still need to mark sight glass tubes). My stand is about half finished (still need to make pump mount, build some drawers and paint.) The stainless pan that sits on the stand to contain any spills still needs the corners welded and a drain put in. I still also need to come up with a vent hood and install the fan and duct work as well as run some electrical and mount the control panel. One of my fermentation fridges is set up with the controller and ready to go so all-in-all, I'm very close to being able to run a batch through this puppy! I have a couple odds and ends to take care of, but I hope to set it up (temporarily) outside the garage within a few weeks and brew a batch.
:ban:
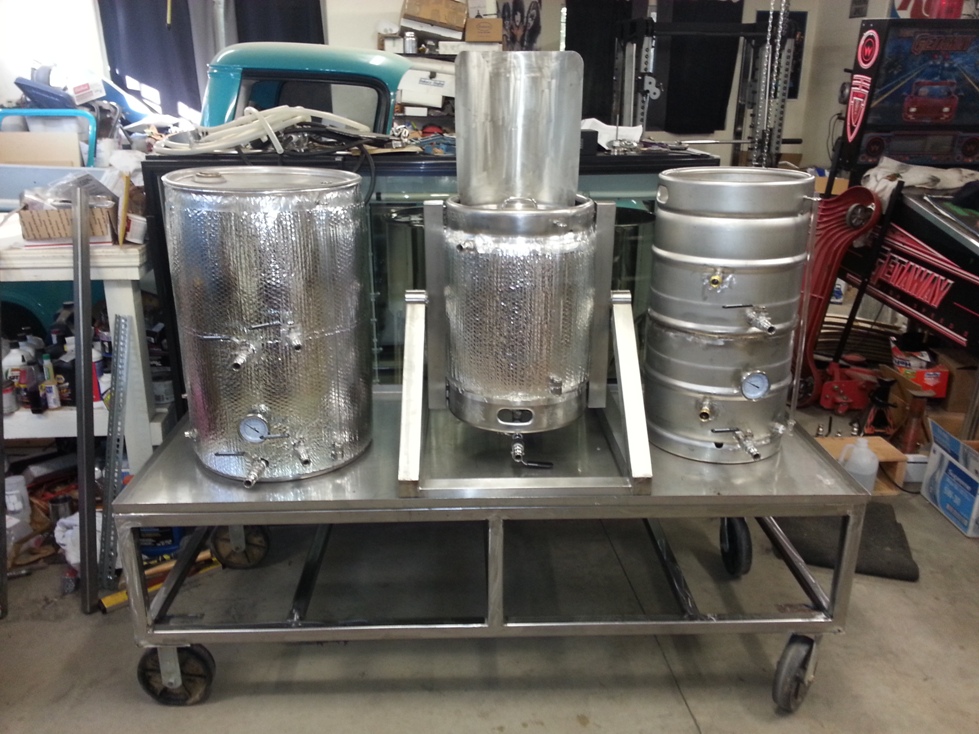
Here are some pics of the system as it is now.

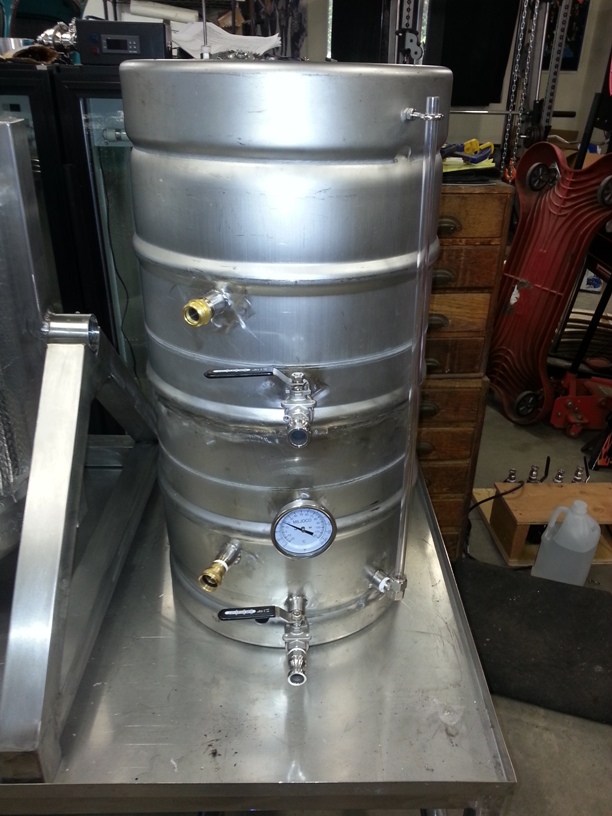
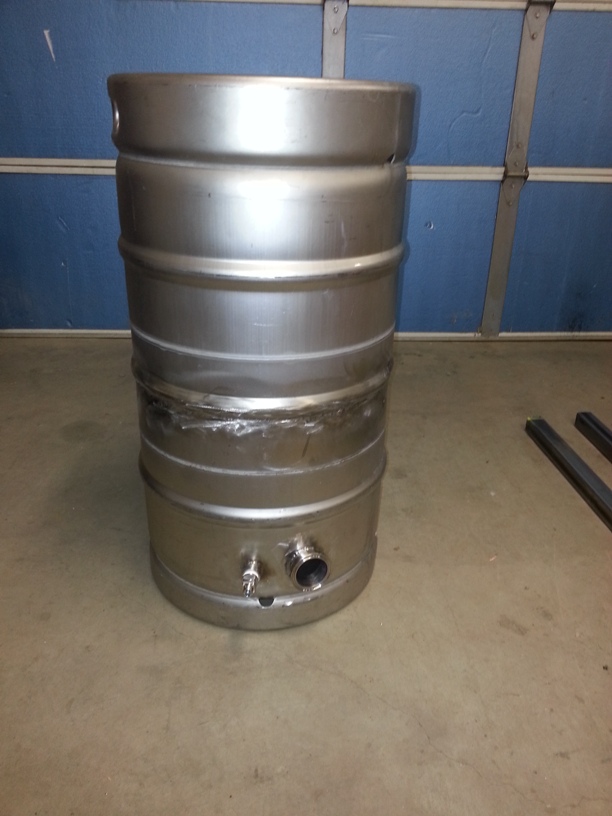
The boil kettle is a bit of a Frankenstein. I took two kegs and cut 1/3 off each and welded them back together. In hind sight I would have been much better off to have just bought a 20-25 gal pot, but where would the fun be in that? I installed a fixed 50' stainless chiller coil in it because I prefer immersion chillers, but didn't want to be having to drip sticky wort all over my garage floor taking one out. I plan to use my pump to whirlpool while I chill and have a lid set up with a CIP ball for cleaning with PBW. I'm keeping my fingers crossed that it will work as planned or I guess i'll have to remove it and go another direction.

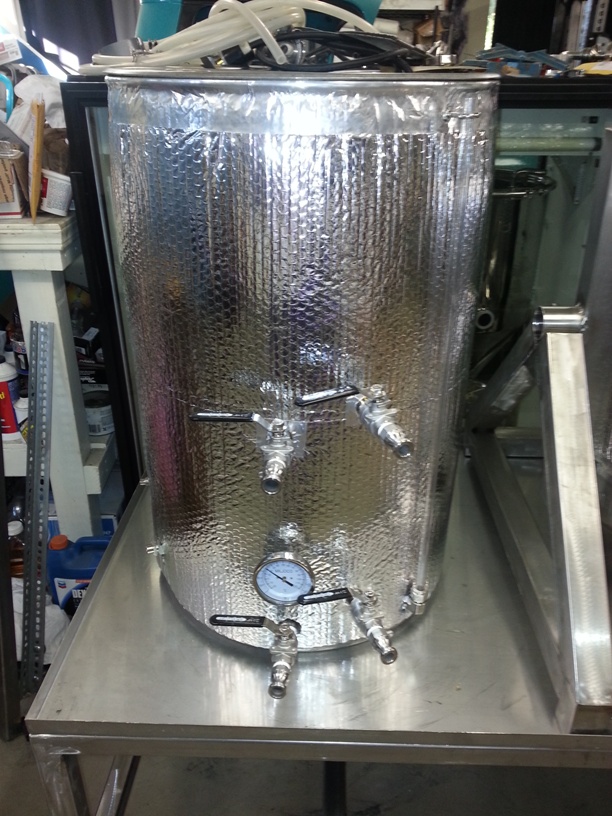
The HLT is a 30 gal insulated drum with 50' stainless HEX coil.

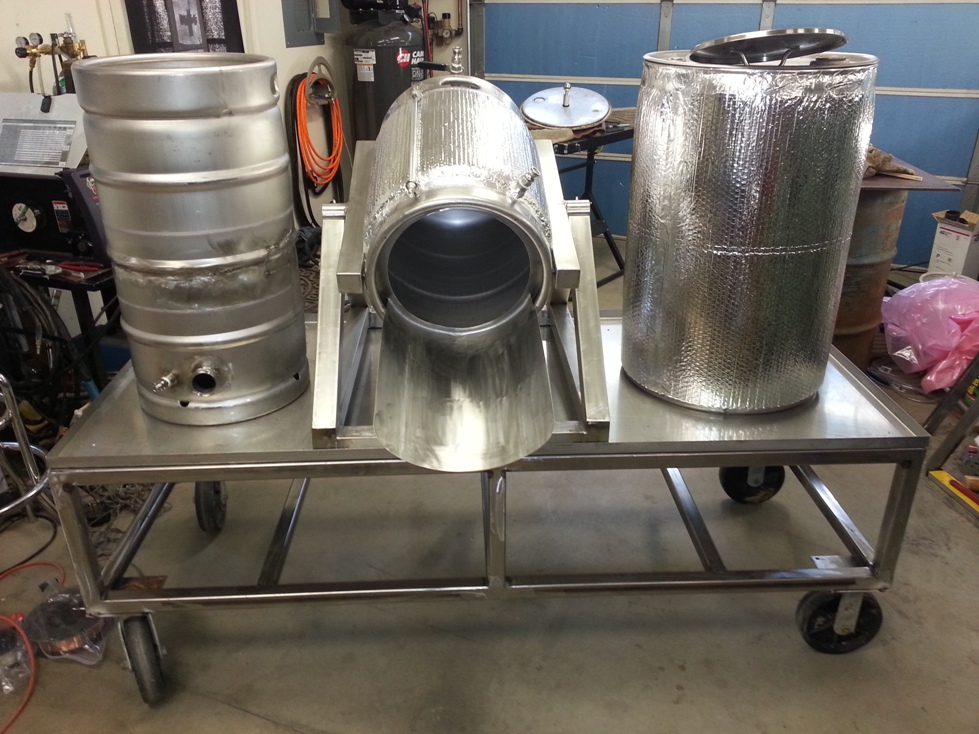
The Mash Tun is a bottom-drained keg on a tippy-dump set-up. I attached a grain shoot to the back side so I can tip it and then just rake the grain into a wheel barrel. You can see it tipped in one of the pictures.

Thanks again to everyone here on the forum for sharing all of your wisdom and experience, I could never have done this without a whole lotta help! :mug:

BK_Front.jpg


BK_Back.jpg


BK_Inside.jpg


HLT.jpg


MLT_Front.jpg


Stand.jpg


Stand_W_Kettles.jpg


MLT_Dump.jpg


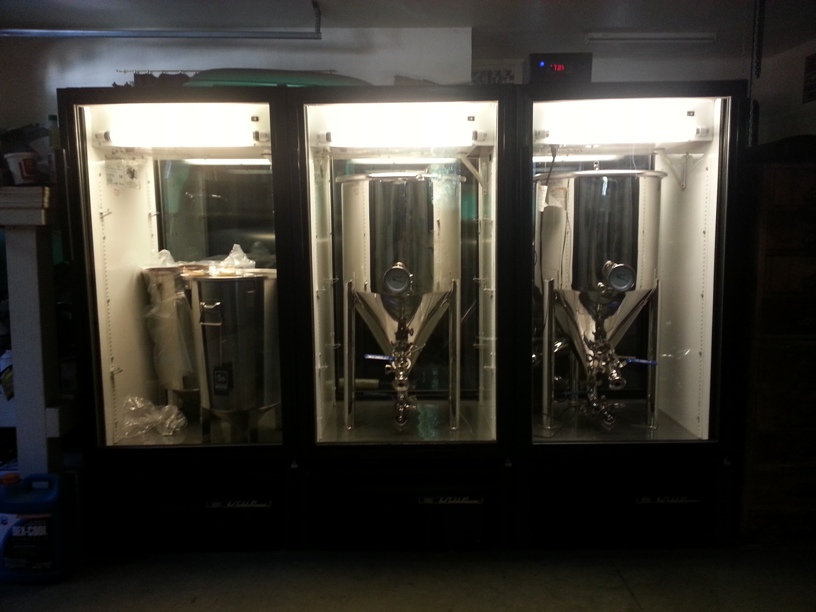
Fermentation.jpg
 
How in the world do you clean all the sticky wort and trub off that fixed immersion coil in the BK? I have a hard enough time with my standard removable copper chiller. I can't imagine trying to clean one fixed in a tiny opening after it's boiled on lol!
 
I am yet to brew the first batch on this system, but very close. My plan is to clean with PBW through a CIP ball. Time will tell. If it proves to difficult, I will remove it and go a different route.
 
A few more things done now. I got the sight tubes marked and the stand is painted. I also welded a drain fitting in the brew pan that connects to copper drain plumbing that dumps between the pumps. My plan is to make a drain pan with hose to catch any spills from connecting/disconnecting of pump hoses and anything coming from the pan drain. Because the distance between the top and bottom rails of the stand is only 12", I decided to maximize the storage by building drawers. One side is full depth and the other has two drawers just under 6" deep. Because of the pumps, I had to make the drawers slide out from the back side of the stand. I welded 3/4" angle iron for drawer guides. I had planned to skin three sides of the stand with stainless to keep drips and splashes away from the drawers, but cost and ability to get it sheared and bent have prevented this. I may go with aluminum sheeting instead. I also added leveling feet for stability. The center inlet chugger pumps are also mounted now. Here's a few more pictures...

The stand with paint.
Stand_Paint.jpg

The drain installed.
Stand_Drain.jpg

View of front of stand.
Stand_Front.jpg

View from back of stand.
Stand_Back.jpg
 
Updated pictures...Please ignore the rest of my messy garage!

The brew cart/stand is pretty much done! (at least for now). Unfortunately the stainless skirting proved to be to costly and hard to work with, so I went with 18 gauge aluminum. I had all the pieces cut where I bought it and I hand bent the corners as I don't have a sheet metal brake. I trimmed out the top edge with some rubber edge trim like this. I also covered the drawer fronts with aluminum. Over all, I think it came out pretty nice. The drawers had to go on the back side so they wouldn't interfere with the pumps and hoses. They really maximize the limited storage space on the cart.

Still left to do....

1) Clean off and remove workbench where brew stand goes.
2) Acquire or build the vent hood and install it.
3) Install vent fan and ducting including controller.
4) Plumb water into wall including a filter.
5) Mount controller on wall
6) Brew some beer!

I may still try to brew outside the garage so that I can get going but unless I pour a little concrete it's going to be tough to move in gravel I think.

Stand_Front2.jpg


Stand_Back2.jpg
 
Been a busy week. Picked up a pizza oven exhaust hood. I've gutted the insides of it for weight and it served no purpose for my brewery (sorry, no pictures yet of gutted version). I have opened the center wall to install wiring and controls for the exhaust fan. I also installed some support backing to hang the brewery controller from. My attic access for the garage was also above the area where the brewery and hood are going..... gotta go! Made a new access closer to the center of the garage. I'm now in the process of re-finishing the sheet rock and will hopefully re-paint this weekend. After that, hang the hood, install the ducting and fan, install the rooftop exhaust vent.

As I type the update of my wonderful project, I'm reminded that life can suck at times. My friend just called to tell me that one of our best friends suffered a heart attack and a stroke today and will not recover. He leaves behind a wife and 2 beautiful daughters. I will go to say my goodbye's in the morning.

Lesson for today... Life is short, don't take the people you love for granted...

I will post pictures when I get more time.

Peace be with you Skipper... I will miss you dearly.
 
I've been busy with work and the brewery. Here's some more updates...

Here's a couple pics of the exhaust hood before I gutted it. It was a pizza oven hood.

Hood_Bottom.jpg
Hood_Top.jpg

I needed to get a little infrastructure work done next. I needed to move my old attic access from above the brewery and move my hose reel a little...

Old_Access.jpg

Initial patching...

Access_Patch.jpg

I was very happy with my patch work, it is nearly unnoticeable except for the paint I found was the right color but a little glossier...

Access_Finished.jpg

At the same time I needed to open the wall between the garage doors to add a fan controller, another 110 GFI outlet and some bracing for my controller mount.

Wall_First.jpg


This proved to be quite a pain in the a$$ because of the blocking you see in this picture...

Wall_Wire.jpg

Finally got it in and ready to close up...

wall.jpg

Initial Patching....

Wall_Patched.jpg

Finished wall. I have to say my sheet rock skills have improved tremendously, the patching/texture blending came out nearly undetectable, but I still hate it with a passion and if I never have to do it again in my life, that would be fine with me!

Wall_Finished.jpg

I also added a sheet of aluminum over the wall to protect it from water/beer damage but I guess I got in a hurry and forgot to take a picture before continuing. You'll see it in the next update with the controller and hood already in place. Some might wonder why I re-textured and painted the wall just to cover it up, it's just because I'm just that anal and didn't want to have to do it later if I someday decide to remove the aluminum.
 
Having finished the sheet rock work it was time to hang the exhaust hood. First I cut and hung some super strut to help distribute the weight over more rafters.

Strut.jpg

Since the hood had strut welded to the top for hanging, the install was fairly easy with the help of a couple friends. Once it was up, I was able to adjust and lock it in position fairly easily.

Hood_up.jpg

As you can see, the aluminum sheet is already covering the wall and the controller is mounted. I am not happy with the articulating TV mount I used for the controller though. It was rated for 50 or 60 lbs but is way too flimsy and the controller sags horribly if extended at all. I will have to fabricate a different mount soon. For the moment I will just keep it flat against the wall.

One of the things I didn't get pictures of was how I adapted the rectangular opening of the hood to 6" vent pipe. I had to scavenge some 1 1/4" angle from the stuff I gutted from the hood originally and used that and some rivets to adapt a 6X10 HVAC vent register to the top of the hood. You can kinda see it in this poor picture...

Hood_Vent.jpg

After getting the hood up, I turned my attentions to the vent fan, pipe, and roof jack. After cutting the hole in the ceiling and finding the approximate path of the vent I decided there was no time like the present to cut a hole in my perfectly good roof.:drunk: There was rain in the forecast soon, so I decided to get it out of the way and let the weather test it for me. The install went well and happy to report no signs of leaking!

Roof_Jack.jpg

Then it was back to the attic for more fun. I'm not sure, but I may hate working in an attic just as much as doing sheet rock! I managed to get the fan mounted just above the ceiling with a short section of pipe followed by an adjustable elbow and ran the solid vent pipe the rest of the way to the roof jack. I used insulation over it in hopes of minimizing condensation on the outside of the pipe.

Vent_Pipe.jpg

With the hood now in place, I figured it was a good time to run a little water testing. The system ran great, but I did have some issues with condensation inside the vent pipe dripping on the MLT and collecting on the hood over the BK. I think it will be manageable with some minor mods, but I kinda wish I had spent a few more bucks and gone with an 8" fan which would have moved more air and could have been slowed down to be a little quieter. Over all though it did a pretty good job of keeping the moisture from escaping into the garage.

Here's a couple pics of the brewery now, just about ready for the first run! I still need to finish my water filter, make a hop spider, and acquire a few more odds and ends, but I should be ready to brew by Christmas.:mug: Maybe then I can get back to work on my poor lonely truck.

In_Place.jpg
Almost_There.jpg
 
Finally gonna fire this sucker up in the morning!! Going to brew a fairly simple Pale Ale to get a feel for the system and get an idea of the brewhouse efficiency before getting too complicated. I'll try to post a few pics tomorrow after I'm done, or possibly in a panic during the brew. :eek:

Wish me luck
 
Finally gonna fire this sucker up in the morning!! Going to brew a fairly simple Pale Ale to get a feel for the system and get an idea of the brewhouse efficiency before getting too complicated.
Excellent idea. Always use a beer you're familiar with and have brewed before so that you know what to expect / can see how the new setup behaves differently from the old one. It'll help you pinpoint issues (if you have any).

Looking forward to the pictures!

Kal
 
So... updates are in order here. I'm eager to hear how your first brew turned out.
I really appreciate your skill to fab the items together. You took standard items and combined them into larger vessels to fit your needs. That's awesome!
 
Sorry for the delay. Here's the update with a few pics. Brew day went longer than I expected, but over all went very well. Christmas has delayed my being able to update promptly as well.

The jury is still out on my new Captain Crush mill, over all I love the design, but there are a few concerns. I ended up milling my grain twice because one of the roller adjustment set screws kept coming loose and letting the gap open up. The other was that there appears to be too much gap at the end of the roller, allowing some grain to go around uncrushed. I'll have to address these and see what I can figure out.

My controller functioned Very well. Thanks again to Kal, PJ, and all the rest of you here who have helped so many of us who NEVER could have built something like this without all the knowledge you have shared. :mug:
The only issue I had was trying to put my BK PID into manual mode. I know it worked before, but for some reason I couldn't get it to work. It was not much of a problem though as the 4500w element was just fine at full on with 14.5 gal in the kettle. I sped things up a bit by heating my strike water in the BK while heating sparge water in the HLT.

My MLT was probably the biggest issue of the brew day, although it did very well too. When I doughed in and started to circulate, grain that had gotten by the false bottom immediately plugged my Chugger (insert "that's what she said" joke). I just stopped the pump, closed the valves, and vacuumed out the pump. Before re-starting, I drained some more into a pitcher and poured back to be sure it didn't happen again. No more plugging issues after that. I did also have some issue with grain getting by during sparge and my grain bed seemed a little "loose". I'm wondering if throttling the flow down during the mash was not the best thing to do. I slowed the flow some because I was worried about compacting the grain and sticking the sparge, though that was never an issue. What do the rest of you HERMS/RIMS brewers do? My Tippy Dump design worked very well for dumping the spent grains into a wheel barrel (the neighbor's goats love me now).

After there was plenty of wort in the BK, I fired the element and set the PID to heat it up closer to boil temps, slowly raising it as I got closer to full volume. By the time I had collected the 14.5 gal target (1 1/2 hour sparge) it was poised to boil in just a few short minutes. I really thought I wouldn't have an issue with boil over in my 20 gal Frankenkeggle, but it still managed a slight one as I frantically tried to figure out how to get my PID to work in manual mode. I had to manually shut the element off for a couple seconds at a time until it broke. The stainless hop spider I built worked perfectly too. I built it with an approximately 1" tall ring at the bottom with the screen on top helping to force the boil to percolate up through rather than around it. The biggest problem with the BK was the placement of my whirlpool inlet. Without thinking, I had positioned it up close to the 12 gal mark on the kettle. I think I was OK on this batch, but by the time the wort shrank from cooling It was starting to whip some air into the wort. Hopefully it was cool enough by then to not cause a problem. I will probably just add a lower fitting as I'm concerned that plumbing a drop arm may affect my whirlpool action. The aeration was probably good as I wasn't too happy with my inline O2 system. It, would probably work fine at full flow rate, but did not work well at all at reduced flow rates (trying not to suck trub). I did loose more than I expected to trub (1 1/2 gal) and I 'm wondering if, since i'm fermenting in a conical, I should just suck it all into the fermenter, let the trub settle out for a while, and then dump it. It seems like it would be faster and probably loose less wort. I'd love to hear from others who ferment in conicals as to what they do.

Now for the BIG question, how did the hard plumbed stainless chiller coils perform and more importantly, clean up? ........

EXCELLENT!

I made a pre-chiller from about 40' of 1/2" copper tube, coiled to fit in a 5 gal bucket. I used about 10 lbs. of ice to pre-chill the ground water as low as possible and was able to chill 12 gal to 71 deg in about 15 min. :rockin:
As for cleaning the BK, I used my 3/4 hp Keg Cleaner/ Beer Line Cleaner/ do all harbor freight sump pump to pump 160 deg PBW through a Brewer's Hardware CIP ball mounted in my BK lid. I placed the pump in a 5 gal bucket in front of the kettle and cycled the pump on and off as needed (the pump pumps way faster than the kettle can drain). After a few minutes of this, my kettle was sparkling clean! :D

I transferred to one of my Stout Tanks 14.5 gal short fermenters and pitched a healthy yeast starter. Using San Diego Super Yeast, I started fermentation at 70 deg for 4 hours and ramped down to 67 deg over another 4 hours and held there. It was showing active fermentation within a few hours! I can't say enough about alphaomega's STC_1000+ controller project. I have them on all three of my fermentation fridges and the dual thermisters allow me to keep the commercial fridges from overshooting temps (they cool VERY fast) while monitoring the beer temp inside the thermowell. Being able to use programmed temperature profiles is amazing too! I'm anxious to try some lager soon. I am a little concerned about suck-back on the blow-off tube when I crash cool before kegging though. Would love to here how some of you have dealt with it.

Can't wait to pour the first beer!

Well that enough talk, here's some pics...

Overview of the brew setup
First_Brew.jpg

Inside the MLT (should have cleaned up the spilled grain before taking pic!)
First_Mash.jpg

Me trying to regulate the sparge
First_Sparge.jpg

Post boil chilling
First_Chill.jpg

DIY Stainless Hop Spider
First_hop.jpg

My do everything Harbor Freight Pump and CIP lid
First_Pump.jpg

BK after CIP cleaning with said pump
First_Clean.jpg

Decanted 3 liter yeast starter ready to pitch
First_Yeast.jpg

1st batch "in the can" so to speak!:rockin:
First_Ferm.jpg
 
What do the rest of you HERMS/RIMS brewers do?

I have experienced the grain-plug on my bottom draining keggle MLT previously... It's frustrating. However, I think I've found a way to eliminate the issue.
My last several brews, I've moved all my strike water (heated in my BK) to the MLT and then start my full speed (all valves open all the way) re-circulation of the MLT. As I dough-in, some grains and hulls get past the false bottom, but nowhere near in the same quantity as if I had doughed-in all the grains and stirred having only then attempted to start my pumps. I have had MUCH better results with this method. It still lets me stir the mash and break up all the dough balls and I've never had my pump get clogged since doing this...
 
That is an amazing setup. I love the innovative way you placed the brew house so you don't seem to lose your garage space.
 
I have experienced the grain-plug on my bottom draining keggle MLT previously... It's frustrating. However, I think I've found a way to eliminate the issue.
My last several brews, I've moved all my strike water (heated in my BK) to the MLT and then start my full speed (all valves open all the way) re-circulation of the MLT. As I dough-in, some grains and hulls get past the false bottom, but nowhere near in the same quantity as if I had doughed-in all the grains and stirred having only then attempted to start my pumps. I have had MUCH better results with this method. It still lets me stir the mash and break up all the dough balls and I've never had my pump get clogged since doing this...

Do you leave your pumps at full flow for the whole mash?
With a bottom drain kettle, I'm guessing that you transfer cold break and all to the fermenter? do you deal with it there or just leave it?
 
I love the fermentation setup :mug:...some day....

Thanks, a bit of an investment, but I think they'll be worth it.

awesome update. awesome system.

Thanks. Thanks again

That is an amazing setup. I love the innovative way you placed the brew house so you don't seem to lose your garage space.

Thank you, It seems to be working out pretty well so far. The only thing that is a little inconvenient is running power cords to the fridges in the center of the garage. It would also be nice to have a sink for clean up. I'm thinking about making a portable one on wheels that I could roll into position and hook up with a garden hose. Maybe even hook up hot water from the HLT. That's another project, they never seem to stop.
 
Do you leave your pumps at full flow for the whole mash?
With a bottom drain kettle, I'm guessing that you transfer cold break and all to the fermenter? do you deal with it there or just leave it?

Yeah, I open the pumps and the Chuggers do a great job of re-circulating the mash. My Wort Pump stays on and open the whole time. The Water Pump circulates the HLT to keep stratification at bay... Plus, my sensors are inline on the out-going plumbing so I have to have pumps moving fluids around to get accurate temps.

Yeah, if I had to do it over, I'd get a nice flat bottom kettle to build into my Boil Kettle. I do transfer break material but usually let the wort rest in a sanitized vessel prior to racking over to the fermentor. This allows the cold break to precipitate and fall out... Nothing but nice clean wort goes into the fermentor! Then, I'll inject oxygen and pitch yeast.
 
Where did you find the bev coolers? Those are the perfect size for your conicals

I found the True GDM-10's on Sacramento Craigslist and bought them before the conicals. I had to travel 1 1/2 hours to get them in Tracy, CA, but think it was worth it. They are only 10 CF but pack a 1/3 hp compressor. They have glass doors on both sides (grocery store soda fridges), but seem to be fairly efficient. I have to measure the power consumption on the next batch. They came out of Safeway stores across all of Ca. because the soda distributor started supplying coolers, not because they had problems. There must have been at least a couple hundred of them (I imagine there are still some left). I picked up 3 of them for $195 ea. and hard wired the controllers in. You can get some more details in the build thread in my signature. I then set out to find a conical that would fit as the inside height is limited. The Stout Tank conical 14.5 gal short conical fit the bill perfectly, and at less than $600 ea., fit the bill perfectly. They are very nice, but I think I will probably upgrade to butterfly valves for them eventually as they are much easier to clean and sanitize than the ball valves.
 
Back
Top