$8 Home Depot Cooler Conversion PT I

Homebrew Talk - Beer, Wine, Mead, & Cider Brewing Discussion Forum

Help Support Homebrew Talk - Beer, Wine, Mead, & Cider Brewing Discussion Forum:

This site may earn a commission from merchant affiliate links, including eBay, Amazon, and others.

pbowler

Well-Known Member
Joined
Aug 31, 2006
Messages
284
Reaction score
1
Location
Motown
I'm posting this here instead of DIY becuase i've never done an AG before, and I'm not sure how well (or crappy) this will work.
Also I had to cut it up because there is a 4 pic limit.
maybe a mod can stitch it back together if it's any use.

if looks like a keeper then Mods can move it wherever, and we'll know by the weekend if it should be moved to the trash (First AG brew to take place Fridayish)

The name is a bit deceiving because you'll need one of thiose LHBS plastic valves that I'm guessing most people without a Tun probably have laying around.


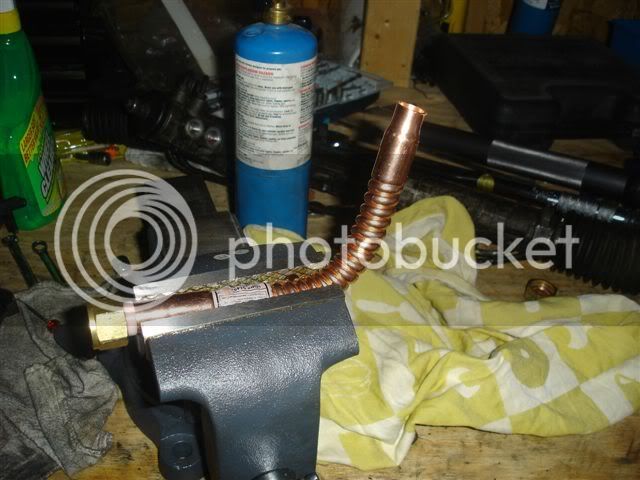
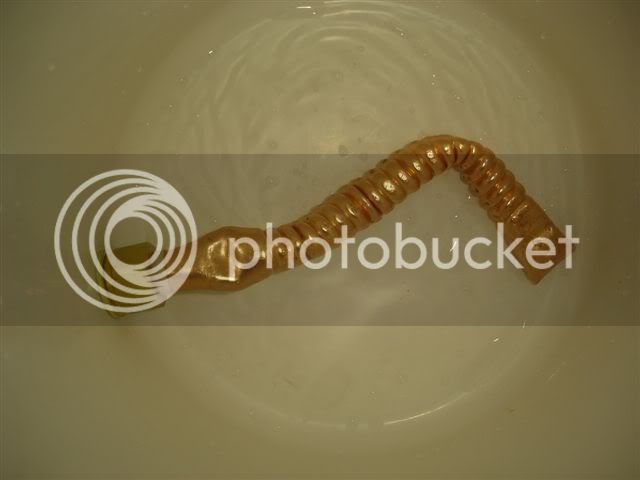
ANYWAY. Turns out that a 3/4" copper supply hose for a hot water heater ($8 at home Depot) is a dead nuts match for teh most popular of those Plastic Home Brew Valves.
DSC03954.jpg


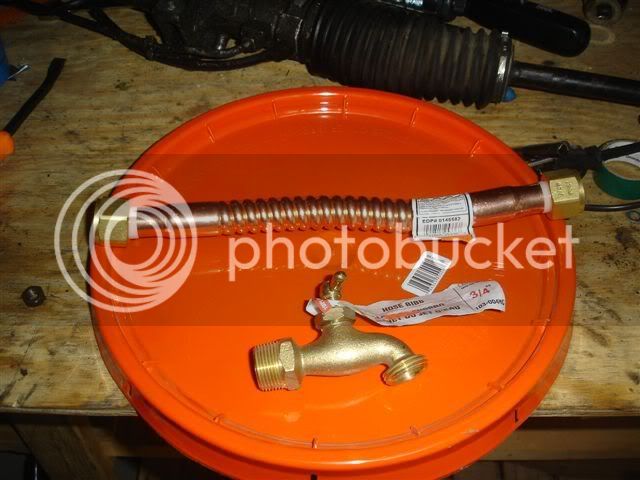
ignore the ball valve, it just didn't work. In addition to being carppy quality, there is nothing for the washer to push against to make a seal againt the outside ovf the Cooler.
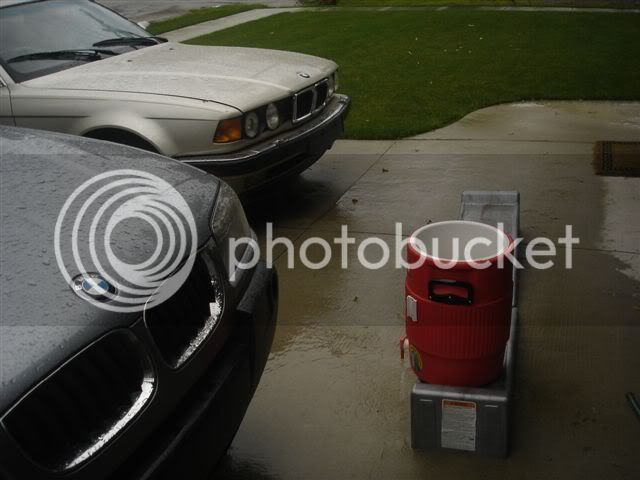
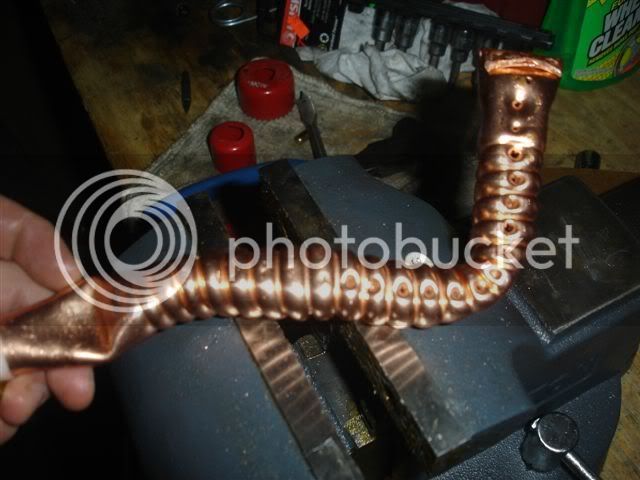
The Cooler
I got a 5-gallon igloo at K-Mart ($26), a Craftsman at K-mart, the world is ending...
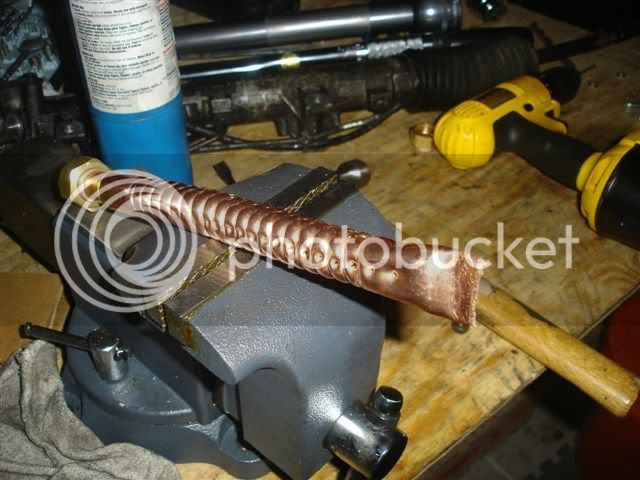
You can see that the wall where the spout was is Fairly thin, this is the key to the whole Dealeo
DSC03962.jpg


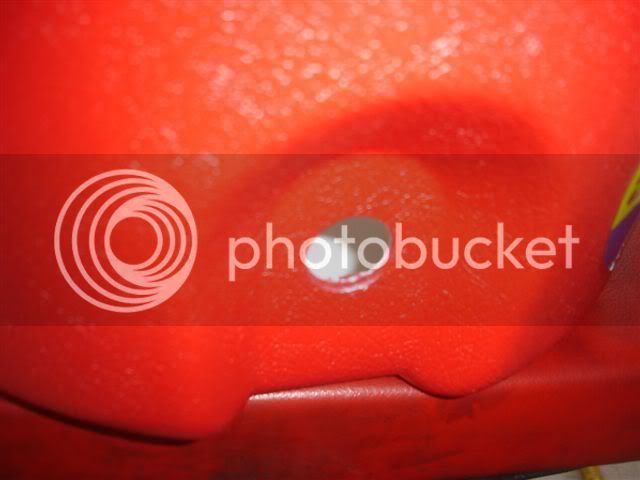
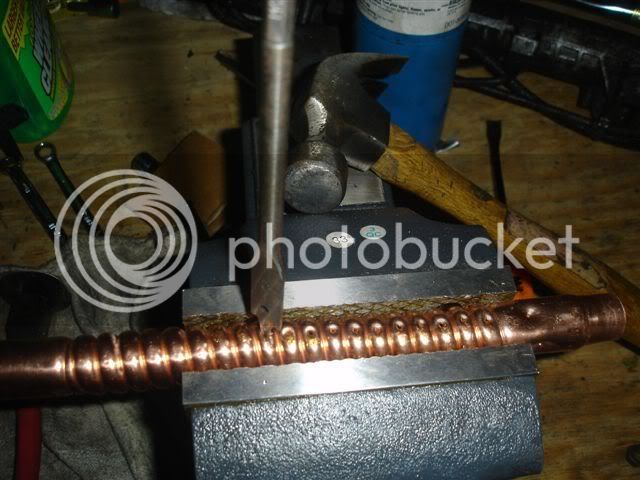
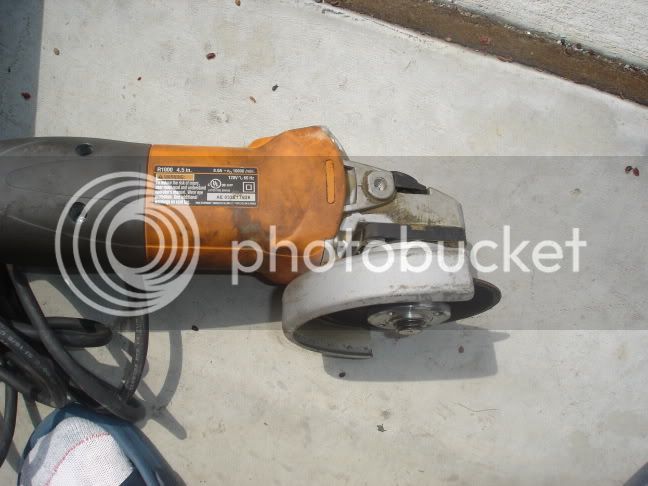
I had to open the hole a bit, to about 1" (1 1/8" to be exact, thanks ablrbrau), but all my construction tools are at my parents house (long story) so I used a 7/8" spade bit that did just a crappy enough job to cause problems.

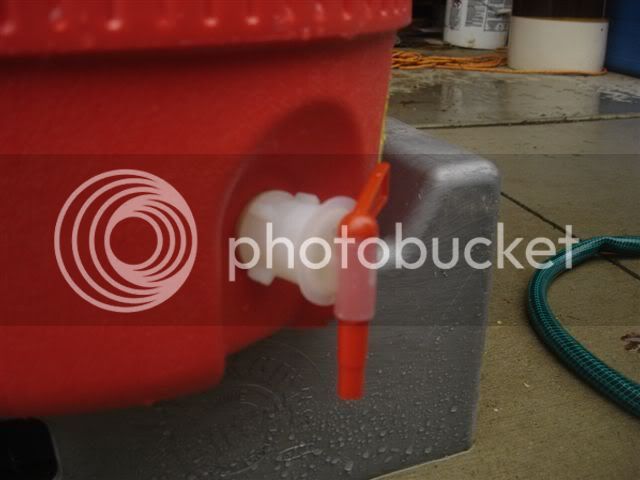
stuck teh HB vlave through the rough hole and attached the Hot Water line for a quick test, so far so good.
DSC03966.jpg

DSC03964.jpg
.
 
PART II
I then added 1 Hard Black Rubber washer to the Valve, then a soft white rubber washer, on the inside I used just a white soft rubber washer.

Leaked a little but nothing too bad. Plus it's raining, am I nuts or what.
DSC03967.jpg


Time to move on.

I disassembled again and put the Water hose in the Vice.

one grinder wipe later, ta da! (be careful with this stuf, the Grinder and the cut copper are HOT and SHARP, if you don't know what your doing, get some help first)
DSC03970.jpg


I then starightened it out and put it back in the vice to perforate. i uased an old 1/2" spade bit (well it's now anyway) becuase it was sharp enough to cut a hole in the copper without making it too big.
DSC03971.jpg


I perforated 3 ends, the 2 sides and bottom of the hose. (I stole that Idea from someone here who cut his copper lines on the bottom)


closed the end
DSC03973.jpg
 
PART III


A few bends to get it to fit in the Bucket
DSC03975.jpg


and Viola!

DSC03977.jpg


A little Teflon tape really helped.

It still leaks a little bit but my washers are a bit old so maybe new ones will help.

and in case you think I'm strange for taking all these pictures, you have to understand that on the BMW board I frequent, write ups like this have saved my ass countless times.

Tell me what you all think, like I said I've never done AG before let alone Built one of these. Lemme know what you think.

And the plastic HB valve is temporary until I can find a suitable washer to make a Brass valve work.
 
I did something real similar with mine. I used a spigot from the LHBS like you did, (oh and it's 1 and 1/8 inches that you need for that to fit) but then I reduced it down to 1/2" (I think) so that I could put on a hose barb. then I bought a false bottom from Northern Brewer and hooked it to the hose barb. I'd post pics of mine but I can't seem to locate the cable for my digital camera. By the way, you won't stop that leak unless you put the gasket on the inside. I know that's not the normal way to do it, but the outside of those coolers are way to bumpy to get a decent seal.

Your setup ought to work okay, but you'll be limited to batch sparging, since that water pipe setup will lead to channeling. I did that same thing on my old cooler, but I used a SS hose braid instead. Like I said, it worked great for batch sparge, but not so good forfly sparging.
 
Cool, I'll edit that to be 1 1/8".

what do you mean put the gasket on the inside?

I have it on both. Good point on the Bumpyness I can take care of that wuith the grinder (I think).

Batch sparging was all I was after, total Setup about $35, not too shabby
 
Also the way you use the teflon tape will help too. Try this.... hoping you can see this.... on one side of the hole in the cooler (or both if the mood suits) your going to take the copper tube and wrap teflon tape around it. I used this tape from Lowes... its pink and is soft (no... no jokes here... they use a couple of different colors.... the pink one is used for water). I wraped it around a bunch of times so it was thick. When you tighten the assembly because the teflon tape is flexible it will form one hell of a tight fit around the hole in the cooler. Sealing it VERY well.
 
I know you dont have the Kewler kit but this is what I have.... this pic was taken before I played with the teflon tape to get it right so it did not leak.

2560-100_0388.jpg


Right after the barb on the left there is the Kewler Kit. You see two red flexible washers (the space between them is where your cooler wall would be) and there is one steel washer, which is on the left. So the teflon tape gets compressed between the two red flexible washers (in this pic the compression is comming from the steel washer on the left and the copper nut on the right. Seems to work like a charm on mine.
 
The Kewler kit I put on my Igloo leaks very very slowly. Seeps is a better way of putting it. It's so slight that it made a six inch diameter spot of sticky wort collected under my Ice Cube mash-tun in the space of 90 minutes. I kept cranking and cranking on the nut to get it tighter until the inner small ring squished partially out from behind the washer. Too tight, I guess, but I couldn't get it to stop seeping.

I'm going to try it again, but remove one of the two washers to see if that helps. I don't know why I think that'll help, but I think it may actually fit better with only one washer on the inside instead of two.
 
I think ablrbrau nailed it. The outside of the cooler is too bumpy.

I'm glad to hear the kewler kit leaks (no offesnse) I had a feeling i could do as well if not better for less (I'm crazy like that).

I'm gonna grind the bumps off and see if it seals up better, with the addidtion of the Custom Teflon Washer (see above)
 
I've seen similar DYI walkthroughs where the copper tubing is not used; instead, you use the stainiless steel mesh sheathing from the outside of a flexible water supply hose. Thinking about trying it out later this year.
 
beer4breakfast said:
I'm going to try it again, but remove one of the two washers to see if that helps. I don't know why I think that'll help, but I think it may actually fit better with only one washer on the inside instead of two.

If your talking about the steel washers, then yes you could be on the right track. I use only one of them in mine. But Dude suggested teflon tape and I have not had a problem since using the stuff.
 
Evan! said:
I've seen similar DYI walkthroughs where the copper tubing is not used; instead, you use the stainiless steel mesh sheathing from the outside of a flexible water supply hose. Thinking about trying it out later this year.

Yes, Palmer has a detailed description of how to do this in his new edition.
 
pbowler said:
I think ablrbrau nailed it. The outside of the cooler is too bumpy.

I'm glad to hear the kewler kit leaks (no offesnse) I had a feeling i could do as well if not better for less (I'm crazy like that).

I'm gonna grind the bumps off and see if it seals up better, with the addidtion of the Custom Teflon Washer (see above)


It shouldn't leak. Like I said, I use a spigot from a LHBS too. On my old cooler, I used that and on the backside I used this:

attachment.php


It is an invert tube backnut that fits onto the spigot. It is made for a plastic fermenter, but it works well for this too. I then put a SS hose braid (from a sink water supply line, only around $4) onto the tube with a hose clamp, and crimped the end. If you put your washer on the inside of the cooler it shouldn't leak a drop, no teflon tape needed.

http://www.williamsbrewing.com/INVERT_TUBE_BACKNUT_P179.cfm

P.s. Can someone please tell me how to insert images into posts? Dummy me can't figure it out.:off:

Edit: I got it in there, but I have no idea how.......
 
OK, I am gonna try the teflon tape and use as is to see if it works.

I have one of those backnuts so if all else fails...

I am confident you were right about the bumps though, and I have something special for those...
DSC03290.jpg

put these tags around the url of the image
"
"
 
Chairman Cheyco said:
I've been above 80% on my last 3 brews with the lowly batch sparge, so don't get too upset about it. It's all in the method.

Sorry, didn't mean to make it sound "lowly". :p I've batched it a lot myself. I just meant that there would be no other options that way. :mug:
 
i myself have ben in love with BMW's sense my first car was a E28 535is that got clobberd by an old lady , thats the past now i drive an e23 i see your e34 and e36 ? right well man thats awesome just wanted to invite you to join WWW.BimmerBoard.com there you can ask anything! and i mean ANYTHING about your car and they will be willing to give an arm and leg to help you. just thought id let you in on that !
 
danthemanbrew101 said:
i myself have ben in love with BMW's sense my first car was a E28 535is that got clobberd by an old lady , thats the past now i drive an e23 i see your e34 and e36 ? right well man thats awesome just wanted to invite you to join WWW.BimmerBoard.com there you can ask anything! and i mean ANYTHING about your car and they will be willing to give an arm and leg to help you. just thought id let you in on that !

Ha, awesome.

Actually thats my wife's E83, and my E32 750il (BIG DOG BABY!!!)
my mom has an E39 540i 6speed and pops has an E30 325iC (that's his old rack and pinion on the work bench).

I have been at BimmerBoard for about a year (came over in the great Shogun Migration from Roadfly when Roadfly decided advertising was more important than information), ands would be TOTALLY SCREWED without it.

That E28 535i has always been one of my favorites, the Big Six is an awesome engine, shame it had to go...
 
Back
Top