Ok,
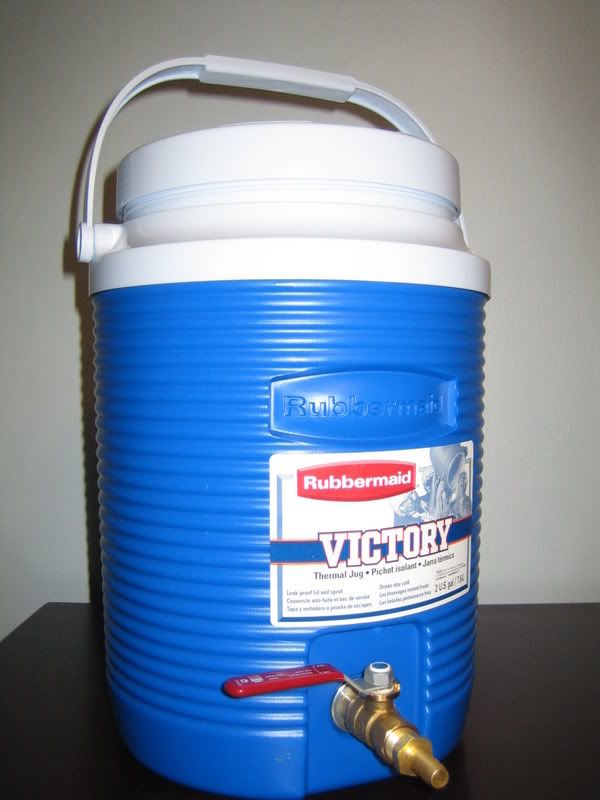
Here is a parts list for a 2 gallon mini mash/lauter tun that I put together. I'm sure it would work for a 3 gallon cooler as well. The cooler was purchased from Target for $9.99. All the parts came from Home Depot and are the "Watts" brand. Use any equivalent in your area. All sizes are 3/8 inch. I will describe the parts for those people who are not familiar with this stuff...like me!:
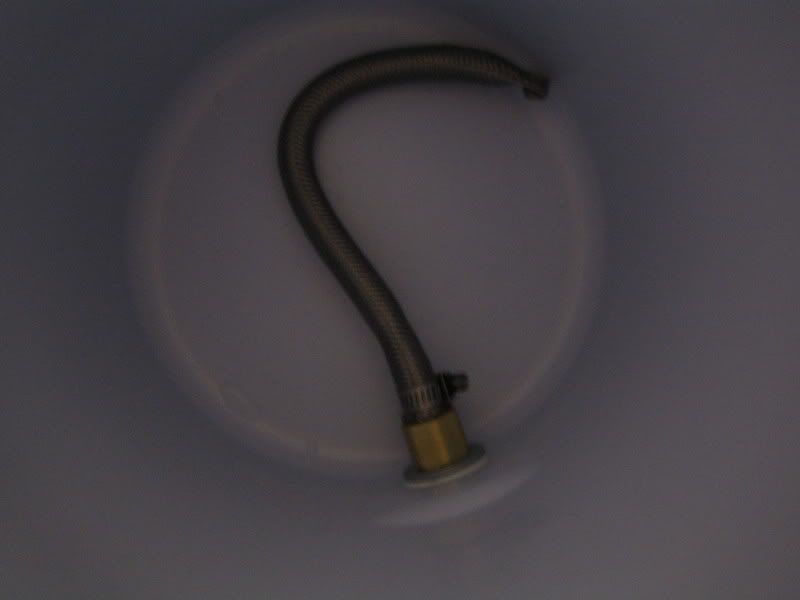
You will notice a white seal pushed flush against the inside of the cooler on this second picture. It was part of the original cooler set up. After I screwed off the plastic nozzle I left this piece on. If your cooler has this, I would suggest keeping it there. It is a part of the cooler's original seal:
The parts are listed in order starting from the outside:
1. Watts A-294: Barb to MIP Adapter (the piece that screws into the valve) = $2.10
2. 3/8" Brass Valve (with 2 female ends to screw the fittings into) The most "expensive" part at just over $6.
3. Watts A-785: Brass Pipe Nipple. You can't see it from the pictures. It's what connects the valve to the other adapter on the inside of the cooler. = $1.52
4. A washer that will go over the nipple on the outside of the cooler...whatever size will fit for your setup. = $0.25
5. Another washer on the inside. = $0.25
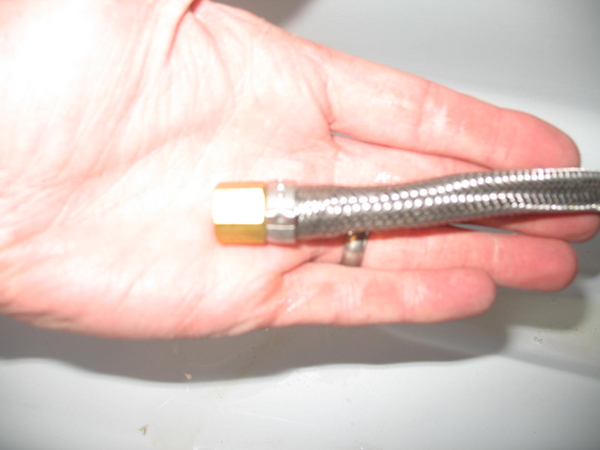
6. Watts A-298: Barb to FIP Adapter. It screws into the nipple. You can't see the actual barb from my picture. It is covered by the SS braid. = $2.33
7. Watts FloodSafe Auto Shutoff Connector: you can use ANY SS braid that will fit inside your cooler. I picked this one beause the braids were so tight I thought it would give me a clean vorlauf/sparge...it did! = $4.69
8. A little clamp to tighten the SS braid to the barb. = $0.79
I also cut a very small piece of siphon tubing and put it on the inside barb before I slid the SS braid over the top and clamped it down....I wanted to give the clamp something to "grab".
Also, don't forget some thread seal tape (only $0.99) for any spots where you screw pieces together.
If you need to there is no shame in bringing your cooler right into the hardware store with you. I did to make sure everything looked right...probably saved myself a trip or two. You don't look as silly carrying a 2 gallon cooler compared to a 5-10 gallon all grain cooler (although, I will probably do that as well when the time comes).
The entire project cost me ~$30, which will more than pay for itself after just a few partial-mash brews...how? 1 lb. of grain at my LHBS = $1.50. 1 lb. of DME = $4.50 (granted, its not a 1:1 ratio, but savings are still an immediate result). This is a great way for extract brewers to start enjoying the variety and benefits of grains during a brew session without needing all the equipment/space to jump immediately into all grain. To read more about the joys of mini-mashing, read the lengthy "Mini Mash For Extract Brewers" Thread here:
https://www.homebrewtalk.com/showthread.php?t=8805
Good Luck.
Here is a parts list for a 2 gallon mini mash/lauter tun that I put together. I'm sure it would work for a 3 gallon cooler as well. The cooler was purchased from Target for $9.99. All the parts came from Home Depot and are the "Watts" brand. Use any equivalent in your area. All sizes are 3/8 inch. I will describe the parts for those people who are not familiar with this stuff...like me!:
You will notice a white seal pushed flush against the inside of the cooler on this second picture. It was part of the original cooler set up. After I screwed off the plastic nozzle I left this piece on. If your cooler has this, I would suggest keeping it there. It is a part of the cooler's original seal:
The parts are listed in order starting from the outside:
1. Watts A-294: Barb to MIP Adapter (the piece that screws into the valve) = $2.10
2. 3/8" Brass Valve (with 2 female ends to screw the fittings into) The most "expensive" part at just over $6.
3. Watts A-785: Brass Pipe Nipple. You can't see it from the pictures. It's what connects the valve to the other adapter on the inside of the cooler. = $1.52
4. A washer that will go over the nipple on the outside of the cooler...whatever size will fit for your setup. = $0.25
5. Another washer on the inside. = $0.25
6. Watts A-298: Barb to FIP Adapter. It screws into the nipple. You can't see the actual barb from my picture. It is covered by the SS braid. = $2.33
7. Watts FloodSafe Auto Shutoff Connector: you can use ANY SS braid that will fit inside your cooler. I picked this one beause the braids were so tight I thought it would give me a clean vorlauf/sparge...it did! = $4.69
8. A little clamp to tighten the SS braid to the barb. = $0.79
I also cut a very small piece of siphon tubing and put it on the inside barb before I slid the SS braid over the top and clamped it down....I wanted to give the clamp something to "grab".
Also, don't forget some thread seal tape (only $0.99) for any spots where you screw pieces together.
If you need to there is no shame in bringing your cooler right into the hardware store with you. I did to make sure everything looked right...probably saved myself a trip or two. You don't look as silly carrying a 2 gallon cooler compared to a 5-10 gallon all grain cooler (although, I will probably do that as well when the time comes).
The entire project cost me ~$30, which will more than pay for itself after just a few partial-mash brews...how? 1 lb. of grain at my LHBS = $1.50. 1 lb. of DME = $4.50 (granted, its not a 1:1 ratio, but savings are still an immediate result). This is a great way for extract brewers to start enjoying the variety and benefits of grains during a brew session without needing all the equipment/space to jump immediately into all grain. To read more about the joys of mini-mashing, read the lengthy "Mini Mash For Extract Brewers" Thread here:
https://www.homebrewtalk.com/showthread.php?t=8805
Good Luck.


![Craft A Brew - Safale S-04 Dry Yeast - Fermentis - English Ale Dry Yeast - For English and American Ales and Hard Apple Ciders - Ingredients for Home Brewing - Beer Making Supplies - [1 Pack]](https://m.media-amazon.com/images/I/41fVGNh6JfL._SL500_.jpg)


")