
EarthBound
Well-Known Member
This is my keezer in its “function over form” state. Within a couple years, I will upgrade it to its “form over function” state, where it will look like Jester’s keezer. This keezer does not void the warranty that came with the freezer. I got this 14.8 cu. ft. freezer from Lowe’s for about $220 after tax, and it was originally $400. I tried to be patient and use CL, but I had to make an exception for such a great deal on a brand new freezer. The hinges that were on it are not shown, but they are huge and badass. I will use them when I upgrade the keezer. I made a dolly that I guess I need to stain so that it matches the collar.
Once again, I copied a couple ideas from some other dude’s design. At least in my case, the insulated collar dimensions were meant to be. The thickness of the three rectangles (outer is 0.75” wood, middle is 1.5” insulation, and inner is 0.75” wood) is exactly 3”. The thickness of the space where the freezer meets the lid is also exactly 3”. Fits like a glove. The collar is siliconed to the keezer. I laid two beads of silicone on the freezer – one on the outer edge and one on the inner edge.
View from the front.

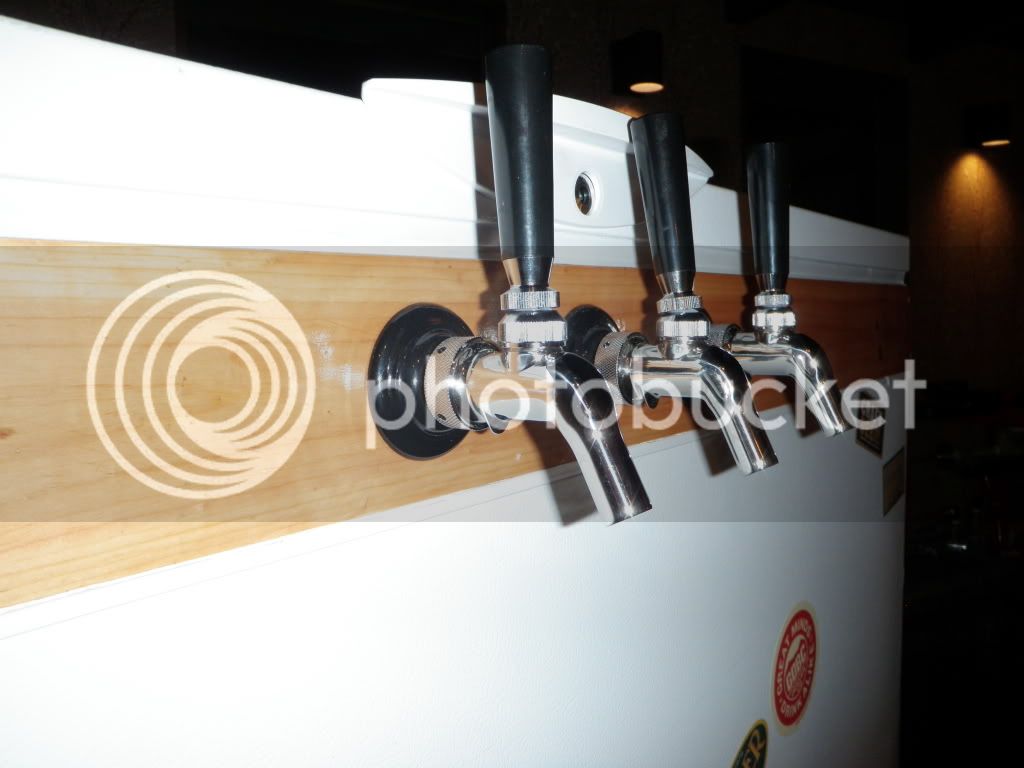
Who doesn’t like a nice view of some SS?
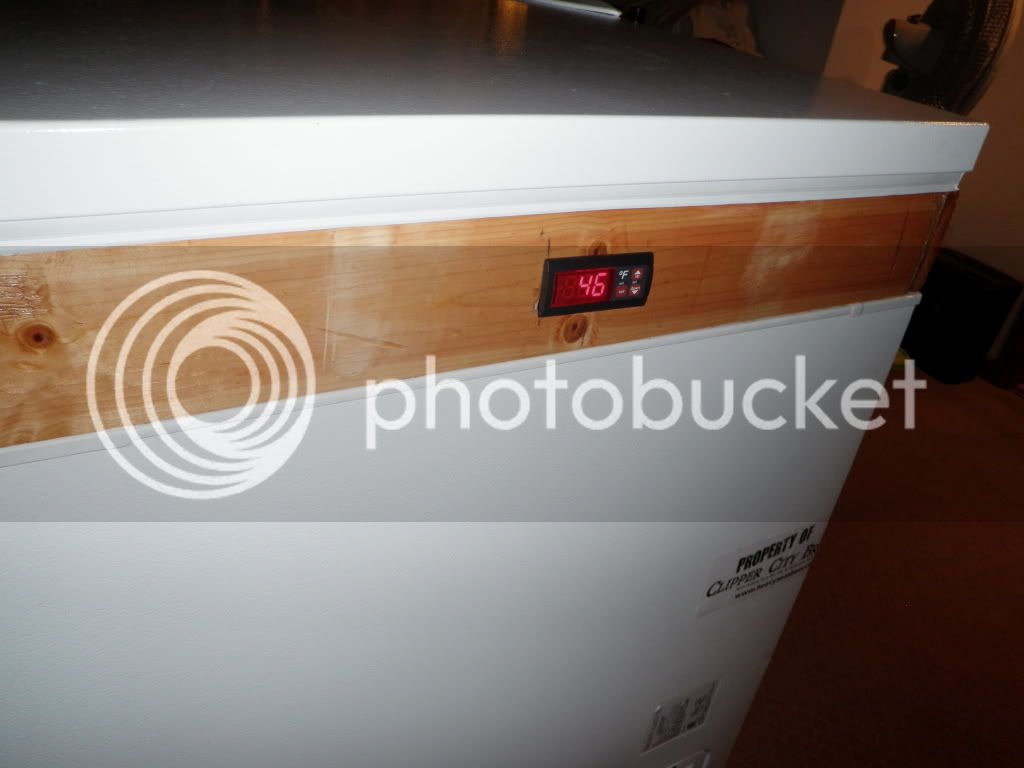
View of the LOVE switch. It’s just a temperature on/off switch (like a thermostat). In the case of my keezer, it’s used as refrigerator (cooling) thermostat. In the case of my brewstand, I use two of them as furnace (heating) thermostats for the HLT and MLT. I love my love switches, bitches! It’s freezing nuts in my brewhut (and will be until I upgrade it with more insulation), so the compressor hardly ever turns on.
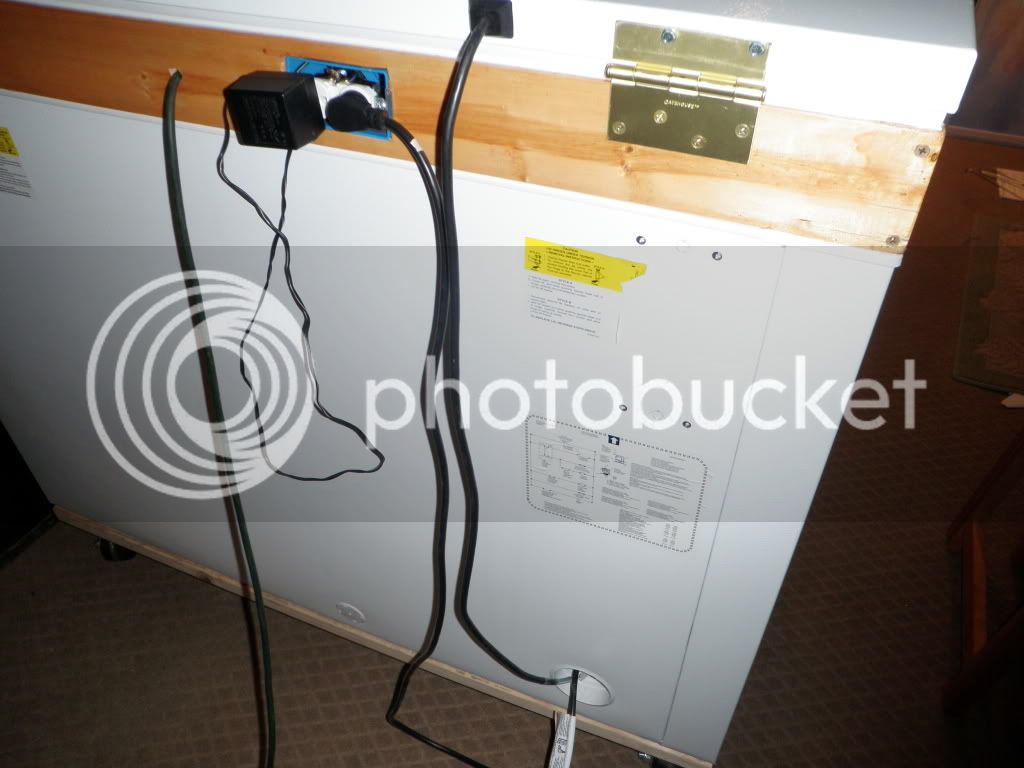
View from the rear. The left outlet is always on. A 12VDC computer fan is wired to a 12VDC transformer and is plugged into the left outlet. The fan is required to have even temperature throughout the keezer. It doesn’t matter which way the fan is pointed. It does the trick. The right outlet is switched by the LOVE switch. The compressor is plugged into the right outlet. The wire going from the hole at the bottom to the lid is just for the light. The hinges were about a dollar at Lowe’s. I chopped off half of one side because it was sticking up a little. Each hinge had four holes in the lid and four holes in the freezer. I did not use the existing holes in the freezer. Two of the four holes in the lid line up perfectly with two of the four holes in the hinge, as you will see below. That made me happy.
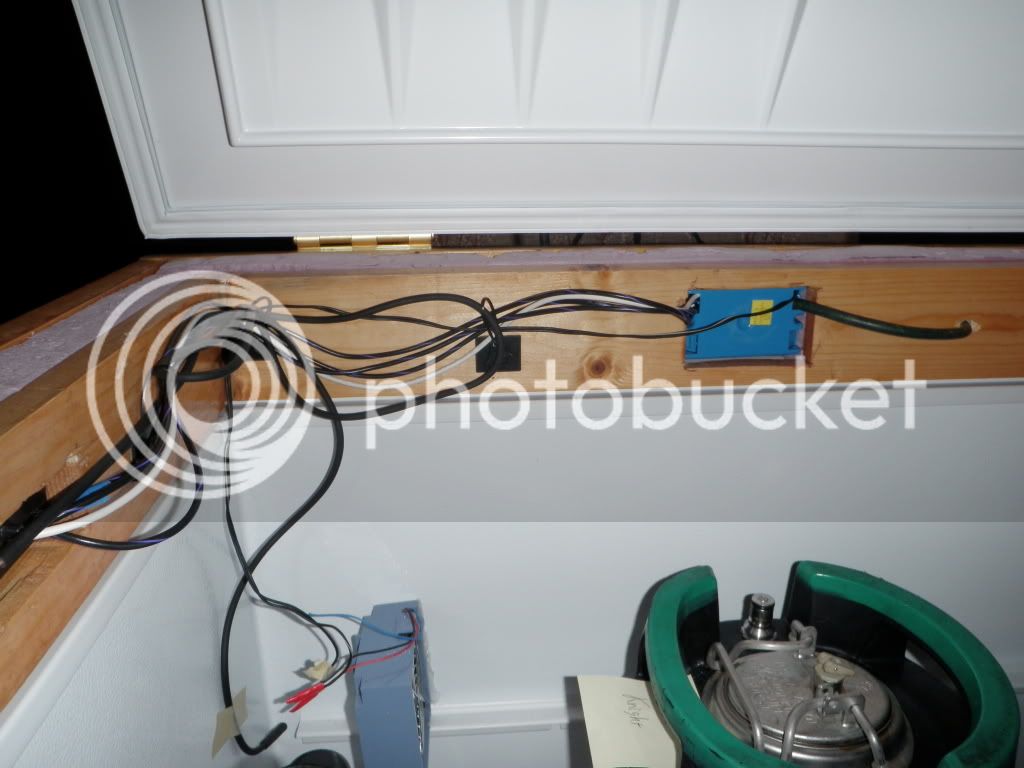
View of the wiring job on the inside. The fan is silicone to the wall. I plan on wrapping the wiring in corrugated tubing sometime. I have seen absolutely no moisture on the inside of the keezer, and I doubt I ever will.
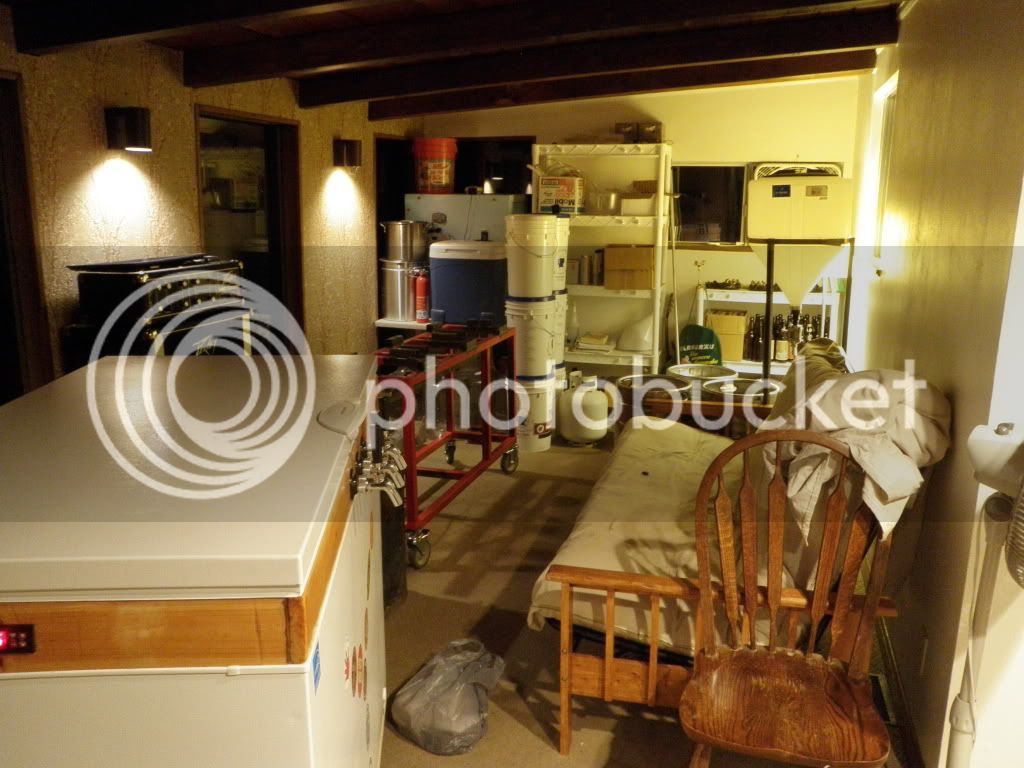
View of the brewhut. You can see that my brewstand is partly (the electrical and liquid phases) dismantled. This is because I am getting ready to finish/paint the entire thing. This picture WILL be updated in about 4-5 weeks. At that time, the brewhut will look much better (cleaner, more organized, and with only brewery-related stuff), and the brewstand will be finished/painted.
I will update this thread once I receive my ball lock QDs and I install the secondary regulators and air distributors. I will make sure to show what the inside looks like because I forgot to take a picture of that. I will update it again when I upgrade from three to five taps, too.
Once again, I copied a couple ideas from some other dude’s design. At least in my case, the insulated collar dimensions were meant to be. The thickness of the three rectangles (outer is 0.75” wood, middle is 1.5” insulation, and inner is 0.75” wood) is exactly 3”. The thickness of the space where the freezer meets the lid is also exactly 3”. Fits like a glove. The collar is siliconed to the keezer. I laid two beads of silicone on the freezer – one on the outer edge and one on the inner edge.
View from the front.
Who doesn’t like a nice view of some SS?
View of the LOVE switch. It’s just a temperature on/off switch (like a thermostat). In the case of my keezer, it’s used as refrigerator (cooling) thermostat. In the case of my brewstand, I use two of them as furnace (heating) thermostats for the HLT and MLT. I love my love switches, bitches! It’s freezing nuts in my brewhut (and will be until I upgrade it with more insulation), so the compressor hardly ever turns on.
View from the rear. The left outlet is always on. A 12VDC computer fan is wired to a 12VDC transformer and is plugged into the left outlet. The fan is required to have even temperature throughout the keezer. It doesn’t matter which way the fan is pointed. It does the trick. The right outlet is switched by the LOVE switch. The compressor is plugged into the right outlet. The wire going from the hole at the bottom to the lid is just for the light. The hinges were about a dollar at Lowe’s. I chopped off half of one side because it was sticking up a little. Each hinge had four holes in the lid and four holes in the freezer. I did not use the existing holes in the freezer. Two of the four holes in the lid line up perfectly with two of the four holes in the hinge, as you will see below. That made me happy.
View of the wiring job on the inside. The fan is silicone to the wall. I plan on wrapping the wiring in corrugated tubing sometime. I have seen absolutely no moisture on the inside of the keezer, and I doubt I ever will.
View of the brewhut. You can see that my brewstand is partly (the electrical and liquid phases) dismantled. This is because I am getting ready to finish/paint the entire thing. This picture WILL be updated in about 4-5 weeks. At that time, the brewhut will look much better (cleaner, more organized, and with only brewery-related stuff), and the brewstand will be finished/painted.
I will update this thread once I receive my ball lock QDs and I install the secondary regulators and air distributors. I will make sure to show what the inside looks like because I forgot to take a picture of that. I will update it again when I upgrade from three to five taps, too.


