ModestBrewhouse
Member
Hello to you eager Homebrewers,
After a couple years using my Automatic Boulanger Bottling System and never seen the concept around any forum, I’d like to share the idea with the community. So the concept of the ABBS is simple, it’s a system that allow to bottle conditioning big batch of beer in a fraction of the time. I do bottle 100 liter in about 4 hours but I’m a bit lazy. By the way ABBS can stand for Automatic beer bottling system as well .
.
So let’s get to the point, ABBS is a gravity feed multi bottle that automatic fill to the desire level your bottle. The key to the system is a float valve (I use the blichmann AutoSparge™ that I already own for my brew session), that level the uncarbonated beer in a second vessel before filling your bottle. I did forgot to say the most interesting part of this ABBS, the bottle stop filling when they are full so no more over filling and you can do other things while it fill, like sanitizing bottle or caping.
Here what you will need for this project but you probably own most of those equipment if you brew big batch:
-A bottling bucket (19$) get one as big as your fermentor
-A Stainless Steel Kettle Valve Kit with Barb (50$)
-A Oval Stainless Roaster (26$)
-A blichmann AutoSparge™ (70$)
-1 Female Stainless 1/2" NPT x 1/2" Barb (10$)
-2’ of tubing ½’’ (I use silicone high temp tubing that I already own) (3$)
-4 Spring Tip Bottle Filler (12$)
- 5’ of 3/8" ID Siphon Hose (7.5$)
- 4 1/2" Auto Siphon Clamp (16$)
- 1 2"x4" 8’ wood studs (5$)
-some tool and some time
First drill a 13/16 hole (ideally with a step drill bit or a knock out punch) on the side of the bottling vessel (oval stainless roaster) the center is at 4" from the bottom. This is the hole for the AutoSparge™. Then drill a 13/16 hole in the bottom of your bottling bucket if it’s not already done.
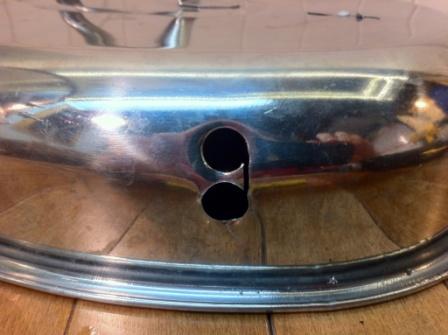
Then the lid need 4 oval shaped hole for the bottle filler. I did drill 2 hole distant of 1 inch and then cut the center piece with a jigsaw. On my setup the hole are 3 1/2" apart.
Then you need to build the frame for the bottling system. 2x4 stud with a couple screw will do the trick. Cut down 2 pieces of 25" for the bottom piece, 2 pieces of 15" for the roaster pot holder, 2 piece of 12 inch for the vertical part of the frame and screw that together as on the picture. The last piece, the clamp holder, is going to hold the siphon clamp and is a 1"x1" by 18" long and need a angle of around 25 degree on one side, so use a table saw at that angle. Pre drill then screw at 12" from the bottom as on the picture.
After that the siphon clamp need to be modified to fit on the clamp holder, just cut down the curved part of the clamp, drill one hole and chamfer it, then pre drill the clamp holder and screw it on the clamp holder as on the picture.
Last part is the modification of the four spring tip bottle filler, which need to be cut to 9". Clean and chamfer the cut end. Cut three - 15" 3/8" ID Siphon Hose and one - 26" 3/8" ID Siphon Hose and plug it in the spring tip bottle filler. The longer one is use to empty the bottling vessel at the end of the bottling session, so just lower the longer bottler filler to finish filling the not full bottle due to the lower level of beer in the bottling vessel.
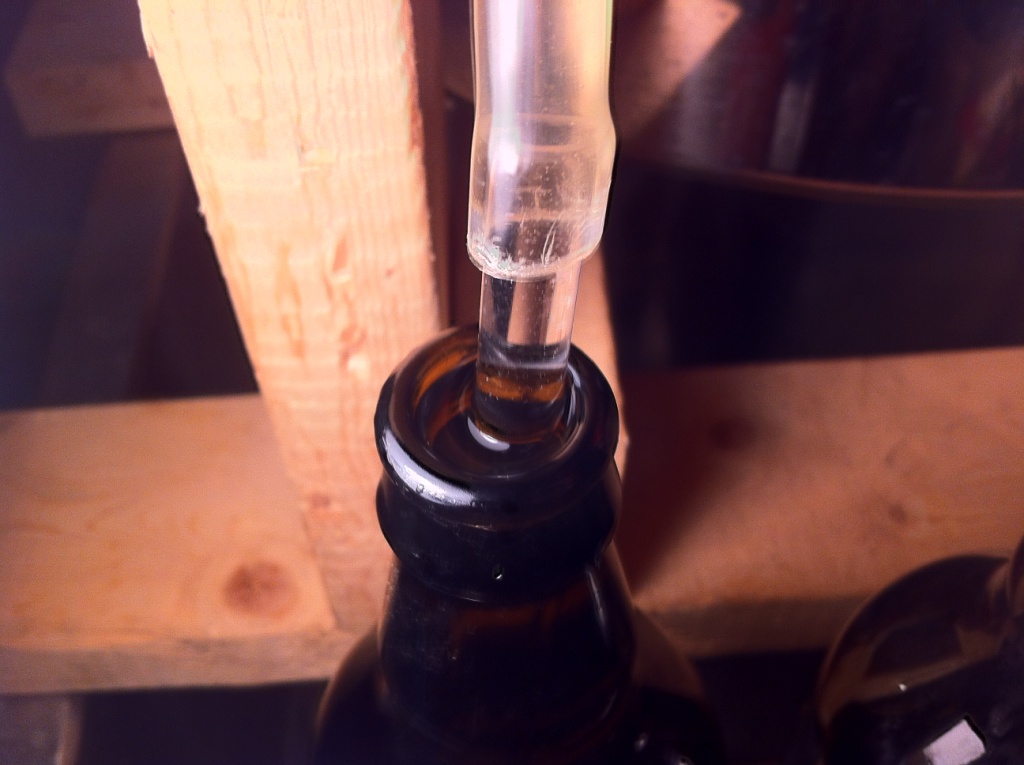
Gear up with Teflon the Stainless Steel Kettle Valve Kit with Barb on the bottling bucket and the AutoSparge™ with the Female Stainless 1/2" NPT x 1/2" Barb on the bottling vessel. Put on the bottle filler on the clamp holder and then in the oval hole of the lid. Put some water on the bottling vessel and then start the siphon as on the picture. Then you need to adjust the AutoSparge™ for your water level to be just as high as the top of your bottle. Fill your bottling bucket with water plus all together and make a test. When you find the right level on the AutoSparge™ make a mark to easy adjustment next time.
Then empty everything, clean and sanitize. Transfer your beer and prime. Then enjoy the easiest bottling day ever.
Thanks for reading and let me know if there is some error or if you need help. And feel free to adjust and modify to your need and let us know your improvement.
Guillaume Boulanger


After a couple years using my Automatic Boulanger Bottling System and never seen the concept around any forum, I’d like to share the idea with the community. So the concept of the ABBS is simple, it’s a system that allow to bottle conditioning big batch of beer in a fraction of the time. I do bottle 100 liter in about 4 hours but I’m a bit lazy. By the way ABBS can stand for Automatic beer bottling system as well
So let’s get to the point, ABBS is a gravity feed multi bottle that automatic fill to the desire level your bottle. The key to the system is a float valve (I use the blichmann AutoSparge™ that I already own for my brew session), that level the uncarbonated beer in a second vessel before filling your bottle. I did forgot to say the most interesting part of this ABBS, the bottle stop filling when they are full so no more over filling and you can do other things while it fill, like sanitizing bottle or caping.
Here what you will need for this project but you probably own most of those equipment if you brew big batch:
-A bottling bucket (19$) get one as big as your fermentor
-A Stainless Steel Kettle Valve Kit with Barb (50$)
-A Oval Stainless Roaster (26$)
-A blichmann AutoSparge™ (70$)
-1 Female Stainless 1/2" NPT x 1/2" Barb (10$)
-2’ of tubing ½’’ (I use silicone high temp tubing that I already own) (3$)
-4 Spring Tip Bottle Filler (12$)
- 5’ of 3/8" ID Siphon Hose (7.5$)
- 4 1/2" Auto Siphon Clamp (16$)
- 1 2"x4" 8’ wood studs (5$)
-some tool and some time
First drill a 13/16 hole (ideally with a step drill bit or a knock out punch) on the side of the bottling vessel (oval stainless roaster) the center is at 4" from the bottom. This is the hole for the AutoSparge™. Then drill a 13/16 hole in the bottom of your bottling bucket if it’s not already done.
Then the lid need 4 oval shaped hole for the bottle filler. I did drill 2 hole distant of 1 inch and then cut the center piece with a jigsaw. On my setup the hole are 3 1/2" apart.
Then you need to build the frame for the bottling system. 2x4 stud with a couple screw will do the trick. Cut down 2 pieces of 25" for the bottom piece, 2 pieces of 15" for the roaster pot holder, 2 piece of 12 inch for the vertical part of the frame and screw that together as on the picture. The last piece, the clamp holder, is going to hold the siphon clamp and is a 1"x1" by 18" long and need a angle of around 25 degree on one side, so use a table saw at that angle. Pre drill then screw at 12" from the bottom as on the picture.
After that the siphon clamp need to be modified to fit on the clamp holder, just cut down the curved part of the clamp, drill one hole and chamfer it, then pre drill the clamp holder and screw it on the clamp holder as on the picture.
Last part is the modification of the four spring tip bottle filler, which need to be cut to 9". Clean and chamfer the cut end. Cut three - 15" 3/8" ID Siphon Hose and one - 26" 3/8" ID Siphon Hose and plug it in the spring tip bottle filler. The longer one is use to empty the bottling vessel at the end of the bottling session, so just lower the longer bottler filler to finish filling the not full bottle due to the lower level of beer in the bottling vessel.
Gear up with Teflon the Stainless Steel Kettle Valve Kit with Barb on the bottling bucket and the AutoSparge™ with the Female Stainless 1/2" NPT x 1/2" Barb on the bottling vessel. Put on the bottle filler on the clamp holder and then in the oval hole of the lid. Put some water on the bottling vessel and then start the siphon as on the picture. Then you need to adjust the AutoSparge™ for your water level to be just as high as the top of your bottle. Fill your bottling bucket with water plus all together and make a test. When you find the right level on the AutoSparge™ make a mark to easy adjustment next time.
Then empty everything, clean and sanitize. Transfer your beer and prime. Then enjoy the easiest bottling day ever.
Thanks for reading and let me know if there is some error or if you need help. And feel free to adjust and modify to your need and let us know your improvement.
Guillaume Boulanger


