My Keezer Project Chronicled

Homebrew Talk - Beer, Wine, Mead, & Cider Brewing Discussion Forum

Help Support Homebrew Talk - Beer, Wine, Mead, & Cider Brewing Discussion Forum:

This site may earn a commission from merchant affiliate links, including eBay, Amazon, and others.

jgweataj

Member
Joined
Oct 6, 2013
Messages
21
Reaction score
0
Location
Montgomery
There are so many helpful threads out there on building Keezers and after reviewing so many I almost went crazy. But I have finished my conversion and the following are the results of a lot of planning and research.

Cheers to the following helpful sites and people!!:mug::mug:

https://www.homebrewtalk.com/f51/converting-frigidaire-7-2-cu-ft-chest-freezer-162225/
http://pizzagoni.com/hobbies/homebrewing/kegerator.html
http://www.mikebeer.net/chestfreezer.htm
http://www.thefreebeermovement.com/...-your-own-keezer-aka-chest-freezer-kegerator/
http://billybrew.com/kegerator-collar (BILLY BREW IS WHERE I DEVOTE MOST OF THE CREDIT FOR MY FINAL PLAN, GREAT WORK!!)
http://www.fairviewhomebrew.com/ (Local brew shop where I bought all my internal keezer/kegging conversion parts. THANKS LEE!!)


Before I continue, I need to lay down my goals for my Keezer:

I wanted it hold at least 3 kegs with 3 taps, I wanted to have room to have my CO2 inside the freezer. Essentially all self-contained with minimal external mounts. I wanted it also to be user friendly and essentially maintenance free. I also did not want to damage the freezer or attach anything 'directly' to the freezer. If the freezer dies then I can essentially take the collar off and put back on top of another freezer that is same brand/size.

And the following is what I came up with:

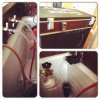
A white Frigidaire 7.2 cf freezer I found on Craigslist that was lightly used. The cardboard on top is for checking to see how many Kegs I could fit inside.

IMG_1572.jpg

I removed the lid, be careful of spring loaded hinges. You need to remove the rubber seal and bottom inner-cover if you plan on painting. Which I decided to Plasti-Dip the entire freezer in black. Needed 5 coats and creates a rubbery coating/texture over the entire freezer. Pretty unique and ENTIRELY removeable with no damage to the freezer :)

IMG_1573.jpg

First coat of Plasti-Dip, 50% coverage.

IMG_1580.jpg

I think this is 2nd-3rd coat.

IMG_1582.jpg

Final coat, the lighting made it look like there were lines in the painting, but I am overall pleased with the uniformity of the coating.

IMG_1588.jpg

On a side note, I taped off on the lid to add chalkboard paint on the top for labeling taps. When I went to remove the tape, the Plasti-Dip pealed right off with the tape. So I pealed all the Plasti-Dip off the lid and just repainted the lid entirely in chalkboard paint. I took the handle off and painted it in Plasti-Dip before putting it back on. At this point I reinstalled the inner cover and rubber gasket.

The next post involves the building of the collar....
 
First, I'll start with my parts list, I purchased most of my supplies from Lowe's and spent a total of about $350.... Those thriftier than I could probably do it for cheaper. I had to buy some extra things like clamps, speed square, etc..

Kegerator Collar Parts

12 feet of 1×8 red oak – $45
14 feet of 2×6 pine – $9
Red Mahogany Stain (1 jar) – $6
Minwax Semi-Gloss Spar Varnish (1 spay can) – $8
Minwax Pre-Stain Wood Conditioner (1 jar) – $6
Sponge Rubber Weatherstrip – $4
Piping Clay (I used this to seal the inside of the collar to the freezer since I'm not siliconing to the freezer)
Brass Bolts (12 total) – $10 1/4" -20 x 3" brass crown bolts
Gusset Angle Brackets (4 total) -$4 (found in building supplies)
Wood Screws – $8 sd8 strong-drive # x 1 1/4" (found in building supplies)
Washers – $3
Nuts – $3
Sandpaper #120 and #180 (staining hardwood)
Sponge Brush
Tack Cloth
Speed Square
Chalk Painting Materials
Plasti Dip-black, 5 cans
3/4 " Forstner bit
Rope (I used this to hang the collar from the garage ceiling to make staining easier)


Measurements: These are the measurements I got for the top of my freezer.

21 5/8" x 35 3/16 "

35 1/4". 21 3/4"


I am building an inner and outer collar, the outer will hang down lower on 3-sides, not the back, and make it possible to secure the collar to the freezer without gluing. I did not do miter joints.
IMG_1584.jpg

This is the gusset brackets holding the inner collar together fastened with wood screws.
IMG_1585.jpg

This is the outer collar after getting mocked up and clamped to the inner collar so I could drill holes for the bolts. I used the brass bolts here. I used 4 bolts on each side (12 total) and drilled holes about 6" in on each side to make a uniform look.
IMG_1595.jpg

I drilled 3 tap holes working off the center. They will fit under a 10" drip tray. I used a 3/4" forstner bit, but you should probably use a 1". The holes were way too small for my shanks. I used my dremel to widen the wholes after staining (A little nerve-racking).
IMG_1596.jpg

I then went ahead and mounted the lid and hinges to the collar before staining. This is a good opportunity to make any adjustments needed to ensure a nice even/flush fit.
IMG_1599.jpg
 
On a side note, I taped off on the lid to add chalkboard paint on the top for labeling taps. When I went to remove the tape, the Plasti-Dip pealed right off with the tape. So I pealed all the Plasti-Dip off the lid and just repainted the lid entirely in chalkboard paint. I took the handle off and painted it in Plasti-Dip before putting it back on. At this point I reinstalled the inner cover and rubber gasket.

This is my first attempt at the chalkboard paint. Just repainted the entire lid in chalkboard paint.
IMG_1598.jpg
 
TIME TO STAIN!!! You have a lot of options with this, but I decided on a dark stain and really turned out with a good rich character to go with the rest of the freezer and my kitchen.

I will add here, before staining, I used my router and a 1/4" roundover bit to softer the top edge of the collar where the lid closes. I was very happy with the result.

Sanded with #120 sandpaper and then moved up to #180 sandpaper. I then used tack cloth to remove all the dust particles from sanding. I then applied a conditioner on the wood. I was hoping this would help my grain show nicely.
IMG_1601.jpg

I then used the red mahogany stain and got that nice rich/dark color. I then applied a couple of coats of spray semi-gloss varnish.
IMG_1604.jpg

I then used silicone after a day of drying to seal the inside of the collar and prevent cold air from escaping the freezer. I essentially covered the gusset brackets and sealed off the inside corner. No silicone was applied to the freezer.

I then applied the sponge weather stripping to the underside of the inner collar. This will sit directly on the surface of the freezer and form to it. You will see the grey piping clay I used to keep the air in and add a little extra insulation (the clay never dries and will not freeze inside the freezer). I will be installing a fan to keep the air circulating.
IMG_1652.jpg
 
First I'll start with my parts list I was able to get from my man Lee at Fairview Homebrew!!! This is what I purchased, there were a few other odds and ends I needed to pick up after. I had to change my beverage line to match my tail pieces on the shanks to the ball-lock:

Air Distributor - Chrome Plated Brass Body
1 $50.00 USD

Barbed Tailpieces, Stainless Steel
FHB-04C03-101 3 $4.50 USD $13.50 USD

CO2 Regulator - Dual Gauge, High Performance
FHB-Regulator-CO2 1 $75.99 USD $75.99 USD

Faucet Cap
3 $0.75 USD $2.25 USD

Faucet Handles
3 $7.00 USD $21.00 USD

Faucet, Perl (Chrome plated; S/S lever)
3 $39.99 USD $119.97 USD

Flare Swivel Sets (Swivel Nut and Barbed Stem)
FHB-04C03-265 6 $2.00 USD $12.00 USD

Growler Filler for Perlick Faucets
FHB-12K02207 1 $18.50 USD $18.50 USD

Nylon Flare Washers
6 $0.10 USD $0.60 USD

Shank, 4 1/8" (1/4" bore)
3 $22.50 USD $67.50 USD

Threaded Ball Lock Disconnect, Gas Side, 1/4 MFL
3 $5.99 USD $17.97 USD

Threaded Ball Lock Disconnect, Liquid Side, 1/4 MFL
FHB-07C07145 3 $5.99 USD $17.97 USD

Tubing, 5-foot
7 $2.49 USD $17.43 USD

Washer, Neoprene "Beer"
FHB-04B03132 3 $0.50 USD $1.50 USD

Wing Nut
FHB-04B03-134 3 $5.99 USD $17.97 USD

Wrench, Faucet and Shank Nut Combo
FHB-20E07100 1 $28.99 USD $28.99 USD

I also had to buy a temp controller which ran $79.99, I bought 3 ball-lock 5-gal kegs at $65 a piece, and I purchased a 10-gallon CO2 tank for $120..... I'm sure I'm forgetting something. I bought some premium parts and that brought my total to about $920.

This is a pic of the most of the purchased parts from the above list before getting put into an organized working order. Right now all my gas lines and liquid lines are loose inside the freezer. This looks messy, but once I get 3 kegs filled and on my taps I will mount my gas lines along the inside of the collar. The liquid lines will remain free hanging.
IMG_1642.jpg

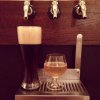
Gotta LOVE the Perlick Perl, mmmm good (worth the money!)
IMG_1645.jpg

I've got the 4" shanks installed and Perl's mounted. This is the jewelry of my Keezer, haha!!
IMG_1651.jpg

Got the air manifold mounted and gas lines mounted. When attaching your fitting to the lines I found useful to put the ends in some hot water. Makes it easier to slip over the male connectors.
IMG_1700.jpg

The fluid lines are now in place with my First Keg! Need to have atleast 3' of line to get a good flow and keep foaming low. I force carbonated my beer in 2 days and was serving out of the tap at 8psi.
IMG_1734.jpg

My next post will be about the install of the fan and temp controller....
 
This shows the analog temp controller mounted out of the way on the back. I may eventually upgrade to digital and I'll use this one for a temp-controlled fermenter.
IMG_1735.jpg

I put the probe in a cup of water, this helps keep a consistent temperature. This cup is insulated, I had to change to non-insulated.
IMG_1737.jpg

This shows where I mounted the fan on a couple of L-brackets... I bought a 3" fan at Radioshack. It is powered by a 500ma DC converter. I need to reduce the current some more so I am about to put on a variable resistor. I will leave the fan on continuously when I do that, right now I'm running during the day and off at night.
IMG_1740.jpg

Pic of the chalkboard artwork!
IMG_1694.jpg

Pic of the kegs in front of Keezer.
IMG_1693.jpg

I will update this down the road when I put on the bottle opener/cap catcher and stainless drip tray. I will also be putting in a wireless dehumidifier to keep the excess moisture out.

I hope this post has answered question and inspired new projects! The collar is not permanently attached to the freezer in any way so I can interchange this to a different freezer when this one goes bad. I did buy it for $100 off craigslist so who knows when she'll give out??? This was my goal and I am happy with the results. You have to do your research and determine what will work best for you....

Post any comments/questions and I'll respond.

You can follow me on Instagram for all my Homebrew updates @jgweataj

:mug::mug:
 
Nice job. It's very similar to mine. I put my 4 taps over the hump on one side so they wouldn't interfere with putting kegs in and out.

I need to do what you did with the fan. I have the fan and just never got around to mounting it.
 
Finally finished tweaking my Keezer build and is time to share my results!
IMG_1998.jpg
I added the the bottle opener and catcher on the right side of the Keezer and the stainless catcher goes well with the wood color. I got the catcher off Amazon, that is also where I picked up a wireless dehumidifier for $20 bucks...

IMG_2003.jpg
Now comes the drip tray, this took a long time to decide what I was going to do because I wanted it to be sturdy enough to hold a full glass of beer. I got a 10" stainless drip tray from Ebay and finally decided on chrome shelf bracket from Lowes (this was a perfect fit!!).... I will eventually move the brackets to the inside of the collar and will bolt in place... I have to take collar off keezer to do that..

IMG_2001.jpg
IMG_1999.jpg
IMG_2005.jpg
I used self tapping metal screws to lock the drip tray in place on the brackets and will easily detach for cleaning!

IMG_1853.jpg
Inaugural Kegs!

IMG_2022.jpg
Finally, the Rheostat I installed to regulate the speed of the fan inside the keezer that keeps the temp constant in top of keezer.....

THAT IS ALL, I hope this post continues to help and encourage home brewers alike to undertake a Keezer conversion!!:mug::mug:
 
First, on the positive. That is a real nice collar build. It is very clean and well crafted. It looks nice and I love the bracket idea.

https://www.quirky.com/invent/1307773/action/vote/query/view=trending&categories=all

Like and Comment and you can get cut in on proceeds if they make/design this product!

I firmly disagree with the link to like and comment to profit off an "invention" that isn't yours. If I am off base here then I apologize, but it sounds like you're attempting to profit off an idea that has long since been used by numerous home brewers as though it is some major discovery made by you. Making collars for people is one thing but I always thought the purpose of the site you linked to was for actual inventions that are at least somewhat unique.
 
I firmly disagree with the link to like and comment to profit off an "invention" that isn't yours. If I am off base here then I apologize, but it sounds like you're attempting to profit off an idea that has long since been used by numerous home brewers as though it is some major discovery made by you. Making collars for people is one thing but I always thought the purpose of the site you linked to was for actual inventions that are at least somewhat unique.

HELLO !!!! you're NOT of base at all.

AGREED!

J.Wether ? you did not really "Invent" Anything ! Did you. ?
You already said you were inspired by like a dozen people, → Before You !

Sorry, that's one large step in the wrong ◄ Direction. :off:
 
First, on the positive. That is a real nice collar build. It is very clean and well crafted. It looks nice and I love the bracket idea.


I firmly disagree with the link to like and comment to profit off an "invention" that isn't yours. If I am off base here then I apologize, but it sounds like you're attempting to profit off an idea that has long since been used by numerous home brewers as though it is some major discovery made by you. Making collars for people is one thing but I always thought the purpose of the site you linked to was for actual inventions that are at least somewhat unique.

Hmmm, it's creating a product that is not currently available to the masses.... Not everyone is able to build something like this from scratch, but may be more willing to give it a try if there was a pre-made collard available to fit your chest deep freezer that is easily customizable. Thanks for the feedback!
 
HELLO !!!! you're NOT of base at all.

AGREED!

J.Wether ? you did not really "Invent" Anything ! Did you. ?
You already said you were inspired by like a dozen people, → Before You !

Sorry, that's one large step in the wrong ◄ Direction. :off:

The invention is a mass-made product for collar conversions.... Come on, I didn't invent the idea and I tried to give credit to all those who inspired me on this forum post...

Show me where this product is already on the market and made available for sale and I will take down the post???? Bottom line, I think more people should have an inexpensive way to store multiple kegs without breaking the bank. What is wrong with that and if I make money it would only go back in further development in the beer community?!??! I guess you're the barrier to entry, get on board!:mug::mug:
 
And now, for something completely different, we have a true tempest in the proverbial teapot :rolleyes:

I say, go nuts. And let us know how it works out...

Cheers!
 
Back
Top