Cademon Test Lab Build

Homebrew Talk - Beer, Wine, Mead, & Cider Brewing Discussion Forum

Help Support Homebrew Talk - Beer, Wine, Mead, & Cider Brewing Discussion Forum:

This site may earn a commission from merchant affiliate links, including eBay, Amazon, and others.

cadwallion

Well-Known Member
Joined
Mar 22, 2012
Messages
154
Reaction score
35
Location
Sycamore
I started this project about a month ago, but this month has seen two weeks of prodromal labor followed by the birth of my daughter (12/17) so I suppose I have been pre-occupied. :)

This build is more than just a brewhouse, it is the complete setup of Cademon Brewing Co.'s test lab for recipe design. I have been doing recipe design using a 5 gallon cooler-based system for six months and made some great beer, but we have decided the business needs a more consistent test lab with larger volume and less disassembly.

I have allocated a 300 sq ft space to be built as the test lab. The lab is a 14-15 gallon eHERMS system running on a Raspberry Pi-driven automation system and controlled via touchscreen. Four 15-gallon plastic conicals are being built for fermentation as well.

I have included a topdown model of the intended lab layout, as well as the space as of last month.

test_brewery_top.jpg


lab_space.jpg
 
First up was building the brewstand. 2"x4" with 1"x4" tops make it up. My wife says I have a thing about constantly building tables (I think I'm up to six or so built in the past year), so I jumped on this while waiting for equipment to arrive.

My business partner helped with the assembly and sanding, and my son decided he was going to tighten all the screws 'just to be sure'. :)

The last picture is doing a weight test on the table.

brewstand_frame.jpg


brewstand_top.jpg


brewstand_assembled.jpg


brewstand_lukas.jpg


brewstand_weight_test.jpg
 
I started this project about a month ago, but this month has seen two weeks of prodromal labor followed by the birth of my daughter (12/17) so I suppose I have been pre-occupied. :)

This build is more than just a brewhouse, it is the complete setup of Cademon Brewing Co.'s test lab for recipe design. I have been doing recipe design using a 5 gallon cooler-based system for six months and made some great beer, but we have decided the business needs a more consistent test lab with larger volume and less disassembly.

I have allocated a 300 sq ft space to be built as the test lab. The lab is a 14-15 gallon eHERMS system running on a Raspberry Pi-driven automation system and controlled via touchscreen. Four 15-gallon plastic conicals are being built for fermentation as well.

I have included a topdown model of the intended lab layout, as well as the space as of last month.

Well. sir, Kudo's to your preparation. Although I do not follow your electronic ( Raspberry Pi-driven automation system and controlled via touchscreen) your layout looks impressive. My finishing room is also 300 sq ft. containing two cooler closets. Space is of a premium. Could you arrange 500 ft^2 perhaps? Just a thought...:)
 
Conical work started with inductor tanks arriving (3 at once, the fourth took a few weeks because apparently we homebrewers keep buying them all up. :mug:). Since I already had plywood and 2"x4"x8' lying around, I decided to forego the $60+ on a stand and build them myself. The stands are 2'x2' with 32" high legs with a 3/8" plywood top. I took a measurement of the size of the tank, drew it on the plywood, and cut out the triangles. Then I freehanded the curves with a jig saw and sanded until the tank fit snugly.

An order from Brewer's Hardware came in for the Tri-Clover fittings for the tanks. 1.5" MNPT x 1.5" Tri-Clover, 1.5" Tri-Clover Clamps, and a 1.5" Tri-Clover Butterfly valve make up the bottom portion. I am still working on the racking port, though I have the fittings for the first conical.

inductor_tanks.jpg


conical_stand_cut.jpg


conical_valves.jpg
 
Well. sir, Kudo's to your preparation. Although I do not follow your electronic ( Raspberry Pi-driven automation system and controlled via touchscreen) your layout looks impressive. My finishing room is also 300 sq ft. containing two cooler closets. Space is of a premium. Could you arrange 500 ft^2 perhaps? Just a thought...:)
I'll post a wiring diagram and breakdown of the setup soon, but it's essentially a Raspberry Pi using GPIO pins to interface with temperature sensors and SSRs, running a custom program that handles PID algorithm, timers, data logging, and more.
 
The kettles arriving led to some fun with my son and a game we call 'It Fits'. :) For size comparison, I have a picture of my original 3 gallon stainless steel pot I started brewing extract in, the 10 gallon aluminum pot I have been brewing in for several months, and the new 20 gallon Concord stainless steel pots being used for the new system.

They're big, and drilling them turned out to be a bigger pain than expected. I started with a 1/8" TiNi bit and promptly snapped it. I acquired a new cobalt bit and after 5 minutes, snapped it. Annoyed, I looked and found I'd barely dented the pot (see pic). After some discussion, I acquired a blue diamond carbide tip bit and it made short work of the pilot hole and let the step bit take over from there. Once getting the bulkheads in, the HERMS and pickup tube was installed, and as you might be able to notice, the HERMS coil is sagging in the kettle. The gaskets appear to be letting the coil sag, and I will be picking up some washers tomorrow to help stabilize on the exterior bulkhead wall.

lukas_kettle.jpg


kettles.jpg


pilot_hole_problems.jpg


hlt_bulkheads.jpg


hlt_herms.jpg
 
Mash tun is progressing. Bulkheads for the recirculated fitting and outlet valve are installed, a false bottom has been ordered from Jaybird, and sparge arm fittings have been ordered from StainlessBrewing.

mlt_recirc.jpg

two_kettles.jpg


I took a break from working on the equipment to work on our control panel software. When I was designing the test lab, I looked at the Kal control panel and noticed that in a 30A brewhouse, only one PID controller is active at a time: either you're mashing and using the recirc sensor to control the HLT element, or you're boiling and using the BK sensor to control the BK element. Additionally, I wanted to be able to have more data logging and batch automation (temperature data from all vessels, durations of each stage, etc, all tied to a given batch number).

I initially mocked the system out using an Arduino Mega 2560 with 3 DS18B20 sensors, a 128x64 LCD, a 12-button keypad, and an SD card reader. The system would read the batch information from the SD card reader to preload data, the system would be controlled by the keypad and toggle switches, display to the LCD, and log to the same SD card it read from initially.

However, I had acquired a few small touchscreens from salvage and became interested in dropping the keypad and LCD entirely. The problem was getting an Arduino to control a touchscreen requires control through I2C because the clock speed is too low to handle it. I looked at some boards to coordinate with, but wasn't very happy. That was about the time my Raspberry Pi arrived after several months of waiting.

Now the Pi treats the touch element as an input device, it outputs via HDMI, and controls the same DS18B20 temperature sensors and SSRs via its GPIO pins. This also lets me use higher level scripting languages to run the system instead of relying on compiled C++. In my day job I am a Ruby programmer, so I took the opportunity to start writing a program that handles the PID logic, logging, and screen output. I am still working on tuning the PID control, but the basic program shell is in place.

I also took the opportunity to reuse my Brewscribe software to take my Beersmith recipes and parse them to handle preloading instead of converting the data into something easily read/processed by the Arduino. In the future, I'd like to expose my recipes via my lab API and post the realtime data back to it, making my control panel not just the controller, but a client of my lab API.
 
This weekend I worked on assembling the rest of the conical fermenter stands, constructing the plate chiller mounting bracket to the brewstand, and assembling the sparge arm.

The framing is complete on the conical stands, I just need to saw out the conical hole in the plywood and all four will be properly standing.

The sparge arm has been fitted, but still needs the 40 or so holes drilled into the stainless to shower over the mash.
sparge_arm_installed.jpg


The plate chiller is firmly mounted with nuts through a 1"x4" with a 3/4" spade bit to reach the chiller's threads.
chiller_mounting_bracket.jpg


The heating element wiring parts arrived today, so tonight will be getting the elements wired and sealed. Once that's taken care of, I'll be focusing on installing the electronics in the control panel.

Leaving update with progress on kettles and picture of my business partner holding my newborn. :mug:

three_kettles_progress.jpg
 
Progress on the lab has been mainly control panel related. I was missing a step bit to drill out the heating elements so I focused on the control panel and automation system. I'm uncertain if my LCD touchscreen will be usable now (incident with the controller board as I was wiring to an HDMI cable), so I'm re-evaluating the screen. The control panel has been prepped for drilling, and the backplate has been laid out and marked for drilling and tapping. Tonight I will be drilling and test-fitting the control panel and will post pictures then.

I performed some pump tests this weekend as well. I was able to pump 15 gallons of water from the kettle, through 15' of silicone hose, into a conical fermenter positioned at the exact distance as they will be sitting in the lab. Flow rate was great, and I'm happy that I don't have to worry about transferring from the brewstand to the conical in any other means than hooking up hoses.
 
This weekend we made a lot of progress, but we had a lot of problems that lead to delays and adjustments.

When drilling the kettles, we had to use a blue diamond carbide tip bit in order to get the job done. When drilling the holes for the sparge arm, we thought the same thing would be necessary. Two broken bits later we decided to take the approach of using a center hole punch to start and finish the holes and the bit to do the middle. 11 hours later my business partner was halfway done. Annoyed that this was taking so long, I picked up a cobalt bit (which I had tried on the kettle and promptly snapped) and in 5 minutes we had a finished sparge arm.

The false bottom from Jaybird arrived this week, and it looks great. He even went so far as to inscribe 'Cademon' into it per my request. :) Unfortunately two problems arose. First, I must have written down the wrong measurement when I placed the order, because it's 1/16-1/8" smaller diameter than the size of the kettle walls. Second, my dip tube doesn't quite reach the false bottom of the kettle. To solve the former, I plan to pick up some PEX tubing and line the edge of the false bottom to make up the difference and protect the kettle wall from scratches. To solve the latter, I need to construct a stand to raise it up a half-inch or so.

sparge_arm_drilled.jpg


false_bottom_arrives.jpg


false_bottom_installed.jpg
 
On the control panel front, we started drilling the control panel and tapping the backplate. Continuing on the doomed front, our hole saw for the heating element power managed to crap out on us without finishing the job, which resulted in having to use a dremel to cut and grind the holes to completion. Additionally, when I was explaining the hole positioning for the switches and indicators to my friend manning the drill press, he accidentally drilled the heating element 3-way switch as two separate switches, resulting in two misplaced holes. I haven't decided if I'm going to drop the 3-way switch in favor of two 2-way switches under each indicator and wire up a lock to prevent both being on inside, or if I'm going to drill a third hole for the 3-way and mount two potentiometers under the indicators for manual mode power control. Currently my software handles manual power control via the keypad, but switching to pots wouldn't be particularly challenging in the code.

I designed the expansion board for the Pi to handle the sensor inputs and SSR outputs and a friend is getting ready to etch and ship it for me. It was originally designed to act like a Pi shield, mounting to the GPIO pins. Since he can only etch one layer, though, I have had to go through a few rounds to get it right and I may have to abandon the shield approach entirely and use jumpers and add mounting holes. I will post the schematic once it has been finalized. The breadboard version has been working well, however, and I look forward to putting all the pieces together this week.

control_panel_drilled.jpg


switch_test_fitting.jpg
 
The Samsung 7" LCD LED touchscreen has shipped and I am waiting on that component for final drilling. I have decided to use RJ11 jacks for temperature sensors, primarily due to availability. XLR connectors look nice, but would cost money for not much gain. I was hoping for something like M12 or M8 connectors for the sensors, but I cannot find a decent price on them when I've got RJ11 and RJ45 connectors and receptacles lying around. The SSR heatsinks have arrived and are getting installed during tonight's sprint.

Our Counter-Pressure Bottle Filler arrived yesterday, I will be constructing a filler stand tonight using some hard plastic board I acquired from a thrown away convention kiosk sign. For bottle holding, I have a tape spring that was used for inventory shelving that should do the trick nicely, and has enough length that bombers and even growlers shouldn't be a problem with a stopper swap.

This weekend is my son's 3rd birthday party, so I'm trying to get as much done before the weekend as possible, since I imagine I won't be doing much then. :)
 
How's the project coming along?
Things are great, I'll post pictures later this afternoon. The brewstand has been working for several months with a few upgrades along the way. Several brews have come through and as we speak I am filling up a few kegs from recent batches. The lab has been extremely helpful in tweaking recipes for production and having samples to give to potential clients.

The control panel, as originally planned, is running all the logic control through a single Raspberry Pi with custom brewery code. The first build ran on OpenGL ES but was a PITA to maintain and extend. I replaced it with a webserver and accessed it via web browser, but the browser was somewhat laggy and I did not agree with running that architecture on an embedded machine. The third build because an ncurses-based interface that loaded up a recipe file. Most recently, I have replaced this ncurses-based interface with a fully interactive touchscreen GUI running in Shoes 4.0.
 
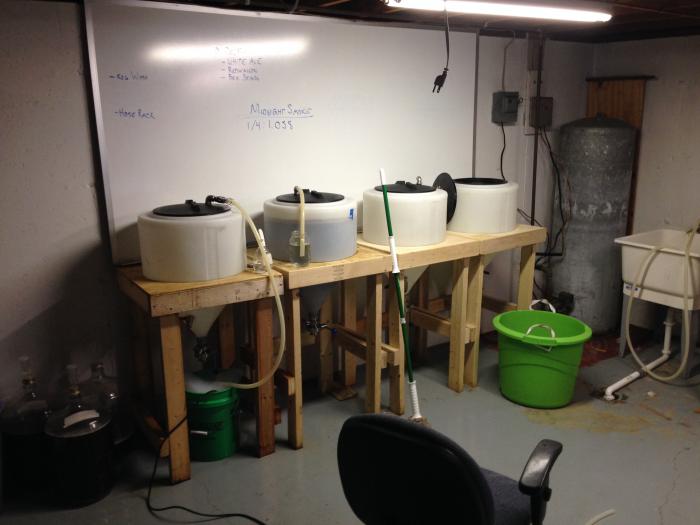
Wow, 3 weeks later and I finally have time to take some pics. The holidays were spent with family and processing all the beer already in the works, this week I have started replenishing. Here are a couple shots of the area while I am currently brewing a Red Rye.

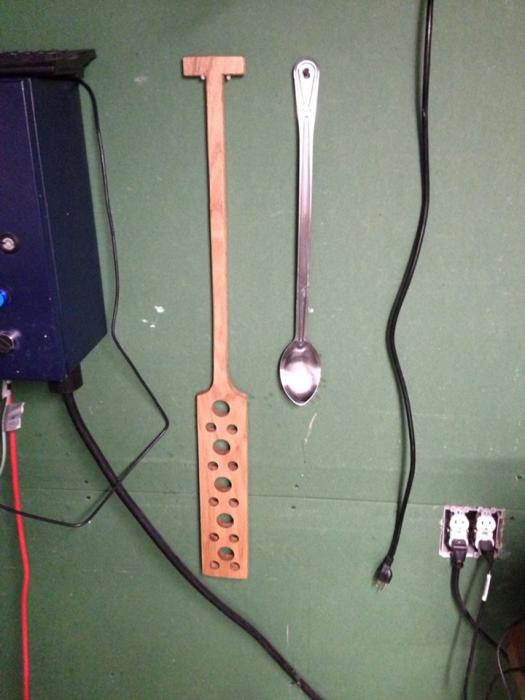
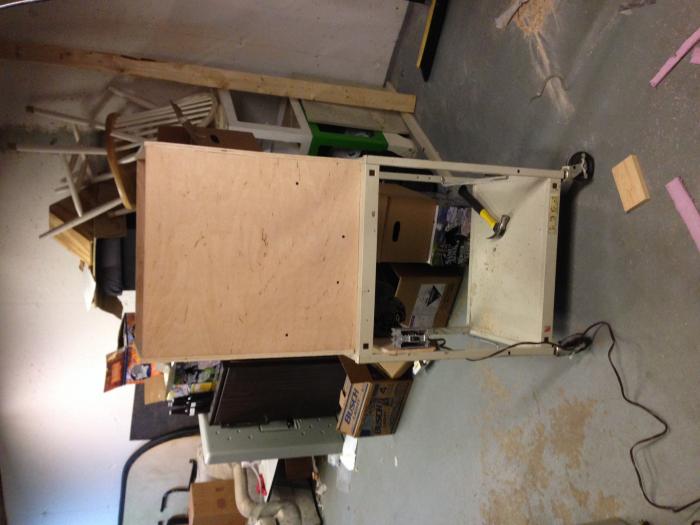
Current projects in the lab include a hose rack on the wall, a new mash paddle, and improving the drill mount on the mill cart. I'll post as they progress.

lab_entrance.jpg


fermenters.jpg


grain_shelves.jpg
 
Not sure if I missed this, but how are you controlling fermentation temp in these batches? Do you get much of an off-flavor profile fermenting at ambient? Just curious.
 
My basement sits 68F year round, so I run ambient. I want to switch to active fermentation control, but the money's been focused on the production brewery so I haven't dropped the cash on immersion coils for each fermenter.
 
Just a quick update on the lab. I've been brewing twice a week for a while now making samples for tastings and such. The mash paddle got a coat of poly/stain last week, the grain mill's drill mount has been replaced with a 1/3hp 1/2" drive shaft motor and is wired up to a switch. The mill is considerably quieter now that I'm not using a mounted drill, and has much better power than before. Couple that with the 55lb hopper I have on it, and milling is a 'set and forget' situation now. :)

My time the past two weeks has been promoting an Indiegogo campaign for the opening of my brewery's taproom. The link is here: http://igg.me/at/cademon

I have a public Meet & Taste on March 1st, another public tasting the week after that, a few private tastings, and some B2B support in progress over the next week.

mash_paddle.jpg


mill1.jpg


mill2.jpg


mill3.jpg
 

Latest posts

Back
Top