Bread.

Homebrew Talk - Beer, Wine, Mead, & Cider Brewing Discussion Forum

Help Support Homebrew Talk - Beer, Wine, Mead, & Cider Brewing Discussion Forum:

This site may earn a commission from merchant affiliate links, including eBay, Amazon, and others.

Orfy

For the love of beer!
HBT Supporter
Joined
Sep 27, 2005
Messages
11,732
Reaction score
123
Location
Cheshire, England
I'm getting fed up at the increase in food cost recently.

I recently used to pay around 40c for a cheap loaf of bread. It's now gone up to over a $.
I've dabbled at bread making and have a machine but have always had the same mediocre results.
I can now by strong bread flour in bulk at 60c a kilo for 10 kg sacks.
I found a free source of bakers yeast.
So I put that at a price of around 20C a loaf compared to a $
The speciality loafs I like are more like $4 a pop!

I made my first last night and just chucked it together.
I really don't know how much of this yeast to use or anything so I'll need to work on it.

I used a teaspoon of yeast dissolved in half a cup of warm water (left for 20 minutes), around 300 gram of bread flour, a splash of milk a pinch of salt, a teaspoon of sugar.

I added water to wet and get a good dough. After kneading for a few minutes I let it sit and rise for 30 minutes then knocked it down. 30 minutes later I put in a 300°F oven untill it looked done and sounded hallow to the tap.

The result is very good.

pict0002ub2.jpg


What to try differently.
I'm going to read this site: http://www.thefreshloaf.com/
I'll probably leave he dough longer to raise before cooking.

I'm going to try and speak to the baker who gave me the yeast for tips.
 
Try to find a copy of Peter Reinhart's The Bread Baker's Apprentice

This book is awesome, and I'm more than pleased with the results. If you like baguettes, you won't believe how easy it is to make some of the best tasting ones you'll ever had with the pain a l'ancienne recipe.

I make all my own bread, not only because it's better, but it's also just healthier with no added junk (at least in the damn U.S. where everything has added sugar). One thing that I usually do is use the bread machine on a dough setting to do all the mixing and kneading, but then shape loaves/rolls myself. Lessens the mess you make, and most bread machines are decent at kneading.

Another thing the book stresses is the art of the pre-ferment. This is making a small combination of water, flour, and yeast the night before or so, then adding this back to the whole recipe the next day. Allowing it to ferment longer means better flavour.
 
Looks like you need to keep it in the oven a bit longer.

I like to make Pizza bread. I make a batch of pizza dough then form it into a big doughnut shape. I then cook it on a pizza stone to get a nice crispy crust.
 
Orfy, if you're interested, here's a good recipe for a no-knead bread. I was visiting my parents last weekend, and my mom mentioned she saw it in the paper and made it. I was a bit skeptical since every bread I've ever made has required kneading, but it was really good. It's crusty, a little sour, with a nice open crumb.

I have a different book than PseudoChef mentioned, and it also stresses pre-ferments. It's not that much more effort, you just have to plan ahead for the 12-18 extra hours it takes.

Keep trying, and good luck!
 
rpucci said:
Looks like you need to keep it in the oven a bit longer.

I like to make Pizza bread. I make a batch of pizza dough then form it into a big doughnut shape. I then cook it on a pizza stone to get a nice crispy crust.

Or a little hotter. I cook 90% of my breads at 550F on a stone.

Save yourself $38 and buy a thick, unglazed quarry tile from a hardware store and set it in your oven.

Pizza stone = $40
Tile from Home Depot = $2
 
I'm going to make this now.
Ingredients:

1 pkg. dry yeast
1 cup lukewarm water
1/4 tsp. sugar
1 tsp. salt
3-1/4 cups flour
Olive oil
Coarse sea salt
Freshly cracked black pepper
1 sprig rosemary
Directions:
Mix yeast and water together in a large mixing bowl; let sit for 10 minutes. Add sugar and salt; mix together. Add flour. Mix together until dough begins to move away from the bowl. Remove dough and knead on countertop for 5-7 minutes. Place in a lightly oiled bowl, cover with a towel and let rise for 1 hour.

After 1 hour, remove dough from bowl. Knead for 3-4 minutes. Place on a medium cookie sheet and spread the dough to the sides. Cover with a towel and let rise for 1/2 hour.

Preheat oven to 400°F. Lightly brush olive oil over top of bread. Liberally sprinkle coarse sea salt and fresh blacked pepper on top. Scatter rosemary leaves over top. Place in oven and baked 25 minutes or until top is a light gold color.

73bb6167cd81f08c1d458cd6839fc352-400.jpg
 
PseudoChef said:
Try to find a copy of Peter Reinhart's The Bread Baker's Apprentice
I went to Amazon and picked up this book on your recommendation. I grabbed a pizza stone for $20 as well, before I saw your post about the unglazed tile.

Of course, the pizza stone was part of the current 4-for-3 deal that Amazon is running, so I ended up buying a bunch of other crap, too.

So what I'm trying to say is, your post cost me $75 :)
 
I've just been to the tile store and picked up a freebie.

I have loads of rosemary in the garden.

My hands now smell of olive oil, rosemary and pepper.:rockin:
 
PseudoChef said:
Save yourself $38 and buy a thick, unglazed quarry tile from a hardware store and set it in your oven.

Pizza stone = $40
Tile from Home Depot = $2

You know, last year I looked at every store in town (Lowes, Home Depot, OSH, Ace, etc.) and couldn't find any large quarry tiles that were suitable for baking. I ended up with a $20 pizza stone from Amazon. No regrets, it's quite nice and included a steel rack that makes moving the hot stone easier.

I did find some nice 4" x 4" quarry tiles and used them to line the floor of my oven. It really helps to maintain a nice even temperature, simply by providing some thermal mass. Not bad for about a $5.00 investment.
 
ryser2k said:
I went to Amazon and picked up this book on your recommendation. I grabbed a pizza stone for $20 as well, before I saw your post about the unglazed tile.

Of course, the pizza stone was part of the current 4-for-3 deal that Amazon is running, so I ended up buying a bunch of other crap, too.

So what I'm trying to say is, your post cost me $75 :)

Yeah, if only I hadn't stumbled across something last September that said, "you can brew beer at home!"

The book is phenomenal. I've made the poolish baguettes, the pain l'accienne, marbled rye, cinnamon buns, pizza dough, foccacia, and the Italian Bread. Making the Italian again tonight.

MAKE THE PAIN L'ACCIENNE NOW!!!
 
BlindLemonLars said:
You know, last year I looked at every store in town (Lowes, Home Depot, OSH, Ace, etc.) and couldn't find any large quarry tiles that were suitable for baking. I ended up with a $20 pizza stone from Amazon. No regrets, it's quite nice and included a steel rack that makes moving the hot stone easier.

I did find some nice 4" x 4" quarry tiles and used them to line the floor of my oven. It really helps to maintain a nice even temperature, simply by providing some thermal mass. Not bad for about a $5.00 investment.

Yeah, I originally had one that was good, but I actually broke it. The one I have now is a little thinner, it's cracked too...but it still does the job. I also broke done and got a baguette pan, which is nice as the baguettes can now take a more circular cross section instead of having a flat bottom.
 
orfy said:
Todays loaf,

another foccocia.

pict0001bg3.jpg


pict0006jx6.jpg


You guys are making me hungry. i've been making our bread weekly - either sourdough or spent grain bread... both have been mmmmmmmmmmmm mmmmmmmmmmmm good!:ban:
 
I just made soda farls but I cheated.

I had no butter milk which relies on the lactic acid to react with alkaline soda to create CO2 to help raise the bread and give it it's slightly tatt/sour taste.

The mad scientist in me said that if I didn't mind missing the slight sour taste then I could use potassium hydrogen tartrate (cream of tartar) to replace the lactic acid and use plain milk.
Result!
No picture because I've eaten it with an Irish stew for lunch!

4 lamb chops
4 medium potatoes
4 medium carrots
4 medium onions
Sprig of fresh thyme or 1/2 teaspoon dried thyme
450 ml of lamb stock (hot water and two lamb stock cubes)
2 tablespoon fresh chopped parsley
2 good shakes of Worcestershire Sauce (Lea & Perrins)
1 tablespoon of Pearl Barley (optional)
50g butter
50g flour
Salt
Pepper
 
I'm baking a couple of loaves of spent-grain wheat today. It's from Peter Reinhart's Whole Grain Bread: New Techniques, Extraordinary Flavor. It's a nifty way to incorporate spent grains from your mash into bread. The spent grains add fiber and texture along with a little of the malted barley flavor. Good stuff.

Chad
 
Last edited by a moderator:
If anyone is interested, here's what it looks like:

1796930044_c1eb44e912.jpg

Spent grains and whole wheat flour soaked overnight to soften the proteins and begin starch to sugar conversion (left) and whole wheat sourdough starter (right). The spent grains are from the American Amber I brewed on 10/26.

1796088245_35eb96b646.jpg

Dough after bulk fermentation/1st rise.

1796088107_d4f4abcc60.jpg

Two loaves of spent-grain whole wheat and a Carolina Brewing Company Winter Porter.

1796929564_bf9a27e02a.jpg

Beauty shot. That's sel gris (grey sea salt) on top. I brushed the loaves with an egg wash and dusted with sel gris before putting them in the oven.

Chad
 
I need to start making my own homeade bread again. The pics in this thread remind me how much I like warm, fresh bread.
 
orfy said:
Looks good Chad, care to share the recipe and technique?

Sure thing. As PseudoChef mentioned earlier in the thread, Peter Reinhart is a proponent of delayed fermentation and pre-ferments to extract the most possible flavor from the grains. Sounds like brewing, doesn't it? In his new book on whole grain baking he uses a couple of beermaking techniques, including mashing his flour. I took a class from him last week and it was interesting to see the parallels first hand.

Anyway, the spent grain bread doesn't use a ton of spent grains, alas, but it is a good way to re-use, recycle and enjoy something that otherwise would have been thrown on the compost heap.

Bread Profile
Slightly enriched, medium soft dough; delayed fermentation; commercial yeast or mixed commercial/sourdough optional.

Day 1
Soaker and biga (or sourdough starter): 20 minutes to set up and mix

Day 2
2 hours to de-chill biga; 12 to 15 minutes mixing; 2-3 hours fermentation, shaping, proofing; 40-60 minutes baking.

This recipe makes one loaf. I double it for two loaves, because it's just as easy to do two, especially if you have a stand mixer.
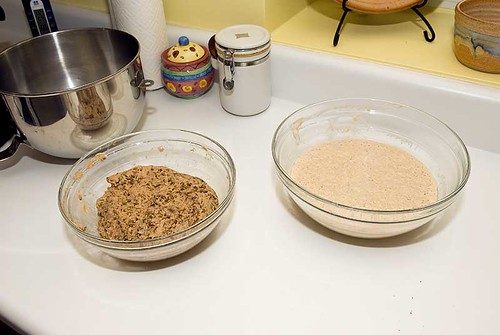
Soaker:
1-3/4c (8oz or 227g) whole wheat flour
1/2tsp (.14oz or 4g) salt (use almost double by volume if using kosher salt)
3/4c (6oz or 170g) water
TOTAL 14.14oz or 401g

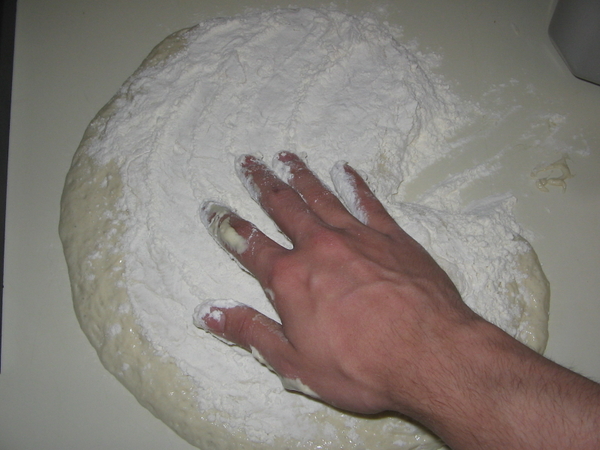
Mix all of the soaker ingredients together in a bowl for about 1 minute until all of the flour is hydrated and ingredients form a ball. I deviate from Reinhart's recipe by adding my spent grains to the soaker -- 4oz or 113g per loaf. I figure that the mashed grains still have some active enzymes that will help convert the flour's starches to sugars.

Cover the soaker loosely with plastic wrap and leave at room temp. for 12 to 24 hours. Will last up to 3 days in the refrigerator if necessary.

Biga:
1-3/4c (8oz or 227g) whole wheat flour
1/4tsp (.03oz or 1g) instant yeast (I use SAF, it's good stuff)
3/4c (6oz or 170g) filtered or spring water
TOTAL 14.03oz or 398g

The biga differs from the soaker in the addition of yeast to begin fermentation. Mix all of the ingredients in a bowl to form a ball. Knead for about 2 minutes to make sure all of the ingredients are evenly distributed. Dough should feel very tacky. Let rest for 5 minutes to hydrate, then knead again for 1-2 minutes. Transfer to a clean bowl, cover tightly with plastic wrap and refrigerate for at least 8 hours and up to 3 days.

This is another place where I differ from Reinhart. I refresh and bulk up my sourdough starter and use that 1:1 in place of the biga. My starter is a little wetter than the biga so I have to add a little extra flour later on. No big deal and the extra depth of flavor is worth it to me.

On day 2, about 2 hours before mixing take the biga out of the fridge and allow to come to room temperature.

Final Dough
All of the soaker 14.14oz or 401g
All of the biga or sourdough starter 14.03oz or 398g
3/4c (4oz or 113g) spent grains if you didn't add them to the soaker
Rounded teaspoon of salt (.18oz or 5g) Double this if measuring kosher salt by volume.
2-1/4tsp (.25oz or 7g) instant yeast.
2-1/2 - 3 tablespoons (1.5oz or 42.5g) honey or brown sugar (I use dark corn syrup)
1 tablespoon (.5oz or 14g) olive oil optional

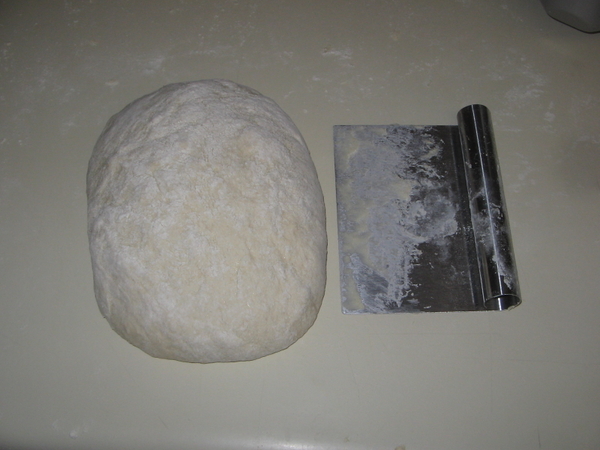
Cut the biga and the soaker into 1oz chunks (or thereabouts) with a pastry scraper. Coat with additional wheat flour to keep the pieces from sticking together.

Mix in a large bowl and stir with a heavy spoon or knead with wet hands (to keep the dough from sticking) for 2-5 minutes. If using a stand mixer, mix with the paddle attachment on low-medium. Either way, make sure the ingredients are evenly distributed and the dough has formed a slightly sticky ball. Add more flour or water as necessary. I've added as much as 3/4 cup more flour to make up for the wetness of my starter, but 5-7 tablespoons will probably do it.

Dust your work surface with flour and knead by hand (or with the dough hook on a stand mixer) for 3-5 minutes, according to Reinhart. I think he's being optimistic. I had to go 10 minutes with my stand mixer on 3 to get the satiny sheen and tacky feel that signals adequate gluten development.

Let the dough rest for at least 5 but up to 20 minutes. This will ensure proper hydration and make the dough easier to work with.

Knead for another couple of minutes, adding any additional flour or water as necessary. The dough should have strength and pass the window pane test -- pinch off a golf ball size round of dough and stretch and turn it in your fingers, almost like making a mini-pizza. You should be able to stretch the dough thin enough to see light through without it tearing. If it doesn't pass, knead some more.

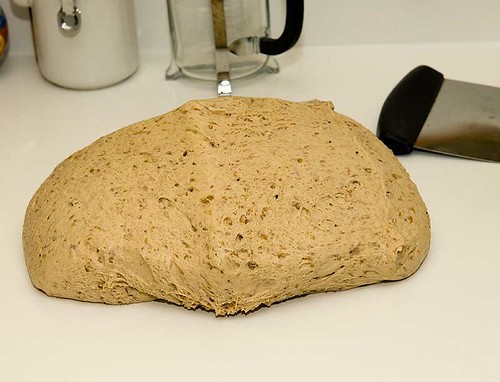
Form the dough into a ball and place it in an oiled bowl. Cover loosely with plastic wrap and let rise at room temp for about an hour, until it is 1-1/2 times original size.

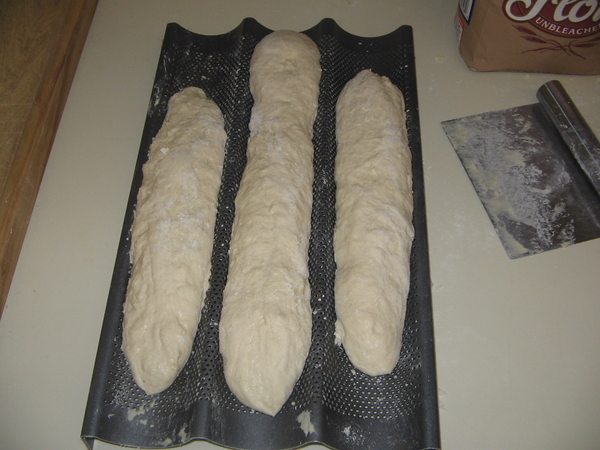
Turn risen dough gently onto a lightly floured work surface, pat it into rectangle and fold into thirds like folding a letter. This gently degasses the dough and gives the yeasts new sugars to munch on. Form into loaf pan shape or batards. Place dough in loaf pan, if using, otherwise place the batard on a sheet pan lined with parchment paper or a linen cloth sprinkled with flour. Spray the top of the loaf with pan spray (optional), cover loosely with plastic wrap and let rise for another 45 minutes to an hour.

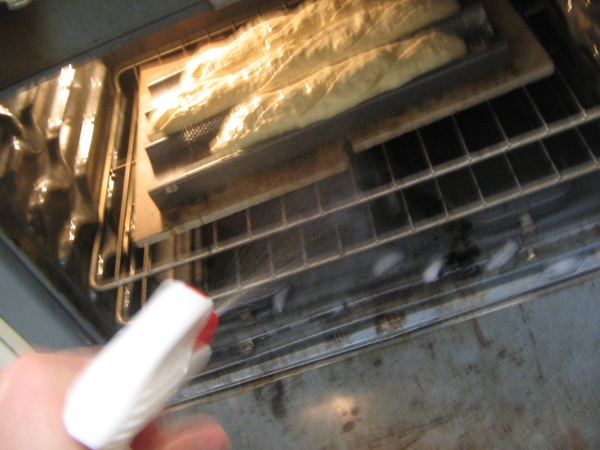
Place a heavy duty sheet pan or iron skillet on the bottom rack of your oven to use as a steam pan. Pre-heat oven to 425f (218c). Pre-heat a cup of water in the microwave or on the stovetop.

When dough is ready, place loaf pan or sheet pan in the oven, pour the hot water into the steam pan, close the door and turn the oven down to 350f (177c). Be sure to cover the glass in the oven door with a towel when pouring. Even a minor splash can crack the glass.

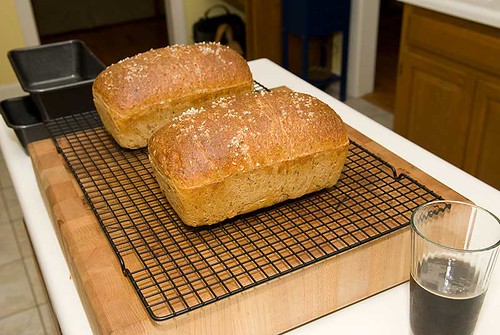
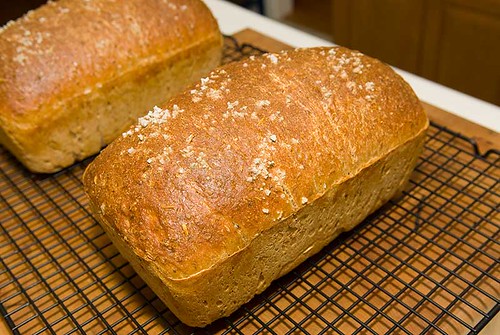
Bake for 20 minutes, turn and bake for an additional 30 minutes. Loaf should be rich brown on all sides and register 200f (93c) in the center.

Transfer loaf to cooling rack and allow to cool for at least an hour to allow the starches to finish gelatanizing.

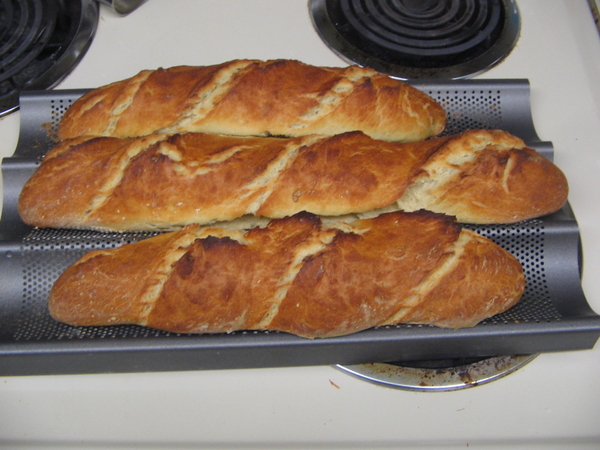
I brushed my loaves with an egg wash before they went into the oven. That gives a nice glossy sheen and gives the coarse salt something to stick to.

If you are into whole grain baking, Reinhart's Whole Grain Breads is hard to beat, but fairly advanced. Still advanced but more general and covering a greater range of bread styles is The Bread Baker's Apprentice, which is probably the best baking book out today.

Chad

Edited to clean up grammar and add that if you don't want to go to this much trouble you can probably add spent grains to just about any wheat bread recipe. The amount of spent grain can be up to 25% of the flour weight.
 
Last edited by a moderator:
Short Drive said:
Love this book. Plus he has another newer book.

Bread alone is a good read as well as good recipes from his bakery.

Bread Alone By Daniel Leader revolutionized my concept of bread. That is the book to have if you really want it old-skool. :D

A few tidbits about bread I can interject. One is that the dough should be somewhat sticky. It takes experience with the dough to find the right balance of moisture. Another is gluten development. Never skimp on the kneading phase. Third is temperature. Many books teach you to bump up the rise temp. I say don't do it. This will result in an overly yeasty and sometimes lingering alchoholic flavor in the bread. Just as in brewing they are sensitive to temperature. Use weight for dry measurements not volumetric. This is especially true with salt.
 
Last edited by a moderator:
I read through the Bread Baker's Apprentice last night and noticed in a lot of his recipes he calls for malt syrup or malt powder, and he says you can get it from homebrewing shops.... am I correct in assuming this is the same as malt extract?
 
ryser2k said:
I read through the Bread Baker's Apprentice last night and noticed in a lot of his recipes he calls for malt syrup or malt powder, and he says you can get it from homebrewing shops.... am I correct in assuming this is the same as malt extract?

That's what I use. For instance, the Italian Bread calls for the malt powder, and I use DME.
 
BlindLemonLars said:
You know, last year I looked at every store in town (Lowes, Home Depot, OSH, Ace, etc.) and couldn't find any large quarry tiles that were suitable for baking. I ended up with a $20 pizza stone from Amazon. No regrets, it's quite nice and included a steel rack that makes moving the hot stone easier.

I did find some nice 4" x 4" quarry tiles and used them to line the floor of my oven. It really helps to maintain a nice even temperature, simply by providing some thermal mass. Not bad for about a $5.00 investment.

I used to load my oven with bricks :D LOL. My neighbor was getting rid of them from his walkway haha. Takes over an hour though to get them hot. I still have them, but now I have a good amount of baking stones. and they are so danged heavy. I had thought of splitting them in half height-wise, but need an "around-2-it" badge. :) I tell you what though, that's the ticket. High temps and a steam environment. It is cold enough now, so after I plant the garlic I think it'll be back to beer, bread and some other stuff.

MMM bread!
 
zoebisch01 said:
I used to load my oven with bricks :D LOL. My neighbor was getting rid of them from his walkway haha. Takes over an hour though to get them hot. I still have them, but now I have a good amount of baking stones. and they are so danged heavy. I had thought of splitting them in half height-wise, but need an "around-2-it" badge. :) I tell you what though, that's the ticket. High temps and a steam environment.
I once heard Julia Child suggest bricks, and gave it a try, but they were too tall and interfered with the bottom rack position. That's when I settled on quarry tiles.

You know, I just glanced in my oven, and the tiles are 8" square. (My failing memory thought they were 4".) Four of them fit precisely into a 16" square sunken area in the bottom of the oven. Looks like a factory fit, and no holes are blocked.

Julia also suggested throwing a 1/4 cup or so of water onto the hot bricks, just as you slide your loaves in. I fear my tiles might crack from the thermal shock, but at 97 cents a pop I suppose I could risk it.

Quarry tiles, $0.97 each.
 
BlindLemonLars said:
Julia also suggested throwing a 1/4" or so of water onto the hot bricks, just as you slide your loaves in. I fear my tiles might crack from the thermal shock, but at 97 cents a pop I suppose I could risk it.

She was prolly drunk :p

Hey Lame Julia Child joke: She get's to heaven and God says "Well I guess your goose is cooked"

On a more serious note, Daniel Leader instructs a water spray bottle. Just after you toss the loaves in you spray down the walls of the oven, avoiding the bulb. Three minutes later you do the same. It works pretty darn well for an ad-hoc method. :mug:
 
So I'm getting ready to go to a homebrew club tasting today, and it will be my first meeting with a new bunch of guys. What better way to make a good first impression than to provide the best palette cleanser, pain l'ancienne.

As I've said before, this recipe produces superb bread that is super easy. The only drawback (and it's not that big of a drawback, either) is you need to prepare the dough a day in advance.

First, I weighed out 27 ounces of AP flour (weigh always for flour in baking recipes!) I added the 2.24 tsp of salt (regular iodinized), and 1.75 tsp instant yeast. In a separate bowl, I added a handful or so of ice cubes and filled it up with water. I waited about 3-4 minutes for the water to be ice cold and added it to the bread mixer bowl (I don't have a stand mixer, but you can use that as well).

9248-IMG_1035.JPG


The beauty of this, is that it is an incredibly slack/hydrous dough. So the mixer will do all the hard work for you, while you go read a chapter of a book or something.

After the knead cycle is done (or about 6-8 minutes with a stand mixer), simply take the bowl, cover, and place in the refrigerator overnight.

The next day, take the dough out about 3-3.5 hours before you want the bread to be complete. Let it warm up/rise a tad more to room temp for the first two hours. I played with my daughter, read some of my book/HBT. Making bread is soooo tough.

Here I've scrupulously cleaned my counter, don't bother working on a board or anything, you'll just make a mess and have one more thing to clean. I've dumped about 3.5 oz flour directly on the counter.

9248-IMG_1037.JPG


You can see here how slack this dough actually is. Bring the remaining flour into the dough via folding.

9248-IMG_1039.JPG
 
After I work the remaining flour in (you may or may not need some more, but the key is to have as hydrous a dough as possible), I form the dough into a mound.

9248-IMG_1042.JPG


I use a dough scraper to cut this into 3 pieces lengthwise. (***Note, I've scaled back Reinhart's 6 baguettes to form 3 in the past with excellent results. However, this time, I ended up with more dough than usual it seemed. 4 baguettes would have been better, but they'll still be delicious**)

After cutting, I immediately transfer to my baguette pan, as I don't want the loaves to lose shape:

9248-IMG_1043.JPG


At this point, preheat your oven as hot as it will get, usually 550degF. Allow this to preheat for 45 minutes to an hour while the dough proofs one final time. Even if your oven light goes off, still wait for 30-45 minutes.
 
Here the oven is preheated and I'm ready to steam. Reinhart tells you to place a pan in the oven so that you can dump water in, but I have scorched pans in the past doing this. Now I just dump a bowl-ful of ice in as I put the baguettes in. Also notice the spray bottle for oven-steaming. I've also lamed the bread using a regular bread knife:

9248-IMG_1044.JPG


Into the oven, spraying every 30 seconds or so the first 3-4 minutes.

9248-IMG_1045.JPG


Turn the heat down to about 425degF and bake 9 minutes. Rotate the pan, and bake about 9-10 minutes more.

Voila!

9248-IMG_1046.JPG
 
Damn! You guys are killing me! I just dug through my cupboards and it looks like I have all of the necessary ingredients to whip up a loaf! I'm DOING IT!:D
 
WOW, orfy! I think you might have turned me onto another hobby!:D

I just started reading through the beginner lesson on The Fresh Loaf.

It seems like it is much like brewing beer: There are 4 main ingredients. Water, Flour, Yeast and Salt. Then you can add other ingredients to impart diffferent flavors and textures, kind of like "Adjuncts" in beer.

My loaf is rising right now!:D
 
I'd suggest gong the sourdough route to really reap the savings. Yeasties are so easy to play with (after my initial worry about getting them going!) once you get the hang of it.
 
Right now I'm making two more loaves.:p

A cinnamon bread
and
A Flying Dog Scottish Porter beer bread.
 

Latest posts

Back
Top