converting charcoal smoker to electric

Homebrew Talk - Beer, Wine, Mead, & Cider Brewing Discussion Forum

Help Support Homebrew Talk - Beer, Wine, Mead, & Cider Brewing Discussion Forum:

This site may earn a commission from merchant affiliate links, including eBay, Amazon, and others.

Walker

I use secondaries. :p
HBT Supporter
Joined
Sep 8, 2005
Messages
10,982
Reaction score
122
Location
Cary
skeeordye11 gave me this charcoal smoker that he didn't want.

smoker12.jpg


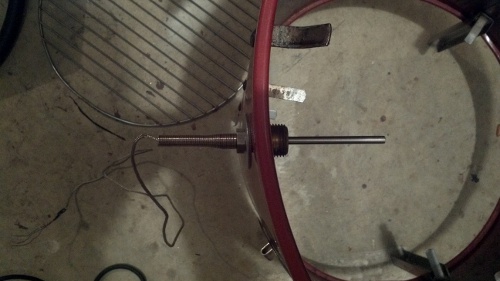
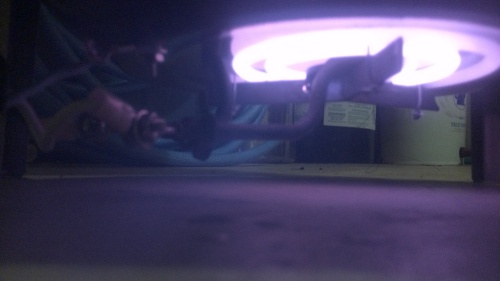
And I decided that it would be a good idea to convert it to electric and use the same panel I control my brewing system with to control the smoker. So, I bought a 6" 1250W element for an electric stove off ebay for $8 and decided to mount it to the bottom of the pan that used to hold coals.

smoker22.jpg


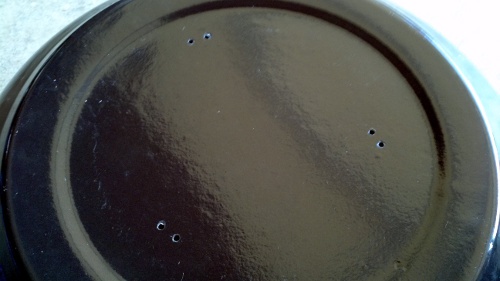
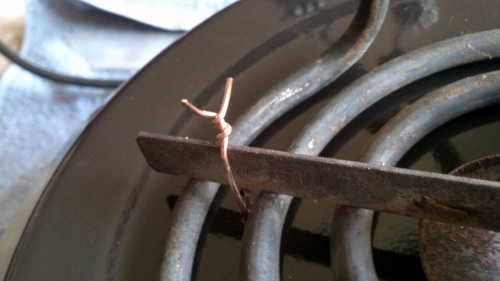
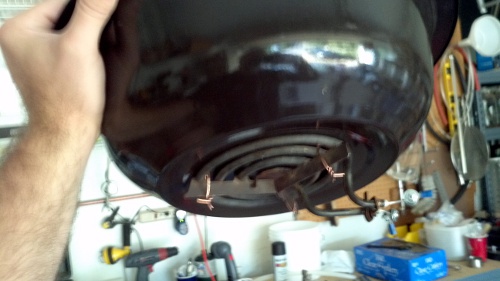
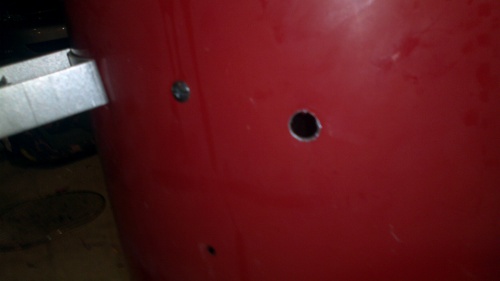
To mount it, I drilled three pairs of small holes in the pan right next to each arm of the "Y" shaped bracket on the burner.

smoker32.jpg


smoker42.jpg


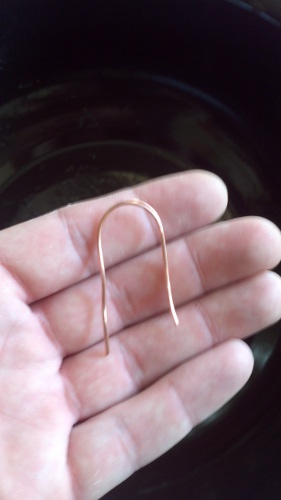
Then I cut some short lenghts of thick copper wire and bent them into a U shape.

smoker5.jpg


From inside the pan, I put each U through one of the sets of holes.

smoker6.jpg


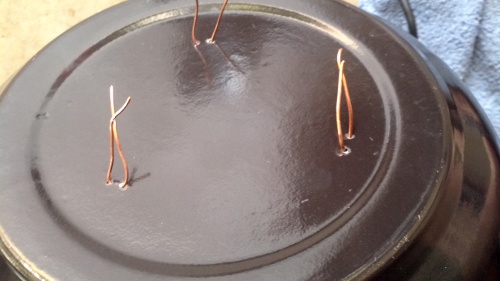
Then I just used those like big-ass twist ties to secure the burner to the bottom of the pan.

smoker7.jpg

smoker8.jpg


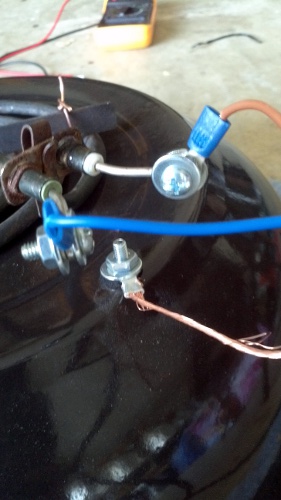
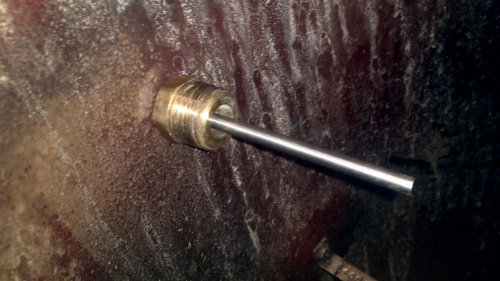
Then came the wiring. I stripped the end of a power cord and put some ring terminals on it.

smoker9.jpg


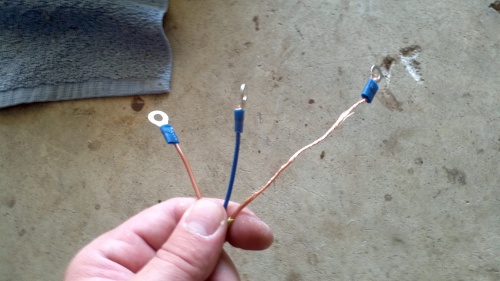
Then attached those to the burner's leads with some machines screws/nuts/washers. I drilled another hole in the pan and attched the ground wire directly to it (and removed the plastic insulation on the connector since it was doomed to melt anyway). I need to probably replace that ground connection hardware with stainless since it's directly in the pan. These are zinc plated steel at the moment.

smoker10.jpg
 
To mount a temp probe, I drilled a 1/2" hole in the side of the thing, just below the top grill rack.

smoker111.jpg


Slipped a washer over a temp probe to give it something to catch on the side better and inserted it through the hole. On the inside, I threaded on a brass plumbing bushing to hold it all in place.

smoker121.jpg

smoker13.jpg

smoker14.jpg


Plug that thing into the back of my control panel where my kettle is normally plugged in and connect the temp probe to the PID and let it rip.

smoker15.jpg

smoker16.jpg
 
Problems and remaining work:

Originally, I wanted to run the element on 120V. The element is 1250W on 240. If you halve the voltage, you quarter the power, which makes it 312.5W. However, the volume of this smoker is pretty big, and 312 watts wasn't cutting the mustard. I could only get to about 140*F. So, I just hooked it up to the full 240V and said, "F*ck it."

But, I still had problems getting over 200*F. The pan with the element attached to it is low. The bowl actually sticks out of the bottom and the element is only an inch or two off the floor. I lose a lot of heat from the bottom.

I have two possible solutions to this issue:
(1) wrap some aluminum flashing around the bottom, basically enclosing the legs of the smoker inside the thing and cutting down that gap at the bottom. (I tested this with aluminum foil, and it got my temps up over 220*F.)
(2) move the rack that holds the fire pan up a few inches inside the smoker so that the bottom of the bowl and the element are up inside the red can instead of sticking out below it.

Apart from that, the only thing I need to do is put a longer power cord on it. The brewery control panel is on a 15' cord, which gets is ALMOST to my garage door. I need the smoker sitting outside, so I need to make sure that the temp probe and power cable to the smoker are long enough to let me do that.

And I am wating for a quick connector for the smoker's temp probe to arrive in the mail. When I tested last night I just opened the panel and wired the probe straight to the PID after taking off the probe from the HERMS system. When the quick connector gets here, I'll be able to swap probes using a little plug/socket that is mounted on top of the panel.
 
I converted an ECB to electric w/some leftover brewery parts. I had the same temp troubles as you. I ended up setting the smoker on a couple pieces of wood wrapped in flashing to reflect the heat. Also, I wrapped the entire smoker in the relflex insulation. In the winter with ambient temps in the high 20s low 30s, it would hold 225F, but struggled mightily.

I ended up building an ~$80 UDS with the help of DataZ's kit. I've only used that a couple of times, but it really does the job.

I still use the EECB for things like raising bread doughs, but pretty much use the drum when I'm smoking.

Any ?'s, just ask.
 
I should mention I incorporated a 1500w 120v burner into the unit and it runs on 110v

edit: found some pic.s in my photos

control panel. top panel display is for a meat probe, bottom is the PID which controls the element.

IMG00145.jpg


First time setting it up w/flashing underneath. I've begun to use more flashing to more adequately cover the entire bottom.

IMG00144_2_.jpg
 
awesome, thanks for the info!

I was worried about using reflectix on this thing. That stuff is basically plastic and has a temp rating of only 180*F. I do use it on my electric boil kettle, but was concerned about it melting or something if I got up to 240*F on the smoker.
 
I'll check the inside of the reflectix when I get home tonight. I believe it to be wholly in tact, though.

Looking at my pic.s, I forgot to mention I wrapped the entire bottom with flashing. That really reduced my heat loss.
 
I had to raise my heating element as well. The default configuration would not get hot enough if there was a mild breeze. After raising it up, it works fine.

Except one time I accidentally bought hardwood chunks instead of chips and they caught fire and the temp went WAY up!

Sometimes I wish I had a BGE, but they are soo much money.
 
I can't believe you guys are letting Walker play with electricity...I mean, look at his avatar. You see what happened last time. ;)
 
Holy ****, Batman!

Last night I moved the electric pan up a few inches and basically made a floor for the red can out of aluminum flashing. That reclaimed a lot of heat that I had been losing with the open bottom. The pan is made of enamel coated steel, and it got hot enough that the pan was glowing red-hot and the enamel melted off. :rockin:

I am going to try dropping back down to 120V and see if it can get to the temps I want now since I seem to have made a significant impact on the heat containment.
 
Good to hear, Walker.

The reflectix on the ECB is completely in tact after ~5 uses w/ temps no greater than 250F.

I'd be interested to hear how much smoke you'll be able to generate with out full blown ignition of the wood/smoke source. The smoke from my unit was on the lighter side but I think your design is better. Do you plan to use wood chips or something else?

:mug:
 
The reflectix on the ECB is completely in tact after ~5 uses w/ temps no greater than 250F.
Sweet! I still have some reflectix left over from my HERMS build. Maybe I'll throw it on there.

I'd be interested to hear how much smoke you'll be able to generate with out full blown ignition of the wood/smoke source. The smoke from my unit was on the lighter side but I think your design is better.

I am a newb with smoking. Haven't actually ever done it. But I have a friend who is WAY into it (to the point of building an in-ground 'whole-hog' pit with paver stone patio around it and a lean-to roof over it). He's got a small electric smoker that is based on a 350W heating element and he uses chunks of wood in a small stainless smoker box.

So.. similar to what I am doing with this thing....

He is very pleased with how much his smokes and smolders.

Do you plan to use wood chips or something else?

:mug:

I haven't thought that far ahead yet. My initial thinking was to soak some chips and use those. But, I'm going to take whatever advice my smoker-guru buddy gives me.
 
Doing first actual smoke test right now. The big chunks of wood work great in this thing.

I totally have a boner.
 
Oh... I did have to stay with 240v. Even with tha flashing I could onl get to about 170F when using 120V.
 
Good stuff! I have an old 'smoke 'n grill' bullet style smoker that I have been wanting to convert to electric for a year now. Thanks for the inspiration... :)
 
I think this person just gave you the smoker to see what you would do with it... remember it's low and slow ;)
 
I bought the same smoker in the electric version from Home Depot last summer for about $60.00. No controller attached to it yet but it keeps temps in the 230's consistently.
 
I am loving this thing. I've used it a total of 5 times so far, and have tweaked things a little to get better control of it. The biggest problem is that the pan gets insanely hot during a big temp ramp-up which lead me to a problem on the first use (ribs). I overloaded the smoker with meat, which messed with the temp reading (probe is RIGHT under top rack).

The element fired constantly, and the smoke was heavy and left a slight phenolic flavor on the meat. It wasn't bad enough to deter my family or the neighbors from eating 3 slabs of ribs, but was something I wanted to fix.

The next use was some fish, but I had too much salt in my brine and it wasn't edible, but I did figure out that some lightly crumpled foil in the fire pan kept the wood from smoking too much.

Then I did a pork shoulder and used a disposable pie pan in the bottom. Worked really well, but the pan burned through after 12 hours of cooking.

I've done meatloaf and chicken since then, using a heavier piece of aluminum in the fire pan and the level of smoke is now perfect, but I do need to worry about wind. There is no insulation on the thing (yet), so even a gentle breeze will pull away a lot of heat. That left me not being able to get the temp I wanted on the chicken, so I had to finish the cooking in the oven after a couple hours of smoking.

All in all, now that I am figuring out how to operate it better, this is definitely the best $20 I've spent in the past 10 years.
 
Hows this thing working?
I've got a Weber Smokey Mountain bullet smoker. A heat sink of some kind works good in these things to keep temps stable. I use a clay pot base, but I know others use sand.
 
I've got the kinks worked out and it works pretty well. I definitely can't complain since I have only $25 or so invested in this in total.

because of wind blowing up and into the bottom of the thing, I ended up extending the walls of the thing all the way to the ground with some aluminum flashing. And I had some extra reflectix laying around, so I went ahead and wrapped it up.

here's my thanksgiving bird from a couple weeks ago (yeah, I was drunk and never removed the useless pop-up thermometer). This was after about 4 hours of cooking (total cook time was 6 hours).

WalkerTurkey.jpg


The biggest issue I have is regulating the smoke. By that I mean that the pan that I have the element strapped to gets REALLY F*CKING HOT (like, glowing red) during the initial heat-up, so if I have the wood directly in there at that time, it will catch fire. :D

To get around this, I set a small steel bowl in the bottom pan and heat it all up with no wood in it. After it gets to my target temp, I open the little door on the side and toss a handful of chips into that small bowl that sits in the bottom. It smokes really well that way. (chips *directly* in the heated pan smokes to heavily. big chunks directly in the heated pan work well)
 
Back
Top