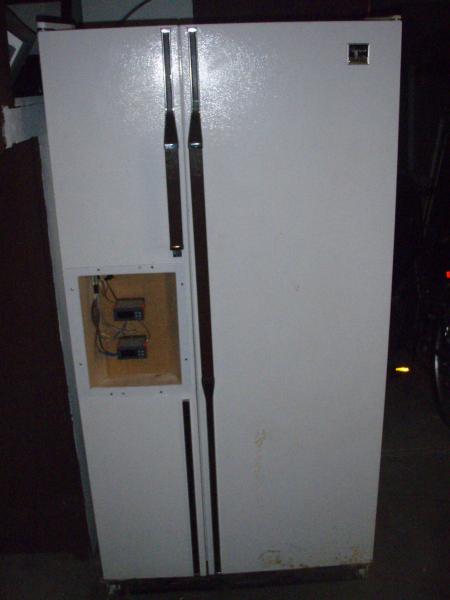
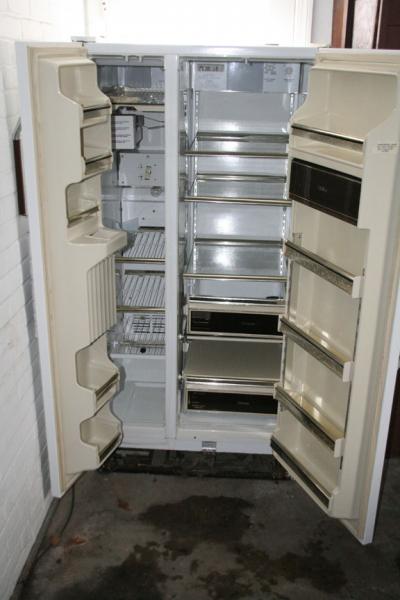
My side-by-side conversion (yes, this fridge is old)

Homebrew Talk - Beer, Wine, Mead, & Cider Brewing Discussion Forum

Help Support Homebrew Talk - Beer, Wine, Mead, & Cider Brewing Discussion Forum:

This site may earn a commission from merchant affiliate links, including eBay, Amazon, and others.

rudu81

Well-Known Member
Joined
Nov 2, 2010
Messages
241
Reaction score
0
Location
cleveland
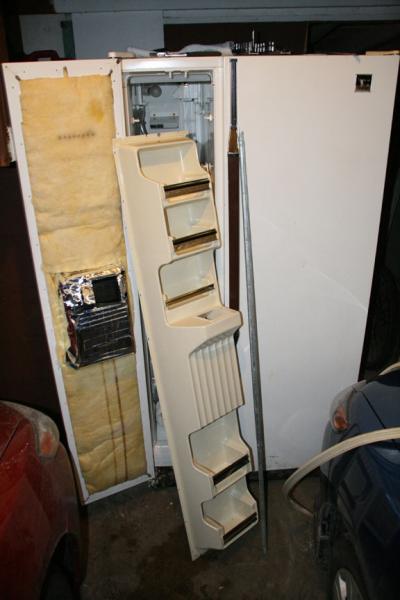
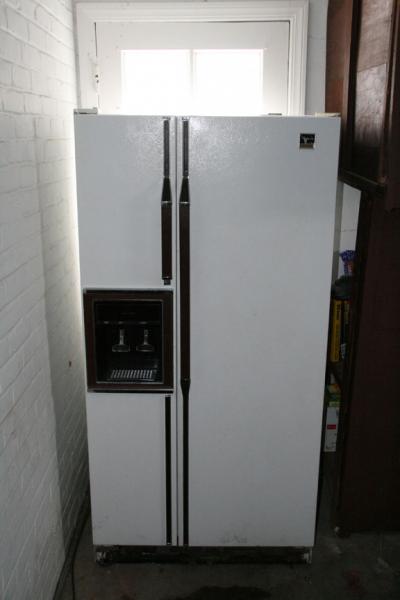
Here is my first build project out of a side-by-side fridge that came with my house. Luckily SWMBO hates it, and for the small price of buying her a new one, I am able to turn this one into my fermentation chamber. It is a Whirlpool model ED22MM1JWRO and is almost as old as I am. Unfortunately, the center divider does not remove, as there is a coolant line that runs through the wall about halfway up. I didn't find this out until I had the center metal stip pulled out - and that wasn't easy.

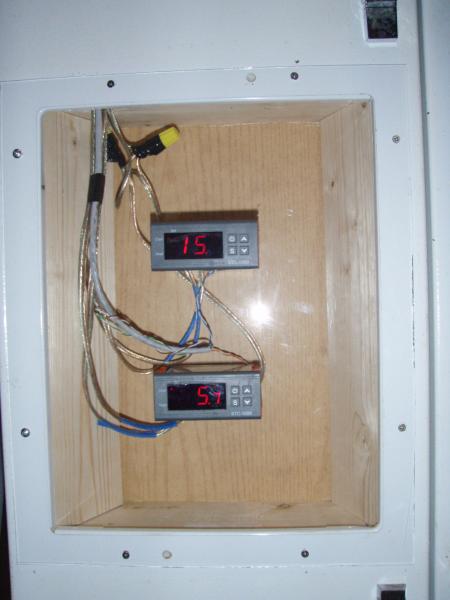
What follows will be a catalog of my build making two seperate chambers out of the same fridge. I have 2 ebay style temp controllers, one for each side, which will operate the compressor, a heat lamp, and 2 80mm 110v fans. The fans will more air between chambers to help each side regulate temps.

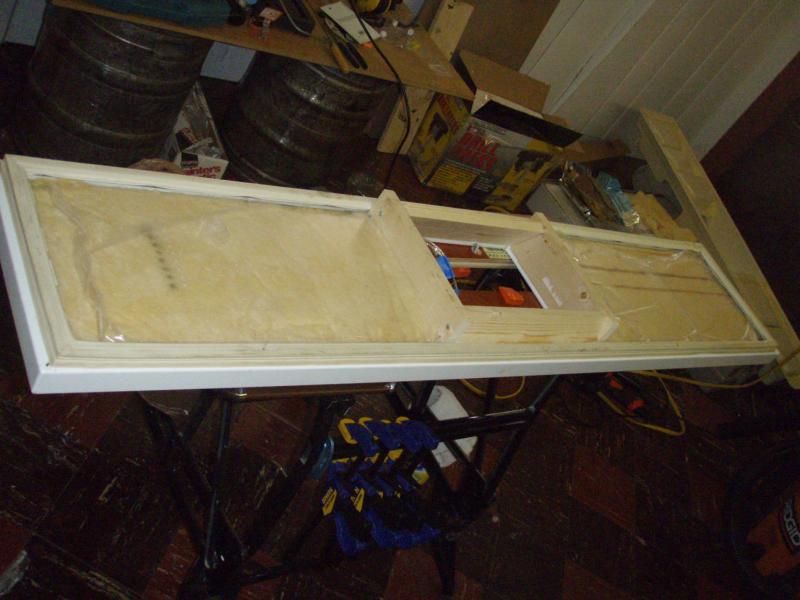
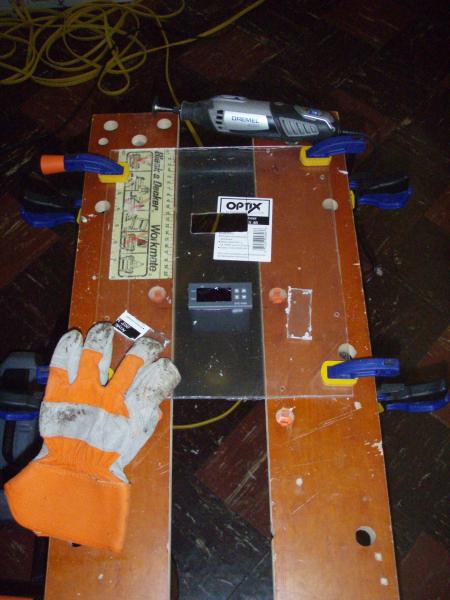
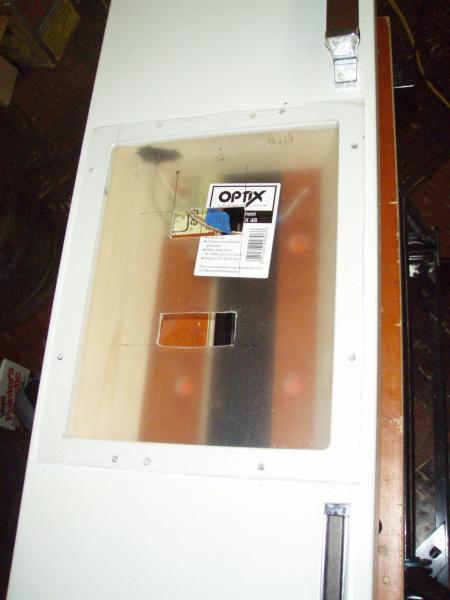
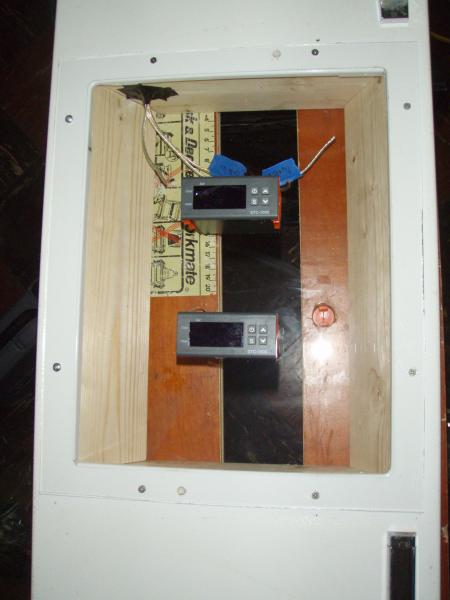
The plan is to place the controllers in the space that formerly held the ice/water dispensing unit. I built the housing for the controllers out of 1x4and as the original liner took up a lot of space in the chamber, I replaced it with .093" acrylic sheeting. The acrylic needed special drill bits for, so I bought a drill press for this and other projects.
IMG_23611.jpg


IMG_23621.jpg


IMG_24061.jpg


P71800011.jpg


P8010001.jpg
 
Here are a few more pics of my build progress. I have the new back on the door and have reinstalled the magnetic door strip as well. The controllers are mounted on the faceplate, but I haven't gotten to the wiring yet.

P80100021.jpg


P80100031.jpg


P80100041.jpg


P80100051.jpg
 
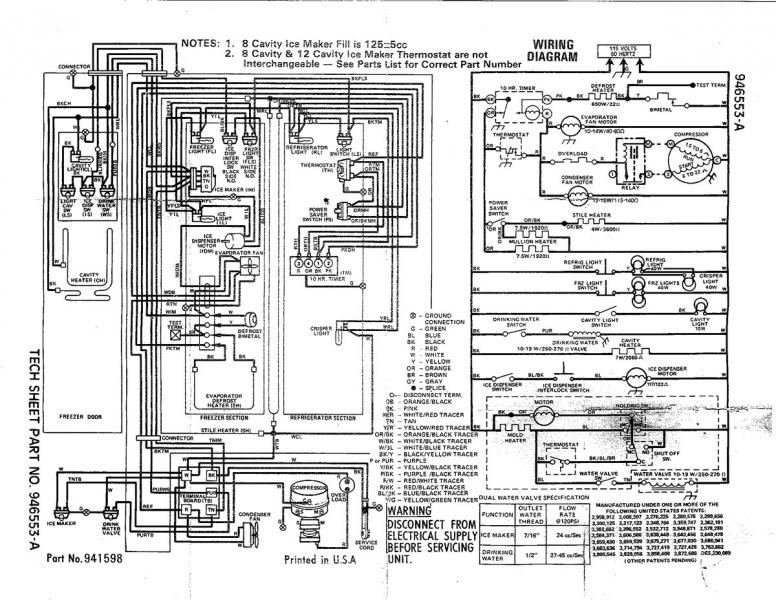
My next step is going to be getting the wiring set for all of the units. I am using the power that comes into the door that used to power the water/ice and run the outputs in flexible conduit to where they need to go. To control the compressor I plane to bypass the original thermostat, but leave the rest of the fridge's functions in place (if I am wrong, please let me know). I must admit that I was dumb today and forgot to leave room to run wire behind the new panel, so I'll have to go back in there to do my wiring. Not a huge deal, but it is mildly annoying.

wirediagram3.jpg
 
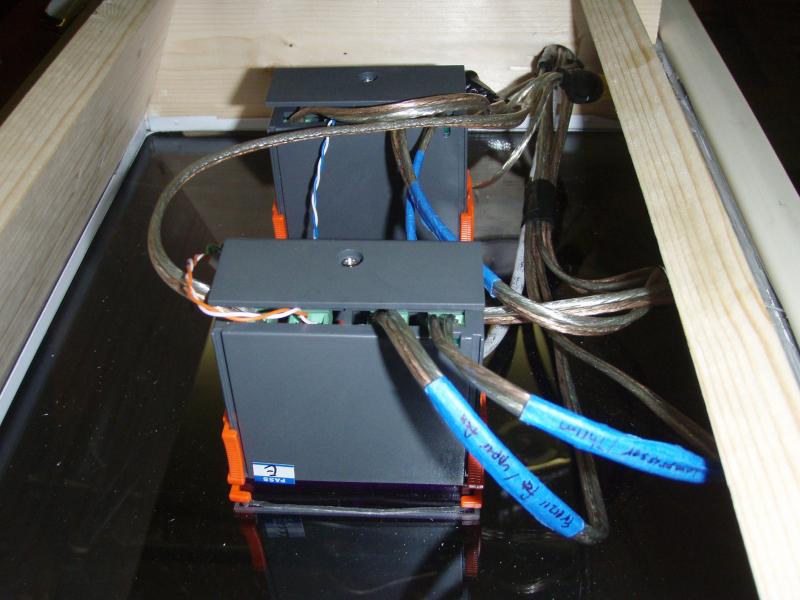
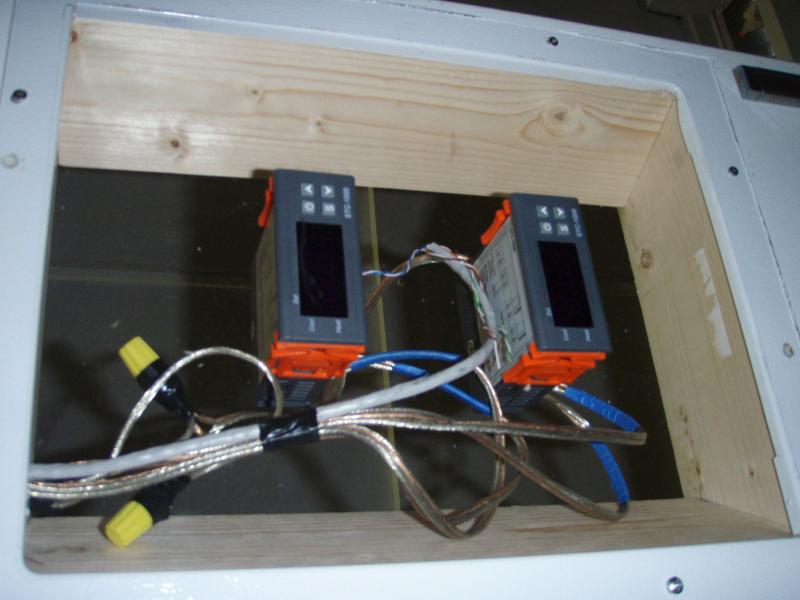
It's been a little while, but here is the progress on the fridge door. Both controllers are wired in and I bundled the wires together so that they will be easier to manage. Although my inital plan was to use acrylic for the back as well, I don't have paint or other matting material, so I'll probably have to stick with wood.

I'd like to get this done quicker than I am, but work keeps getting in the way.

P81500011.jpg


P81500021.jpg


P81500031.jpg
 
My side by side single compressor runs the freezer side then vents to the fridge side.

I was able to raise the temp in the freezer to 40F using the existing thermastat and then vented to the main fridge chamber making it 54F without any fans. The great thing about the fridge side is it doesnt fluctuate at all. The Freezer side does lot though probably a 15 degree range.

Good luck, I am interested in how you do the fans and bulb.

My first thought was to try it your way, but the fridge wouldn't fit down my staircase, so it's in the garage. That's probably the biggest reason for how big this project has to be.
 
What was the reason behind using two conductors for each of those contacts? And are you doing something on the plexi window or will all the wires be visible from the outside?
 
I went with the acrylic because I needed a material that I could machine myself and that would be strong enough. The wires will be visible from the outside. There is a way to paint the acrylic, but it is much more costly. Given that this is going in the garage, I'm not too worried about that. Although I could always cover it with stickers from various breweries...
 
Here's the next update. What I thought would be a five minute process involving six screws and closing the door turned out to be a two hour project. Aside from not realizing that the interior walls are tapered and that I had to cut down the sides of the box I built (which is bigger than I need anyways), there were a couple shims that got left out the first time around.

Here's the result. The doors close!!! I did plug it in and got satisfying error messages (nothing is hooked up) and the accompanying beeping. Now to get the final pieces put together...

P82800071.jpg


P82800081.jpg
 
Got here from your questions on the controller thread.
Are you aware of the difficulties in controlling wort fermentation temps by controlling the chamber air temp?
The wort is exothermic and can be 10F hotter than surrounding air. Most agree that taping the probe to the side of the vessel, then insulating lightly give the best temp control with typical controllers. Results are even better than a thermowell in the center, due to the overshoot (too cold) caused by conduction/convection delay of temps in the middle of the wort.

Fermenting more than one batch at a time is tricky. There are ways to do it, but involve at least 1 controller per batch + 1, and heat belts, and keeping the fridge air well below ferm temps when a batch is active. The heat belts then keep the individual batches in range. Mildly wasteful of energy, but not as bad as it sounds, especially if the fridge temp is turned up (hotter) as fermentation slows. For batches done fermenting, if you can live with the mild temp swings while another batch is active, the chamber can be used for fermenting and storage/conditioning with just the one controller.

Glad you found it!! Comments and suggestions are always welcome :mug:

I've done some reading here about probe placement and was planning to use insulation (left over foam board, bubble wrap, etc.) to put the probe against the side of the fermenter. Buckets are what I use for primary, so thermowells are unfortunately unrealistic for me. I most likely won't have two fermenters in active fermentation for a while, so it's not a big deal. When I get to that point, I would likely be using the same yeast or at least pitching the yeast at the same time. It'll be an experiment at the very least.

Sounds like you have a good idea how to make it work. For fermentation, putting the probe on the side of the vessel seems to give better temp control than a thermowell anyway.

Watch out for heat/cooling feedback battles, and temp lag. For the times of year when ambient temps are guaranteed to be too cold or too hot, it might be worth switching probe placements, strategies, etc. Your current strategy is only needed for the worst case scenario of (daily/weekly) wildly fluctuating ambient temps, and can cause control problems when it isn't needed.

When ambient is going to be hot, and you have an active ferm on the freezer side, a brew belt may work better to heat the fridge side beer directly instead of fridge air/beer and subsequently freezer air beer. You might take a look at the DIY heat belts (fermwrap?, brewbelt?). There are some threads with links to some reptile supply sites that are the cheapest source for the components. I think the cost was ~$8 for a belt, as opposed to ~$30+ for a fermwrap.
For controlling finished beer on both sides with hot ambient temps, you might get better results with the probes in smallish containers of liquid to give a little faster response, especially when the fridge side needs cooling, but the freezer side doesn't (yet). Hard to say, though, without some testing.

When ambient is guaranteed to be cold, you could use a heat belt for both sides.

For the gray area with fluctuating temps above and below the desired temp, the method you are using with a heat source for the fridge air is probably best. The same reptile supply sites may have good prices on the ceramic reptile light bulb heater things.
 
Thanks for the advice! I planned to do some testing with jugs of water first, and then better bottles to see what the effects are. Until I invest in some corny kegs I will probably just store beer in the freezer side. I could probably rig a bottle with water and a thermowell to get the good response time.

I thought of the reptile heating pad, and I could modify the controller if needed. Hopefully the chamber will only be in one mode (either heat or cool) at one time. I've also got the compressor set on a longer delay to help protect the system overall.

The short cycle delay is just to prevent "hot starts" when the lines are still pressurized from a recent run. 5 min or so is average, but longer can't hurt. Using the short cycle settings won't help frequent cycling, though. Most max out at 10-15 minutes. If larger values were possible, it could prevent frequent cycling, but at the expense of temp control. You shouldn't have any problems as long as the sensor is in/on something 12oz. or bigger, even with a 1F differential.
 
Here is a pic of the controllers at work. They do fight just a bit, but overall work well together. I am already fermenting an oatmeal stout in this, so I'll have to see how well I have done. Also, I am still working on the temp differential (F4 setting), as I am not entirely sure I have it correct.

Thank you to all who have helped!!!!!

P91100031.jpg
 
I know it's just in the garage, but a quick shot of black spray paint to internal side of the plexi glass would just make it look so much nicer :p
 
IrregularPulse said:
I know it's just in the garage, but a quick shot of black spray paint to internal side of the plexi glass would just make it look so much nicer :p

I agree, just go to home depot and pick up some spray paint, any kind will work, doesn't need to be expensive. Just scuff the acrylic down a bit and spray away.
 
Also, I am still working on the temp differential (F4 setting), as I am not entirely sure I have it correct.
If you have the STC-1000, F4 is just for calibration. It allows you to adjust for differences in sensors. If you have a known temp (ice water) or a known good thermometer, you can adjust for the difference between that and your sensor. You just add F4 to displayed temp to equal the correct temp.

For some reason, some people also use the F4 parameter to compensate for the difference between the sensor temp (usually in air) and beer or ferm'ing wort temp, instead of just using proper sensor placement and/or sensor damping which provides better control.

Once your sensor is calibrated, all you need to set is the set point (F1), and the amount of temp differential (F2) you want before the heating (F1 - F2) or cooling circuit (F1 + F2) activates.

F3 is compressor delay, and I just max mine out at 10 minutes. It is really only for compressor health/safety, and should not factor into temp control. I think it also activates for heating mode as well, which is unnecessary unless you are using a heat pump with a compressor.
 
I agree, just go to home depot and pick up some spray paint, any kind will work, doesn't need to be expensive. Just scuff the acrylic down a bit and spray away.

I thought about this, but decided that seeing the wires was cool for me. If I ever change it or make a new one I'll either paint or use a colored material.
 
If you have the STC-1000, F4 is just for calibration. It allows you to adjust for differences in sensors. If you have a known temp (ice water) or a known good thermometer, you can adjust for the difference between that and your sensor. You just add F4 to displayed temp to equal the correct temp.

For some reason, some people also use the F4 parameter to compensate for the difference between the sensor temp (usually in air) and beer or ferm'ing wort temp, instead of just using proper sensor placement and/or sensor damping which provides better control.

I spent time using ice water to try and get it right, and I thought I had. Also, I used one of my spare buckets to test both getting to temp from lower and higher and it seemed to work fine. However, once I had it set and on the fermenter, there was a big difference between the fermometer and the temp probe, so I've been trying to get it back down. Once this fermenter is done I'll take a spare bucket and put my floating thermometer in it and try to match that.

Once your sensor is calibrated, all you need to set is the set point (F1), and the amount of temp differential (F2) you want before the heating (F1 - F2) or cooling circuit (F1 + F2) activates.

F3 is compressor delay, and I just max mine out at 10 minutes. It is really only for compressor health/safety, and should not factor into temp control. I think it also activates for heating mode as well, which is unnecessary unless you are using a heat pump with a compressor.

I have a compressor delay set on the freezer side, but not for the fridge side, as it's just a fan. I am also considering using fermwrap or a belt for the fridge side and possible a reptile heat lamp. Currently I have a 60 watt bulb, but I'm not sure it's the best solution.
 
However, once I had it set and on the fermenter, there was a big difference between the fermometer and the temp probe, so I've been trying to get it back down. Once this fermenter is done I'll take a spare bucket and put my floating thermometer in it and try to match that.
Are those fermometers known to be accurate? I saw them mentioned/recommended, looked at them briefly, and saw they were nothing but the "mood ring" style temp strips. Unless they have greatly improved the technology, those things are just for ballpark measurements.

During cooling, there will be a temp difference between the wall of the fermentor, and the center. I haven't gone to the trouble of measuring, but some have reported up to a 3F diff. Taping the sensor to the wall under some insulation seems to give an accurate enough wort temp when no cooling is taking place, and is impacted by air enough when cooling is on that it mitigates overshoot.
 
I like your mood ring analogy! When I look at it and there is a range of temps, it does make me slightly suspicious. However I normally keep a standard thermometer nearby and measure against air temp. Not that it's perfect, but it does give a range.

Temp differences make sense, but I'm not overly concerned. Getting some portion of the beer to be the temp I want will do for me, as opposed to letting it swing wildly. Now if I had money for a temp controlled conical.....
 
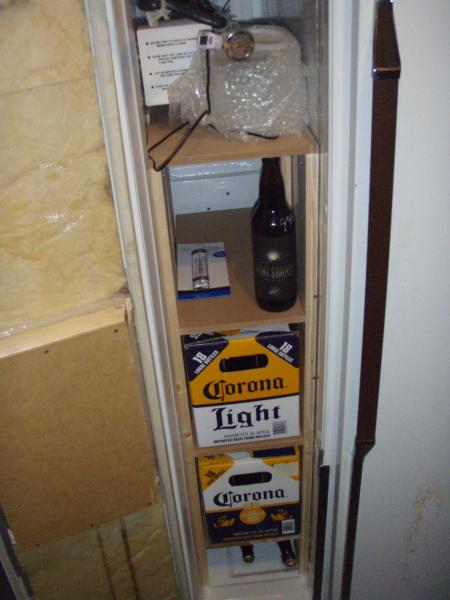
Got the shelves installed in freezer side. Due to the restriction in space at the front of the freezer I built each post with L brackets first, and then put it all together inside the freezer. The posts are 1x4 and the shelves are 1/2" mdf.

The first shelf clears the top of the cooling fan, and each subsequent shelf has 11" of space. Also, as you can see, Corona boxes (donated by inlaws) fit perfectly. Not that I planned it this way, but 22's fit pretty well too.

PB0500011.jpg
 
Back
Top