Jaded Brewing Chiller Build

Homebrew Talk - Beer, Wine, Mead, & Cider Brewing Discussion Forum

Help Support Homebrew Talk - Beer, Wine, Mead, & Cider Brewing Discussion Forum:

This site may earn a commission from merchant affiliate links, including eBay, Amazon, and others.

FuriousE

Well-Known Member
Joined
May 9, 2014
Messages
242
Reaction score
31
Location
Milwaukee
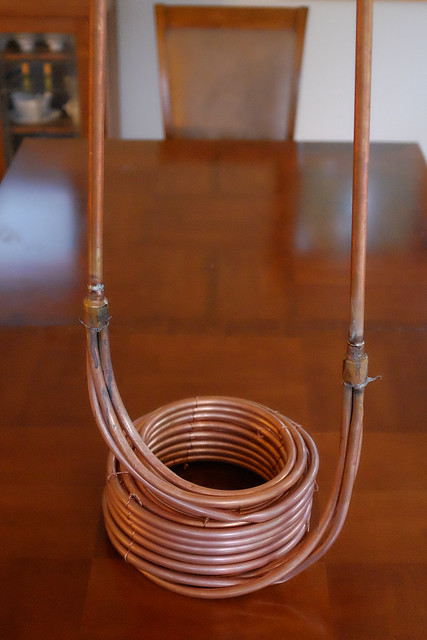
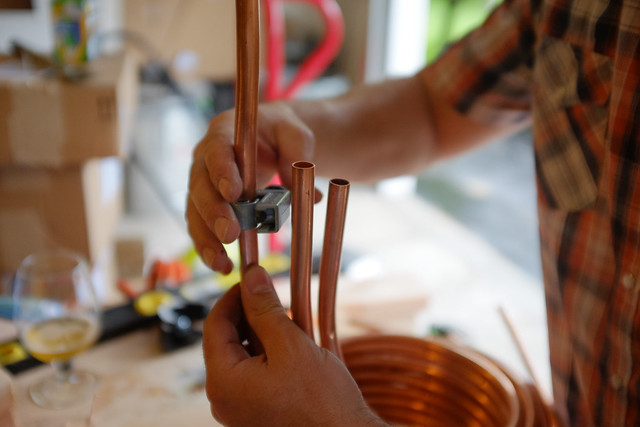
Here's my take on a chiller styled after the ones available from Jaded. This is made up of 3 20' lengths of copper tubing.

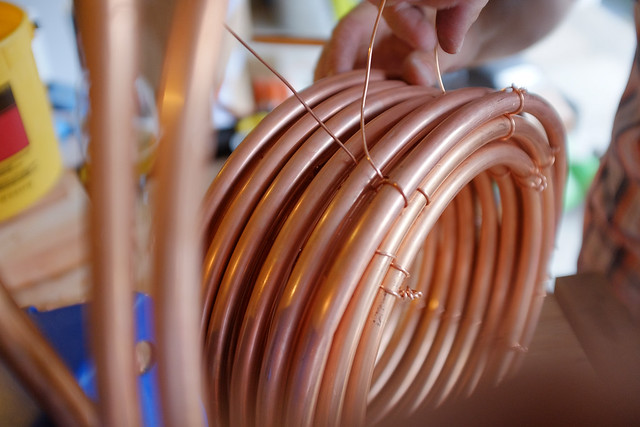
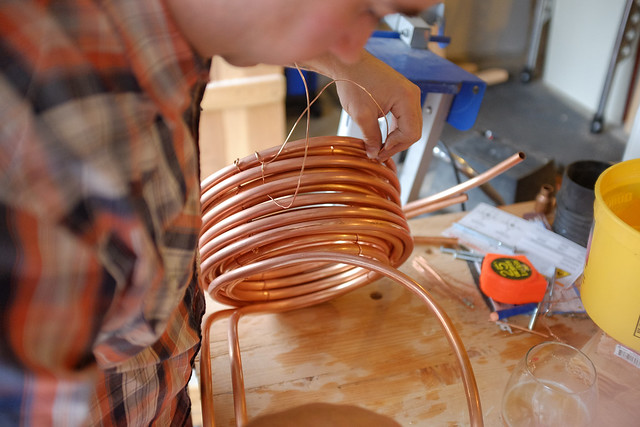
I used a 1 gallon bucket as a form, and I used some copper wire sourced from some leftover romex I had to tie it together.

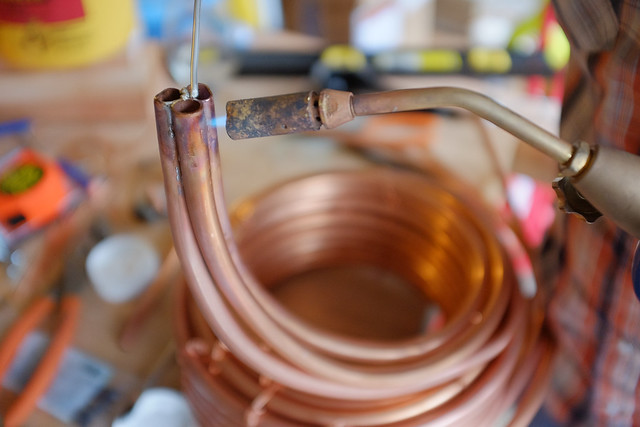
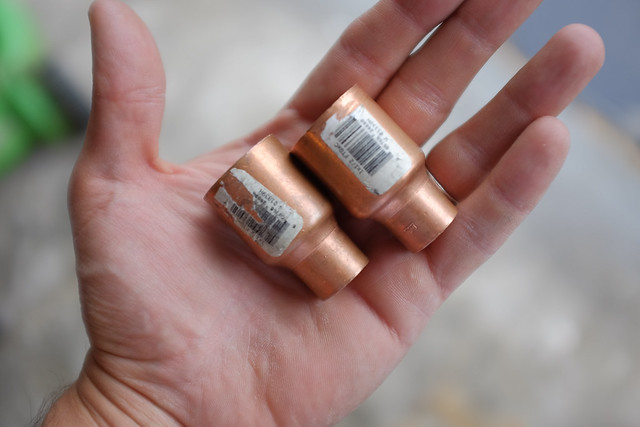
I tied the three pieces together with a 1" to 1/2" reducer I soldered to the ends, and then I sealed with silicon. I haven't leak tested yet. My backup plan is to create a manifold using a couple of T's and an elbow.

I don't have a tubing bender, so I wasn't able to get the two sides exactly where I wanted them, and I have one or two kinks, but I think this will work.

It is quite heavy, and I'm hopeful that it is quicker than my old setup (which was one 20' coil).

https://flic.kr/p/nEbSpt
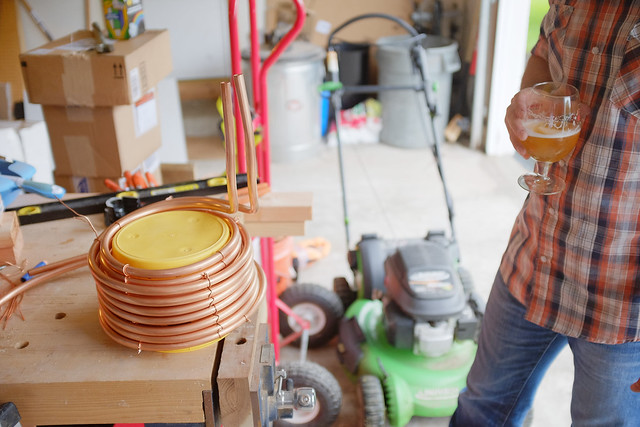
 
I recommend you test that silicone out before putting it in wort. You did a great job on the coils but I'm not sure you should trust the supply or exit. Also you shouldn't trust my recommendation since I think this is my first post


Sent from my iPhone using Home Brew
 
It looks good hopefully that kink doesn't mess with the cooling much. But it seems kinda tight doesn't it? Aren't the coils suppose to be open to allow more surface contact? But I use a plate chiller, so what do I know.
 
I will most definitely leak test before it sees the wort!!

I am a little worried about the kinks, but once you kink you can't go back.

In terms if separation, none of the coils are touching each other. That should allow the wort to contact all sides if each coil, which is what you want.
 
When I made mine I used a spring tube bender(cheap) to bend the in and out down and away from the pot so any leaks would drip on the ground. Sorry don't have pic's
 
If it doesn't leak; it will chill very fast. BUT, the time saved chilling will be spent cleaning it. I have
since left that road.
 
I'm hoping cleaning won't be too bad, a soak in some oxy clean should do it.

The bad news - it leaked. Plan b is to solder some copper wire in the gaps, maybe fill with some steel wool. Plan c is a manifold.
 
Man that sucks!

How about a pourable Epoxy ?

I don't find much cleaning needed after a brew. All of my coils are below the wort and never get any kinda Klingons on it. I just hose it off and maybe a light brushing where the risers stick outa the wort. Hope ya make it work.
 
Plan b was a success!! About 10 minutes away from finding out how well it works... It stopped the boil when I added it. My old one never did that.
 
And it worked like gangbusters. It worked so well I was shocked. I forgot to time it, but if it took 5 minutes to get from boiling to 65 degrees, I'd be shocked. My old one would take over a half hour, and wouldn't get it down to 65. I am beyond thrilled with this one!
 
Oh thats great. And amazing time it took to chill. I 'm going to make another IC and have been looking at the Jaded types.

Is that 3/8" tubing or 1/4" tubing? Yea man ya dropped a hunk of cold metal in that wort! LOL Did you do a 5 or 11 gal batch? I do 11 gal batches mostly.
 
Good to see this thread! Thanks for trying and sharing it with us.I was thinking of making something like that Hydra but wasn't sure where to start.

How was it for clean up after?
 
That was for a 5 gallon batch. I was amazed at how fast and well it worked. I used three 20' lengths of 3/8 inch tubing. Clean up was pretty easy - I shot some of the hot water into my MLT (cooler) and soaked it in there. Honestly, it didn't get too dirty.

The built process was pretty easy. Like I said, we used a 1 gallon buck as a form to wrap the tubing around.


Once the tubing was wrapped, we used the copper wire and weaved it between each coil to hold them in place and keep them separated.


We also tied the top and bottom coil of each outer layer to each inner layer.

Once all three layers were added, we cut each coil to length and soldered each of the three coils together.


We then used a couple of 1"x1/2" reducers and soldered these over each bundle of three tubes.


Then we soldered a length of 1/2 copper tubing on each reducer.

I initially tried to seal this with silicon, which didn't stick to the copper. Instead, we ended up cutting little pieces of copper wire, sticking them in the cracks, and soldered those into place using a ton of flux. After the first leak test, we had two small leaks so we added some additional pieces, and that sealed off any leaks.

Plan C was to make a manifold of sorts with each tube going into a copper T, and each T soldered together.

Overall, I am very pleased with how this turned out! The only other thing I'm going to do is add a 90 elbow on the top of each of the 1.2" copper tubes, and then I'm going to call it done!
 
Arent you limited by the input volume to begin with though?

If you take a 1/2" input and split it into three 1/2" tubes, your only going to end up with 3 tubes 1/3rd full of water no? So your only ending up with 1/3rd of each tube diameter actually chilling...which doesnt seem any more efficient than just having one 1/2" tube having water contact around the entire outer diameter of the single tube. I suppose if you could guarantee that that 1/3rd amount of water going into each tube is only coating the outer wall of the tube leaving a hollow area in the middle you'd see better cooling...

Or am i missing something?
 
Say you have a 1/2 inch solid, and split into thirds.
I see more surface area exposed to the coolant, but then again, I've been told I'm crazy as hell a few times.........;)
 
Arent you limited by the input volume to begin with though?

If you take a 1/2" input and split it into three 1/2" tubes, your only going to end up with 3 tubes 1/3rd full of water no? So your only ending up with 1/3rd of each tube diameter actually chilling...which doesnt seem any more efficient than just having one 1/2" tube having water contact around the entire outer diameter of the single tube. I suppose if you could guarantee that that 1/3rd amount of water going into each tube is only coating the outer wall of the tube leaving a hollow area in the middle you'd see better cooling...

Or am i missing something?

You end up with all three tubes full but with 1/3 the water pressure. Which is likely of benefit, being that most people lose efficiency with immersion chillers by having the water flow too high.
 
You end up with all three tubes full but with 1/3 the water pressure. Which is likely of benefit, being that most people lose efficiency with immersion chillers by having the water flow too high.

YES! For sure. Also keep the wort in motion and you will triple your chilling time!

Nice work!

Cheers
Jay
 
Arent you limited by the input volume to begin with though?

If you take a 1/2" input and split it into three 1/2" tubes, your only going to end up with 3 tubes 1/3rd full of water no? So your only ending up with 1/3rd of each tube diameter actually chilling...which doesnt seem any more efficient than just having one 1/2" tube having water contact around the entire outer diameter of the single tube. I suppose if you could guarantee that that 1/3rd amount of water going into each tube is only coating the outer wall of the tube leaving a hollow area in the middle you'd see better cooling...

Or am i missing something?

A couple things here.

First, its fed with a garden hose (5/8") into a 1/2" piece of copper, which feeds 3 3/8" tubes. A 1/2" tube has about twice the area of a 3/8" tube, so you're not losing much there.

Second, water (wort) contacts each tube all the way around. None of the tubes touch each other.

I'm not an expert by any means, but it seems to me that three shorter runs are better than one longer run, the reason being that the heat transfers pretty quickly. With three shorter runs, you are getting a larger volume of colder water, and ejecting the hotter water quicker.

That aside, my pot is 19" in diameter and only 12" high. One 60' tube would leave a good deal of the tubing above the wort, which is obviously bad!

Regardless of the theory, in practice it works really well. Like I said, went from boil to <65 in under 5 minutes. I'll time it next time.


great work, but that looks like a pain in the butt to clean

Not sure why people think this is hard to clean? Soak it in some hot water you collect from the cooling process, hose it down, you're good!
 
A couple things here.

First, its fed with a garden hose (5/8") into a 1/2" piece of copper, which feeds 3 3/8" tubes. A 1/2" tube has about twice the area of a 3/8" tube, so you're not losing much there.

Second, water (wort) contacts each tube all the way around. None of the tubes touch each other.

I'm not an expert by any means, but it seems to me that three shorter runs are better than one longer run, the reason being that the heat transfers pretty quickly. With three shorter runs, you are getting a larger volume of colder water, and ejecting the hotter water quicker.

That aside, my pot is 19" in diameter and only 12" high. One 60' tube would leave a good deal of the tubing above the wort, which is obviously bad!

Regardless of the theory, in practice it works really well. Like I said, went from boil to <65 in under 5 minutes. I'll time it next time.


Not sure why people think this is hard to clean? Soak it in some hot water you collect from the cooling process, hose it down, you're good!


I think its all those twisted copper wire bits...they are going to harbor a ton of crap..that said it shouldnt be that bad and your always adding your chiller doing the boil anyways ...
 
I think its all those twisted copper wire bits...they are going to harbor a ton of crap..that said it shouldnt be that bad and your always adding your chiller doing the boil anyways ...


If you put the chiller into the boil with 10 minutes left, you shouldn't have to worry about the crap on the coil. Bright side, it makes the copper all shiny again! Good work on this chiller!


Sent from my iPad using Home Brew
 
If you put the chiller into the boil with 10 minutes left, you shouldn't have to worry about the crap on the coil. Bright side, it makes the copper all shiny again! Good work on this chiller!

Yup, I always boil it for 15 minutes. After my first use, it came clean by just hosing it off. I should be brewing again this week, and this time plan to measure how long it takes to chill!
 
An update:

It took 6 gallons from 198 (I did a 12 minute hop stand) to 65 with 58 groundwater in 3:45. It used about 30 gallons of water in the process. It got to 68 at something like 3:10, the last few degrees took awhile. Either way, very pleased with the performance!!
 
An update:

It took 6 gallons from 198 (I did a 12 minute hop stand) to 65 with 58 groundwater in 3:45. It used about 30 gallons of water in the process. It got to 68 at something like 3:10, the last few degrees took awhile. Either way, very pleased with the performance!!

That is awesome. I just built a Hydra type chiller, or triple fed immersion chiller for my electric HERMS system and posted my build (see link below)
https://www.homebrewtalk.com/f51/electric-herms-custom-immersion-chiller-build-488144/

I hope to get similar results that have been posted on this thread. I'm thinking it should work great since it is a "rib-cage" design with about 85' of copper! My only worry is enough water getting through it. However, the city pressure is pretty good, and I don't think it will be a problem.
 
FuriousE - just curious if you had many of the materials on hand prior to your build? I bought all the materials, as well as the tools needed (minus the propane torch), and my build costs exceeded the price of an actual Hydra.
 
Back
Top