My Ugly Junk- Corona Mill Station...

Homebrew Talk - Beer, Wine, Mead, & Cider Brewing Discussion Forum

Help Support Homebrew Talk - Beer, Wine, Mead, & Cider Brewing Discussion Forum:

This site may earn a commission from merchant affiliate links, including eBay, Amazon, and others.
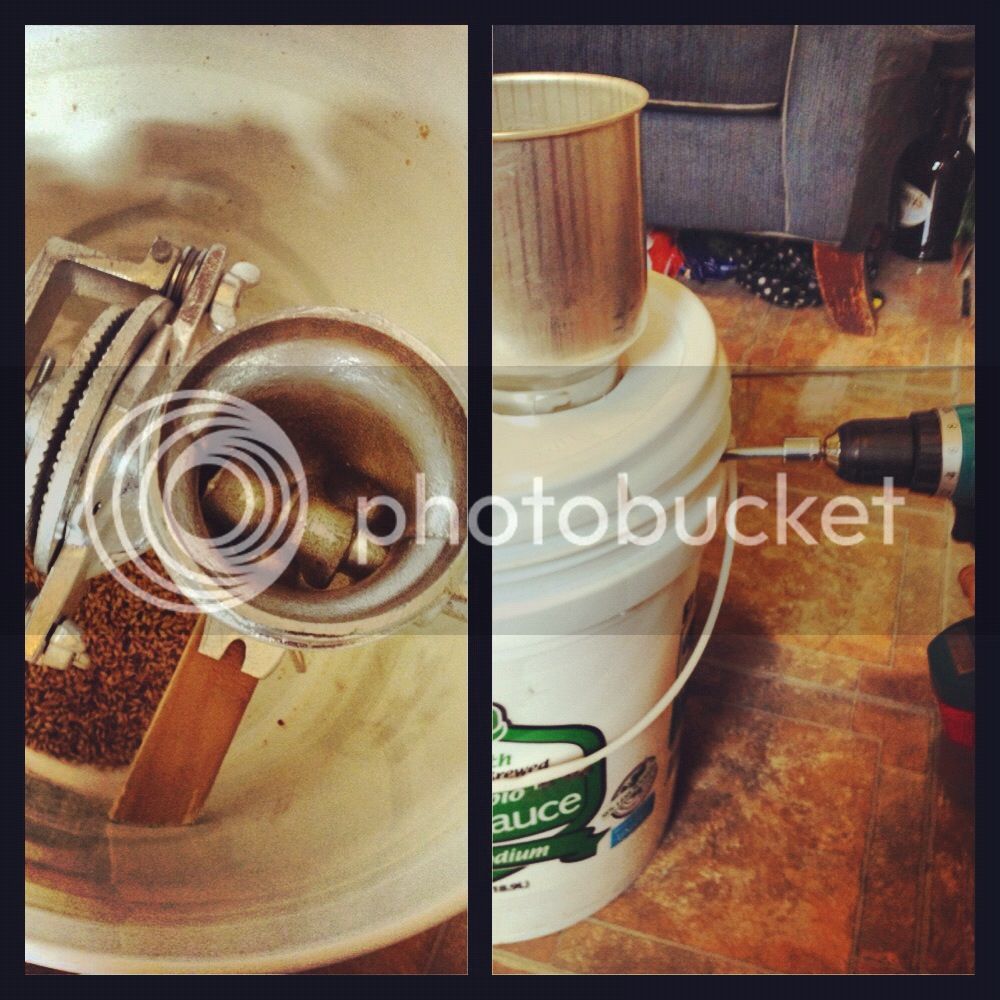
Done! A Victoria mill, hidden in a bucket. The top bucket is supported by over-the-door hooks (dollar store) so that I could store the bucket at the bottom of the bottom bucket to save space.

I used 2 washer on each sides of the c clamp. I removed the cutter pin and inserted a 1-1/4 in 8/32 bolt (1-1/2 bolt was scratching against the plastic deflector).

Also, I decided to leave the rotating disc wobling. Otherwise, at the disc was not parallel to the stationary disc. The grains take care of it while crushing.

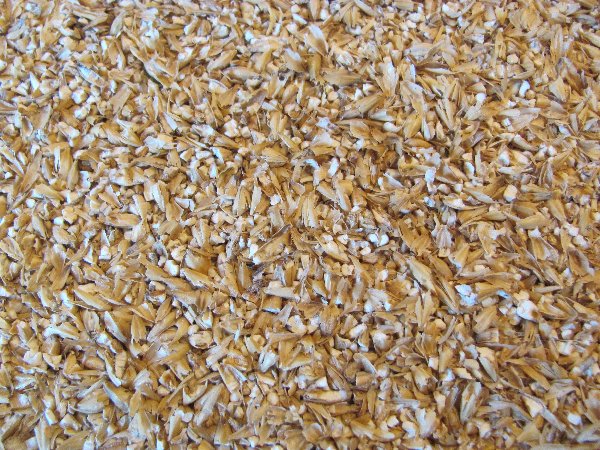
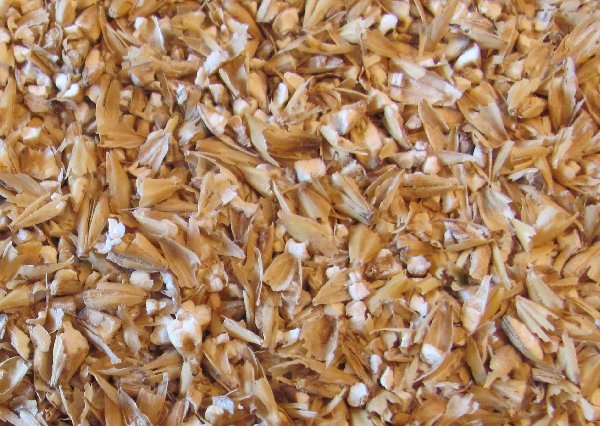
I obtained a very good crush by playing with the adjusting screw a bit. I will see this week end from the BG I'll get.

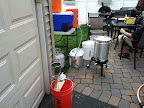
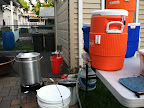
By the way, the strange thing to the left is my soon-to-be-retired pasta mill that milled only 20lbs before starting to generate shavings between the rollers and casing.... Too bad.

image-1127618297.jpg
 
I did not need to do any mods to my mill, no washers or bolt. It is good to go out of the box, i guess it was the lucky one of the bunch. Victoria by the way.
 
I used mine for the first time a couple weeks ago for my last brew session. I haven't had time to junk it up, so no pics yet. I used mine out of the box and just adjusted it until the crush looked ok. I had some friends over during the brew session and we sampled all my beers. So, after I got everything done and in the fermenter and pitched my yeast, my wife then asked if I took a gravity reading. Well, apparently I had sampled too much to remember to take an OG reading. So, I don't know what my efficiency will be. I'll have to measure on the next batch. But, it was easy to crank out 13lbs by hand. Though, it will be nice when I get the drill setup and can burn through the milling. I will try conditioning my grain too for the next and see if that makes a difference
 
I hate to break the love fest going on here but I hate my corona mill. I have a very old corona that has stones instead of the metal plates and I get a TON of flour with it. I still use it to grind my grain but either I find a regular corona or buy a roller mill I think.

Stupid mill is no good for grinding wheat into flour either. I spent half a day hand grinding 6 cups for bread one time. I will not do that either again unless I am dang hungry :D
 
Those stones are intended to be a flour mill... right? The Burr plates are for cracking grains as in our application. Whoever you got it from probably had been using it to actually make flour.
 
Well it was supposed to crack corn from what I have been able to find about it. It works and let me tell you I get some righteous efficiencies with it but even with LOTS of rice hulls I am right on the ragged edge of stuck sparges.

I like having it because the power where I live goes out sometimes for a day or three and it is kind of cool to think I could brew my beer with out any power.
 
:confused:I love my Corona... with a nice low speed Drill hooked a nut.. this makes it very easy. I also get rediculous efficiency :ban: but am too on the cusp of suck sparges every batch. :cross:

I only hand cranked, my adjunct grains .5# 1# max using human crankage.... get a drill! :eek:nestar:

"Just put the finishing touches on my bucket in a bucket and gonna hand crank 16# for a pliny clone"

cant even imagine how long this took?
I just realized i never posted pics of mine.. def. forum inspired.

Only good one i had.. i'll take a nice shot on my next brew day.
IMG_1123.JPG

There it is in the background.. resting..
IMG_1121.JPG
 
Well it was supposed to crack corn from what I have been able to find about it. It works and let me tell you I get some righteous efficiencies with it but even with LOTS of rice hulls I am right on the ragged edge of stuck sparges.

I like having it because the power where I live goes out sometimes for a day or three and it is kind of cool to think I could brew my beer with out any power.

Try conditioning your malt before grinding. It really does wonders for keeping the husks intact. I started doing it my last few batches and although I wasn't getting stuck sparges before, it just looks "right" now.
 
I brewed today and used my Victoria for the first time. It went fast, I just needed to readjust for the malted wheat. Overall I got 80% efficiency from a batch sparge! I'm good with that result. As some said, I don't see why I would pay for a roller mill... Thanks to all of you who shared their ideas.
 
Just made one of these with some advice and tips from here. Pretty stoked on the outcome. Crushed through the 11 pounds of malt we had lined up for it. Wasnt too hard to get it tweaked either. Great modification.
IMG_1966_zps7b46caa2.jpg
 
Heres the beauty. $30 mill, home depot bucket, hose clamps, few screws and a scrap of 2x6. The crappy mill had the handle screw drilled at a horrible angle, couldnt use a straight screw to drill as it bucked all over. Used the inside vinyl tube from my toilet hose that i took the stainless braid from for my MLT. After 10 pounds the vinyl is twsting. I think another tube with stainless left on will do the trick. Also drape it in a little tinfoil when milling to keep it all contained.

Cheers

grainmill.jpg
 
The stainless braid should give it the strength it needs but heres the idea, worked great to keep the wobble of the uneven screw down.

twist.jpg
 
I went to my LHBS to pick up supplies for a Cocoa Kona Stout and grind the grains there on their Drill-powered Barley Crusher mill.

Showed up and the drill was gone and the employee told me someone broke it... Long story short, ended up grinding 15 lbs. of grain by hand.

That made me seriously rethink purchasing one of these bad boys. I am sure the experience would have been better with a pint full of homebrew but such was not the case. Although when I made it home and started brewing 3 pints of my Irish Red Ale went down the hatch before I hit a boil haha.
 
Just ground 17.5 lbs yesterday by hand. Was great fun, don't really mind hand cranking. Once I got to 10 gallon batches though this may change...
 
I hate to break the love fest going on here but I hate my corona mill. I have a very old corona that has stones instead of the metal plates and I get a TON of flour with it. I still use it to grind my grain but either I find a regular corona or buy a roller mill I think.

Stupid mill is no good for grinding wheat into flour either. I spent half a day hand grinding 6 cups for bread one time. I will not do that either again unless I am dang hungry :D


I believe the mills with stones are specifically designed for making flour, not grinding course.
 
My ugly junk mill that I just put into a bucket. I wish I would have came back and looked at some of the more inventive ideas on this thread first. Love this thing!

corona mill complete.jpg
 
The great thing is that there are a multitude of ideas, and in the end they almost always work! I've got mine setup the same way. Even though there are other tweaks I've come across, I haven't been unhappy enough with my results to change anything. I either run my cordless drill slow enough to not throw the grain, or if I grind a bit faster I drape an old BIAB mesh bag around the top and go to town. Keep on brewing!

Ibrewaletx said:
My ugly junk mill that I just put into a bucket. I wish I would have came back and looked at some of the more inventive ideas on this thread first. Love this thing!
 
This is a great thread! I'm only about one quarter of the way through it, but have learned a lot about Corona mills.

My Discount Tommy Corona knock-off showed up on Friday and I spent some time over the weekend setting it up . . . as much as it can be set up. The Discount Tommy "500" model Corona mill is a total POS! Comparing it to photos of other knockoffs posted in this thread, the Tommy mill could be the worst of the bunch. It doesn't have any flat and/or square surfaces . . . none! But, it's biggest problem is that the bearing hole for the end of the auger shaft that goes into the adjustment bracket (with the thumb screw and wing nut) is waaaaaaaay oversize. The hole is easily 1/8" larger than the diameter of the auger shaft that goes in it, so as you crank the handle, the end of the shaft in the bracket clanks around in the bearing hole. This makes any attempt to square up the grinding plates a total waste of time. So, as many others have done, I opted to let the rotating plate float rather than trying to tightly square it up with the fixed plate. That seems to have worked, as the wobble allows the grinding plates to self align (somewhat) when they're crushing grain.

FWIW, here's the result of my initial set-up. This is a pic of the grind I'm getting with the plates spaced a little less than the thickness of a penny . . .

corona-mill-crush-test-1-59255.jpg


Here's a close-up of the same grain . . .

corona-mill-crush-test-2-59256.jpg


As a complete novice at this milling stuff, I'd appreciate any constructive comments about this crush. Should I crank down the plates a little more and go for a finer grind? Are the husks OK or do they look shredded? With this setting, there's very little un-crushed grain, but I know the goal is to have 100% crushed grain.

Thanks again for all the great info in this thread. I'll keep reading and learning.


Jack

You're about where I was when I started over three years ago (I am also the proud owner of Discount Tommy's "Victoria 500" POS). It's a good start, but I'm seeing some grains that aren't crushed, and those chunks can be smaller. As "wilserbrewer" told me after I started, "crank it down until you're scared." I would only add "- and then give it another quarter turn." You're not going to get a stuck sparge just because of a little flour.
 
Last 2 times i brewed, i got a stuck sparge because of a little flour... I am going to back off of the spacing to reduce the amount of flour, but am concerned about efficiency. The last time I was at 70% and happy. I buy grain by the 50lb bag and am not really concerned about dropping efficeincy to 65%, but would rather not.
 
Last 2 times i brewed, i got a stuck sparge because of a little flour... I am going to back off of the spacing to reduce the amount of flour, but am concerned about efficiency. The last time I was at 70% and happy. I buy grain by the 50lb bag and am not really concerned about dropping efficeincy to 65%, but would rather not.

What's your setup for sparging? I use a Bargain Fittings braid kit in a cooler, and don't really have any problems, even cranked down.
 
You're about where I was when I started over three years ago (I am also the proud owner of Discount Tommy's "Victoria 500" POS). It's a good start, but I'm seeing some grains that aren't crushed, and those chunks can be smaller. As "wilserbrewer" told me after I started, "crank it down until you're scared." I would only add "- and then give it another quarter turn." You're not going to get a stuck sparge just because of a little flour.


Thanks for the feedback on my test grind. Glad to know I didn't do anything really bad. I'll crank down the plates and give it another try. Would it be OK to run the sample batch through the grinder again to crush some of the larger chunks into smaller pieces?


Jack
 
Last 2 times i brewed, i got a stuck sparge because of a little flour... I am going to back off of the spacing to reduce the amount of flour, but am concerned about efficiency. The last time I was at 70% and happy. I buy grain by the 50lb bag and am not really concerned about dropping efficeincy to 65%, but would rather not.

Were you using a lot of wheat? Just like rico567, I use a stainless steel braid in a cooler and have had only 1 stuck sparge 20+ batches with my corona. And I grind pretty finely, lots of flour. Recently I started conditioning my grain, just for kicks, and it has reduced the husk shredding considerably.
 
Thanks for the feedback on my test grind. Glad to know I didn't do anything really bad. I'll crank down the plates and give it another try. Would it be OK to run the sample batch through the grinder again to crush some of the larger chunks into smaller pieces?


Jack

I've read people who say they've reground their grist, but never done it myself.
 
Thanks for the feedback on my test grind. Glad to know I didn't do anything really bad. I'll crank down the plates and give it another try. Would it be OK to run the sample batch through the grinder again to crush some of the larger chunks into smaller pieces?


Jack

I just did my first batch through a POS Weston mill. Looked a lot like your pictures. Decided to run it through again at a finer setting. Quite a bit of flour but no stuck sparge and about 75% eff. Using a cooler with toilet line SS braid.
 
I used mine for the first time today finally. Did 8.5 lbs through it by hand. It took a little longer than I thought it would but it wasn't too bad. It looked like a pretty fine crush but I had a real smooth sparge going and it didn't stick. We'll see how things turn out.
 
I have mine cranked down pretty good, I would say a fair amount of flour. I cranked it down until I had no intact grain. I have a direct fired MLT and use a pump to recerculate the mash. As long as I keep the pump output turned down I don't compact the grain bed to bad and if flows good, if I pump it wide open it will slow or stop the output of the pump from the bed compacting. I do stir the mash every 10 to 15 minutes and when sparging I turn the output down to a pretty slow rate. No stuck sparges for me as of yet and that might be 20 to 30 batches.
I am very happy with mine, I have made some modifications to my bucket in a bucket setup that I haven't posted pictures of and at some point will do that. basically changed the top bucket cover with a new one and added a 5 gal water bottle as the hopper, no more stopping the drill to refill the hopper with grain.
My MLT is a keggle with a false bottom from my original setup, a round cooler.
 
This is the correct approach- don't be afraid to crank this mill down until you find a grist that works for your setup. It can always be changed.
 
Question for a newbie. Is the outside girding plate supposed to spin when rotating? Or should it be tight enough so that does not spin.
 
Back
Top