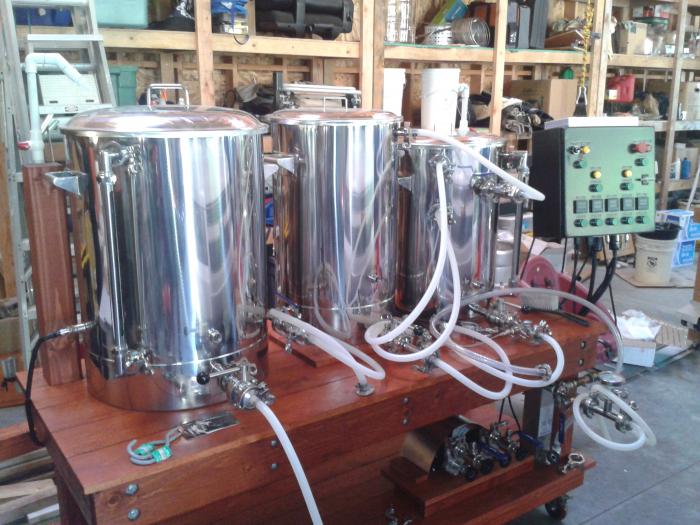
E-Herms Build 50 amp

Homebrew Talk - Beer, Wine, Mead, & Cider Brewing Discussion Forum

Help Support Homebrew Talk - Beer, Wine, Mead, & Cider Brewing Discussion Forum:

This site may earn a commission from merchant affiliate links, including eBay, Amazon, and others.
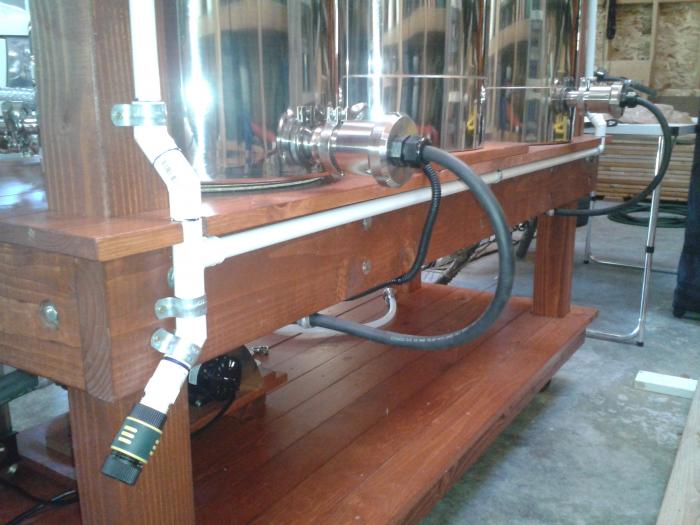
I finally ran some PVC water lines on the back side of the stand and ran the all of the power cords beneath. Now I just need to calibrate the sight glasses and make sure everything is buttoned up. I will post a bunch of pictures soon.
 
Cheez, what size are your Stout Tanks? I read the entire thread so sorry if I missed it.

30 gal BK, 20 gal HLT, & 20 gal MT. I plan on doing 15 gallon batches so a 20 gal BK would have been pushing it for higher gravity brews. I really wish they, or anyone for that matter, offered a 25 gallon BK as that would be perfect for 15 gallon batches. Unfortunatley, this 30 BK may be too big to use for 5 gallon batches.
 
Thanks, my long range plans are for a 20 BK, 20 HLT and a 20 MT. I want to be able to brew from 5 gallons to 15. I am concerned though if 5 gallons will work, but if it works for you it will for me.
 
Thanks, my long range plans are for a 20 BK, 20 HLT and a 20 MT. I want to be able to brew from 5 gallons to 15. I am concerned though if 5 gallons will work, but if it works for you it will for me.

A 20 gal BK will really pushing it for 15 gal batches. I hope to do a test run within the next couple of weeks and I'll see if 5 gal is doable in my huge kettle.
 
A 20 gal BK will really pushing it for 15 gal batches. I hope to do a test run within the next couple of weeks and I'll see if 5 gal is doable in my huge kettle.

Might I suggest Fermcap-S if you feel that boilovers are a serious concern?
 
Might I suggest Fermcap-S if you feel that boilovers are a serious concern?

I use that stuff and love it. I just think a 20 gal BK is pushing it for 15 gal batches, especially for a 90 minute boil and massive hop additions
 
I currently use a keggle. My last batch was a 13 gallon Saison. I filled it up to 14.5 gallons and boiled down to 13. Now, that would not have been possible without fermcap, and I did not have big hop additions. It was a challenge, but I do not do brews that big very much.
 
Thanks, my long range plans are for a 20 BK, 20 HLT and a 20 MT. I want to be able to brew from 5 gallons to 15. I am concerned though if 5 gallons will work, but if it works for you it will for me.

Sorry Cheez, don't mean to hi-jack, just adding some input. Looking at the dates, I'm willing to bet my stout tanks came in the same shipment as yours...just drove down to pick them up a few weeks ago.

Anyway, I went with all 20 gallon kettles. The reason behind that is I primarily brew 5 gallon batches but occasion to go larger. I intended to buy the 15 gallon size but then I saw that the diameter of the 20 is the same as the 15 and the price for the extra capacity was not much higher so it made complete sense to add cheap capacity as it wasn't going to impact brewing smaller batches. The 30 gallon kettle increases the diameter so that I figured that would negatively impact my ability to brew 5 gallon batches.
 
No problem. I got about 99% of my build ideas from this forum so the least I can do is return the favor.

I got 1/2" x 1-3/4" plastic tags with beveled edges, white lettering on a black background, 1/8" tall letters, Arial Black font, and double sided tape.

Cost for 28 tags including shipping was just over $50.

I need to order some tags too. Did you upload a list of all the tags you want or did you add them individually?
 
I just e-mailed them a spreadsheet list.

Cool thanks, will have to get on top of that this week. 6 week old colicky son is making it hard to get the brew stand parts cut and welded so I have time yet. We will have to compare notes on Stout Tanks when we get an actual brew in.
 
Cool thanks, will have to get on top of that this week. 6 week old colicky son is making it hard to get the brew stand parts cut and welded so I have time yet. We will have to compare notes on Stout Tanks when we get an actual brew in.

I've had everything almost ready to go for a couple of weeks now. Self-employment and two kids takes up some time :) All I need to do is calibrate the sight gauges and then I can do a test run. That better happen this weekend!
 
I've had everything almost ready to go for a couple of weeks now. Self-employment and two kids takes up some time :) All I need to do is calibrate the sight gauges and then I can do a test run. That better happen this weekend!

Wish I could brew, shiny new kettles ready to go and no place to put them. Got an hour to start doing some welding the other night and the breaker kept popping and made my welds look like hell...so off to the hardware store to get a new one and hope that is the problem. Anyway, good luck on your trial run, I will hopefully be welding instead. Let me us know further likes/dislikes with the stout tanks.
 
I finally did a couple of test runs on the new system with water over the past week. One of the PID controllers went bad and Aubers replaced it within just a few days. Then I noticed one of the Auber RTD sensor tri-clover fittings was leaking so they will be sending out a replacement today. Aubers has been top notch on customer service!

Here are my inital thoughts and comments on the Stout and electric system:

1) The butterfly valves bottom out on the brew stand so I had to raise the MLT and HLT. You would think that butterfly valves and kettles from Stout tanks would work together...

2) I definitly cannot do a 5 gallon batch with the 30 gal kettle. The RTD sensor would be above the wort level and the element would only have a couple of inches of wort over it. So, I had a 1.5" tri-clover bung welded onto the back of my old keggle and I installed a weldless 1/2" NPT thermowell on the side to use for batches smaller than 10 gallons. Cheap and easy. Iwould think a 25 gal BK would be a popular option for people that want to brew 1/2 bbl batches. A 20 gal would have been too small for me and this 30 gal is too big.

3) Autotune on the 2352 PID worked like a champ. It only took about 15 mintues to do it's thing and it works it's magic very well.

4) I wish there was a way to hang the kettle lids. I needed an extra table just to put the lids on.

5) I have a 5,500w element in the HLT which works great. It takes about 40minutes to heat up 20 gallons of 62 degree water to mash strike temps. I originally had a 4,500w element in the BK but found that it didn't have a very vigorous boil, even with the PID set to 100% in manual mode. I switched to a 5,500w element and it seems to do a better job, plus this element is a couple of inches longer so it reaches out further. It boils just fine but it doesn't really stir up the wort like having propane heat blasting the entire bottom did. There is kind of a dead zone on the opposite side of the kettle from the element if that makes sense. Kind of like a dead zone inside of the hop spider. Regardless, it brings it to a boil which is what really matters.

6) My original plan was to collect all of the plate chiller cooling water into the HLT for use in cleaning the system when done brewing. Even with the 30 plate Dudadiesel chiller, I quickly fill up the HLT when trying to cool 10 gallons of wort down. So, I need to come up with an easy way to get rid of the cooling water once the HLT is full. I may just scrap trying to collect it at all and run a garden hose out into the lawn like I did before. I really don't want to have to worry about switching stuff over in the middle of moving wort into the fermenters.

7) I really like how the water plumbing turned out. I simply reach over and turn a valve to fill up the BK or HLT. I put a quick disconnect on this and also near the plate chiller cooling water inlet.

8) I have had no priming issues with the center inlet Chugger pumps. I had a lot of priming issues with my side inlet March pump, even with a Watts vent on the outlet. I know the Chugger and March specs. are similar, but it seems like the Chugger's pump at a higher rate.

9) The 3/8" (I believe that's the size) HERM's coil restricts flow to a point where I should be able to simply leave the outlet valve wide open during mash recirculation. I was worried that I would have to constantly mess with this valve to obtain a certain recirculation rate.

10) The whirpool inlet on the BK is practically worthless. I had about 16 gallons of water in there and had short hose runs to/from the Chugger pump. It may eventually move junk to the center but I gave up after 5 minutes. I may still use this inlet to recirculate through the chiller after boiling. I have the hop strainer from Chad that will keep most of the hops out anyway.

11) I am glad I went with two Aubers timers. It nice to have one dedicated to the boil kettle and the other for either hop additions (if doing a single batch) or as a mash timer when doing back-to-back batches.

12) I would give the overall quality of the Stout kettles a B grade. Most of the inlets, outlets, ports, etc. are not lined up with each other horizontally and/or they are welded to the kettle at a slight angle. The angle is really noticable when you have the length of a valve, tee, and then hose barb coming out. The false bottom was slightly warped but nothing I couldn't fix with a little muscle. The thing that really peeves me is having to raise the MLT and HLT for the ball valve body to clear the stand.

13) The EPDM tri-clover gaskets from brewershardware really stick to the tri-clovers. There were a couple of times I really had to pry to get the connection apart. They are supposed to have a heat range up to 300 deg so I'm not sure what is going on. I may see if brewershardware will switch these out for the silicone ones.

I think that's it for now. I plan on brewing for real this weekend. Off to start on the yeast starter...

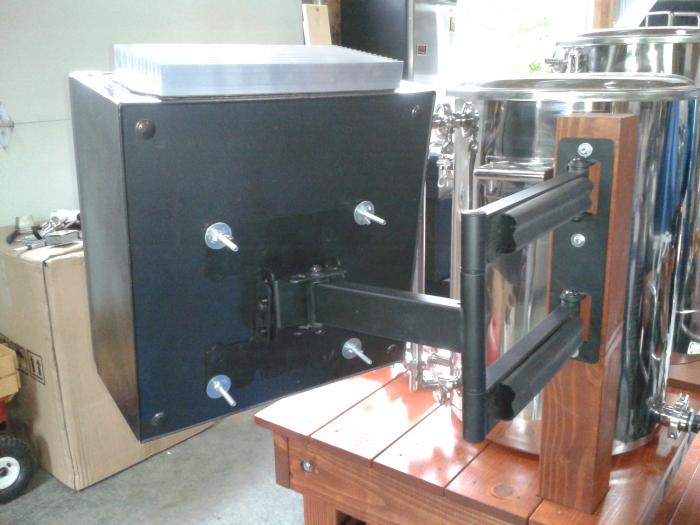
2013-06-20 17.36.08.jpg


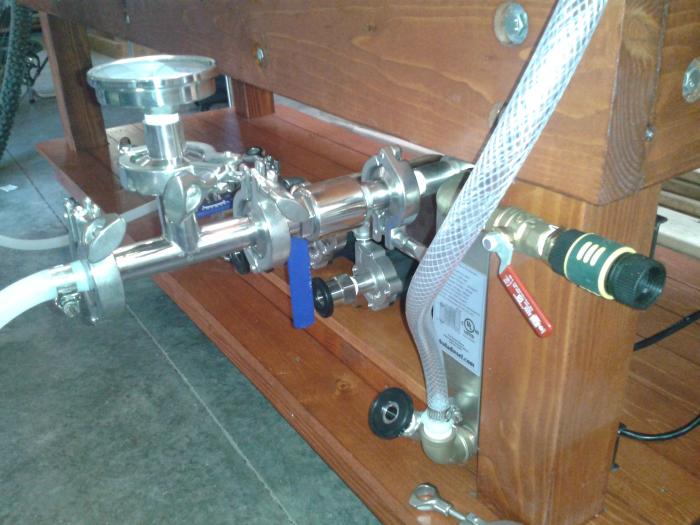
2013-07-18 18.04.55.jpg


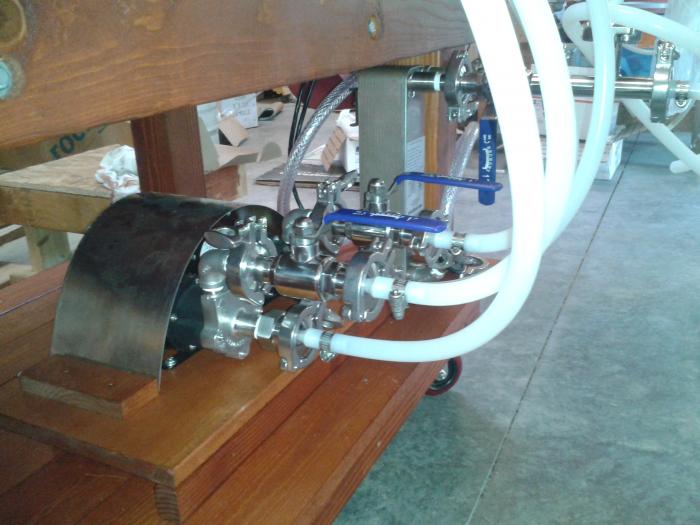
2013-07-18 18.18.58.jpg


2013-07-18 18.05.16.jpg


2013-07-18 18.08.33.jpg
 
Good feedback on your trial runs...I didn't think about the lids, I will have to add a lid rack of sorts to my brewstand. Too bad about the tangential not working, I hope it is better in the 20 gallon as I was looking forward to that feature and would rather not have paid for something that is functionally useless, that means it was just added as a gimick to entice the sale. If you ever jump onto the probrewer forum and read what they have to say about whirlpooling, plenty of them argue that it is better hand whirlpool on small systems (to them that means 7-10 barrel systems) for a number of reasons. At least on the homebrew scale we don't need a boat paddle to get the whirlpool going :).

I noticed the same thing you did with the butterfly valves, on the 20 gallon kettles they too do not clear, something I would find highly annoying if my valving did not overhang the edge of the stand making it a non-issue for me.

What is your strategy for cleaning and clearing grain from the MLT?
 
It sounds like your pump isn't powerful enough to whirlpool. You can also try running your two pumps in tandem.
 
Good feedback on your trial runs...I didn't think about the lids, I will have to add a lid rack of sorts to my brewstand. Too bad about the tangential not working, I hope it is better in the 20 gallon as I was looking forward to that feature and would rather not have paid for something that is functionally useless, that means it was just added as a gimick to entice the sale. If you ever jump onto the probrewer forum and read what they have to say about whirlpooling, plenty of them argue that it is better hand whirlpool on small systems (to them that means 7-10 barrel systems) for a number of reasons. At least on the homebrew scale we don't need a boat paddle to get the whirlpool going :).

I noticed the same thing you did with the butterfly valves, on the 20 gallon kettles they too do not clear, something I would find highly annoying if my valving did not overhang the edge of the stand making it a non-issue for me.

What is your strategy for cleaning and clearing grain from the MLT?

I was thinking about adding a few hooks from the stand to hang the lids from. I was also thinking about mounting a multi. garden tool (shovel, rake) hook thingy to the wall to hang hoses from.

I plan on using an ice machine scoop or a small bucket to scoop the grains out of the MLT.

I forgot to attach my brewing process guide so here it is. I know I will be tweaking it after a few brew sessions.

View attachment Brewing Process 1.pdf
 
13) The EPDM tri-clover gaskets from brewershardware really stick to the tri-clovers. There were a couple of times I really had to pry to get the connection apart. They are supposed to have a heat range up to 300 deg so I'm not sure what is going on. I may see if brewershardware will switch these out for the silicone ones.

It's not the heat, because the EDPM rings can really stick on my conical as well. The 4" ring sometimes takes a large flathead screwdriver to pop free.
 
It sounds like your pump isn't powerful enough to whirlpool. You can also try running your two pumps in tandem.

It's definitely due to the pump. I was just hoping that a homebrew scale pump would work for whirlpooling a homebrew scale kettle. I know I'm not going to buy an industrial size pump just to whirlpool with :)

One thing I may try next time is to start a whirlpool with my mash paddle to see if that will give the pump a jump start. Worst case I will use my mash paddle to whirlpool with like I have for the past few years. It keeps me in shape :mug:

EDIT: I don't think it's worth it to me having to buy two wye fittings, more valves, and more clamps and gaskets to make a parallel pump setup work. It would be more fittings dangling off my already long BK outlet and more off the tangential inlet.
 
It's not the heat, because the EDPM rings can really stick on my conical as well. The 4" ring sometimes takes a large flathead screwdriver to pop free.

Yeah, I feel like I'm going to snap off one of the welds on the kettle trying to pry apart two TC fittings. It really surprised me the first time. They also leave behind a little residue on the surface of the TC.

I shouldn't have to use a ton of force to undo these fittings so I may try the silcone ones.
 
I learned the hard lesson on epdm gaskets also. The silicone ones are much better, they can cling sometimes but they are far easier to release.
 
I was thinking about adding a few hooks from the stand to hang the lids from. I was also thinking about mounting a multi. garden tool (shovel, rake) hook thingy to the wall to hang hoses from.

I plan on using an ice machine scoop or a small bucket to scoop the grains out of the MLT.

I forgot to attach my brewing process guide so here it is. I know I will be tweaking it after a few brew sessions.

Any reason why you are pumping into the bottom of the herms coil? I originally mapped my process like that than I realized I would be asking my pump to push uphill through around 25' (or however long it is) of coil so I changed it to pump into the top and let gravity take it down the coil. But, I won't get to fire up the system for some time, so it is all ideas in my head and not yet practical knowledge.
 
Any reason why you are pumping into the bottom of the herms coil? I originally mapped my process like that than I realized I would be asking my pump to push uphill through around 25' (or however long it is) of coil so I changed it to pump into the top and let gravity take it down the coil. But, I won't get to fire up the system for some time, so it is all ideas in my head and not yet practical knowledge.

No reason at all. It seemed to work just fine during the test run. I may switch it as it would make the hoses line up (less tangled) better.
 
Any reason why you are pumping into the bottom of the herms coil? I originally mapped my process like that than I realized I would be asking my pump to push uphill through around 25' (or however long it is) of coil so I changed it to pump into the top and let gravity take it down the coil. But, I won't get to fire up the system for some time, so it is all ideas in my head and not yet practical knowledge.

I don't think it will matter much at all to the pump. The length of the coil isn't changing no mater what end you pump into, so that loss won't change. The added head pressure by pumping into the bottom will be very small since it's based on height at not the length of tube traveled. So, If the HERMS coil is only, say 1 foot, then the added head pressure is only an additional 0.434 PSI I think a March 809 or chugger could handle that unless the coil itself is really high in relation to the pump. Would you concur sir?
 
I don't think it will matter much at all to the pump. The length of the coil isn't changing no mater what end you pump into, so that loss won't change. The added head pressure by pumping into the bottom will be very small since it's based on height at not the length of tube traveled. So, If the HERMS coil is only, say 1 foot, then the added head pressure is only an additional 0.434 PSI I think a March 809 or chugger could handle that unless the coil itself is really high in relation to the pump. Would you concur sir?

The head pressure created by gravity is the same whether pumping to the top or the bottom of the HERMS coil, as it is indeed based upon height. The liquid flowing through the coil creates friction, so additional head pressure, whether traveling up or down. The liquid either flowing up or flowing down through the line from the top of the HERMS coil also creates friction, so additional head pressure.

While I'm sure that it doesn't matter in practical terms, and because it is a closed system I don't think it is even different in theoretical terms, I'm far enough away from my physics classes that I cannot be certain on the latter. Any physics guys want to answer definitively?
 
Bensiff said:
Any reason why you are pumping into the bottom of the herms coil? I originally mapped my process like that than I realized I would be asking my pump to push uphill through around 25' (or however long it is) of coil so I changed it to pump into the top and let gravity take it down the coil. But, I won't get to fire up the system for some time, so it is all ideas in my head and not yet practical knowledge.

Shouldn't matter. It's the height "head" of the pump. While its coiled through 25' of tubing, the diameter is small, so the velocity through the coil should be fast, and the coil will only be a foot or so tall. Correct me if I am wrong, I haven't read the whole thread, and been awhile since I had physics.
 
jeffmeh said:
The head pressure created by gravity is the same whether pumping to the top or the bottom of the HERMS coil, as it is indeed based upon height. The liquid flowing through the coil creates friction, so additional head pressure, whether traveling up or down. The liquid either flowing up or flowing down through the line from the top of the HERMS coil also creates friction, so additional head pressure.

While I'm sure that it doesn't matter in practical terms, and because it is a closed system I don't think it is even different in theoretical terms, I'm far enough away from my physics classes that I cannot be certain on the latter. Any physics guys want to answer definitively?

Fluid dynamics is a more accurate class that would cover this subject matter, but I'm about 12 years removed from that class, but design closed loop recirculating cooling systems at work. So I'm pretty certain that this is correct.
 
Fluid dynamics is a more accurate class that would cover this subject matter, but I'm about 12 years removed from that class, but design closed loop recirculating cooling systems at work. So I'm pretty certain that this is correct.

Fluid dynamics was about 20 years ago for me :cross: The above responses are all spot on in my book. The bottom line is that it works how I have it set up.
 
Fluid dynamics is a more accurate class that would cover this subject matter, but I'm about 12 years removed from that class, but design closed loop recirculating cooling systems at work. So I'm pretty certain that this is correct.

This is all very interesting to me as I'm going off of a little knowledge and a lot of assumption...just one of those things that doesn't matter much so why research if there is no problem either way.

But that does make sense when you guys explain it, while it takes more effort to push something straight up compared to pushing it up a slow curve, less friction it is still the same amount of energy and since in this system it has to go through the herms coil either way the friction will ultimately be the same. Correct?

Alas, I'm still going to hook my pump up to the top of the coil though for my other reason...my process is almost the same as Cheez's so when I do the pump switch over between the mash and sparge steps (Cheez's steps 5 and 6) I don't want to have 25' worth of coil drain hot sticky wort all over the floor. I'd rather save that disconnection for when the coil is filled with hot water.
 
That whirlpool is so fast it may well be ineffective. I pulled some notes out that I have gathered from pro brewers so hope they help. Whirlpool 3-6 rpm max and an inlet speed of 2-3.5m/s depending on fittings being used on a large system. I was helping a friend on a 7bbl system once and he specifically pointed out how slow a proper whirlpool looks. Obviously 2m/s on a homebrew scale is too fast an inlet speed; but, the rpm is scalable. The other things I have gleaned is that you only need to whirlpool long enough to get it stabilized, you don't need a 20 minute whirlpool, 5 will work fine and then let it rest. Max rest time before cooling according to the pros I have talked to is 30min for ales and 20min for lagers or you risk DMS issues.
 
If you pump bottom to top wouldn't you reduce air bubbles as the air is pushed up and out? I know the discharge on the pump should be higher then the intake for this reason, not sure if that is an issue here.
 
If you pump bottom to top wouldn't you reduce air bubbles as the air is pushed up and out? I know the discharge on the pump should be higher then the intake for this reason, not sure if that is an issue here.

Perhaps the pump impellers aren't designed to run with liquid coming in at pump pressures so subsequent pumps in the series are causing a cavitation?
 
I finally brewed my first batch on this new system yesterday. I did switch my HERMS in and out as it made the hoses a little less tangled.

Two things:

1) The tangential inlet and chugger pump whirpools just fine. It didn't look like it with the test run using water but after whirpooling for about 10 minutes there was a nice concentrated cone of junk in the middle of the kettle. Nice!

2) I heated up mash strike water in the HLT to 166 deg (calculated from both BeerSmith and from my brewing spreadsheet to hit a target mash temp. of 155), transferred 10.5 gallons to the MLT, and added grains. I started the HERMS recirc. and for whatever reason my mash temp was only 145 at the start. I did two things - 1) added about another gallon of 166 deg strike water to the MLT and 2) raised the temp. of the HLT to 175. It took 30 minutes for the mash to go from 145 to 155. So, I was only at my target mash temp. for about 15 min. before it was time to start raising the the HLT to mash out temp (168 deg). It took about 20 minutes to raise the mash temp from 155 to 168, which seemed reasonable. I played around with the recirc. valve position but settled on wide open (which isn't much of a flow rate after going through the 3/8" HERMS coil).

Worse case my winter ale will be a little on the dry side. I can't complain as that was the only crappy thing to happen. It took about 5-1/2 hours from start to finish which is just a little longer than it took on the old system. I suspect this will reduce after I get used to this new setup. It took about 1/2 hour longer to clean up. Part of this was from being more particular about taking care of the new equipment. I didn't care as much with my old beat up kegs :)

My mash eff. was 83% which isn't bad. I was used to getting 90% on average with my old system. I missed my pre- and post-boil gravities by only 1 point so I was stoked about that.

I absolutely love the near silence of the electric system. I could listen to the radio, talk on the phone, etc. Propane is strictly for the BBQ again :ban:
 
I brewed another batch on Sunday and got a lot closer to hitting my target mash temperature right off the bat. After my first batch I realized I didn't account for the initial heat losses in the stainless steel mash tun in my spreadsheet or in beersmith. I had a rubbermaid cooler for my old mash tun so it didn't lose as much heat up front as the new tun.

On this batch I got just over a 90% mash efficiency, I was over my target OG by 2 points, I collected the exact volume I wanted in the fermenter, and I shaved about 1/2 hour off the first brew day. So, I'm back to about where I was with the old system but am much happier with this one! It will be nice to have consistent mash temps. Now I'm saving some dough for a conical and freezer.

Thanks again to everyone who helped make this happen :mug:
 
cheez said:
I brewed another batch on Sunday and got a lot closer to hitting my target mash temperature right off the bat. After my first batch I realized I didn't account for the initial heat losses in the stainless steel mash tun in my spreadsheet or in beersmith. I had a rubbermaid cooler for my old mash tun so it didn't lose as much heat up front as the new tun.

On this batch I got just over a 90% mash efficiency, I was over my target OG by 2 points, I collected the exact volume I wanted in the fermenter, and I shaved about 1/2 hour off the first brew day. So, I'm back to about where I was with the old system but am much happier with this one! It will be nice to have consistent mash temps. Now I'm saving some dough for a conical and freezer.

Thanks again to everyone who helped make this happen :mug:

That's good progress...imagine when you have your process down perfect. Do you think jacketing the mash tun would be worthwhile or is it simply a matter to factor for initial heat loss on the strike calculation? How many degrees did you factor for temp loss?
 
That's good progress...imagine when you have your process down perfect. Do you think jacketing the mash tun would be worthwhile or is it simply a matter to factor for initial heat loss on the strike calculation? How many degrees did you factor for temp loss?

I increased the specific heat of the mash tun in beersmith and changed my formula in my spreadsheet based on what I was seeing in the real world. Basically, it raises the strike temp. by 2-5 degrees from what I was using before, depending on the water-to-grain ratio.

I did find that I have to keep the temp in the HLT about 4 degrees higher than the target mash temp during recirculation to keep the mash temp on target. Obviously there is heat loss through the tubing, pump, kettles, etc. I'm sure insulating the mash tun would help but it just seems like another headache to deal with.
 
That's good progress...imagine when you have your process down perfect. Do you think jacketing the mash tun would be worthwhile or is it simply a matter to factor for initial heat loss on the strike calculation? How many degrees did you factor for temp loss?

I did end up wrapping my mash tun with a roll of reflectix. Instead of setting my HLT PID 4 degrees higher than the target mash tun temp, I can now set it to about 3 degrees higher. Was the expense and hassle of putting the reflextix on worth it? Probably not. I would like to think that the mash tun temps may be a little more even throughout but with recirculating through a HERMS it probably doesn't matter much. Brew on.
 
Back
Top