Hoppo's Rustic Motorized Grain Mill Cabinet and Grain Storage Bin

Homebrew Talk - Beer, Wine, Mead, & Cider Brewing Discussion Forum

Help Support Homebrew Talk - Beer, Wine, Mead, & Cider Brewing Discussion Forum:

This site may earn a commission from merchant affiliate links, including eBay, Amazon, and others.
Thanks guys. :mug: I'll resume the project upon my return and plan on tackling the drywall/tile work in the brewery, as well as the keg conversions for the HERMS system when I get back. Just need to recharge my batteries and get the hell outta here! A week on the beach in the carribean should do the trick! :D
 
Your projects make me feel like a looser that doesn't get anything done.
Can you send the the machine that you use to stop time? I'll only use it for a second.

Are you brewing with your modified keg setup yet - 10g batches?

The only thing I can think of is that you may want to make a box for a larger amount of grain than will fit into a pail. I'm commonly using two pails of grain when making a bigger beer and the malt bill is up in the 25-30lb range. It would suck to have to stop the milling to swap-out pails. OR, if you have room you could make a secondary hopper/splitter... just a thought.
 
Dude that's a great idea! I may try to figure something out. No I haven't used the modified keggle set up yet. I'm still doing small 5 gallong batches, some AG and some partial mashes, dependent upon the volume that my small 10 gallon MLT cooler will handle.

I was just planning on splitting the grain bill into two seperate buckets for bigger beers and running two seperate milling cycles. Now you have my gears turning.....DAMN YOU! :D
 
Welcome back. I trust that you are well rested? Did you get any wild ideas for your build while sitting poolside?
 
Thanks guys....yes, I'm back from the Caribbean, but wish I wasn't. :( Hopefully I'll hunt down the pulleys this week to run the mill. I have a few different HVAC guys looking for me around town. If not, I'll bite the bullet and run down to Grainger and pay their ridiculous price for the large pulley (12" pulley = $38 + tax). My gears were turning a bit while on vacation thinking about how to mount the motor under the cabinet, how to incorporate a tensioner for the pulley, how to incorporate the shroud to cover the pulley, and how to fabricate a larger hopper for feeding grains into. Now Ted (Gridlocked) has me thinking about building a grain box for the receiving end of the mill to catch a larger amount of grains for bigger beers......something that can hold a larger volume of grains than a 6 gallon bucket. I'm sure I can come up with something. Yes, I will be building a shroud over the pulley behind the mill once I get the rest of the materials to finish the mechanical portion of the build.

I'll try to resume this project asap, but I have a bunch of winter maintenance crap to do around the house like blowing out my sprinkler system, installing the guard/filters in my gutters, winterizing my hot tub, putting away all of the patio furniture, trimming back landscaping, and the list goes on and on. One of these days, I may start hiring out some of this stuff, but I have a hard time paying someone to do things that I am capable of doing.....just wish there were more hours in the day. I'll keep the pics. coming as I continue to progress. :mug:
 
I'll trade you a sprinkler blowout for help with my kreezer. :D I've been running blow-outs from 9a-7p on Saturdays and Sundays and at least 3 every night after I leave the office. I've be pulling those from Friday the 5th and it "should" end on Sunday the 21st.
 
Man, you got way too much time and money on your hands to build all this stuff.

Quit making us all look bad :)
 
I'll trade you a sprinkler blowout for help with my kreezer. :D I've been running blow-outs from 9a-7p on Saturdays and Sundays and at least 3 every night after I leave the office. I've be pulling those from Friday the 5th and it "should" end on Sunday the 21st.

Damn dude......and you tell me that I work too hard! :D

Man, if we lived closer to each other, I would take you up on the offer. It takes me 2-3 hours to blow out my sprinkler system with my crappy, old compressor. I have 15 zones and have to cycle though each zone 3 times to get all of the water out. It takes forever for my compressor to build back up pressure between blowouts, so I keep busy waiting by sharpening my lawn mower blades, changing oil in the tractors, etc.
 
Man, you got way too much time and money on your hands to build all this stuff.

Quit making us all look bad :)

Not entirely true nickmv. ;) I own my own businesses and work a lot of hours, so time is at a premium. What little spare time that I do get outside of work, kids activities, family time, etc., I devote to brewing and brewing related projects. It is my stress relief and helps me to keep my sanity. :drunk: I have always been the type of person that has a hard time sitting idle and am in constant need of projects to keep me busy. Once I started homebrewing and realized the endless array of potential projects associated with advancing in the craft, it was a match made in heaven for me and I've went at it full bore. Yes, I do have the financial means to tackle these projects, but I am also very economical with how I proceed with them. I have no problem buying used equipment (grain mill, ss brewing table, ss prep. table, ss commercial sink, brewery fixtures, chest freezers, decommissioned sanke kegs, etc.), fabricating my own equipment, and anytime I can recycle old lumber or materials, I do. I rarely purchase anything brand new, so I'm able to complete these projects at a fraction of the cost. I'm like a bloodhound on CL, so if there is something I need for a brewing related project and it's out there, I'll find it. It doesn't take an unlimited supply of cash to build some really nice equipment, if you are ambitious and patient. :mug:
 
I love the rustic look... Really Cool!!

Maybe you could build a scale into the top of your milling station on one side and remote mount the display where you intended to put your outlet on the front.
Here is a similar scale to the one I use and would look really cool built into your milling station. Digital Shipping Postal Scale
 
Thanks man! Yes, I was planning on having a scale on the left elevated surface next to the mill. I have been looking around for a scale, but hadn't considered a postal scale. The price isn't bad either! I probably won't build it into the top, rather once the cement board and tumbled travertine are installed, just set it on top. I have electrical outlets all over the place in the brewery with two down low behind the milling cabinet and two at countertop level above the cabinet, so the outlet on the front of the cabinet isn't crucial. I just have a little OCD when it comes to symmetry, so when I installed the handy box for the mill switch, I needed to balance it out with a receptacle on the opposite side. If the display could fit and mount into the handy box, then I would certainly consider mountint the display there. Thanks for the heads up and ideas! :mug:

P.S. I've been searching high and low for a large pulley, but no luck. :confused: I'm going to bite the bullet and order the pulleys, reducing sleeve, and belt from Grainger today so that I can move forward.....at total of around $60. With the exceptional price that I got on the mill ($60) and having recycled materials to build the cabinets and install hardward, I'll still only be $200 into the project when all is said and done.
 
Update: I did a little more searching around and found a vendor on Amazon called Zoro Tools that has pulleys, reducing bushings, and belts for much less than Grainger.

12" OD with 1/2" bore pulley: Grainger= $37.80 Zoro= $25.75
2" OD with 1/2" bore pulley: Grainger= $5.66 Zoro= $3.68
V-Belt 60in 4L: Grainger= $8.97 Zoro= $7.45
1/2" to 3/8" reducing bushings (3 pack): Grainger= $7.40 Zoro= $5.79

My total with $5 shipping with Zoro was $47 for a 30% savings over Grainger. I'll update on how quick they ship, but their prices are more reasonable for the exact same products by the exact same manufacturers (Congress, Dayton). :mug:
 
FYI: I placed my order with Zoro Tools yesterday late morning and it shipped mid afternoon via UPS. Anticipated date of delivery is tomorrow! I can't believe that I didn't know about this company. :drunk: They have over 300,000 products and from what I see are significantly cheaper than Grainger. They also have free shipping on orders over $50, otherwise their rates are very reasonable, as they only charged me $5 to ship my entire order. So far I'm impressed with their efficiency and as long as I receive delivery tomorrow, I will happily continue to use them over Grainger!

I'll try to get the mechanical side of the build done throughout the weekend. I worked 14 hrs. yesterday, so I should get out at a decent time today. Hopefully I'll have time to sand the mill and grain storage cabinets and maybe get a coat of poly on each. Coming down the home stretch! :mug:
 
what will be the system to organize your grain in your bin? Showed the pics to my wife and she loves all of it. BTW when are you going to the islands, thought you left already?

I've been thinking about your question further on organizing/storing of the grains in the bin. I think I'm going to use food grade buckets with gamma lids to seal them air tight. I'm going to take a few measurements, but should be able to fit at lest 6 of them in the bin along in 3 stacks with some smaller, air tight containers for miscellaneous specialty grains. Should be plenty of storage. If you have any other ideas, let me know. I have several restaurants around my business, so I'm going to see if I can pick up the buckets for free and then just order the gamma lids.
 
I like the Gamma lids for dry stuff...but for wet there is a gap between the snap-on ring and the pail that is hard to clean/sanitize....I'm considering silicone to seal it.
 
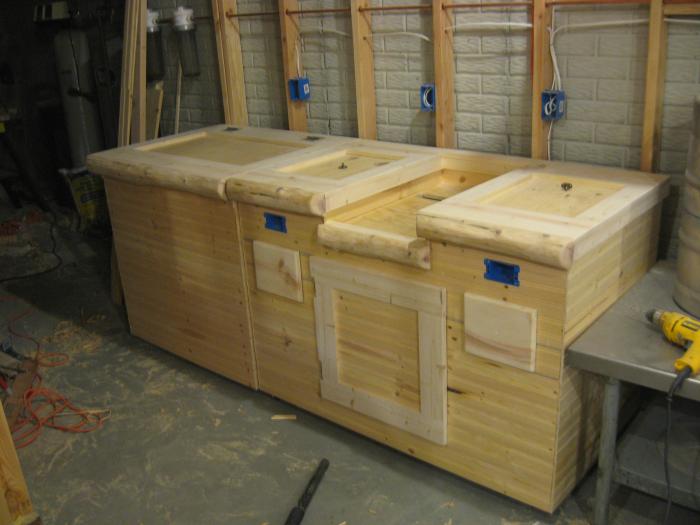
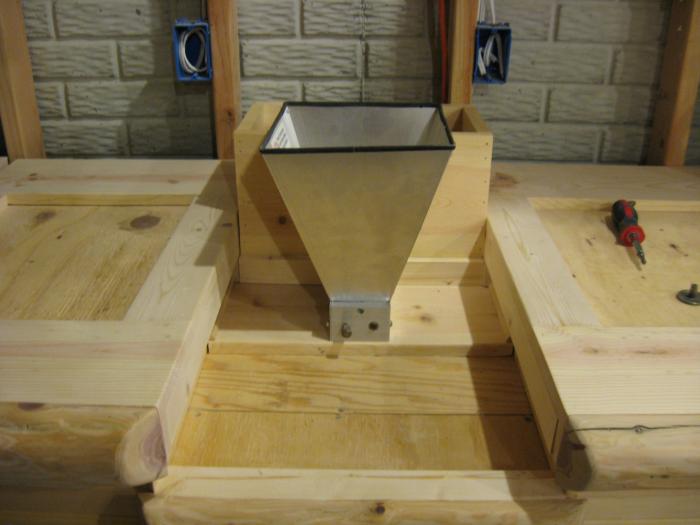
Got a little more done today. I cut a trim piece to size for the mill to sit on and then cut the r/o's for the grain chute and an elongated notch for the pulley system. I also got the logs cleaned up and both pieces completely rough and finished sanded. I then started frabricating a shroud to cover the pulley system on the back side of the mill, but will wait for the pulleys, etc. tomorrow to finish it because I'm having a couple of clearance issues. Here are a few pics. of today's progress.

p.s. Thanks for the feedback helibrewer!

IMG_2785.jpg


IMG_2789.jpg


IMG_2792.jpg


IMG_2796.jpg
 
I received my shipment from Zoro Tools on Friday. I installed the 12" pulley on the mill with the reducing bushing. I went to install the small pulley on the motor and realized that the shaft was 5/8", not 1/2" like I was told. When I got the motor, it had a 3 inch pulley already on it and I was just assuming that the shaft was 1/2", so I never measured it before ordering. :drunk: Anyone need a 2" pulley with a 1/2" bore? It was only $4.00, so it will be more a hastle trying to return it.

Using the existing 7 lb. hopper that came with the mill was making things difficult due clearance issues, because the hopper flares out in all directions. I didn't leave a hell of a lot of clearance on the back side to fabricate a shoud to block the pulley from fingers. :eek: I tried several different configurations, but eventually got pi$$ed off and went a different route. :mad: I decided to build a new hopper for the mill that will not only give me the clearance needed behind the mill, but will also give me more capacity and serve a a shroud to block the pulley. It's still a work in progress, but here's what I got done so far. I'm making the hopper removeable, so that I can still easily access the set screws for gap adjustments.

IMG_2800.jpg


IMG_2801.jpg


IMG_2806.jpg


IMG_2807.jpg
 
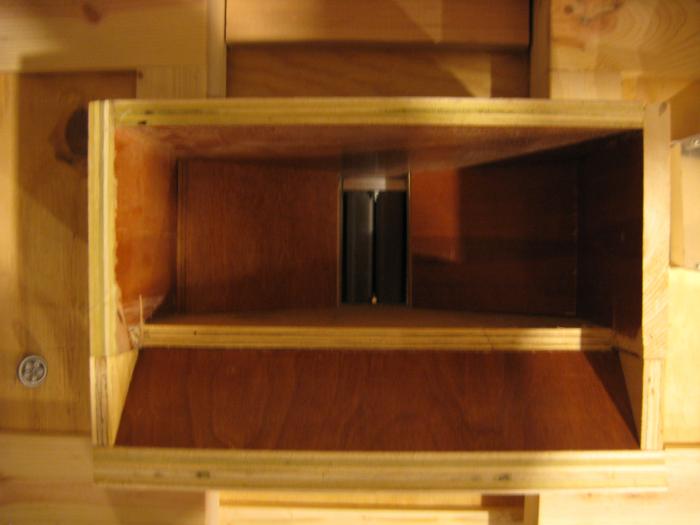
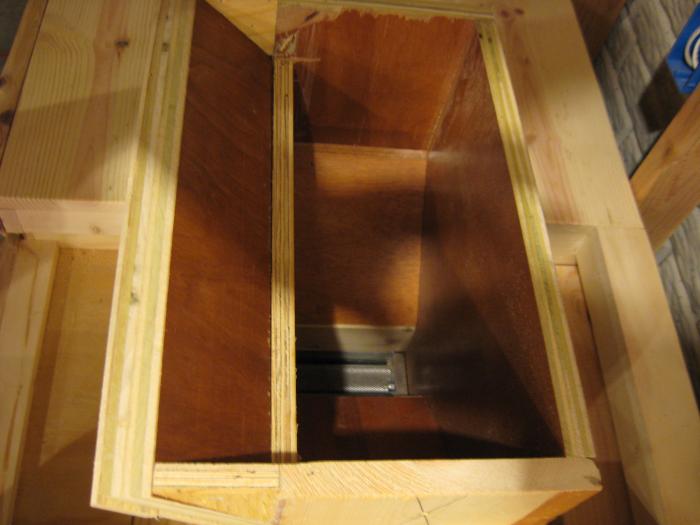
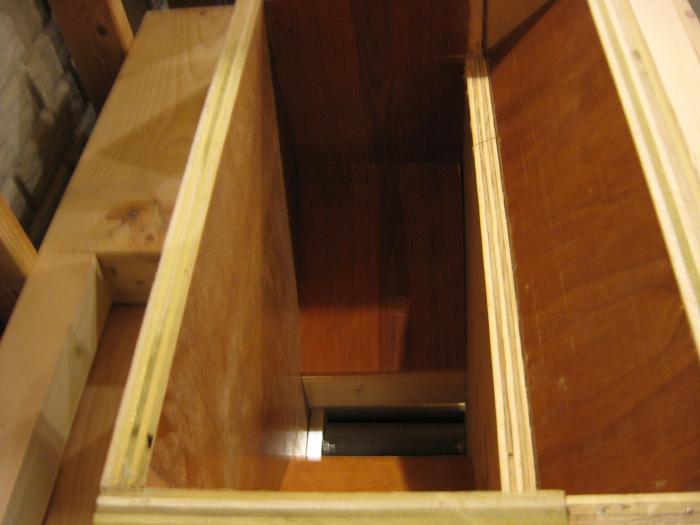
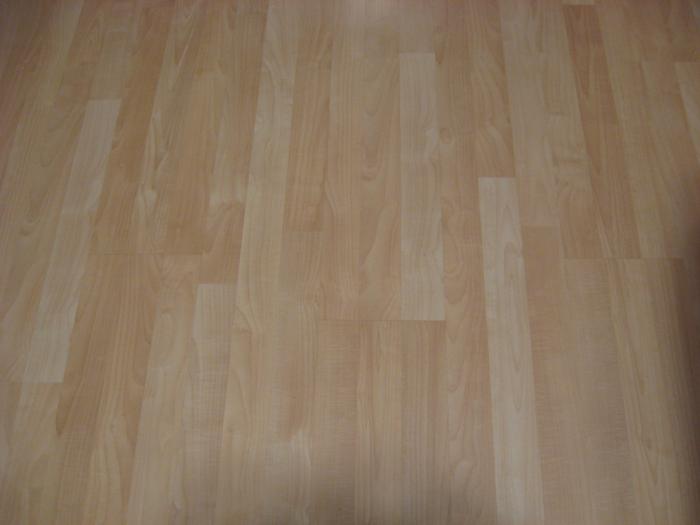
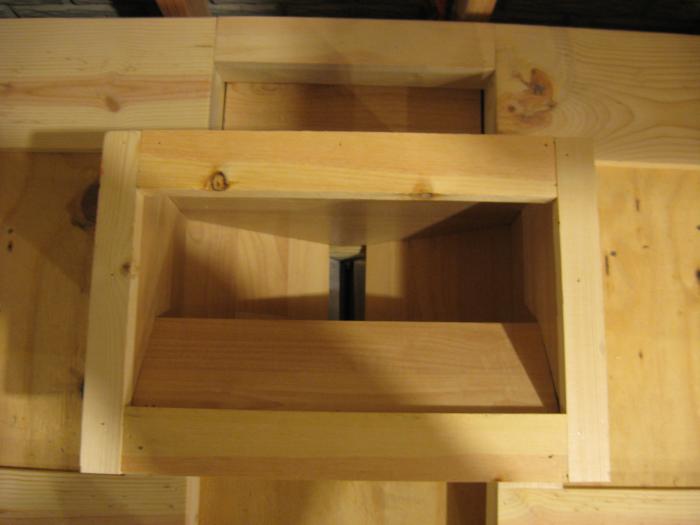
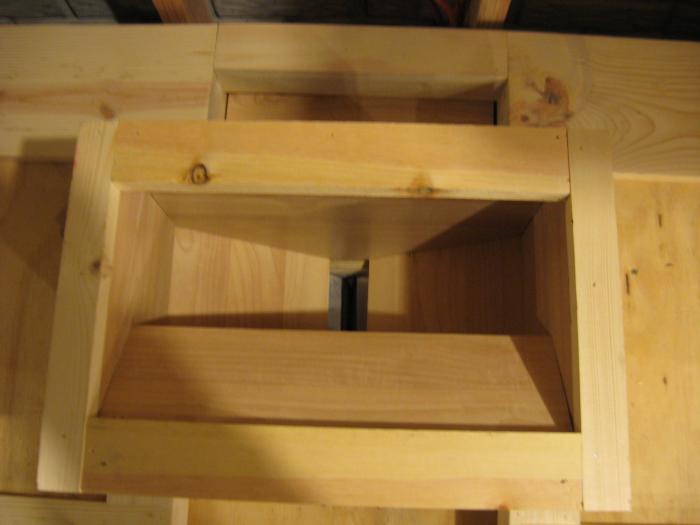
Sorry, went over to my inlaws for dinner and to watch the Tigers/Yankees game, so no more progress today. Go Tigers! :D The mill hopper is not the prettiest thing on the inside right now, but after I finish dressing up the outside with knotty pine paneling and trimming it out, I'm going to line the entire inside with some laminate hardwood flooring material. Again, I'm using up scrap pieces from the old entertainment center and just piecing the hopper together as I go. I have a couple of cases of the laminate flooring left over from when we built the house. I figure that it's brand new material and is a pre-finished laminate, so there should be no friction and the grain should slip right down the surface of the material.

I have a question.......Is it totally frowned upon to use this laminate flooring or simply wood with a polyurethane finish to line the hopper? I'm sure that some would say that the interior should techinically be stainless or at least lined with a food safe plastic, but is that necessary? I just figure that the a portion of the grain will be in contact with the surface as it slips down the sides of the chute and into the mill. The contact will be brief, without long term exposure. Am I safe doing this or should I line the interior with something different? I don't want to start a major debate like some of the grain storage threads that I have read about food safe pails vs HD buckets, jsut want a little feedback. :mug:

Here's a few pics of the interior and a pic of the laminate flooring that I was planning on using.

IMG_2809.jpg


IMG_2811.jpg


IMG_2812.jpg


IMG_2814.jpg
 
I think you'll be fine with the prefinished wood. Its not getting wet, and not hot so there isn't going to be any transfer to the grain.
 
Sorry, went over to my inlaws for dinner and to watch the Tigers/Yankees game, so no more progress today. Go Tigers!

I hope your sack gets caught in the mill.:mad:

Obviously kidding... Everything looks great as usual.
 
Maybe consider having a HVAC guy make a liner out of galvanized metal you could just drop inside your wood hopper. Would be a piece of cake for any HVAC metal shop and would be cheap. That way you have the cool wood look from the outside and a smooth non stick metal surface on the inside. Just a thought. Looking Good!
 
I think you'll be fine with the prefinished wood. Its not getting wet, and not hot so there isn't going to be any transfer to the grain.

That's what I was thinking too. I'm sure there will be a few arguments against using it, but for now that's my plan. Thanks man! :mug:
 
I hope your sack gets caught in the mill.:mad:

Obviously kidding... Everything looks great as usual.

Ouch! :eek: Obviously you're a Yankees fan I presume? I'm just glad that the umps are calling nice clean games! ;) Kidding.....the Yankees have been shafted more than once this series so far.

Thanks for the compliment. :mug:
 
Maybe consider having a HVAC guy make a liner out of galvanized metal you could just drop inside your wood hopper. Would be a piece of cake for any HVAC metal shop and would be cheap. That way you have the cool wood look from the outside and a smooth non stick metal surface on the inside. Just a thought. Looking Good!

Something to consider. My wife thinks that the laminate wood flooring idea is going to "look stupid" with rustic knotty pine on the exterior and clear maple on the interior. I'm sorta just looking to use up materials that I have laying around without spending any more money on this particular project. If it looks like crap when i get it done.....I'll certainly consider your idea of a metal liner. Thanks for the feedback! :mug:
 
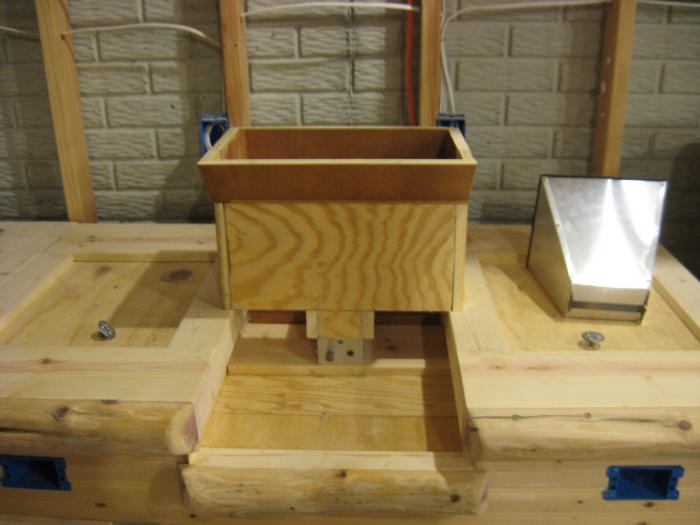
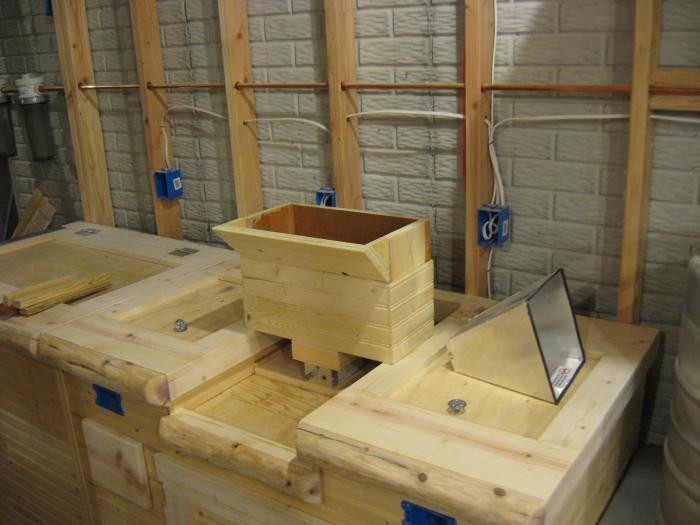
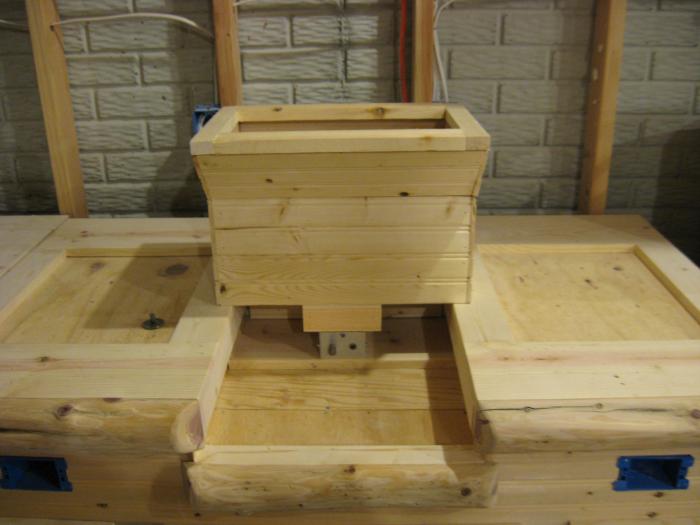
Alright, 90% complete with the grain hopper for the mill. I ended up lining the interior with the laminate hardwood flooring and finishing up the knotty pine on the exterior. Still need to install outside pine 3/4" x 3/4" corner trim to clean up the edges. I have another ripped log that is the perfect size to install across the front lip of the hopper....just need to knife it and cut to size. What do you guys think......log across the front or no log? Once I get that done, I'm going to build another box behind the hopper to serve as a shroud for the pulley system. The hopper blocks it from the front, but I might as well box out the back, trim it out and put a couple of rows of tumbled travertine on the top to coordinate the piece. Feedback about the log please. :mug:

IMG_2815.jpg


IMG_2816.jpg


IMG_2818.jpg


IMG_2820.jpg
 
Kent,
Something I was just thinking about that you may or may not ever have to deal with. Every once in a while, my mill (Monster Mill 2.0) messes up and won't crush. Grain gets stuck between the housing and the roller, jamming one of them. I have to pour the grain out of the hopper back into the pail that I use to measure out the quantity, flip the mill over and run it forward and backward to clear the roller again. If it was fixed, I'd be screwed.

so, I E-mailed monster mill today and got an awesome response. Looks like I need to make some adjustments to my mill to stop the problem from happening.
 
I made the hopper, so that I can detach it easily if needed. Granted I would spill a bit of grain if that were to happen, but not that big of a deal I suppose. With the appropriate gapping and having a motor/pulley system that generates an approriate amount of torque at the correct rpms, hopefully I won't have any major jamming issues. I won't know 'til I start milling. :confused:

What do you think....install a log across the front lip of the hopper or leave as is? So far, I've only gotten one vote for NAY. (Thanks for the feedback TBaGZ!)
 
tough call with the front lip - log or no...
I think you could go either way - to tell you the truth. The other horizontal surfaces do have the log, but they're all relatively on the same part of the piece.

If you do, sneak it under the lip that you have so it's relatively subtle.
 
I'll have to agree with the nay, may look a little out of place floating in the air. If it was a larger section, perhaps, but since it is relatively small compared to the rest of the cabinet I don't think it will look as good. But I'm incredibly jealous of all of it. Can't wait to get a house again.
 
Thanks for the feedback guys. Here's what I am going to do. I'll knife the log, cut it to size, tack it on, and post a pic. If the concensus is that it looks stupid, I'll ditch it. I'm working a 14 hr. day today, so I won't get anything accomplished tonight. I'll try to get it done tomorrow along with mounting the motor and running the electrical. My new pulley is set to arrive tomorrow a.m., so hopefully I can progress with the mechanical side of the build. I also am building a shroud box behind the hopper as well, which hopefully I can work on tomorrow and over the weekend.
 
Wow!
Dude the bar looks great! your puttin a lot of work and time in to it, can't wait to see the finished product! :rockin:
Dennis
 
Dude, awesome! I love the look. Not sure about the log but will wait for the pic to get a visual, good idea. again, great job!
 
Wow!
Dude the bar looks great! your puttin a lot of work and time in to it, can't wait to see the finished product! :rockin:
Dennis

Thanks Dennis. I sent you an email, but just wanted to know if the offer still stands on me burrowing your set of Greenlee Punches. Once I wrap up this mill, I'm going to start my keg conversions and they would sure come in handy. Thanks man! :mug:
 
let me know if you have questions or want info on the keg conversions. I have about 4 holes in my MLT that I wish I would have done differently...
 
let me know if you have questions or want info on the keg conversions. I have about 4 holes in my MLT that I wish I would have done differently...

As alway....thanks man! I'm sure I will have plenty of questions when the time comes. AND....thanks tattooman for dropping off the Greenlee punches at my office. Your too kind! Now back to the mill.
 
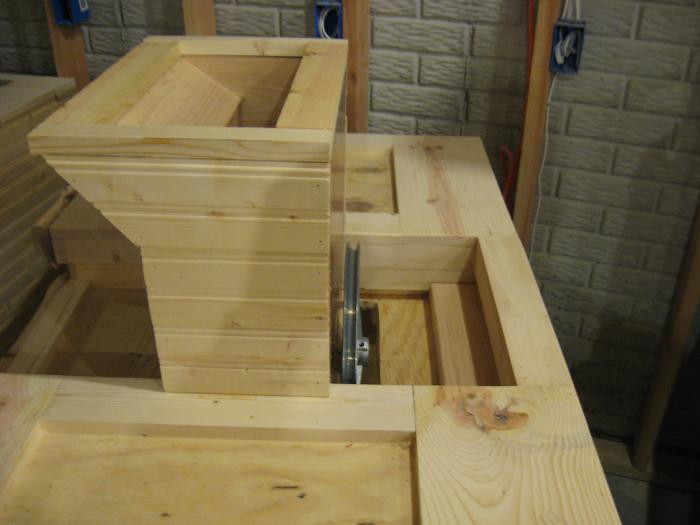
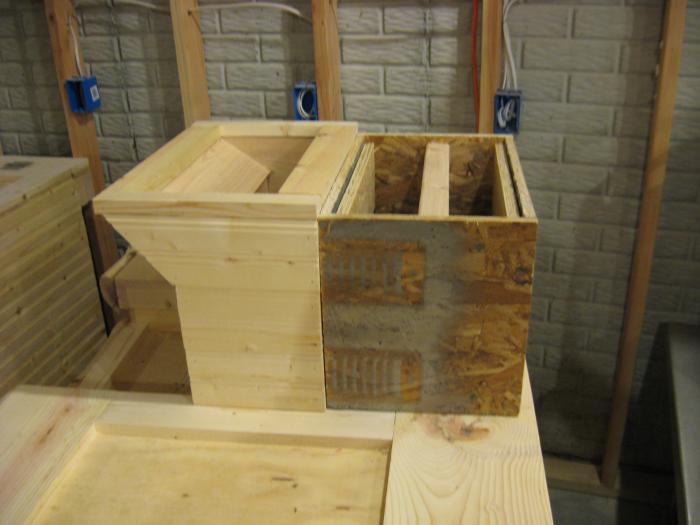
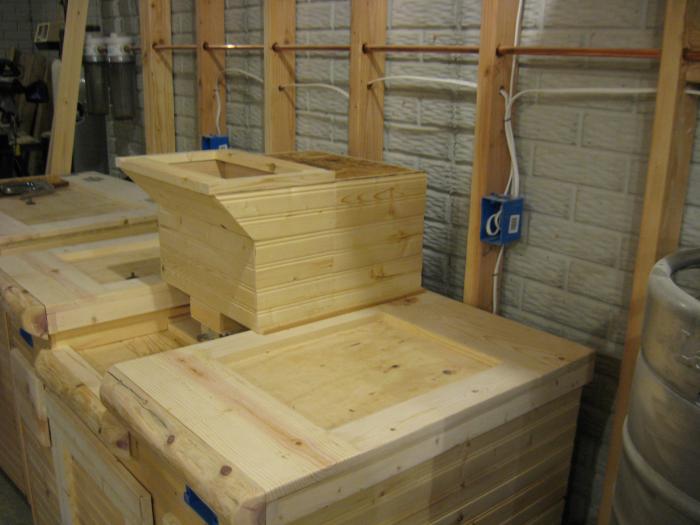
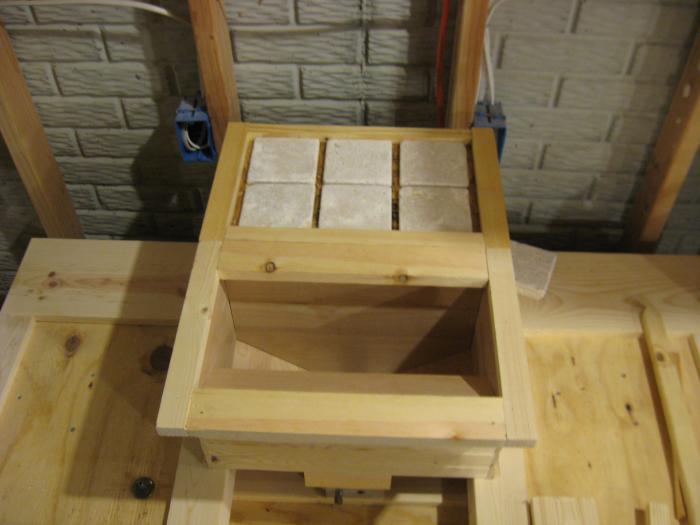
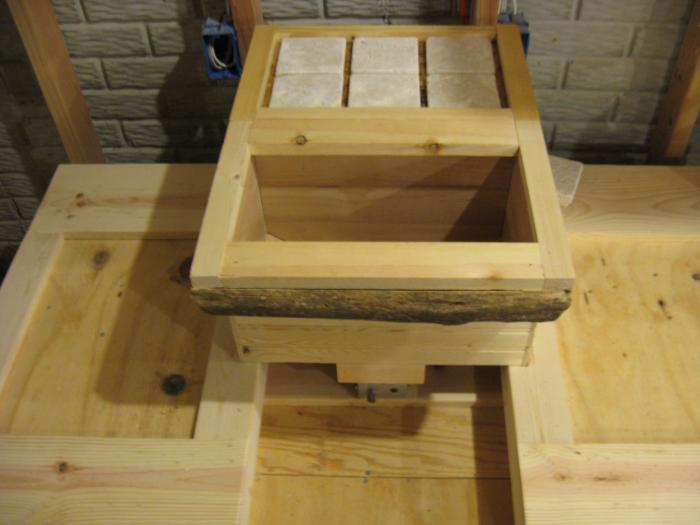
Got a couple of hours today to work on the pulley cover/shroud behind my hopper. I had some old particle board laying around, so rather than purchasing more plywood, I used that for the box. Then, as always, covered it with knotty pine and trimmed out the top with pieces of pine in my scrap box. I need to hit the HD, because I'm sick of digging through scraps to find trim pieces. I plan on running 2 courses of 4"x4" tumbled travertine on the top of the box to coordinate with the rest of the cabinet. Here's what I have so far. Still need to clean up corners with mouldings, but can't find any laying around. UPS just arrived with my new pulley for the motor, so now I can start laying that out and working on the mechanicals.

IMG_2830.jpg


IMG_2831.jpg


IMG_2833.jpg


IMG_2836.jpg
 
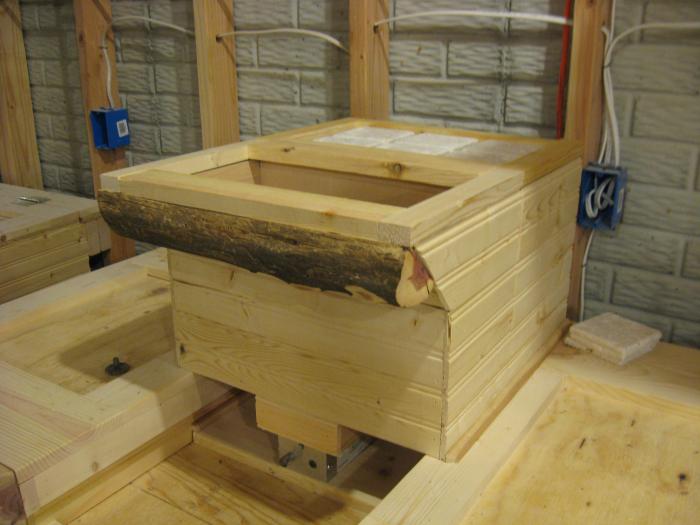
I tacked up the log to see how it looks. It looked terrible on the front face, but I kinda like Ted's idea of tucking it underneath the front trim piece, so it's more subtle. Before I take the time knifing and sanding the log, here are a few pics to get some feedback. It's just a rough fitting, so if I go with using the log, I will knife it for a more precise fit, but for now I'm not going to waste time on it if I'm potentially not going to use it. Feedback please!

P.S. Once knifed and cleaned up, it will look exactly like the lower logs and won't stick out like a sore thumb. It still has some mossy bark and oxidation on it in the pics.

IMG_2841.jpg


IMG_2842.jpg


IMG_2843.jpg


IMG_2844.jpg
 
Back
Top