Another Brutus System is Born

Homebrew Talk - Beer, Wine, Mead, & Cider Brewing Discussion Forum

Help Support Homebrew Talk - Beer, Wine, Mead, & Cider Brewing Discussion Forum:

This site may earn a commission from merchant affiliate links, including eBay, Amazon, and others.

schweaty

Doe Re Mi Beer
HBT Supporter
Joined
Sep 18, 2008
Messages
1,802
Reaction score
53
Location
Glass City
First and foremost I must give thanks to some of the members of HBT without whom none of this would have been possible.

Klaude - You were the most helpful and influental person involved in this build. I appreciated you tolerating the PM's back and forth time and time again. Sometimes you had to repeat yourself but your patience and wisdom was unparalled. Thanks for helping me with the gas system parts list, sellers, and troubleshooting. :mug:

lehr - You really hooked me up with the welding when I was in a pinch. You did a great job and the turnaround time was super fast. Seeing your brewery in person was even more impressive than on these forums. And your beers were damn fine if I do say so myself! :rockin:

nicksteck - The frame for your system was a real beauty and as soon as I saw it I knew that was what I was looking for. Perhaps I should have made it a few inches shorter as I'm willing to bet your have a height advantage on me! Thanks for your inspiring build! :tank:

lonnie mac - Last but not least, of course. You're the father of the brewtus system and what an amazing thing it is. Thank you for your creativity and pioneering! :ban:

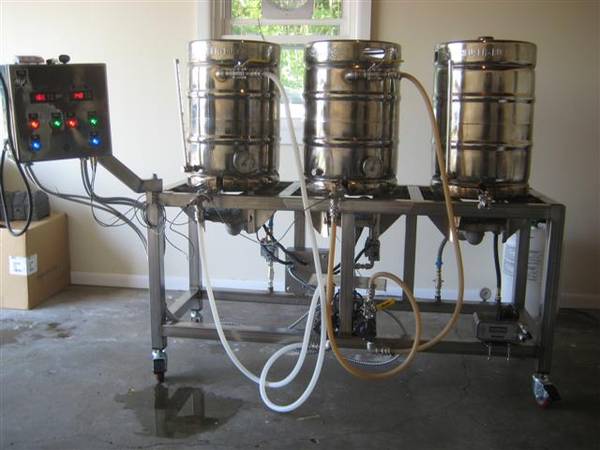
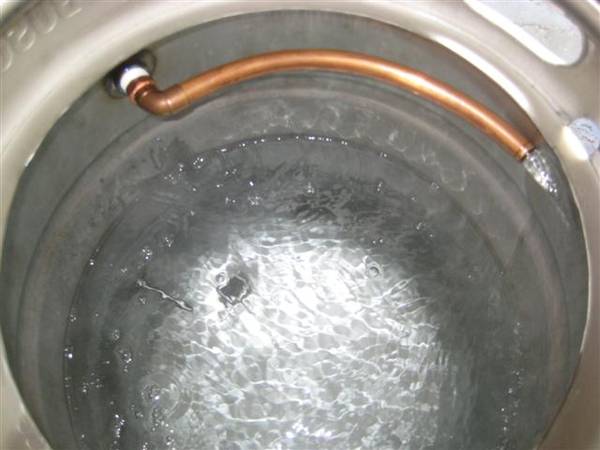
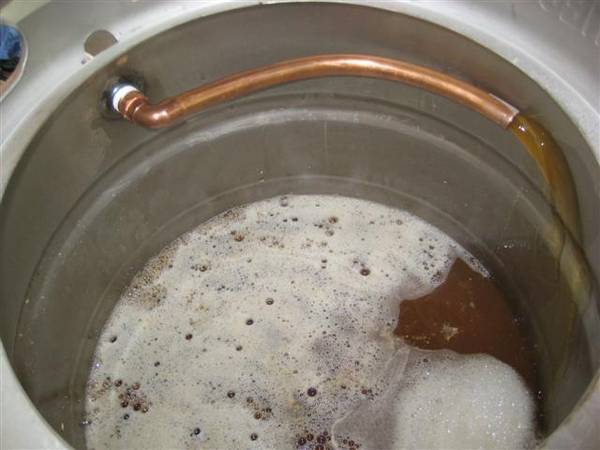
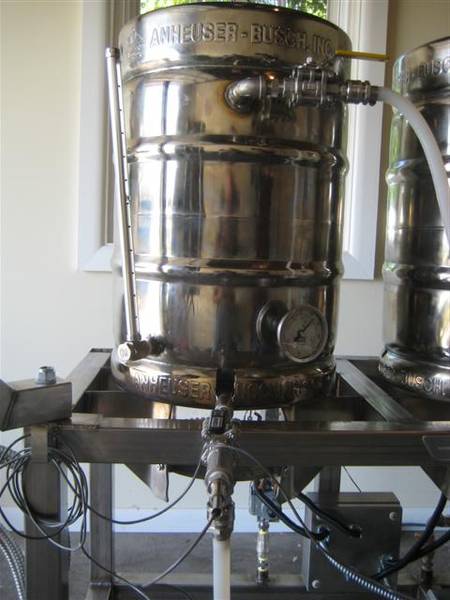
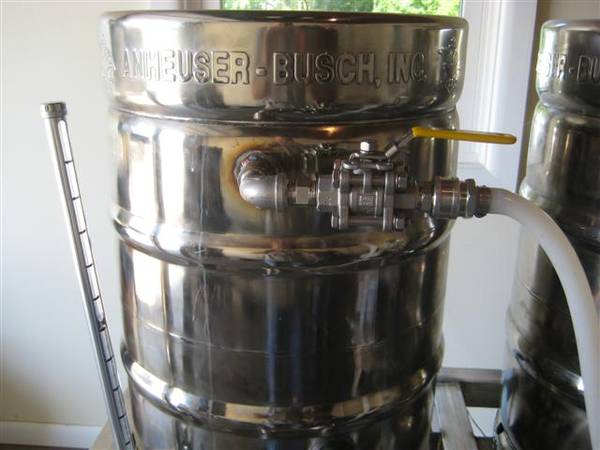
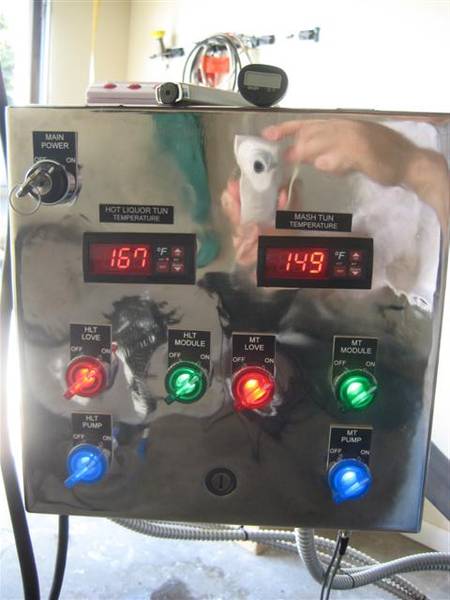
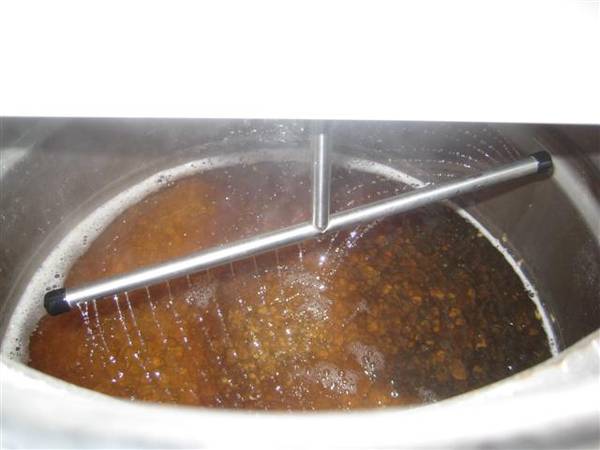
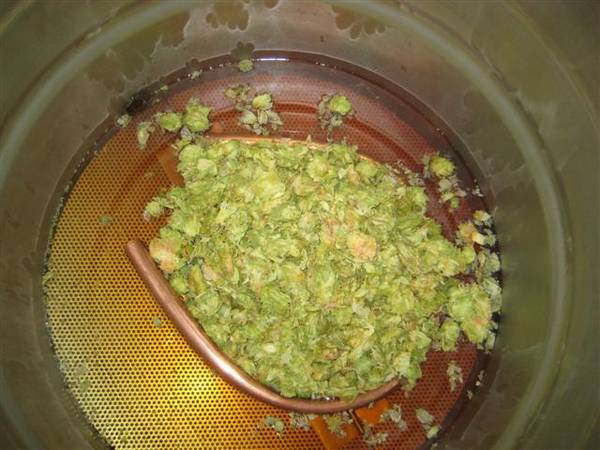
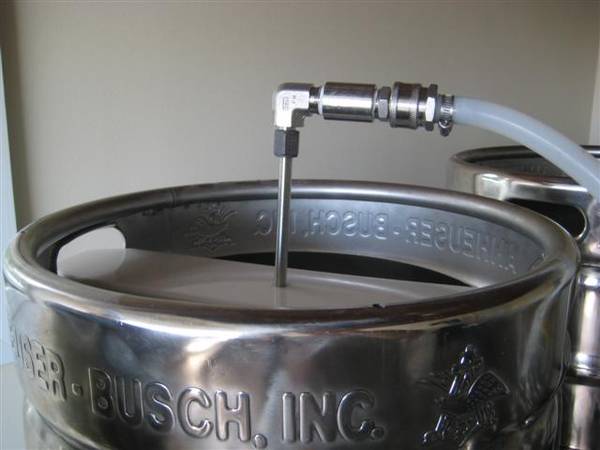
This system has been in the works since I sold my old one back in February 2010. Needless to say that life got in the way of the build and some financial and technical speedbumps delayed the finished product. I hadn't brewed a batch of beer in 5 months as of last Sunday and I'm happy to say that I'm back on the wagon. And now, for some pictures :)
 
The control panel box before it was cut and drilled. I would have left it with a brushed finish but we scratched up the front when drilling. What a pain in the neck it was to drill out so many 1" holes in this system. I must have gone through 3 step bits.
Picture_001_Small_.jpg


The control panel arm after cutting the pieces with the mitre saw.
Picture_002_Small_.jpg


The control panel measured out for hole locations.
Picture_003_Small_.jpg


Mock layout of what the control panel will look like.
Picture_004_Small_.jpg
 
The control box with all holes knocked out. I wish that I would have discovered the brake press at work before I did this. Life would have been so much easier.
Picture_005_Small_.jpg


All electrical components put into the case.
Picture_006_Small_.jpg


Burner brackets after cutting them out, before being bent.
Picture_007_Small_.jpg


Cutting the brackets with a circular saw and metal cutting blade.
Picture_008_Small_.jpg
 
Probe quick disconnects on the bottom of the control panel.
Picture_010_Small_.jpg


Control panel completed with all name tags.
Picture_011_Small_.jpg


Just got the cart back from lehr after he did the welding.
Picture_012_Small_.jpg


Top view of the cart after welding.
Picture_013_Small_.jpg


Front view of cart.
Picture_014_Small_.jpg
 
Burner mounts, ala nick steck. I actually bent them on my own at work. That was a real treat let me tell ya!
Picture_017_Small_.jpg


Closeup of the burner and mounts.
Picture_018_Small_.jpg


Gas manifold
Picture_019_Small_.jpg


Burner testing. I had a heck of a time getting the right orifice size for low pressure propane. The 3/32" had too much orange in the flame so I had to cut back to 5/64" instead. Seemed to do the trick on a 8 gallon boil no problem.
Picture_020_Small_.jpg
 
The brewery all ready to go on its inaugural voyage.
Picture_021_Small_.jpg


Dual March pumps and shroud.
Picture_022_Small_.jpg


Side view of the brewery in action.
Picture_023_Small_.jpg


Gas plumbing closeup. I got the stainless braided hoses custom made from tejas smokers in Texas.
Picture_024_Small_.jpg


The L bracket that a childhood friend welded on for me at the college. Held up much better than the plastic insert from McMaster thats for certain.
Picture_025_Small_.jpg
 
Hot liquor tun recirculation. Sparging has never been more accurate and easy!
Picture_026_Small_.jpg


Mash tun recirculation in progress. I'm going to remove the copper and put a lock line in there. There was too much foaming going on and all I could think about was the head retention I was losing.
Picture_027_Small_.jpg


Close up of the Hot Liquor Tun. I'm going to move the probes down to the pump so they don't stick out as far.
Picture_028_Small_.jpg


Return valve on the HLT. Sorry Pat I haven't cleaned up the welds yet :)
Picture_029_Small_.jpg
 
In my opinion this is one of the funniest parts of the brewery. I got this from a fellow student at my College. He did a presentation on his injection molding plant and brought this in. At the end he asked if anyone wanted to take some of them home and I took this one. I wasn't sure what I was going to do with it until last Saturday.
Picture_030_Small_.jpg


Boil kettle gas line and line in from propane tank.
Picture_031_Small_.jpg


Ignition module box and its wiring. This is one of the things I would have done different in this build. I would have preferred to wire it as much as possible through the frame. It was so clean looking until I put this box on. Still happy though! :)
Picture_032_Small_.jpg


The control panel all lit up. Oooh, glowy and shiny!
Picture_033_Small_.jpg
 
Fly sparging after the mash out. I love adding 45 minutes to brewdays! That's atleast 2 more beers :)
Picture_034_Small_.jpg


Running into the boil kettle with the copper pipe (as per the suggestion of Colin Kaminski) I had never seen runnings so clear in my 2 years of brewing. The constant recirculation during the mash and the fly sparge was great!
Picture_036_Small_.jpg


Quick disconnect and compression elbow on the fly sparging apparatus. I was so stoked when I found that fitting on McMaster's website. Worked brilliantly!
Picture_037_Small_.jpg
 
Awesome, I absolutely loved the feeling of brewing on my brutus for the first time. If only mine looked as good as yours.

I am raising a glass to your success :mug:
 
so your BK has a false bottom, but there is a copper tube connected to the bottom ball valve? no dip tube?

also, do you happen to remember the part number for that compression elbow fitting? i've got the same sparge arm but have been trying to come up with a way to integrate it to my brutus. great work!
 
That's freaking beautiful man, Im very jealous.

What's the copper tube suggestion that made your beer super clear? Ive never head of this.
 
so your BK has a false bottom, but there is a copper tube connected to the bottom ball valve? no dip tube?

also, do you happen to remember the part number for that compression elbow fitting? i've got the same sparge arm but have been trying to come up with a way to integrate it to my brutus. great work!

That's freaking beautiful man, Im very jealous.

What's the copper tube suggestion that made your beer super clear? Ive never head of this.

The BK has the false bottom to filter out the hops since I use whole leaf hops. The drain is on the bottom underneath the false bottom. The copper is there to help remove sulfur in the boil, it contributes to yeast health, and helps with maillard reactions. The copper doesn't help make the wort clear. The constant recirculation during the mash is what I believe helped clarity the most.

The compression elbow from was from McMaster http://www.mcmaster.com/#52245k835/=838z27
I'm going to throw together a parts list in the near future if anyone is interested.
 
The BK has the false bottom to filter out the hops since I use whole leaf hops. The drain is on the bottom underneath the false bottom. The copper is there to help remove sulfur in the boil, it contributes to yeast health, and helps with maillard reactions. The copper doesn't help make the wort clear. The constant recirculation during the mash is what I believe helped clarity the most.

I see..So you still have the regular dip tube going through the FB and to the ball valve? Never heard of the copper idea, but if you just made your siphon dip tube out of copper, would that be sufficient to help reduce sulfur?
 
Wow, sweet build!!!! My stand is getting welded and I hope mine turns out half as good as yours!! Thanks for posting the pics, a part list would be nice to see if you get time. I also have bugged Kladue with many a pm and he is so patient with my sometimes very stupid questions, and he is always eager to help. There are many others to that are eager to help and this forum is the best!

Schweaty I might be bugging you with pm's also as I continue building my system! :D
 
Schweaty,

Very nice build. I loved the ignition system and shiny control box. I'm sure your gonna polish it out like lehrs, right? Way cool! I have one request, a source or part number for your stainless,QD's. Thanks in advance. Lonnie's gonna like it! Again, awesome job.

Snake10
Brutus owner
 
The BK has the false bottom to filter out the hops since I use whole leaf hops. The drain is on the bottom underneath the false bottom. The copper is there to help remove sulfur in the boil, it contributes to yeast health, and helps with maillard reactions. The copper doesn't help make the wort clear. The constant recirculation during the mash is what I believe helped clarity the most.

I see..So you still have the regular dip tube going through the FB and to the ball valve? Never heard of the copper idea, but if you just made your siphon dip tube out of copper, would that be sufficient to help reduce sulfur?

There isn't a dip tube at all as the drain is underneath the false bottom. If I had to do it all over again when I drilled out the kegs I would have just gone the route you are speaking of but ofcourse I had to be different. If you put in a copper dip tube it would serve the same purpose as the copper in the bottom of my kettle.
 
Wow, sweet build!!!! My stand is getting welded and I hope mine turns out half as good as yours!! Thanks for posting the pics, a part list would be nice to see if you get time. I also have bugged Kladue with many a pm and he is so patient with my sometimes very stupid questions, and he is always eager to help. There are many others to that are eager to help and this forum is the best!

Schweaty I might be bugging you with pm's also as I continue building my system! :D

Yeah, klaude has patience beyond belief that is for sure. Please feel free to contact me if you have any questions and I would be more than willing to share anything I have learned from this build. I will work on a parts list tomorrow and get it up here asap.
 
Schweaty,

Very nice build. I loved the ignition system and shiny control box. I'm sure your gonna polish it out like lehrs, right? Way cool! I have one request, a source or part number for your stainless,QD's. Thanks in advance. Lonnie's gonna like it! Again, awesome job.

Snake10
Brutus owner

At this point I just want to brew on the darn thing. I'm not worried about polishing it at this point in time. Perhaps down the road when the pipeline is full and I have some free time. It's a lot of work to get them good and shiny like lehr has his. The QD's are from morebeer.com http://morebeer.com/search?search=quick+disconnect
 
Wow, beautiful looking brewery. Done exactly the way I'm planning my B10. I look forward to your specs. One question on putting the drains in the bottom of the keg. I've always wanted to do this but since they are under direct fire (especially the MT) aren't you concerned about caramelization or scorching occurring in that piping?
 
Wow, beautiful looking brewery. Done exactly the way I'm planning my B10. I look forward to your specs. One question on putting the drains in the bottom of the keg. I've always wanted to do this but since they are under direct fire (especially the MT) aren't you concerned about caramelization or scorching occurring in that piping?

Never been a problem. Just have to let them soak in oxyclean or pbw for a little while occasionally and they are just fine. They're not directly in the center but more inbetween the center and the skirt. I almost have the parts list done, with prices and links to retailers. If I could do it all over again I would have just put the drains in the side of the keg wall rather than the bottom.
 
As promised, a parts list with part name, quantity, vendor, website address, and cost. I didn't realize how much I had spent over 5 months but it was worth every penny! I'd do it all over again in a heartbeat, with a few changes ofcourse :)

Brewery_Parts1.jpg
 
The burner brackets for the brewery, side and top view with measurements.

Picture_00118.jpg
Picture_00216.jpg


Stainless Steel Tubing, Cut List

Long Horizontal
4 @ 58" - 232" Total

4 Corner Posts
4 @ 25" - 100" Total

Cross Members
7 @ 18" - 126" Total

Vertical Posts Under Burners
4 @ 19" - 76" Total
 
That looks so sweet. I have no idea how half that stuff works (just got into brewing) but it definitely looks official!
 
That thing looks SWEET and I can attest this guy makes some GREAT beer.
The control panel is really nice man...You better send me one of those Cherry poppin beers.

Good job buddy !
Pat
 
That thing looks SWEET and I can attest this guy makes some GREAT beer.
The control panel is really nice man...You better send me one of those Cherry poppin beers.

Good job buddy !
Pat

Thanks Pat! Rather than send I will just come up for another visit on one of your brew days. I'll bring a sampler pack once I get the pipeline full. I should be pretty well caught up by the fall :) I'm skeptical on how the 1st brew will turn out as we had problems with the cooling. I wasn't aware the outdoor water faucet ran through the attic and the water temp was 80 degrees. So needless to say, it took a long time to cool it down and then it had to sit in the fridge for three more hours to get to pitching temps. My remedy, some ice and water in the HLT and chill with that. It worked like a charm.

The brewery turned out good, but I want to do something with the wiring as I feel it looks too sloppy. That and I need to fix a few other minor things before I can be completely satisfied. All of that has to wait though because I'm going to be brewing like a man possessed until mid September. Once the winter gets here I'll start tweaking the little things that bother me.
 
Sounds good to me ! Plumbing through the attic that's strange.
I'm going to run a water line out of my house by the garage that will bypass my softener I have to walk to the other end of the house now to get water and it's not so fun in a couple feet of snow.
Hope to see you soon...send me that Barleywine recipe !

Pat
 
What's your estimate on how much propane you go through in a single brew session?

A 20 lb tank has lasted me over 2 sessions now, that includes boiling 5 gallons of water to sanatize the pumps, kegs and chillers. Usually I'm heating another 10-13 gallons for dough in and sparge. And then the cycling of the burner on the hot liquor tun and mash tun. And ofcourse the boil. I'm pretty happy with my propane usage thus far.
 
Back
Top