ebay aquarium temp controller build

Homebrew Talk - Beer, Wine, Mead, & Cider Brewing Discussion Forum

Help Support Homebrew Talk - Beer, Wine, Mead, & Cider Brewing Discussion Forum:

This site may earn a commission from merchant affiliate links, including eBay, Amazon, and others.
I could be mistaken, but I thought that # 1 & 2 were for the probe leads, not line power which should be #3 & 4. None of the wiring seems to be correct. Like I said, I'm doing this from memory, so check the wiring diagram that came with the unit or someone can help who actually owns one. If you energized it as you have it shown, it may be smoked permanently. Hopefully, that is not the case.

No, 1 & 2 are power and 3 & 4 are temp sensor. He's got it wired right as far as I can tell. My first question was going to be if he waited for the compressor delay, but android beat me to it. Could it be the 220V controller?
 
No, 1 & 2 are power and 3 & 4 are temp sensor. He's got it wired right as far as I can tell. My first question was going to be if he waited for the compressor delay, but android beat me to it. Could it be the 220V controller?

OK, disregard my above post. I think the Love controllers have #1 & 2 as the probe leads.
 
OK, disregard my above post. I think the Love controllers have #1 & 2 as the probe leads.

I do have the 110 model and have waited for the compressor delay. No such luck.

The only thing I can think of at this point is that there is not enough amperage to turn over the compressor. I'm going to go check the voltage and amperage at the receptacle. It's possible that the wire I'm using isn't up to it, though it is rated for 300v.

To safely switch 10A @ 110V, you must use at least 14 gauge. Anything less is a fire hazard.
 
I don't think the gauge of the wire is the issue. Although 14 ga or thicker should be used, even 22 gauge would probably handle the startup current.

It could be a stray strand of wire causing a partial short, or bad connection somewhere.

This post does have the background story for a theory of mine regarding which wire to switch. My freezer has a start cap that, in stock form, has a hot wire to it at all times, and is discharged when the thermostat (and PTC relay) switches the downstream side to the compressor's start coils. Without live power to the hot wire prior to starting, the cap is not charged, and does not provide full starting current/voltage to the start coils when it is in the start circuit.

I could be wrong about the cap behavior when it is part of the start circuit, but that is how the schem looked to me. I also remember a post by someone retrofitting/replacing a thermostat with this controller, and the fridge would not start without switching the neutral (as opposed to the hot as is standard for schem in this thread). The schematic in that post was similar to how my thermo is wired.

I wonder if it wouldn't be better to switch the neutral so the stock behavior of the appliance is preserved.
I thought that this is how Johnson and Ranco controllers are wired as well, but that is from memory from reading done many moons ago. I don't have one to test to see whether the hot wire is hot, and the neutral is what is switched.
 
My freezer temp controller is terminal-based (I wired it into an extension cord to be able to use it on other stuff if need be) and the diagram indicated that the hot wire is the one that gets switched. I wired it like that, and it works just fine.
 
I'm going to go check the voltage and amperage at the receptacle.
You posted earlier that the voltage at the outlet was ~120v. Were you checking the plug side, or the wire (back) side of the receptacle?
Like others posted, don't assume anything, and start simple. It sucks to undo work you have done, but often leads to a faster resolution.
You can also use the heating circuit to see if it is just the cooling coil (or circuit) that isn't able to start the fridge. You can't rule out a defective part in the controller yet.
 
My freezer temp controller is terminal-based (I wired it into an extension cord to be able to use it on other stuff if need be) and the diagram indicated that the hot wire is the one that gets switched. I wired it like that, and it works just fine.
Not sure what "terminal-based" means. Switching the hot or neutral will deliver very similar functionality for most devices, but some things rely on "polarized" plugs to take advantage of the hot wire internally. My freezer appears to be one of these devices.

If the start cap does need the hot wire powered prior to starting to provide 100% start assist, then the neutral should be swtiched. That being said, if a compressor has a start cap, and won't start without the start circuit functioning at 100%, it probably means the compressor is circling the drain. This may have been the case with the guy's fridge who had to switch the neutral to make it work.

I am still not sure whether the start cap on my freezer would or would not function fully with the hot switched, but when I looked at the schem, it appeared that it would not.
 
cwi said:
You posted earlier that the voltage at the outlet was ~120v. Were you checking the plug side, or the wire (back) side of the receptacle?
Like others posted, don't assume anything, and start simple. It sucks to undo work you have done, but often leads to a faster resolution.
You can also use the heating circuit to see if it just the cooling coil (or circuit) that isn't able to start the fridge. You can't rule out a defective part in the controller yet.

Solved! Turns out that the salvaged wire i was using was not quite 14 ga and didnt have a solid connecrion to the terminal on the receptacle.
 
Ok, I'll freely admit it - I'm mainly posting just to move this near the top so it's easier to find.

But seriously folks, I've read most of this, and looks like lagering is in my future. I've tried reading through most of this, have not seen anyone's heat source....anyone want to chime in on what you're using? Hot rock, hot lamp, hot pad, hot blonde, etc?
 
So I'm wondering... I've done some electrical wiring before, and wired a similar, albeit single-stage controller directly into an extension cord, but never wired to an outlet before, though I'm confident I can. I mainly just want to make sure I have all the right parts ready. Is this it?

Thermostat
Project enclosure
Outlet
Faceplate
Extension cord (for cable/male plug)
Extra wire
Wire connectors
Electrical tape
 
I've been planning to do this project for a while and I just acquired a fridge, so it is time. I'm looking on ebay and today I see this:

http://cgi.ebay.com/2-Socket-Temper...776?pt=LH_DefaultDomain_0&hash=item3f0b421cd0

for the price, this looks to be far easier and not any more expensive. Anyone see any problems using this? (other than the low feedback of the seller)

Looks like to me it only controls heating

the plug does not look standard....unless they ship a different one if you order from USA

yes, the feedback is concerning
 
I've been planning to do this project for a while and I just acquired a fridge, so it is time. I'm looking on ebay and today I see this:

http://cgi.ebay.com/2-Socket-Temper...776?pt=LH_DefaultDomain_0&hash=item3f0b421cd0

for the price, this looks to be far easier and not any more expensive. Anyone see any problems using this? (other than the low feedback of the seller)

Those sockets are what is used in Europe. You'll need a few adapters to use them in the US.
 
What is the amps on the US version? I could be wrong, but it looks like the 220 may only go to around 5 amps which is pretty low.

Re plugs - they shipt the appropriate voltage version with presumably the proper plugs.
 
Yes but it isn't specified in the listing what the watts are for the 110 version. Its somthing of a crap shoot. I think 10 amps is marginal at best for our applications. Am I wrong?
 
220 @ 5 amps is the same as 110 @ 10 amps.

According to Ohm's law, yes. But when you're talking relays, amps don't scale. If a relay can handle 5 amps at 220 volts, it can also only handle 5 amps at 110 volts. I know the watts are different between those two conditions, but it's the ability for the contacts to make and break connections, (assuming it's not an SSR inside there, but they are usually contact relays...you can hear them "click"). Way back in this very thread this argument raged for the other temp controller, which lists 10A at 220, leading people to think it could handle 20A at 110. It can't...it can handle 10A only....you go much higher and you'll get the contacts fusing.

(To make this point clear...what if you take it to the extreme...do you think this thing could handle 100 amps at only 10 volts?)
 
^YES! Those are only maximum ratings...you can have any combination of currents voltages, as long as you don't exceed either of the maximums.

And 10A is more than enough for most keggorators, fermentation chambers, ect. That's a steady state current...starting current may be higher, but it's momentary and most contact are designed to handle that large out of phase current.
 
I do not know anything about the temp controller being discussed at this point in the thread.

I do know that the STC 1000 uses the same relays in it's 110 volt and 220 volt version. They are rated at a MINIMUM of 12 A at 125 VAC.

1
110 VAC STC 1000 on Ebay for $26.00 including free shipping
 
I just ordered 3 controllers. Two for my multi-zone fermentation chamber and one to control some fans to exhaust my 110+ F degree garage. It looks like the most expensive part after the controller is the extension cord. Does anyone have a recommendation on a cord I can buy by the foot at HD, Lowes, or elsewhere? Also, can I use this same cable on the interior of the box or is it recommended to use solid copper wiring?
Thanks!
 
I do not know anything about the temp controller being discussed at this point in the thread.

I do know that the STC 1000 uses the same relays in it's 110 volt and 220 volt version. They are rated at a MINIMUM of 12 A at 125 VAC.

1
110 VAC STC 1000 on Ebay for $26.00 including free shipping

Where do you get 12A? I see "Relay contact capacity: Cool 10A/250VAC;Heat 10A/250VAC;" on that page...In any case, that's what I was talking about....although it says 10A/250VAC, it means they can also only handle 10A at 125VAC.
 
...Does anyone have a recommendation on a cord I can buy by the foot at HD, Lowes, or elsewhere? Also, can I use this same cable on the interior of the box or is it recommended to use solid copper wiring?
Thanks!

I got this cord from Harbor Freight for less than $8. Cut the female plug off, and thread it through the box. I used a zip tie to hold it in place in the box.

Ideally, you should use solid wire internally, but if you twist the stranded wire sufficiently, you can get them to stay on the outlet screws. Of course, never use anything but solid cable if you're using the push-in connectors on the back of the outlet.
 
Where do you get 12A? I see "Relay contact capacity: Cool 10A/250VAC;Heat 10A/250VAC;" on that page...In any case, that's what I was talking about....although it says 10A/250VAC, it means they can also only handle 10A at 125VAC.

That is the rating printed on the relay itself.

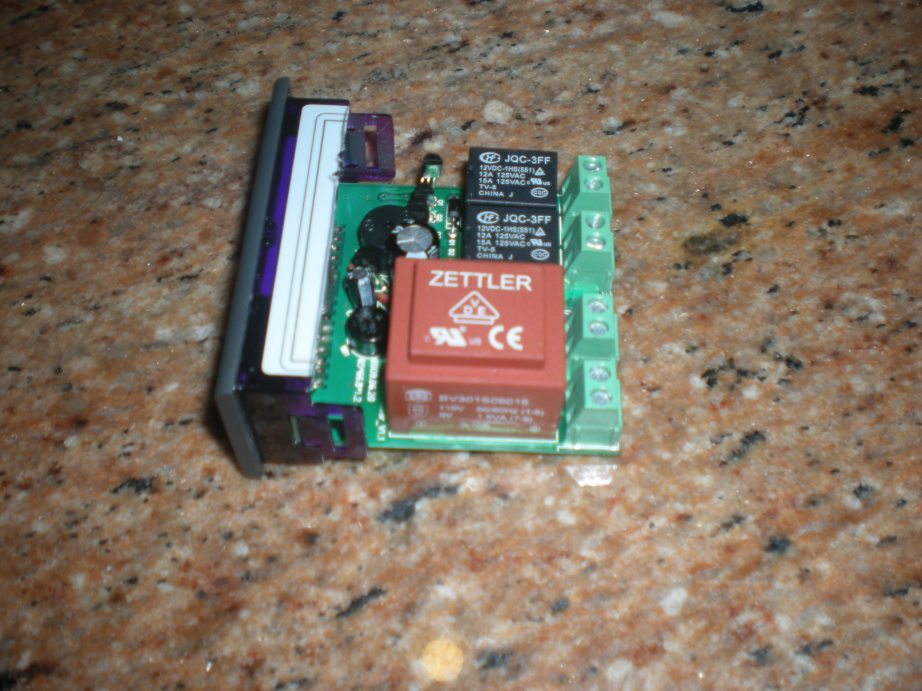
Here is a picture of the 220 V controller taken by Infection

3.jpg


I looked inside my 110V controller and it uses the same relay.
 
:confused: --Prepares self for oncoming onslaught of beration--

OK, so for those of us late to the party and having trouble following a 1500+ post discussion, what happens when you plug in the 220v version to 110v? Does it work? Does it blow up? Does it fizzle? Do you and Doc Brown end up in the wild west?
 
williamnave said:
:confused: --Prepares self for oncoming onslaught of beration--

OK, so for those of us late to the party and having trouble following a 1500+ post discussion, what happens when you plug in the 220v version to 110v? Does it work? Does it blow up? Does it fizzle? Do you and Doc Brown end up in the wild west?

LCD turns on but relays won't work.
 
williamnave,

You might want to check with "infection".

As of post 1502 he had a few 110 volt transformers to replace the 220 v transformer. With a fairly simple desoldering of the old transformer and soldering in a new one you can get the controller to work.
 
:confused: --Prepares self for oncoming onslaught of beration--

OK, so for those of us late to the party and having trouble following a 1500+ post discussion, what happens when you plug in the 220v version to 110v? Does it work? Does it blow up? Does it fizzle? Do you and Doc Brown end up in the wild west?
williamnave,

You might want to check with "infection".

As of post 1502 he had a few 110 volt transformers to replace the 220 v transformer. With a fairly simple desoldering of the old transformer and soldering in a new one you can get the controller to work.

I still have 4 for sale....PM me....or post here; selling them for my cost plus shipping (shipping alone is $5.20 if sent priority mail flat rate)
 
I'm having a heck of a time with hysteresis on my fermentation chamber. It's due, I think, to trying to control to the temp of the beer by taping the probe to the side of the carboy and insulating it. By the time the carboy at the probe reaches the setpoint, the ambient inside the freezer is much colder (or warmer) than the beer so the temp continues to change. It will then pass by the setpoint + deadband and fire up the heater (or freezer) to compensate. I just oscillate back and forth, which is not good for beer or equipment.

When I just have the probe dangling in the freezer, the control is very accurate and stable. Essentially, I'm wishing to myself that this controller was a PID in which I could tune the hysteresis out.

Anyone else in the same boat?

Specifics:
Ambient - 70F
Setpoint - 18.4C
Offset - 0.5C
Compressor Delay - 10 min

Mine has been up and running since last week. I have watched the temp controller from time to time. What's going on is the compressor inside the freezer is very cold, when the controller turns the power off it continues to chill. Mine is set to 20C and it often gets down to 19.2C. I also have my offset at .5C. I live in Atlanta and right now ambient temps below 20C are not a problem, so no heater is set-up.

Have you tried setting you offset to 1C? In watching mine it never looks like it drops below a full 1C after the temp controller cuts the power.

Hope this helps...

Cheers
 
mine did the same thing when I had the probe taped to the bucket. It would cool about .5 to .8 below the set point. It would hit the temp, shut off, then continue to cool. While I was experimenting, I put two computer fans blowing away from the freezer section and left the probe dangling at the furthest point from the freezer. It worked much better this way. It cooled quicker, and didn't go much past the set point....only .2 or .3. So I guess instead of taping the probe to the bucket, I'll leave it dangling and compensate 5 or 6 degrees for fermentation heat.
 
I got this cord from Harbor Freight for less than $8. Cut the female plug off, and thread it through the box. I used a zip tie to hold it in place in the box.

Ideally, you should use solid wire internally, but if you twist the stranded wire sufficiently, you can get them to stay on the outlet screws. Of course, never use anything but solid cable if you're using the push-in connectors on the back of the outlet.

Awesome, thanks for the reply.
 
It will then pass by the setpoint + deadband and fire up the heater (or freezer) to compensate. I just oscillate back and forth, which is not good for beer or equipment.

When I just have the probe dangling in the freezer, the control is very accurate and stable. Essentially, I'm wishing to myself that this controller was a PID in which I could tune the hysteresis out.

"Probe in air" is NOT the way to do it, especially for fermenting beer. It will kill your compressor and also not keep ferm'ing beer temps stable.

You may have your probe too well insulated which prevents the ambient from influencing the probe and causing an early shutoff (hysteresis compensation). You may also have to probe in an area that gets more residual cooling. A small computer fan can help.

Your heater sounds oversized. You only need ~40 watts. Also, why is your heater even plugged in? I know you are probably proud of the job you did wiring it up and all, but it's July!

I have a feeling that the beer temp isn't varying as much as the probe temp, and the low temps at the probe are being warmed by both the beer and the heater heating the air.
 
Thanks for the replies, guys. I'll tweak things a little over the long weekend and see what I can come up with.
 
Back
Top