First Brew!

Homebrew Talk - Beer, Wine, Mead, & Cider Brewing Discussion Forum

Help Support Homebrew Talk - Beer, Wine, Mead, & Cider Brewing Discussion Forum:

This site may earn a commission from merchant affiliate links, including eBay, Amazon, and others.

IPAddict

Active Member
Joined
Apr 7, 2011
Messages
38
Reaction score
2
Location
San Francisco
Hey I just did my first brew! I wanted to get some feedback and I had some questions as well. I'm using a 1 gallon starter kit from Brooklyn Brew Shop, and I'm doing their Everyday IPA. I started a thread about some questions I had before I actually brewed: New to brewing, lots of questions (brooklyn brewshop). Any feedback/comments are appreciated, thanks!

Brewed on Wednesday, 10/17/12. Prep time took about 45 minutes, and the whole brewing process took about 3.75 hours. Followed the directions that came with the kit, for the most part. Got through it with some minor difficulties, but overall pretty straightforward. Had a great time, and can't wait to see how it turns out!

Here's my log:

[LOG START]
Wed, Oct 17, 2012.
4:27p prep
5:13p start
5:35p steeping grains (60 min)
- having trouble getting to 144-155 degF range (staying in ~162 degF)
- got it down to ~148 degF (45/40 min left)
- 146 degF (30 min left)
- 144 degF (20 min left, bringing heat up)
- 150 degF (10 min left)
- 148 degF (done)
- letting it steep for an extra 15 min due to temp range complications in the beginning
6:50p raising mash to 170 degF
6:55p sparge
7:05p bring to boil
7:16p foamed, reduced heat to rolling boil, added columbus hops
- added 1/5th cascade hops (7:31p)
- added 1/5th cascade hops (7:48p)
- added 1/5th cascade hops (8:01p)
- added 1/5th cascade hops (8:11p)
- added 1/5th cascade hops (8:16p)
8:17p placed in icebath
8:41p cooled to 70 degF
8:57p took hydrometer reading: OG 1.116
8:59p yeast added and shaken
9:01p blowoff tube connected and fermenter put in a cool dark place
[LOG END]

I replaced the blowoff tube with an airlock about 4~5 days after fermentation started. I checked up on it everyday for the first week, then about every couple days til now, which has been 15 days. At 21 days I'm planning on taking a hydrometer reading and seeing how it looks. If the ABV is close to what the recipe says it should, I'll check it the next 2 days to make sure it's done and then begin the bottling.

I didn't log anything after I set it down in the cool/dark place to ferment. Now I'm thinking I should log anything I do (change to airlock, frequency of co2 being released, color, amount of krausen, etc) as well as anything I plan to do. I do plan to log the beers characteristics when I end up drinking it, and the FG of course. I'm also thinking I should make a template for a log sheet once I've brewed a few times. I also plan on coding a program to process and store the data once I've entered it in.

With that all said, how does my log look? I'm sure I'm missing some things so please let me know. Any advice on it?

I did have a few issues along the way, and some resulting questions:
  1. When steeping the grains, I had some difficulty getting the temperature in the correct range. In the future, I think I can figure out when to kill the heat and have it land in the range. But when I found myself higher, as directed I poured in 1/4 cup of cold water to cool it. I was scared about adding too much (in the end I shouldn't have) and so I poured, stirred, took the temp, waited, and then had to do it again a few times to get it right. I did this probably too slow and it seemed to take about 15 minutes to get into the right range. Should I be adding more than 1/4 cup, or just really adding it quicker to bring it down asap?
  2. When taking the temp, I stirred to even it out, and took the temp from the middle area, careful to avoid the bottom of the pot which might affect the reading. Is this how I should do it?
  3. Since I had problems getting the grains to the right temp for the first 15 minutes, I let it steep, with in the range, for an extra 15 minutes, hoping it would pull the fermentable sugars that were missed in the first 15. Was this a good idea, or was it complete folly?
  4. When I siphoned the wort into the carboy, I used a mesh strainer as directed. I'm not entirely sure it was fine enough to catch all the hops, as the wort looked greenish in the carboy. Is this something to worry about? It seemed to clear up as everything settles, and it definitely looked like beer a day or two later. I'm thinking it's gonna be fine (and hoping) since hops have the preservative, but I'd like some reassurance. You can see pictures towards the end of the thread.
  5. If I need to strain it better, can I line the mesh strainer with cheesecloth or something? Or should I go out and get a finer strainer?
  6. I didn't have a scale, so I divided up the cascade hops into fifths by sight. They were pellets, I don't think that really mattered too much, right?
  7. When I took the first hydrometer reading, I sanitized the test tube and hydrometer before I poured in the wort. After I poured it in and took the reading, I poured it back. Everywhere I've seen they keep saying not to pour it back, but as long as everything's sanitized, correct? Can I do the same thing for when I take the FG?

That's all the questions I can think of for now. And on a side note, the directions in the book differed slightly from those on the ingredient kit, and the yeast does not list an ideal fermentation temp on the packet. Thanks for reading, below are the pictures.

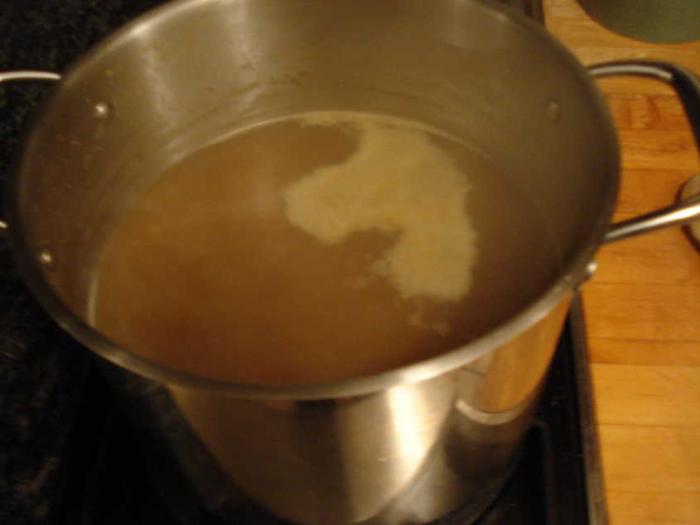
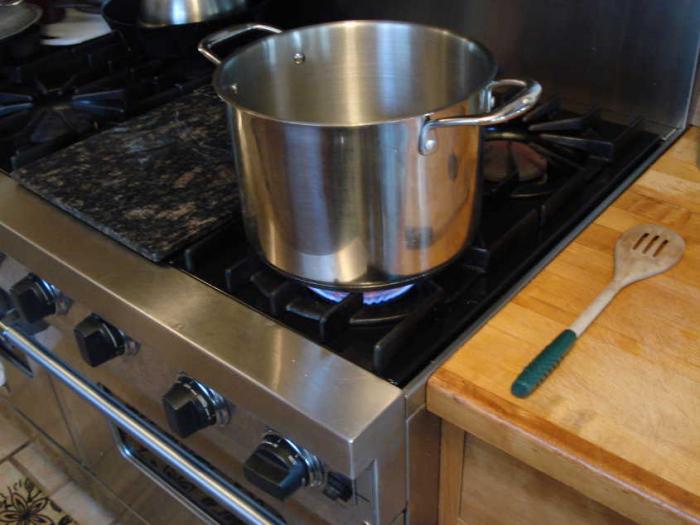
1st pic: Bringing the water to a boil for steeping the grains in.

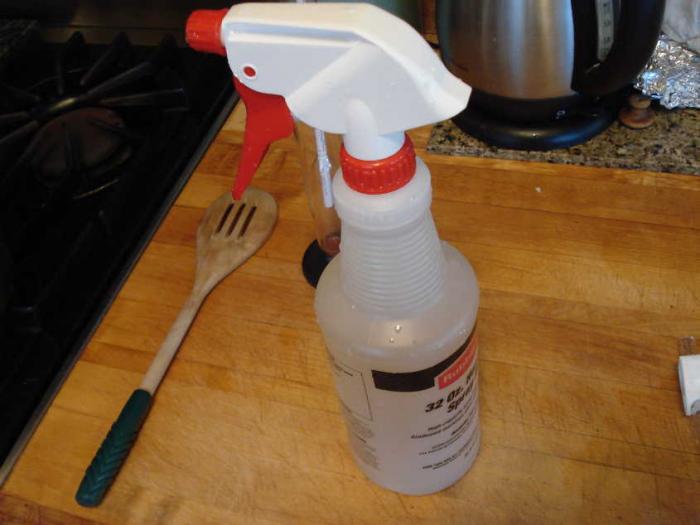
2nd pic: Got the spray bottle of sanitizer.

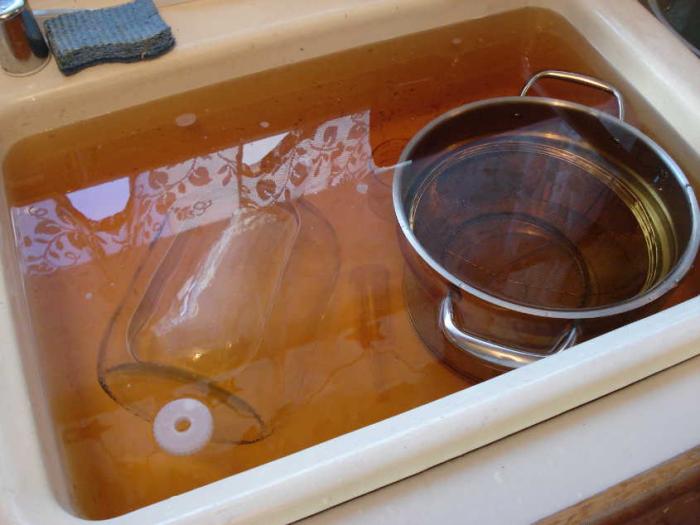
3rd pic: Plugged the sink and made a sanitizing solution. It's a 10 gallon sink, so I think I'll go find a 5 gallon bucket
and make it easier.

4th pic: Steeping the grains.

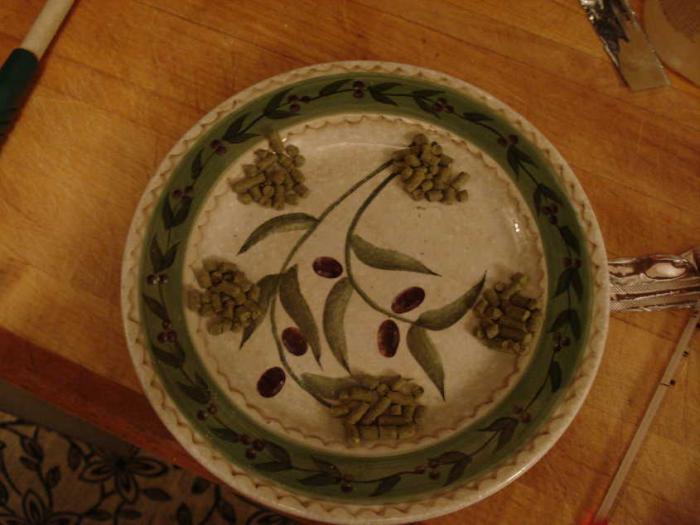
5th pic: Hops and yeast that came with the IPA kit.
z14.jpg


z15.jpg


z16.jpg


z17.jpg


z18.jpg
 
1st pic: Starting the boil.

2nd pic: Eyeballing 5ths of hops, since I don't have a scale.

3rd pic: Boiling now.

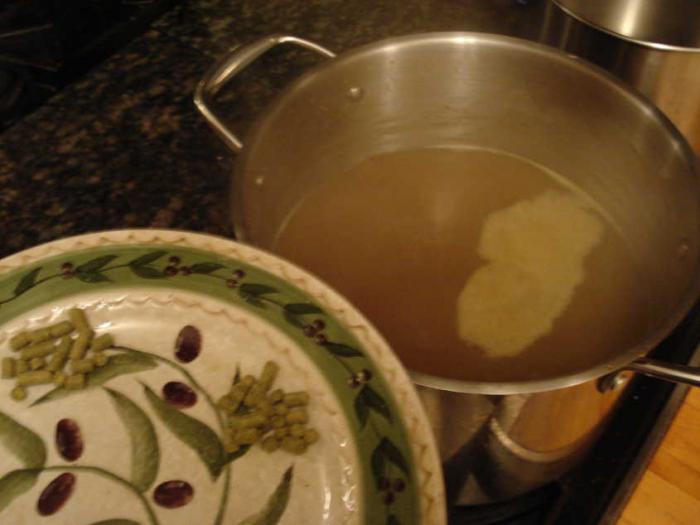
4th pic: Just added the 3rd 1/5th of the cascade hops, 2 more left.

5th pic: Boil's done.

z19.jpg


z21.jpg


z23.jpg


z24.jpg


z25.jpg
 
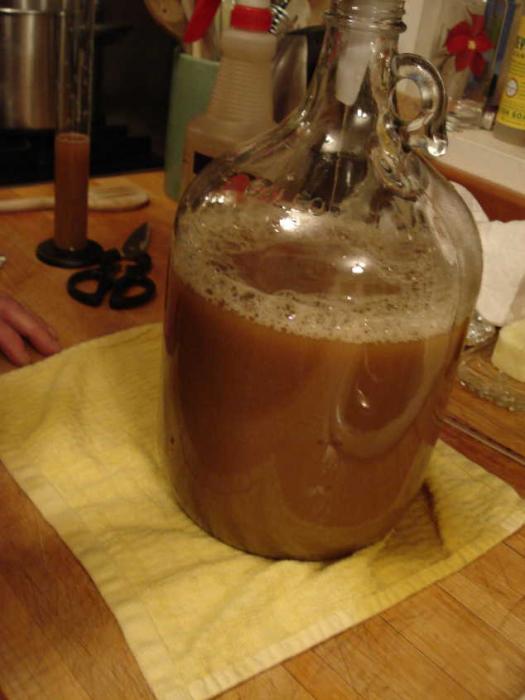
1st pic: Poured the wort into the carboy.

2nd pic: The hops and anything else filtered out. This pic shows how fine (or unfine) my strainer is.

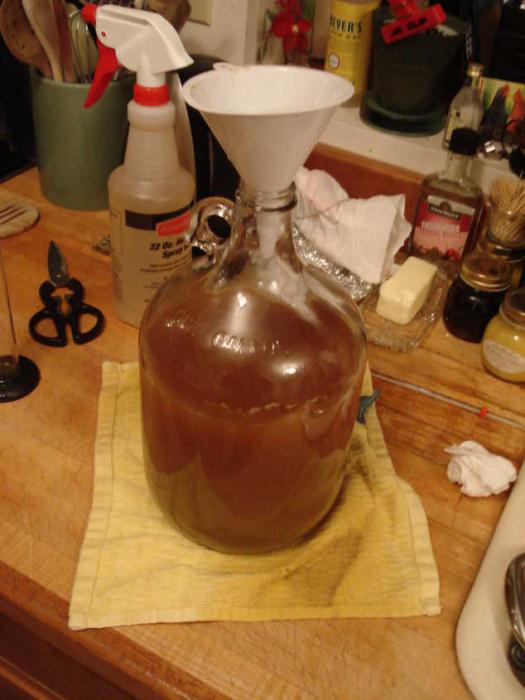
3rd pic: Used the funnel to get it in. Go slow enough and it worked like a charm for me. Shows what the book called the one gallon mark. I was looking for a line, so if there is one, I couldn't find it. Only saw the big "ONE GALLON" text printed around the carboy.

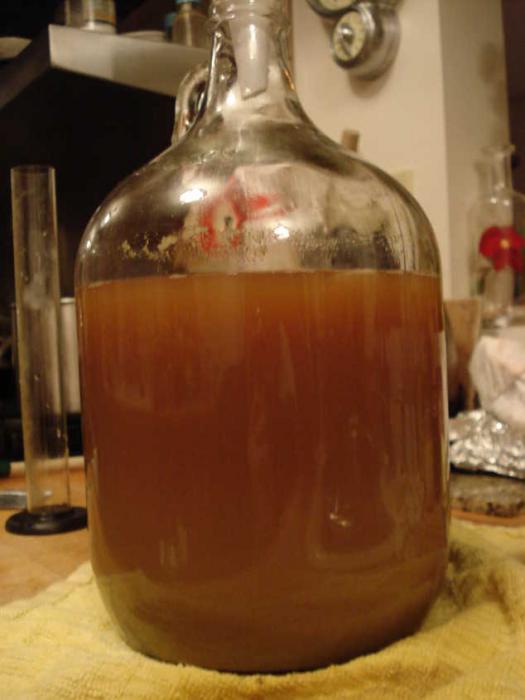
4th pic: Side view shows how far down the wort was from the general 1 gal mark. Had to fill a little water in there.

5th pic: Blowoff tube set up, placed in the basement, cool and dark.

z28.jpg


z30.jpg


z31.jpg


z34.jpg


z39.jpg
 
everything looks normal! thanks for sharing. i think this is a great resource for people making their first couple batches.

you've got good intuition and i think you handled the things that came up well. 1 gallon brewers often keep their samples because they don't want to lose the beer. and yes, so long as you keep everything sanitized, you'll be fine. those hydrometer tubes sometimes have nooks and crannies if they aren't the one-piece kind so be sure to clean it well.

the mashing is going to be tricky with one gallon, i think. with 5 gallons, we'll typically use a calculator like this one and heat the water to the calculated temperature, remove it and wrap it in a blanket or something and let it sit for an hour. The thermal mass of all the water keeps its temperature pretty well.

If i were you, I'd consider finding a 2 gallon cooler and doing your mashes in there. if you get it to where you can keep it around 150 on the stove there is no reason to do this, though

If I had to guess, I'm going to say that your initial high mash temperature is going to result in a slightly sweeter beer that has a relatively high FG.
 
Great post! I agree with progmac, it is a great resources for newbies! Thanks!
 
Everything looks great, though I think you may have been a little too tedious on your hop additions. I'm not big into IPA's yet, so I haven't done one, but there are pretty much three zones for hop additions. Beginning of the boil gets you the bittering, 20-15 minutes left gets you flavor, and 5 to flameout gets you aroma. You probably could have combined some of those cascade additions, but either way it will turn out fine, and if I'm wrong, someone will correct me :drunk:
 
Looks good! And your notes are great- very detailed. You should also make sure you record types and amounts of grain and volumes of strike and sparge water. Even though this was a kit, you should still have all that info written down. If it comes out well, you might want to brew your own, non-kit version of it one day and will need to know all the details in case you want to modify the recipe at all.

Sounds like you did everything right, at least inasmuch as there is a “right” way to brew! We all have our own techniques, and you’ll develop yours as you get through a few more batches, but you definitely used an effective process here. No flaws that I see.

Your mesh strainer is fine- I use a very similar one. Don’t worry about some of the hop gunk getting through- it’ll settle out in the fermenter.

Eyeballing the hop amounts is fine, but go ahead and invest in a digital scale at some point- you’ll be glad you did.

As long as everything is sanitized, returning the hydrometer sample to the fermenter should be fine- some people just don’t do it because it does create one more slight opportunity for infection. Personally, I drink my hydrometer samples, as I like to see how the brew tastes at all points during the process.

Welcome to the world of homebrewing! :mug:
 
Great job and congrats on your first brew!

1,2,3 - You don't have to worry too much about temps when you are steeping grains. As long as you are somewhere close, you will be fine. You are basically just washing the sugars out of the grain and any hot water will do. If you decide to try an all grain batch, you'll need to work on being able to maintain accurate temps.

4,5 - letting a bit of hops into the fermenter won't hurt anything. You'll probably want to keep "most" of them out just for volume constraints in your small batch size, but your current method is just fine. I personally use the mesh bags designed for filtering paint. A 5 gallong batch of IPA quickly overwhelms the small strainers.

6 - if you are going to stick with 1 gallon batches, you might want to invest in a scale. You can certainly make perfectly good beer just eye-balling weights, but virtually every recipe you are going to do will involve fractions of an ounce for every addition. Being able to actual measure those will help with your consistency and ability to recreate any batches you particularly like.

7. technically, nothing wrong with returning wort from a sanitized tester. As a practical matter though, you are adding another infection point. You'll want to be very careful at those steps. Also, when measuring the finished beer, you need to minimize any splashing etc that might pick up oxygen.
 
Great job and congrats on your first brew!

1,2,3 - You don't have to worry too much about temps when you are steeping grains. As long as you are somewhere close, you will be fine. You are basically just washing the sugars out of the grain and any hot water will do. If you decide to try an all grain batch, you'll need to work on being able to maintain accurate temps. .
Bill - I actually think these 1 gallon kits are all grain, as in no extract, even though in the directions they just say 'steeping the grains' when all of us here would say 'mashing'
 
Thanks for reading everyone, and thanks for the comments. Sorry I didn't reply sooner, but I've been pretty busy, and I forgot all about it. So here's a reply post, and I'll follow that with an update post of the bottling. Cheers! :mug:

*Oh, I was gonna just bold each person's name, rather than quote the post. I figured since it's been a while since you all posted, quoting each of you would probably let you know through email/pm, where as bolding wouldn't. I shortened the quotes too, so the post isn't so long.

everything looks normal! thanks for sharing. i think this is a great resource for people making their first couple batches.

...

Thanks for reading! And thanks for the kind words! :mug:

I'm definitely going to be returning my hydrometer samples, so that's good to hear. And yes it is because it's such a small batch, otherwise I wouldn't mind having a taste :) .

I'll keep that in mind for down the line, whenever I upgrade to a 5 gal system. Yeah, I'm pretty sure I can keep the temperature in the correct range, at least once I have it in the range. Temperature of an object doesn't cool to room temperature linearly, but my log shows it cooling at about a rate of 1 deg / 5 min. I think in the scope of that temperature, it acts linearly enough. Next time I'm gonna be very focused on keeping that initial temp from getting above the range. If I can start it within the range, I'll be just fine.

Great post! I agree with progmac, it is a great resources for newbies! Thanks!

Thanks for reading, and thanks for the compliments! :mug: I hope others starting off with this kit (or just starting out) can get some help from this.

Welcome to the addiction. It's only going to get worse from here.

Hahaha, thanks man! I think you're right! :D

Everything looks great ...

Thanks for the advice! I did it this way only because I'm following a recipe that came with the kit. Once I have a few brews under my belt I plan on modifying some recipes and eventually trying out my own altogether. IPA's are my favorite beer (hence the username :) ) so I'm interested to see how this turns out. Also, the recipe is called "Everyday IPA" so it seems a bit like they're trying to hit all 3 of those zones evenly. I'll post up the recipe in the update post (following this reply post).

Looks good! ...

Welcome to the world of homebrewing! :mug:

Thanks for the comments and advice, much appreciated! :mug:

I do have recipe in the book that came with the kit, and it also comes with dozens of other recipes too. I am going to take your advice though and write it down anyways. I like that idea, and it's good to get in the habit of doing that now, so when I try a recipe not in that book, I'm already accustomed to logging it. And as you mentioned, I do like to have plenty of detail. Sounds like you're the same :tank:

I'll keep using the strainer then, and I now have a digital scale in the house. As for the sample, since it's a 1 gal batch, I'm gonna keep it. But once I'm at a 5 gal, I'll be sampling the goods :) .

Great job and congrats on your first brew! ...

Thanks for the comments! Much appreciated! :mug:

The kit's an all grain set up. Don't worry about it though, you are definitely not the first fooled by this :) . As for the hops, glad to hear it. I believe you about a strainer like that in a 5 gal batch. This strainer had a tough enough time for a 1 gal :p . And I have a digital scale now, so I'll be able to get that precision. And yeah, keeping the beer from getting contaminated it definitely high on my list :) .

Bill - I actually think these 1 gallon kits are all grain, as in no extract ...

Yeah, it's an all grain. Could you explain why some people tend to think it's extract? Just curious, thanks!
 
UPDATE:

Ok, so I waited a full 4 weeks to let it ferment. Since I didn't want to risk contamination, I decided this was the better option, rather than taking multiple hydrometer readings over a few days. I'm glad I did this, I'll explain a bit further down. So I bottled on Wednesday, 11/14/12. Prep time took about 30 minutes, and the whole bottling process took about 1hr 10min. I got it done, with much difficulty/frustration :( , but the keywords: I got it done :) .

Here's the update to the log:

[LOG UPDATE START]
Bottling: Wed, Nov 14, 2012

2:20p start prep
2:20p move fermentor onto counter (& let sit/settle)
2:22p checking I have everything I need
2:25p re-sanitizing bottles/instruments

2:50p start bottling process
2:50p boiling priming sugar mix (water and honey)

4:00p finish
[LOG UPDATE END]

As you can see, the log for the bottling process wasn't as thorough. I got too involved with what was going on to really take note on paper and timestamp it. I think once I've done this a few times and have an idea of everything I need, I can make a template where I just have to fill in the time next to the step (and anything else, like temp), and I can add additional notes if needed. I think that would make logging a lot easier.

Ok, I'll go over what went wrong:
  1. Right off the bat, things weren't looking good. I had the jar with the sanitizing solution that I had used for the blowoff tube during early fermentation. I figured it's sanitizing solution, just leave it there and it will be fine since it will kill off any bacteria that comes into contact with it. I was also thinking I could reuse it for sanitizing for the bottling process. In the last two weeks of fermentation, I hadn't checked things as often as I had in the first two weeks. And after the airlock was on, I hadn't been really paying attention to the jar. Well, I had let the jar set there with no lid, and right before bottling, when I went to get it, there was some mold forming on the top. Well, I just can't use that sanitizing solution, no big deal right? Well, I had left the tubing in there in the hopes of just rinsing it off right before bottling.

    Part of the tubing came up out of the surface. The good thing was that both ends were submerged, and the only air the tube was what was in the part sticking up. Since that air was trapped, I don't think there was any mold (It didn't look like it, but my eyes aren't microscopes... I'm just hoping here). I poured out the solution, wiped off the mold thoroughly with a wet/soapy paper towel, and then proceeded to wash the ****e outta the tubing with scalding water and dish soap. I let it soak in scaling water for a bit before rinsing it, and then spraying it with sanitizing solution. I'm pretty sure the mold was only on the outside of the tubing, no more than 2 inches long, and I'm pretty damn sure I got rid of it all.

  2. If you've noticed, I don't have a FG reading listed in the log. The wine thief I bought doesn't actually fit in the 1 gal carboy, which is surprising since I bought it based on the fact that it fits in a 1/2 gal growler. I knew that already though. My idea for bottling day was to take the tubing, dip it in the carboy, sanitize my finger and use that to plug the other end, then pull it out, put it in the hydrometer tube, and remove my finger. This did not work, not even close. I had imagined this would be as easy as when you're a kid and you do this with a soda and a straw; it wasn't at all. Not only that, with sanitized hands, I felt it difficult to really hold the tubing (kept slipping, pretty easily).

    It took me a good amount of tries to fill the hydrometer tube about 1/5 to 1/4, not enough to get a reading. I was getting worried about disturbing the beer too much and having it leave the carboy, then drop back in, make bubbles. I got paranoid about contamination, and I started to get frustrated with it, so I decided to skip that and just get it bottled without an FG. At that point I had figured, this is my first brew, it's more about getting the process down, I don't necessarily need to worry about knowing the actual ABV at the cost of loosing my cool and potentially messing something up. So I siphoned it into the pot with the priming sugar.

    I could have filled the hydrometer tube when I was siphoning, but I was holding the carboy high up with one hand and holding the tubing with the other. I couldn't hold the tube as well, over the pot, and I didn't want to spill transferring back to the pot (or even knock the tube over).

  3. The racking cane is difficult to deal with by yourself. Although it does have that cap that ensures it draws from above rather than below (I'll try and mspaint it for those that might not know what I'm talking about; I don't know if this is something standard or not), the cane can reach the bottom of the carboy. That means it will rest on the trub, which means it will disturb it at least once (putting it in) and any time the cane moves. It's just resting on the mouth of the carboy, and it is attached to the tubing; it does move. I tried to fix that by clamping it down at the mouth with a rubber band. It only alleviated a little bit of movement. It was better, but it still moves a lot and did disturb the trub.

  4. Siphoning at any point was an absolute PAIN. I had to use water to fill the tubing with since I was low on sanitizer (so I didn't fill it all the way to the racking cane). It was hard to get it going and then keep it going. It would go strong initially, then trickle off slowly. This wasn't so bad for getting it into the pot with the priming sugar, but when it came to bottling, it was so difficult. Since I had to stop between bottles, it cut off the vacuum, and since the flow gets cut to a trickle, when the tube gets clamped shut, there's not enough beer in the tube to start the siphon again :( .

    The amount of difficulty I had with this, is why I'm glad I didn't try to take multiple hydrometer readings before bottling.

  5. It was difficult to fill the bottles since I had to slow down towards the top and stop a couple times to make sure I don't overfill. This was more to do with the siphoning issue, but still.

Hindsight:
  • Next time I'm just gonna clean/sanitize everything when I'm done using it. I'd rather just be thorough with it.
  • If I set it up better, I could get the sample for the FG by filling it up as im siphoning into the pot with the priming sugar. I should just have a box or something to have the carboy raised. It would be easier on me, give me a free hand, and I could make sure the trub stays settled.
  • A brew buddy, or buddyette if you're lucky enough ;), would definitely help for many things. Right now, any friend I could use to help would be working when I'm brewing. Same with the girlfriend too, although she would help me in a pinch if she could. She doesn't drink beer, but I'll have to do a cider brew down the line for her /tangent
  • An auto-siphon would really, really help I think. Since this is what caused me the most frustration, I'll definitely get one of those.
  • A bottling wand would help. I'll pick one up.

Although I didn't get enough of a sample for the FG reading, I did have enough to at least taste the beer. It tasted good, nice and hoppy, and a very hoppy aroma, all like an IPA should. It did taste sweet, as expected, due to the high temp during the first 10-15 min of the mash.

When preparing the priming sugar I decided to just add water right off the bat, rather than try and heat the honey by itself. It recommended to add a 1/4 cup at a time; I think I added 1/2 cup total. The reason I did this, is because I'd rather have it fairly diluted and very fluid (and not stuck in clumps or stuck to the bottom of the pot). I want it to be easy to mix evenly with the beer, so each bottle is carbonated as uniformly as possible, as well as to keep me from stirring too much and get oxygen in the beer.

Minus the siphoning and filling issues, getting the beer into the bottles wasn't bad. It seems a lot of people don't like this part, but I didn't mind it, and well, maybe that's because I was so frustrated with some of the other parts of the process, but I don't think it was that bad. The hard part for me at first was keeping an eye on the beer level in the bottle. It was hard to see with brown bottles, and the label on, but once I figured out the angle to hold it at so I could tell where the level was, it wasn't bad at all. I had all the bottles out and sanitized. I'd just take one, fill it, and set it aside. Eazy peazy.

The capping was straight forward, although I'll admit, I couldn't resist when I bought it and tried it a few times :) . I had some bottle caps sitting in a small bowl of sanitizer as well as the 12 pack box ready. I just took a bottle, took a cap, capped it, and put it in the box. Rinse and repeat, no issues there.

Since the trub was getting disturbed when I siphoned the beer into the pot, I knew my beer would have some settlements at the bottom of the bottles (more than what would be usual). Sure enough, it does. I've included a couple pictures so you can see. They're in 12oz Racer 5 bottles, so that will give you an idea of the size. It's not a big deal, and I'll live. Next time, I will try and attach/fasten the cane in a way so that it is stationary.

It's been conditioning in the bottles for 2 weeks as of yesterday (Wed, 11/28/12). I think I will be patient and let it condition for 2 more weeks, for a total of 4. I'm not drinking during the week, so it will really be 4 weeks 2 days (or 3 days, depending upon weather I drink it on a Fri or Sat). I might have one of the beers in a week from tomorrow. I will definitely let you all know :) .

Thanks for reading, check out the pics that follow. I'll give another update after I try the first beer :D . Thanks again for all the help, advice, and support, much appreciated! Cheers!
 
Pic 1: mspaint of how the cap on a racking cane works (for those that don't know). The cap is the black piece at the end of the racking cane. there's space at the top, between the edge of the cap, and the cane. The bottom is closed. nothing gets in from the bottom of the cap (indicated arrows with red x's) it has to go in from the top where the openings are (indicated arrows with green checks). However, the cane can disturb the trub, which unsettles it and can result in it getting drawn in to the cane.

Pic 2: Carboy moved to counter. Letting sit to resettle trub.

Pic 3: About eye level view of the trub. A little blurry, sorry.

Pic 4: Not as eye level, but a clearer. Show the trub in relation to most of the carboy.

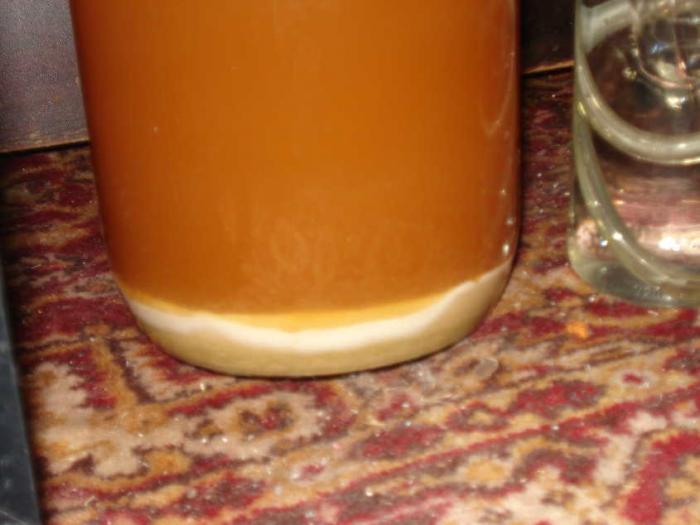
Pic 5: Shows the kraussen residue around the neck.

rackingcanecap.jpg


d39.JPG


d41.JPG


d42.jpg


d43.jpg
 
Pic 1: Shows 7 filled bottles, the empty carboy with trub left behind, almost done!

Pic 2: Close up of the trub left behind. That's a Racer 5 bottle up next to it for size reference.

Pic 3: Pic taken today, shows the sediment in the bottle. Would have liked to have much less, but that's ok. I'll try and do better on that next time.

Pic 4: All bottled! There are 2 empties just to keep it packed nice and tight, since there are no cardboard dividers in there.

Pic 5: None so far, so I'm happy! =D

d45.JPG


d51.jpg


d54.jpg


d55.jpg


d57.jpg
 
+999,999,999 to auto-siphon. Best brewing purchase I've made to date.

You might also consider a turkey baster to get the samples from your gallon jug to the wine thief. I know it's an extra step and another possible point of infection, but I haven't managed to infect any of my gallons doing this. Just angle the thief a little and let the beer flow down the side to reduce the chance of oxidation.

Awesome! I'm hoping I'll be saying the same thing. With that said, does any old one work, or are some better than others? Any recommendations are appreciated; I'd like to get a solid one that will last a long time.

And you know what's funny is, I looked all over the kitchen for a turkey baster and didn't find one. I was told after "oh it's in there somewhere." Come Thanksgiving, I'm doing the turkey, we still couldn't find it. I guess it's time to go out and buy another.
 
My LHBS only had one brand and it works just fine. I've read that as the auto-siphon gets older it will start to lose the seal that makes it work, but you can pour some sanitized water in the outer tube and that will give you a seal. Every time I bottle I give thanks to the people that invented bottling wands and auto-siphons. I also silently thank Revvy for his bottling sticky.
 
you know, whoever you work for is lucky to have you. your posts and beer-making is the most thorough and well-documented i've ever seen. i couldn't help but smile when i read the time stamps of all the different activities! i imagine this translates to other aspects of your life as well.

you asked why people kept assuming you were doing extract. the reason is because most new brewers on here start out doing 5 gallon batches with malt extract (thick, syruppy goo made from the same type of malted grains in your kit) rather than 1 gallon all-grain. the reason 5 gallon brewers don't start with all grain is because making 5 gallon batches on the stove starts to involve multiple really big pots and apparatuses and large volumes of grain and water, so 24 out of 25 beginners use extract so they can brew with just one pot and not deal with 10+ pounds of grain. more experienced brewers also use extract at times for similar reasons. but with 1 gallon batches, the amount of grain and water is small enough that you can do everything in a fairly small stock pot. i actually think that the 1 gallon process you're doing is probably more educational than a 5 gallon extract brew.

to me the next logical step in your addiction is 3 gallon all-grain BIAB style brewing.
 
MTate37:

Sounds good. I'll check out my LHBS and see what they have. Once I have those pieces, I'll go ahead and reread his sticky.

progmac:

Thank you very, very much for that compliment! :D And yes it does carry over. I have a very high attention to detail. It can be time consuming but the rewards are well worth it.

I didn't realize so many started out that way. I thought most people either did smaller kits or just dove right in to 5 gal systems. I'll definitely be checking out that 3 gal BIAB, but I'm not sure if I'll make it there. The reason why is because of some good news =D.


Good news everyone! My cousin just recently moved back to my town and he's got a lot more free time. He has a 5 gal system and he said he's down to get some brewing going. So now I have someone to brew with, and it will be on a 5 gal level. I'll still be doing 1 gal brews though, but this will be fun to get some more out of it, and I'll be able to learn some things from him. If I get the experience in, then once I'm able to, I'll set up my own 5 gal system.

Goodnewseveryone.jpg
 
If anyone was curious, here's the recipe. I have the recipe in the book I got with the kit, but I'll add to my log anyways, as mentioned.

Here's the recipe:

EVERYDAY I.P.A.
6.8% ABV


60-MINUTE MASH AT 152°F

2½ quarts water, plus 1 gallon for sparging
1.8 pounds American 2-row malt
0.4 pound Caramel 20 malt
0.2 pound Victory malt
0.1 pound Munich malt
*all grains should be milled (see note, page 17)

------------

60-MINUTE BOIL

0.1 ounce Columbus hops
0.5 ounce Cascade hops, divided into fifths

------------

FERMENT

½ packet American ale yeast, such as Safale S-05 or Wyeast American Ale II (see note, page 22)
3 tablespoons honey, for bottling


MASH: In a medium stockpot, heat the 2½ quarts water over high heat to 160°F. Add all the malts and stir gently. The temperature should reduce to 150° within 1 minute. Turn off the heat. Steep the grains for 60 minutes between 144°F and 152°F. Every 10 minutes, stir and take the temperature. If the grains get too cold, turn on the heat to high while stirring until the temperature rises to that range, then turn off the heat. With 10 minutes left, in a second medium stockpot heat the 1 gallon water to 170°F. After the grains have steeped for 60 minutes, raise the heat of the grains-and-water mixture to high and stir until the temperature reaches 170°F. Turn off the heat.

SPARGE: Place a fine-mesh strainer over a pot, and pour the grains into the strainer, reserving the liquid. Pour the 1 gallon of 170°F water over the grains. Recirculate the collected liquid through the grains once.

BOIL: Return the pot with the liquid to the stove on high heat and bring to a boil. When it starts to foam, reduce the heat to a slow rolling boil and add the Columbus hops. Add one fifth of the Cascade hops after 15 minutes, 30 minutes, 45 minutes, and 55 minutes. Prepare an ice bath by stopping the sink and filling it with 5 inches of water and ice. At the 60-minute mark, turn off the heat and add the remaining Cascade hops. Place the pot in the ice bath in the sink and cool to 70°F, about 30 minutes.

FERMENT: Using a sanitized funnel and strainer, pour the liquid into a sanitized fermenter. Add any water needed to fill the jug to the 1-gallon mark. Add the yeast, sanitize your hands, cover the mouth of the jug with one hand, and shake to distribute evenly. Attach a sanitized stopper and tubing to the fermenter and insert the other end of the tubing into a small bowl of sanitizing solution. The solution will begin to bubble as the yeast activates, pushing gas through the tube. Wait 2 to 3 days until the bubbling has slowed, then replace the tubing system with an airlock (see page 28). Wait 11 more days, then bottle, using the honey (see page 30 for bottling instructions).

One thing to note, that I don't think I mentioned earlier; the kit and the book are sold separately. The book is just that, the book. The kit contains the items used for brewing (carboy, airlock, tubing, etc.) and the ingredient pack. You can buy the ingredient pack alone, but your first time, you buy the kit so you have what you need. With that said, I don't know how old the kit I received was. There was no date on the box, anything inside, or anything in the ingredient pack. The book though, has a copyright date of 2012, so I know that it's not that old (I received it in August 2012).

The hop packets had some directions with it. It varied from that of the books in that it instructed on adding the Cascade hops differently (different intervals, and amount). Since the book is probably more recent IMO, I figure they tweaked the recipe to something they feel is better. So when brewing, I opted to follow the book's directions, rather than that from the hop packet.

--------

On a side note, does anyone know phpbb really well? I'm looking for a convenient way to add non-keyboard symbols in posts. I'd like to avoid copy/paste. As of now, I've found this alt code website, which might be helpful to some. You just hold the ALT key, and press the number sequence for that symbol, then release.

For example, to make the degree symbol (°), the code is ALT-248. So you press and hold ALT, press 2, press 4, press 8, then release ALT. In about a half a second, the symbol will appear. The codes only work for me with the numbers from the keypad (numberpad, right-hand side of the keyboard), fyi. And note, I'm doing this on Windows XP; it might be different for Mac and Linux users. Also, I think windows 7/8 have some easier thing with setting up keyboard shortcuts for symbols from a table.

I've only used ° and ½, and I can remember their codes easy enough, but I was wondering if anyone knows of a way to do this with tags possibly, since that might be a little more intuitive, and therefore easy to remember. And I do visit this forum from different computers, so rather than set up shortcuts, tags would be easier. Thanks.
 
If anyone was curious, here's the recipe. I have the recipe in the book I got with the kit, but I'll add to my log anyways, as mentioned.

Here's the recipe:


One thing to note, that I don't think I mentioned earlier; the kit and the book are sold separately. The book is just that, the book. The kit contains the items used for brewing (carboy, airlock, tubing, etc.) and the ingredient pack. You can buy the ingredient pack alone, but your first time, you buy the kit so you have what you need. With that said, I don't know how old the kit I received was. There was no date on the box, anything inside, or anything in the ingredient pack. The book though, has a copyright date of 2012, so I know that it's not that old (I received it in August 2012).

The hop packets had some directions with it. It varied from that of the books in that it instructed on adding the Cascade hops differently (different intervals, and amount). Since the book is probably more recent IMO, I figure they tweaked the recipe to something they feel is better. So when brewing, I opted to follow the book's directions, rather than that from the hop packet.

--------

On a side note, does anyone know phpbb really well? I'm looking for a convenient way to add non-keyboard symbols in posts. I'd like to avoid copy/paste. As of now, I've found this alt code website, which might be helpful to some. You just hold the ALT key, and press the number sequence for that symbol, then release.

For example, to make the degree symbol (°), the code is ALT-248. So you press and hold ALT, press 2, press 4, press 8, then release ALT. In about a half a second, the symbol will appear. The codes only work for me with the numbers from the keypad (numberpad, right-hand side of the keyboard), fyi. And note, I'm doing this on Windows XP; it might be different for Mac and Linux users. Also, I think windows 7/8 have some easier thing with setting up keyboard shortcuts for symbols from a table.

I've only used ° and ½, and I can remember their codes easy enough, but I was wondering if anyone knows of a way to do this with tags possibly, since that might be a little more intuitive, and therefore easy to remember. And I do visit this forum from different computers, so rather than set up shortcuts, tags would be easier. Thanks.

Sooooo how did it taste?
 
Back
Top