So, I make what amounts to an amalgamation of a lot of the brewstand builds I really like on this forum. The only thing I really liked that I'm not doing is the built in tipping frames (which is brilliant).
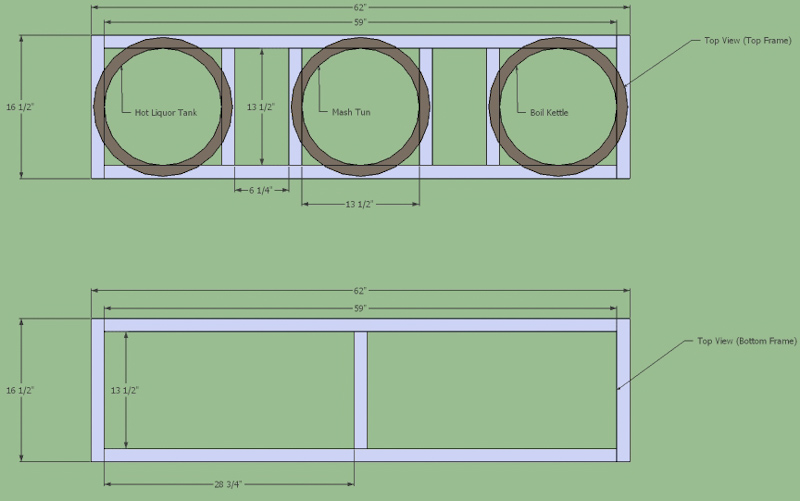
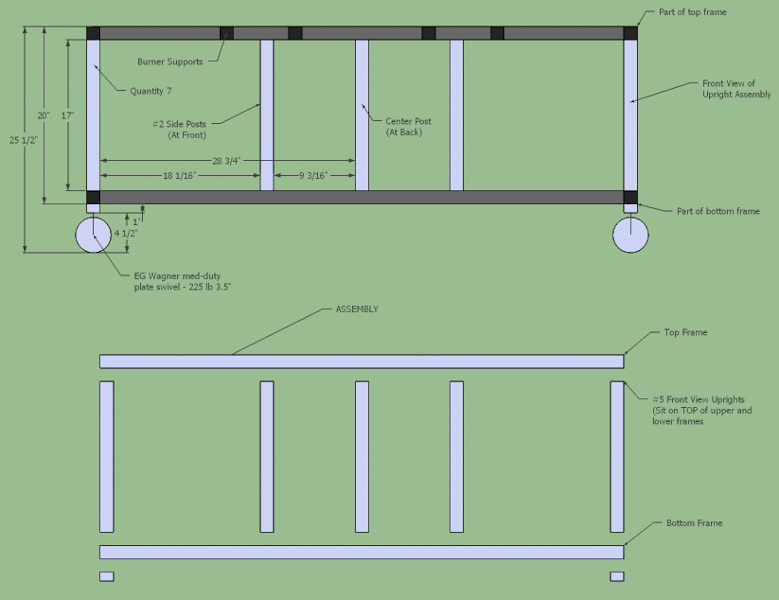
So, original Sketchup drawings:
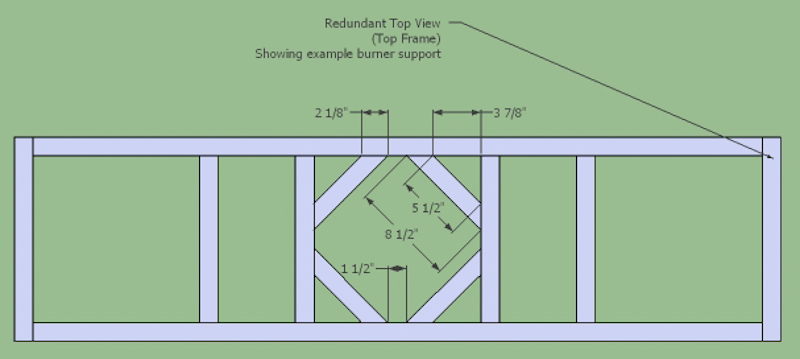
and this, which was my original plan for the burner supports. Currently I'm not really sure what I'm going to do in that area. I may still do this. No idea yet.
So, I stopped at the local welding shop and asked Steve to order me two 24' sticks of 16 gauge 1.5" square box tubing. Took a couple weeks, went up with my cutlist for 20 cuts, paid him 70 bucks and I was on my merry way 2 miles back to my parents house where I actually have room to work on projects like this.
Tragically, the MIG was almost out of gas, so the first night of work was a bunch of extremely fast welding trying to get as many inches of weld as possible out of the ~4% remaining argon/co2 left in the tank.

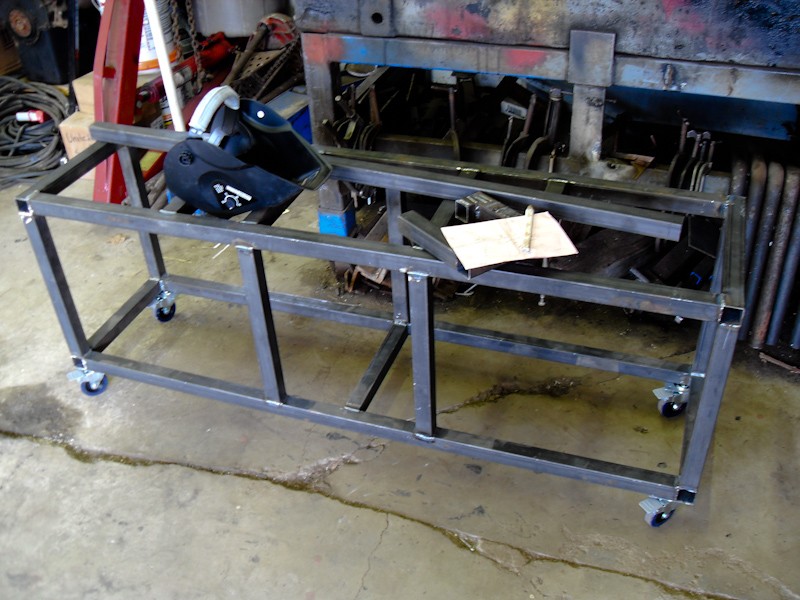
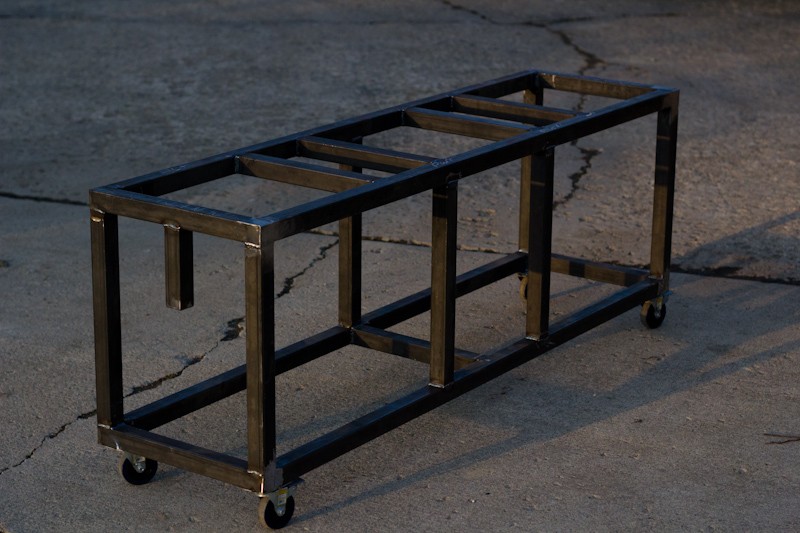
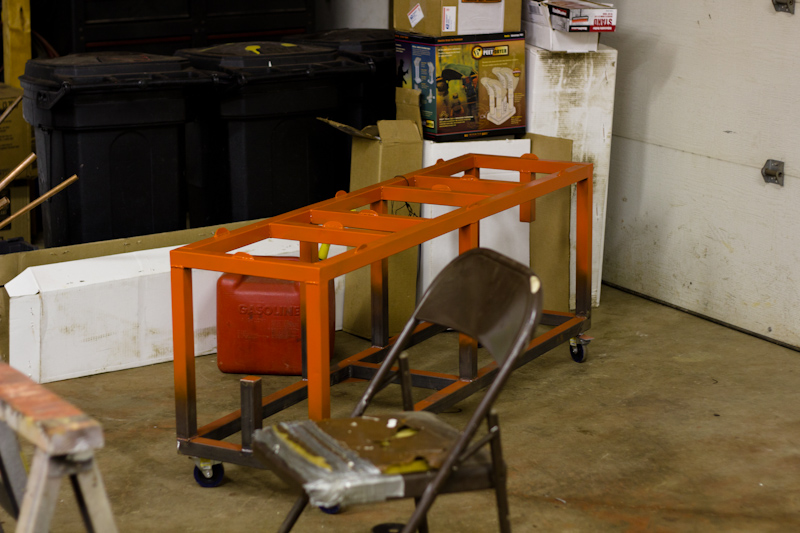
I got the top frame finished except for capping the ends. Bottom frame is done except for one end, which I had just enough gas to make two really ugly tacks. Just need to grab some gas on monday and then I can start welding in the uprights.
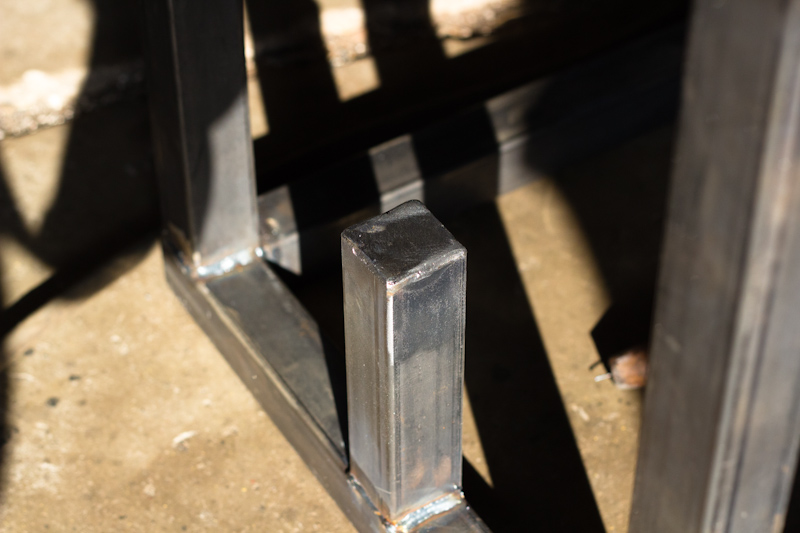
Then I just need to weld the caster plates and studs on, make a filter mount and weld in the pump mount studs. I'll probably cap off the 8 open pipe ends last, because it's going to take a fair amount of shaping with the grinder to make them pretty.
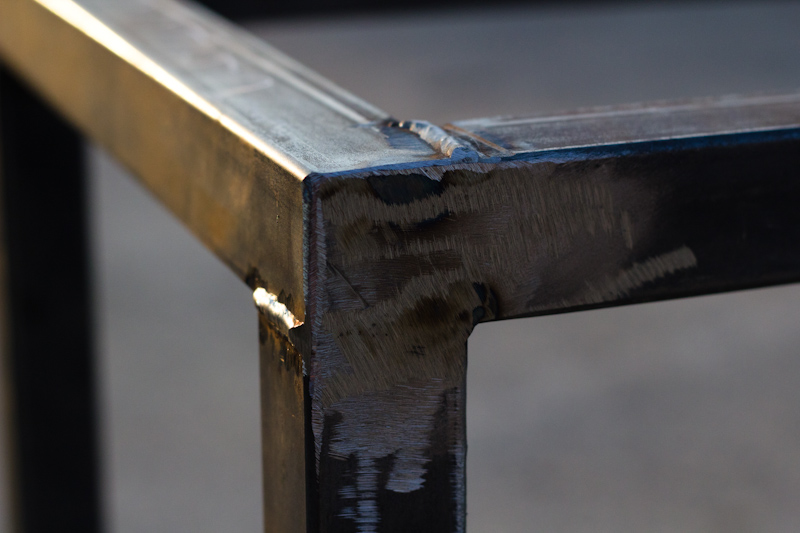
Then I get to grind every weld flush so I can paint it, which will take a lot of grinding.
Then I get to spend hundreds of dollars on doing the electric setup
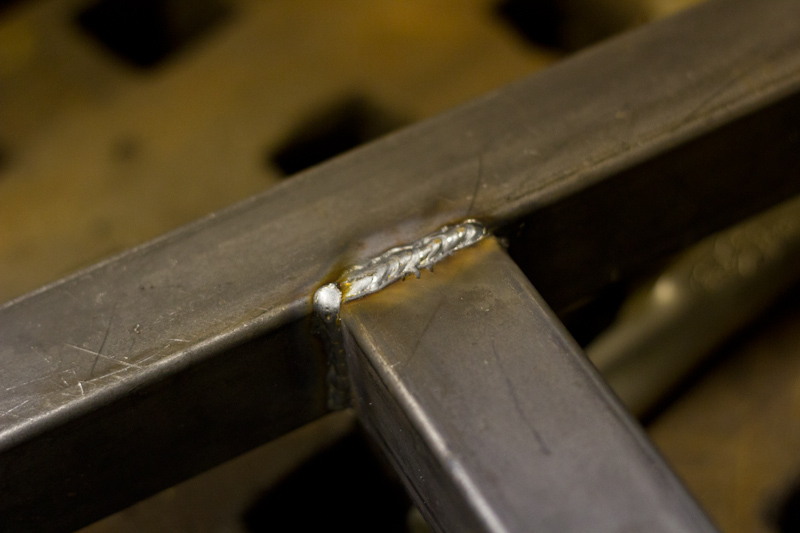
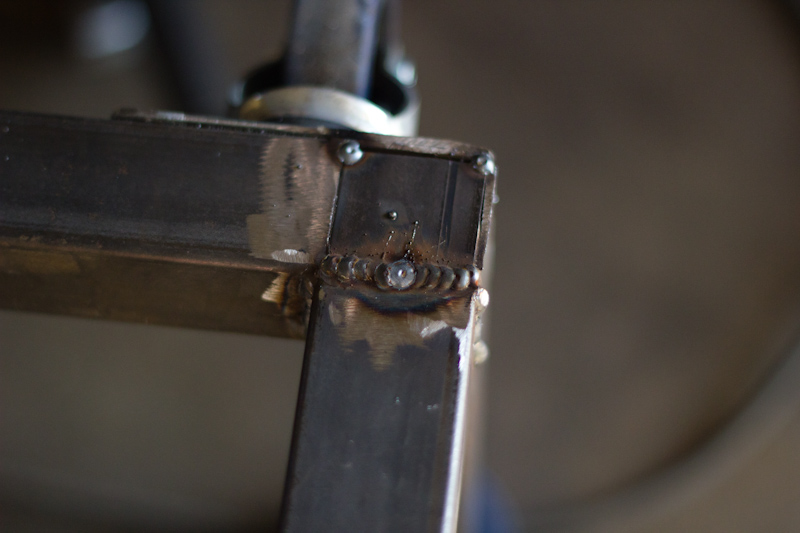
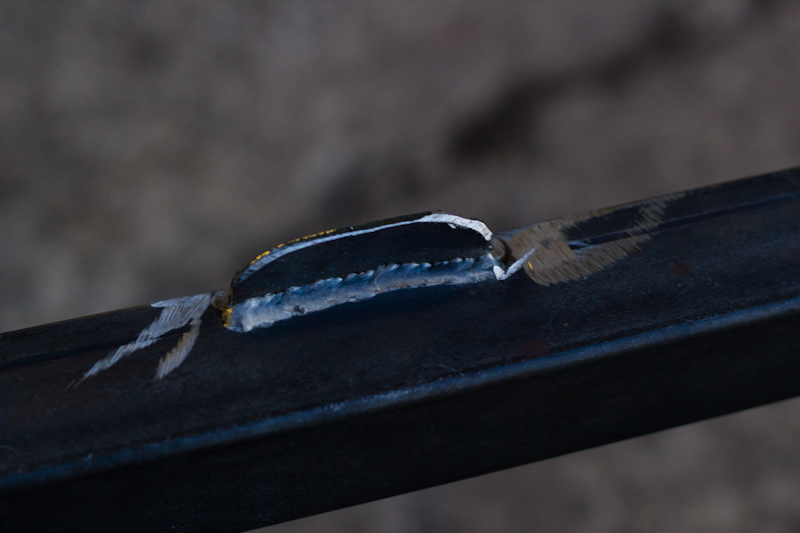
My race against the welding gas made my welds pretty ugly, but they burned in well and they'll get ground off anyway. If I see any porosity after grinding flush, I'll reweld any joint that needs it. There are at least 3 that I know didn't burn in as well as I'd like, but MIG is forgiving so it's grinding and reburning time. I'm sure drinking a couple beers while I was in the garage didn't help at all.
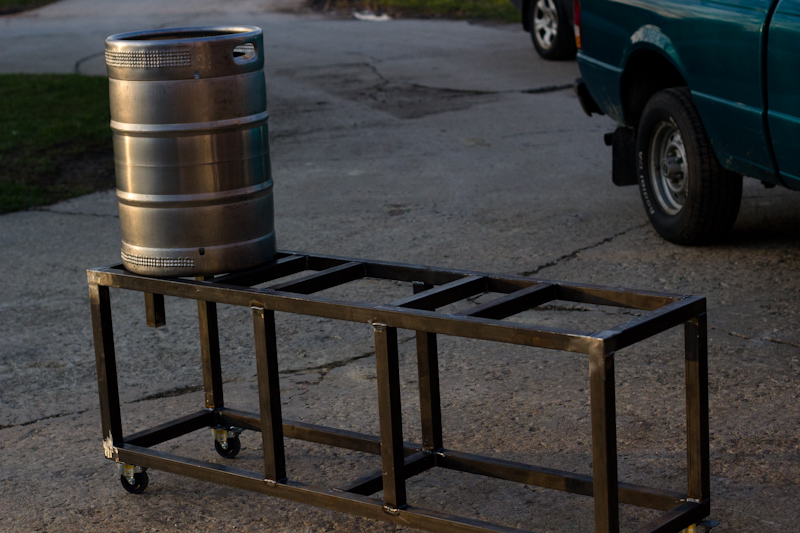
Coming soon; more welding, more grinding, etc. Work starts up again on the 11th, and then I'll have money to start collecting everything for the actual electronics build. In the mean time, I'm strongly considering throwing two burners under there just so I can brew a few times while I'm building the control panel and such.
The electric setup, as of now is going to be 1200 watt RIMS, 5500 watt RIPP elements in the BK and HLT, two pumps and no hardlines.
Control panel will be fairly spartan, no built in timer or alarms.
In the future I'm going to experiment with using a RIMS tube to heat a home made water jacket for the MLT, but that's going to be hugely expensive so it's going to wait.
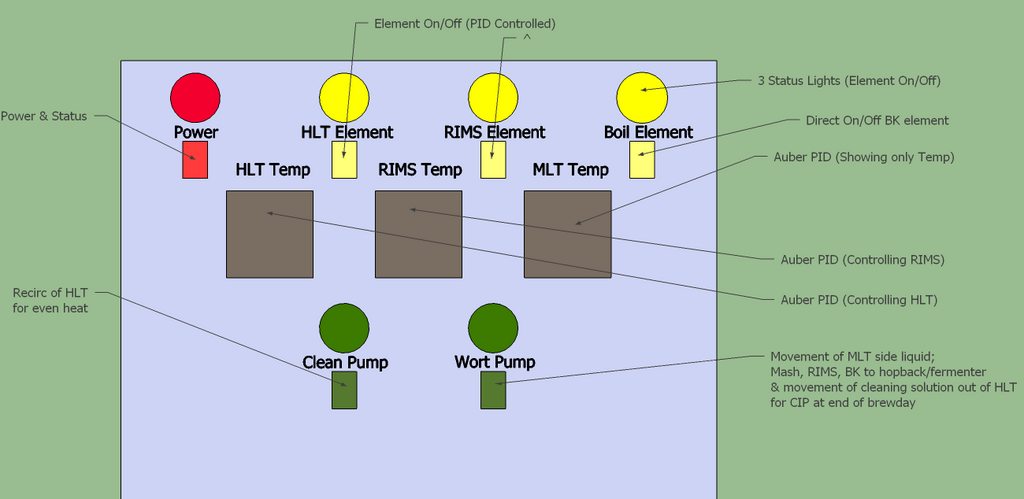
That was the plan as of a couple weeks ago. Since then I've realized that running a 5500 watt element wide open in the BK would be a little silly, so I'm either going to put in another PID controller and use it as straight duty cycle control, or put a 3500 watt-ish element in the BK opposite the 5500 and a direct switch for each. I don't really like either of those ideas though, in all honesty.
Two pumps seems strange, but the "clean pump" (which really won't be the clean water pump occasionally, but that's what I was considering it when I made the control panel layout) will be hugely useful for double brewdays, pumping around sanitizer and cleaning solution during the mash, and for pumping over HLT liquid while recirculating or draining the MLT. I batch sparge, but it'll give me the option of fly sparging if I ever get the urge, too.
So, original Sketchup drawings:
and this, which was my original plan for the burner supports. Currently I'm not really sure what I'm going to do in that area. I may still do this. No idea yet.
So, I stopped at the local welding shop and asked Steve to order me two 24' sticks of 16 gauge 1.5" square box tubing. Took a couple weeks, went up with my cutlist for 20 cuts, paid him 70 bucks and I was on my merry way 2 miles back to my parents house where I actually have room to work on projects like this.
Tragically, the MIG was almost out of gas, so the first night of work was a bunch of extremely fast welding trying to get as many inches of weld as possible out of the ~4% remaining argon/co2 left in the tank.
I got the top frame finished except for capping the ends. Bottom frame is done except for one end, which I had just enough gas to make two really ugly tacks. Just need to grab some gas on monday and then I can start welding in the uprights.
Then I just need to weld the caster plates and studs on, make a filter mount and weld in the pump mount studs. I'll probably cap off the 8 open pipe ends last, because it's going to take a fair amount of shaping with the grinder to make them pretty.
Then I get to grind every weld flush so I can paint it, which will take a lot of grinding.
Then I get to spend hundreds of dollars on doing the electric setup
My race against the welding gas made my welds pretty ugly, but they burned in well and they'll get ground off anyway. If I see any porosity after grinding flush, I'll reweld any joint that needs it. There are at least 3 that I know didn't burn in as well as I'd like, but MIG is forgiving so it's grinding and reburning time. I'm sure drinking a couple beers while I was in the garage didn't help at all.
Coming soon; more welding, more grinding, etc. Work starts up again on the 11th, and then I'll have money to start collecting everything for the actual electronics build. In the mean time, I'm strongly considering throwing two burners under there just so I can brew a few times while I'm building the control panel and such.
The electric setup, as of now is going to be 1200 watt RIMS, 5500 watt RIPP elements in the BK and HLT, two pumps and no hardlines.
Control panel will be fairly spartan, no built in timer or alarms.
In the future I'm going to experiment with using a RIMS tube to heat a home made water jacket for the MLT, but that's going to be hugely expensive so it's going to wait.
That was the plan as of a couple weeks ago. Since then I've realized that running a 5500 watt element wide open in the BK would be a little silly, so I'm either going to put in another PID controller and use it as straight duty cycle control, or put a 3500 watt-ish element in the BK opposite the 5500 and a direct switch for each. I don't really like either of those ideas though, in all honesty.
Two pumps seems strange, but the "clean pump" (which really won't be the clean water pump occasionally, but that's what I was considering it when I made the control panel layout) will be hugely useful for double brewdays, pumping around sanitizer and cleaning solution during the mash, and for pumping over HLT liquid while recirculating or draining the MLT. I batch sparge, but it'll give me the option of fly sparging if I ever get the urge, too.