How I built my Stir Plate

Homebrew Talk - Beer, Wine, Mead, & Cider Brewing Discussion Forum

Help Support Homebrew Talk - Beer, Wine, Mead, & Cider Brewing Discussion Forum:

This site may earn a commission from merchant affiliate links, including eBay, Amazon, and others.

NoNothing

Well-Known Member
Joined
Aug 1, 2008
Messages
476
Reaction score
13
Location
Chattanooga, TN
I finaly decided to get a stir plate together since I had most of what I needed already. I know I saw a post here before by (name escapes me) and it was a great tutorial! He put the motor inside a cigar box if I remember right. I dont have a cigar box, and not many shops up here in the UP, so I went to wal mart and got what I could.

The list of mats is as follows:
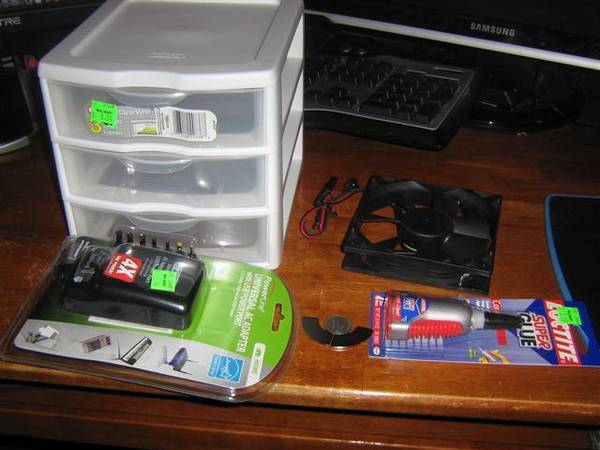
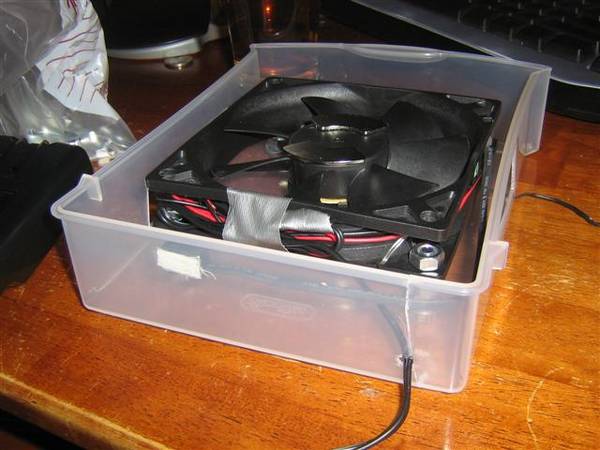
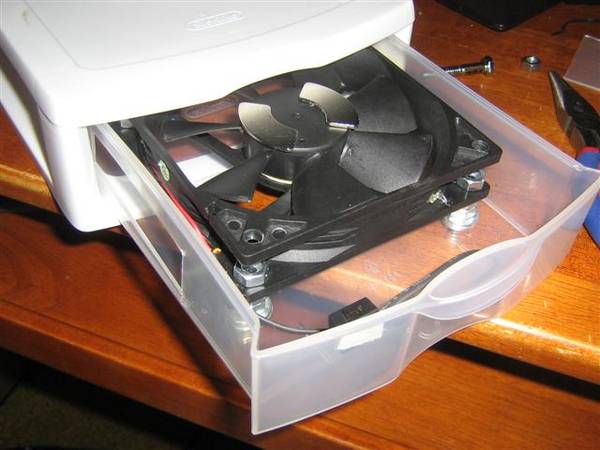
Container, I used a Sterilite small 3 drawer container, I will only use the top drawer.
Motor, Im using a 120mm computer fan.
Magnets, I pulled these suckers out of a hard drive.
Power, Some on the website built circuits, now Im good with computers, but Im lazy, I used a AC-DC power converter from Wal Mart
IMG_0114.jpg


How to get the magnets out of the hard drive:
Take the hard drive apart, this can be a bit hard. I had to use Torx 8 drivers to remove the casing, you could ofcourse just drill out the screws. Once you have the case open, the magnets you want are in the actuator. Remove the big peice of metal in the corner of the hard drive, that has the magnets you want in it. As a quick side note, if you have a REALLY old hard drive (I had a 240MB hard drive) they may only have one magner, you will need 2, I had to take apart an old 60GB to get the 2 I needed. To get the magnets off the metal bits they are on you will need to take 2 pairs of pliers and bend the metal so it forms a U shape. This will give the magnet less surface area to grab onto and it will come right off.

Preparing the power
As I said before, I am cheap and lazy. I could have made a circuit and used a pot to dial in the speed, but this handy peice of equipment I picked up from walmart will do just fine.

IMG_01151.jpg


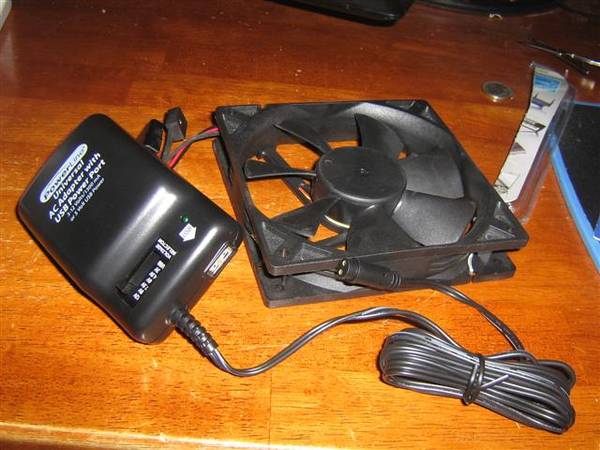
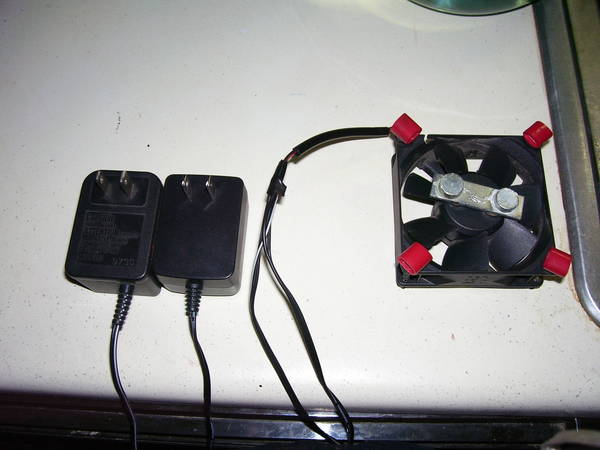
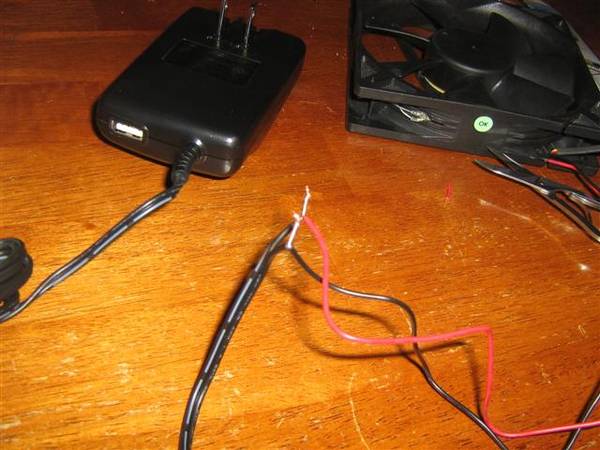
Computer fans run on 12v, so I will set the adapter to 12v when I run it at full speed. The fan I have has LEDs on it that I think Im going to just pull out later, could get annoying. It also has a speed control on it, High, Medium, and Low, I can use that to adjust the speed, I can also change the voltage of the regulator. This sucker only cost me $12 at Wal Mart, pretty good deal for minimal wire work. I have cut the ends off of the adapter and the fan. The fan will only spin one way, and the wire with the white line on it connects to the red wire, and black to black. I am going to solder these together but its not a nessesary step. Keep in mind the fan blows towards the side that has a 'frame' the side with the logo sticker on it. Which in my case, will be 'down'.

IMG_01161.jpg


Applying the magnets
Getting the magnets centered is pretty important. I put a nickel on the very middle of the fan, and glued up my magnets and set them down. It doesnt matter which side of the magnet is up or down, both top and bottom of the magnets EACH have a north and south pole on either side.
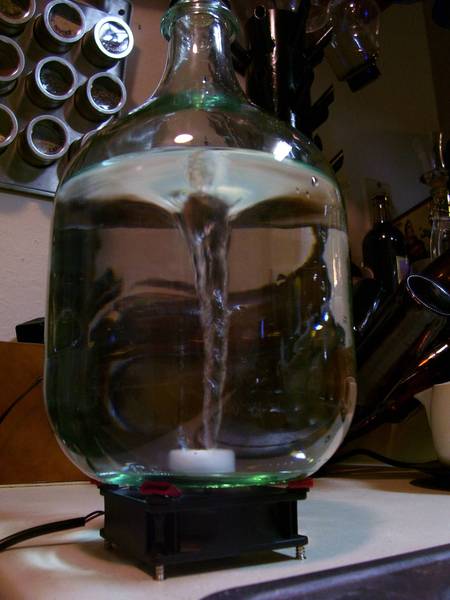
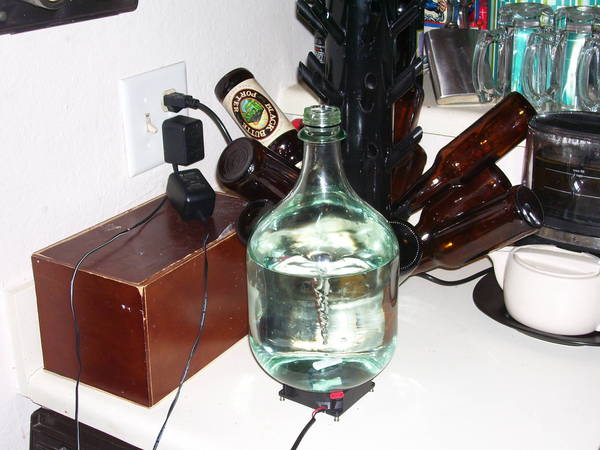
 
Mounting the fan
I didnt really think this one through at first. But I went to the hardware store and bought some 1/4th inch dia. bolts that are 1" long, and plenty of nuts and washers since I didnt know how many I would need. I bored out the holes on my fan to 1/4inch and drilled holes in the bottom of the clear plastic drawer. Im going to use the bolts as struts to raise the fan up. I found my fan fit just nicely after I used 2 nuts and 3 washers to space it up, and I put a nut on the top of the bolt to hold the fan down.

IMG_01171.jpg


Finishing the box
To finish up the box, the fan is going to need some sort of ventalation, though I guess you could just snip the blades off, but why? I cut 2 holes in the side of my box to let air in/out. I also cut one large hole in the bottom of the drawer to let air out. Im sure I could have been a bit smarter about it and cut a hole at the top for air in, and another at the bottom for air out, but this works too. Finaly I cut a slit in the back of the drawer to let the cord out and taped up some of the cord inside to the side of the fan and taped the speed control that was on my fan already to the front of the box for easy access.

Fan running after mounting and magnets on:
IMG_01191.jpg


Holes I cut in the sides:
IMG_0120.jpg


A view of the rear:
IMG_0121.jpg


One drawback to this system is the lack of an on off switch, but that would be super easy to install on the hot wire if I had one laying around, which I dont, so Im just going to plug it in for on. Hope this helps people out. The overall cost of this, not including the fan or hard drive for the magnets was about $20 USD. If you had to buy the fan it would come up to about $30. And if you dont have a spare hard drive to take apart, I dont think this is a project for you. unless ofcourse you can buy magnets cheap, which I havent done ANY research in.
 
And a few shots of the finished product.

Drawer open exposing magnets, fan and switch:
IMG_0123.jpg


Finished box all closed up:
IMG_01221.jpg


Its not that pretty, you could do something to spruce it up, But it sure gets the job done.
 
And if you dont have a spare hard drive to take apart, I dont think this is a project for you. unless ofcourse you can buy magnets cheap, which I havent done ANY research in.

A spare hard drive was the only pert I didn't have for my stir plate. I used...

1 - cheap 3L wine bottle from wally world.

1 - old computer fan

1 - 3.7 volt cell phone charger (perfect speed at that voltage, I tried a few I had lying around)

2 - 1" stir bar - $5 @ mcmaster-carr

2 - 1/2" magnets - $3 each @ mcmaster-carr
or
1 - magnetic fish tank scrapper (has incredibly storn magnets inside)

Total cost, about $8 dollars per stir plate. I got four magnets from one magnetic tank scrapper I had laying around, and I had purchased 2 from mcmaster, and I had 2 free fans, so I made 2 striplates for about $16. One more free fan, and I will have 3 stirplates for $16, bringing cost per stirplate down to $5.33.

No boxes or anything, it's very bare bones, just little rubber plugs from the fans themselves holding the bottle on top, and 4 srews for legs.

You know, I've seen these things for $120, they look a bit nicer, but do the same job.
 
OK I have a somewhat noob question on stir plates. Do you have some kind of stirrer insie the flask that is propelled by the magnets?
 
BarleyWater, I like what you did! I would love to see some pictures of it, seems very simple, which is what I was trying to stick with, and cheaper!
 
Nice job- I love mine, but have a tough time in the summer running it in the house all night long. That little stir bar (round) makes a bit of noise and it was plenty warm in the garage.
 
Here ya go NoNothing, and anyone else interested.

My DIY, $8 striplate...

First the magnet, salvaged from an old fish tank scrapper, or rare earth magnets from mcmaster-car can be used, about $3 each.
100_1855.JPG


Magnet in place, and some free rubber stoppers to hold the bottle in place.
100_1838.JPG


Free "variable speed control". Two old cell phone chargers (I have tons), one is 3.7v, the other is 5v, actually quite a difference between the two. Make sure any power supply you use is, DC or you will fry the fan.
100_1839.JPG


Cheap wine jug in place, and everything ready to go. My DIY beer tree in the background.
100_1840.JPG
 
Now for the action shots...

Low Speed, see the stir bar spinning.
100_1846.JPG


High Speed, see all the air bubbles, not sure if that's necessary though.
100_1848.JPG


And the whole view on low, you can see the stir bar in the jug.
100_1853.JPG
 
Yeah these things are really easy to make.

A lot of people are over complicating these with circuits and what not.

If its a need to adjust speed a fan that comes with a controller and your 5 v charger is all you need.
 
Hello all,

So I went ahead and built my stir plate this weekend as well but I did not have a good outcome.

I used the computer fan with the magnets from the hard drive. Both positive sides on the same side of the fan. I have a variable 5V power supply. I am also using the large stir bar from NB. I mounted everything in a cigar box. There is a 1/2 inche between the magnets and the top of the box.

With all that said, all my stir bar does is vibrate. Even if I set the flask on top on the fan it just vibrates more.

See pictures attached.

What gives?

IMG_3505_2.jpg


IMG_3509_2.jpg
 
i had real good results by stacking the two magnets and putting them in the center of the spinning motor.
 
Thanks for the pictures and information BarleyWater. I'm planning on making a very similar setup. I've never used a stir plate before. Typically, do you leave it running the entire time you're making the starter or only intermittently to re-oxygenate the starter?
 
Both positive sides on the same side of the fan.

That's why it isn't working. The magnets have to be polar opposites to attrach the two ends of the stir bar. If both magnets are facing the same way, then there is no way for the stirbar to spin, and it will just wiggle.

do you leave it running the entire time you're making the starter or only intermittently to re-oxygenate the starter?

Well, I just started actually using mine for the first time yesterday, but as I understand it, it runs the whole time. That's how I'm doing it anyway.
 
Here's another yeast starter noobie question: the wiki yeast starter page says to cover the starter with tin foil or a loose cap. Is there a reason not to use an airlock when making a starter? Does is inhibit yeast growth by depriving the starter of fresh oxygen. It just seems much safer than risking bugs or other bacterial sources.
 
Here's another yeast starter noobie question: the wiki yeast starter page says to cover the starter with tin foil or a loose cap. Is there a reason not to use an airlock when making a starter? Does is inhibit yeast growth by depriving the starter of fresh oxygen. It just seems much safer than risking bugs or other bacterial sources.
When making a starter you want oxygen - that's part of the point of using a stirrer.

bacteria and other bugs are not an issue as long as the cap and neck of the bottle are clean. See Louis Pasteur's famous swan neck experiment - in short, bacteria rides on dust, and dust can't go UP to get underneath the cap into the flask.

I guess I was just more concerned about fruit flies, which have their way of climbing into airlocks and dying. Maybe I'll just crimp foil over the top of my starter and reintroduce fresh oxygen (I have an O2 tank) from time to time to make sure it's getting enough.
 
Back
Top