Show us your DIY stir plate!

Homebrew Talk - Beer, Wine, Mead, & Cider Brewing Discussion Forum

Help Support Homebrew Talk - Beer, Wine, Mead, & Cider Brewing Discussion Forum:

This site may earn a commission from merchant affiliate links, including eBay, Amazon, and others.

DeBrewer

Supporting Member
HBT Supporter
Joined
Aug 23, 2010
Messages
236
Reaction score
20
Location
The South
I have seen a quite a few threads popping up but have yet to see a "Show your...." thread for stir plates, so here it is.

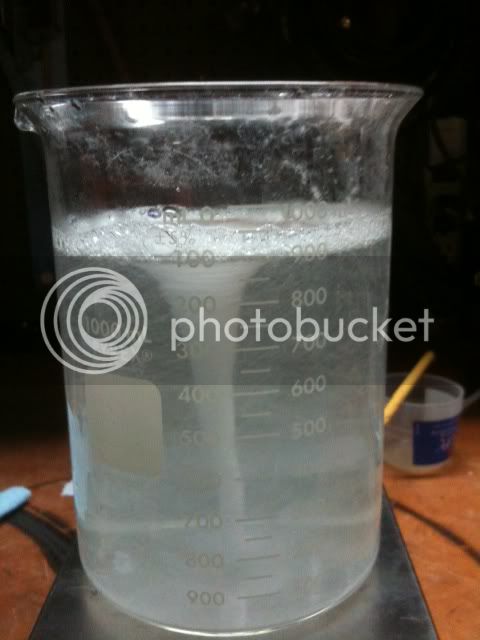
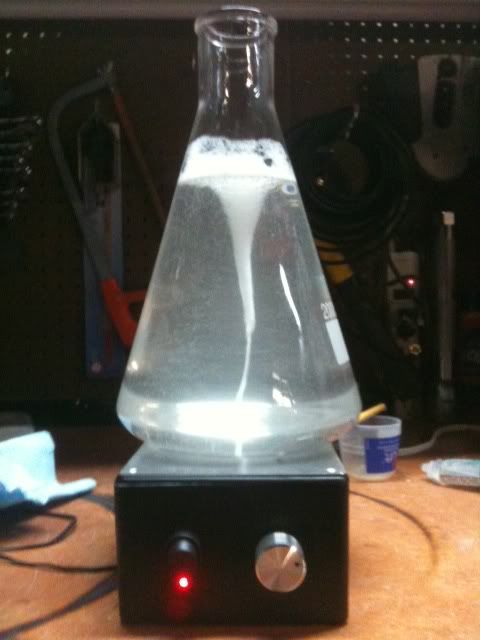
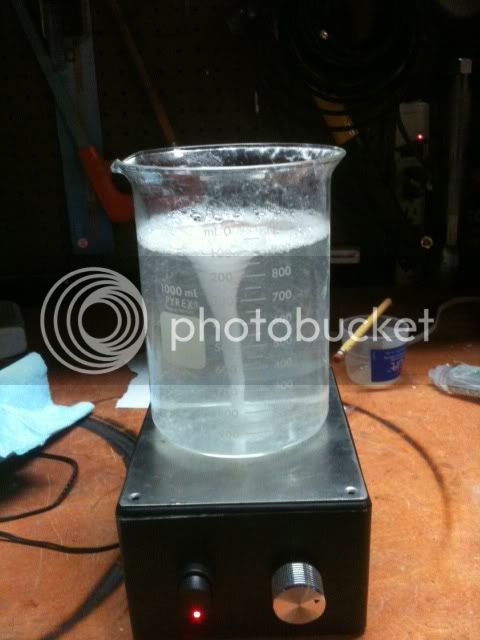
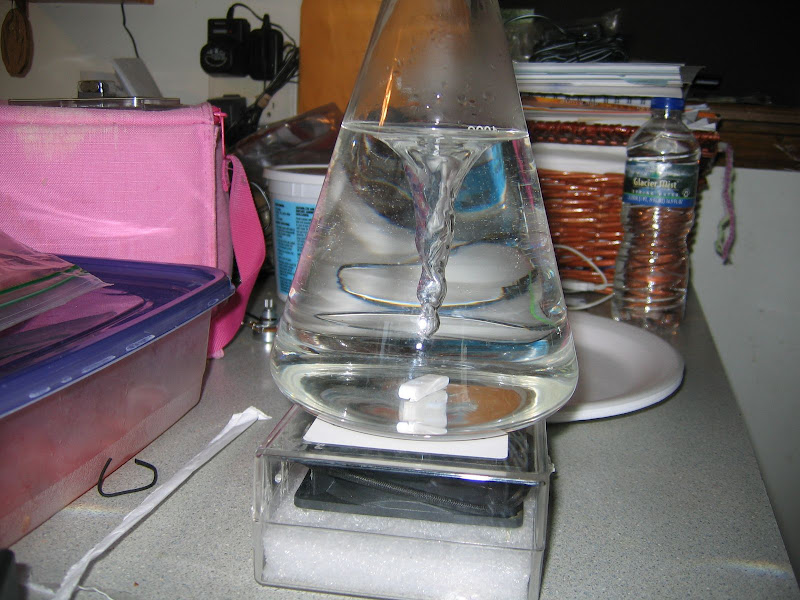
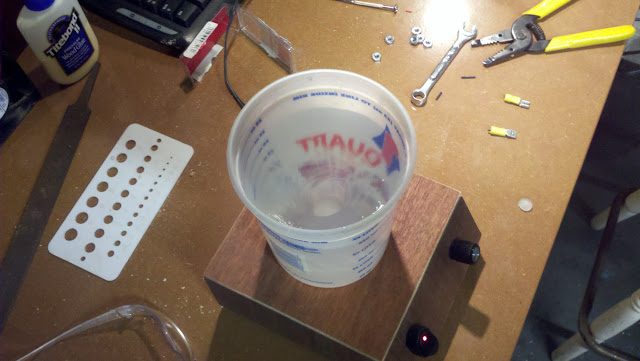
Just finished mine today. I wanted the ability to run multiple starters at a time so this is what I came up with. It is in essence 4 stir plates controlled by 1 unit. It took maybe an hour and a half to put it all together.

Parts List:
Fan Controller $10
Fan $5
Project Box $7
Magnets $0.41 x 2
Machine Screws #10-32(I Think) 3” Home Depot $2
110AC - 12VDC Converter Wal Mart $18

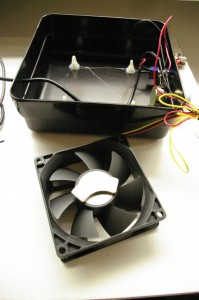
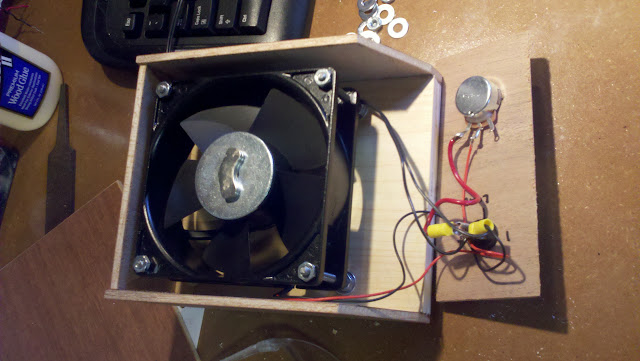
First you need to mount the fan to the project box. I centered the fan on the cover and drilled four holes using the fan mounts as a pilot. Once I had the bolts installed I spun nuts down to lock them in place and then placed another set on to hold the fan up. Once the fan was sitting on the bolts I glued the magnets to the center of the fan giving them appx. a 1.5" spread.

28a95173.jpg


After the fan was mounted I ran the existing three pin wires out the back so that they could plug into the controller. I used the same method for all 4.

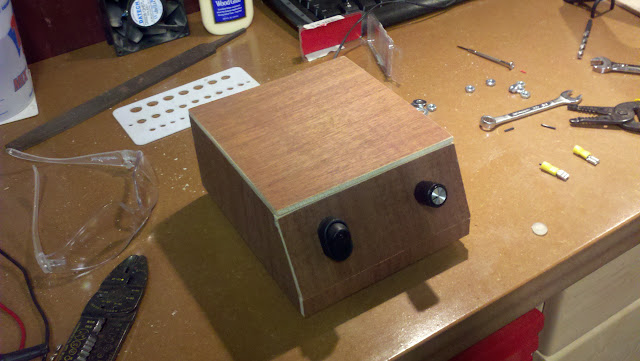
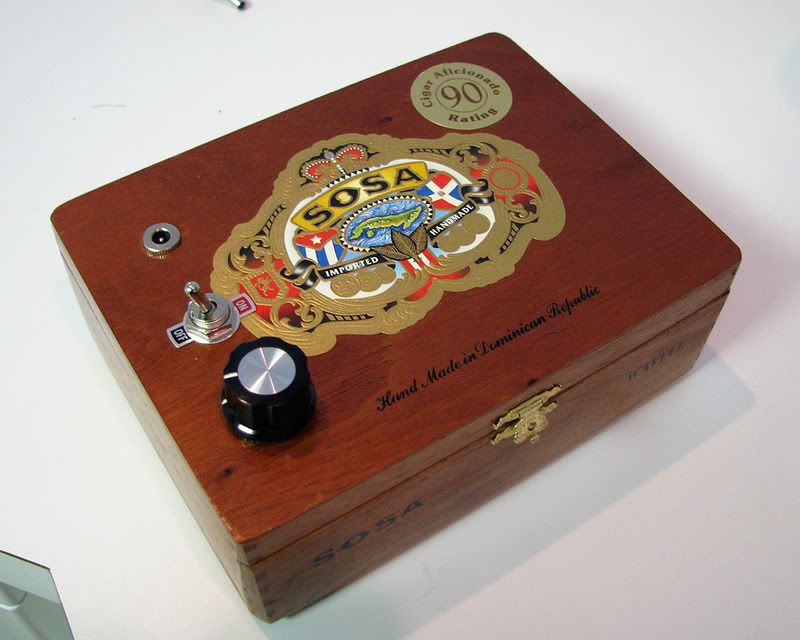
The power supply and controller were the more complicated if you even can call it that. Wire the power supply to what would be the black and yellow pin on the controller and then extend the three pin pig tails to hang out the back of the project box so you can plug in the remote stir plates. I mounted the controller by just cutting a hole in the boc and fastening it in. As you can see I need to make a trim panel. The dremmel got a little excited....

13bb03cb.jpg


1c44a20d.jpg


So after it was all said and done I have about $75 -$80 in total for all 4. There are cheaper ways to do it but it fit my requirements and was a fun and easy project. Now lets see yours! :mug:
 
Nice setup! Mine is a bit less complicated and more seat of the pants. I used a new fan from MicroCenter and a plastic food storage container from Walmart. The fan is wire to a potentiometer from Radio Shack. I used a 12V transformer that I had laying around fitted to a plug from the Shack. I plan on redoing it with new controls to control the speed more accurately. The neodimium magnets are from Michael's and are epoxied to the hub of the fan.

Here is a quick pic of it in action stirring up some Wyeast American Ale II for some cider:

ForumRunner_20110227_111127.jpg
 
Well figured this was good enough for my first post, been reading for a while just trying to gather some info but figured i have a cheaper and easier way to do this

download.jpg


I used an old case fan from a computer laying around, super glued a magnet from a hard drive on the center of that, then spliced a 5v power adapter from an old cell phone charger to the fan's power, then using electrical tape and super glue i added stacks of penny's to the bottom and top the raise it off of the counter and raise the mix vessel off of the fan, i then took 7 magnets off of ex-employee name tags from where i work and use that as the stir bar, works pretty well for making it out of scrap laying around the apartment, i dont have a flask yet so i just used a vase and some water to show it off
 
Cat22, ours are very similar! I control the speed on one of the legs... homegrown linear voltage regulator.

No, ours actually operate much differently. I'm using a standard light dimmer which is basically a PWM unit. It does not regulate the voltage. Instead, it switches the current on and off very rapidly to affect the supplied current. Completely different thing than voltage regulation and the effect is completely different as should be obvious in the video. I get much more dynamic range in the speed adjustment with this design. I attempted to demonstrate this in the video. I can run it at very slow and controllable rpm's, full speed and anywhere in between. Every DIY stir plate that I have seen appears to have very poor speed control, particularly at low rpm's. Typically, the builder will show them running at high speed with a huge vortex. I think this is because they have no alternative. Many of the demos videos are recorded with loud background music which conveniently masks their noisy stir plates.
 
IMG_2468.JPG


Pretty simple. I used some magnets, a switch, and LED and a fan I had lying around, and bought the rheostat and project box at Radioshack. Too bad I broke my erlenmeyer flask....D'oh!
 
No, ours actually operate much differently. I'm using a standard light dimmer which is basically a PWM unit. It does not regulate the voltage. Instead, it switches the current on and off very rapidly to affect the supplied current. Completely different thing than voltage regulation and the effect is completely different as should be obvious in the video. I get much more dynamic range in the speed adjustment with this design. I attempted to demonstrate this in the video. I can run it at very slow and controllable rpm's, full speed and anywhere in between. Every DIY stir plate that I have seen appears to have very poor speed control, particularly at low rpm's. Typically, the builder will show them running at high speed with a huge vortex. I think this is because they have no alternative. Many of the demos videos are recorded with loud background music which conveniently masks their noisy stir plates.

I meant construction. I figured that was a light dimmer. Thats a very good idea. I'm gonna try that myself on my next stir plate!

FWIW, mine is completely silent, and I get nearly identical range of stirbar speed. I can slow it down to a crawl. Yours might get a bit slower, but not much. (my stir bar doesn't have that nice ridge... I've got to get one of those). I've built 4 of these and they have all been this way.
I'll post some more video later.
 
Here's another video using a one gallon jug and a 2-1/4" barbell shaped stir bar. Started it out at very low rpm's then increased the speed and added the food coloring so we could see the mixing action a little better.

 
Last edited by a moderator:
Yea, that dimmer is working really well. I never thought of that until I saw this thread. Nice job. Food coloring is a nice touch. Here are a couple more

Slow stirring - 4000ml

Slow stirring - 1000ml
 
Last edited by a moderator:
Yea, that dimmer is working really well. I never thought of that until I saw this thread. Nice job. Food coloring is a nice touch. Here are a couple more

Slow stirring - 4000ml
http://www.youtube.com/watch?v=H6cIU00K1fg"]http://www.youtube.com/watch?v=H6cIU00K1fg"]http://www.youtube.com/watch?v=H6cIU00K1fg
Slow stirring - 1000ml
http://www.youtube.com/watch?v=niq79hxS5Ww

Yours is working better than just about any of the others I have seen. Much quieter as well. Very good videos!
 
Talk about simple DIY. Double stir plates using a wooden box used to hold silverware from a thrift shop. 2 computer fans adjusted to raise up to 1/8 below top cover. two smashed hard drive magnets. 1" stir bars. It works great.
Snake10

DSCI0002.jpg


DSCI0004.jpg
 
Here are a couple more pics of my stirplate.

The first pic is the unit without a flask on it:

The second is with the lid off showing the 2 magnets epoxied to the hub of the fan.

And the last one shows the plug that I wired in to accept the 12V transformer that I had laying around from something or other.

IMG_20110306_093827.jpg


IMG_20110306_093918.jpg


IMG_20110306_093934.jpg
 
Here is mine. Had some plexi-glass laying around. Thought about building another one just to put more bling on it.

Plexi-Glass.jpg
 
Just finished mine based on the cheap stirplate build. Came out great. I used the Super Magnets from Ace Hardware, a 6 pack was less than $5. I had to stack 3 on top of each other on each side of the washer as close to the center hole as possible in order not to throw the bar. I tried it with a 2 inch and 1 inch bar and the 2 still gets thrown. I used a 4 inch computer fan from radio shack with a 12V power supply from a linksys modem. These are 1 liter and 2 liter flasks on minimum power.

photo3.jpg

photo2.jpg

photo1.jpg

photo.jpg
 
Doesn't get any cheaper or simpler than this:

Computer case fan - $0
Two spare hard drive magnets (stacked) - $0
Small cardboard box - $0
Old 5V cell phone charger - $0
4 matching screws - $0

All the parts were laying around... sometimes it's useful to be a computer nerd.

- Stripped the wires on the fan and cell phone charger with scissors (I've gotten quite good at it), twisted them together, wrapped in electrical tape, wrapped that in duct tape
- Duct taped the top of the box to waterproof it
- Broke the blades off the fan and glued one hard drive magnet in the center of the fan (later placed the second on top for a stronger magnetic pull)
- Glued the fan in the bottom of the box, screwed the screws into the holes at the corners of the fan to support the top of the box (distance is adjustable via screws)
- Done!

It's actually quite quiet when in operation. My original build was pretty noisy but I added the second magnet and switched stir bars and now it's great.

dscn1517z.jpg


dscn1518s.jpg

^ the cat is always intrigued whenever I turn it on, she really wants to get at that spinning bar

dscn1520b.jpg

After I took this pic I set the flask on the ground and went to upload it and I heard splashing in the other room... she was sticking her paw down in the flask to try and get at the bar!
 
Hard drive magnet, box that used to contain experimental plague vaccine, variable voltage power supply I had hanging around, some bits of paper clip (see the build thread on my sig for that).

IMG_4420.JPG
 
USB port's are 5V so using a USB cable cut off one end then spliced only the red and black wires to a 80mm 2300rpm fan red/black wires and its working fine am getting a small vortex. No luck with the full 12V connection as that spun all three fans 1350-2600rpm I tried too fast. Will hopefully source someone's 5V cell phone charger to remove the computer power connection. Used an old spare PC to be safe after finding lots of Google hits on modding USB cables to power 5V electronics.

Made a temporary stir bar from a bolt with a nut attached at the end to help balance. Wrapped it in a few layers of 6 mil vapor barrier plastic then melted together with a heat gun. After it cooled added an O-ring to the center as a balance point.
 
Here is the stirplate I just built....

I had a bunch of scrap 1/4" plywood laying around and my local radio shack didn't have the enclosure boxes so I used what I had. I originally planed on this being a cheap build but I ended up spending around $45 ($30 was the fan). Probably could have bought one for the same amount but that is pretty much the case for all my projects.

I modeled mine after Anthony Lopez's Cheap Stirplate build here https://www.homebrewtalk.com/f51/my-stirplate-cheap-easy-build-86252/

I used a 12v 4" fan, 9V radio shack power supply, this spins plenty fast, hope not too fast, I am still waiting for my flask, but it will throw water out of my 1 quart plastic measuring cup.

Here's a few pictures.........

2011-04-16_18-36-25_875.jpg


2011-04-16_19-38-41_536.jpg


2011-04-16_19-39-07_697.jpg
 
I am stealing this, love the dimmer. What are you using for power supply?

That one is using a 12V DC, 500 ma transformer. The fan only draws a max of 250 ma, so you would want at least that much power available. The light dimmer works really well for speed control and it was cheap to put together.
 
Thanks Anthony Lopez for the post that inspired this project...

I work on an Air Force base and the recycling center has a drop off location for electronics :D. Needless to say, I loaded up 3-4 old computers and brought 'em home. I also found an assortment of DC power supplies in which I loaded up many different outputs. Tore the CPUs apart and raped all the HD magnets and 7-8 spare fans.

I built my stir plate with the items that AL suggested in his post. However, my fan isn't really even mounted. I drilled 2 holes in the front and 2 in the back. I stuck a 1 1/2 inch bolt through each hole and secured them on the inside of the project enclosure with nuts. The fan just sits atop of the bolt that protrude inside. I works great also.

I initially had issues with the stir plate throwing the bar. After wiring in various power adapaters, I ended up using a 6VDC supply. 9V was too much and 5V wasnt enough. I have a 2 inch stirbar. I also have a 1 inch but will not work due to my current magnet placement. Magnet placement really is probably the most difficult thing I encountered with this build. Thanks to the forum again with all of your help!!!

5723043554_c193efae3f.jpg


5722493123_e7e8a35140.jpg


5723046044_b0cd8d46b7.jpg
 
I already posted this in the stir plate thread, but I'm so stoked about how my stir plate turned out that I'm going to sum it all up here!

Case Fan - $0 from an old PC
Rare earth magnets - $10 for 12 from my local hobby shop
Power supply - $0 from the junk bin at work
Power jacks, pot, toggle switch and knob - about $12 from Radio Shack
Washer, epoxy, hardware - about $6 from Home Depot
Cigar box - $1 from my local Cigar Store
2" stir bar with pivot ring - $7 from Ebay

IMG_5654.jpg


IMG_5658.jpg


I get very good low-speed performance, and it is very quiet up to half speed. The speed at the start of the video is with the pot pegged at the slow end.

 
Last edited by a moderator:

Latest posts

Back
Top