Using IC/MLT as fermentation water chiller

Homebrew Talk - Beer, Wine, Mead, & Cider Brewing Discussion Forum

Help Support Homebrew Talk - Beer, Wine, Mead, & Cider Brewing Discussion Forum:

This site may earn a commission from merchant affiliate links, including eBay, Amazon, and others.

kpr121

Well-Known Member
Joined
Jul 30, 2009
Messages
3,117
Reaction score
138
Location
Pittsburgh
I posted this in the Water fermentation chiller thread but would like to ask the questions here seperately:

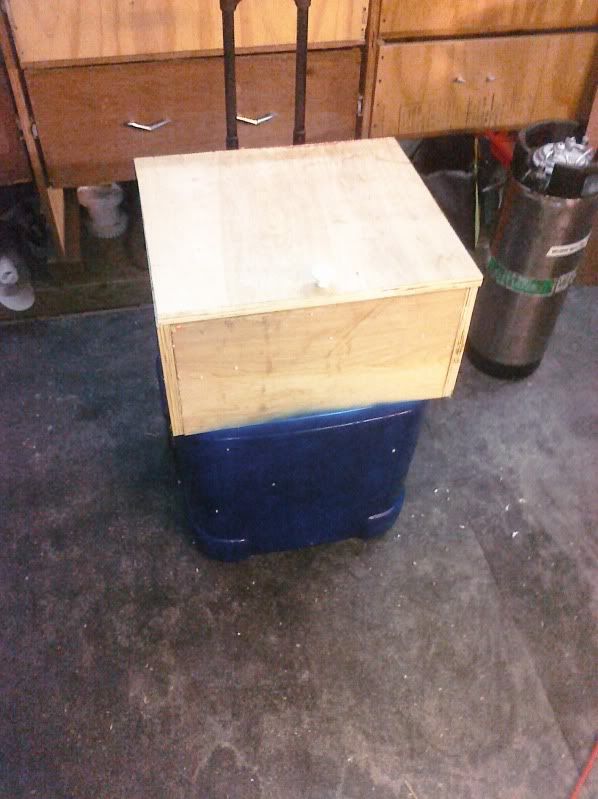
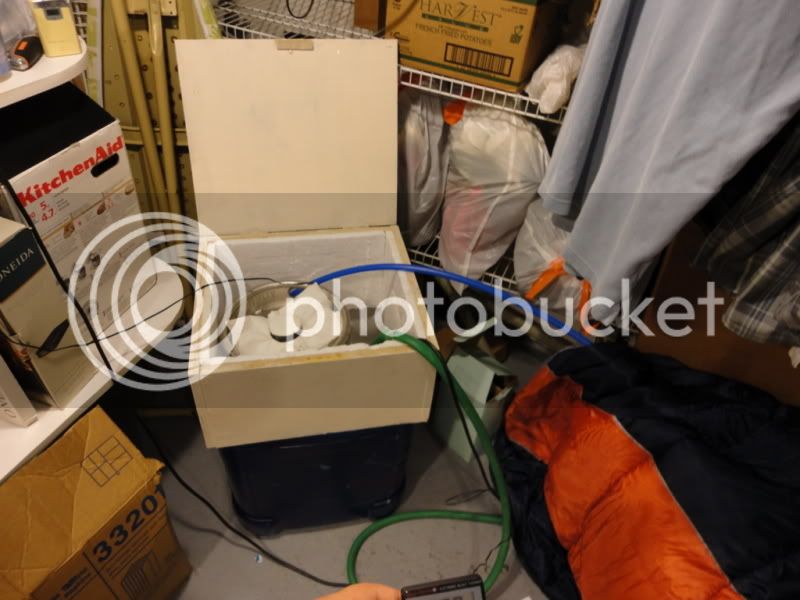
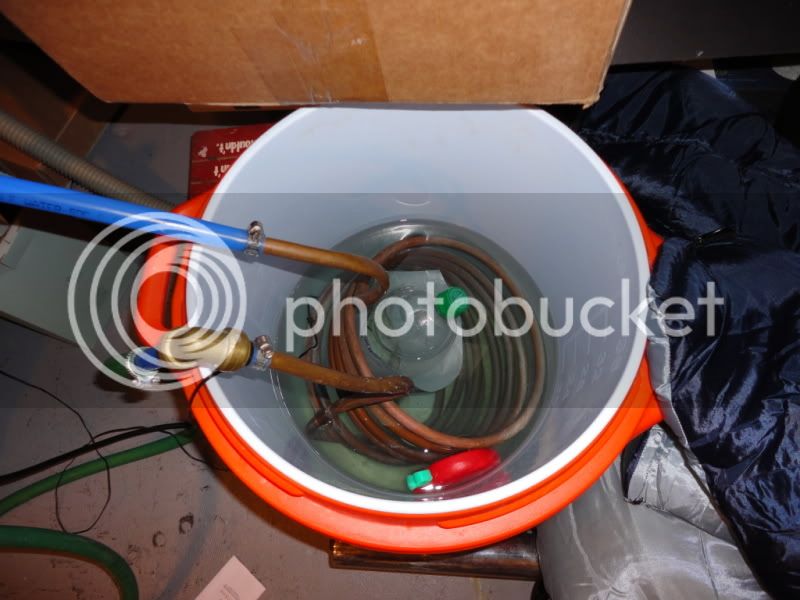
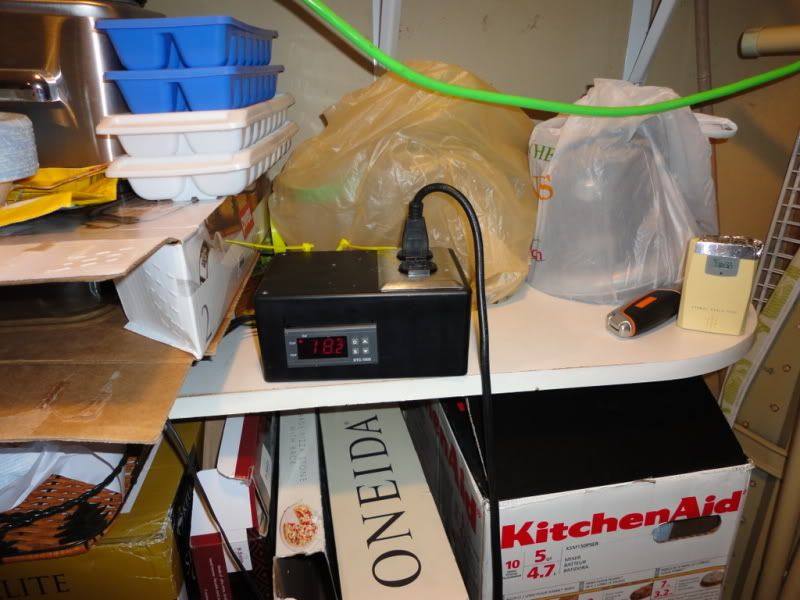
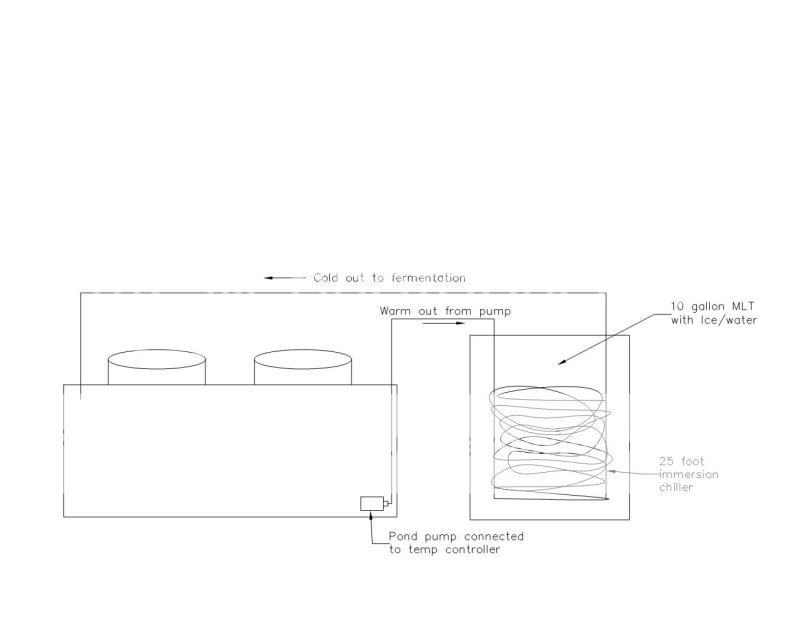
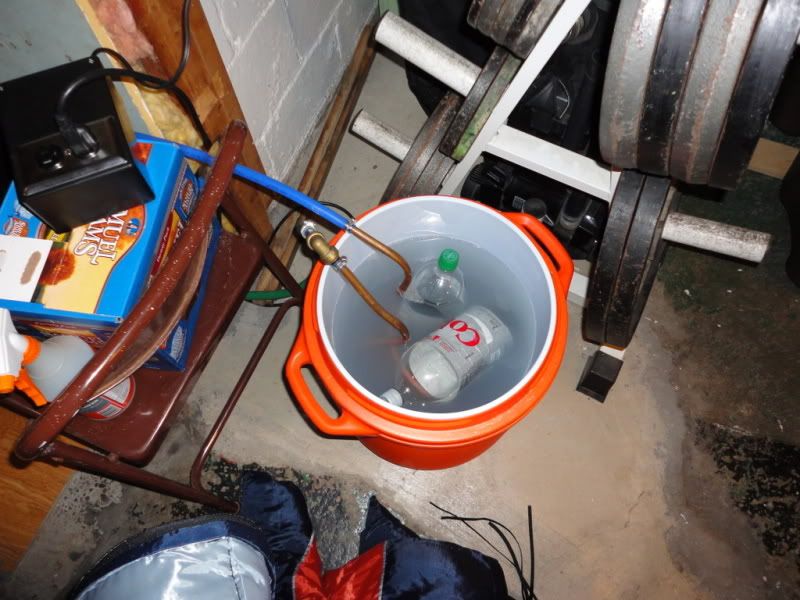
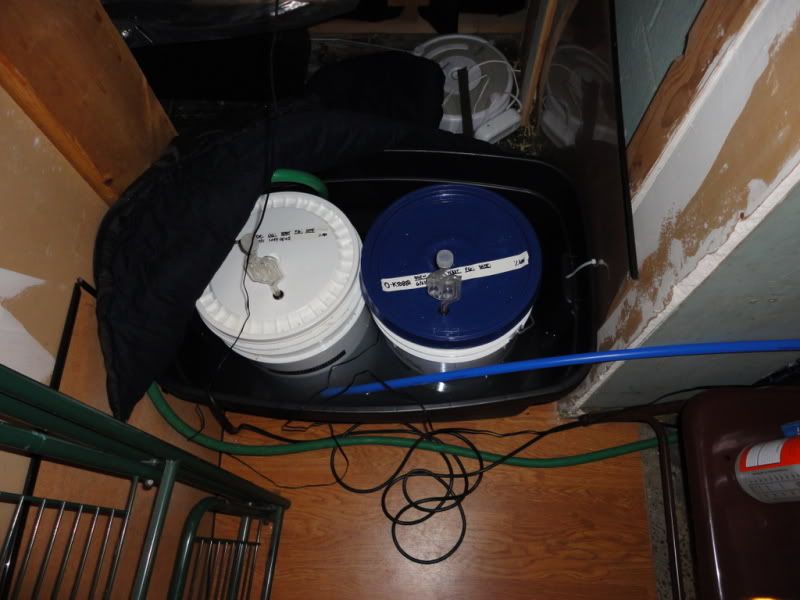
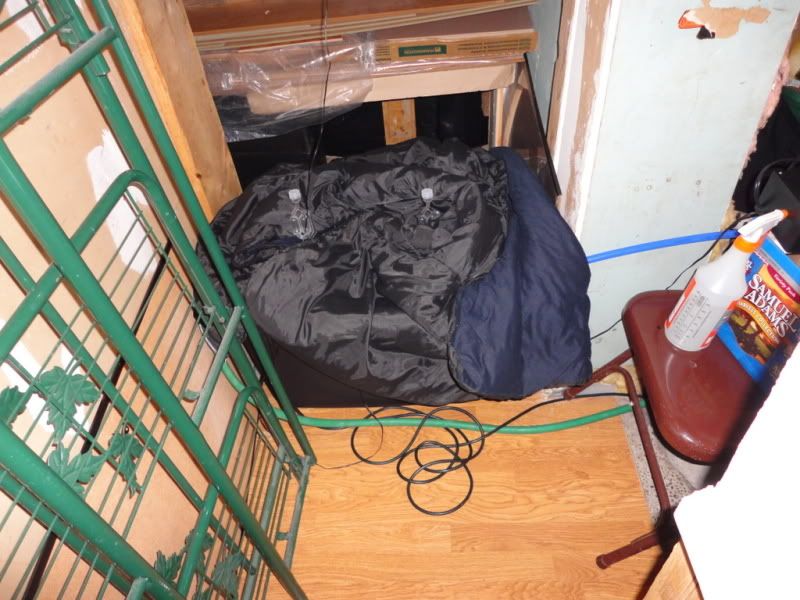
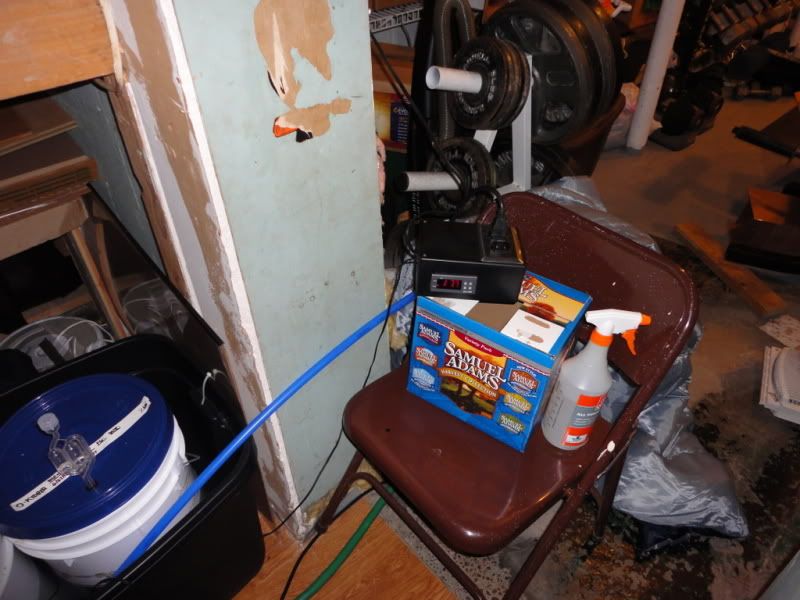
Does anyone use the following as fermentation control or have any opinions/ideas? I want to use my immersion chiller and pond pump set up as is without much modification. If I put the IC copper coil in my 10g water cooler mash tun filled with ice water, the pump in my Rubbermaid container where the fermenters are, and plug the pump into an ebay temperature controller, theoretically it should work correct?

This way I don’t have to worry about overflow pipes, both containers can stay on the floor, and all the water being pumped will end up right back where it came from. The only issue I can see is stratification of the chilling water in the mash tun, but I think it should still work. I guess if its taking too long I could throw a small aquarium pump in the cooler to keep the ice water turbulent.

I figure this is the best way to use the equipment I already have, and since I almost never do back to back days of brewing, the equipment can basically be utilized at all times. If I brew the following week, usually the beer has fermented to FG and temp control is not as necessary. So I would be pulling the first batch out of the Rubbermaid, and replacing it with the new batch. After cleaning the IC and mash tun, it goes back to fermentation chill mode. (This would give me incentive to clean my equipment right away as well lol).
 
Heres a sketch of what I am thinking:
Drawing1Model1.jpg


BTW I frequently do 10 gallon batches, and currently use the rubbermaid container as a swamp chiller to chill two buckets at the same time. In the recent heat, I've had to change frozen water bottles up to 3 times a day. Hopefully with this setup I can partially enclose the rubbermaid container (at least put a blanket over it, and possibly insulate the outside walls as well). If I can get away with a constant temperature while only having to change ice once every couple day, I will be ecstatic!
 
well after all of 15 minutes I had this up and running tonight. It took nearly 5 lbs of ice cubes to get down to 64 from 68, but did so through the chiller in under an hour. I must say I think this is going to work, at the very least it's better than swapping ice directly in the rubbermaid blind to what temperature swings will happen.

I'll take pics tomorrow with my new sony camera that's coming in the mail if anyone is interested.
 
Thanks for the interest. I guess one issue I can already foresee being possible is keeping the chill water from getting gunky. Bleach won't work well in the copper correct? I guess I could use starsan but hate wasting that. Or is it really that big of a deal?
 
Temperatures held fairly steady overnight, although it seems to be melting ice pretty quickly. At 11 PM I added a frozen two liter (all of the ice was melted), and this morning at 7 the temp was around 64 (set temp at 62.6 F). The chill water had risen above the set temp so the pump was just running and adding heat.

I added another 5 lbs of ice, another frozen 2 liter, and a small ice pack that was in the freezer since I will be away from the house over 12 hours today.

I think it will be easy to maintain temperature within a degree as long as I can keep the chill water cold. I need to work on better insulation, the wrapping with sleeping bags isn’t cutting it. Ambient temps of over 80 don’t help.
 
I was actually thinking of doing something kinda like this. I like the idea of water cooling a lot better than air cooling for fermentation. What pond pump do you have? Also, how do your run your hoses into your MLT? Definitely looking forward to pictures.
 
I was actually thinking of doing something kinda like this. I like the idea of water cooling a lot better than air cooling for fermentation. What pond pump do you have? Also, how do your run your hoses into your MLT? Definitely looking forward to pictures.

Its the Harbor Freight pump, here:
http://www.harborfreight.com/264-gph-submersible-fountain-pump-68395.html

Right now the hoses are just draped over the top of the open MLT, and the whole thing is covered with a sleeping bag. I think I am going to cut out a piece of rigid styrofoam insulation in a circle that has holes or slots for the pipe connections.

Hoses are connected to the IC via garden hose, PEX tubing and sharkbite fittings. The IC has sharkbite connections, that go to the PEX, and the garden hose slides right over the PEX. You don't really need hose clamps but I use em.

Hopefully I get my camera and can take pics tonight.
 
well after all of 15 minutes I had this up and running tonight. It took nearly 5 lbs of ice cubes to get down to 64 from 68, but did so through the chiller in under an hour.

For the initial chill, I'd add ice directly to the fermentor side. You won't need the control until you get close to target - no sense running the pump so much and adding heat which just melts ice.

The chill water had risen above the set temp so the pump was just running and adding heat.

Hmmm, that's a problem. Hopefully, better insulation will hold you until you can refill the ice. I'd also experiment with my earlier suggestion of putting the probe right near the cold water output tube. That 200+ GPH pump will pump the cold water out of the IC in no time, a small 'dose' of cold water should bring down the temp in the bath quick. Beyond that, the pump is adding heat.

-kenc
 
For the initial chill, I'd add ice directly to the fermentor side. You won't need the control until you get close to target - no sense running the pump so much and adding heat which just melts ice.
Yep, I will probably do this in the future. I was just interested to see how quickly it could cool through the IC.
Hmmm, that's a problem. Hopefully, better insulation will hold you until you can refill the ice. I'd also experiment with my earlier suggestion of putting the probe right near the cold water output tube. That 200+ GPH pump will pump the cold water out of the IC in no time, a small 'dose' of cold water should bring down the temp in the bath quick. Beyond that, the pump is adding heat.

-kenc

Yep, if you go down this route you need to keep the chill water in the MLT lower than the set temp. Better insulation and possibly a smaller footprint of ferment container would help this. My next batch will be 5 gallons and I will use my Igloo Cube cooler instead of the 20-30 gallon uninsulated rubbermaid. I can imagine that will be much more efficient.
 
Could a mod possibly be able to move this thread into the DIY section? I think it pertains to that aspect of homebrewing, plus I'd love to get the input of some of the nutjobs (its a compliment, trust me) that peruse that forum fairly exclusively.
 
No pics yet. But I can report that temps have held all day. There was ice left in the tun when I got home from work at 7, and I haven't had to add anything as of yet. I'm gonna let it sit overnight to see if the temps rise again.
 
Woke up this morning to temps around 65-66 again, same thing happened as the night before. Chill water was no longer chilling. Added another icemaker load into the tun, and temps got back down within 15 minutes. I should note that these are temp readings on the side of the fermenting buckets. There is not much difference at any given point between temp controller set temp and fermentation bucket temp.

In other words:

-Heat transfer from the IC/pond pump is great.

-Temperature control is great (2 degrees after 24 hours. I would venture to say that there may even be larger swings in temp inside chest freezer ferm chambers).

-Outside insulation is not so great. Still better than an uncontrolled swamp bucket, but I need to increase the insulating properties once this batch has reached FG.

PICS TONIGHT I PROMISE (to the two people following this thread). At least I can use the thread as a tool to keep track of my personal progress.
 
Pics:

IC inside of MLT cooler. This is covered with a sleeping bag normally:
DSC00010.jpg


Rubbermaid container holding fermenters. Pump sits in the top left of picture, pumps through garden hose to the IC, then returns from blue PEX line toward center of rubbermaid. Temperature probe is in the top center of this pic:
DSC00008.jpg


Covered up with sleeping bag:
DSC00007.jpg


Temperature controller on high tech shelf:
DSC00009.jpg
 
I checked gravity last night, and they were both down to about 1.025, so I decided to start to ramp up the temperature to finish the ferment and also diacetyl rest. So I increased the set temp to 18.9 C (66 F). I will increase this temp a couple degrees each day until it is at room temperature. Then the buckets will come out of the rubbermaid (and sit at room temp for a couple more weeks to condition) to make room for the next batch.

I think this kind of one-week schedule could work well for most regular beers.
 
In other words:

-Heat transfer from the IC/pond pump is great.


-Outside insulation is not so great.

I'd agree.

Some rough calcs I did show that for a typical fermentation chamber (~ 20 sq feet surface area), insulated to an R-Value of 2, and a 10F delta to ambient, you will lose ~ 100 BTU/hour.

Just making up that 100 BTU loss would be 2400 BTU/day. A pound of ice out of the freezer will give up about 200 BTU (0F-60F = 60 BTU, plus ~ 145 BTU to melt it = 205 BTU/#). so it takes 12# of ice/day, and that's about 1.5 gallons. Plus whatever you lose in the chill cooler, and pump heat, and fermentation.

So even with pretty good insulation, it takes some gallons of ice to get the job done. That should just give you a ball-park for expectations.

If anyone wants to check my math - I assumed 20 square feet of surface area for a typical 'box', and this formula for BTU/hour:

(Sq_Feet_surface_area * DegreesF_delta) / R_Value_of_insulation

So (20 * 10)/2 = 100 BTU/Hour

-kenc
 
149.jpg


This is from about 2 weeks ago--the second time I have used it. Mine is a little different than any I have seen, but the idea is the same. This 2x5gal batch took two or three changes of ice per day during the first 3 days or so. That's 2 frozen gallon jugs in the rectangular mash tun on the left. Note that the fermenter water jacket buckets are not insulated, but it took less than one ice change per day once fermentation started winding down.

Interesting note: with no ice, and with no fermentation activity, the circulating water maintains about 5 degrees below ambient just by evaporative cooling. I have no idea how that's useful, but it may make this system impractical in the winter.

Also, KPR, your pump is way too big (which means more heat input into the system). I used 2 pumps-one for circulating the primary cooling water from the silver bucket, around the fermenters, and back to the silver bucket, and one to pump 32-deg water from the mash tun into the silver bucket (which drains back to the mash tun) on demand from the thermostat. I can't remember the GPH (maybe 20 or 30?), but they are both about the size of limes and will only pump against about 2 feet of head. They work perfectly for this application, and in fact I wish I had bought two of the smaller one instead of one of each.

BTW, I cheaped out and hacked an HVAC thermostat. This was a mistake, because I cannot get it to cycle off without dropping the temp a whole degree below my setpoint. I doubt this actually drops the beer temp much, if at all, but who knows for sure? The whole point of this is to keep the yeast comfortable and I know I don't won't a sudden temp drop of even a fraction of a degree right at the end. Oh well. I bought three of them off of ebay for nothing, and the first one works really nice in the kegerator.

And I know it's cheaper and easier to use a fridge or a freezer, but I simply do not have any more room, and I will not give up my kegerator at this point in my life. I have no idea how I got along without it for the first 28 years. This whole system stacks inside itself when not in use.

In a way, I hate to see others using chillers like this, because I am vain and was very pleased with my own brilliant ingenuity. But on the other hand, I guess I feel somewhat validated.:cross:
 
Corncob, I like your setup. So you use the metal bucket as your heat transfer point, kinda similarly to my copper coil. Seems like you have more opportunities for efficiency losses.

In a way, I hate to see others using chillers like this, because I am vain and was very pleased with my own brilliant ingenuity. But on the other hand, I guess I feel somewhat validated.:cross:

HA! I said the same thing, although I was a little mad at myself that I went close to 6 months brewing all grain and not thinking of this sooner!
 
I'd agree.

Some rough calcs I did show that for a typical fermentation chamber (~ 20 sq feet surface area), insulated to an R-Value of 2, and a 10F delta to ambient, you will lose ~ 100 BTU/hour.

Just making up that 100 BTU loss would be 2400 BTU/day. A pound of ice out of the freezer will give up about 200 BTU (0F-60F = 60 BTU, plus ~ 145 BTU to melt it = 205 BTU/#). so it takes 12# of ice/day, and that's about 1.5 gallons. Plus whatever you lose in the chill cooler, and pump heat, and fermentation.

So even with pretty good insulation, it takes some gallons of ice to get the job done. That should just give you a ball-park for expectations.

If anyone wants to check my math - I assumed 20 square feet of surface area for a typical 'box', and this formula for BTU/hour:

(Sq_Feet_surface_area * DegreesF_delta) / R_Value_of_insulation

So (20 * 10)/2 = 100 BTU/Hour

-kenc

Thanks for the calcs kenc. The math look pretty good, but I would estimate that I am closer to 10-12 SF, who knows how much insulation my sleeping bag is (probably close to your R-2). I'm thinking if I can get spray foam insulation in between the two rubbermaids, add a layer of rigid insulation to the outside, and fabricate some sort of top for it, I can bring that heat loss down quite a bit.

Either I am happy with the results so far. There is definitely room for improvement, but this is the most control I have had over any of my brews so far. Lets hope that the O-Fest gods thank me for taking care of their sweet nectar (and overlook the fact that it is an ale instead of lager)!
 
... I am happy with the results so far. There is definitely room for improvement, but this is the most control I have had over any of my brews so far. Lets hope that the O-Fest gods thank me for taking care of their sweet nectar (and overlook the fact that it is an ale instead of lager)!

Well, the important thing is that it is working for you. It appears you have a solid design, no big 'oooops' anywhere. You can add insulation and so forth, or just weigh that effort against the effort of adding a little more ice, more often. It's not really a big deal if you just need a few days control from time to time.

I brew some Munich Ales and Vienna Ales, and I enjoy them - I just don't call them O'Fests - I don't know if those O'Fest gods are purists, and I'm not gonna risk it! ;)

-kenc

Thanks Kenc. I dunno, I may end up calling this thing an Ok-Ale or something lol.

An update: Temperatures have been holding steady at 66F for over 24 hours. Ambient temps have come down inside the house since we turned the AC on, I'm sure this delta T is the reason I havent had to add any ice.

I probably will let the system come all the way up to 75 (room temp) today or tomorrow since I am planning on brewing a new batch this weekend. Then the fun will start all over again (with more insulation this time).
 
kpr121,

Any thoughts on what you are going to use for insulation this time around?

Im thinking spray foam in between the two rubbermaid tubs, then either reflectix or 1/2 rigid foam paneling all around. I will probably just keep the sleeping bag for the top, since cold sinks there wont be much loss other than breezes.

For the MLT chiller, I am going to cut a piece of 2 inch rigid insulation in a circle, and add slots for the copper lines to protrude through the tops.
 
I'm pretty sure that if you are going to insulate at all, you are spinning your wheels insulating the top. The point I was trying to make in my post is that you will need lots of melting ice to suck the heat away from your rapidly fermenting beer-insulation or not, and after yeast activity slows, almost no ice is needed at all-insulation or not. Insulation may actually work against you while things are going hot and heavy. And after that, a gallon or two of ice per day should keep you as far below ambient as you want to go with no insulation at all.

Granted, most of the heat that ice is absorbing is from the environment and not your beer, but if you have the freezer space, it's easier than all the effort spent on insulation. At least that's my intuition.

I really like the use of the IC, by the way. That was a great idea--getting around managing changing water levels. It took me awhile to figure out how to deal with that on my setup. The guy in the big long old post had it right with the overflow tube--I just didn't want to go to the effort to fabricate something like that with my short mash tun.
 
Well this rendition was 5 gallons of Oatmeal Stout in my modified igloo ice cube cooler instead of the rubber maid. I've noticed that I've only had to change the ice once per day (and usually only 1 frozen 2-liter bottle instead of 2) to keep temps at 63. It's hard to judge because the previous batch was 10 gallons, but I definitely think the insulation helps, I am using less than half the ice I was before.

Heres an old pic of the igloo cooler. It was modified to be used as a portable kegerator.
CIMG0006.jpg
 
Heres pics of the new setup. This has worked great, I swap the frozen 2 liters about every 36 hours. BTW, like my ghetto airlock? The carboy cap I have wont fit on the top of my sanke.

DSC00043.jpg


DSC00045.jpg


DSC00046.jpg
 
Love this idea!! I ferment in a sanke keg in a water bath. I have everything except the small pump and the controller. My ambient air temps are only in the 60's to occasionally 70's during the summer. I am going to hook up one side to the pump and the other to my aquarium heater. It should work as well as dedicated fermentation fridge. In the winter I might even be able to do temp controlled lagers.
 
Love this idea!! I ferment in a sanke keg in a water bath. I have everything except the small pump and the controller. My ambient air temps are only in the 60's to occasionally 70's during the summer. I am going to hook up one side to the pump and the other to my aquarium heater. It should work as well as dedicated fermentation fridge. In the winter I might even be able to do temp controlled lagers.

Glad you like the idea. My plan in the winter is to ferment in the garage if doing a lager. A simple aquarium heater placed right in the fermenting tub should be able to keep the temps right where they need to be.

This has worked great for me thus far. No complaints until I get a chest freezer!
 
kpr121, thanks for posting. I love the setup.

I don't know where you place the fermenters in relation to the nearest fridge or kegerator, but you could also place the IC in that fridge or kegerator and run the lines through the side into your fermentation bin. The heat transfer will be lower in this setup because you are trying to transfer the heat to the air inside the fridge instead of into water, so your pump might run a little more. But you won't have to be replacing the frozen 2 liters. Just a thought. I think I will try this, I already have a hole in the side of my garage fridge for a CO2 line that I can use for the coolant lines. Thanks again.
 
Back
Top